
As I said in my Instagram Post, this pattern is tiny but mighty. The Stitchmaiden Daisy Top has multiple versions in one top. I find it to be a good skill building pattern. I’ve been wanting to experiment with attaching trims and more decorative details in my sewing and this pattern has a great section on ideas of show to add decorations. There is also a length variation, so I chose the longer version.

Once I got going with my top, I knew I wanted to make another one straight away. But before starting on the final versions, I used the remnant white slub to make a toile. I initially cut the size 44 but found that it was too roomy at the bust, and the princess seam didn’t sit in the right position. I decided to make the size 42 but didn’t have to grade to the 44 waist because the pattern has a 2cm side seam which makes the pattern so easily adjustable.
The top I had envisioned with this pattern was a softer, breezy top with lace detailing. I was happy to find a rayon with a print called Daisy for the top. I matched it with a cotton lace trim which I would insert instead of the ruffles in Version C of the pattern. I’ve never inserted lace before. Initially, I inserted it with the lace facing inwards, so I had to get out the seam ripper. That’s when I decided to film it. I find documenting the process really helps me to learn.
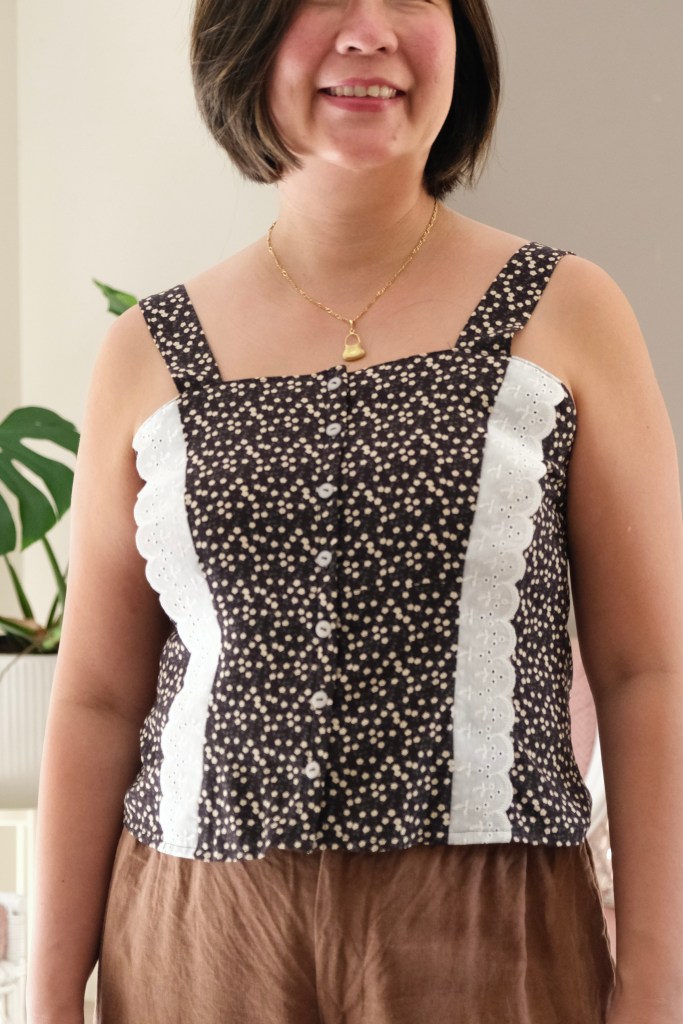

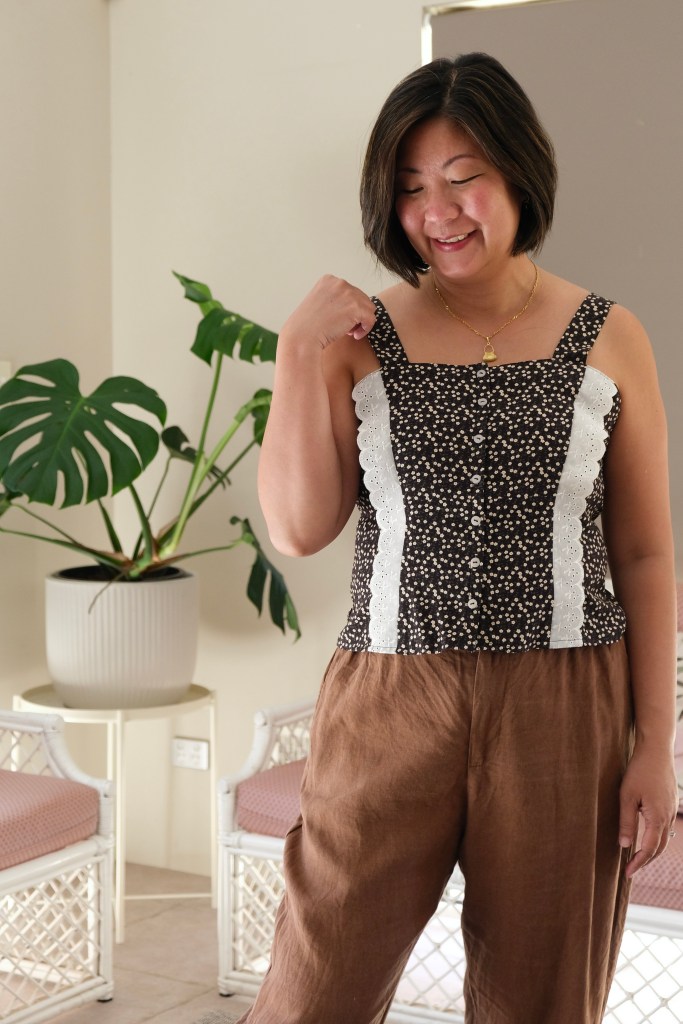
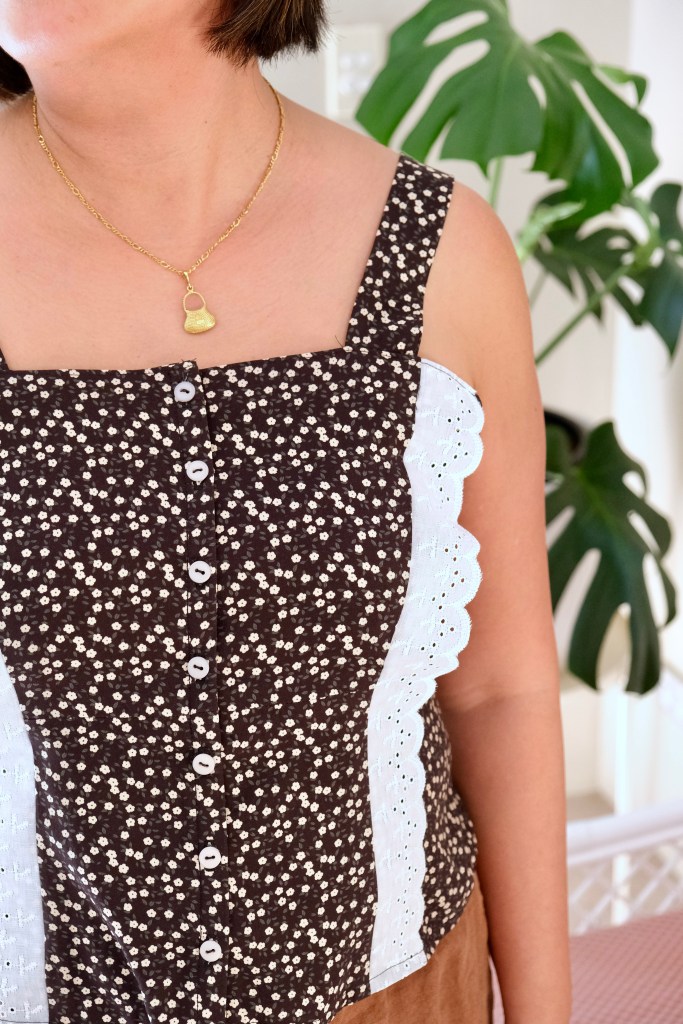

In the end, the top came together quite easily. As I said, this pattern is drafted, and the construction is organised so that everything can come apart quickly for adjustments. I only had to modify the side seam with the 2 cm seam allowance at the top of the bodice and sewing down to a 1cm seam allowance at the waist. The strap comes with a 5 cm seam allowance which fitted well. I did move the straps inwards of the princess seams because I have slightly sloping shoulders. This worked well except I found that I couldn’t wear a bra with straps because they weren’t covered with the straps in that position.
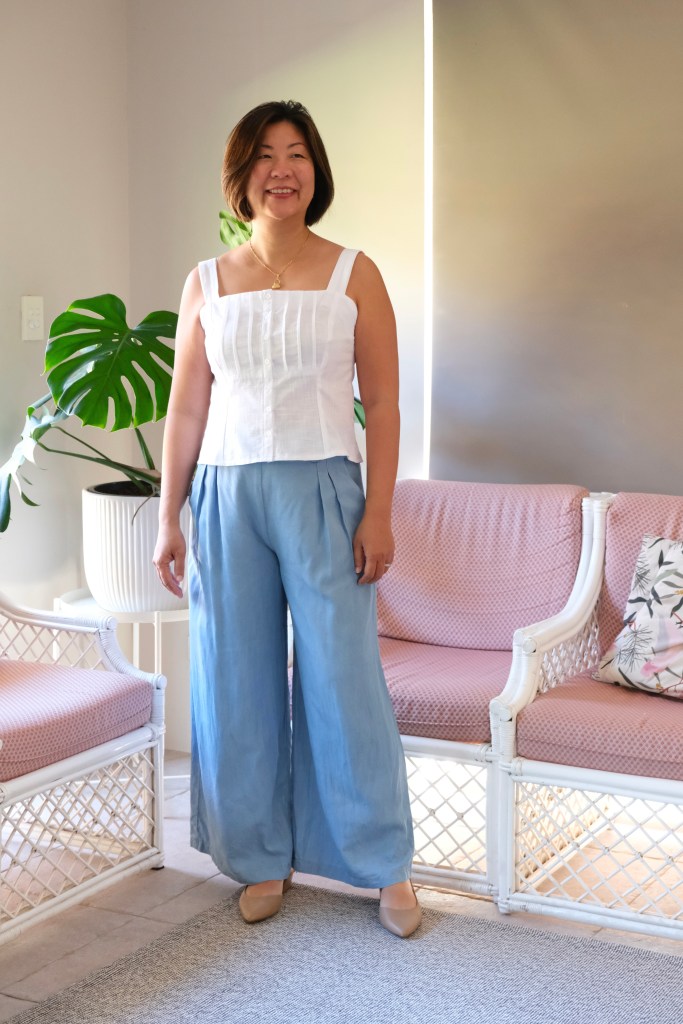
Once that was finished, I went back to the white slub toile. I removed all the basting stitches and cut down the pieces to the size 42. This time, I thought that the stiffer structure of the fabric was better for Version D which features pin tucks. I stayed with the straight neckline rather than a sweetheart neckline. I love how the neckline rises slightly in the front.

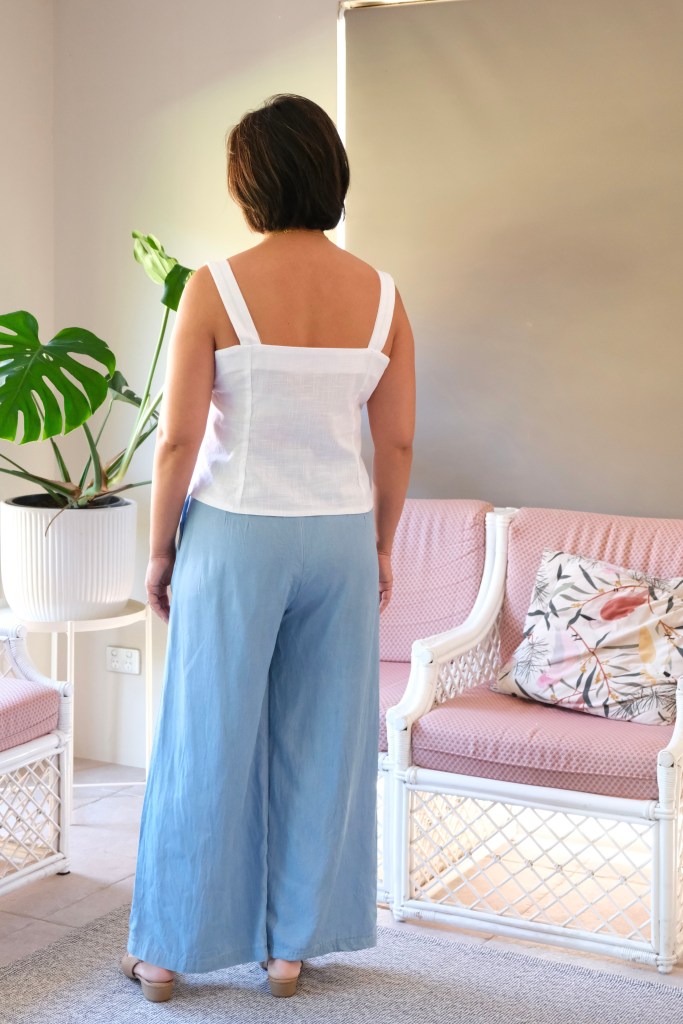

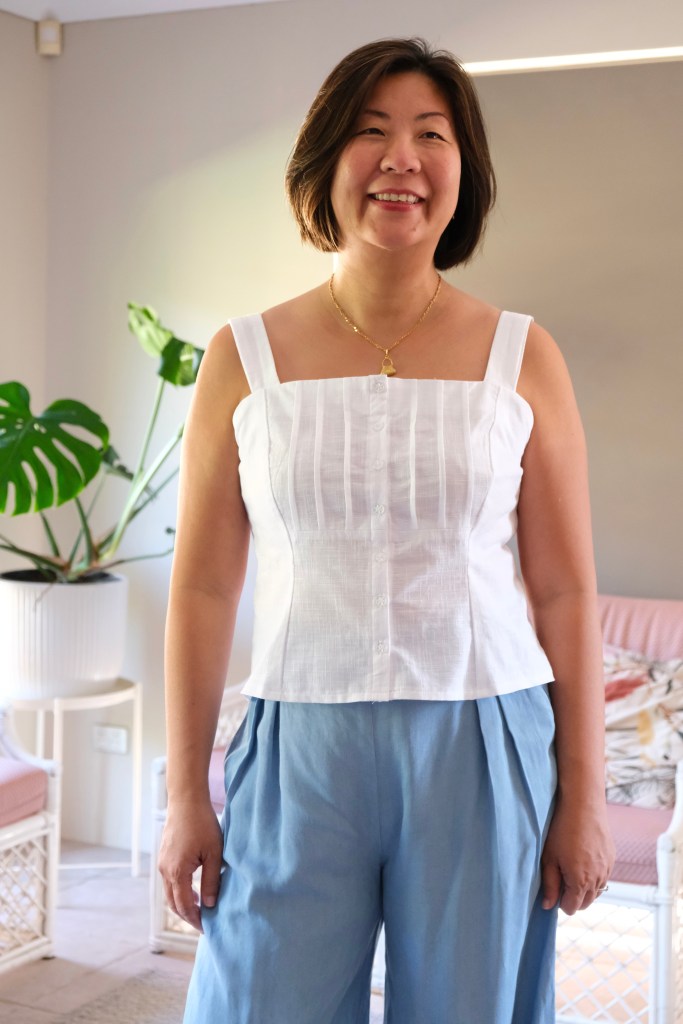
Again, this pattern was enjoyable to make. In the second pattern, I decided to add the facing pieces as one after I had sewn together the side seams. I also attached my straps before attaching the facing. Only be aware that doing the construction this way makes it harder to readjust at a later stage.
The Daisy Top is a lovely addition to my growing handmade wardrobe. It’s pretty but also practical. I think I’ll get a lot of wear out of them. I’m grateful to be collaborating with Stitchmaiden as they gifted me with this pattern. Even though gifted, no blog post was required but I felt it was worth sharing and all opinions remain my own.
Thanks for reading and happy sewing!
X Em
