Marigold Dress

I’ve been a long admirer and follower of Stitchmaiden Patterns but never brave enough to attempt a pattern because they look so technically hard. When Stitchmaiden reached out to me, I took it as a sign that it was time to stretch out of my comfort zone and I was so pleasantly surprised with the outcome. 

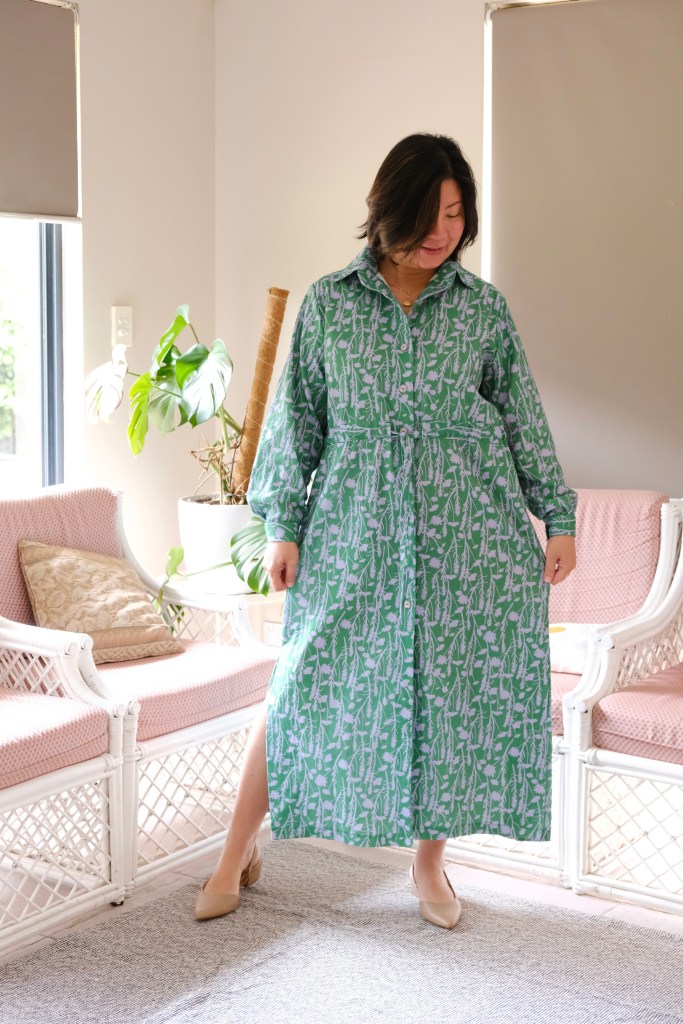
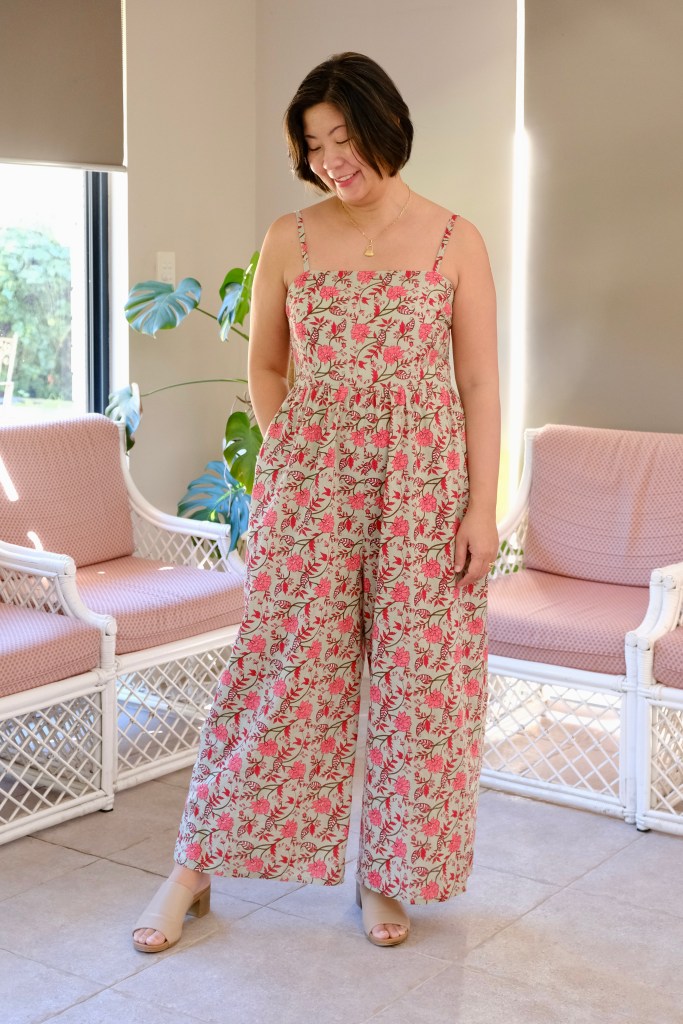
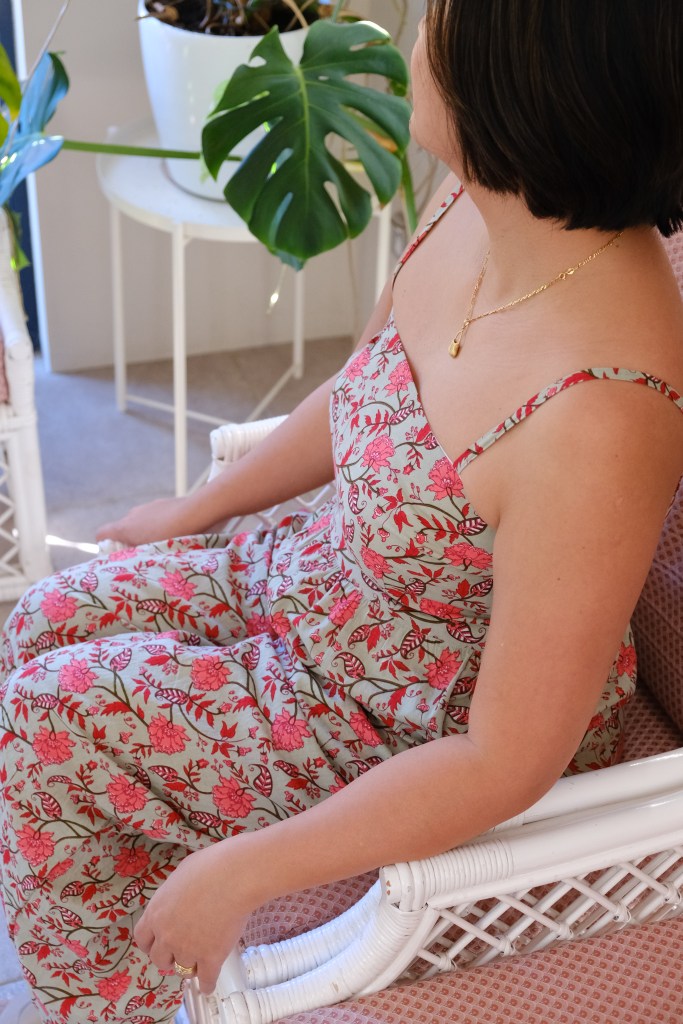
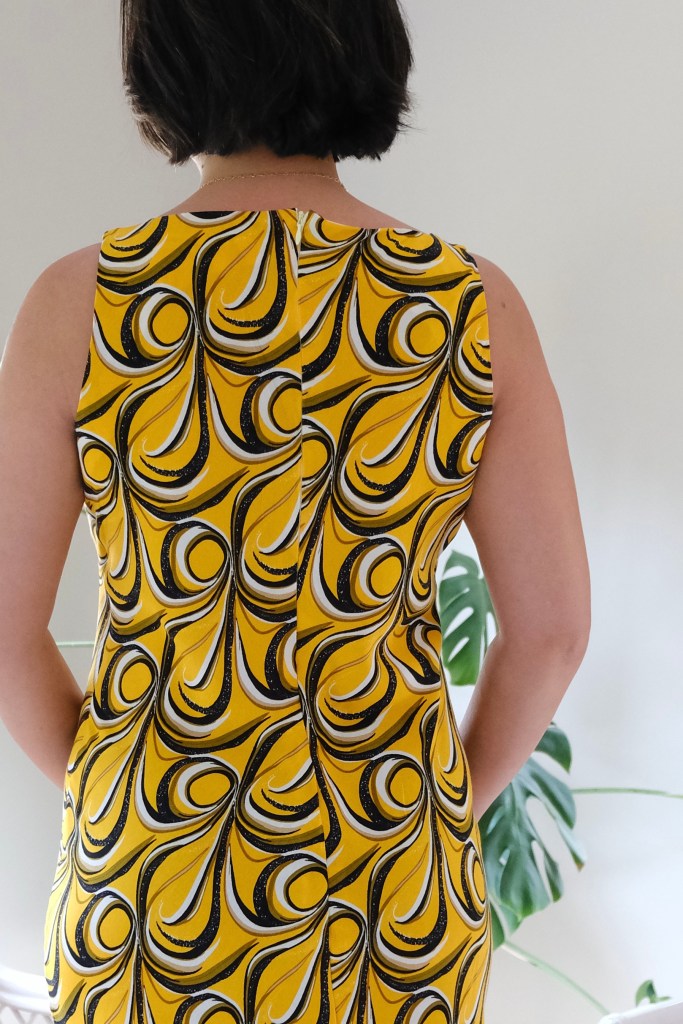
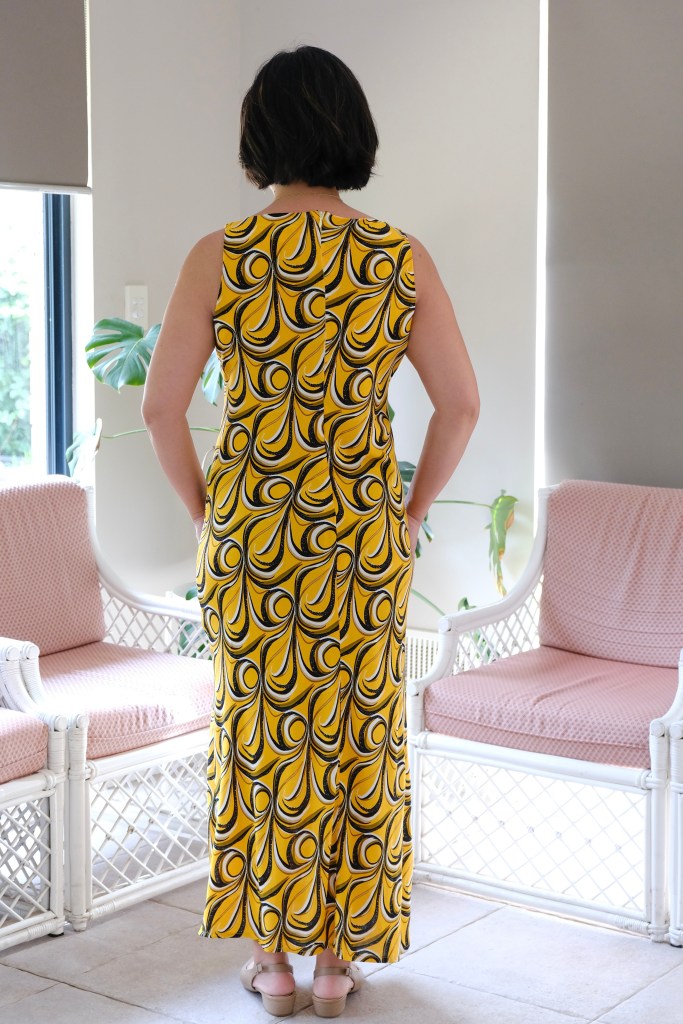
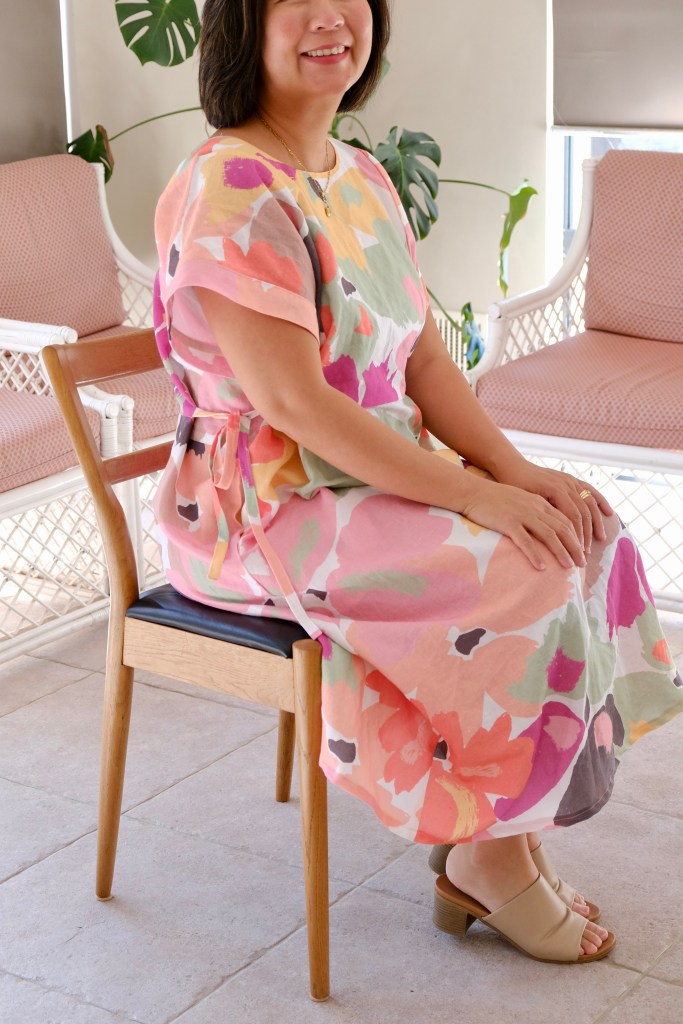
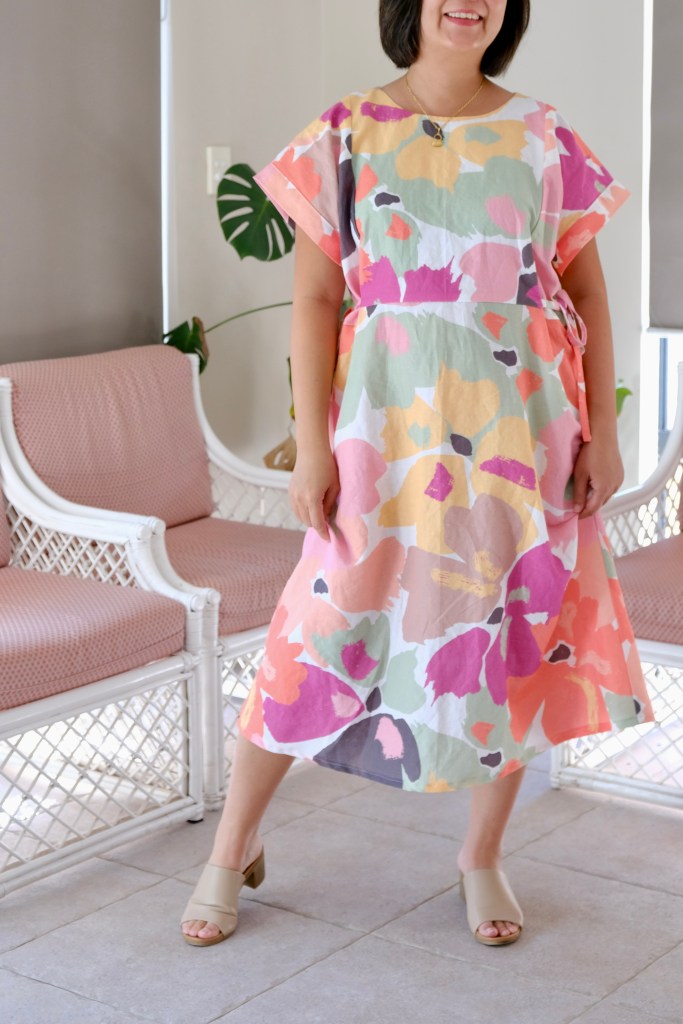
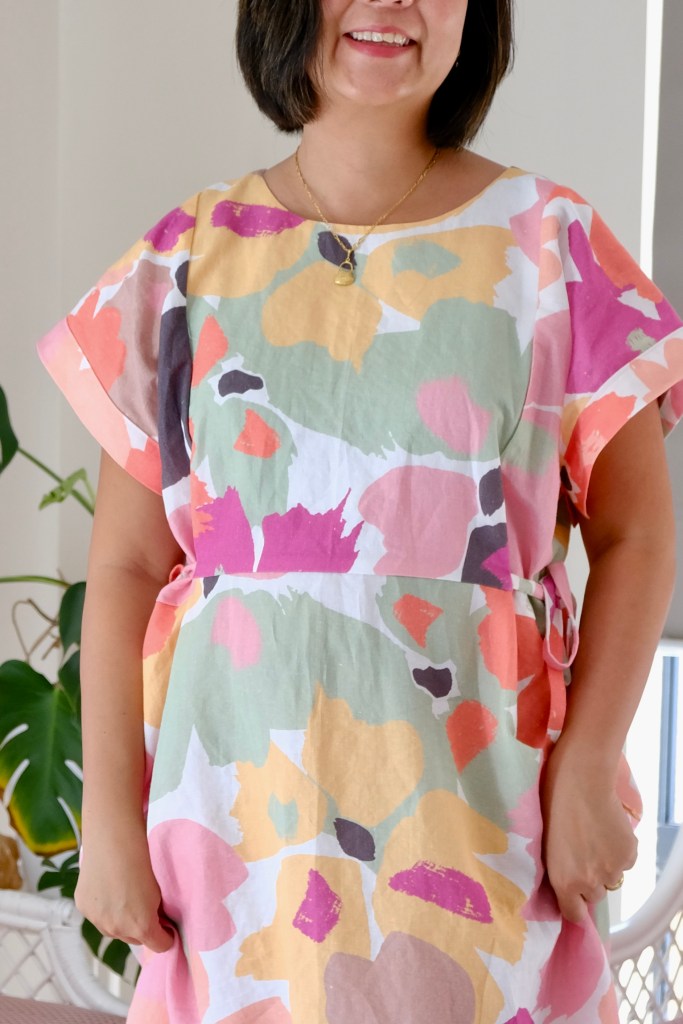
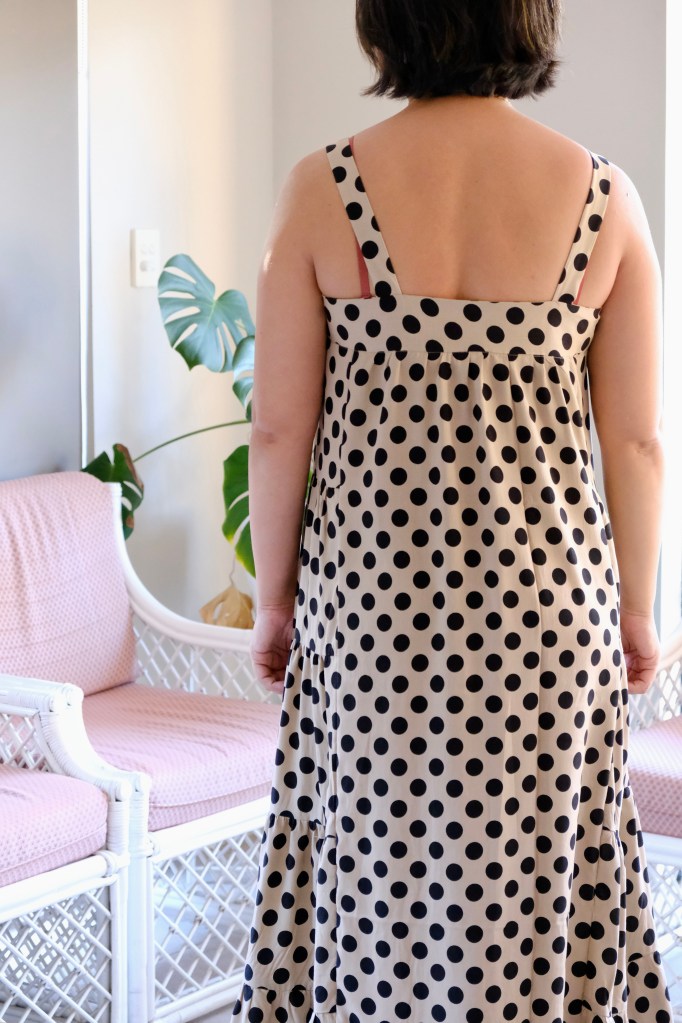
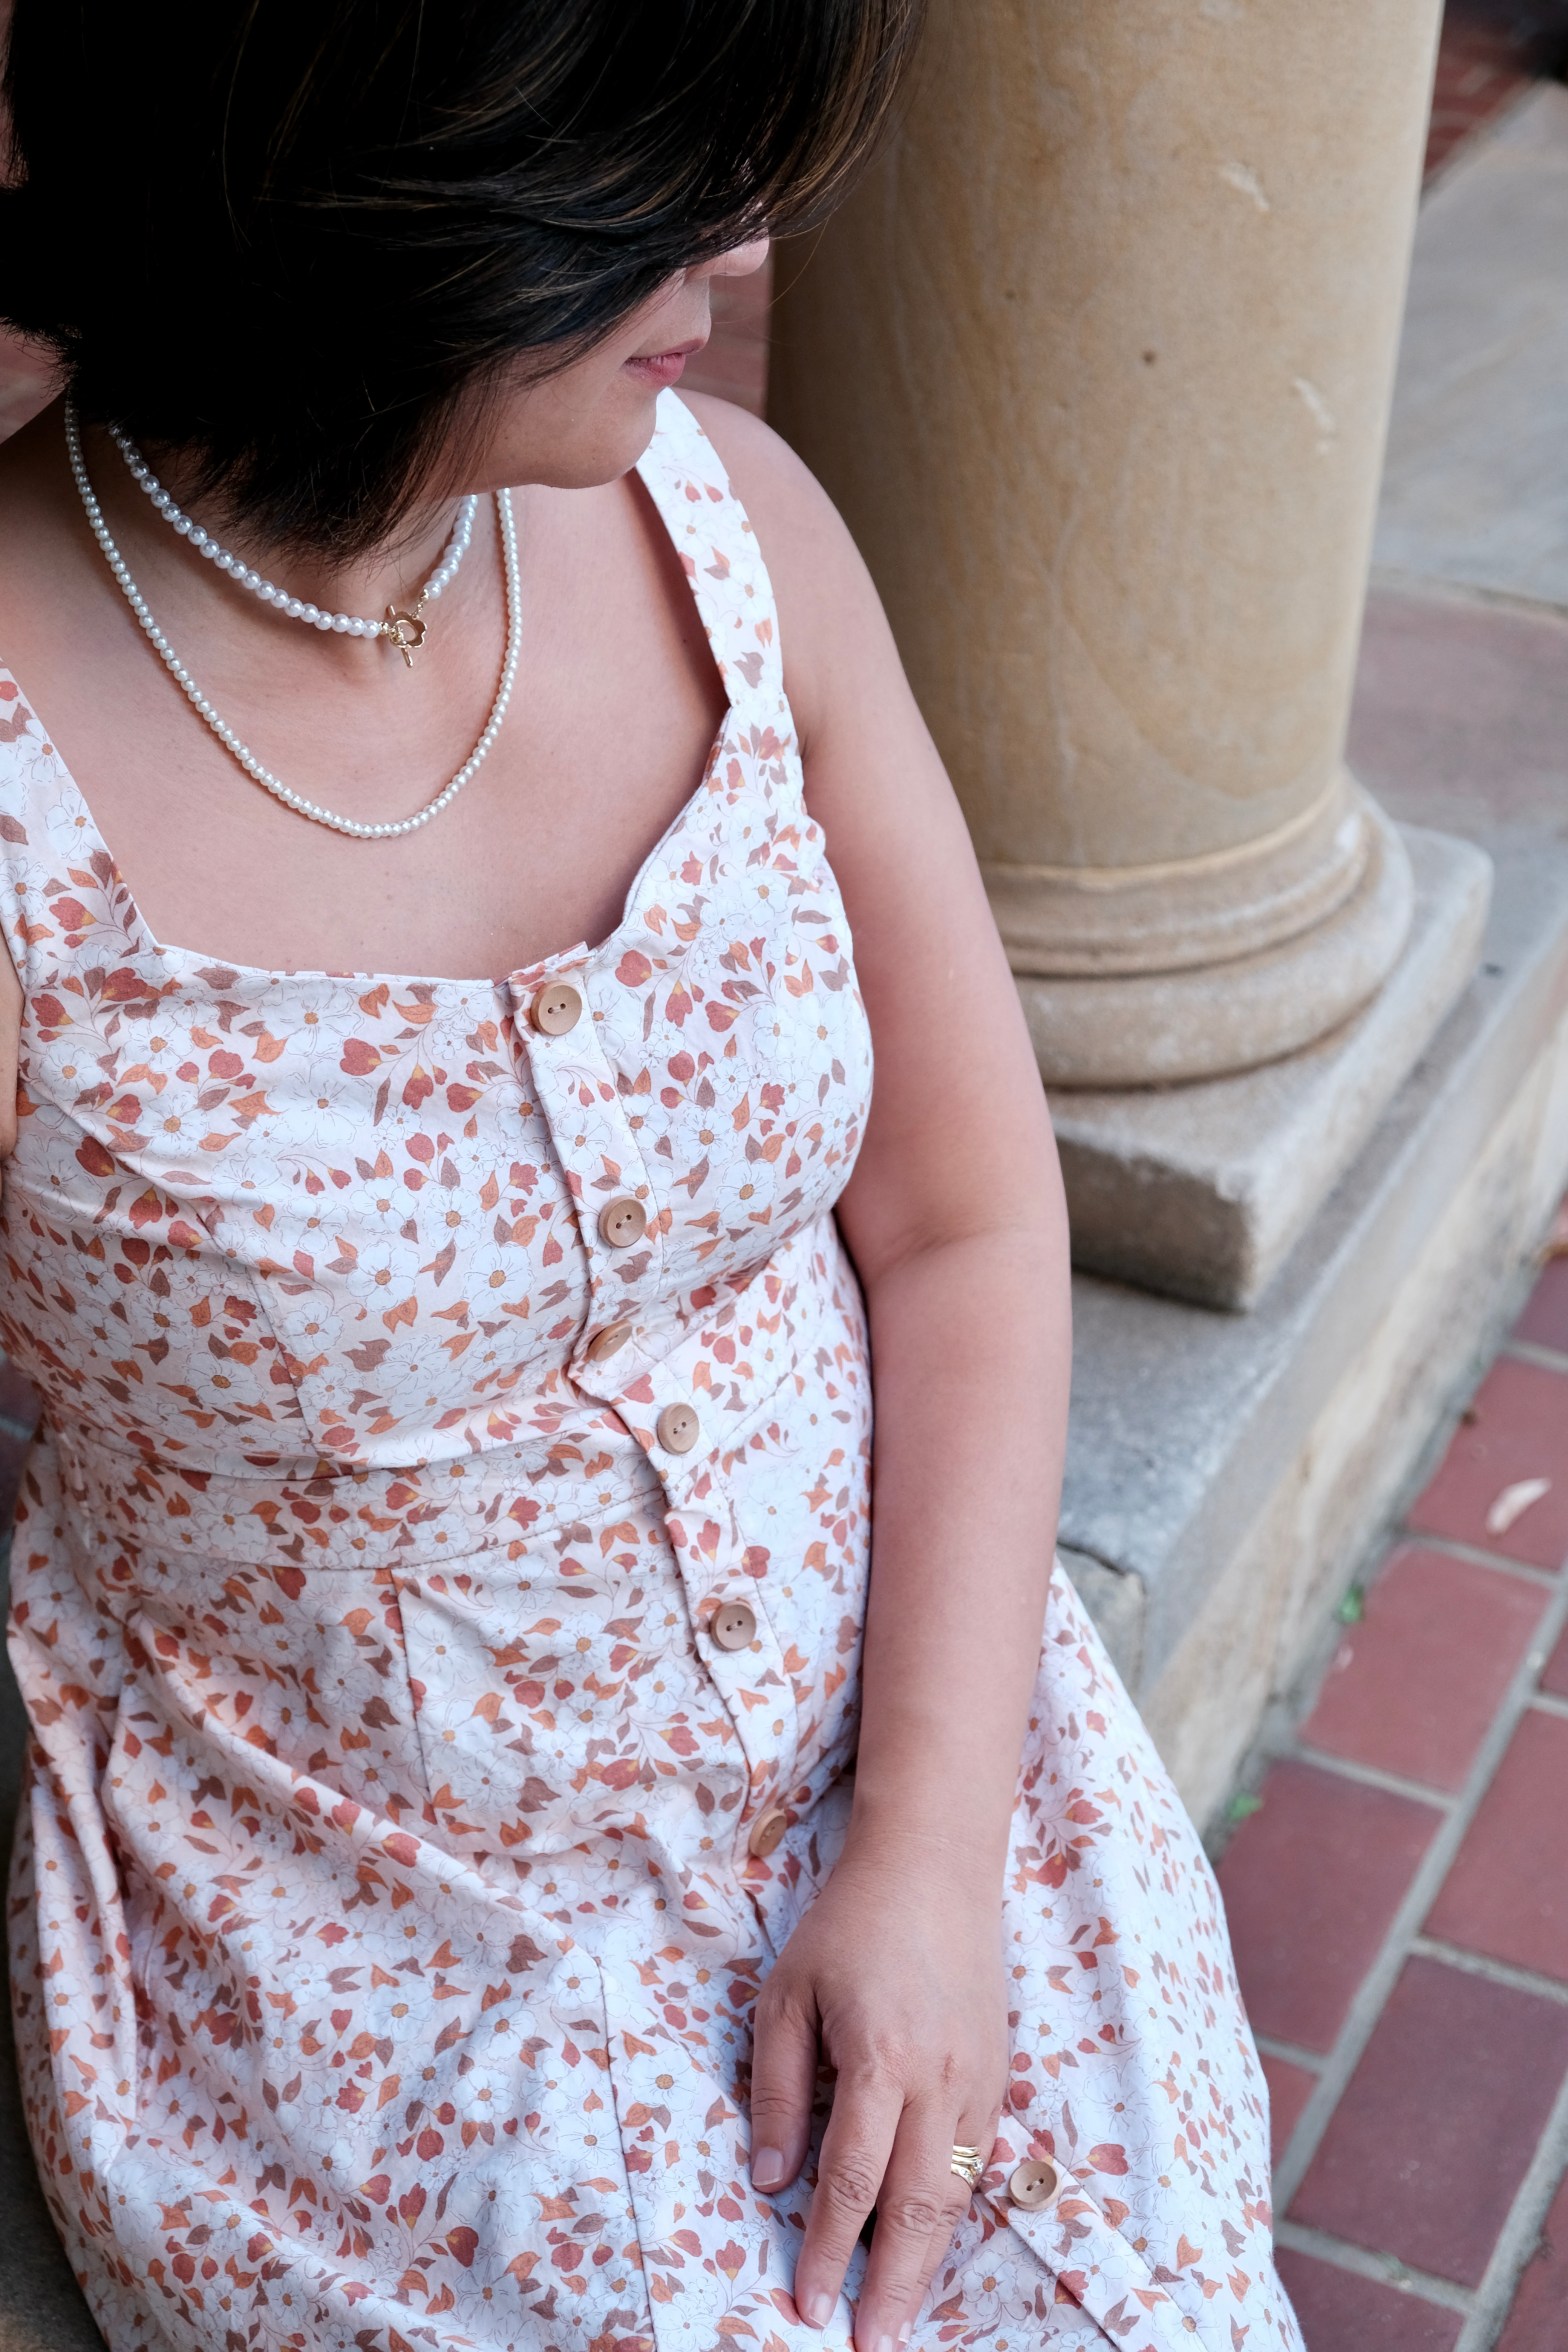
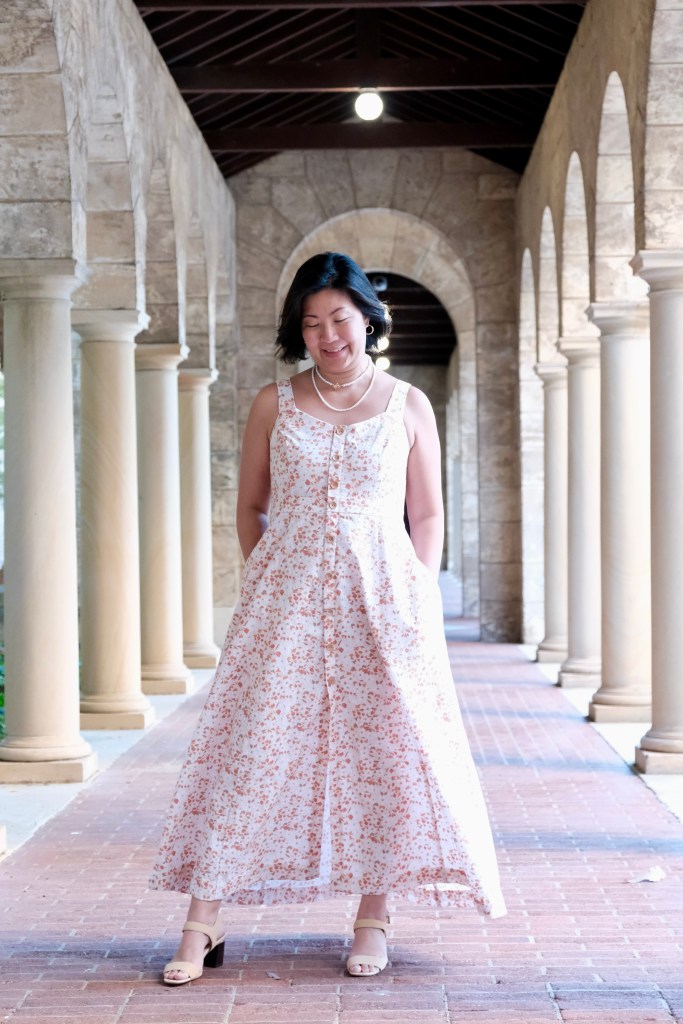
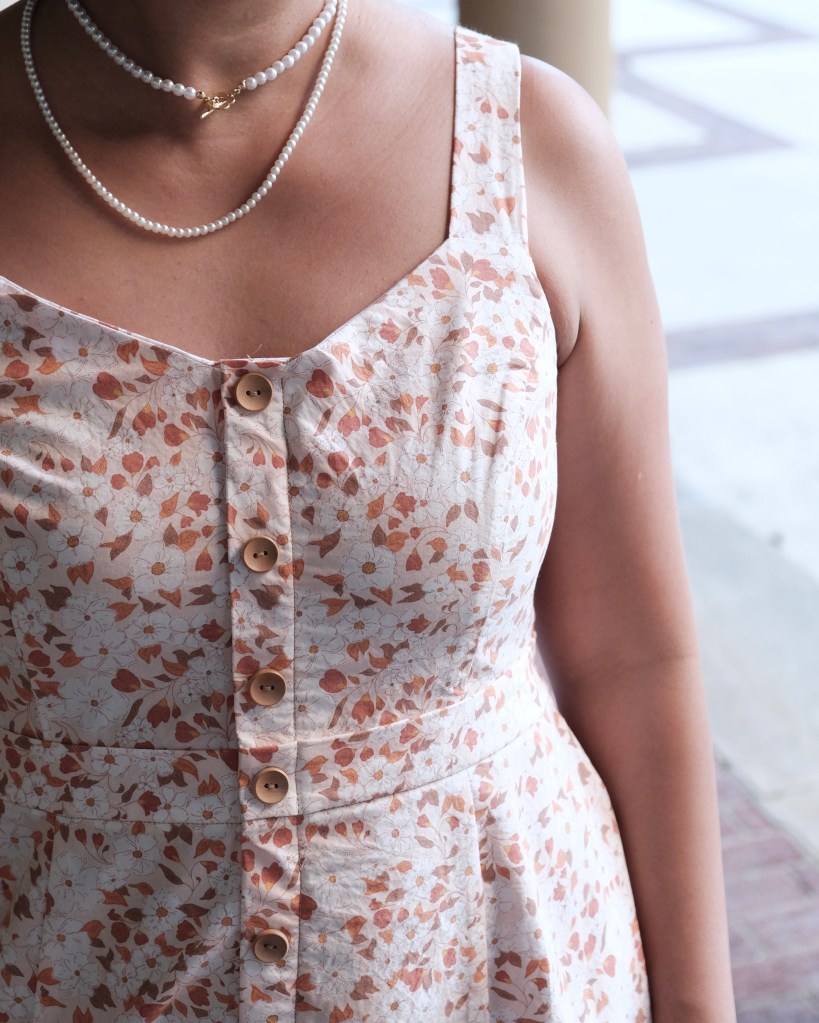
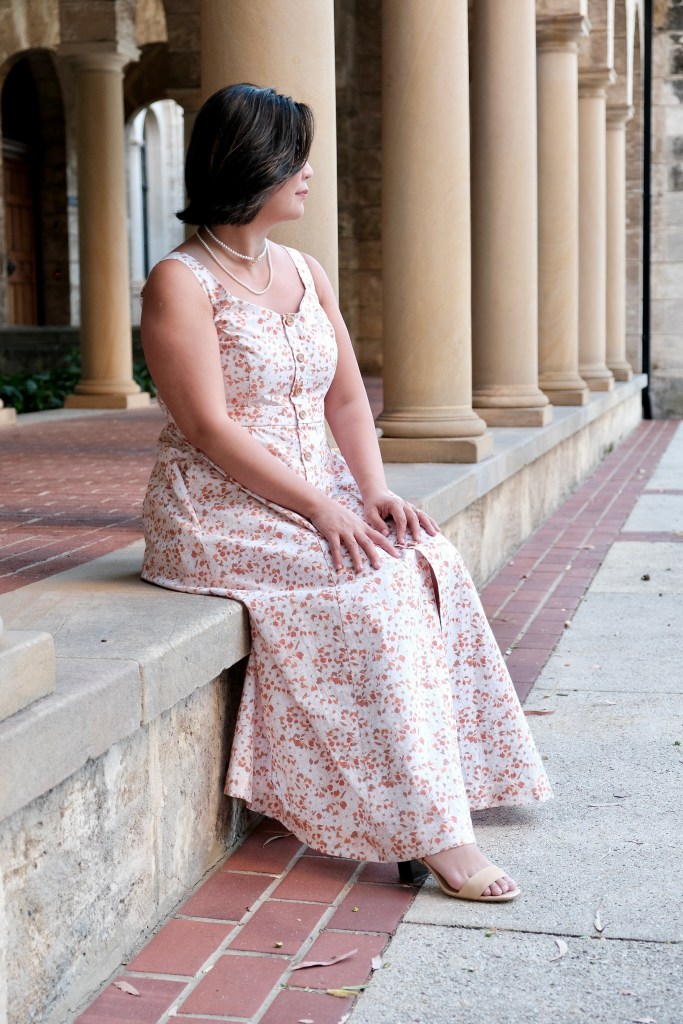
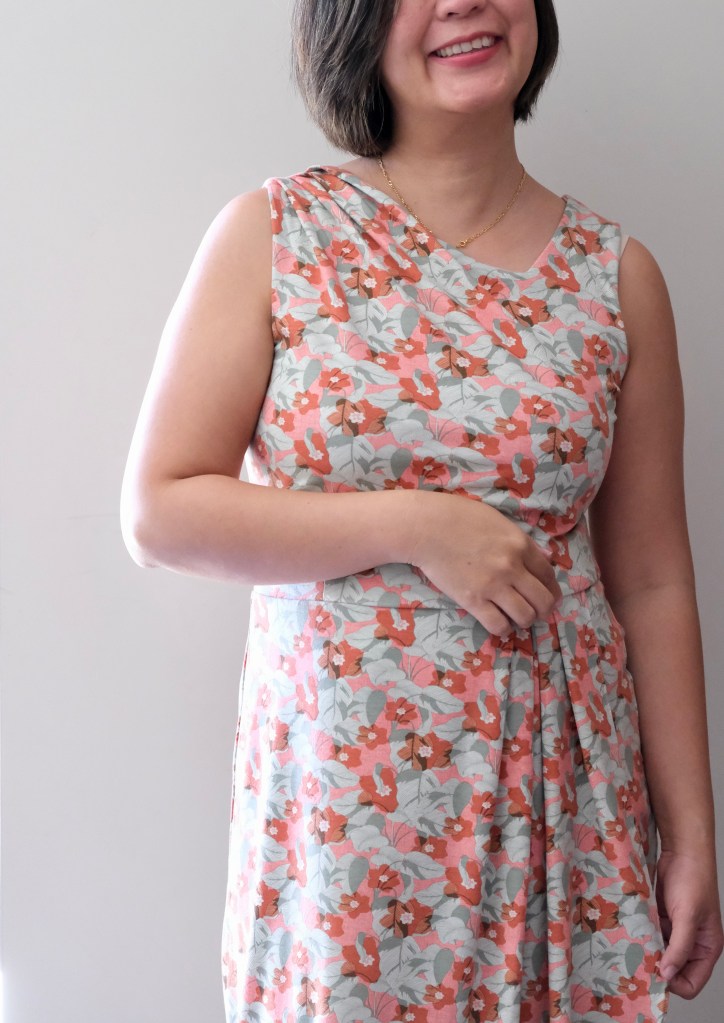
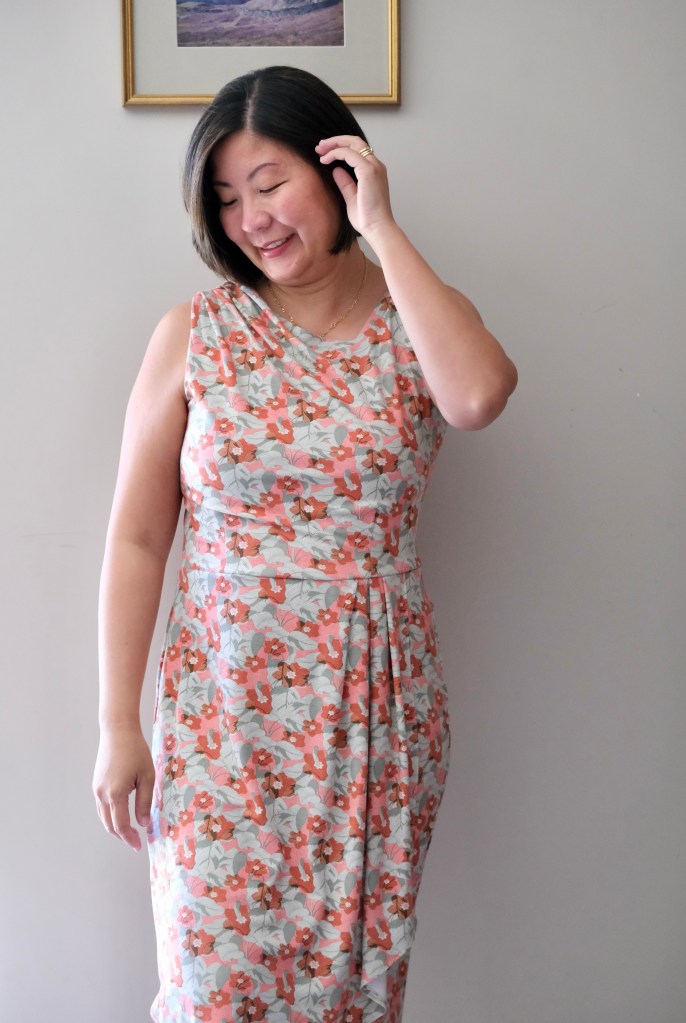
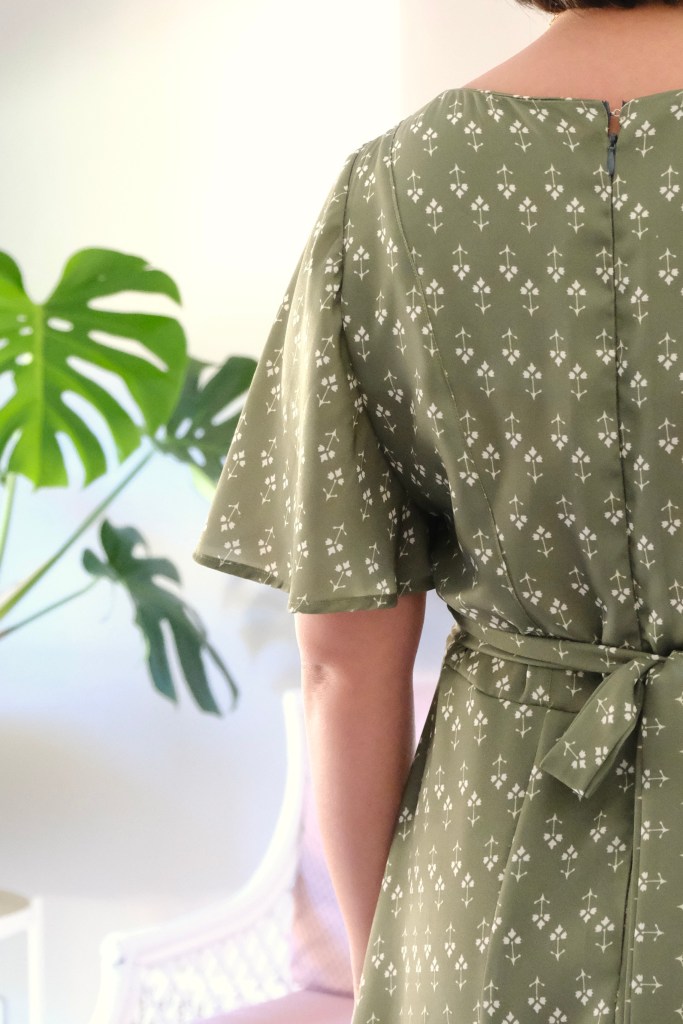
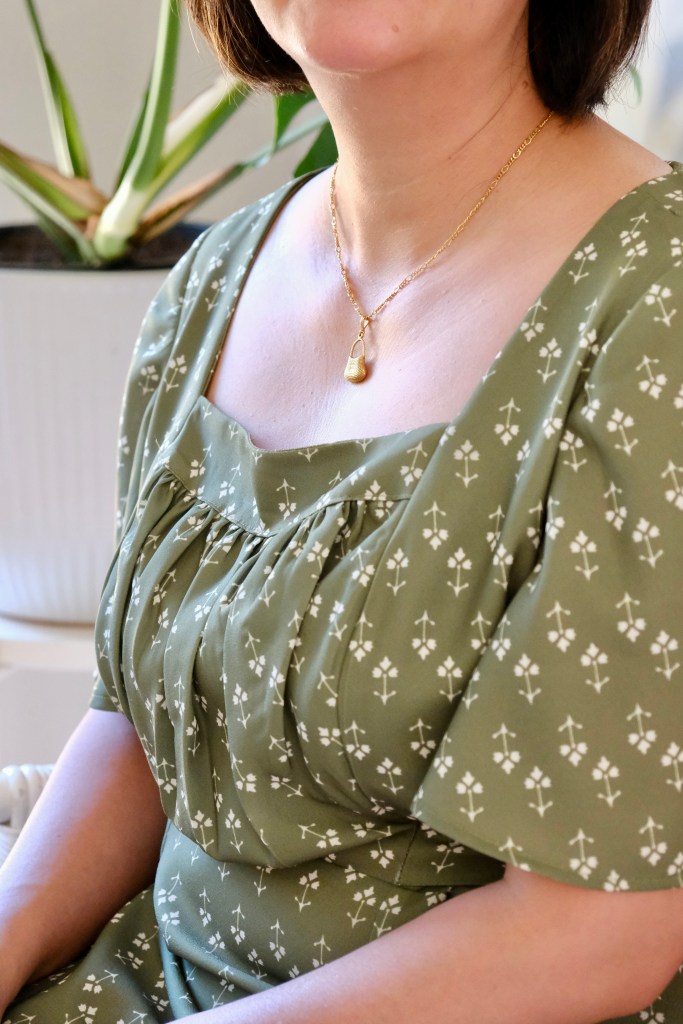
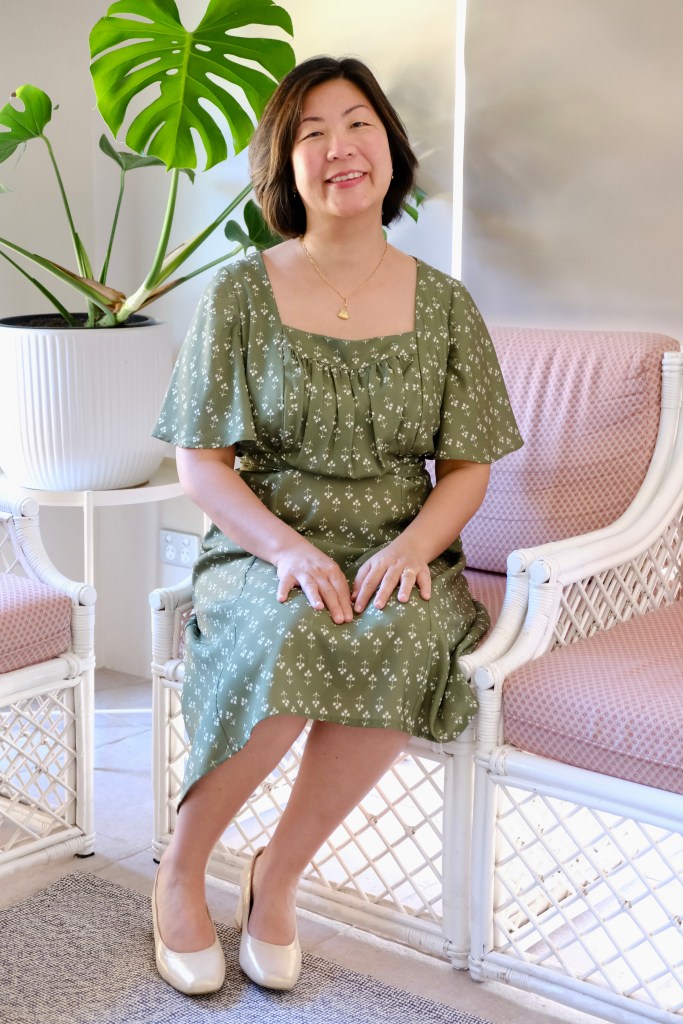
Firstly, the pattern I chose was the Marigold Dress. Each pattern draws inspiration from a period in history. The Marigold is from the Romantic Academia Collection. It is a pattern that keeps on giving because of the multitude of combinations possible with just a switch of one or two features. There are three versions which are suggested for the seamstress. The basic concept is a square neckline with princess seams and a fitted waist. I chose the suggested Version A which has a slim fitted skirt, but I chose the butterfly sleeves from Version C, and I left off the ruffled hem. There is also a belt that is sewn in which I chose to keep.

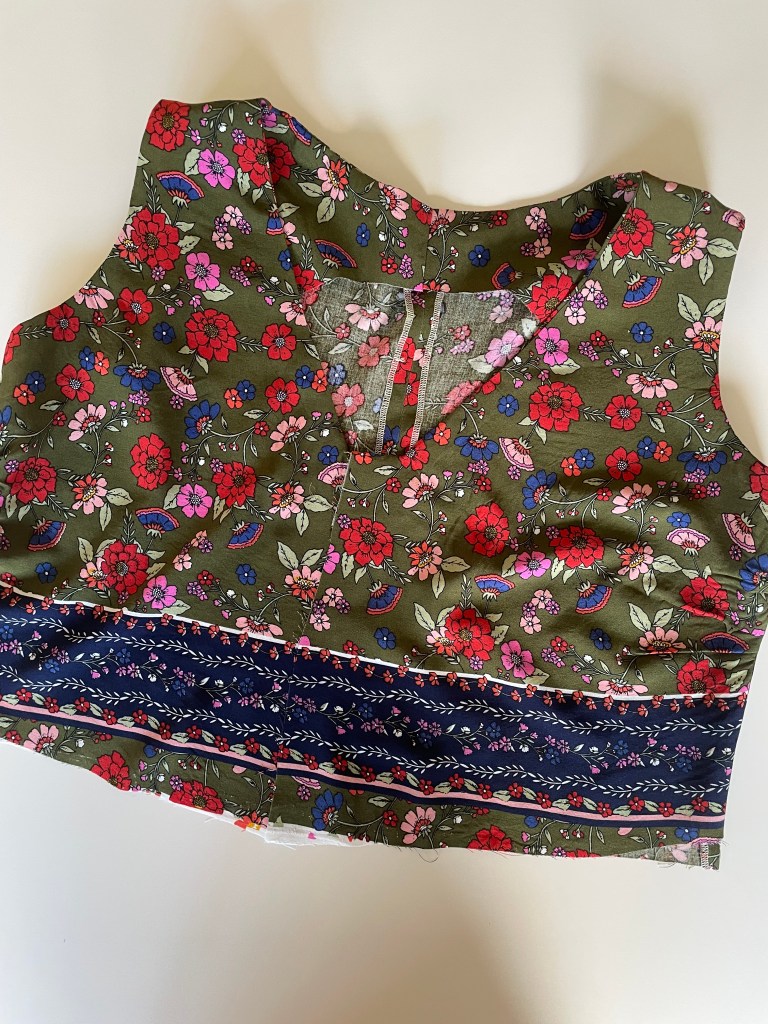
With this many options, I thought that printing and putting together the pattern was going to be time consuming and difficult but there is a comprehensive table, and it made the whole process quick and painless. There are two ways to print the pattern, one is without the seam allowance and the other is with the seam allowance added. I’m more used to having my seam allowance included so that is the one I chose. This is where it got interesting for me … I mistook the sewing line for the cutting line. I had printed the size 42 and size 44 because I fell between those two sizes and needed to grade the pattern. In the end, I decided to only cut the size 44 and grade from there but as mentioned, I cut the sewing line! To make matters worse, I cut into my “good” fabric thinking I had enough seam allowance and ease with the larger size to then “fit” it once I had cut the fabric pieces.

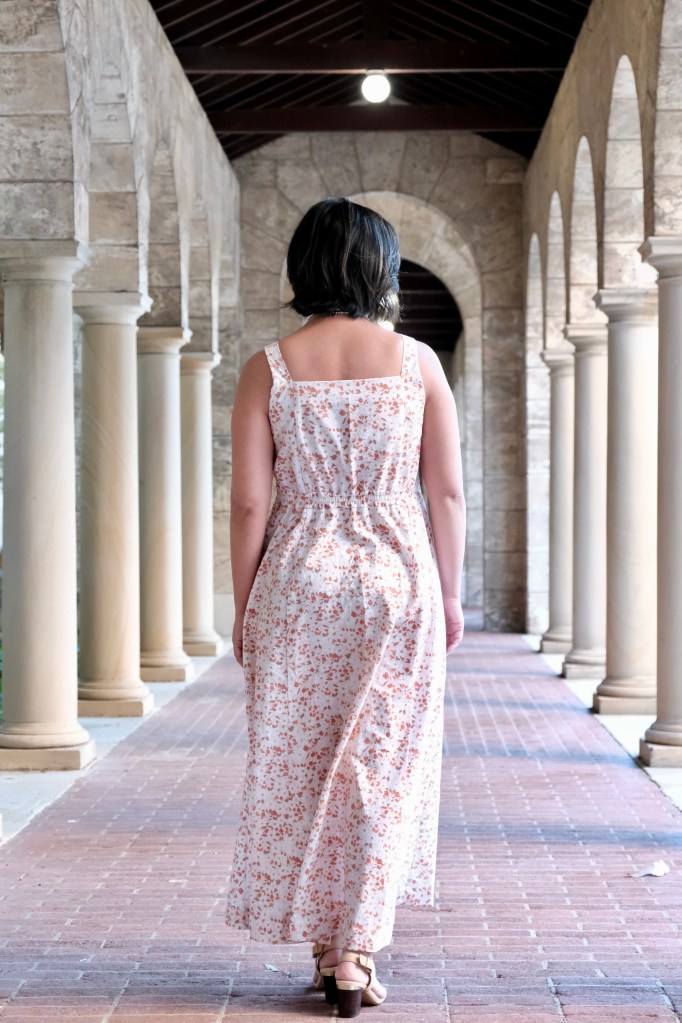
The dress has an invisible zip closure, so I did the usual basting stitches on my side seam and basted my zip. Imagine my panic when I couldn’t zip up the dress and there was no amount of ease or seam allowance that could help! It really puzzled me for the afternoon then I went back to the pattern and thought I’d start again, and this time make a better toile. When I reprinted the pattern, I realised my mistake which was actually a relief! It was me, not the pattern.

I chose the size 42 and 44 for my measurements of 38-inch bust, 33-inch waist and 40-inch hips. I graded the bodice from the 42 to the 44 waist and hips. The dress is a tailored fit with moderate ease, and I felt that this worked well for me. When I make the dress again, I might adjust the princess seams as well.

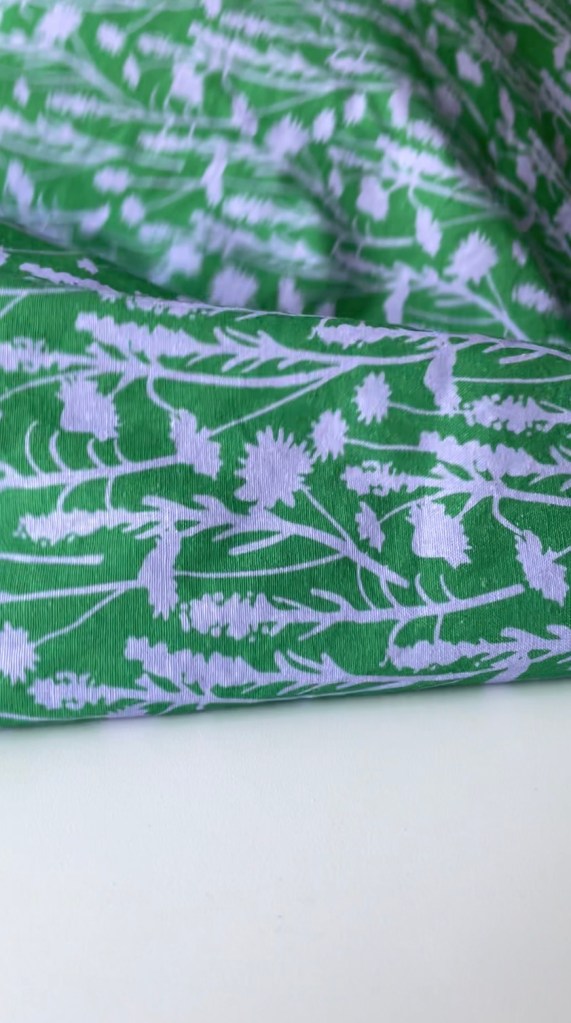
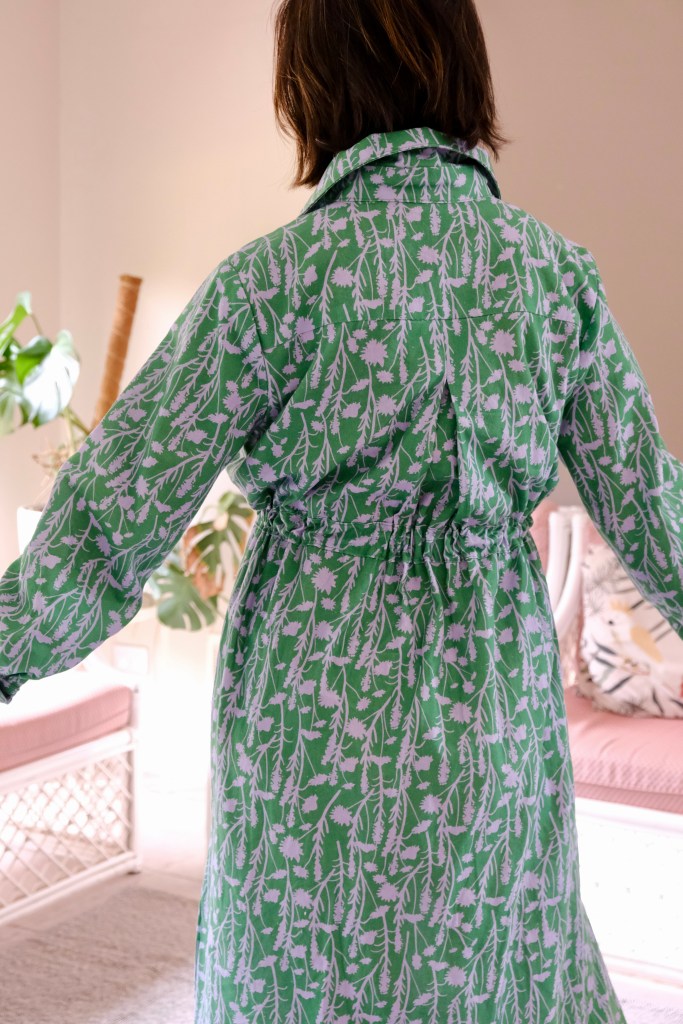
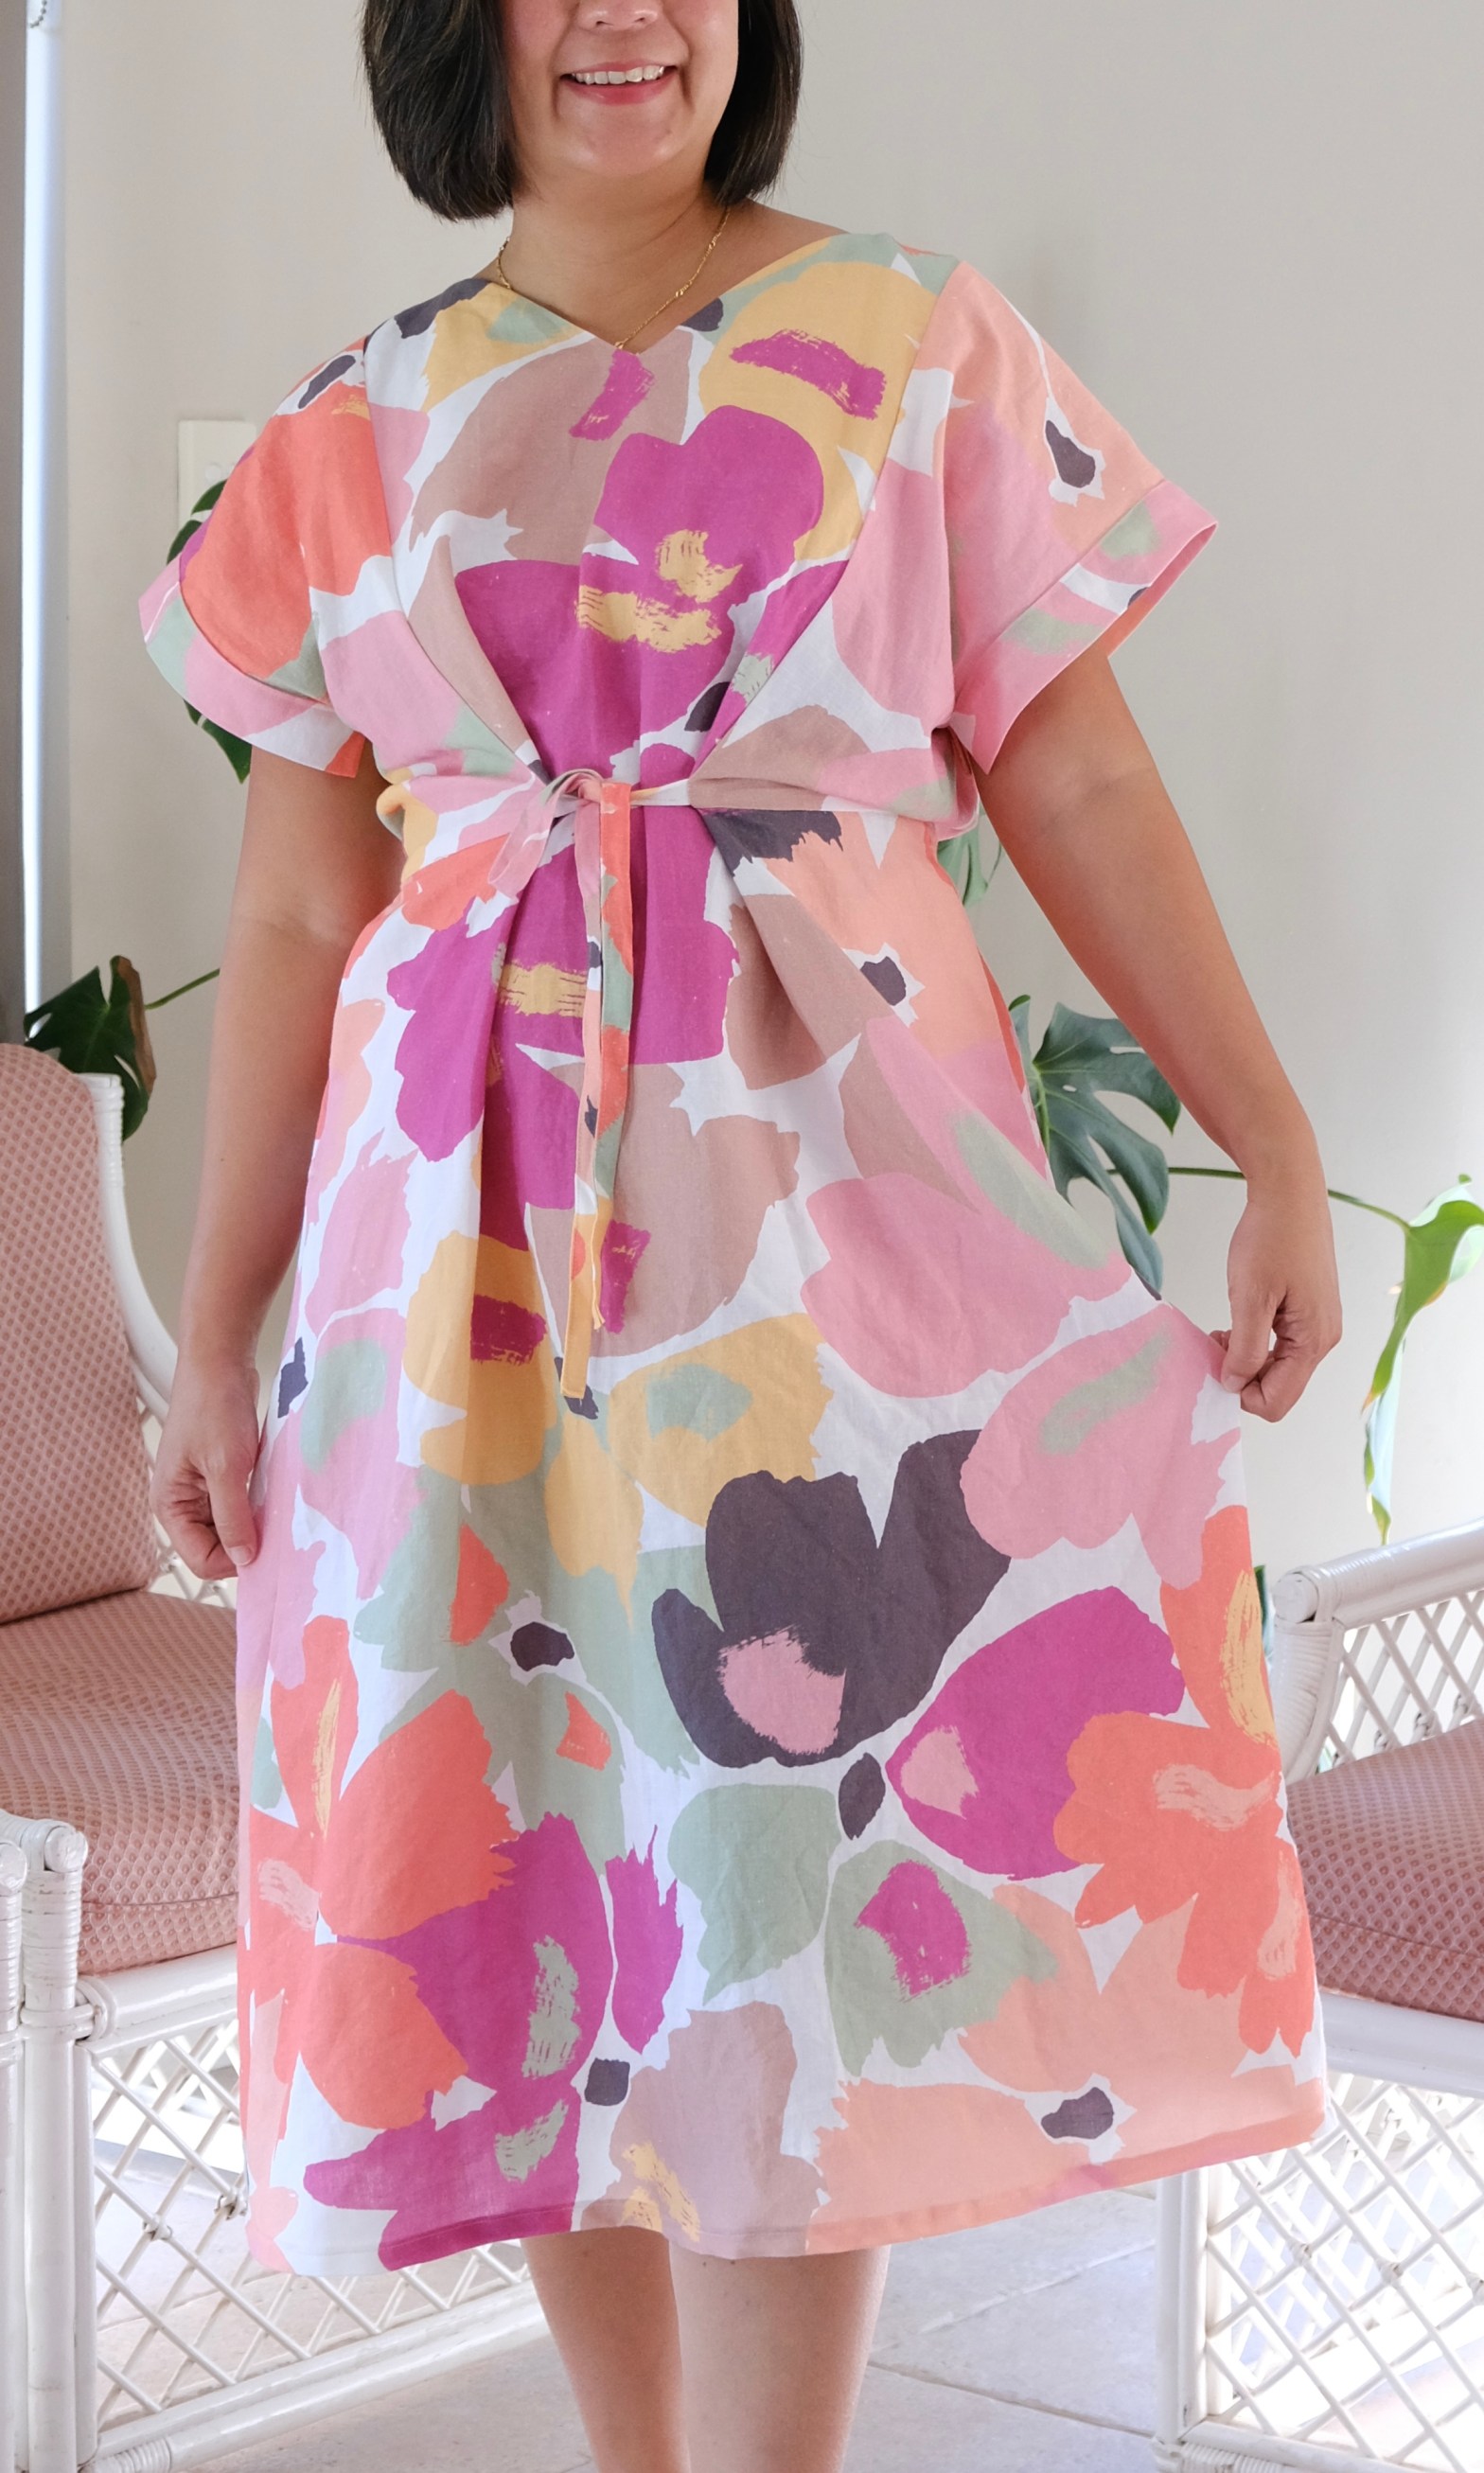
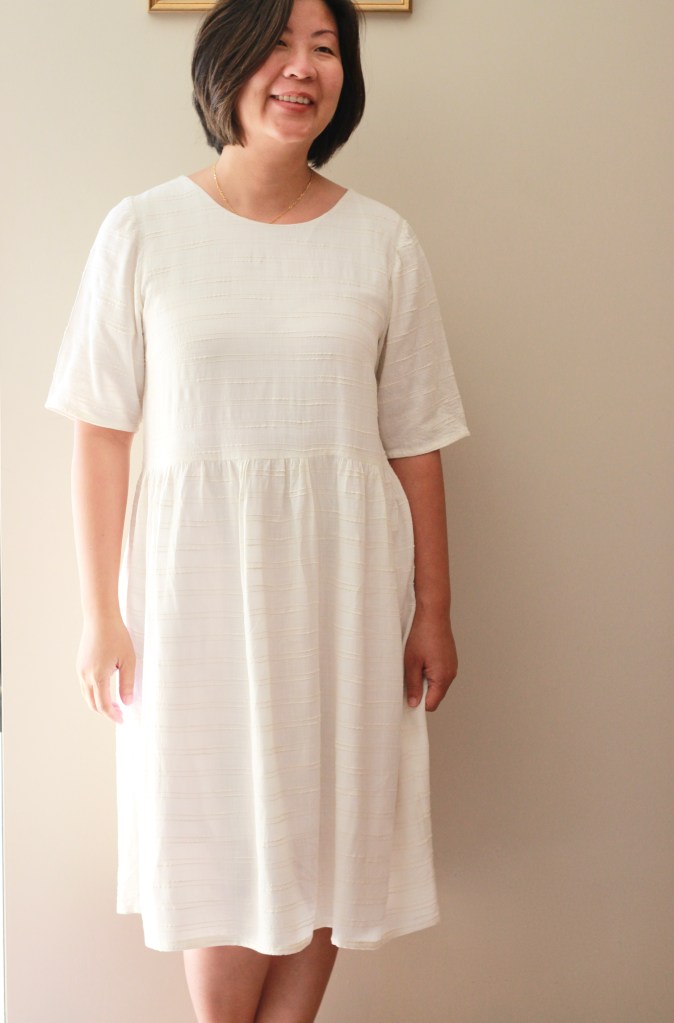
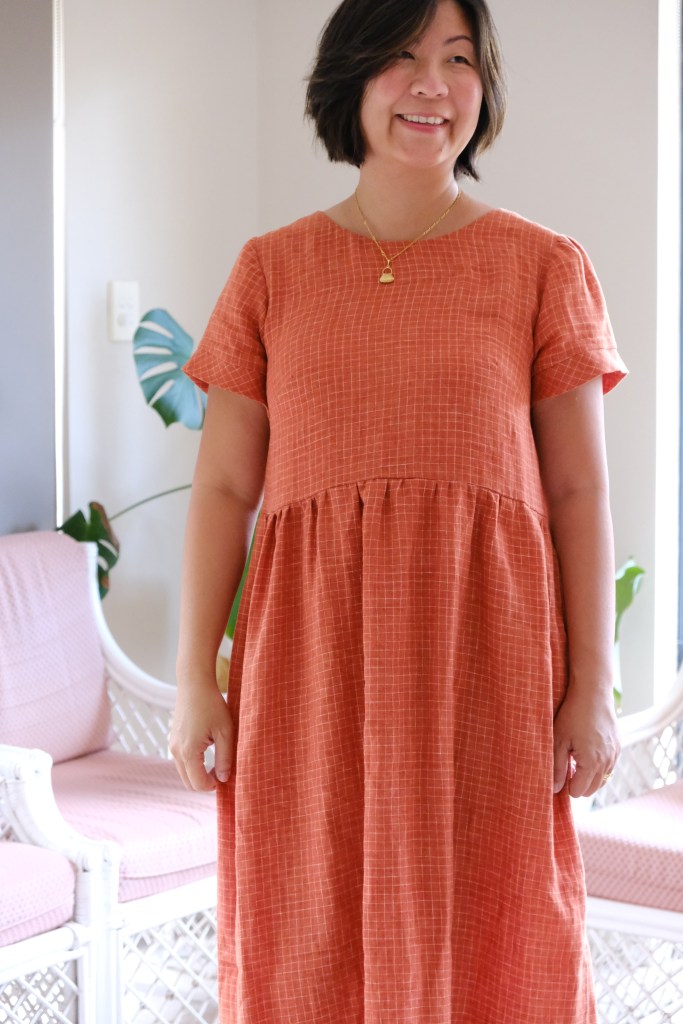
Initially, I was going to use a beautifully printed linen but because of my mistake, that fabric will now be made into a dress for my daughter. Instead, I had this green crepe the chine which my husband bought me that I’ve been keeping for a special make. He bought me 5 meters of this fabric of which I’ve used about 3.5 meters. The crepe the chine is drapey and light which is beautiful to wear. It highlights the skirt, the gathered front and butterfly sleeves nicely. I actually think this fabric was a better match in the end.

The pattern comes with some of the most extensively detailed instructions and illustrations which are great to learn from, but they also provide a summarised set of instructions for the more experienced sewist. I used the detailed instructions and appreciated the two pages of Basic Workmanship which is great for those looking to extend their sewing repertoire.

Stitchmaiden Patterns have a vintage vibe and draw inspiration from history but they really are timeless classics. This will be a dress that transcends passing trends and I’ll be wearing it time and time again. It’s a pattern that can be changed easily with so many mix and match options, so it is a “TNT” (tried and true) pattern for me. Oh! And another thing, please now refer to me as Stitchmaiden Emily.

Thanks for reading and happy sewing!

X Em

* This pattern was provided for a review with no obligation for a blog post.

Ritual Dress

Featuring Fabric from the Devonstone Fashion Summer Abroad Collection by Lindsey Rae

So excited to feature the latest fabric collection from the immensely talented Lindsey Rae @sewtogrow. It’s currently available for wholesale through Devonstone Fashion. It was hard to pick which design I wanted but I settled on the Cornwall Oceanside Print in a luxe linen cotton blend. It is fifty-five percent linen and forty-five percent cotton, 180-185 gsm and 145cm wide. The pattern is reminiscent of wildflower fields. I love the riot of colour in this collection. Best of all, it will also be available in a variety of substrates like rayon, poplin, and jersey to name a few.

Cornwall Oceanside Print

The pattern that immediately came to mind when I received the Cornwall Oceanside Print Linen was the Swimstyle Ritual Dress. I had bought this pattern last year but was waiting for the perfect fabric to match it. It’s basically a shirt dress but with the additional features of the drawstring waist casing in a maxi length. I haven’t had the opportunity to sew many collars and cuffs, so this was another consideration in my choice. The instructions for these are superb for entry level sewists.

As with any other sew, I washed the linen cotton on a cold cycle and popped it on the medium setting in the dryer. There was no noticeable shrinkage and no fading of the dye. I like how the addition of the cotton to the linen helps to reduce wrinkling and cuts down the time it takes to iron. I do appreciate that relaxed vibe that wrinkling in linen can give but I prefer to start wrinkle free and earn the wrinkles along the way.

Of course, I also checked my needle. I left it on the universal 90/14 gage needle that I had been using. I matched the fabric with the Gutermann CA 02776 thread. I’m not sure the colour of the print shows up in the photos, but the print consists of shadows of mauve flora on a background of green. 

The Ritual Dress has quite a lot of ease in the pattern sizing, so I chose my usual Size L for my measurements of 38-inch bust, 33-inch waist and 40-inch hips. I did not make any modifications. My height is 167cm. I felt the pattern was true to size and fitted comfortably. Perhaps the sleeves could have been shortened slightly but I wanted to have the full-length sleeve and a properly maxi dress. I guess I’m great at sewing summer outfits, but I really need to make items that will see me through the cooler weather. I think this dress fits the bill nicely.

The collar and cuff instructions were great if you lack experience in this area. It’s really made for novice level and can highly recommend it. The Summer Abroad linen cotton has been such a good quality fabric to sew with. It still has that slight stiffness that linen starts with so it feels a little bit course on the skin but that will soften with a few washes. I know that’s sometimes a concern with linen, but it really doesn’t take long for it to season to a soft and pliable garment.

Hopefully, the Summer Abroad collection will be available for purchase soon from your favourite fabric store! Currently, it’s available for wholesale through Devonstone Fashion. Keep your eyes out for it from the Sew To Grow newsletter.

Thanks for reading and happy sewing!

X Em

Darla Jumpsuit 

Featuring Fibers to Fabric Hand-blocked Cambric Cotton 

It was so exciting to receive this beautiful hand-blocked cambric cotton from Fibers to Fabric for a review. The first thing I had to find out was, what was cambric cotton? It’s sometimes known as batiste and it’s a beautifully sheer fabric that’s great for summer. It reminds me of the handkerchiefs my grandmother used to hand embroider. It’s a natural fabric and usually made from either linen or in this case, cotton. It’s popular because it can be dyed easily so it’s perfect for the Fibers to Fabric hand-block.

My first challenge was narrowing down what I was going to make with it. The fabric width is 42” (107 cm) and I had 3 meters. The design of the hand-block was non-directional. I narrowed it down to the True Bias Darla Jumpsuit because I wanted to maximise the use of every square inch of this fabric. With a bit of creative cutting and use of a white muslin for the liner, I managed to cut the maxi with classic bodice version of the Darla. Gloriously, this included the pockets!

To prepare the fabric, I overlocked both cut ends of the fabric before soaking and washing it in cold water. Once out of the wash, I air-dried it then finished with a warm iron. The benefit of cambric cotton over plain cotton is the tighter weave which makes it more resilient with frequent laundering. It’s stands up better to being washed without compromise to the lightness of the fabric.

While my fabric was drying, I gathered my supplies for my Darla Jumpsuit. There are four versions of this pattern. It can actually be sewn as a dress and comes as a maxi or mini. There are two bodice options. One is a tie back or the classic with the invisible zip. I decided on the classic, so I needed an invisible zip. When I was at Spotlight, I also bought the invisible zipper foot. The pattern calls for lining which can be from the same fabric. I used a white muslin and interfacing which was already in my stash. To prepare my machine, I changed my needle to a new size 10/70 needle which is great for lightweight fabrics.

Now, I’m not brave when it comes to cutting straight into “good” fabric with a new pattern. I toiled the Darla bodice with a remnant thin cotton and had to make some adjustments. I recommend this especially since the Darla has a fitted bodice. For my measurements of 35” HB:37.5” FB:33” W:40”H, I made the size 12 and I did have to adjust the bust. It says in the pattern that it is drafted for a C Cup so my measurements would put me between the B Cup and C Cup. The structure of the bust is made from two darts, one from the side (underarm) and one from bottom (under bust). Without going into too much of the math, the dart can be adjusted to be narrower for a smaller cup or wider for a fuller cup. I adjusted the side seam to compensate for the adjustment and I only adjusted the underarm dart. The main message is to toile, and I always adjust on my body and then measure. I’m terrible at doing it the proper way which would be more accurate. I find the Darla pattern true to size.

This hand stamped floral block print was a dream to work with. It’s very stable to sew and easy to handle. I used an overlocker to finish the seams which worked fine. Some finer fabric would need French seams, but the cambric cotton tolerated the overlocking. True Bias instructions and order of construction is excellent. It was a joy to bring together this pattern and the fabric. I just need a bit of sunshine and heat to wear it. Is it okay to book a tropical getaway so you can wear an outfit? Asking for a friend. 

Thanks for reading and happy sewing!

X Em

Full disclosure: Fabric was gifted for a review but all opinions remain my own.

Ella Dress

Pattern Scout has done it again! This is the newly released pattern from Pattern Scout, and it hits the mark of a timeless classic. The Ella is a sleeveless shift dress which can be sewn on the bias, so it just skims the curves. It’s a classic with the boatneck midi dress. If you’re looking for a pattern with some skill building features, there are instructions for French seams, sewing on the bias and installing the invisible zip.

I was lucky enough to get onto the testing team. I really like testing for Casey and have sewn many of her patterns. The instructions are always comprehensive and easy to follow. The illustrations are great, and she also has a YouTube Channel which is another great reference. I’m sure she will be providing some great sew along videos for the Ella Dress. I also like the sizing especially the inclusion of cup sizes.

This pattern is drafted for woven fabric. It would suit anything light to medium weight with fluid drape. I used a rayon from East Coast Textiles. I had discovered East Coast Textiles through some sewing friends and really love their rayon. Luckily, a new batch had arrived when I was doing this pattern test. I had three meters available which was perfect for the pattern to be cut on the bias. The pattern can also be sewn straight grain which can be a fabric saver.

My measurements of 35HB:37FB: 33W:40H fits the size 12, B-cup. The pattern is drafted for an average height 5’9” (175cm). I’m slightly shorter but decided not to shorten the length with this make because I was testing the piece. There are always good instructions about fit and how to modify the pattern included with Pattern Scout Patterns. Without shortening the length, the dress does look more maxi than midi on me. I have decided to leave it as a maxi because I would wear it more.

The dress is neatly finished off with French seams and the neckline and armholes have facings. I feel like this is a great pattern for practicing some of those advanced sewing skills. I also liked the instructions for installing the invisible zip. I still haven’t bought myself an invisible zipper foot, but I think I’m used to it now. I use a normal zipper foot, but I make sure that I iron open the zip tape to sew as close as possible to the zipper teeth.

It’s nice to have a wardrobe staple like the Ella Dress. I feel that this silhouette is a classic and doesn’t date. It’s something I will return to sew again and again. I can’t wait to wear this in summer. Maybe I’ll make one that will be suitable for winter layering and add lining. 

Thanks for reading and happy sewing!

X Em

Andi Set

Brunching with other ladies who sew can be dangerous for the budget. It was during one of these brunches when I discovered East Coast Textiles and their fantastic selection of rayons. They also have other fabric, but I was mainly interested in the rayon which I bought three pieces at a bargain price. The one I’m featuring has a border print which I wanted to challenge myself with. Initially, I thought of making another pair of flint pants or a pyjama set but when I was sewing up my Andi Set Top, I thought of how this fabric would pair so well with a sleeveless version of the full Swimstyle Patterns Andi Set

So, I set about researching how to sew with border prints. First, I had to decide how to use the border print. Seeing as there was no seam running vertically in the front of the skirt, I decided to use the border to emphasise the bottom of the blouse and the skirt. I think this was a nice way of pairing the set and adds a bit of matching detail. 

The second challenge was cutting the fabric. The border runs along the selvedge on both sides, so I had to cut the pattern cross grain. We don’t usually cut cross grain because there is more stretch to the fabric this way but since the pattern pieces are not too heavy and allow for lots of drape, it’s okay for this pattern. 

This was good in theory but challenging in execution. It took me a whole afternoon to figure out how to align and modify the pattern pieces to fit the border nicely. Rayon is very slippery fabric so another challenge was cutting everything accurately so the seams would line up and not interrupt the border print. I’ll try to describe what I did. For the top, I lengthened it by 1 inch but when sewing the side seams of the top, I did not match the sides according to the notch provided but by the border print. This gave me an uneven bottom edge, so I then trimmed it to even it up before finishing the bottom hem. The side seam of the Andi Top has gathers on the front bodice piece, so this is how I was able to modify it. For the skirt, I cut the pattern as it is drafted but left the bottom of the skirt straight. When I had matched and sewn the side seams, making sure my border print had matched up, I trimmed the bottom raw edge following the curve of the pattern piece before finishing the hem of the skirt. There are probably a few ways of doing this but, I found that this worked best for me. This skirt has two side splits, so it wasn’t too difficult to use the border print for this.

The sizing was true to size. I sewed the Size L for the top and the skirt without any modifications. My measurements are 38-inch bust, 33-inch waist and 40-inch hips. I decided to make the long tie for the top. I finally worked out how to use my loop turner properly which make the process a lot easier and faster. I swear that the loop turner I bought came with gave me completely different instructions which is why I’ve struggled in the past! 

Instructions and illustrations are excellent with the pattern which makes it so enjoyable to sew Swimstyle Patterns. I have been gifted the pattern as part of their Ambassador Program, but they are excellent instructions and all opinions in this article remains my own. One small annoyance is that I think the pattern is made more for people who like to trace their patterns not the people who cut into them like I do! No hate please, do as you like but I tend to print the size or sizes I need and then cut accordingly. There are no size layers when you print and there’s also no differentiation of the cutting lines so it’s a bit easy to get lost. I mention this because I did! I started with the line for size L and then somehow was cutting the size M. Luckily, I had noticed quite quickly and could stick the paper to repair it. 

The design is superb, and you can tell that these patterns are designed and drafted by someone with a lot of experience. The set has a beautiful look and fit. Even though the skirt has an elasticised waist, it looks sleek and well fitted. I also love the elongated tie which is an elegant part of the design. So happy with how this set turned out. I love sets because of how versatile they are. Whether you wear each piece styled independently or together.

Thanks for reading and happy sewing!

X Em

Tie Dress

Catching up with my latest make which is this beautiful newly released Tie Dress from Sewing Therapy. So, if you have been following Sewing Therapy on YouTube, you’ll also be following Sara on Instagram under the handle @yoursara_k and you can find it in her Two O Nine Fabric Etsy shop. Okay, now that you know where to locate everything, let’s talk about this uniquely versatile dress which features four ties and comes as short or long sleeves. The ties can be tied in a multitude of ways to create a different look. 

It’s always a short testing period with Sewing Therapy Patterns. I’m fine this as long as it spans over a weekend. When I signed up, I was so excited to get into the testing team because it was a long weekend here in Australia. This was until I got to the fabric store and realised that it was closed for the public holiday! Luckily the store reopened the next day when I found this beautiful linen/cotton blend fabric. I love the bright large floral print. The print is bright but is also muted. Not quite pastel but halfway there.

The pattern is a great beginner’s pattern and Sara has created very comprehensive sew along videos. It’s important to know that there are written instructions but there are no illustrations in the pattern. If you are not great with videos or have no access to YouTube, then it might not qualify as a beginner’s pattern. I did find the written instructions to be logical and easy to understand but I did appreciate the videos that Sara released early to the testers especially for the attachment of the short sleeves and the ties. The methodology for the construction of the short sleeves was quite novel to me. 

My sizing was fine for the test but there were some adjustments made for the larger sizes. I like testing for Sara because she’s quick to respond to testers questions and she always gives us feedback or updates as we sew. I made the size 12 (38B:33W:40H) and I would happily sew the same size again. I’ll be making the dress with the long sleeves to wear over winter. 

Styling this dress is so much fun because of the ties and, you can wear it with the V neck or Boat neck. It’s never boring! The dress will also be great for layering which is why I hope to make another one soon. 

Thanks for reading and happy sewing!

X Em

Marcel Dress

When it comes to floaty maxi dresses, there is nothing more iconic than the Chalk and Notch Marcel Dress. It’s immediately recognisable with the dress fitting through the high bust and the tiered panels along the side. I had sewn the tank top version as a wearable toile last year but was waiting to find the right fabric for the maxi dress. When I found this polka dotted rayon from East Coast Textiles, I thought that it would be the right combination.

The dress is quite loose through the full bust, waist, and hip area so the high bust measurement is the main measure for fitting. It also has cup sizes from A to D so the full bust measurement can be used to determine this. I made the size 12 A/B cup without any modifications for both the tank top and the maxi version.

Construction of the dress involved a lot of gathering. This was also why the right fabric must have a good amount of drape and be lightweight enough for gathering. Once you get the rhythm of gathering and then sewing the panels, putting together the dress goes quite fast. But it’s times like this that I wish I had a gathering foot! A quick note on sewing with rayon, I think I have listed some helpful tips in the past, but I would like to reiterate a few things. Remember to use a rotating blade cutter instead of scissors, mark your fabric before removing from the cutting table, use spray on starch if you want to stabilise the fabric, and stay-stitch necklines and armholes.

I enjoyed the pattern as the instructions and the illustrations were very clear. I also used the sew along tutorial that is available on the Chalk and Notch blog. The photographic tutorial was a nice extra but really, you could understand the pattern well enough from the written instructions provided.

This dress came together in a day which was lucky because I was making it for a getaway with my girlfriends. I hate sewing in a rush, but I knew the fit would be fine from my previous make of the tank top. The getaway was to Brisbane which is a beautiful city. It was quite hot and humid with periods of rain on and off. The dress was great for a dinner at the heritage listed Howard Smith Wharfs which is tucked under the Story Bridge, which everything revolves around in Brisbane. I was grateful to be able to spend some time with my oldest and dearest friends (they won’t be happy that I’ve referred to them as old).

Thanks for reading and happy sewing!

X Em

Lanti Swing Dress Again

I can’t believe it’s been almost two years ago when I was a tester for the release of this Sew to Grow Lanti Swing Dress pattern. I’ve always meant to come back and sew it again because I do wear the two that I’ve made a lot especially my flax-coloured version. I have really enjoyed coming back to make the pattern as I knew the modifications I wanted to make, and I was already familiar with the sizing. Also, the pattern pieces are already put together which meant I could get into the sewing part faster.

For this version of my Lanti, I wanted to use this Yarn Dyed Linen Grid Check which I bought from Megan Nielsen Patterns when she still had a shop. It’s such a beautiful quality linen that I have been hesitant to use it and also when you buy fabric ahead of time, you have to see if the pattern’s fabric requirements match your available fabric. I had 2 meters x 150cm available. The Lanti Dress comes as two versions, one is the smock style dress and the other is an A-line version. Initially, I thought I would take the opportunity to sew the A-line however, it would have wasted ¼ of the fabric. After looking to Pinterest for inspiration, I decided I wanted to make the smock style but add quite a lot of length to the skirt and to make it with short sleeves. 

The smock dress has an empire waist with a boxy bodice. I kept to the size 12 that I previously made for my measurements of 38-inch bust, 33-inch waist and 40-inch hips. I modified the pattern by lengthening the skirt to 30 inches and narrowing the width of the skirt by 4 inches. I wanted to make the dress a midi length and I needed to narrow the width because the linen had a bit of body to it. It probably sits between the light and medium weight gage. Another small modification was to swap a button and button loop closure for a tie closure.

The instructions and illustrations with Sew to Grow patterns are well set out and written. However, I found myself deviating and sewing the pattern from my own preferred construction. I think that is a natural progression as you gain experience. Small things like pocket construction, seam finishes or attaching facings can all be sewn in different ways with the same outcome. 

Needless to say, I’m happy with the outcome. My new Lanti Swing Dress will be easy to layer with leggings or with a cardigan thrown over. I was also experimenting with shoes. Chunky white sneakers or something neutral. The dress is so versatile and I’m looking forward to adding it to my autumn/winter capsule wardrobe.

Thanks for reading and happy sewing!

X Em

Holyoke Dress featuring Melco Fabrics

This is not a sponsored post. Melco fabrics gifted me the fabric and reached out for a review without any obligations to post. When Melco fabrics reached out to me, I hadn’t really heard about print on demand fabrics. Basically, the concept is that you can order from a variety of featured artists, in this case, Deer Fiorella, and you can order the substrate and fabric amount needed which is what will be supplied. Less waste, more sustainable and environmentally responsible. I love that this is happening in the sewing arena. 

I chose the Gypsy Girl Sundance for my Holyoke Dress in a poplin. The Holyoke is a Cashmerette Club pattern which is a maxi dress featuring princess seams, button placket, a partially elasticised waistband and most importantly, pockets. I had used the skirt of this pattern to pair with the Hamden dress bodice in a previous make, but I really wanted to make the Holyoke dress in its original form.

Poplin is not the usual type of fabric that I reach for, but I wanted to try a more structured look for the dress. Poplin was a popularised in the 1950s with those beautiful full skirt dresses. It’s really durable and wrinkle resistant but still lightweight enough to wear comfortably in warmer weather. I’m really impressed by the quality of the dye and the cotton from Melco. There was no loss of colour when I gave the fabric a hot wash and iron when preparing the fabric for sewing. It’s normal to expect a bit of shrinkage from cotton which is why it’s important to prepare the fabric before sewing. The amount wasn’t noticeable for my pattern.

The poplin is 110 grams per square meter (GSM) with medium drape, so I used a universal needle size 90/14 on my machine. This worked very well but I had a bit of a hairy moment when I was trying to sew through several layers of fabric at the waistband. I think there were a few skipped stitches, but I wasn’t going to redo that area as I was just grateful not to break any needles. I guess I could have sewn up to the waistband and then swapped the needle to a heavier size, but the button does close over the waistband anyway.

Sizing a Cashmerette dress is so easy because of the unique sizing calculator for their patterns. It’s as easy as punching your numbers in and getting your sizing recommendation. Mine was 35-inch high bust, 38-inch full bust, 33-inch waist and 40-inch hips which recommended a size 10 bodice, size 14 waist and size 8 hip. I still made a toile as poplin does not have any stretch, so the sizing needs to be spot on. I followed the “Sew a quick and dirty muslin” tutorial for the toile. It is greatly detailed for anyone who isn’t familiar with the toiling process. I ended up making a slight adjustment to the side seams of the bodice.

Melco have really impressed me with the quality of their product. I love the designers featured and the fabric is a beautiful quality. I’m thrilled that they’re not just producing beautiful fabric, but they are passionate about ethical and sustainable fashion. Making and wearing something that has had a light touch on the environment makes me feel good about being someone who sews because sewing supports slow fashion for some of those same reasons.

Thanks for reading and happy sewing!

xEm

Dewey Dress

The Dewey Dress is the pattern of the month December for Cashmerette Club. I’ve received my membership due to a previous collaboration, but all opinions remain my own and there was no obligation to sew this. I feel very lucky to have been gifted this Club Membership as it feels like I’ve really learnt a lot and have been able to develop my skills. I’m self-taught so I really do rely on good instructions and tutorials when I sew.

With the holiday season in full swing, I was on the lookout for a dress and when the Dewey Dress popped up, it fit the bill perfectly. It’s a knit fabric dress with a unique asymmetrical neckline which is carried through to the pleating on one shoulder and pleating the opposite overlay. The tulip skirt is fully enclosed with the overlay creating a faux wrap look. It’s sleeveless but I’ve seen a few other makers combining the Dewey pattern with elements from the Grafton, which is a mix and match pack, to add sleeves to their dresses.

I don’t have a great amount of experience sewing with knit fabric but I’m feeling more confident as I practise. My knit fabric was bought two years back in the Christmas sales. It’s a stable cotton jersey (like t-shirt material). One day, I’d love to try it in a fabulously glamourous metallic lamé. I had about 5 meters available, so I used the same fabric for lining the bodice. I had a little freak out when I cut the fabric because I had cut from the right side facing up like I usually would but reading the instructions more carefully, it did say to cut from the wrong side facing up. I thought that I would have to restart with another fabric but because I was consistent with cutting from the right side, it was fine. The only visible consequence is the reversal of which side the pleats sit on and my pleats face the wrong way. 

For sizing, I made the size 10 without any modifications for my measurements of 35HB:38FB:33W:40H (inches). I used the C Cup bodice. I think the fit was great. There is a great sizing calculator that is available for all Cashmerette patterns, so I often refer to it to check. I decided not to grade as this is a knit fabric garment. 

The process I enjoyed the most with this pattern was using the burrito method to finish the armholes. There’s no visible stitching from the outside. The whole construction process went smoothly because the instructions are always very comprehensive and there are great illustrations accompanying the instructions. I did also appreciate the YouTube tutorial by @SewSewLive. It’s always great to see someone else’s process when they sew.

There will be a few more items I hope to finish before the end of the year but I’m doubtful about accomplishing anything as I have a lot of spring cleaning that I’ve neglected. Sewing is always more fun right? I have also discovered Diary of a Vampire. It’s a teen drama but I have been binge watching as the last day to watch it is 31 December on Netflix and there are 8 seasons! Oh and of course, getting everything ready for Christmas. I’m sorry if I haven’t been able to get back to everyone’s messages but I really appreciate your readership.

Thanks for reading and happy sewing!

X Em