Revel Topper

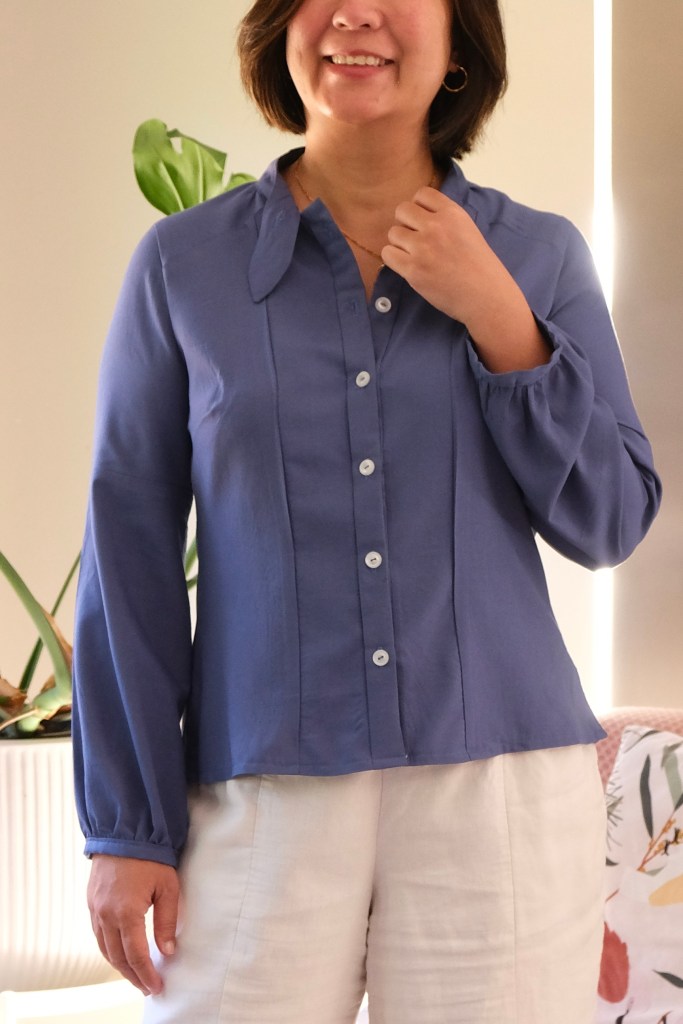
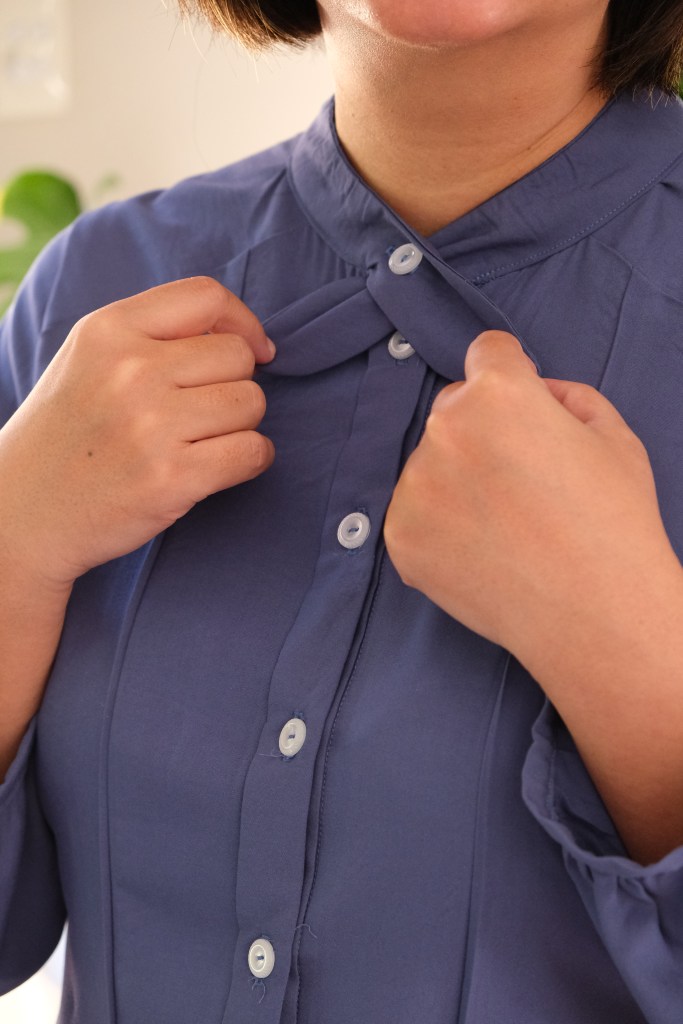
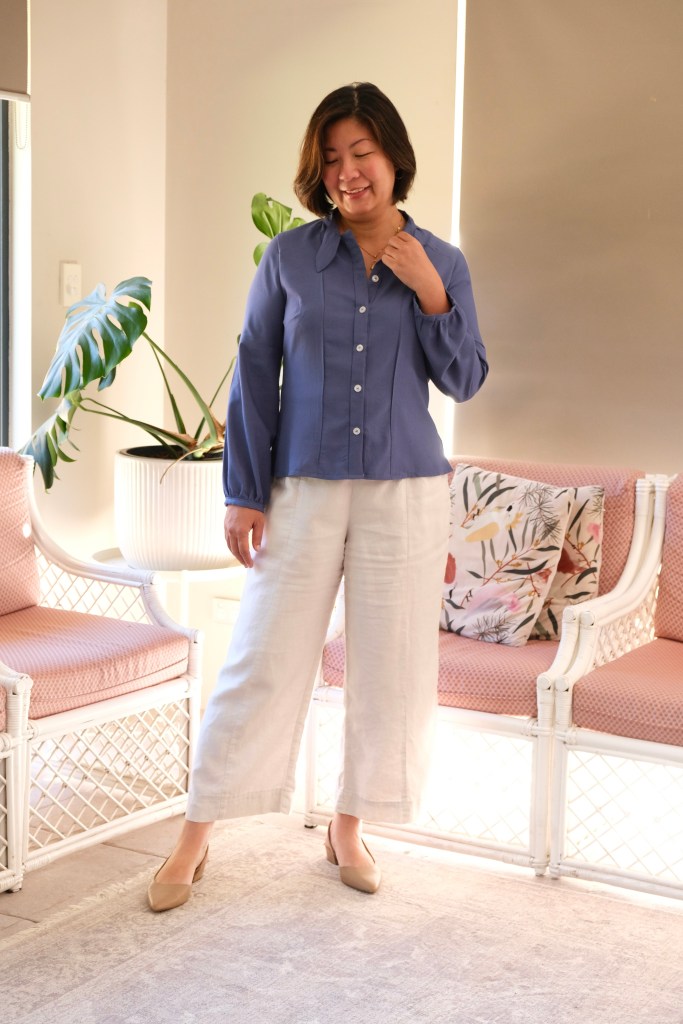
This Sew House Seven Revel Topper caught my eye for several reasons. I love the look of the boxy top with its various sleeve options, but I was also very keen to try sewing a yoke neckline and the shawl collar. Sew House Seven is one of the pattern makers I used to learn from when I started sewing because of the excellent instructions.

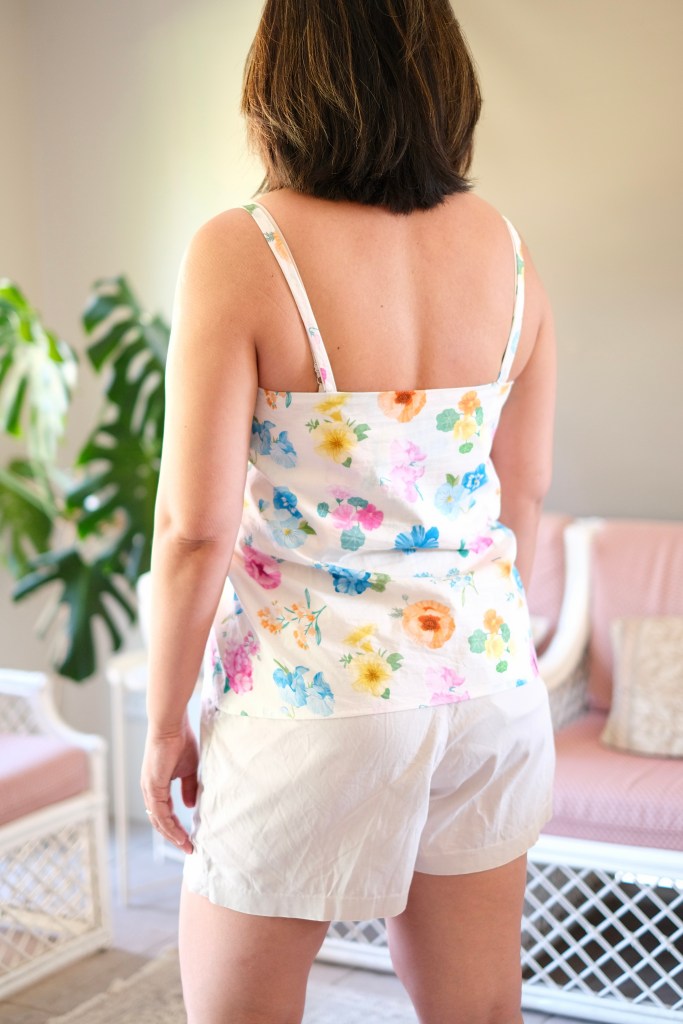
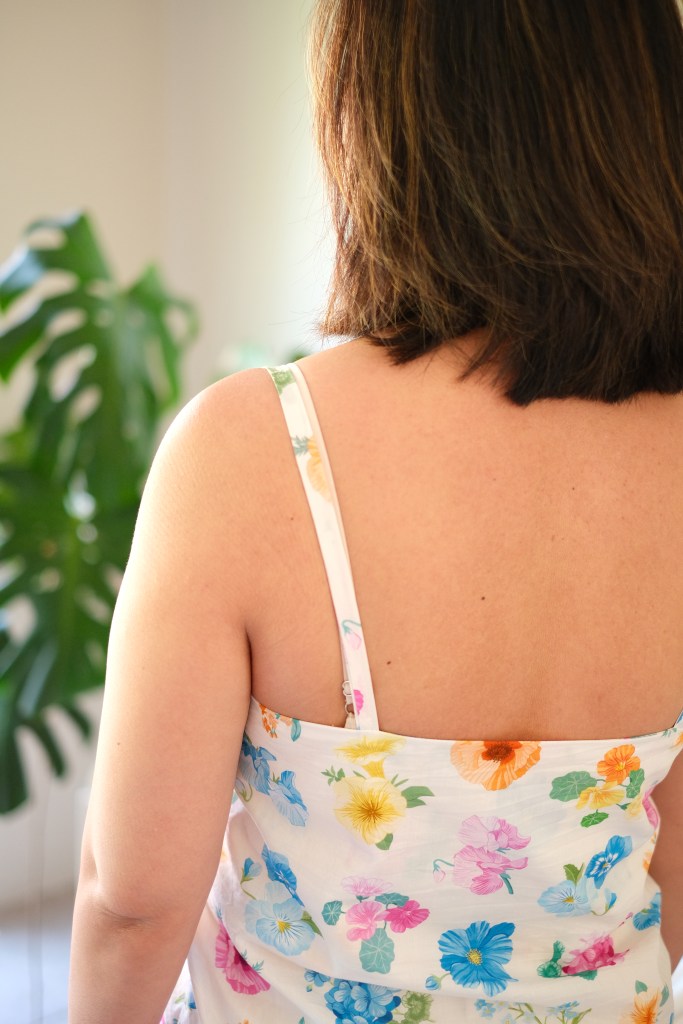
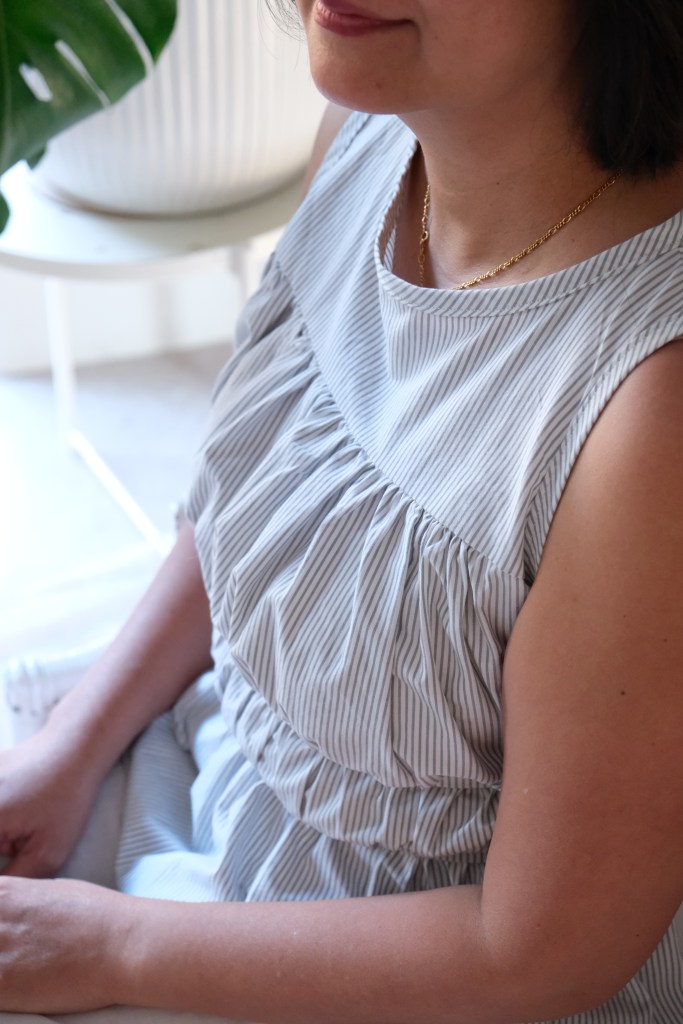
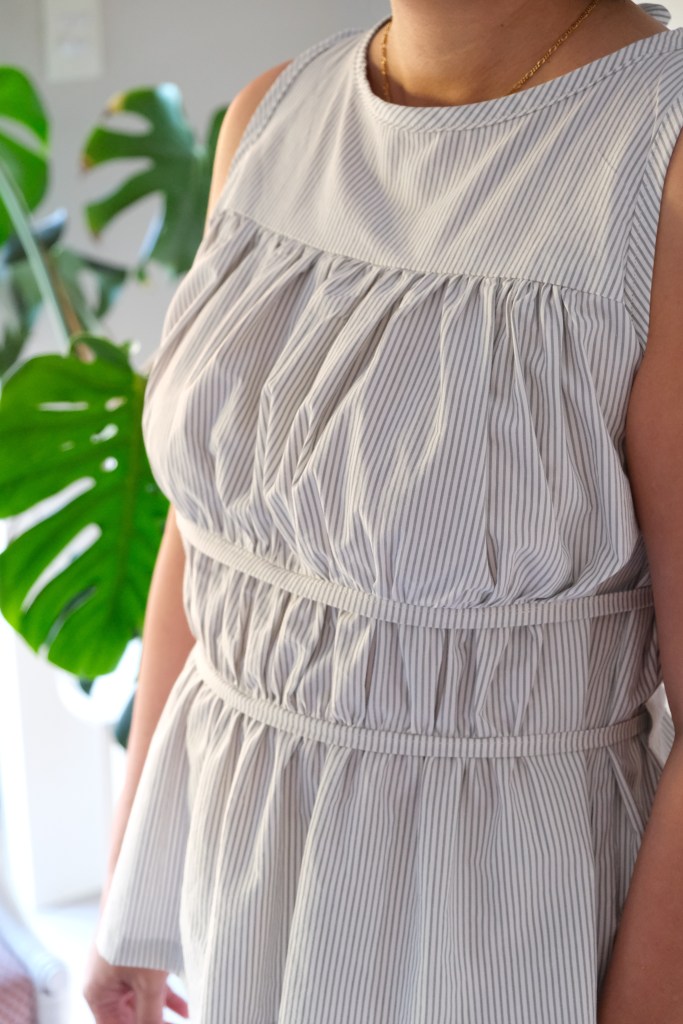
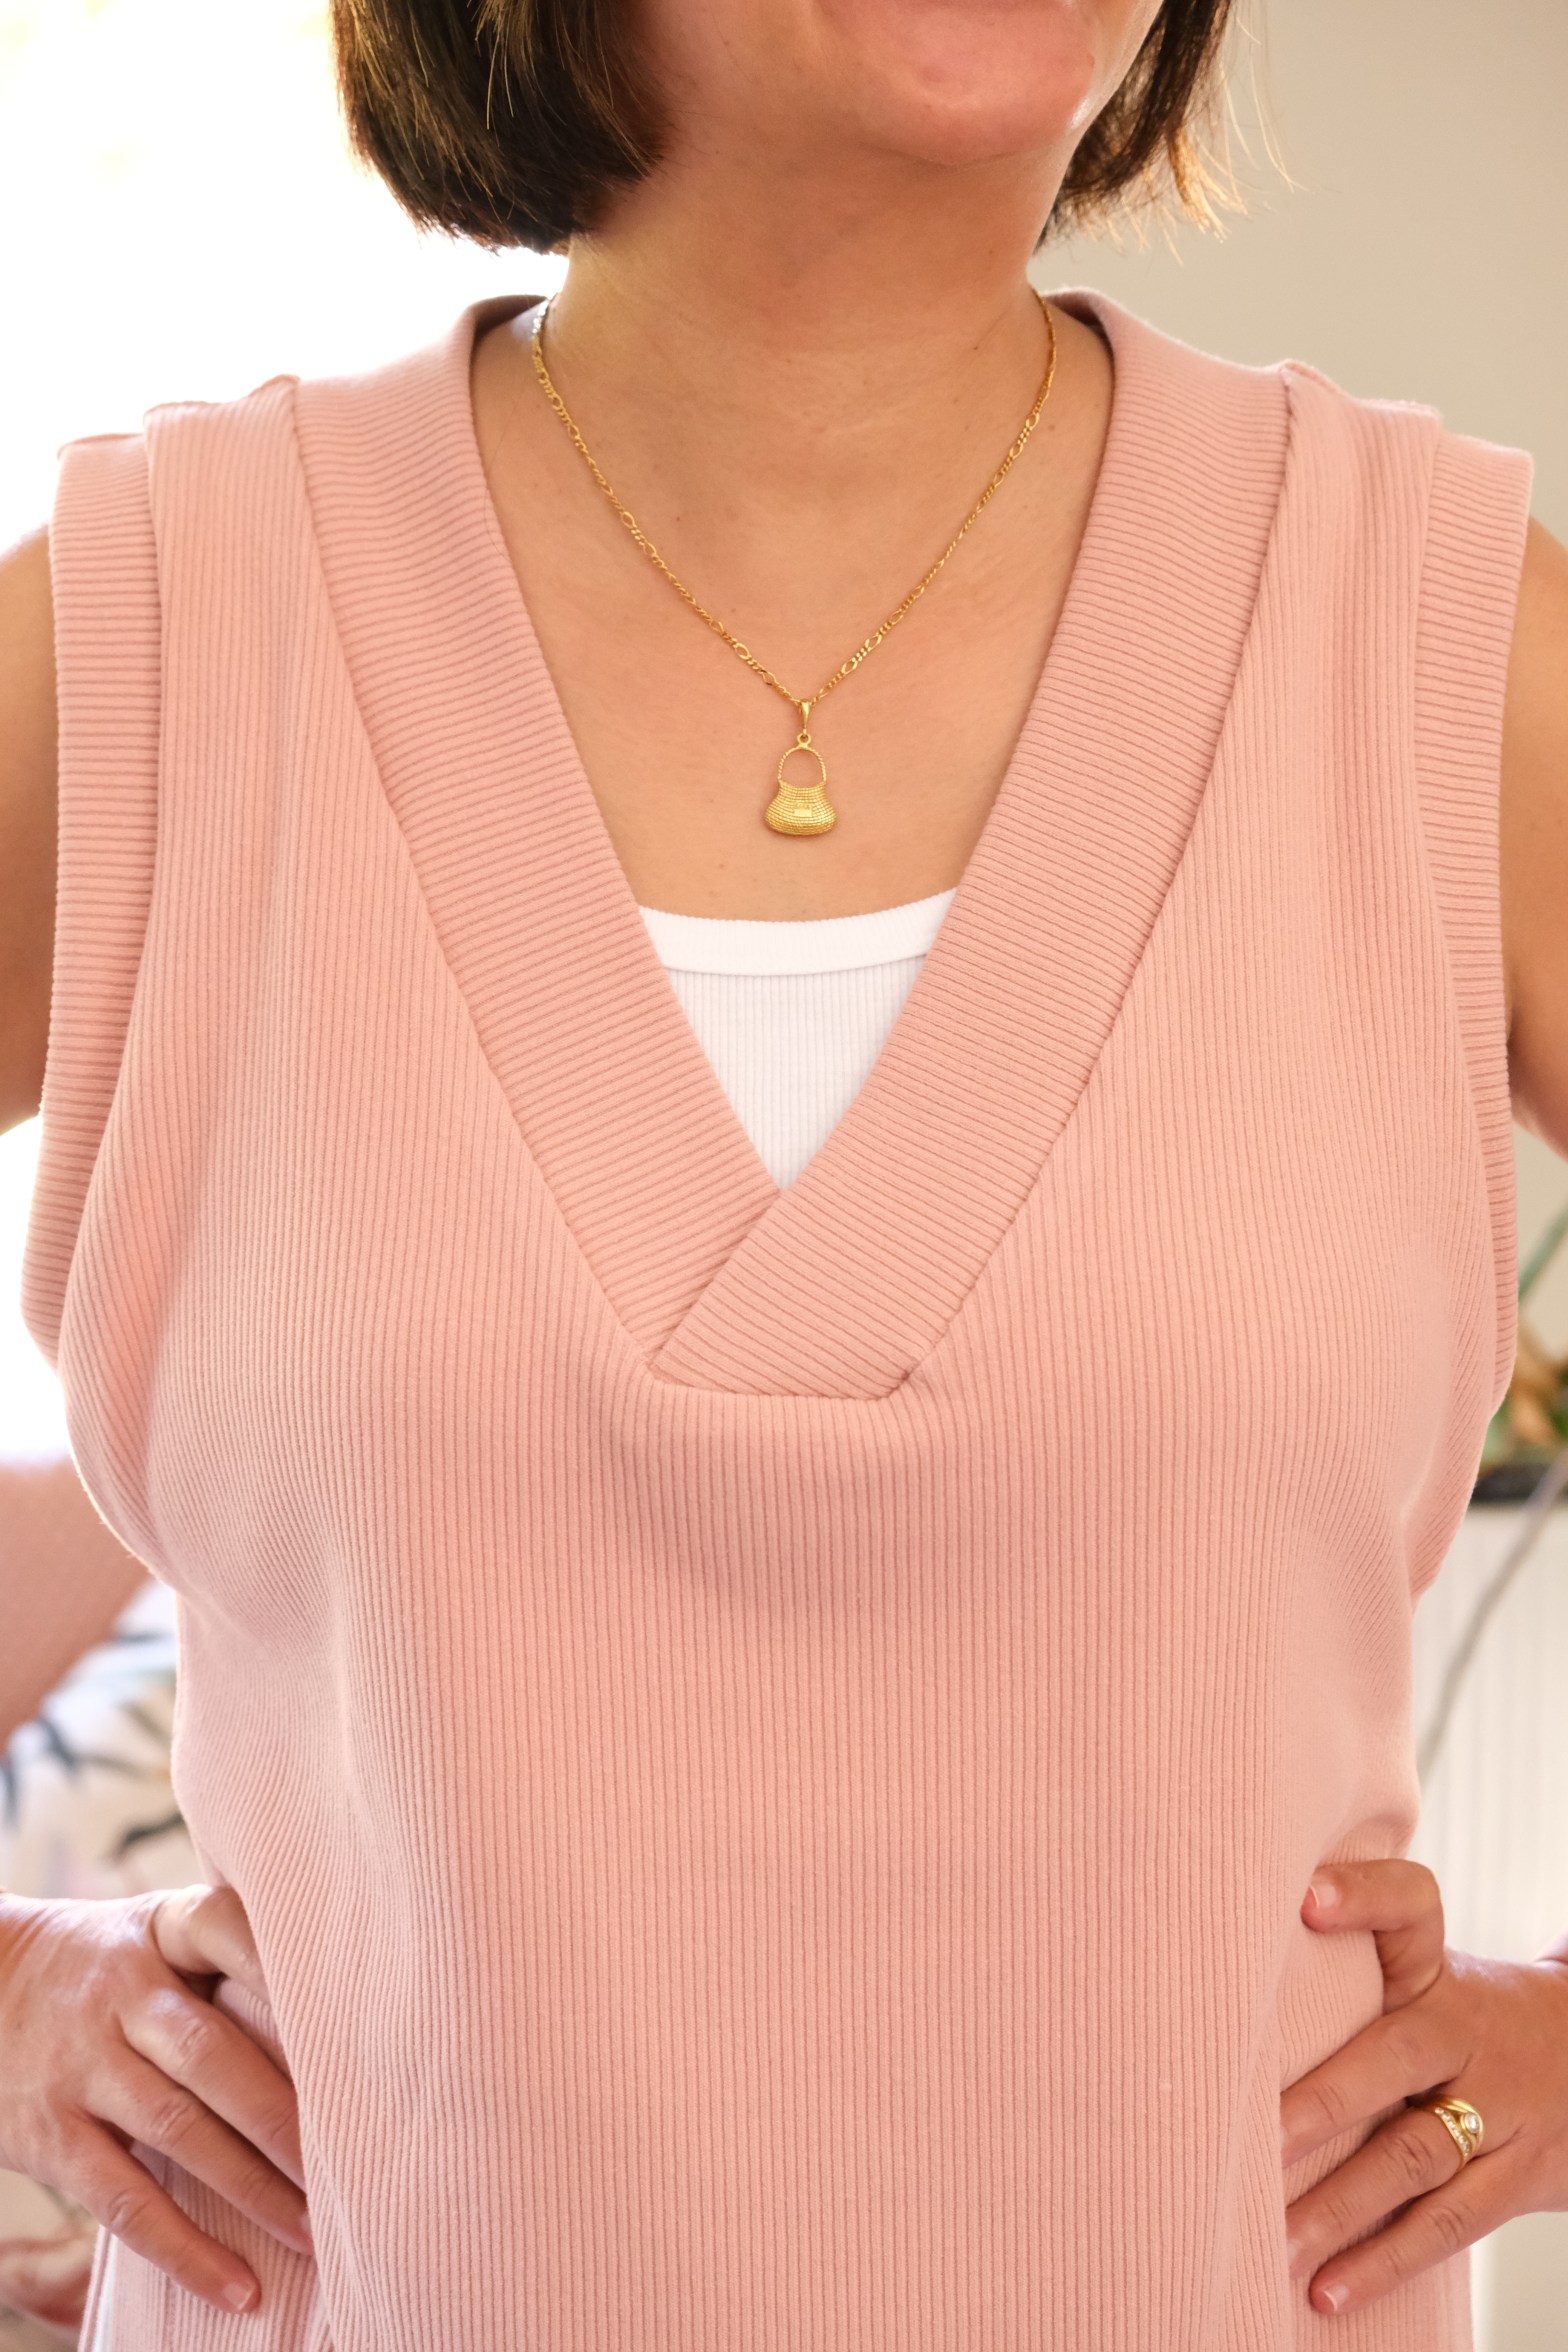
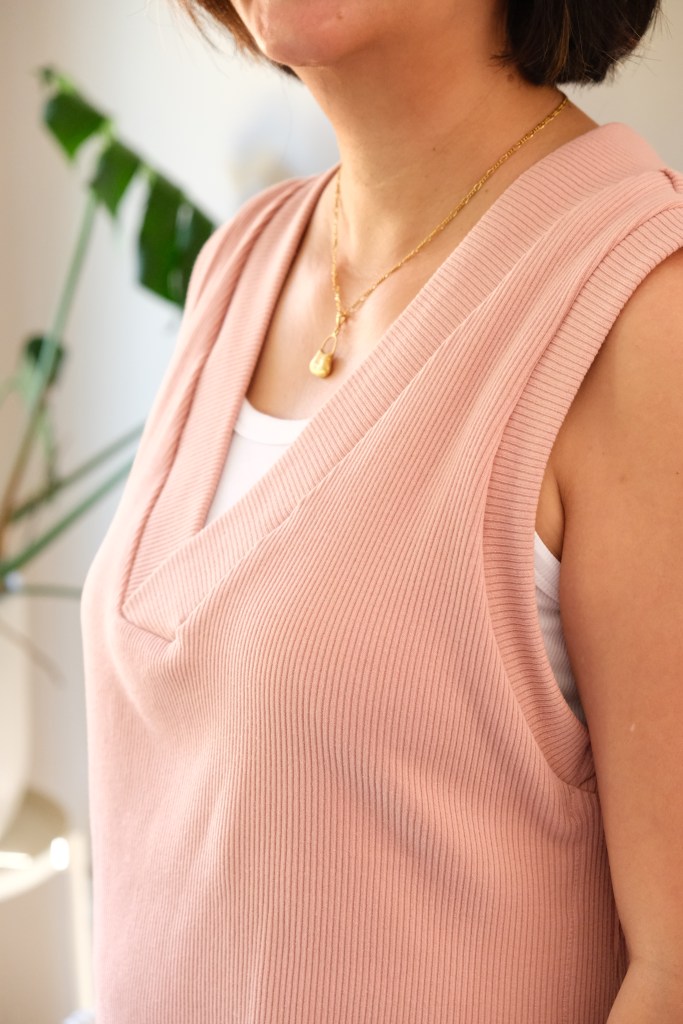
I made Version A first as a wearable toile and checked the fit. Version A is sleeveless, but the bodice is wide, so the armholes drop over the shoulders to look like capped sleeves. In this version, I used the same fabric to make the facing but chose to sew the facing to the inside. The sleeves have facings as well which are deep and sewn down.  

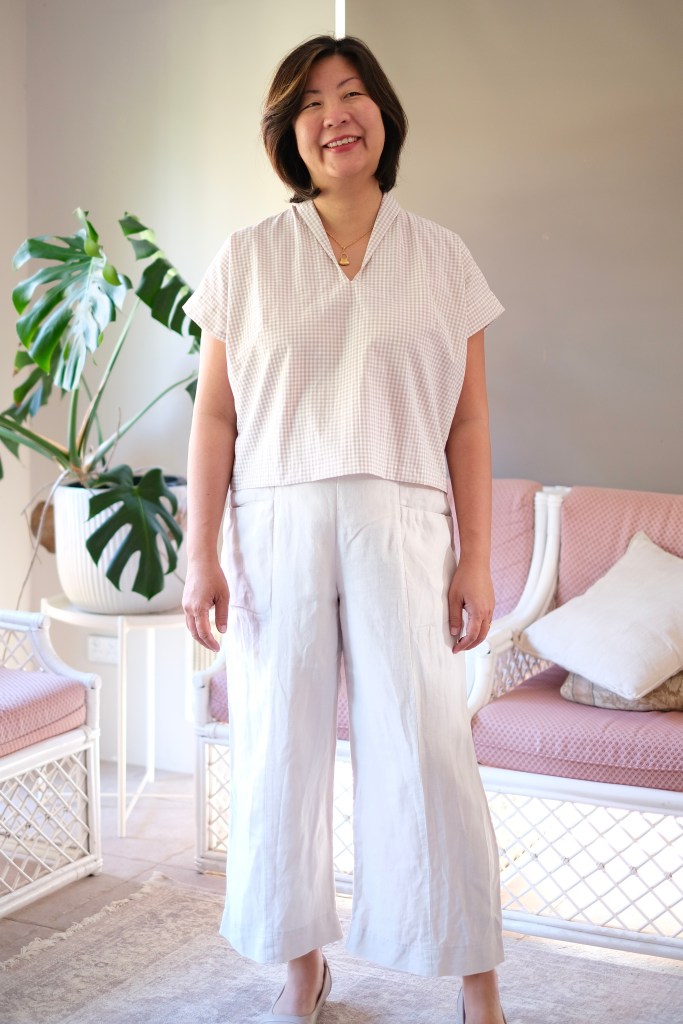
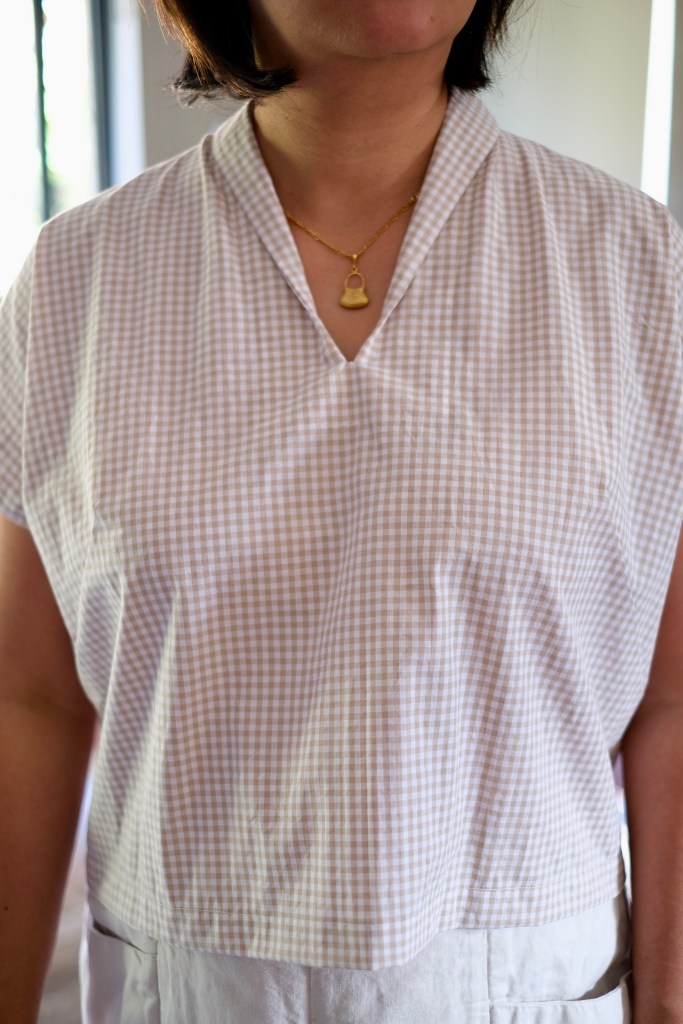
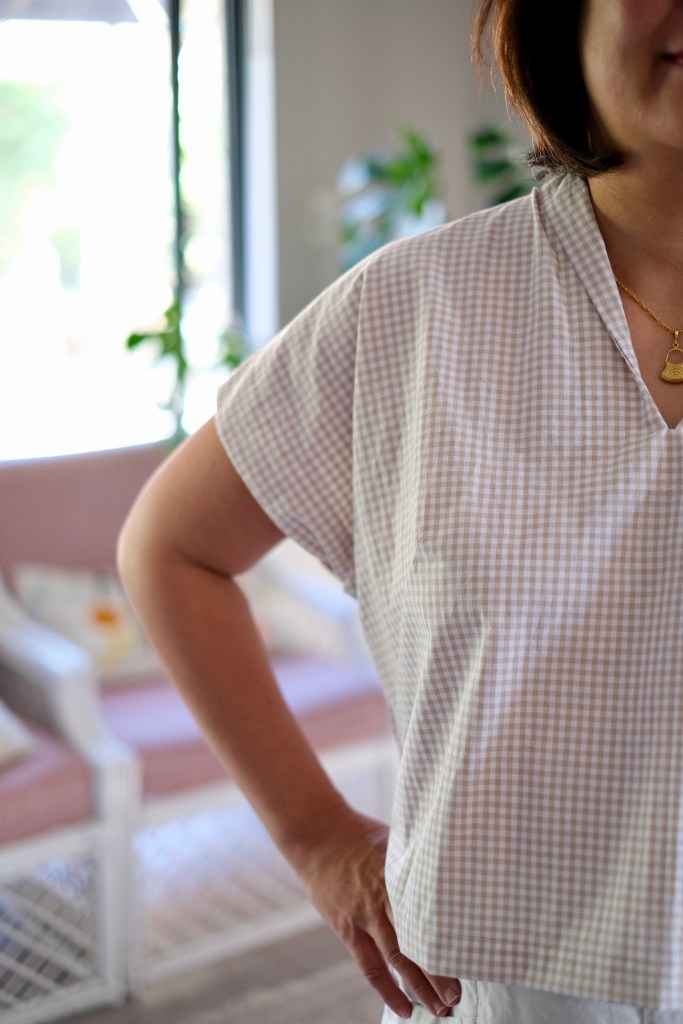
For my measurements of 38-inch bust and 33-inch waist, I made the size 12. I based my sizing on my bust measurements. My waist sizing falls into size 14 but looking at the ease, I felt that the size 12 would fit my frame better. The topper length is cropped but can still be tucked into high-waisted pants or skirts. 

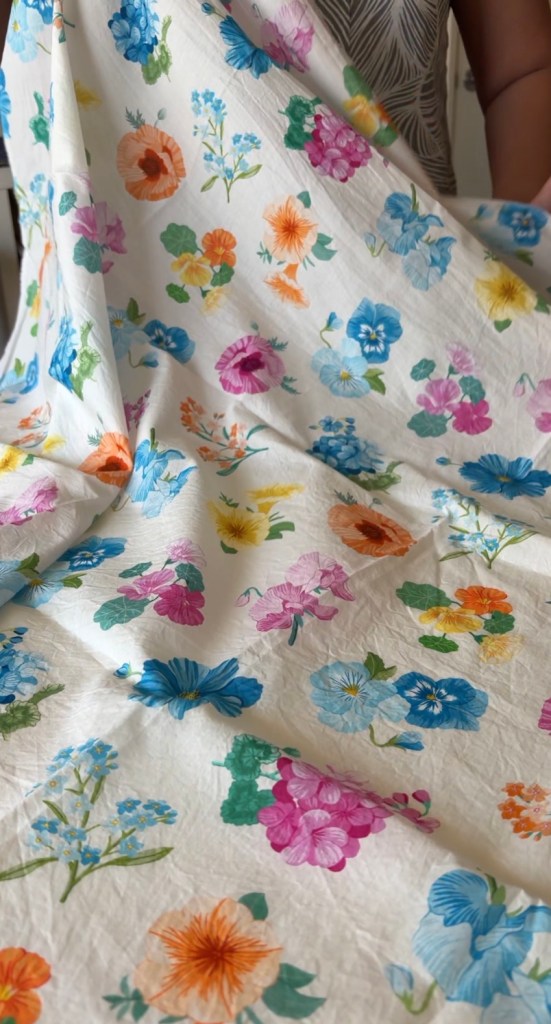
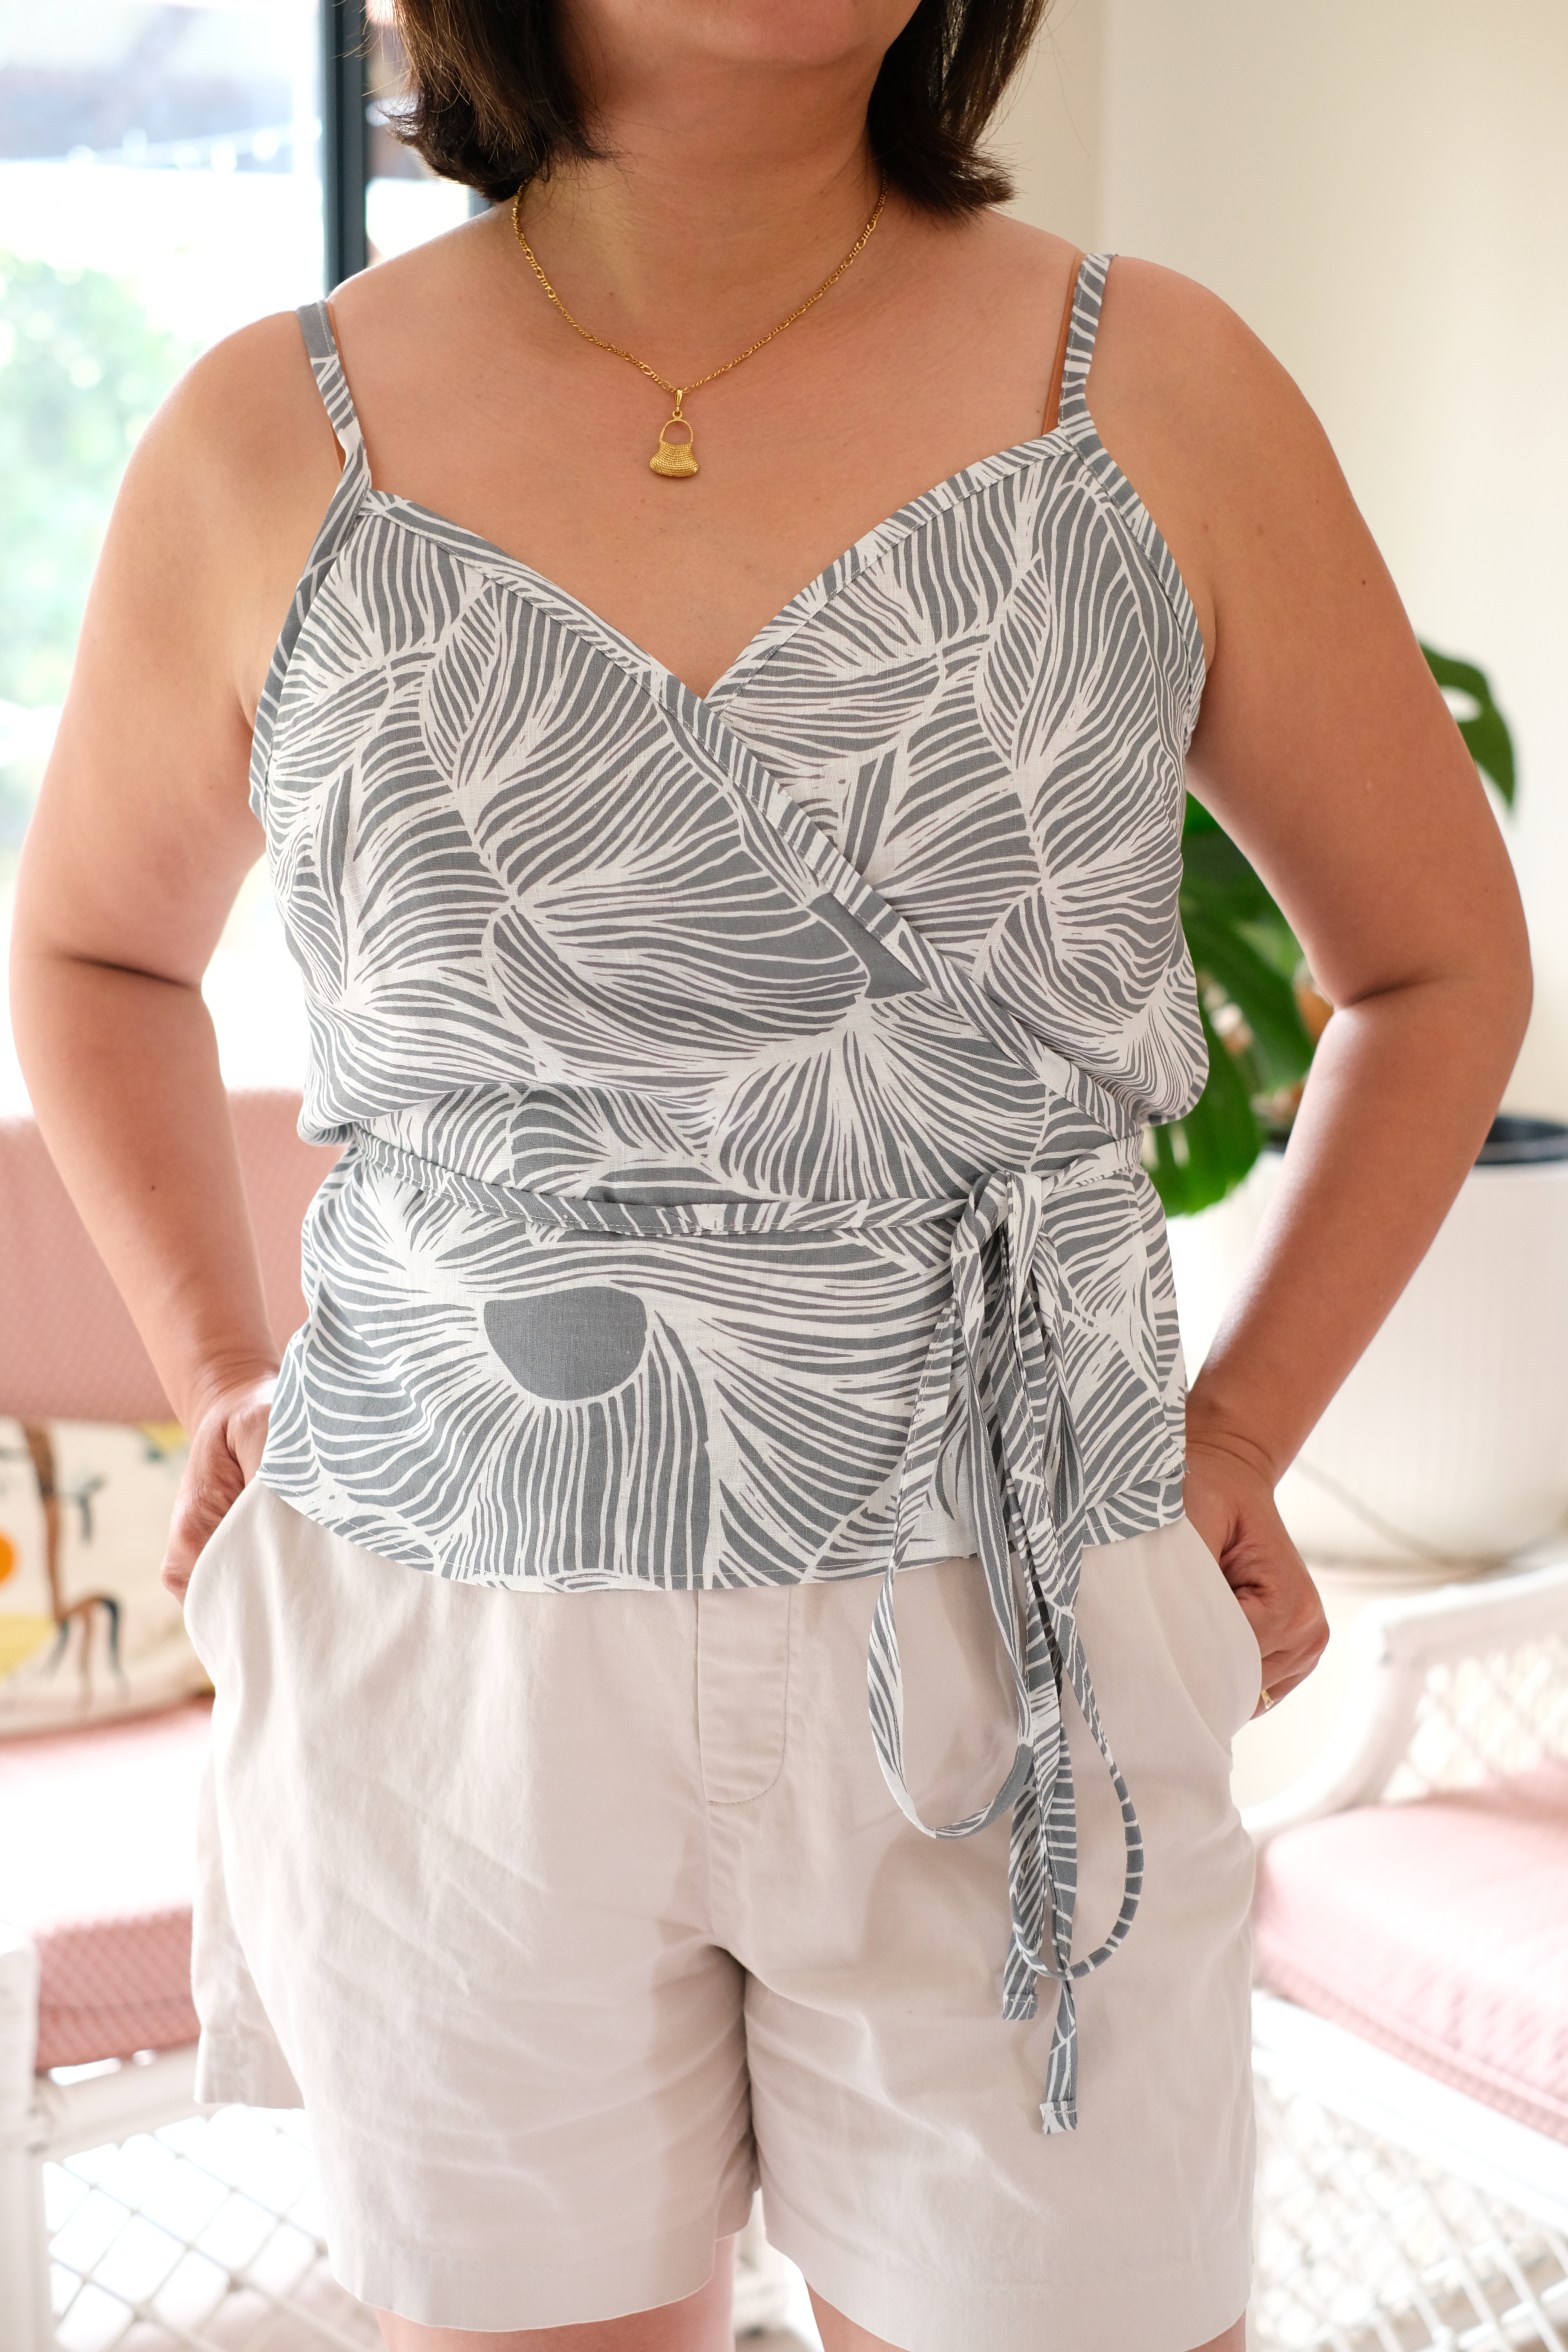
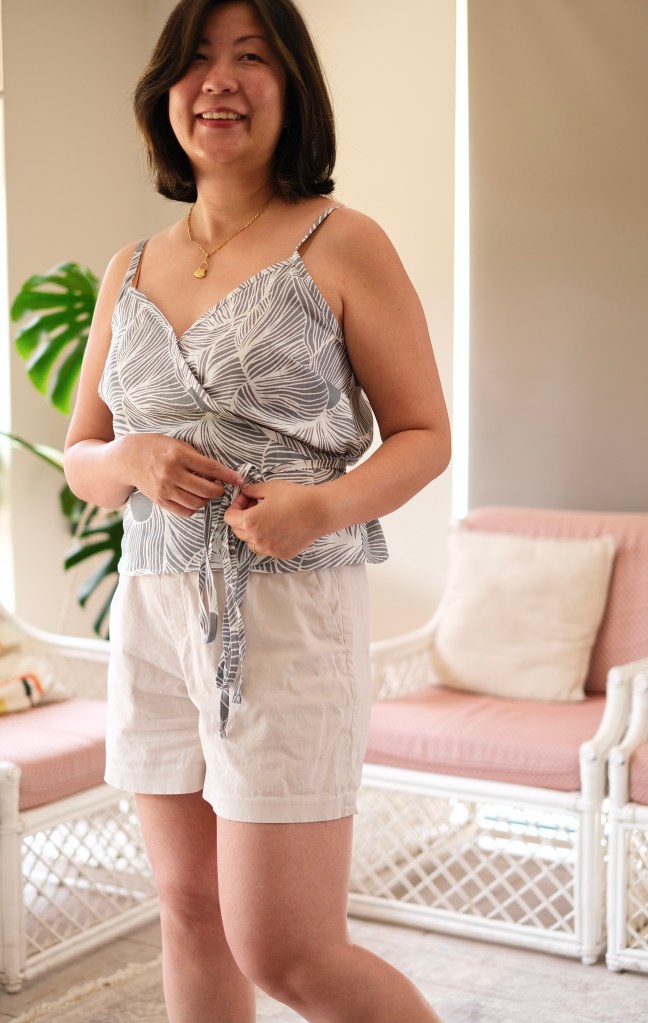
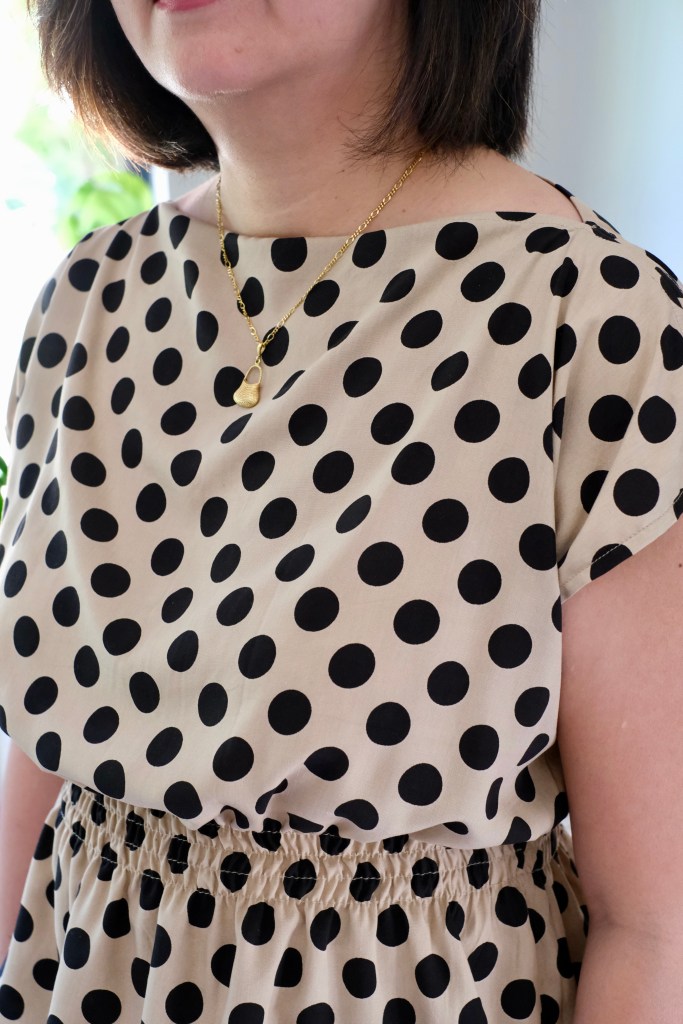
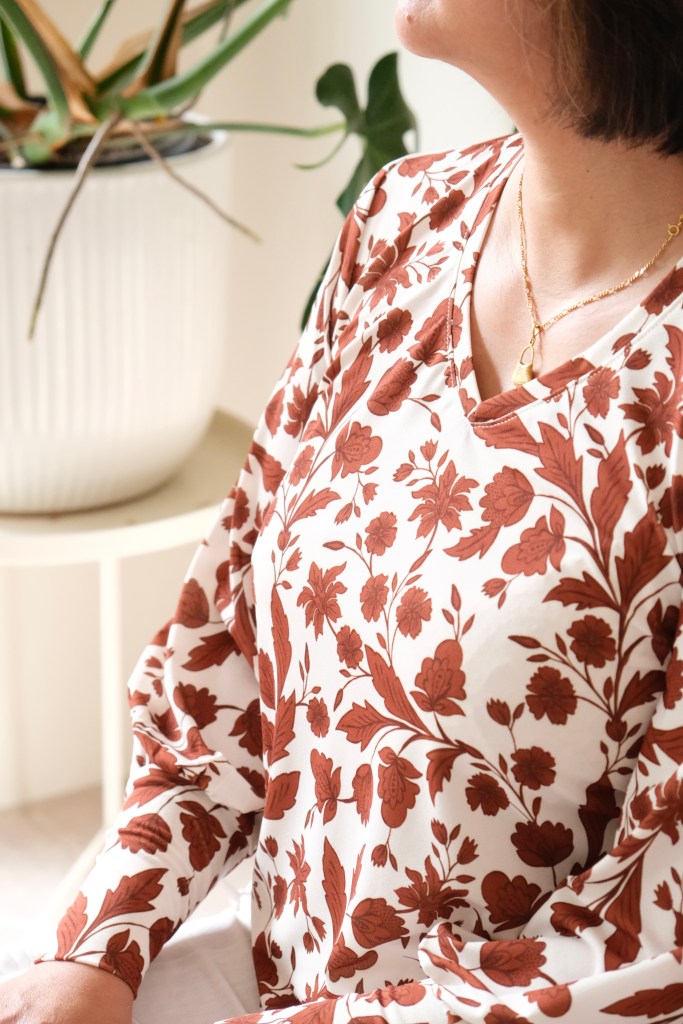
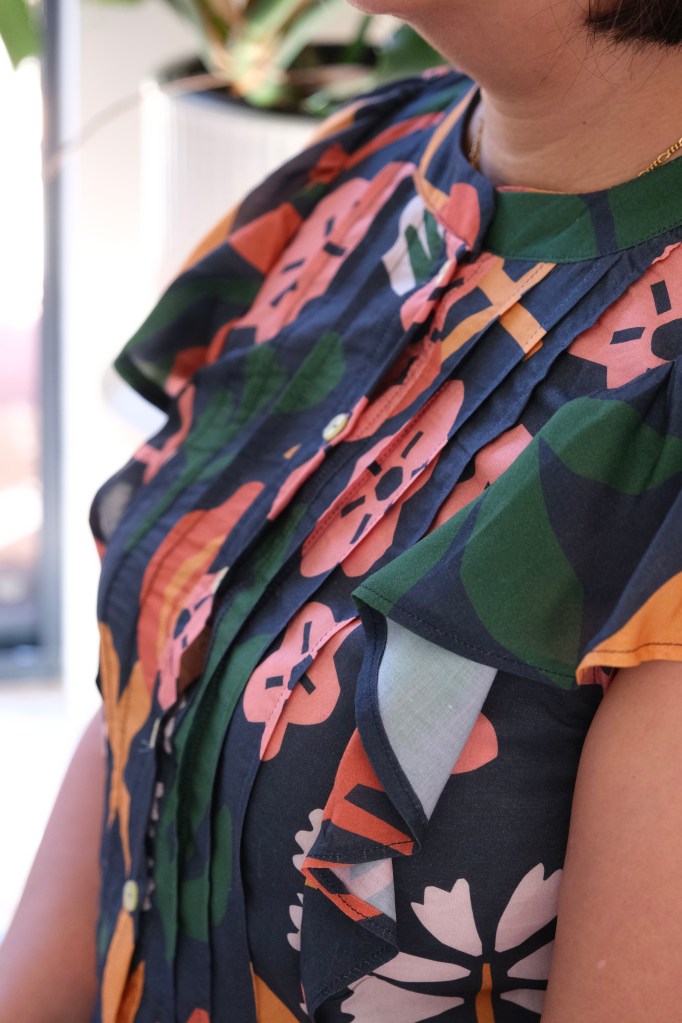
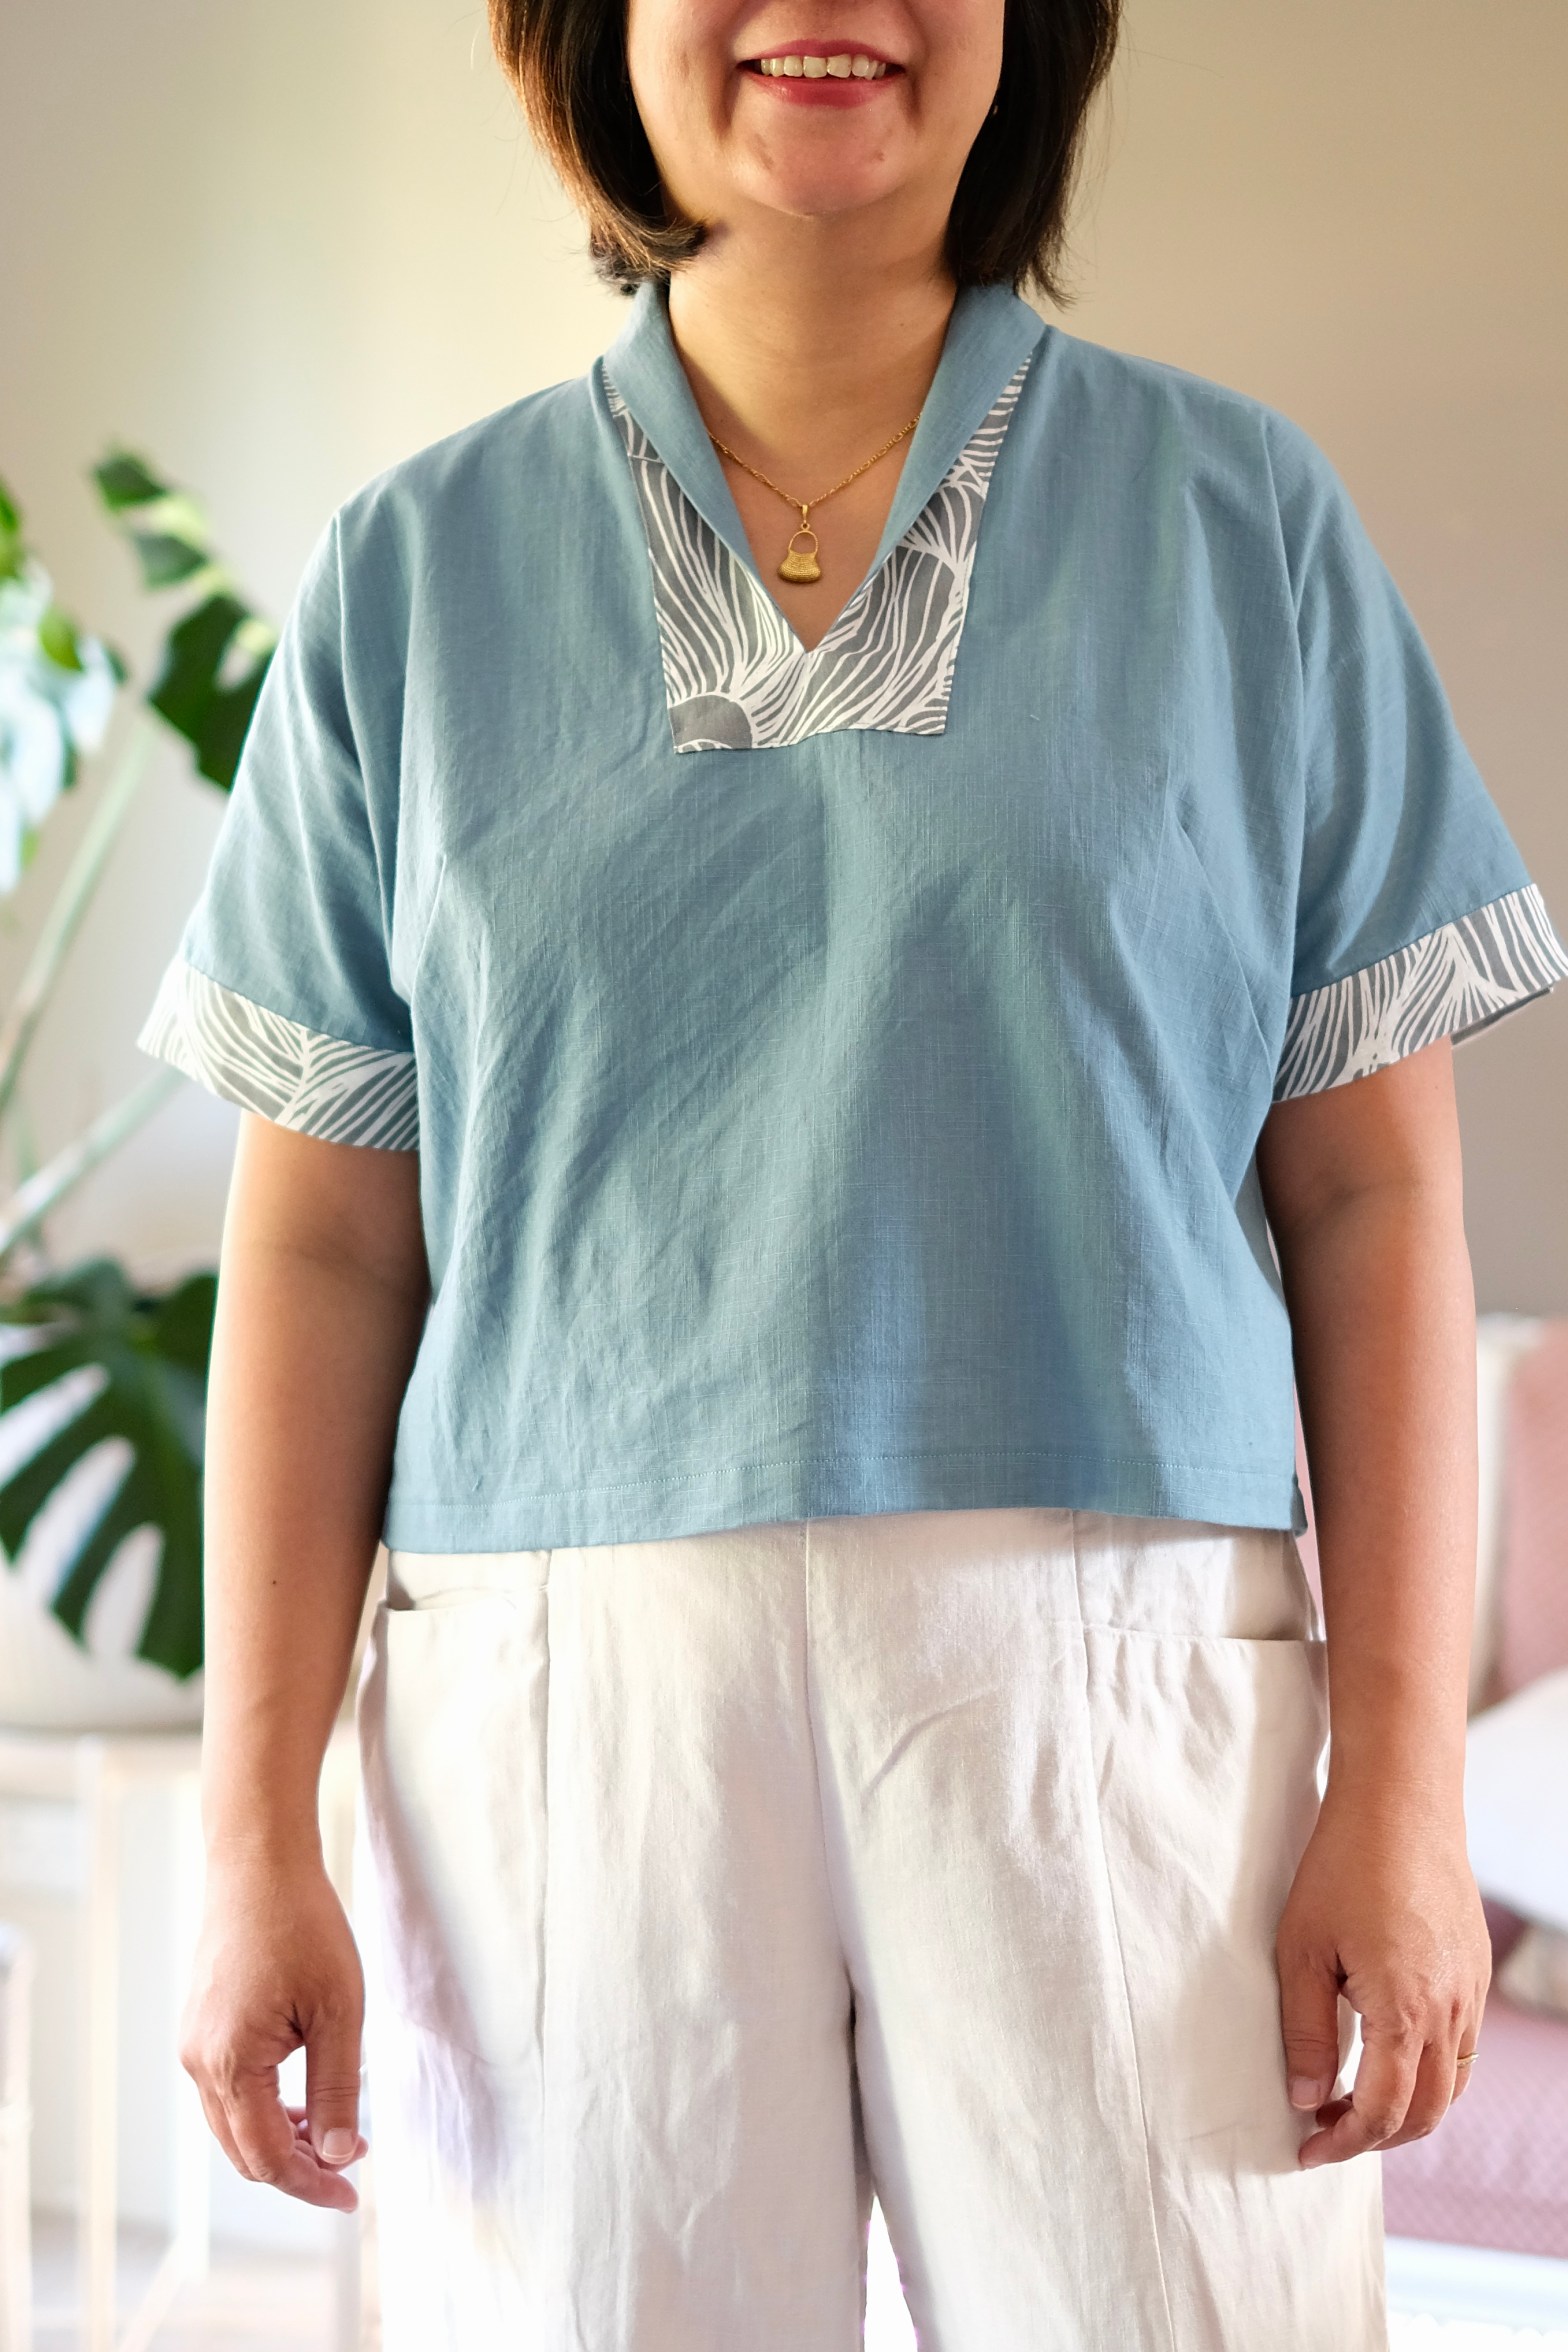
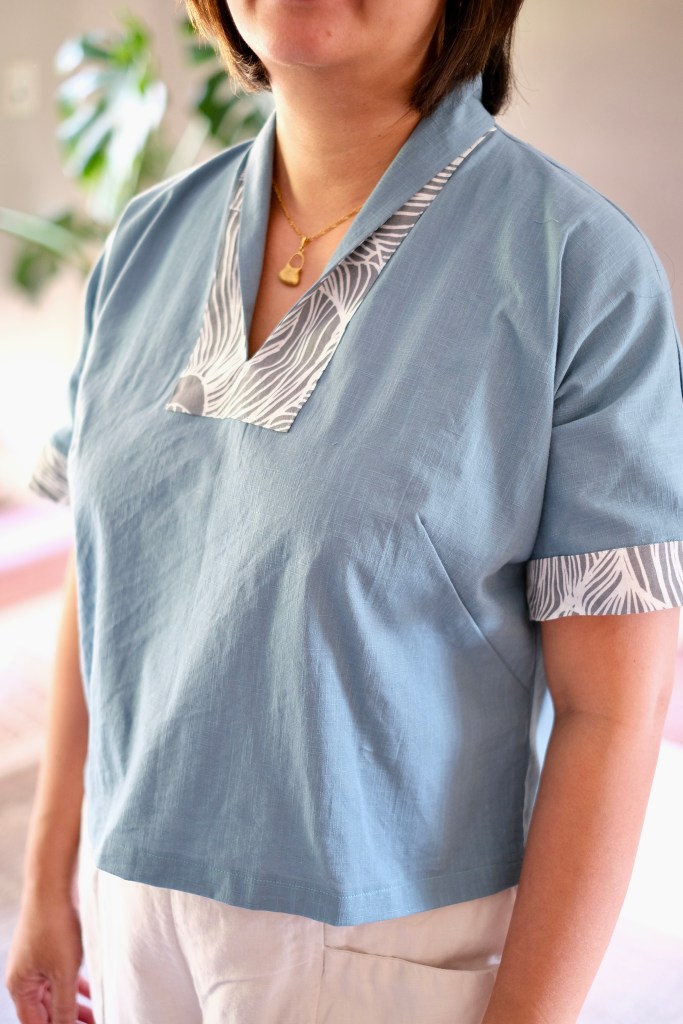
The fabric I used for version A was a cotton gingham. It worked well and I like the outcome, but the fabric makes me feel like I’m wearing a scrub top. For the next top, I felt like I needed something with a looser weave, so I chose to use a lightweight linen. Unlike the first version, I decided to use a contrast fabric for the facings. Searching through my scrap pile, I found just enough of the Maai Design Joanna Ralph Silent Bloom print linen.

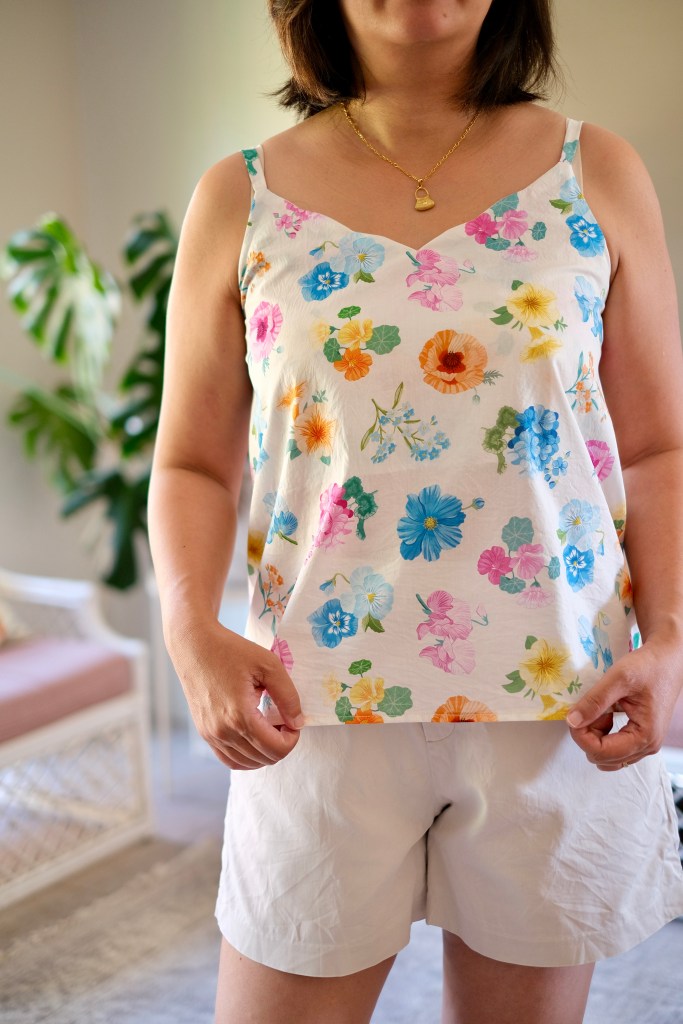
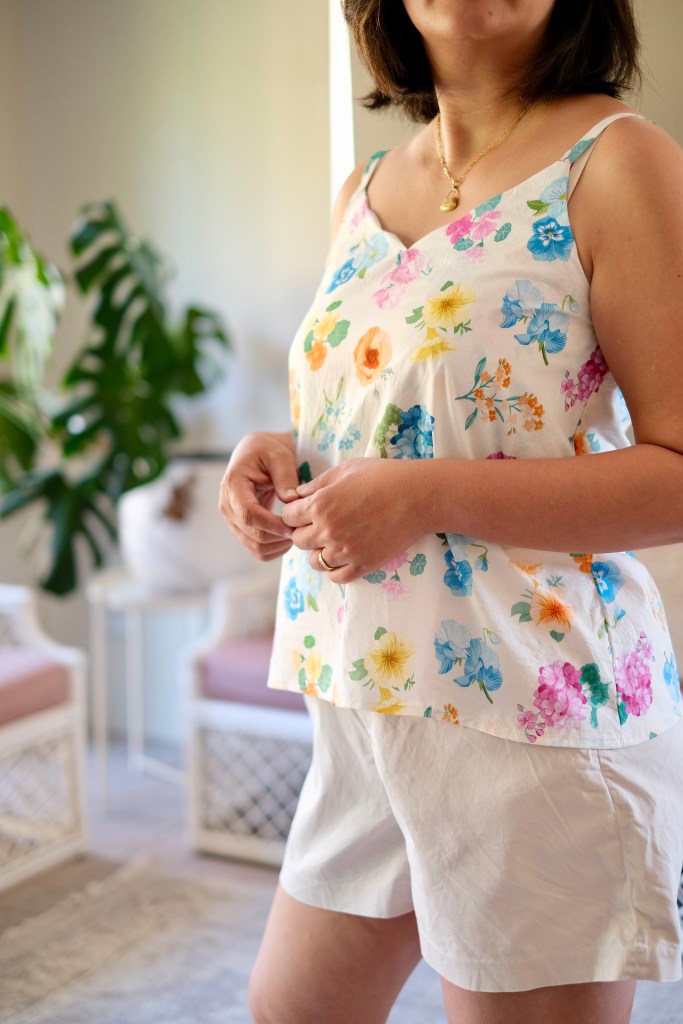
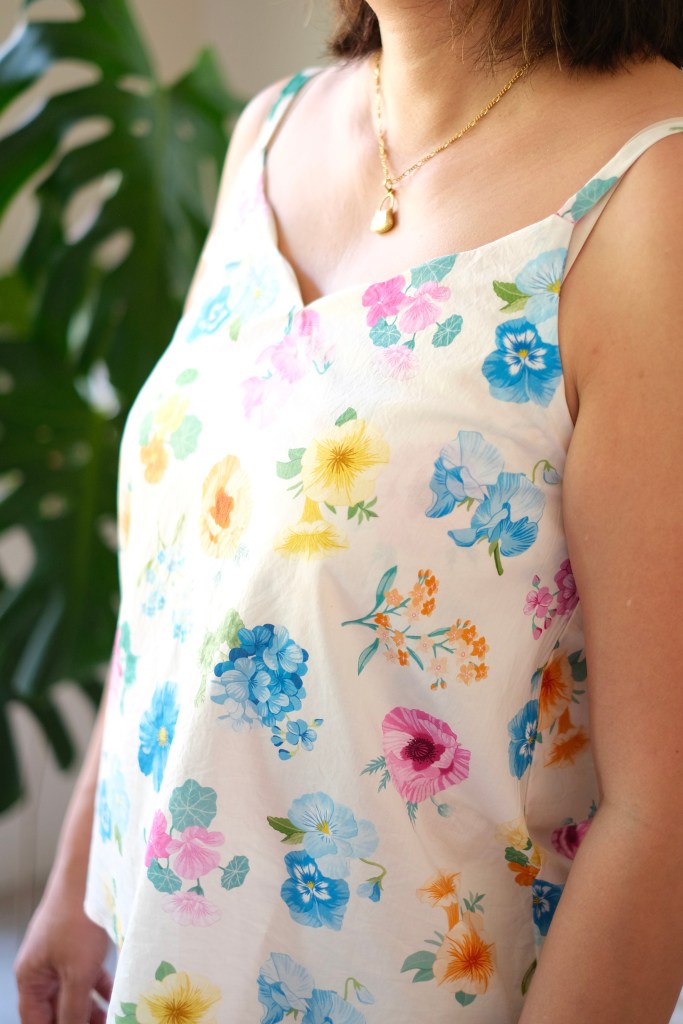
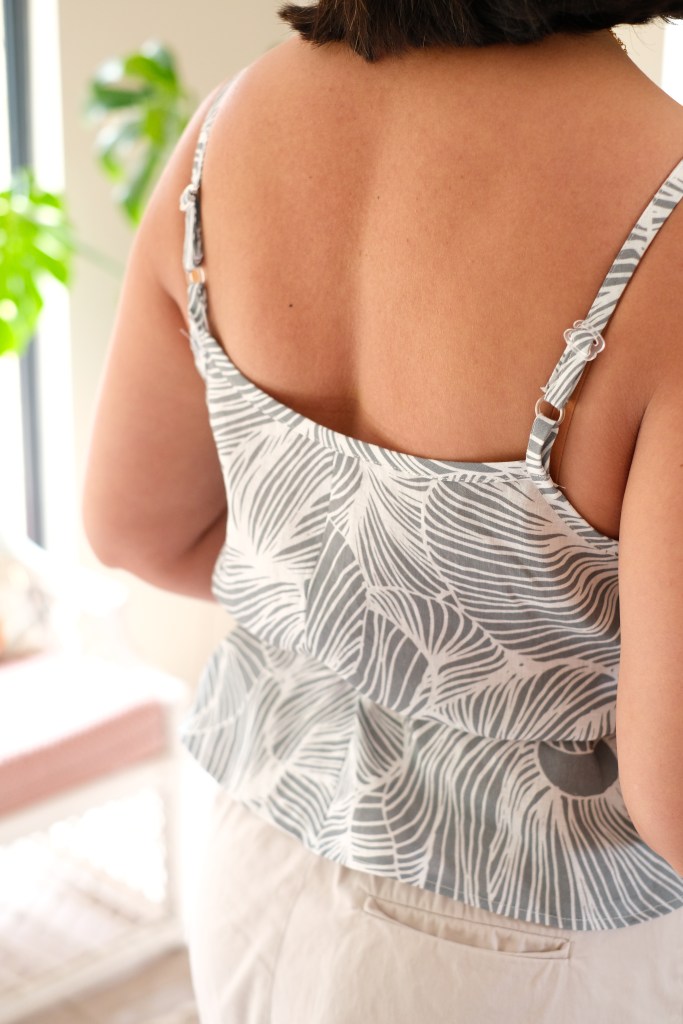
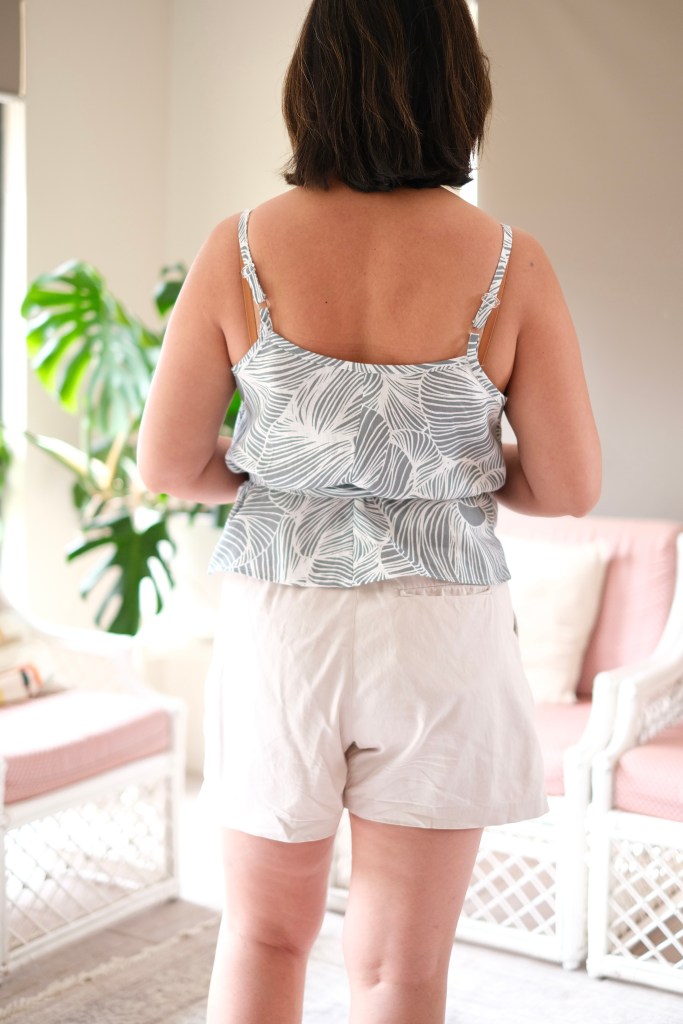
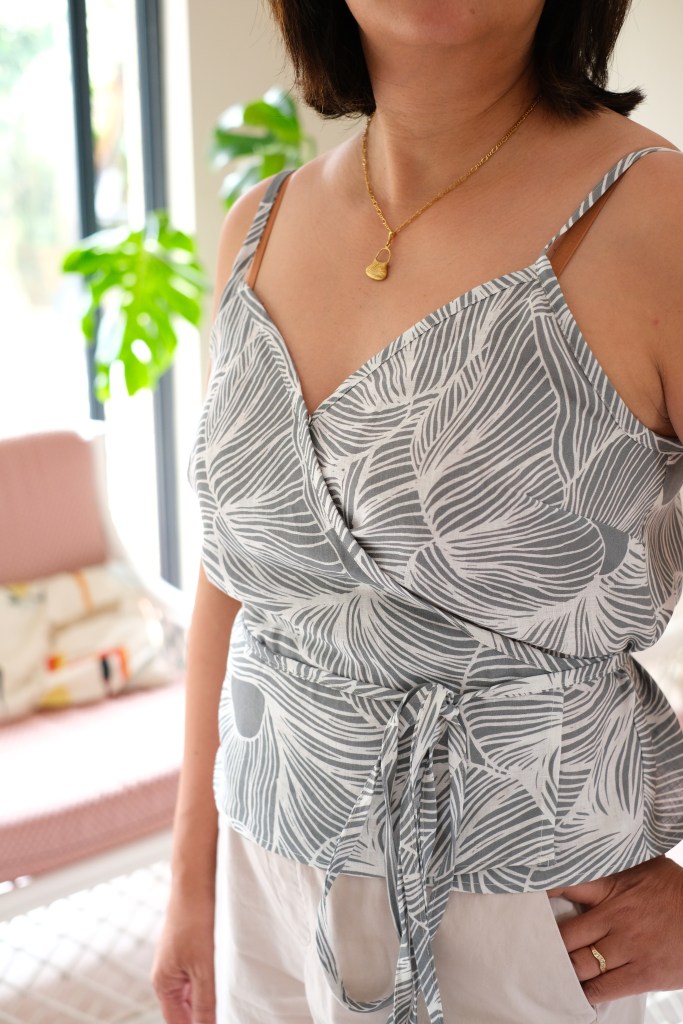
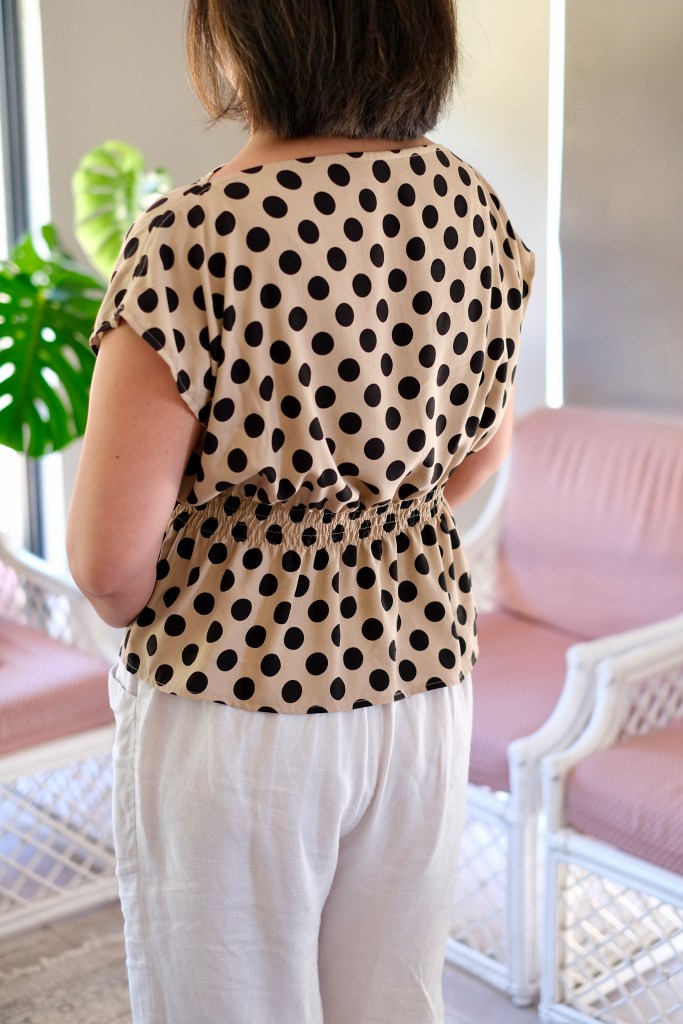
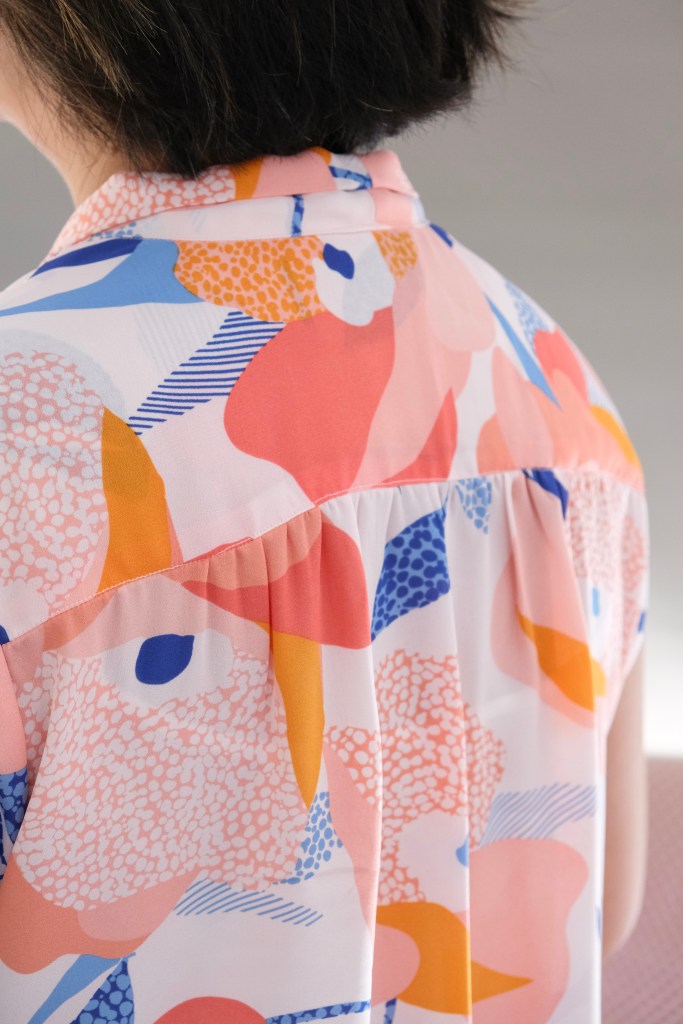
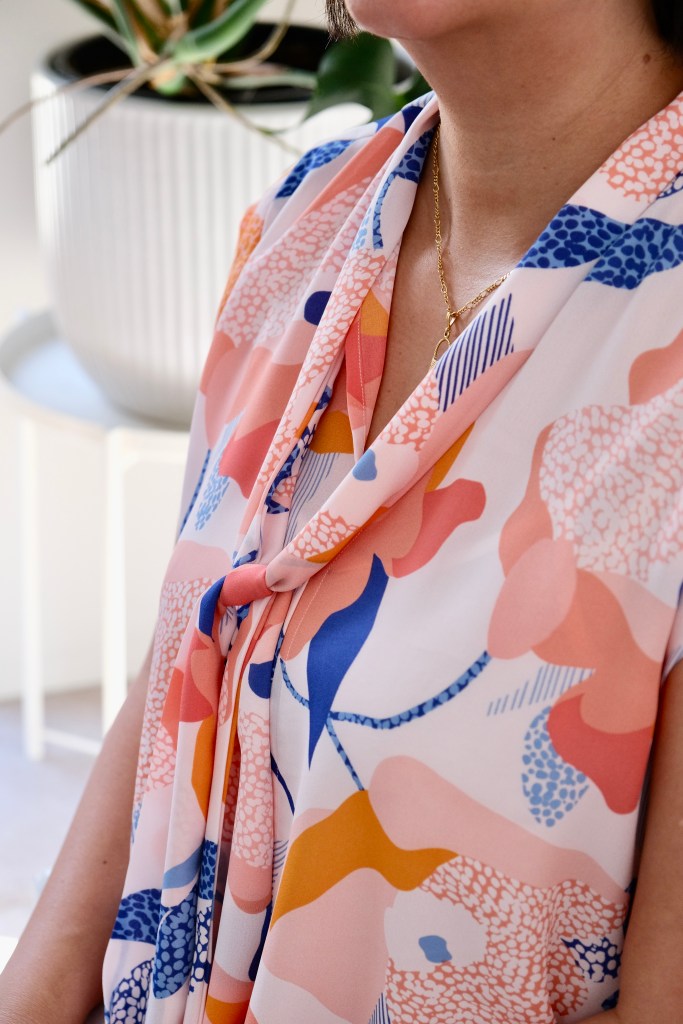
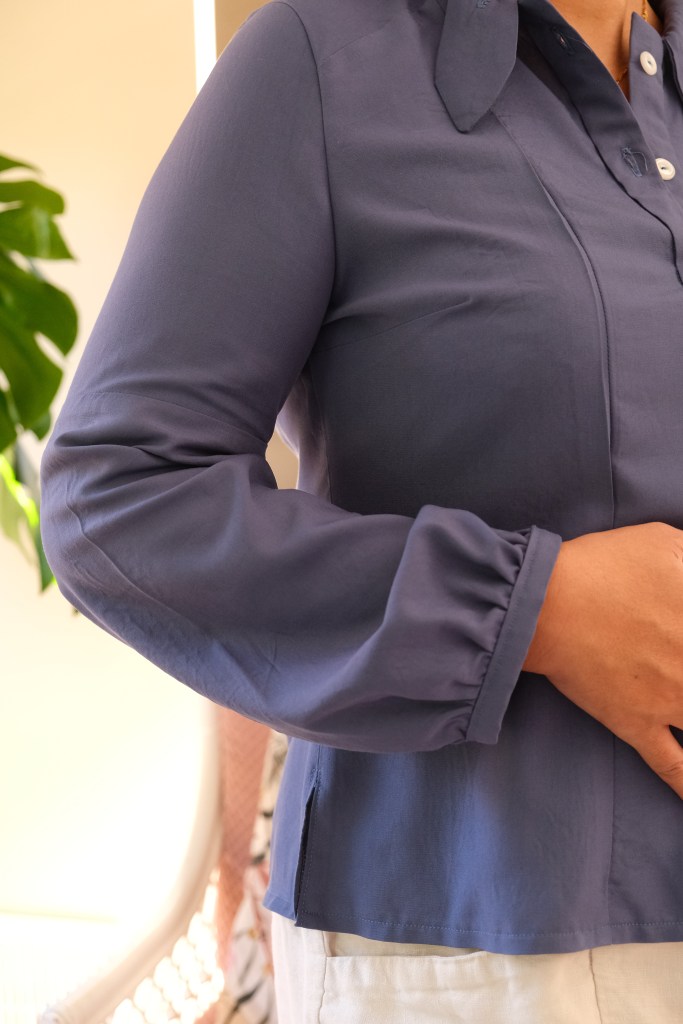
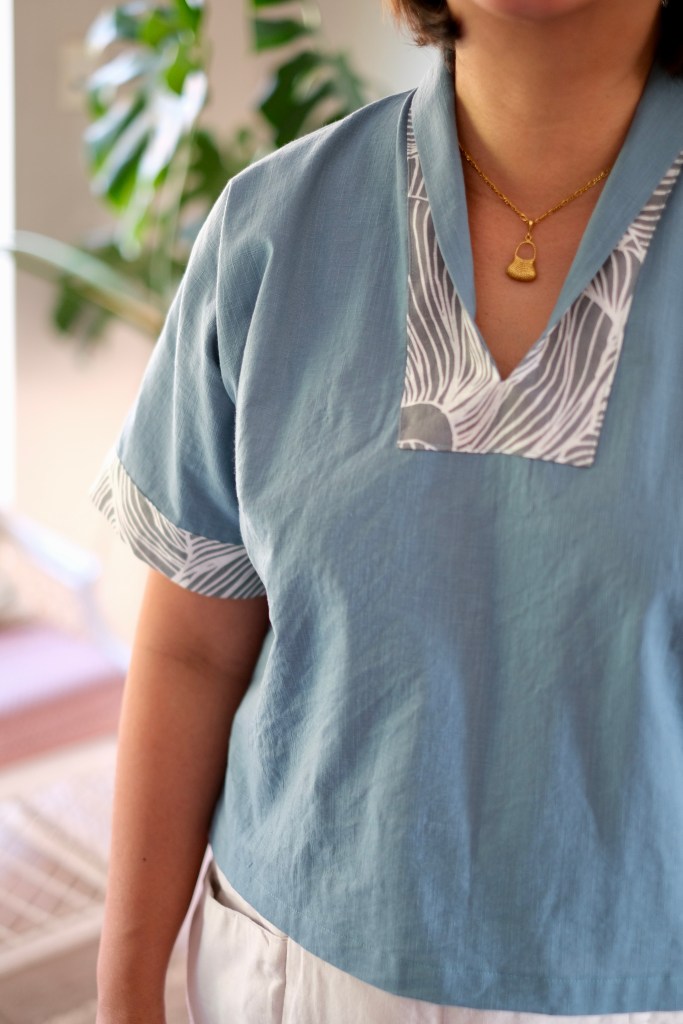
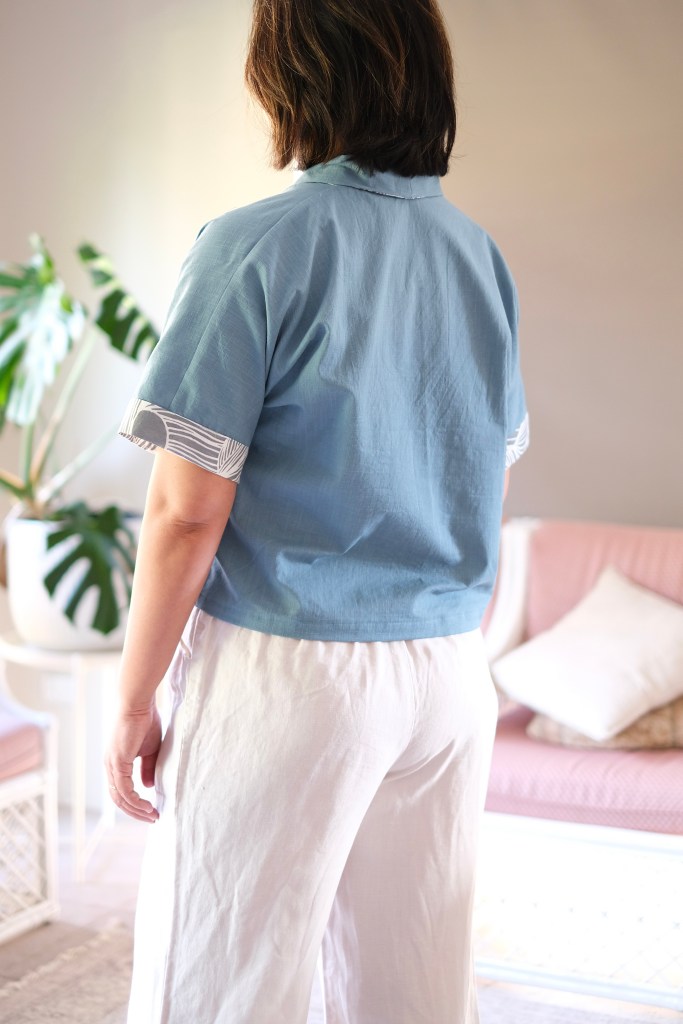
Version B has short sleeves attached and I chose to use the contrast fabric for the yoke and sleeve facings showing on the right side. I think the contrast also helped to highlight the shawl collar. The lightweight linen worked well, and this time doesn’t feel like I’m wearing a scrub top. This is my favourite version of the top. 

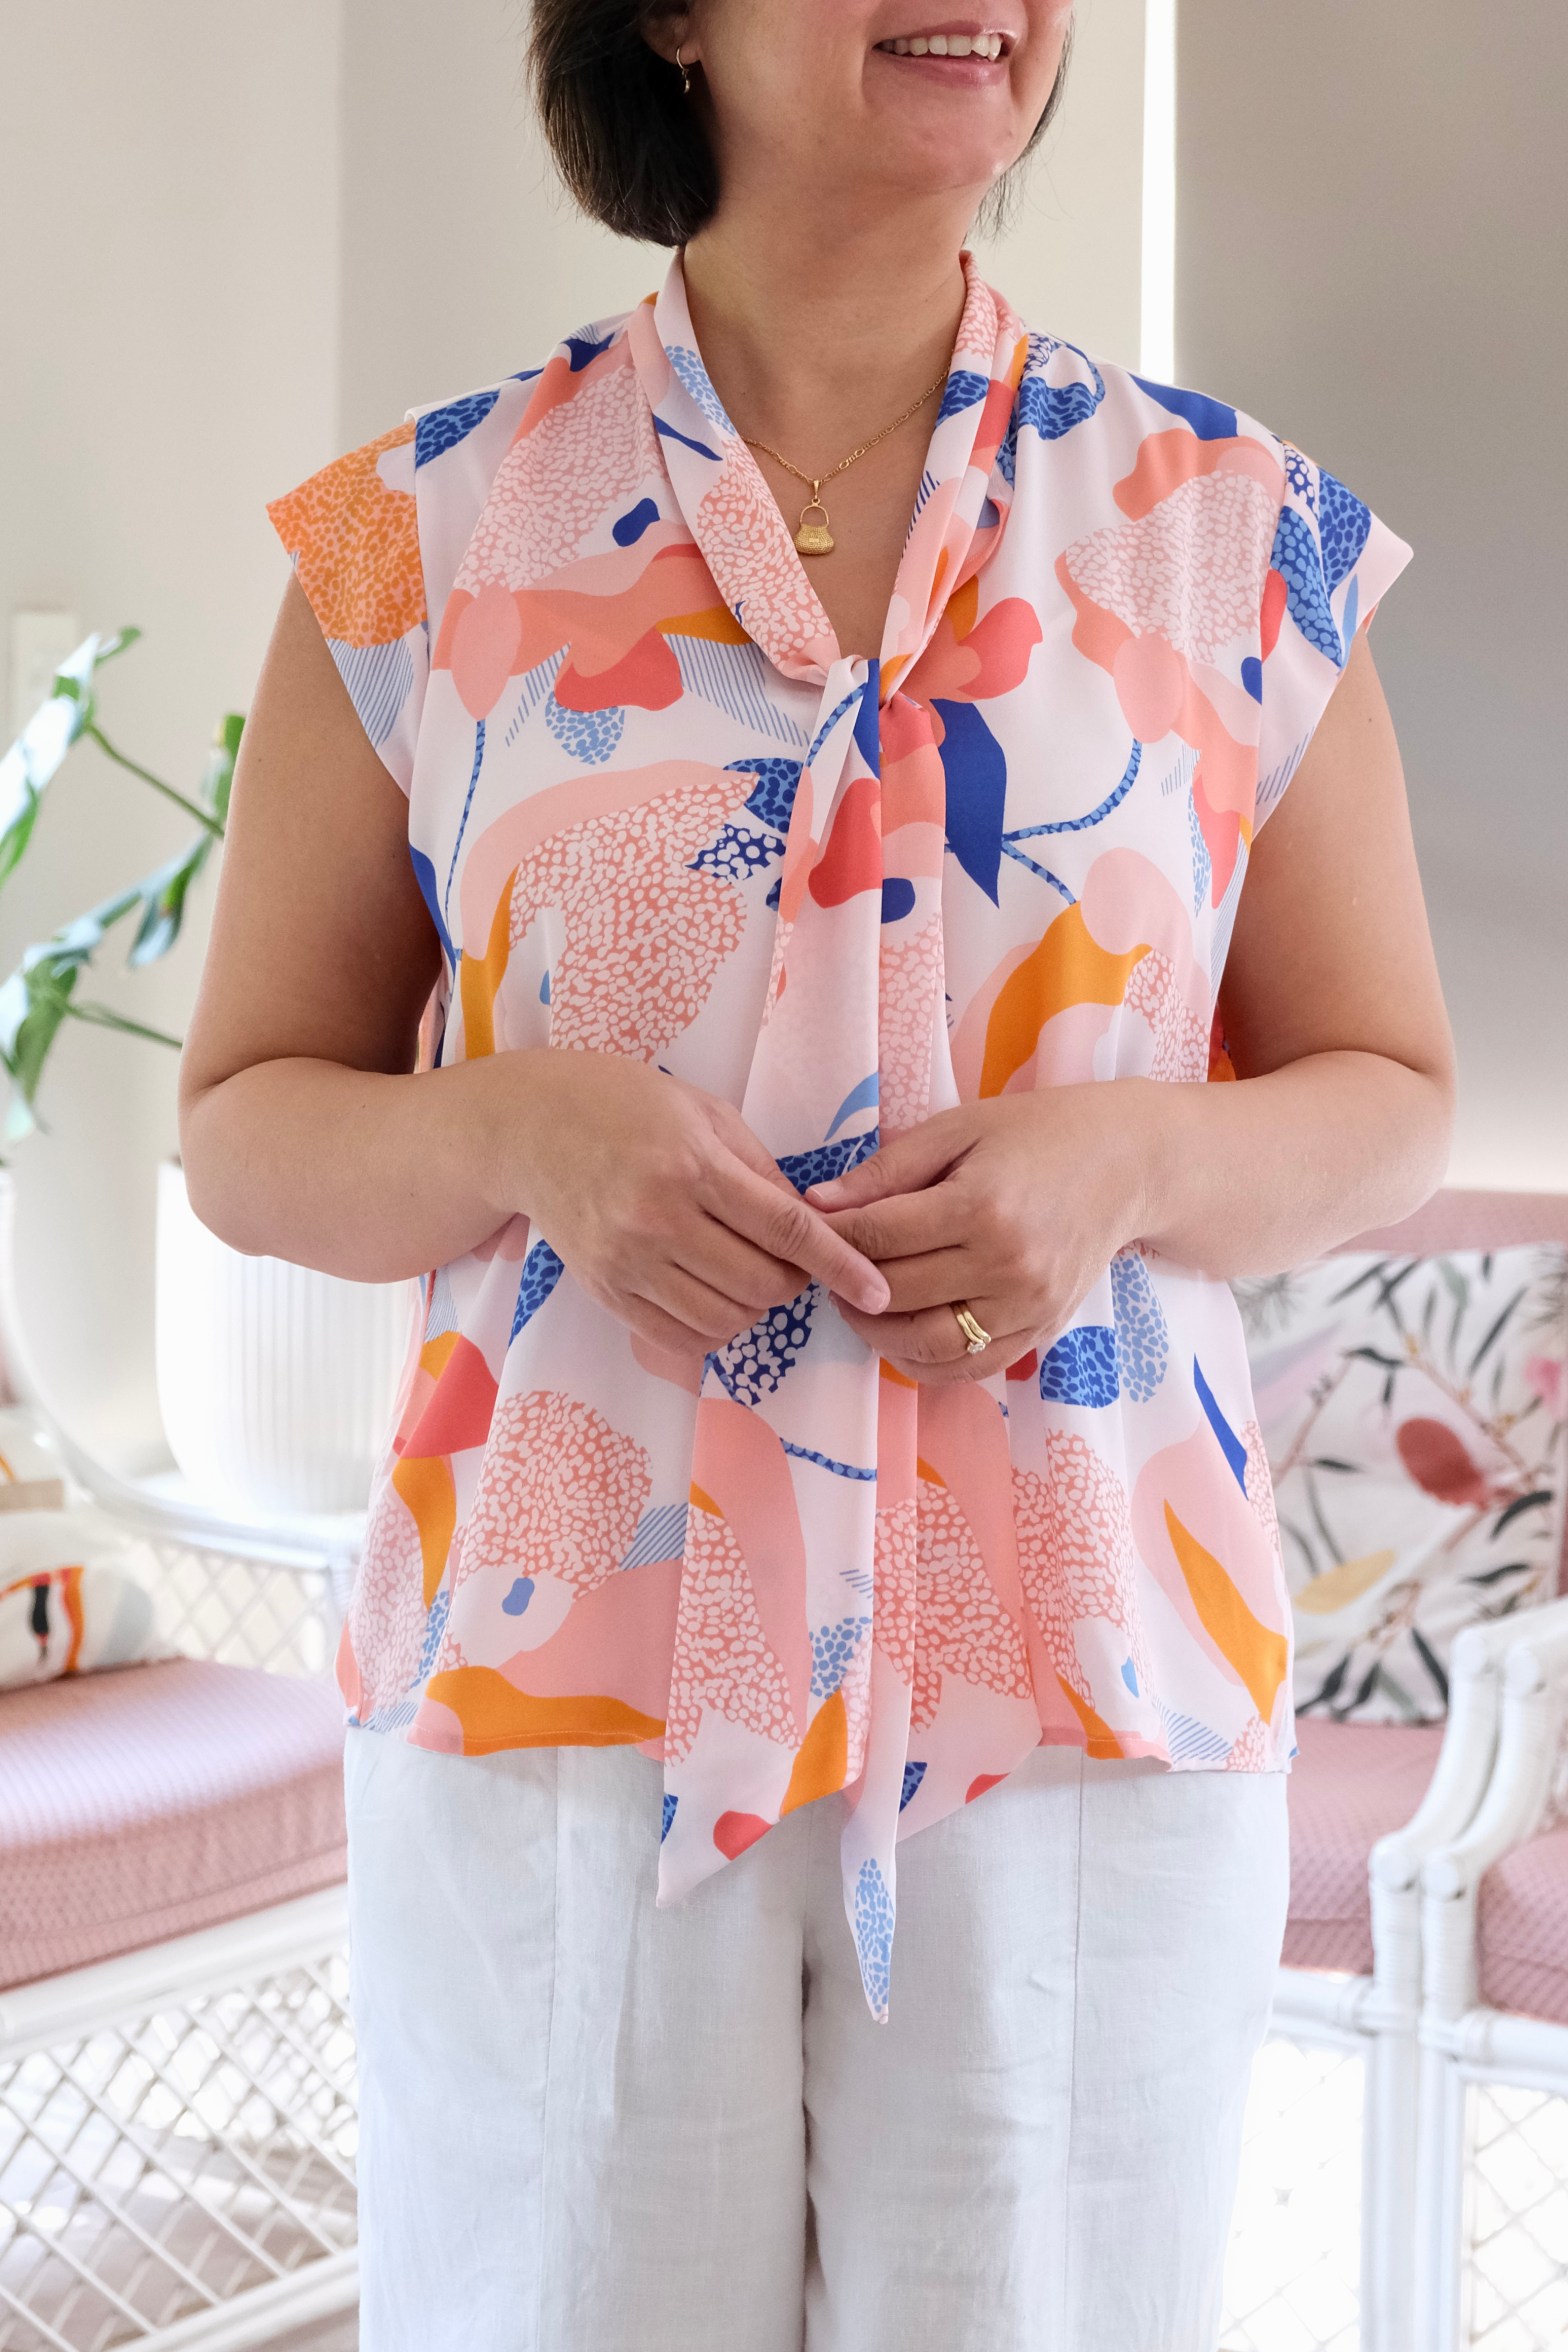
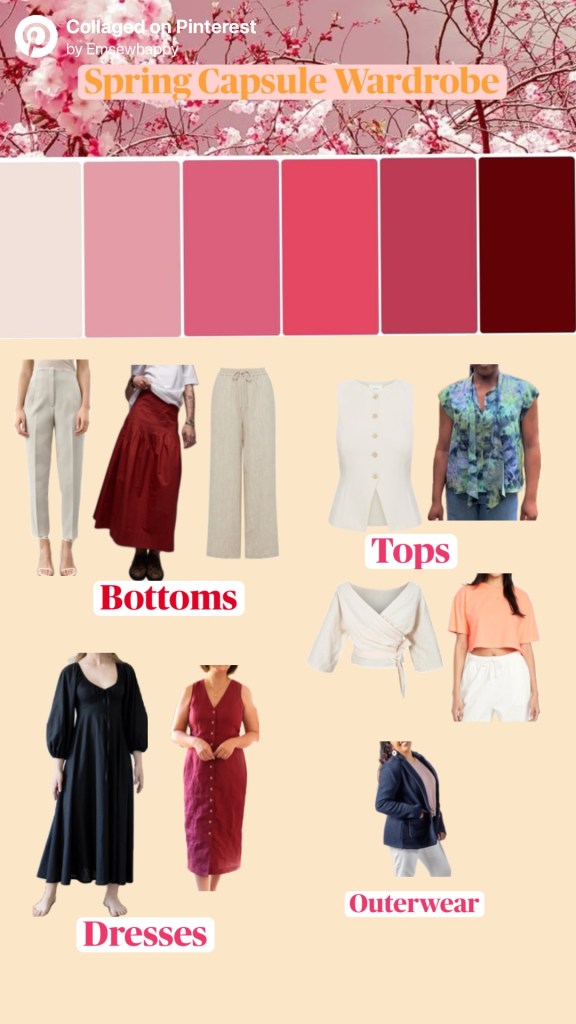
The Revel Topper fits well into my closet. When I first started sewing, I would just choose anything that caught my eye. Now I try to choose items that fit in well and that can be paired with at least three other items in my closet. My plans this year are to plug a few holes in my wardrobe but to make sure that the fabric and style fits in. 

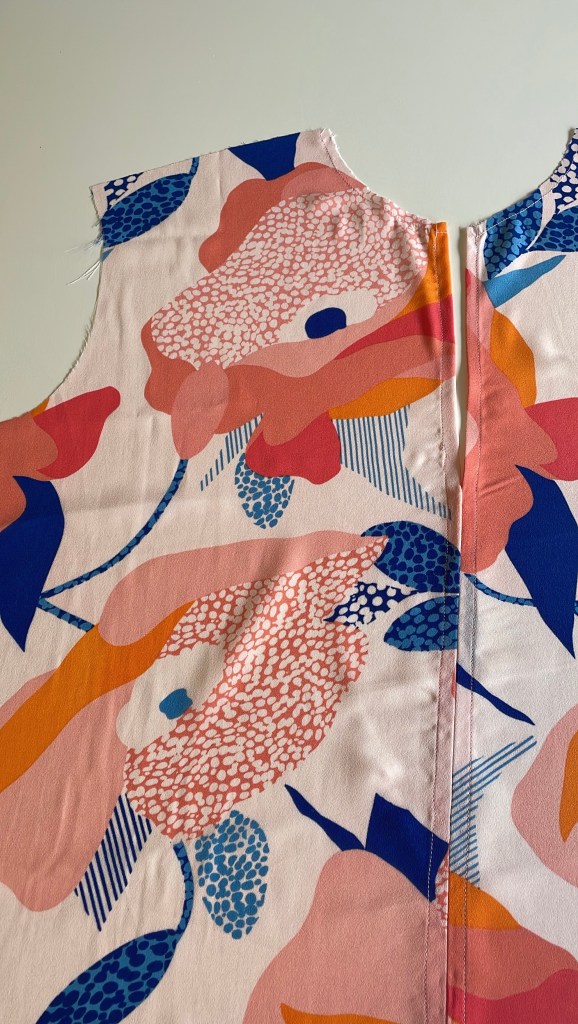
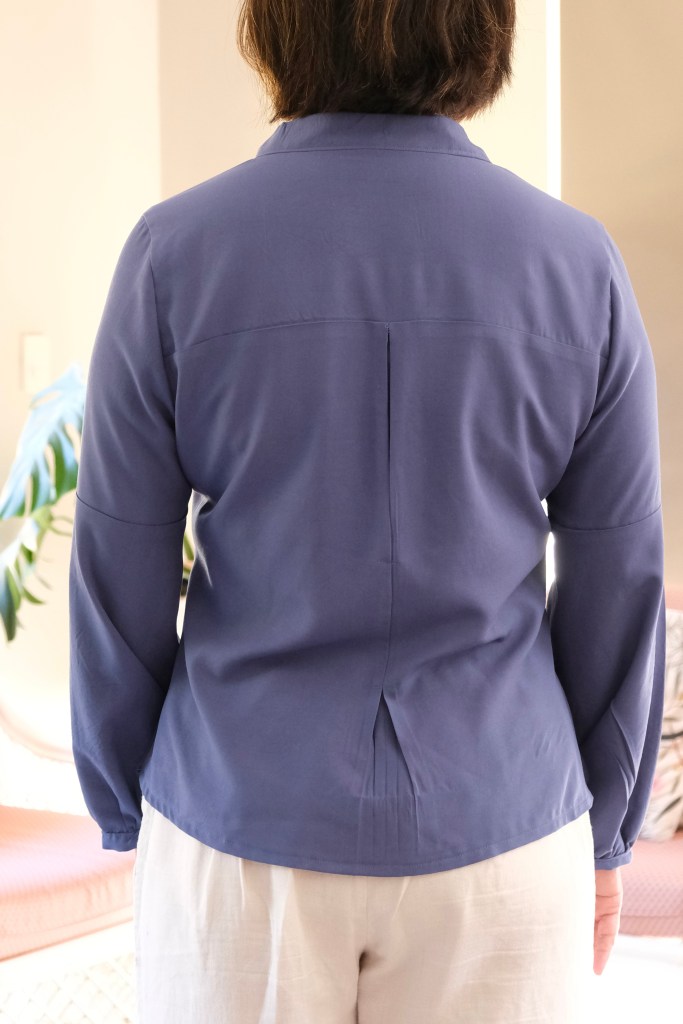
The pattern is rated for a confident beginner which is accurate. There are some watch points which are also great skill builders. The first is the yoke neckline, second is the shawl collar. There is also the French seam when joining the back bodice to the front. It’s a little tricky when sewing around the shoulder and the collar. It was easier to do with the lightweight linen than the cotton which was a stiffer fabric. Sewing down the yoke to the right side also requires some care to make sure both sides are even and neat. It was good to resew the pattern and I would love to make it again. I’ll be looking for fabric with fluid drape to make version C. I learnt so much from this pattern.

Thanks for reading and happy sewing!

X Em

Etty Camisole

This is my first Tammy Handmade pattern. It is always great when a pattern maker provides a free pattern to try. This is a lovely camisole with a scallop neckline. The neckline is a great point of difference. The length of the camisole with thin straps makes for an elegant looking top. 

I was so happy to match the pattern to a beautiful piece of fabric that I had received from Devonstone Fashion. It’s a Liberty Tana Lawn named Mrs Gardener. The print shows brightly detailed flowers on an off-white backdrop. There was a recent showcase by Regent Street Fabrics and Two Green Zebras in Brisbane and Melbourne showing some beautiful Liberty fabrics. So many beautiful prints. It looked like such an inspiring event with all the outfits showcased on the catwalk. I was gifted 600 cm of this fabric but with the 130cm wide width, it was easily enough for this Cami top.

Mrs Gardener Liberty Tana Lawn

My measurement of 38-inch bust, 33-inch waist sits between the size 12 and 14. The finished garment shows a bit of ease in the waist, so I chose my size based on my bust size and made the size 12 without any modifications. It’s a little bit snug under the arm but feels like a good fit. The pattern is true to size. Next time I would reduce the seam allowance by a little.

The construction was very beginner friendly. The steps were logical and easy to follow. The facings are attached separately to the front bodice and back bodice. It was also an easy method for attaching the straps. The instructions and illustrations are comprehensive so I feel that someone with little experience could pick up this pattern and follow it easily.

The cotton lawn is a lightweight breezy fabric. It’s a great fabric for a beginner to sew with because it’s stable. It’s also such a comfortable fabric to wear for summer. The most challenging part of the pattern was sewing the scallop neckline. The instructions were great for this, and it was a good practise for sewing curved lines. I really enjoyed the process, and I’ve seen Tammy use some decorative stitching in her versions and would love to try this next time.

Overall, a great experience sewing this pattern. I think Tammy Handmade is a great indie pattern company that I’ll be returning to. This camisole has been a great quick project. I’m tempted to try sewing a few in a batch even though my previous experience sewing in batch has ended in disasters. I think with a little bit more experience under my belt, I might try again. I’ll explore sewing with different fabrics next time maybe with viscose or rayon. It’s nice to be dreaming of things to sew.

Thanks for reading and happy sewing!

X Em

Calvin Wrap Top

Choosing my first project for the year has been hard and I’ve been dithering. So instead of sewing, I cleaned my sewing space, and I was inspired when I came across this awkward piece of leftover fabric from my collaboration with Maaidesign last year when they were featuring designs from Johanna Ralph. This fabric design is named Silent Bloom which features a beautiful abstract design.

I had about half a meter leftover and a long strip which was about 15cm in width. I had enough for the bodice pieces because the fabric width was about 150cm. What I struggled with was fitting the bias pieces for the ties and straps. I considered using pre-made bias binding or perhaps a contrast binding. However, I’ve been trying to be more conscious about fabric waste, so I decided to cut on a bias but not a true bias. I made sure that I cut the neckline piece on a true bias but not the longer strips. 

For my measurements of 38-inch bust, 33-inch waist and 40-inch hips, I chose to make the size 12 without any modifications. The Calvin is a wrap top or dress. Ultimately, I want to make the dress, but the top makes a great wearable toile for the dress. The straps are adjustable and one of the reasons why I wanted to sew this pattern was to learn how to install the bra sliders that make the straps adjustable. The instructions were fantastic to learn and sew from which is why I return repeatedly to True Bias patterns to learn new skills.

A word on my bra sliders, the ring is right but the sliders are not. They would normally be used for detachable straps but these were the only ones available at my local Spotlight store so I just bought them but I’m planning to swap them over when I can get hold of the right sliders. Those with an eagle eye have probably already spotted them from my Instagram reels.

Happily, the slight change with the longer strips of bias binding worked fine. The pattern came together quite fast and I didn’t feel a need to modify anything. I was worried about the length of the top before starting but didn’t change it because it’s a toile for the dress. I’m very happy with the top length which hits below the natural waist.

I’m now looking forward to sewing the dress version. Using the linen was fine for the top but I’m thinking about drapier fabric for the dress. Making this top has me so excited about sewing again. I didn’t realise how much I was missing it until sitting back at my sewing machine. It has been a bit of respite from a tumultuous and distressing end to 2025.

Thanks for reading and happy sewing!

X Em

Rectangle Top

When I bought this pattern, I didn’t expect to be making such a playful, elegant blouse just from two pieces of rectangles. I’ve been using Sewing Therapy patterns for a while now and have come to expect reliable, beautiful patterns from Sara who is the creative behind Sewing Therapy Patterns. This blouse really exceeded all expectations. I’ve made the View A, but I can see myself making View B and C as well soon. 

Best of all, Sara drafted this top to use up remnants. For this top, I used some remnant polka dotted rayon. It was something I bought from East Coast Textiles which is sadly no longer trading. I chose the rayon because of the fluid drape of the fabric which suits the shirring. I like how Sara has a table setting out detailed instructions on how to choose the right fabric. I would have loved this when I first started sewing because fabric choice only improves with experience and I use to agonise over it, sadly sometimes making a mistake. 

For the Size L, I used less than 1 meter of fabric. I chose the L from my bust measurement of 38 inches. It’s a very beginner friendly pattern for sizing because there is such a range and ease in the pattern. I really love how the shape is given by stitching and shirring. Speaking of shirring, I had almost forgotten how to do it. Sara does explain it very well in the pattern, but I find that my machine is always the exception when it comes to these things. I tested on a scrap piece of fabric, but it didn’t work. I found that for my machine, I had to wind the shirring elastic onto the bobbin with a bit of tension, and I had to turn up my machine tension. I also followed the instructions in increasing my stitch length. The main thing is to test before starting on the real piece.

Sewing Therapy Instructions always come with YouTube videos which are wonderfully high quality. This time, Sara has included beautiful hand drawn illustrations with her written instructions which are so useful too. I watch Sewing Therapy videos for general relaxation anyway. It’s the perfect Sunday afternoon reset activity.

I have some remnant linen which I will be using up with my next rectangle blouse. This project was a quick sew which is great when time or energy is short. It’s also a good project for those last minute makes when you have an event you need something for. Overall, a fun few hours of sewing!

Thanks for reading and happy sewing!

X Em

Paloma Top

So excited to get into the testing pool for the newly released Swimstyle Patterns Paloma Top. I just loved the unique style and design immediately. The top features two ties that are sewn down at the front and are threaded through the back. These ties can be left loose, or they can be used to cinch in under the bust and waist to feature a peplum. It also features a yoke and gathering with biased binding to finish the neckline and arm openings.

This pattern is designed for woven fabric. I used a medium weight cotton that I extracted from an old doona cover. It was nice how the cotton gave it some structure but in my next version, I would use a lighter weight fabric. I have thrifted some old Saris and would been keen to experiment with that. The Saris are made from georgette fabric so it would be super lightweight and drapey. This version is my tester version so it’s not perfect but I was so excited to share it.

My sizing is always consistent with Swimstyle Patterns. My measurements of 38-inch bust, 33-inch waist and 40-inch hips sat within the Size L so that is what I tested. It was pretty much spot on. There was one adjustment that all the testers agreed on, and it was quickly adjusted and remedied. Apart from that, I didn’t find any other adjustments were needed.

There was some suggestion of making a dress version of this top which I had thought of when I was making it. I think this would make such a pretty dress! I have matched this top with quite a few items already in my closet, so I know that I’ll be getting a lot of wear out of it.

I’ve been so lucky to test quite a few patterns this year. It’s an enjoyable process to help in a small way, bring a pattern to life. Testing for Swimstyle was enjoyable and stress free. I liked the testing period, and the Facebook group was helpful and communication was orderly. Looking forward to making the Paloma Top again.

Thanks for reading and happy sewing!

X Em

Viola Vest

Some patterns I sew are real skill builders and the Viola Vest is one of these. I have a few things to work out with this pattern, and I considered not sharing until I made a version that I was one hundred percent happy with, but this blog has always been a journal for my sewing whether successful or not.  I decided that I should jot a few notes down and come back to it.

Swimstyle Patterns has been my go-to for elegant, elevated core wardrobe items. The Viola Vest is drafted for knit fabric and has a wide V-Neck with angled, overlapped side seams. It has an oversized relaxed fit. I bought this for that relaxed oversized look.

My measurements of 38-inch bust, 33-inch waist and 40-inch hips fit into the L size range so that was the pattern size that I cut. Generally, this was great. I like how the pattern also included how to choose the right fabric with what stretch and recovery was needed. I found a ribbed knit that was suitable, but I didn’t consider how bulky the ribbed knit would get. I do have a very basic home sewing machine which might have also affected my ability to deal with the bulkiness of my fabric.

The part I thought I would struggle with was the V-Neck. It actually worked very well and was easy with the excellent instructions provided. I felt that I skilled up by sewing this neckline. The part that I couldn’t work with was the angled and overlapped side seam. The side seams are neatly folded and finished before being angled to sew together about 4 layers. The folded seams provided a great finish to the vest. However, with 4 layers, I had problems getting the angle and the bulk made it hard to stitch the seam as instructed. In the end, I had to sew it with a straight stitch.

Another thing is the hem which is sewn and prepared all in one before joining the side seams. The bottom is a bit wavy so I must have pulled the fabric a bit when sewing. I’m a bit of a perfectionist and I considered unpicking and retaking the photos but I decided to leave it and try again with another fabric. I need to give myself more grace when it comes to my sewing.

So, I’m not sure if the armhole sits too low because of my modified stitching or whether this was part of the design. I need to find slightly thinner fabric to make it again but I’m not sure if I should size down. This is why I like stalking a pattern on Instagram because it’s handy to see items on other people (regardless of size).

I would have always worn this vest with a shirt or tank top underneath anyway, so I still feel this is a good addition to my closet. I’ll be trying to find another knit for this vest because I love the look so much.

Thanks for reading and happy sewing!

X Em

Vera Knit Top

I’ve been trying to be more adventurous with knit fabric. I came across this floral stretch crepe jersey fabric from The Fabric Store Online which has a beautifully fine texture with good drape. I bought a 125cm x 150cm wide piece which I thought would be lovely for the Vera Knit Top pattern from Forget Me Not patterns. I’ve been meaning to sew this lovely top featuring bishop sleeves using the long cuff option for a while and finding the perfect fabric has prompted me again. One of the suggested fabrics was viscose knit which is why I thought the crepe jersey would be a good match. 

Floral Stretch Crepe Jersey (White Coffee)

Forget Me Not has generously offered this as a free pattern to the sewing community and it includes all the detailed instructions that come with her other patterns. There are no short-cuts just because it’s a free pattern. It is a great way to sample their incredible patterns.

The blouse is based around a B-cup bust. My measurements of 38-inch bust, and 33-inch waist and 40-inch hip sits between a size 38 and 40. The pattern is nested which make it super easy to print. I decided to print both sizes and graded from the size 38 to 40 and added one inch to the length from the bottom of the blouse. The top features a V-neck and it’s fitted in the bust with more ease around the waist. 

Knit fabric is always a bit tricky for me. I’m still gaining experience with handling the stretchy qualities of knit fabric. The instructions are excellent with tips all the way on how to handle the fabric, which needle to use and what stitch to sew with. It really takes all the guess work out which is so helpful. Another quality of the fabric I should mention is that there is more stretch one way than the other which has been fine for this blouse as the pattern is quite versatile. I would love to make a winter version with merino wool or something similar.

I’m excited to add this top to my Spring Capsule Wardrobe. I’m hoping to sew a skirt as well to wear with this, but I think it will match quite a few items I have. I know I’m categorising my sewn items into different capsules but obviously any item can be worn for any season. With my love of neutrals and browns, everything could fit into an Autumnal theme. I’ve just been organising my sewing this way to get a better cross section of items into my handmade wardrobe.

I’m feeling more confident with knit fabric coming away from this. I want to practise with this pattern a few more times so I’ll be on the lookout for more fabric suitable for this pattern.

Thanks for reading and happy sewing!

X Em

Spill the Tea Tie Neck Top

There has been a lot of chatter about Pattern Emporium patterns in my sewing circle, so I’ve been keen to try them out. When the Spill the Tea blouse was released, I loved the design and thought it would fit into my Spring Capsule Wardrobe. I’ve been thinking more about how to make my handmade wardrobe more cohesive, so I’ve been playing around with collages on Pinterest. I’ve picked some highlight colours that I’d like to feature in the capsule.

The Spill the Tea Top is a tie neck top with two back options, two sleeve options and two length options. I chose to make the gathered back with a yoke, the cap sleeves and tall length. I wanted the option of leaving the top out for a more casual look. It’s so impressive at the number of options available and best of all, printing it was made very logical and easy. I really liked that it wasn’t necessary to print every page, only the relevant ones which was a good paper saver.

The pattern is made for woven fabric and is quite versatile. I had a piece of georgette fabric in my stash that I bought a while ago but was a bit afraid of sewing. I thought it was a good match for the pattern because of the high drape. Excitingly, there was enough of it for the top which required about two meters. I was making the size 12 for my measurements of 38-inch bust, 33-inch waist and 40-inch hips. I love the fine quality of georgette fabric, but it does add some difficulty to sewing. I tested the fabric on the overlocker and decided to use French seams because the fabric frays very easily.

Apart from the seams, I had to solve the issue of the yoke and how to finish it. I decided it would be best to cut two so that the yoke could line itself. I’ve tried to describe what I did in the steps below because I deviated from the instructions.

I also finished the sleeve seams with French seams, but I think it would have been thick enough for the overlocker. French seams do give a satisfyingly neat finish. The other tips I learnt when sewing with georgette fabric is to reduce the stitch length and changed the needle to a 70/10 gage. It was also handy to use the rotator cutter for the curves.

The Pattern Emporium instructions were very detailed. It is made for reading on a screen because the illustrations are photos. The bonus is that everything is clear with contrast fabric. The instruction booklet was like a mini magazine, and I love the inclusion of all the different people modelling the blouse. I like printing my instructions but at 50 pages, I limited my printing to the sewing instructions only. I found myself deferring to the photographs when I came to the attachment of the ties. The construction was very enjoyable with the precise pattern pieces and instructions.

Overall, it was easy to see why my sewing friends fully endorse Pattern Emporium patterns. It’s been a fantastic sewing experience and a good one to get my sewjo going again. I’ll hope to share more soon about my sewing plans for my handmade Spring Capsule Wardrobe.

Thanks for reading and happy sewing!

X Em

Selwyn Top Featuring Maai Design Fabric

Maai Design have done it again. They have released their Artist Collection Drop 2 featuring surface artist and illustrator Myriam Van Neste famous for her bold and playful designs. I was one of the lucky to receive a 120cm sample of the “Pressed Florals” in a rayon lawn fabric for a pre-release review. 

Pressed Florals by Miriam Van Neste

I’ve never sewn with rayon lawn before but what a discovery. It’s beautifully soft with a lot of drape. The colour of the print really pops and there was no fading, or colour runs when I washed my fabric in cold water. I did line-dry my fabric because that would be the normal way that I like to dry my clothes, so I didn’t experience any noticeable shrinkage of the fabric. 

It didn’t take me long to decide to sew the Cashmerette Selwyn Top. It’s a lovely pin-tuck shirt with button placket and a ruffle that drapes over the bias lined arm openings. The top can be sewn without the ruffle, but I love how the ruffle softens the silhouette and adds a bit of feminine detail into the blouse. So, in order to add it, I had to do a bit of pattern piece Jenga. Luckily, the width of the fabric was a generous 150cm! It was a win because the fabric requirement chart recommended 1.8m for View A with fabric 140cm width. I was very pleased with my pattern piece Jenga. 

Often with rayon, I find it’s best to use a rotary cutter for curves and to mark the notches before you move the fabric. I think it’s quite difficult to mark those notches accurately once it’s been moved. Also, it can help to lightly spray the fabric with starch. I skipped this step because I’m quite used to handling rayon, but I did make sure to staystitch and pinned excessively. Before sewing, I changed my machine needle to a 70/10-gauge needle.

I made the same size as I did the first time, I sewed the Selwyn Top which is the size 10 for my measurements of 38-inch bust, 33-inch waist and 40-inch hips. It’s very comfortable. I used some scrap rayon that I had to make the sleeve facings because I wasn’t able to squeeze making my own out of what fabric I had remaining.

I love the silky softness and the movement that the rayon lawn allows. I’m so glad that I managed to get these ruffles on my top.

Maai Design meticulously selects collections of high-quality fabric.  I was very scared of buying fabric online when I first started sewing but Maai Design is one of the stores that I have repeatedly trusted and return to. I’m grateful to have found it early in my sewing.

Thanks for reading and happy sewing!

X Em

Full disclosure: I was provided this sample for a preview but no blog post was required and all opinions remain my own.

Clover Blouse

As you know, I have been sewing Stitchmaiden Patterns this year as a collaborator. I have been working through their extensive library of patterns which are all inspired by history and it’s been so enjoyable. The patterns have a high level of detail and I’m finding them to be quite technical in execution.

April is #SewAprilBlouse sewing challenge month where you can sew a blouse to enter. It’s a fun challenge hosted yearly by Cloth Edit and various Co-Hosts. This year, it’s co-hosted by Sewn On The Tyne. I had chosen the Clover Top as my next collaborator project with Stitchmaiden and thought it would double perfectly as an entry for the challenge.

The Clover Top by definition could be called a shirt pattern, but I think, what turns it into a blouse are the details like the little tie, the feminine cut of the shirt which includes bust darts, the bishop sleeves and the shaping continues to the back of the shirt with the centre pleat. Stitchmaiden always include many variations which can be mix and matched to create something new every time you sew the pattern. I decided to make a simple Version A as my first iteration of the pattern. I decided to go ahead and make the blouse without a toile because we’re at the end of the month and the challenge ends!

I felt that my past makes have shown me that the patterns are true to size for me so with my measurements of 38-inch bust, 33-inch waist and 40-inch hips, I chose to make the size 42. I love that the patterns are nested, and you can choose to just print the size that you need. I also really like it that you have the option to include the seam allowance and don’t have to remember to add it when cutting the fabric. I remembered from the first time to check which was the line I had to follow for that!

So, a shirt or blouse seems like a simple item to sew until you realise that it can be the more technical item. It’s like cooking. The simpler the look of the dish, the harder it is to get perfectly correct. I felt that it was like that with this blouse. The instructions and the illustrations are beautifully written and explains everything so well, but I did find myself making mistakes. I think it’s a pattern that gets better the more times you sew it. Also, I sewed this in a day when I really should have spaced out each stage.

Ok, what was hard? I found the collar construction difficult because my fabric is slippery rayon, and the pattern demands accurate clipping and sewing. My fabric kept slipping and I found myself seam ripping the collar twice because it had slipped to leave an unacceptably big gap. In the end, I hand basted before machine stitching which seemed to do the trick. The next mistake was the button placket. I think I kept confusing View A and View B in my brain. View A needed one placket to be left longer at the top so that it could be folded over the ties to make a cute bow. I only realised at the end what I should have done, so to solve the problem, I made a buttonhole in the tie, and it still works but not as neatly as intended. I think I would wear the blouse unbuttoned anyway. Lastly, I did a minor change from sleeve cuffs to bias bound cuffs. I think on a practical level, I like them better, but I need to fiddle around with the size of them as they are a bit big.

As I said, it’s the first iteration and I think the first of any project tends to wear the most mistakes. I have used a drapey rayon fabric which is lovely and soft to wear but I’d like to try a cotton or something sturdier especially if I want to make the version with the pintucks. 

Stitchmaiden patterns have been such a surprise to sew. I feel that these patterns are exceptional and have had so much research and work put into them. They are very technical and hence something that will advance your skill level. The Clover Blouse is beautifully formal and from the Wonderland Collection. I love how even though it’s form fitting, it’s so comfortable to wear (no dinosaur arms when you’re out to dinner). Another beautiful design from Stitchmaiden.

Thanks for reading and happy sewing!

X Stitchmaiden Em

Full Disclosure: Pattern was gifted for collaboration with no requirement to blog. No affiliate link. All opinions remain my own.