Milenda Dress featuring Johanna Ralph collection from MaaiDesign

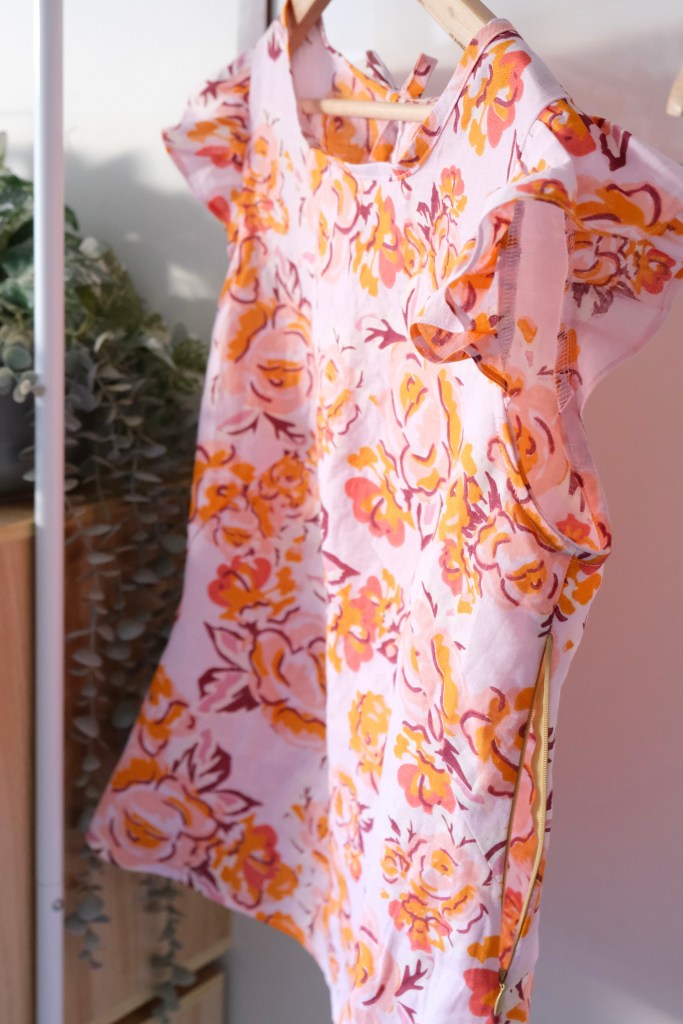
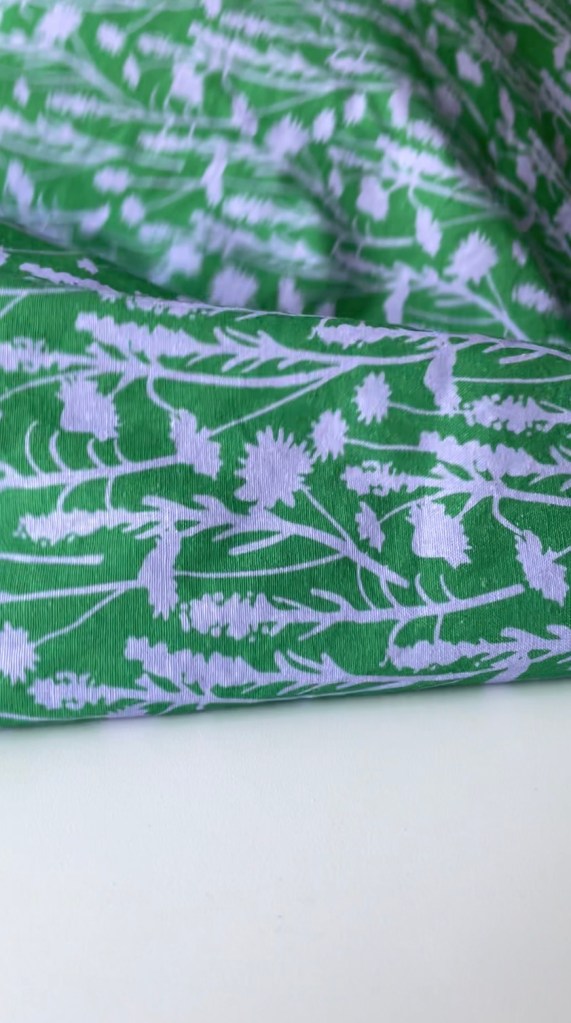
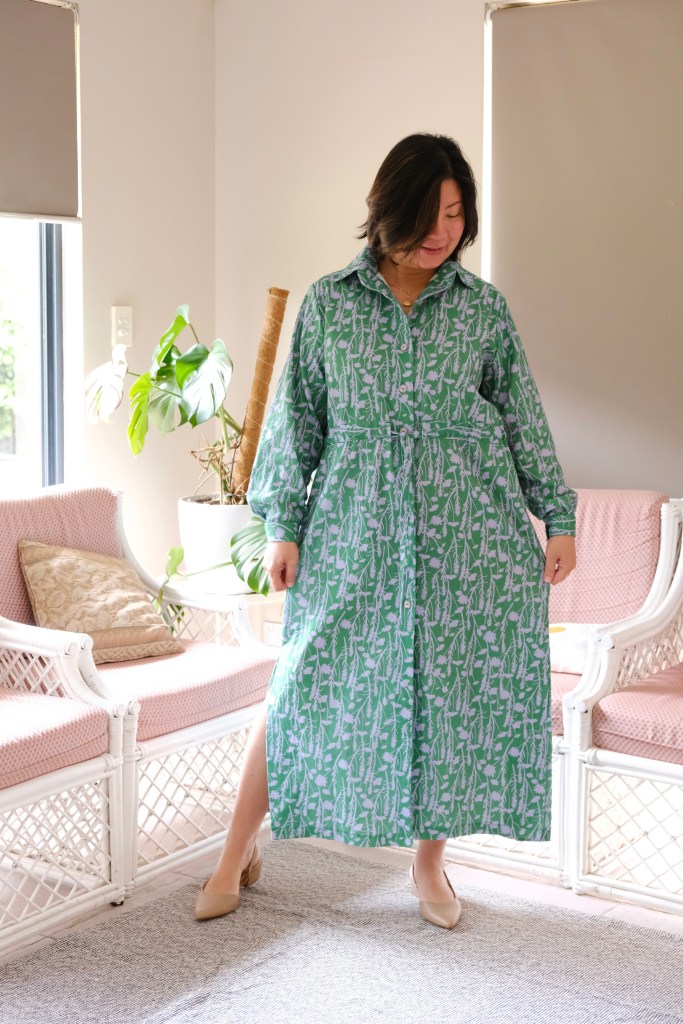
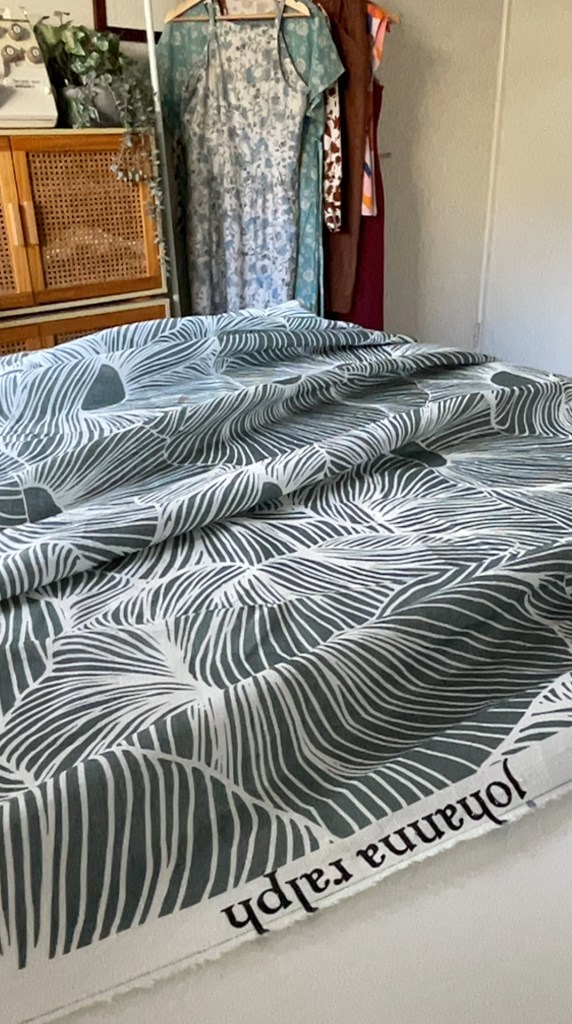
Maaidesign is launching a new fabric brand called Johanna Ralph* and I was super excited to receive a preview of the Silent Bloom print. It’s a beautiful abstract graphic married with elegance. I chose to preview the linen, but the print comes in other substrates. When this luxurious linen arrived, quite a few patterns sprang to mind. I settled on the Milenda Dress because I thought that the linen would feature the linen beautifully. Linen is great for items needing structure.

I tried making this dress about five years ago. I had just started sewing and I loved the look of the dress. Even though the pattern advises that it’s for intermediate level sewist, I jumped in and tried to sew it. I used a double gauze and instantly started making mistakes like not adding the pattern pieces to make the right length, I confused the pleat construction, I didn’t attach the bias binding or the pockets the right way. However, despite all that, I was super proud, and the Milenda Dress has ended up being a dress I’ve reached for repeatedly.

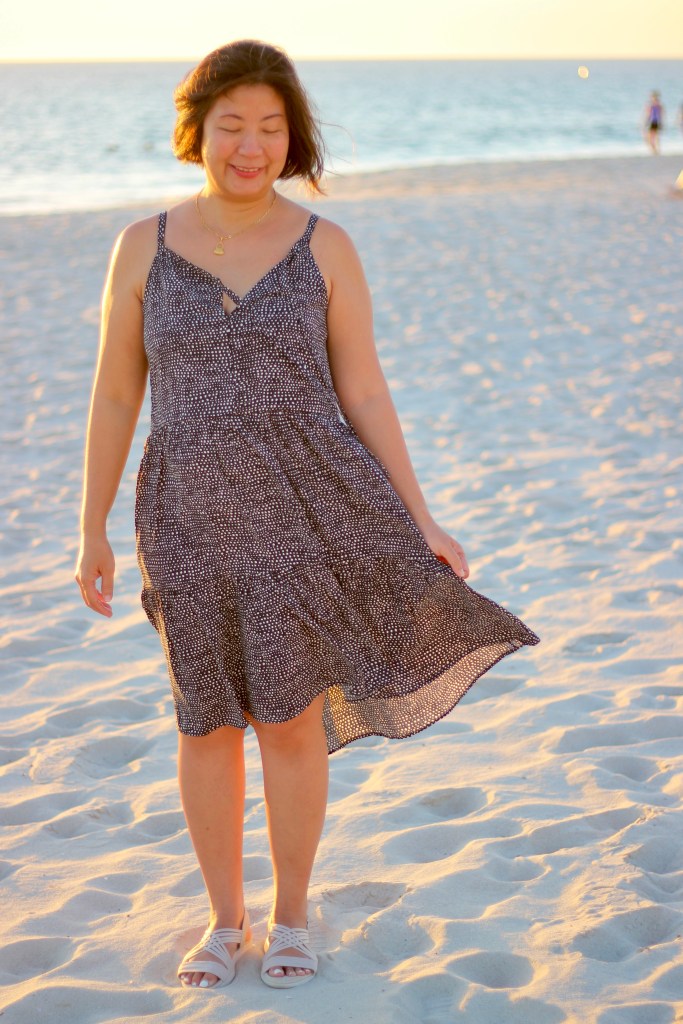
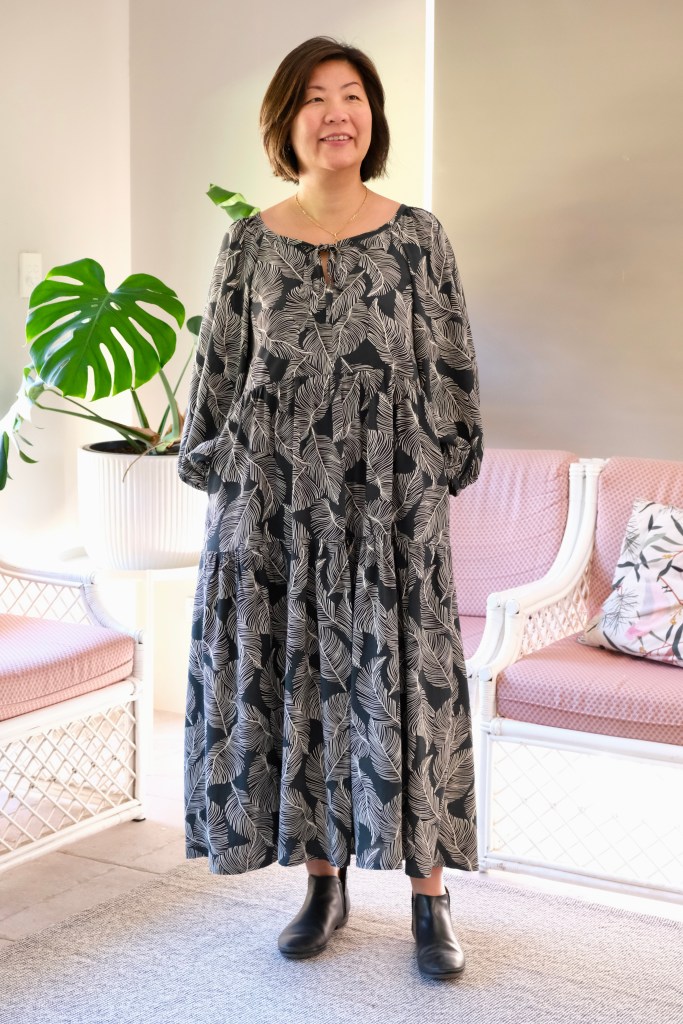
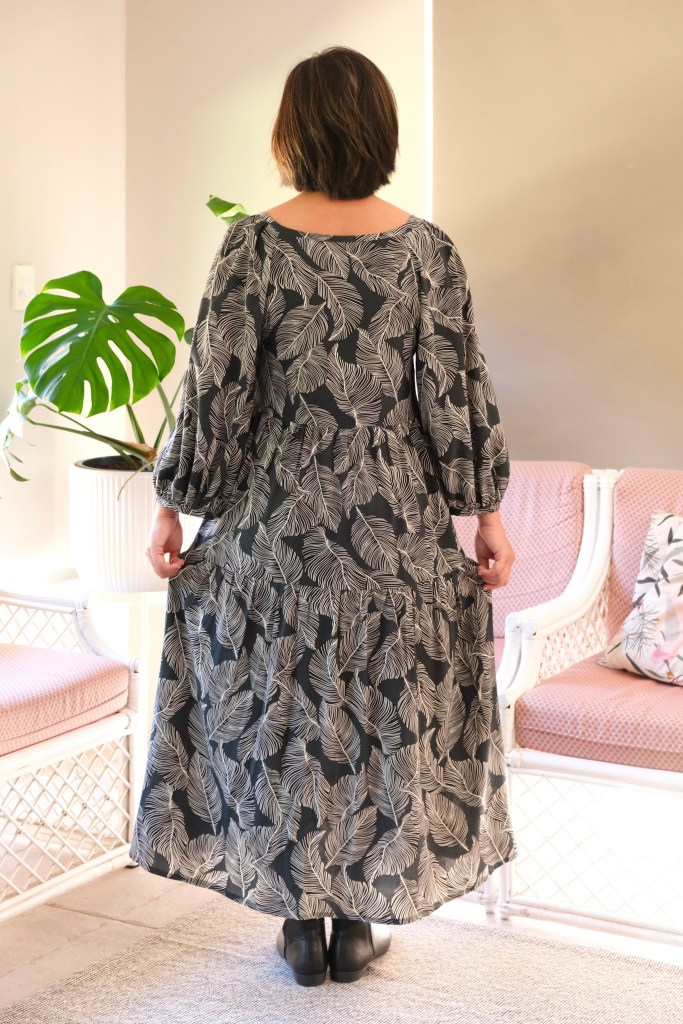
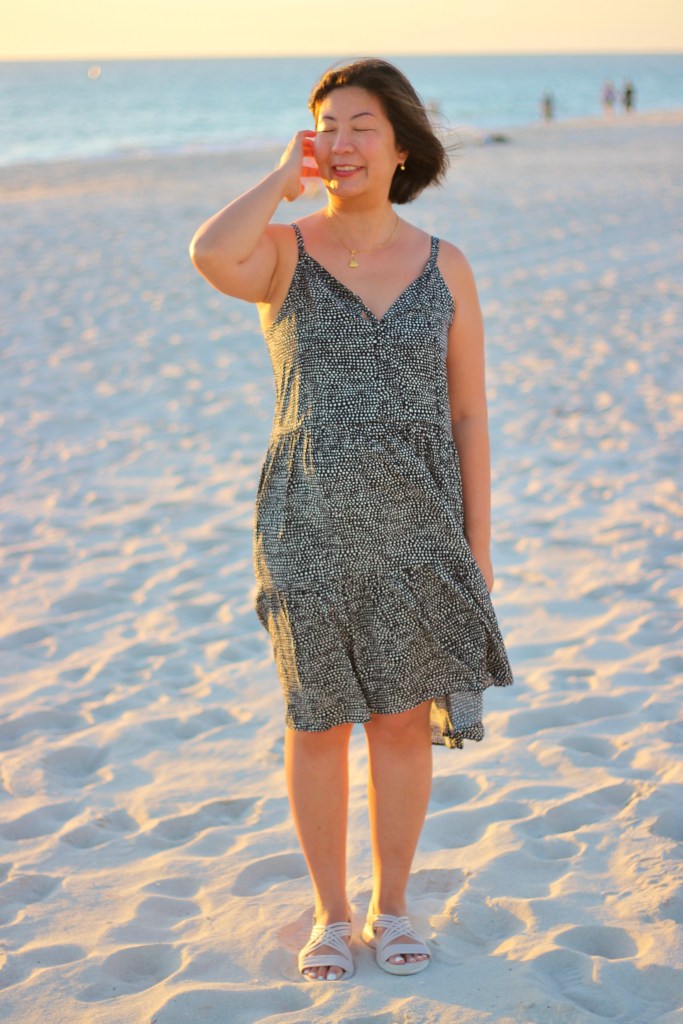
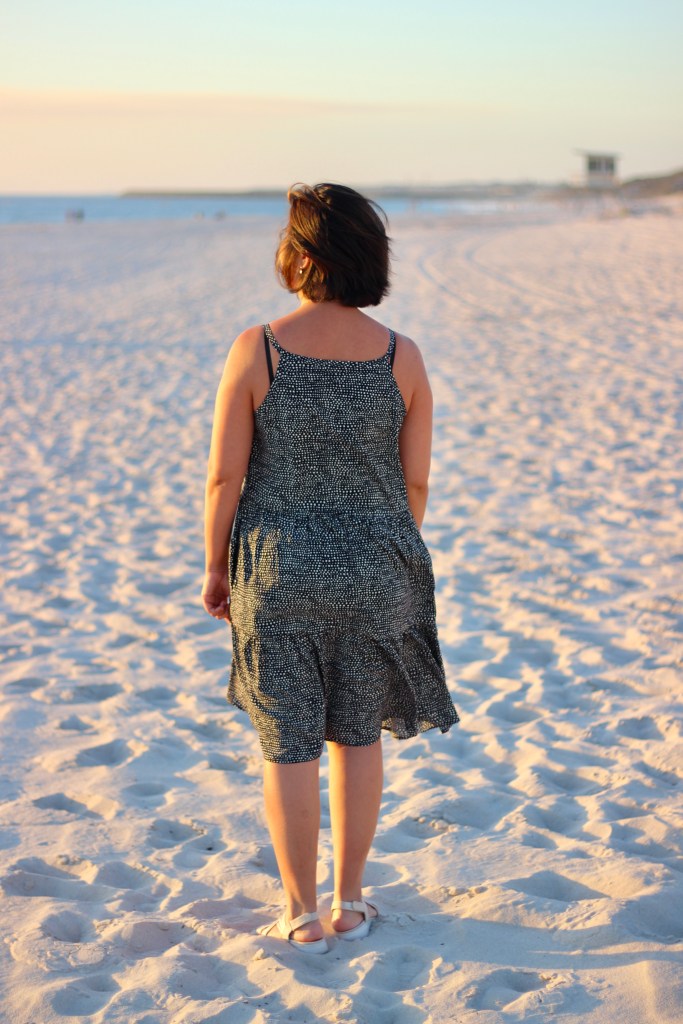
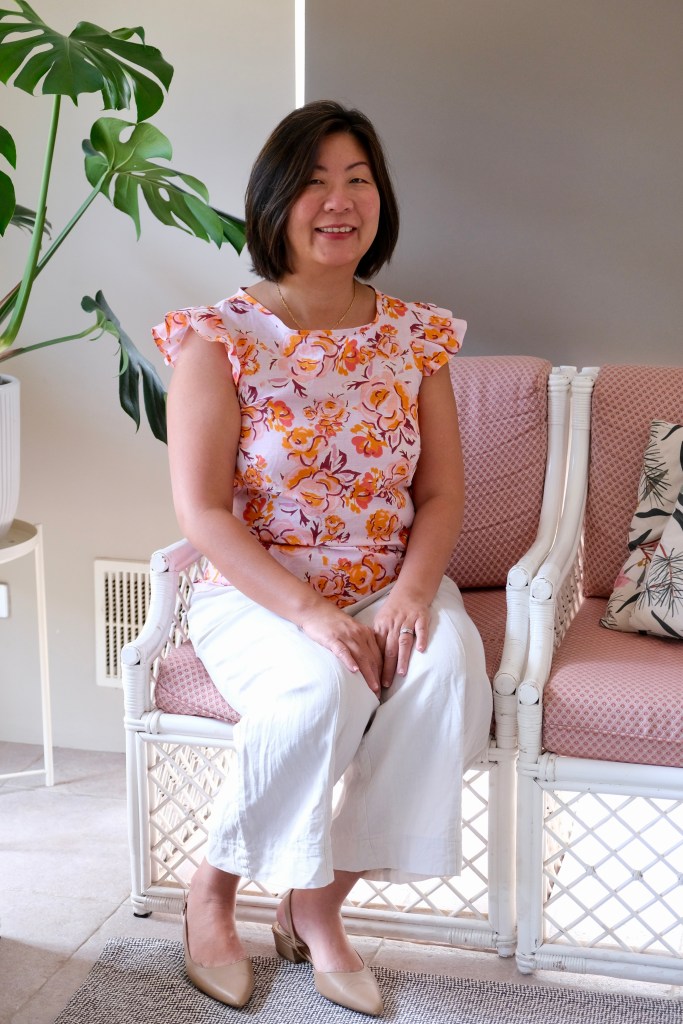
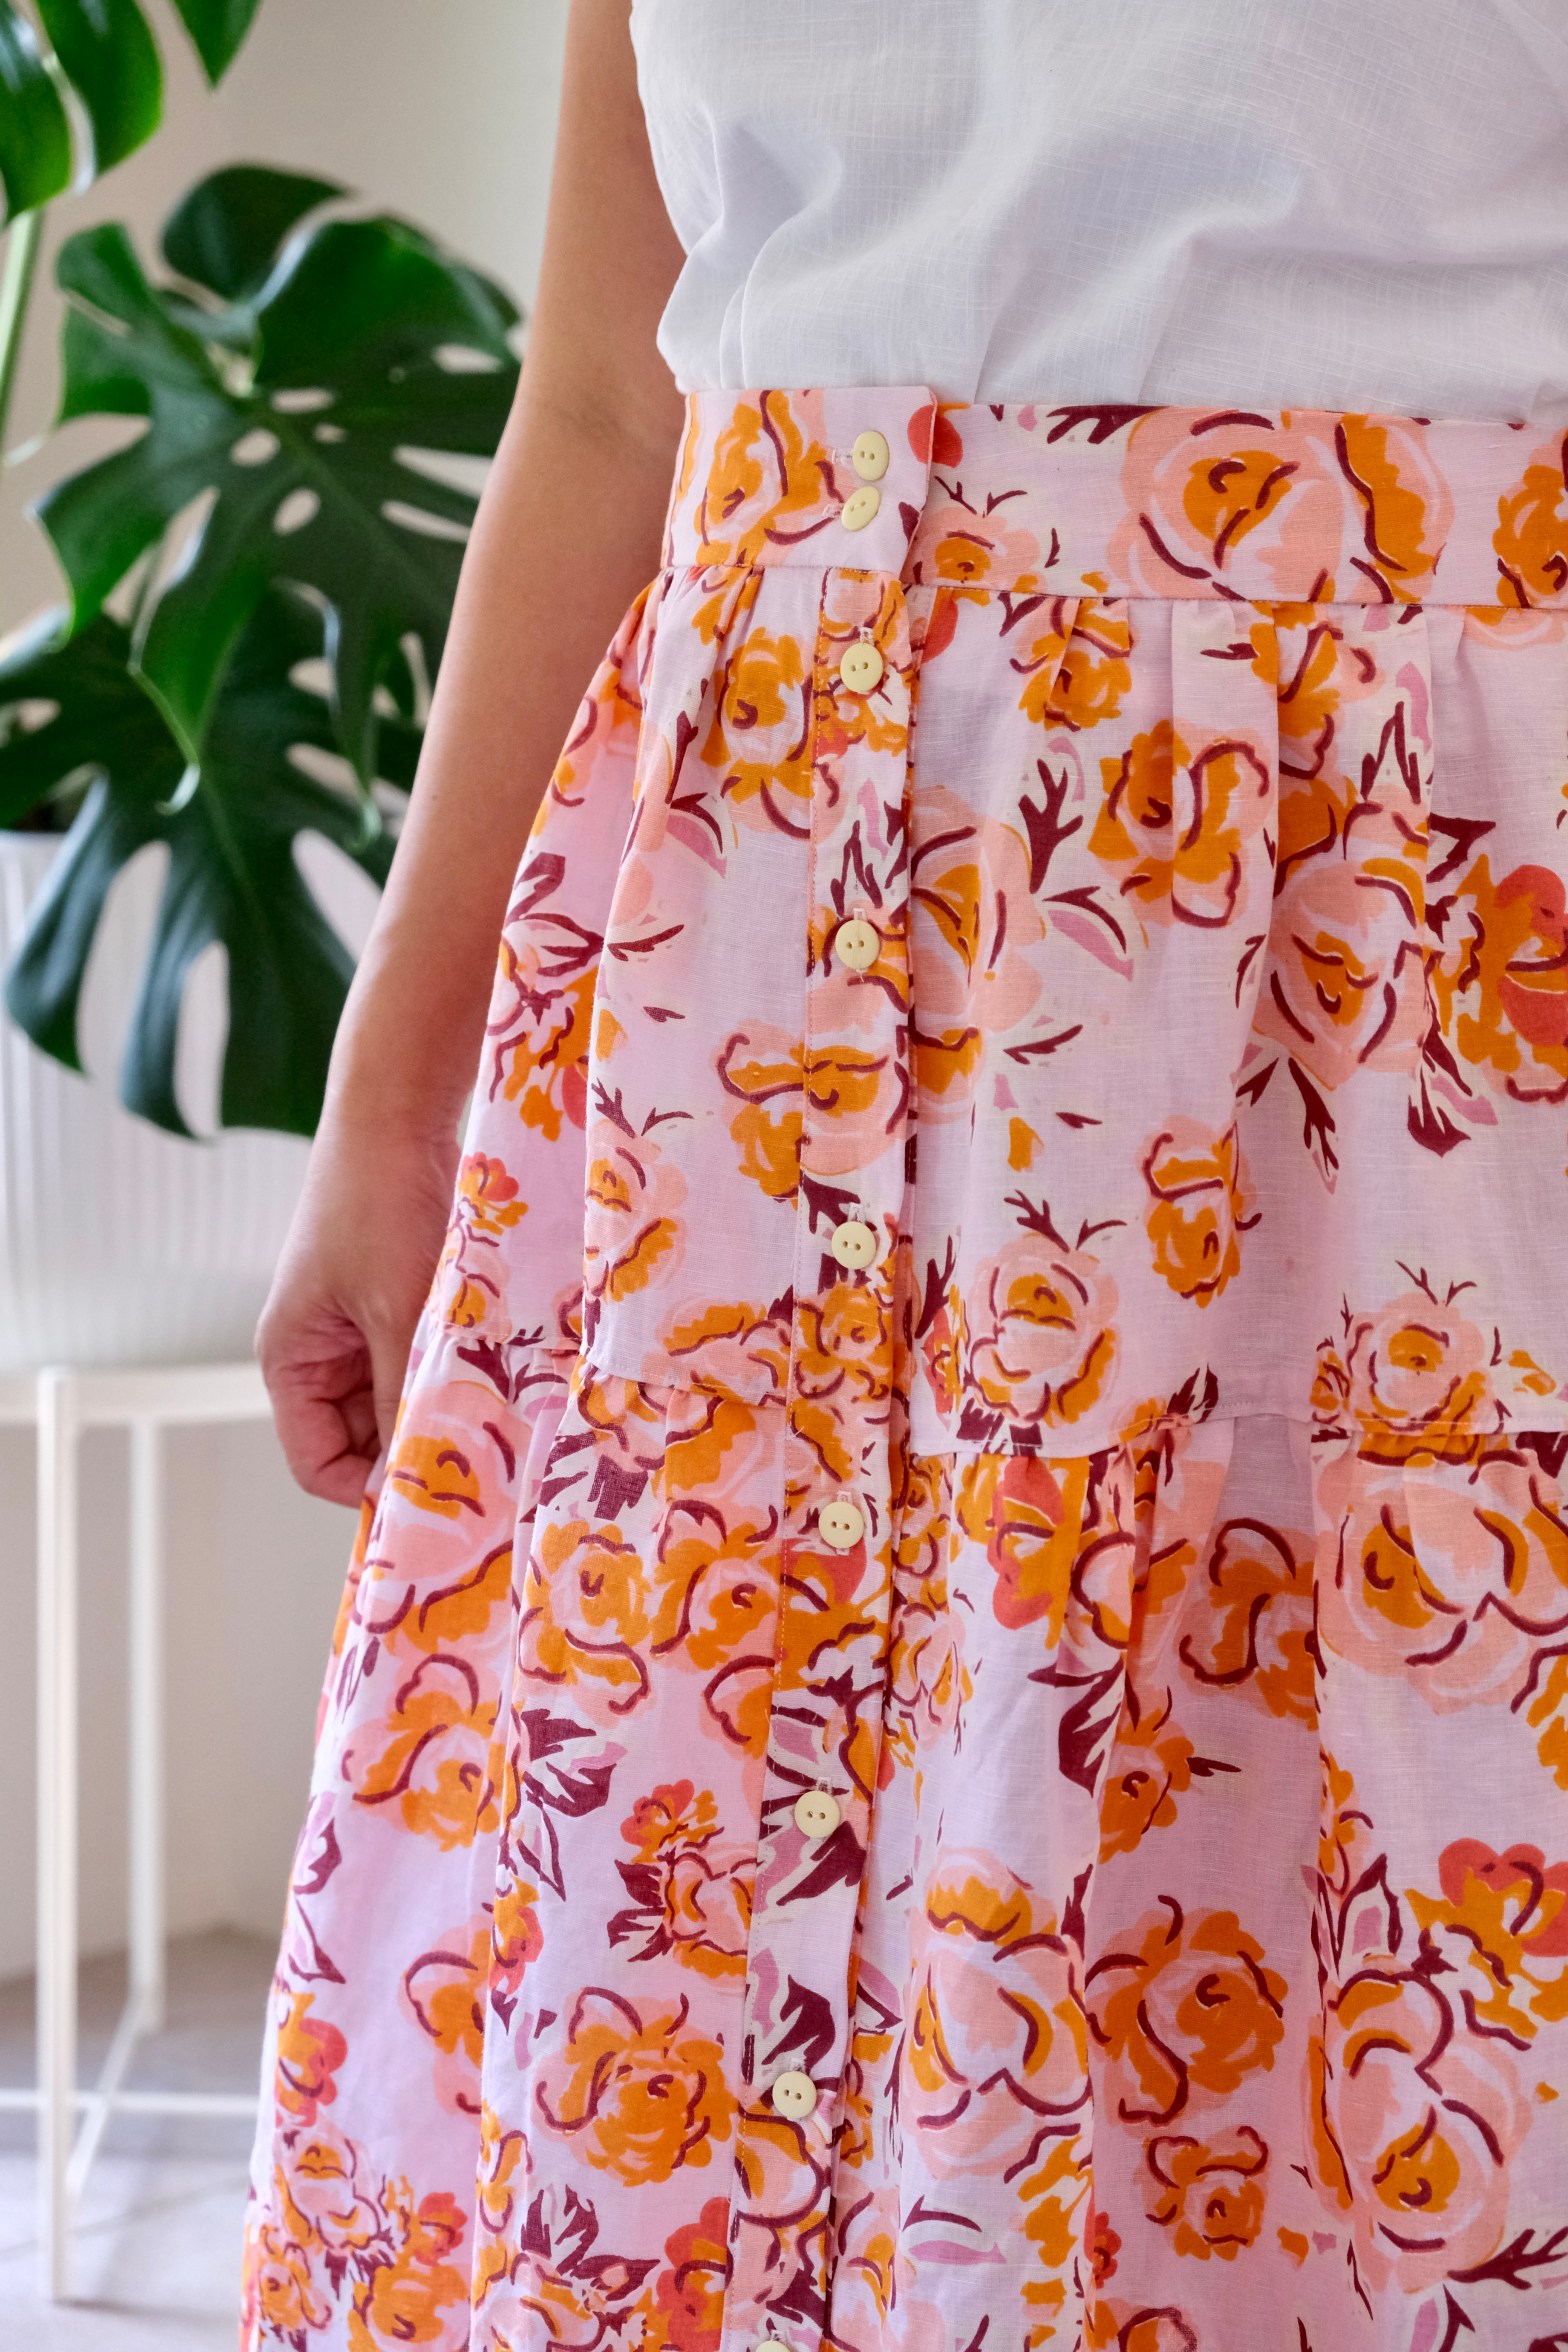
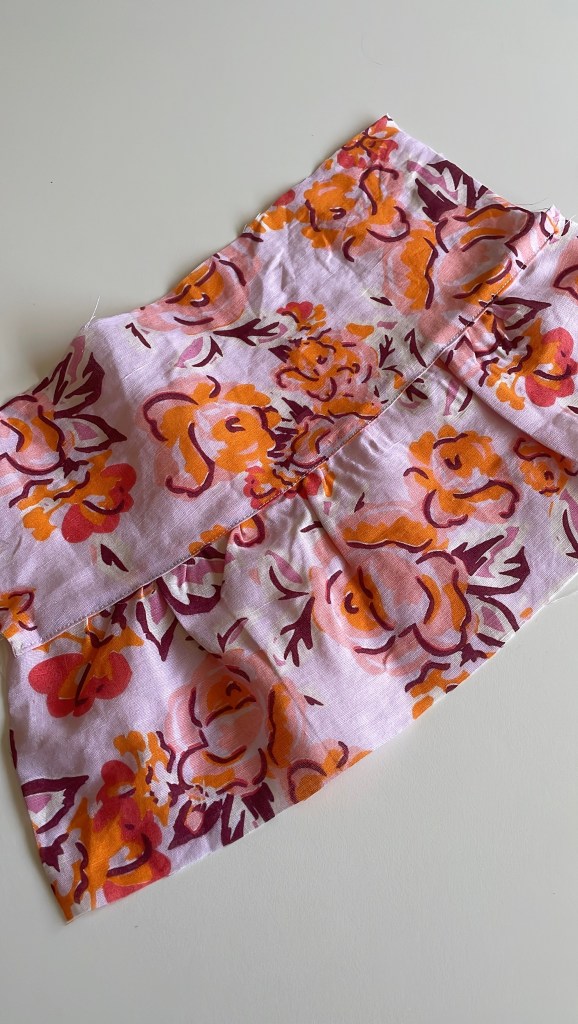
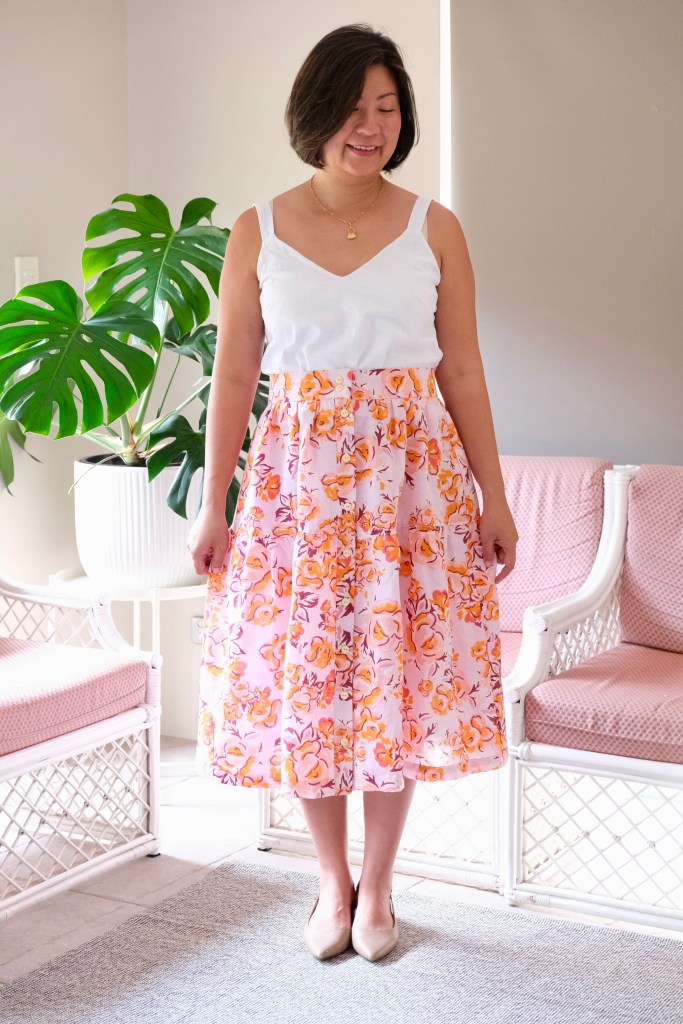
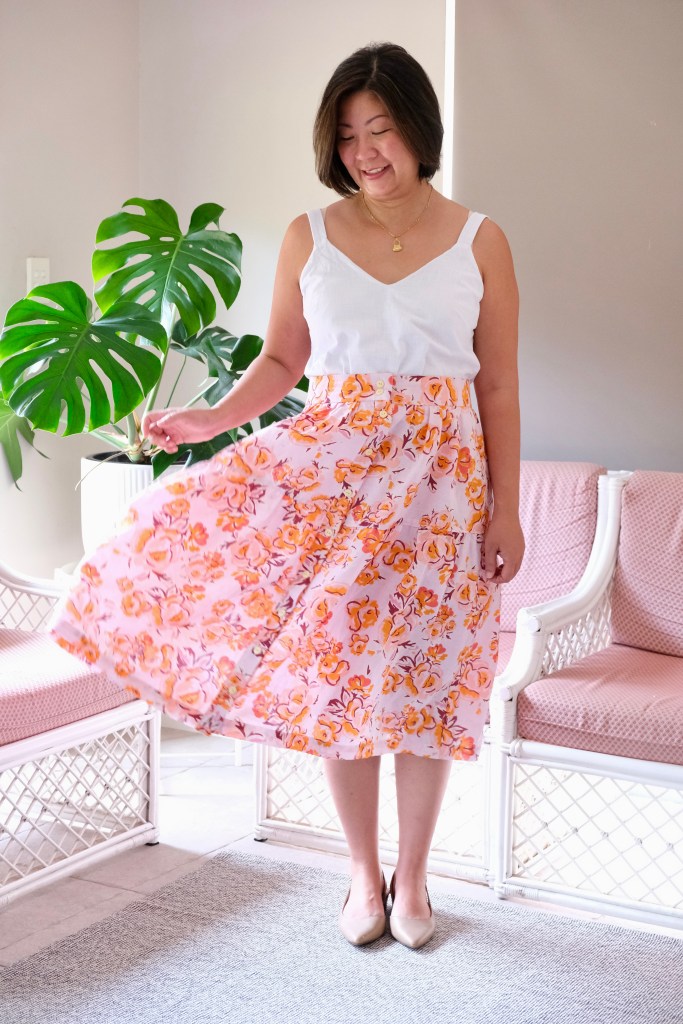
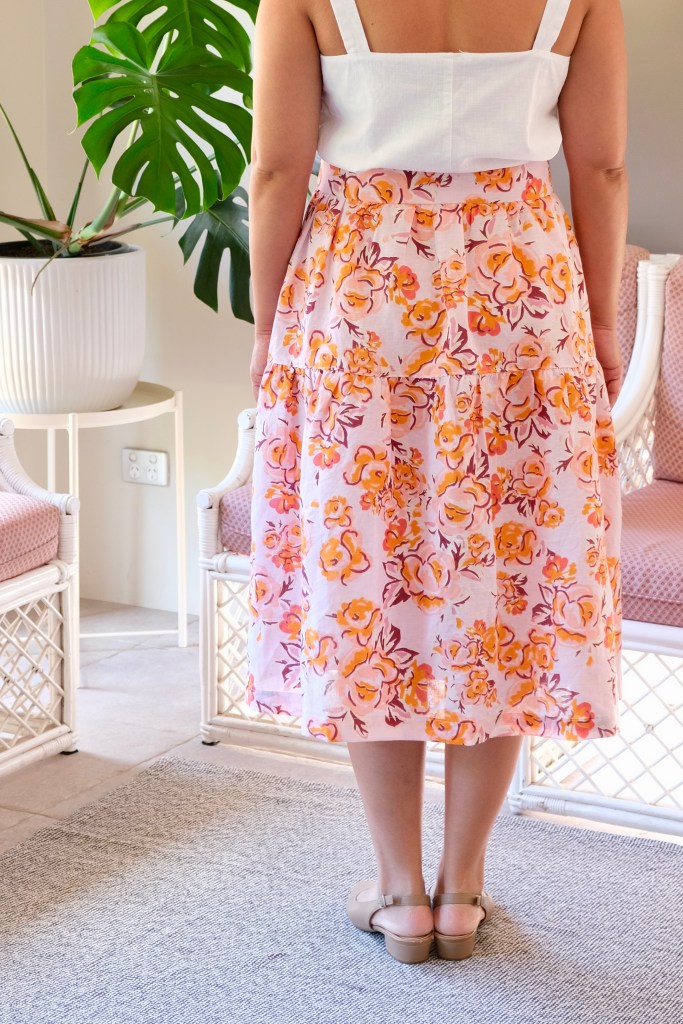
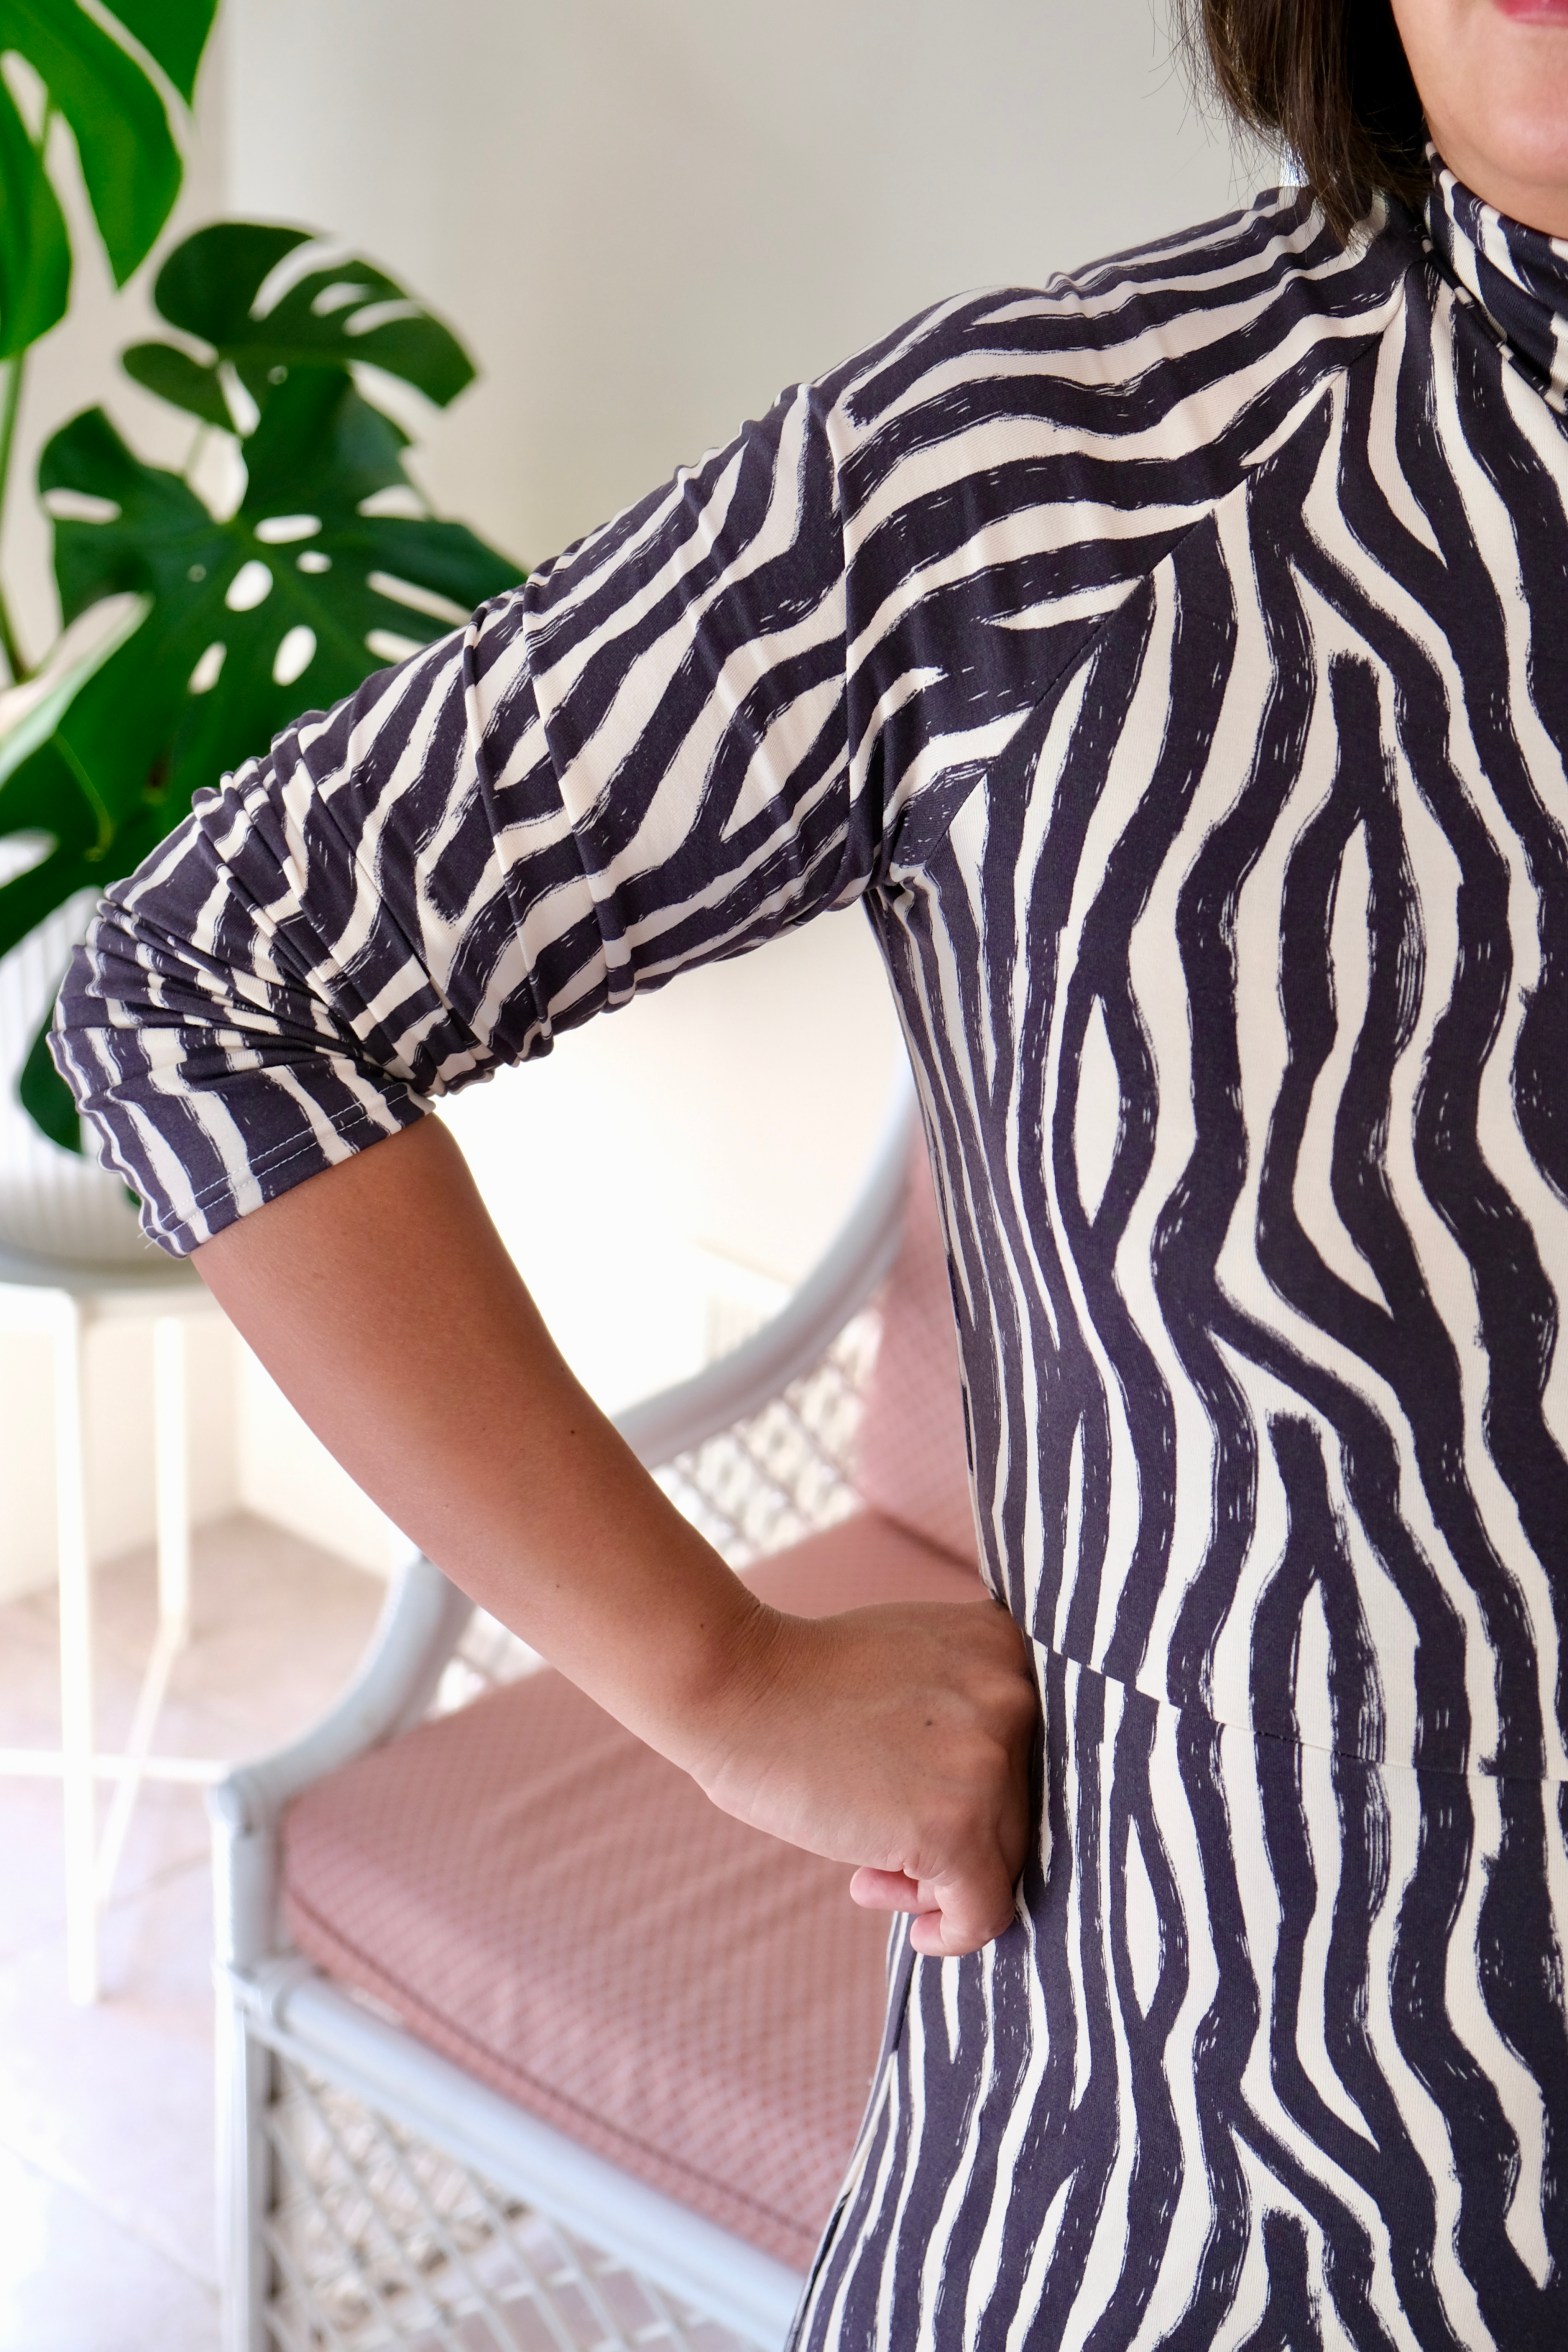
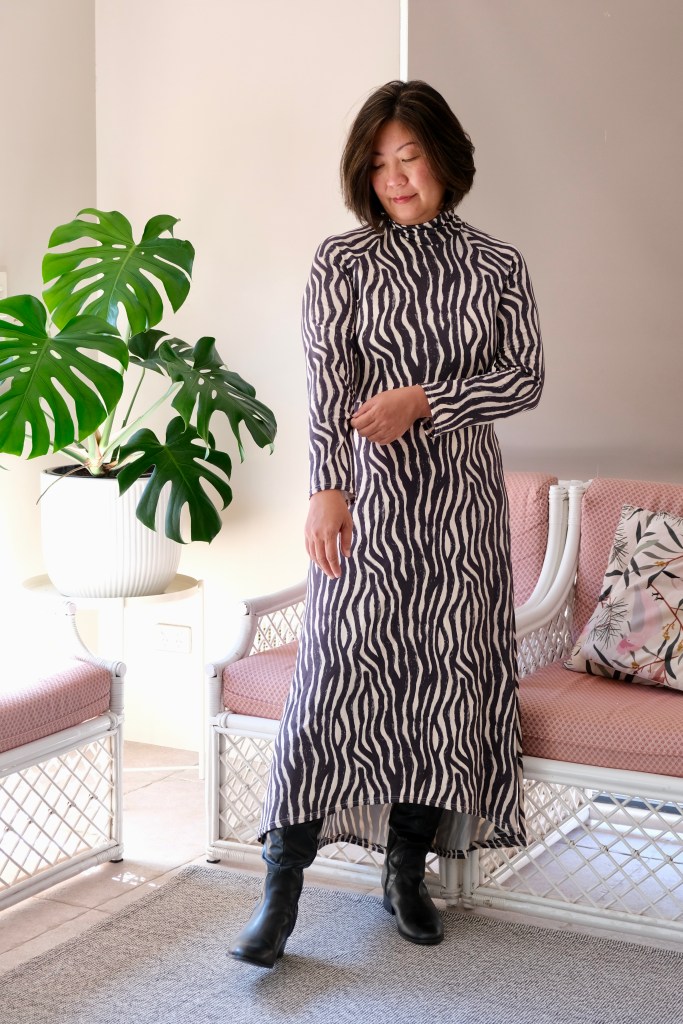
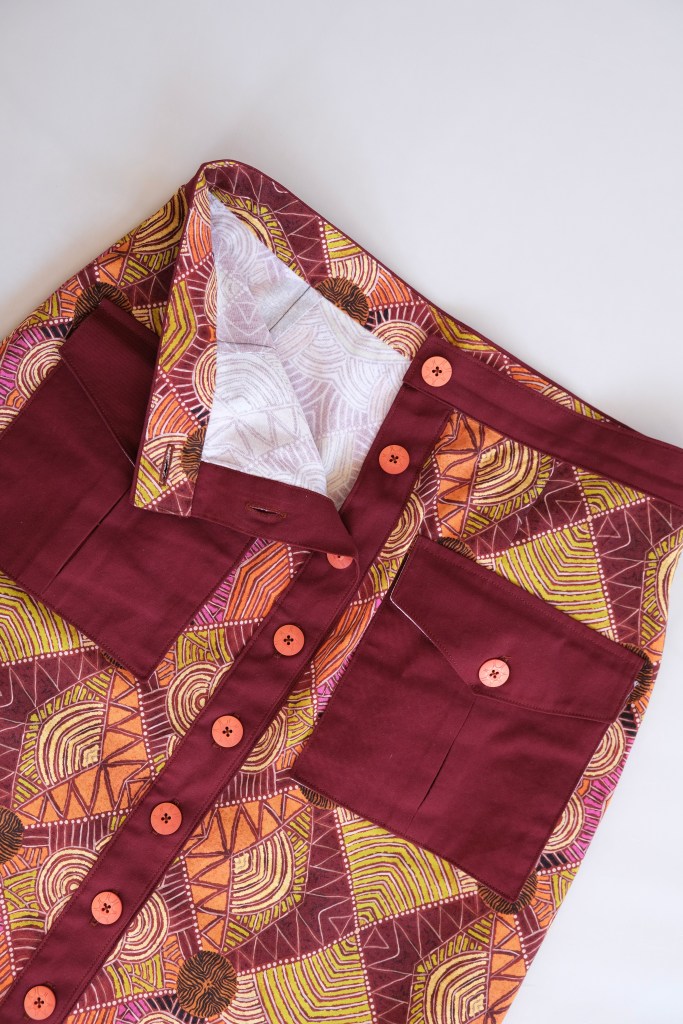
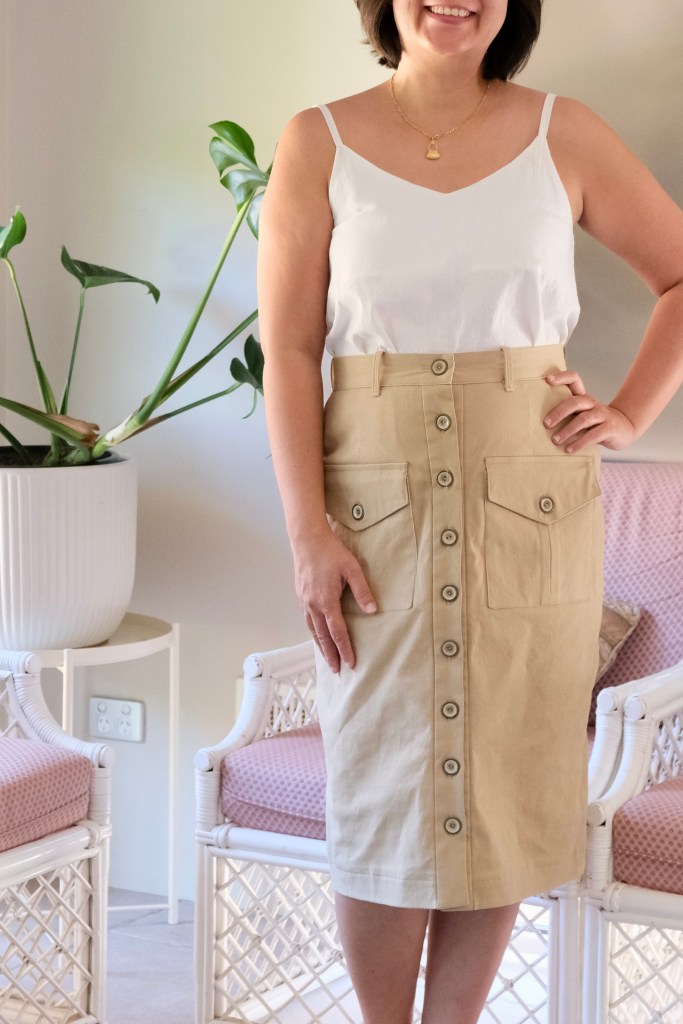
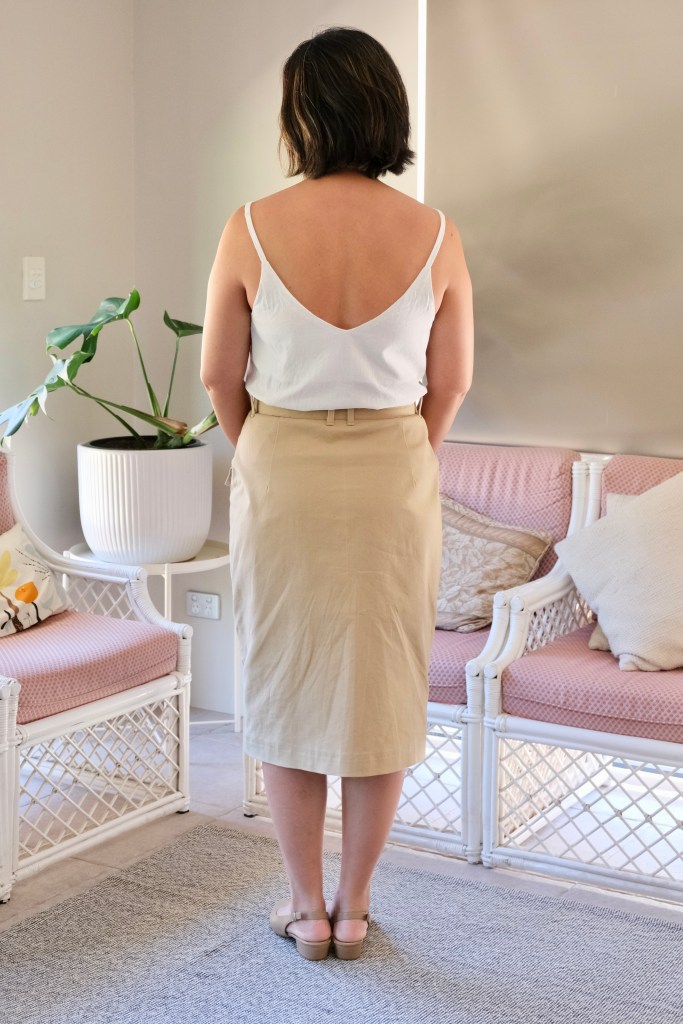
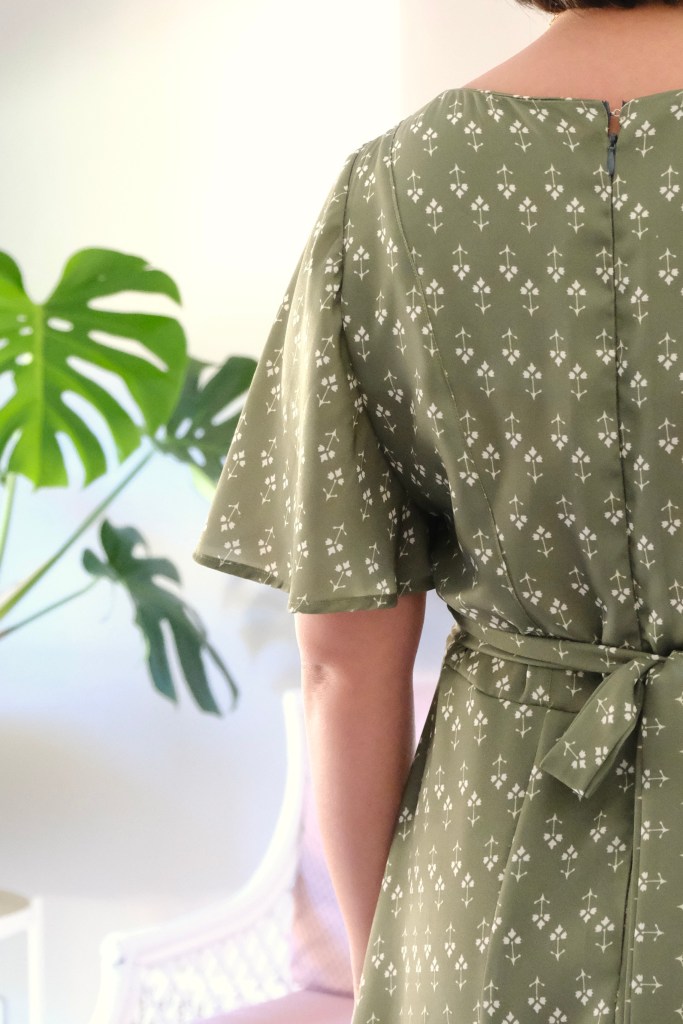
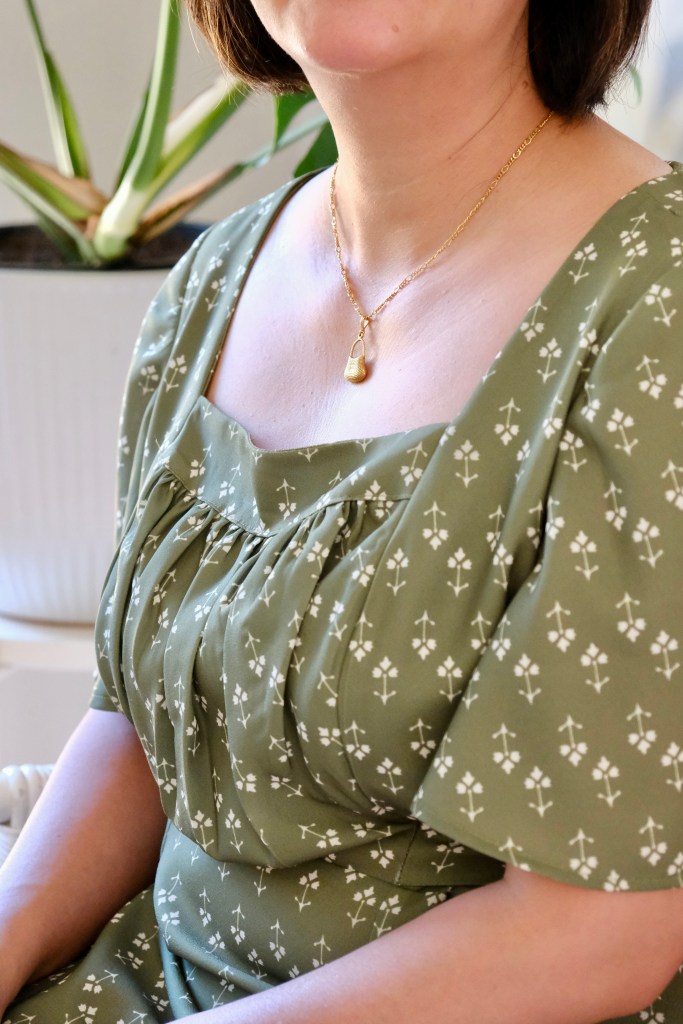
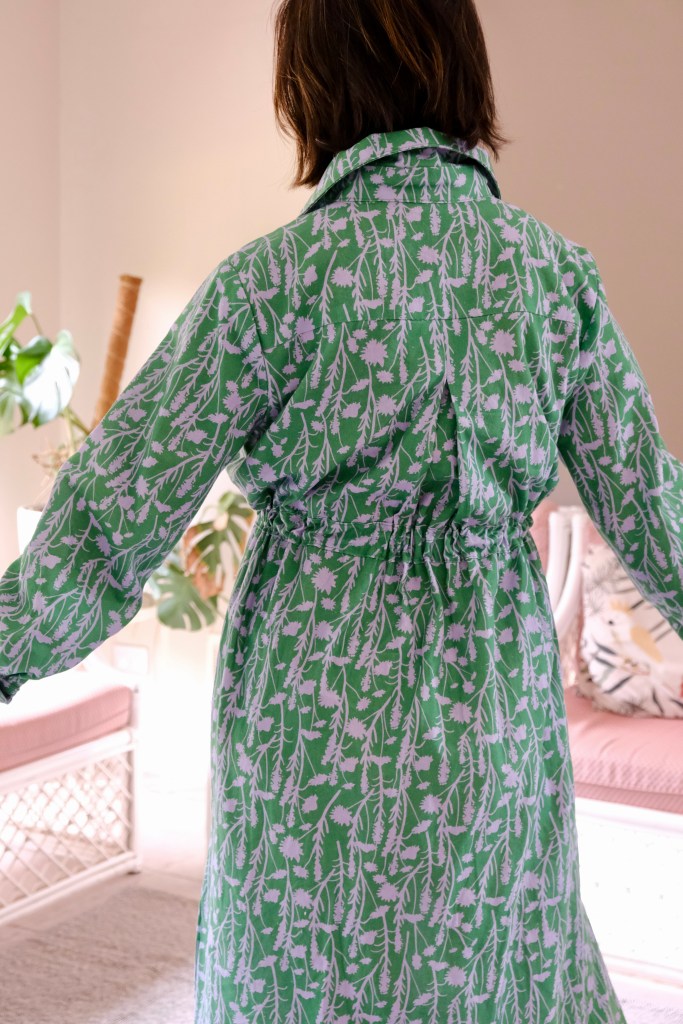
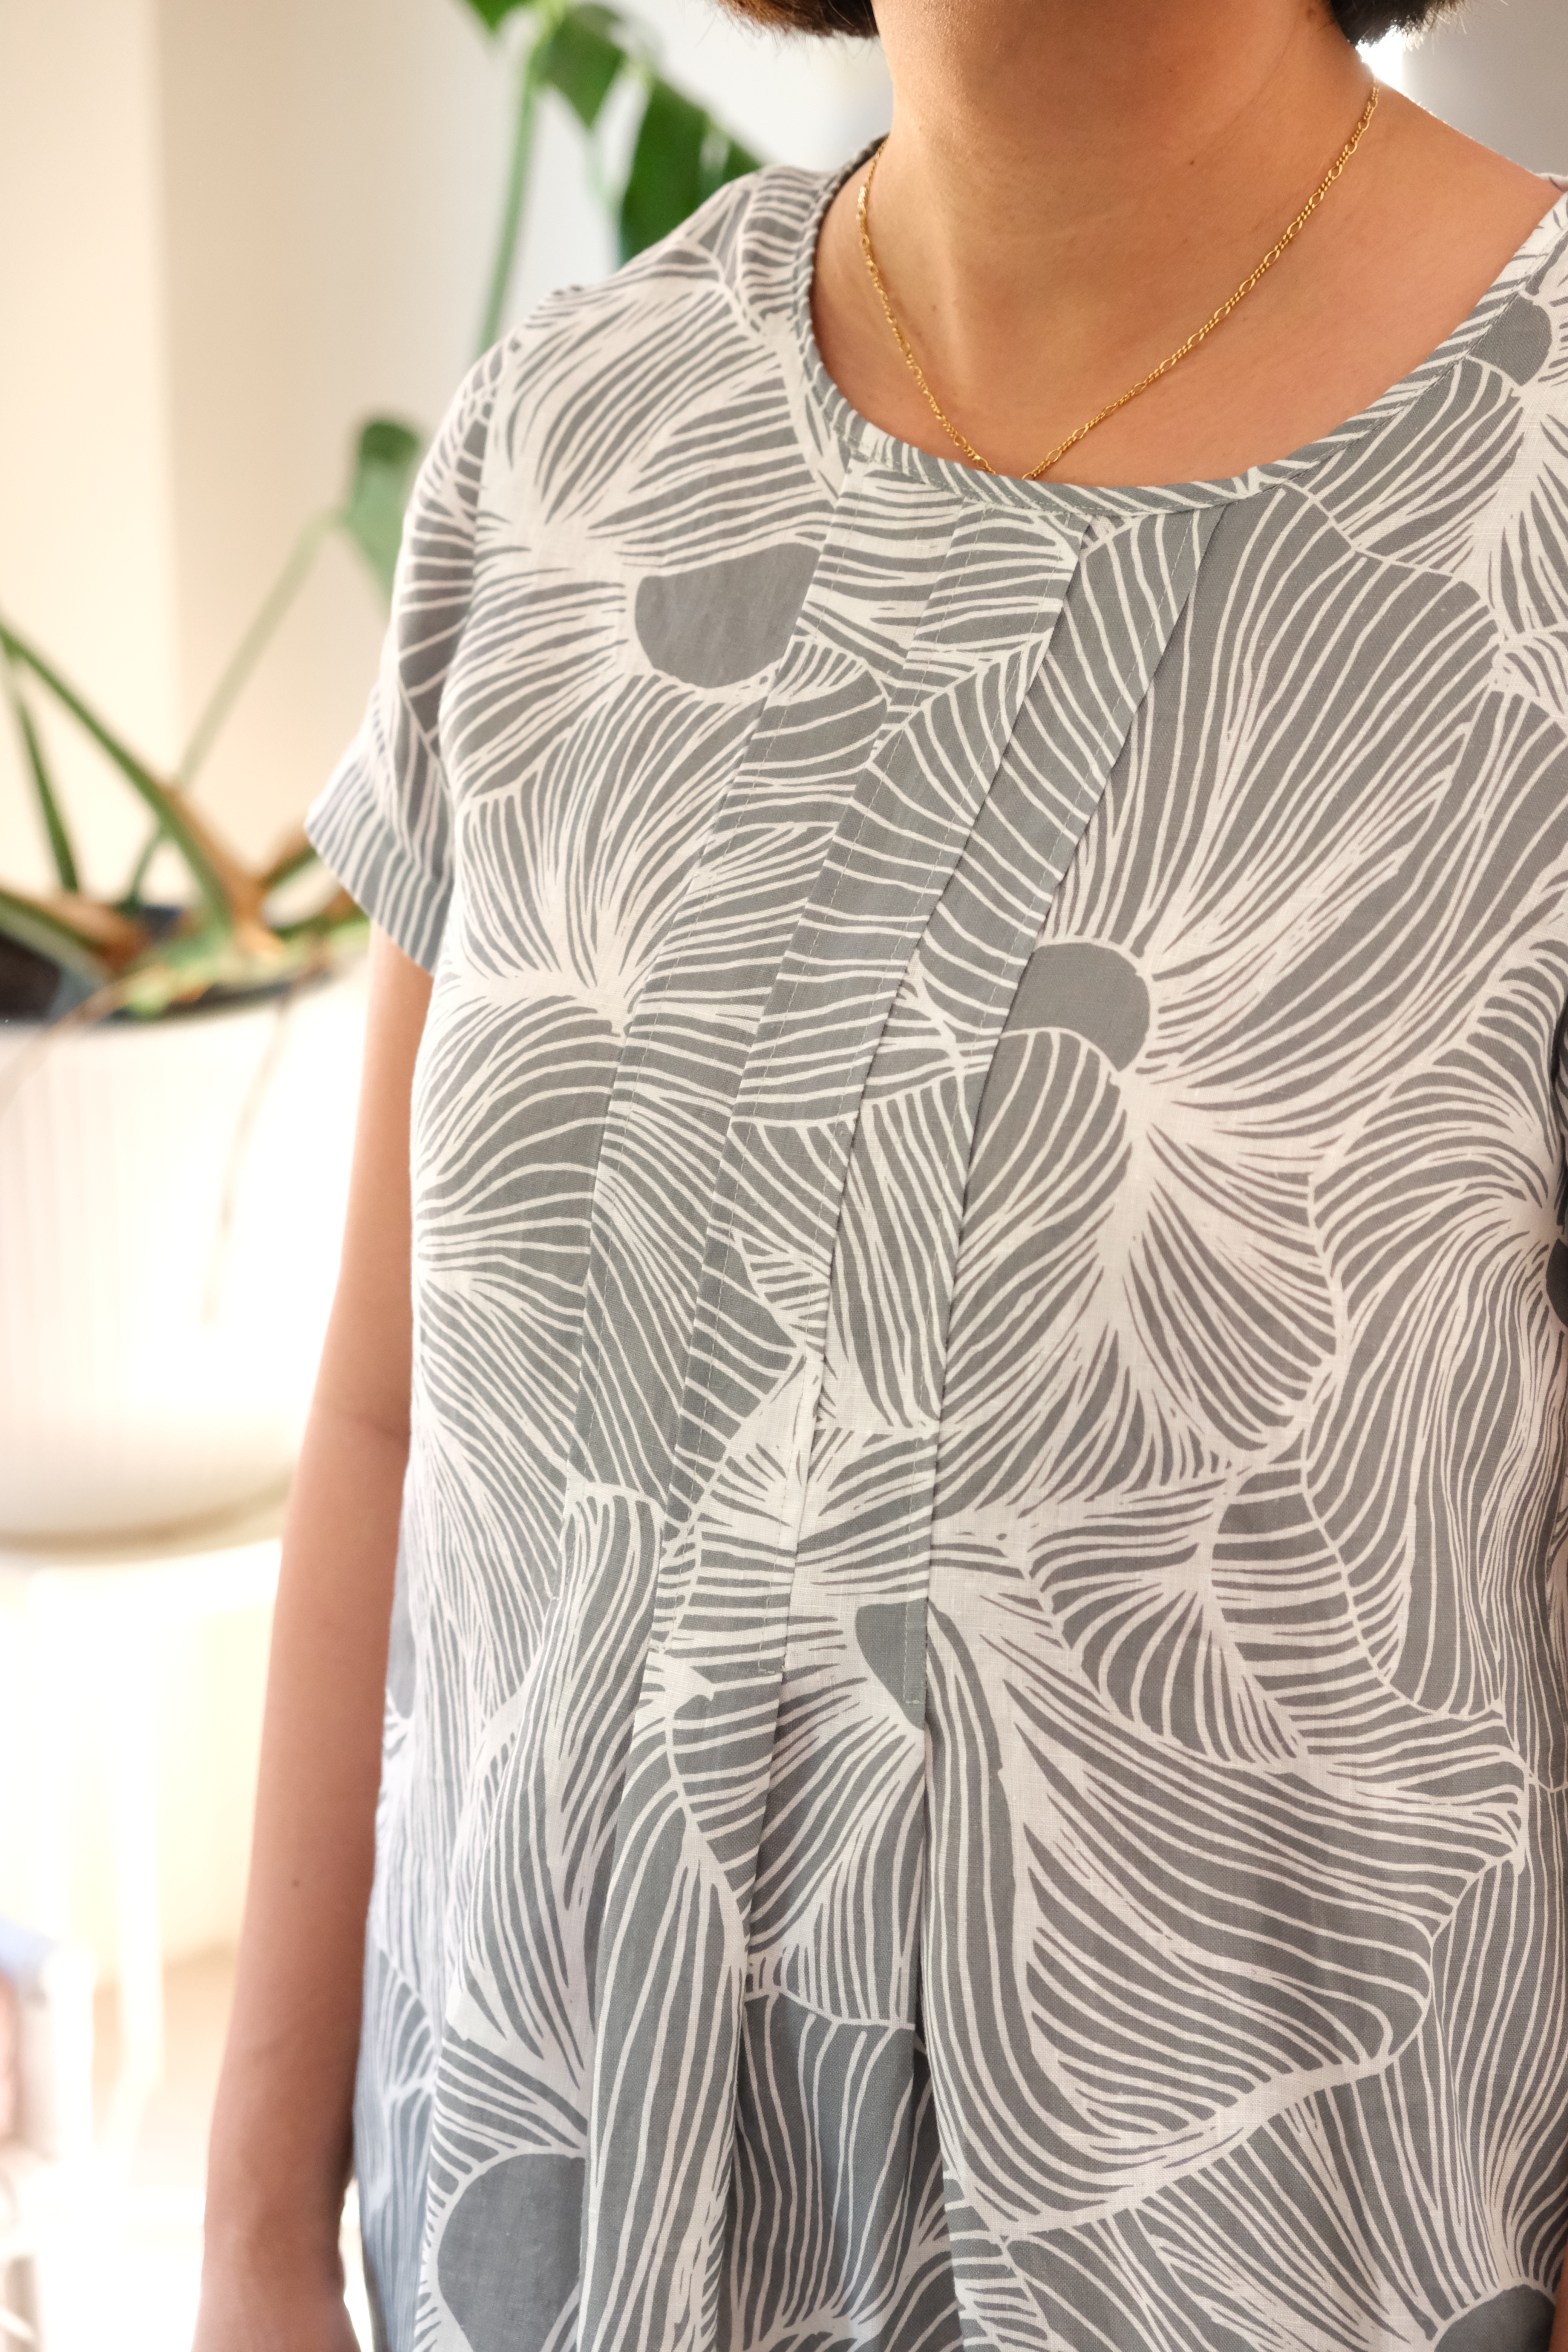
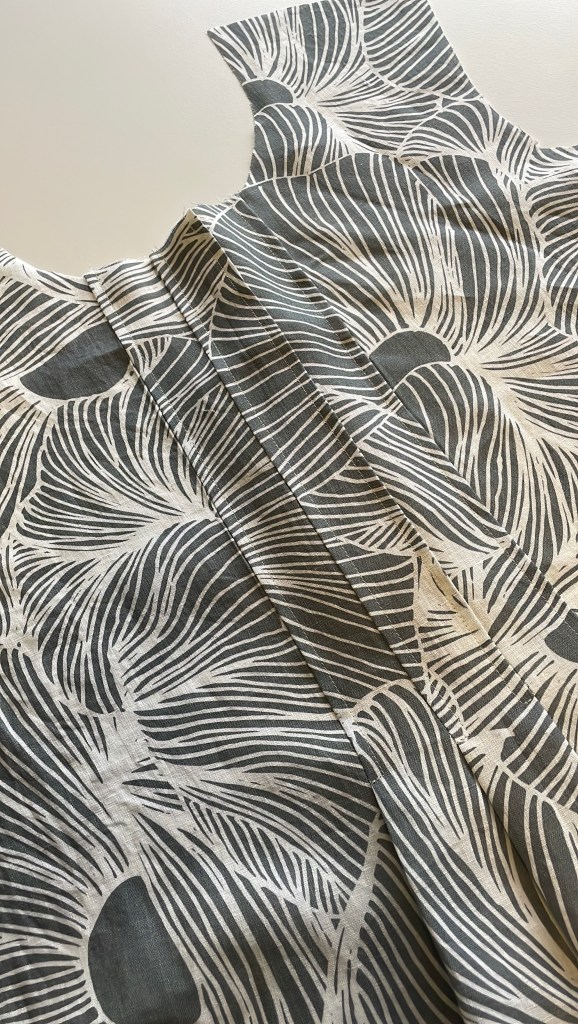
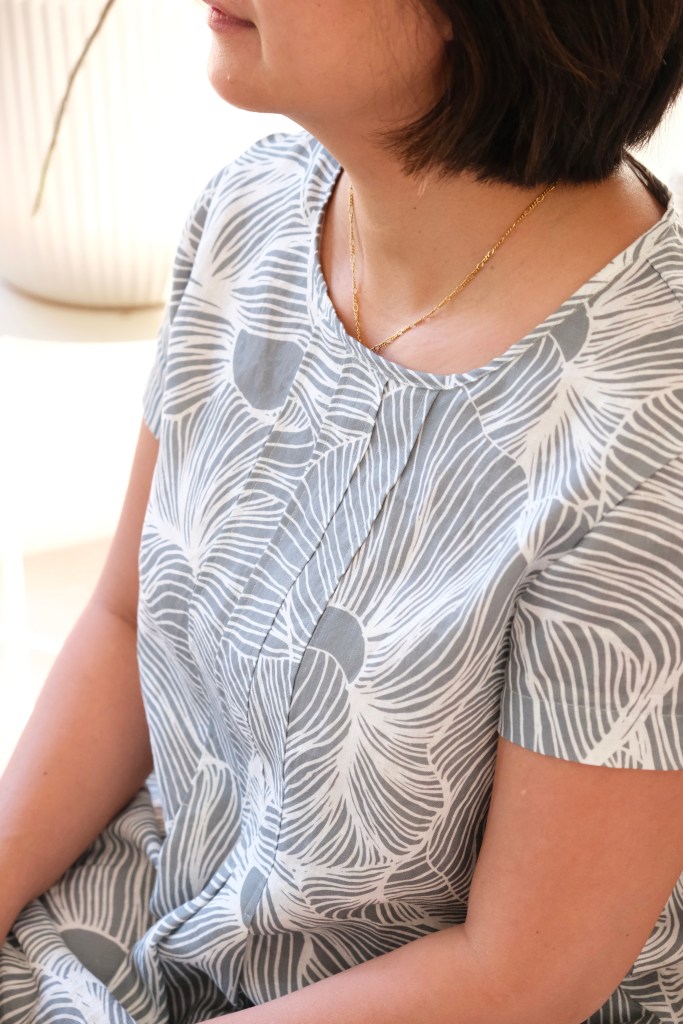
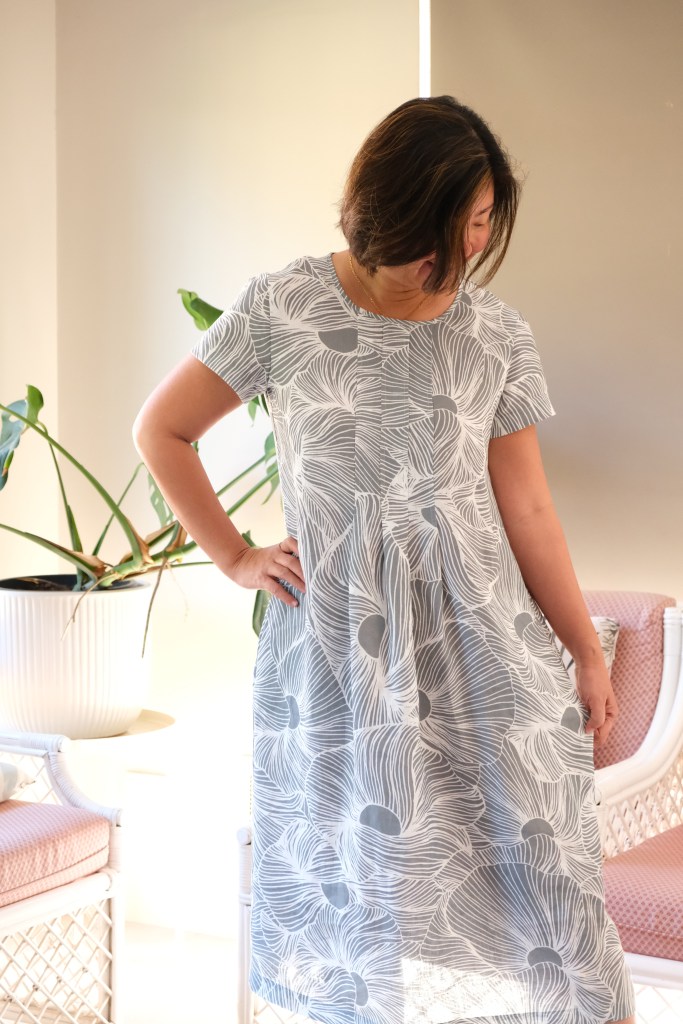
The Milenda is a classic shift dress that can be pulled over the head. The design these features pleats in the front and back which release into a skirt. These pleats are a clever feature and really help to shape the dress in a flattering way.

When this beautiful 100% linen fabric arrived from Maaidesign, I knew I had to make the Milenda Dress again. I started by giving it a cold wash and then a cool dry in my dryer. I then changed my machine needle to a universal 90/12 gage needle. Linen does wrinkle so a good press is essential before sewing. I don’t mind the wrinkles once it’s sewn but it’s good to iron it to make sure the pattern pieces remain accurate.

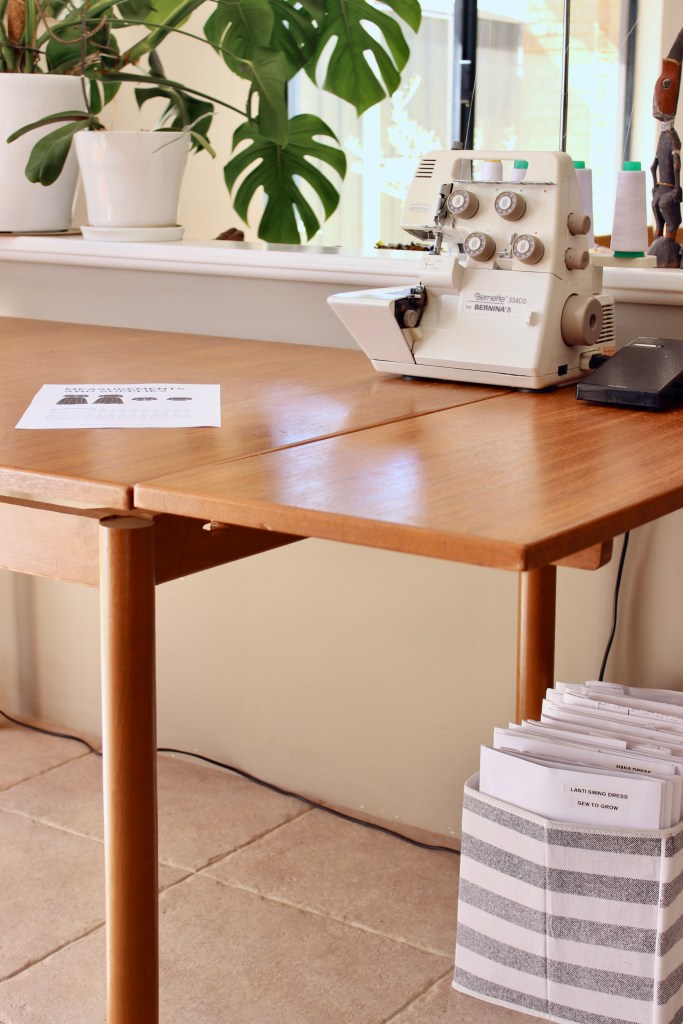
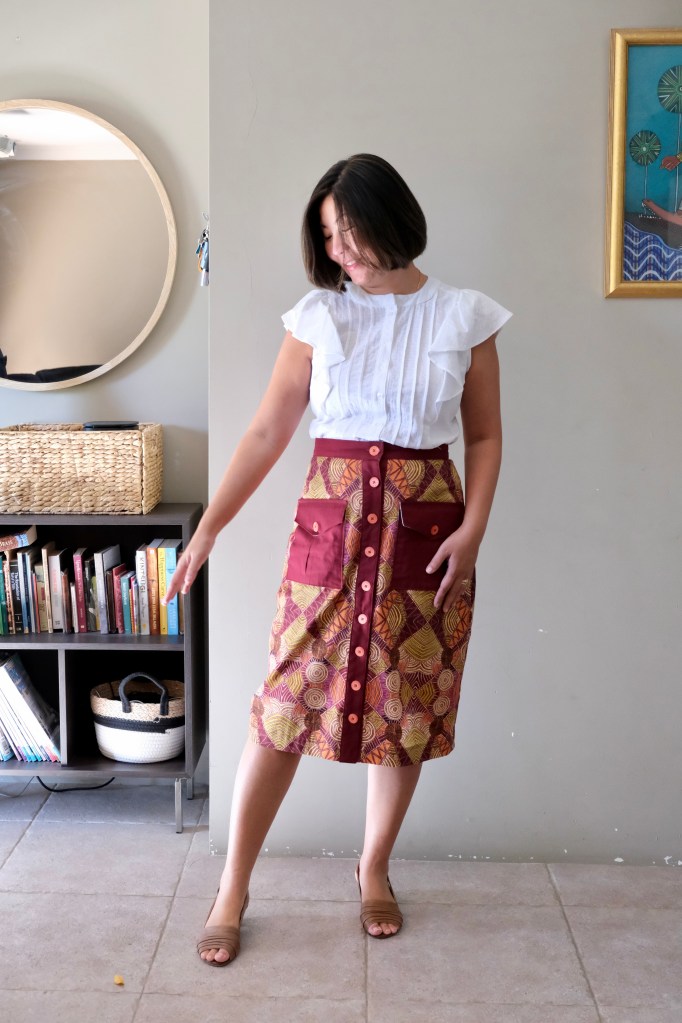
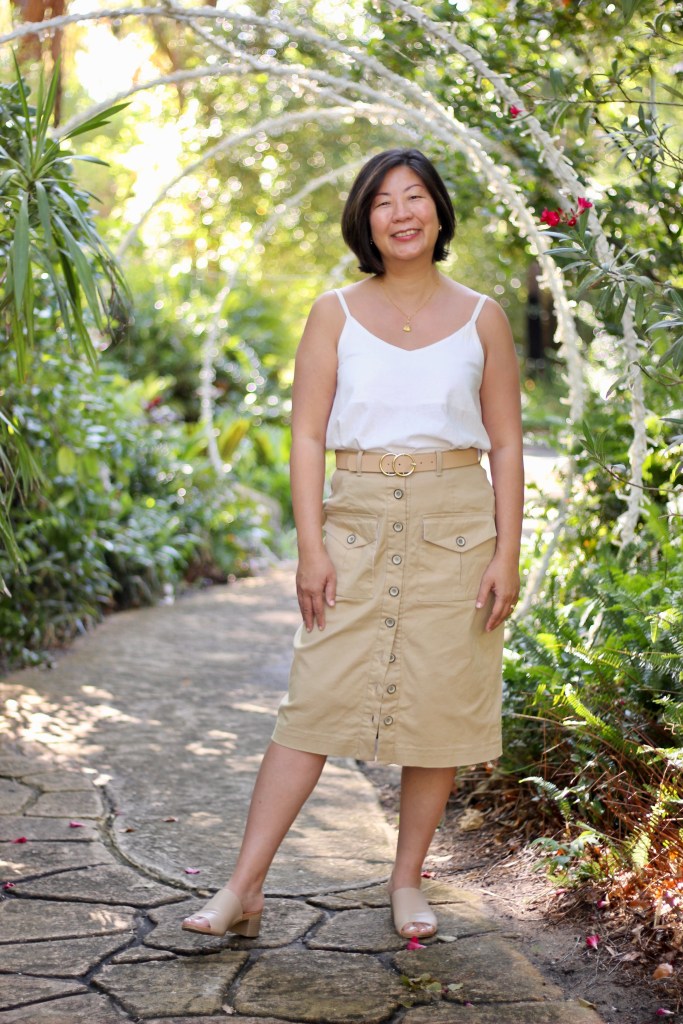
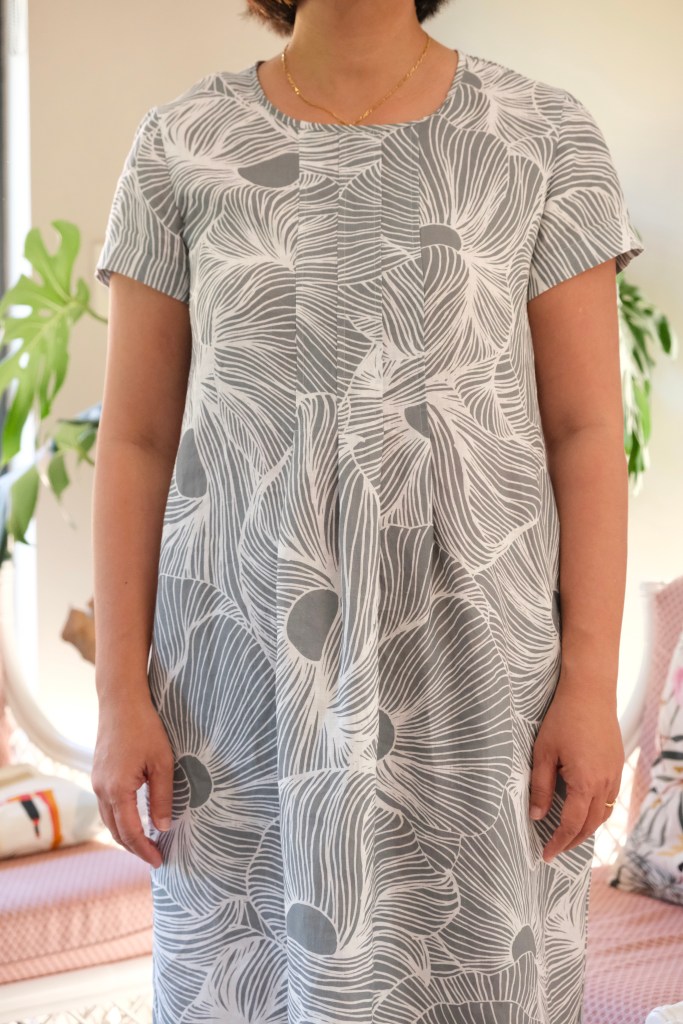
For my measurements of 38-inch bust, 33-inch waist and 40-inch hip, I made the size M. No modifications were needed. I was so happy that I could follow the instructions to the tee! I guess I am making progress with my sewing. On a little side note, the Tessuti instructions are excellent, but the pictures are photographed not illustrated so it’s easier to follow the instruction on the computer. Everything is logical and the construction is excellent.

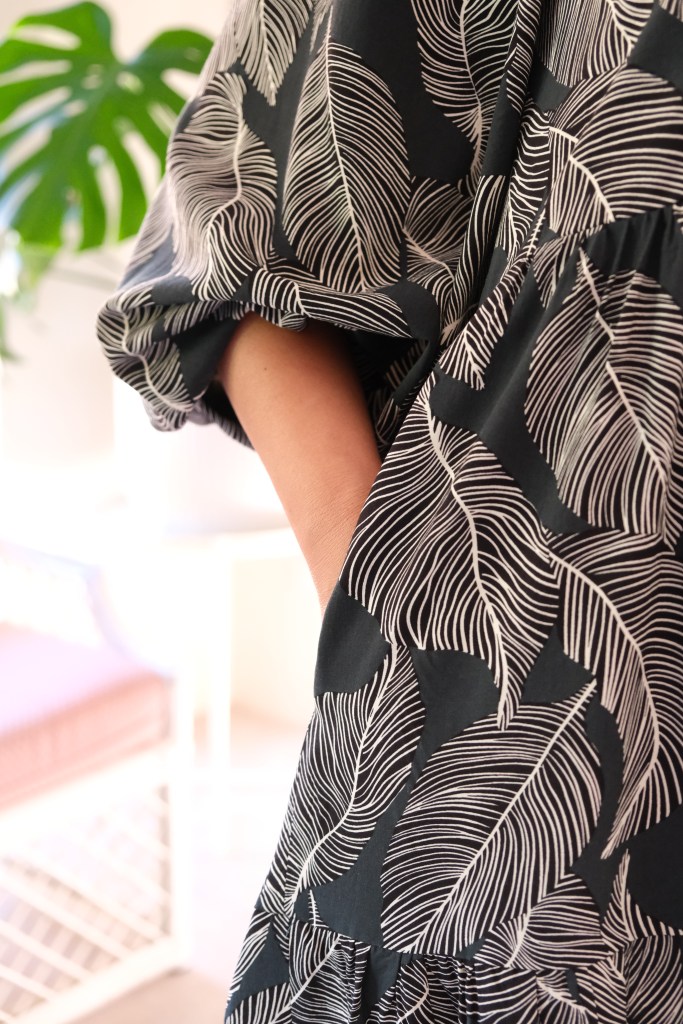
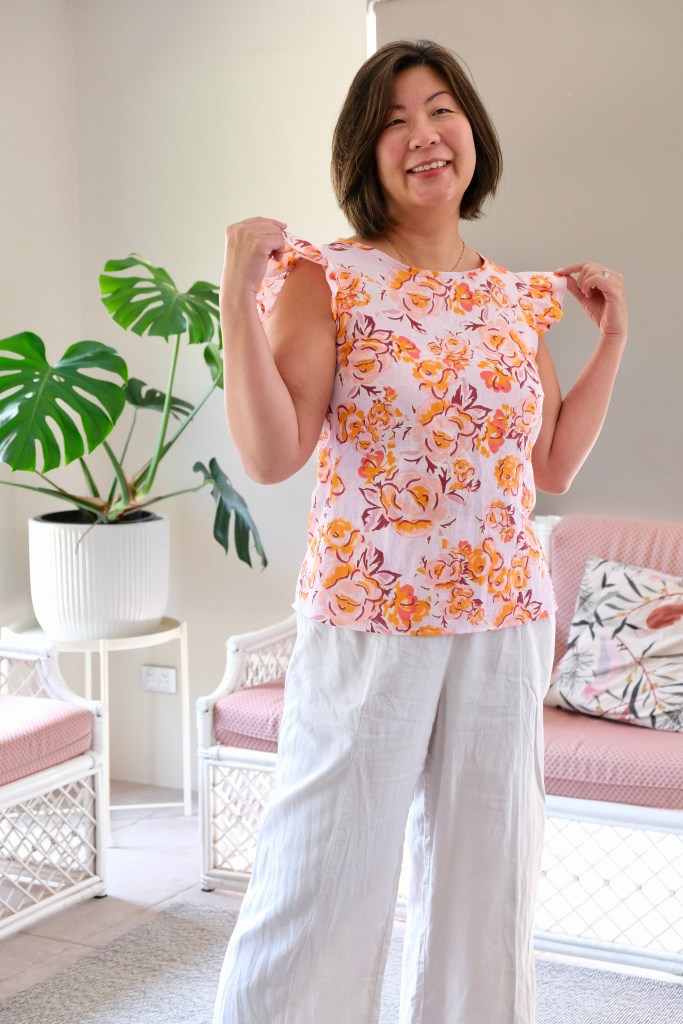
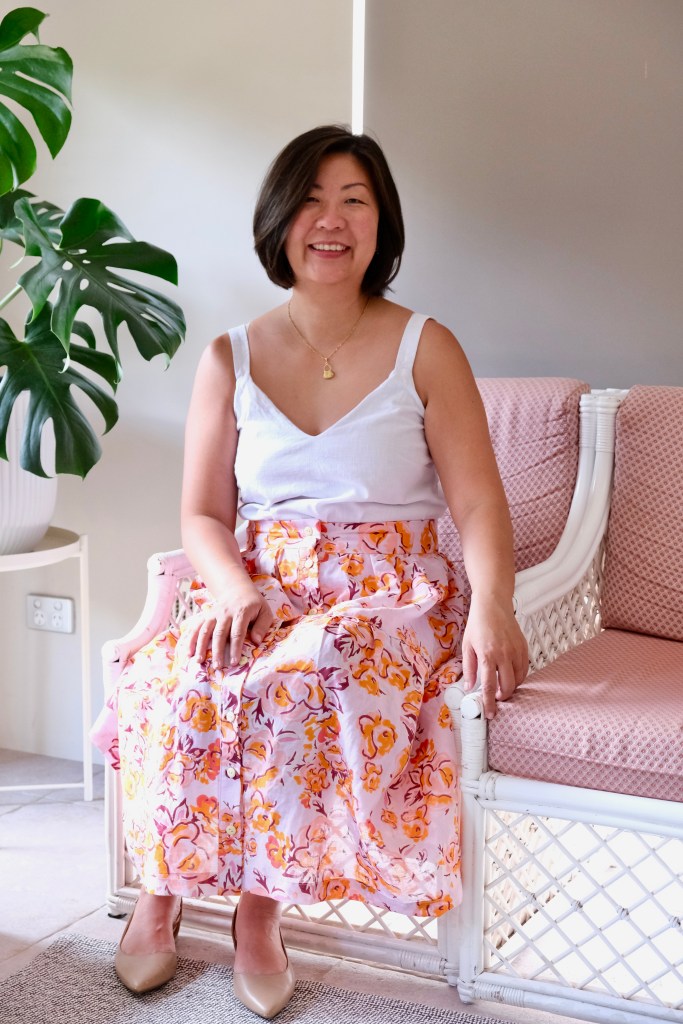
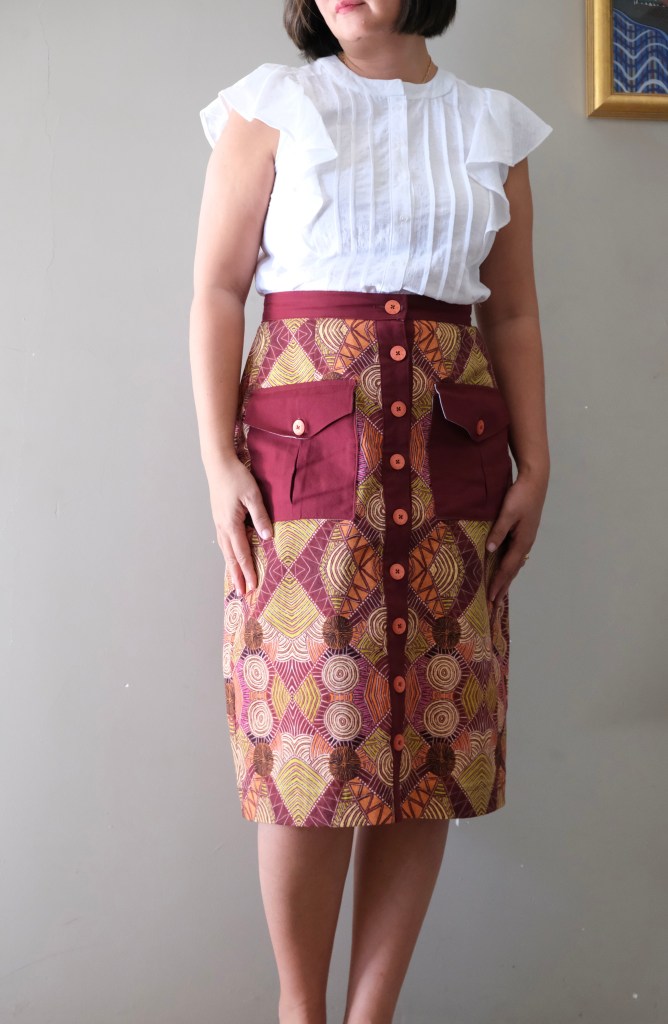
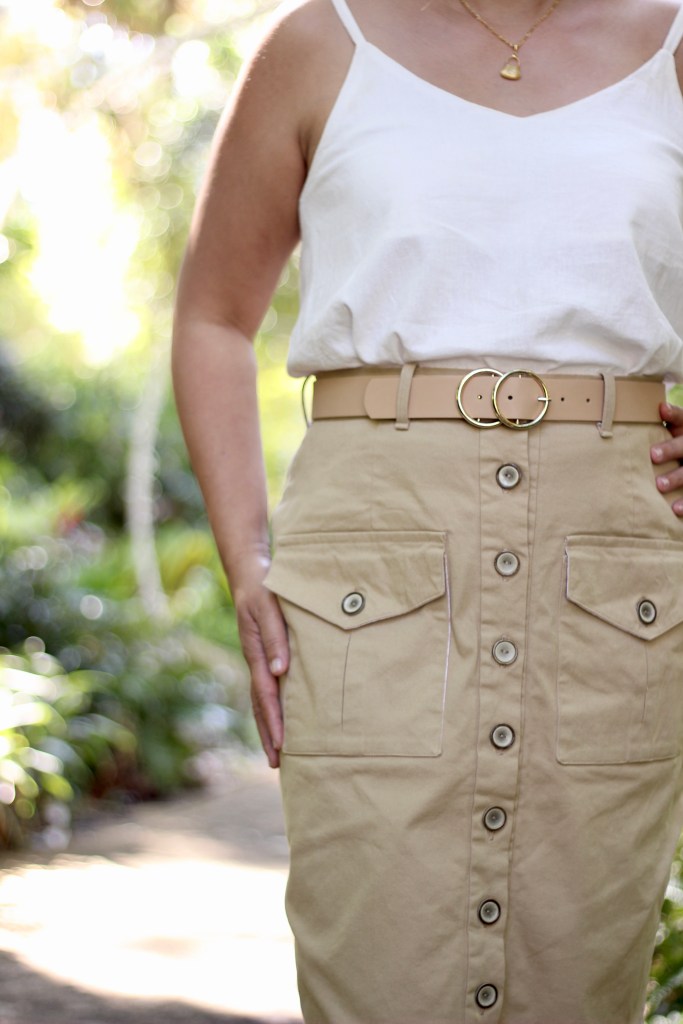
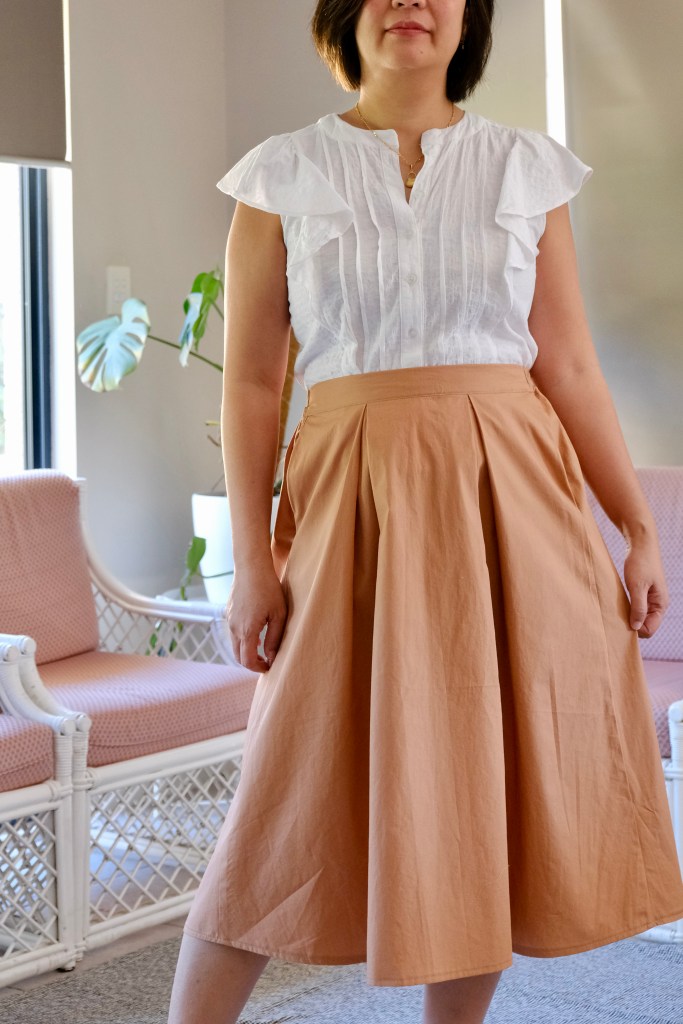
Don’t you love a dress with pockets? I loved how these pockets were constructed because they sit to the front. Also, the pockets are at the perfect level and are properly deep.

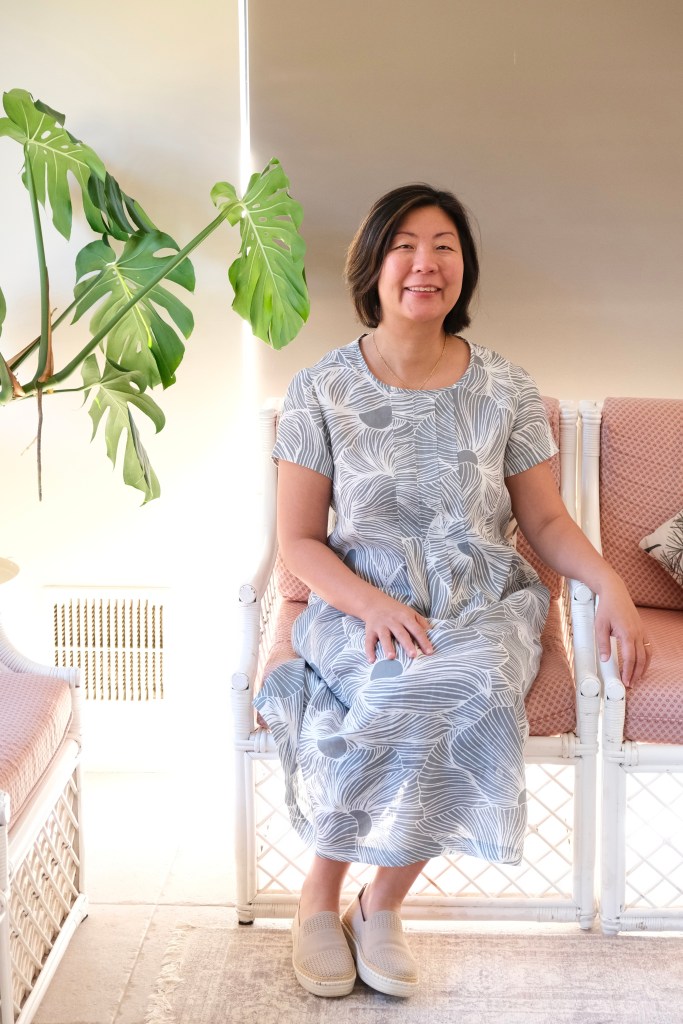
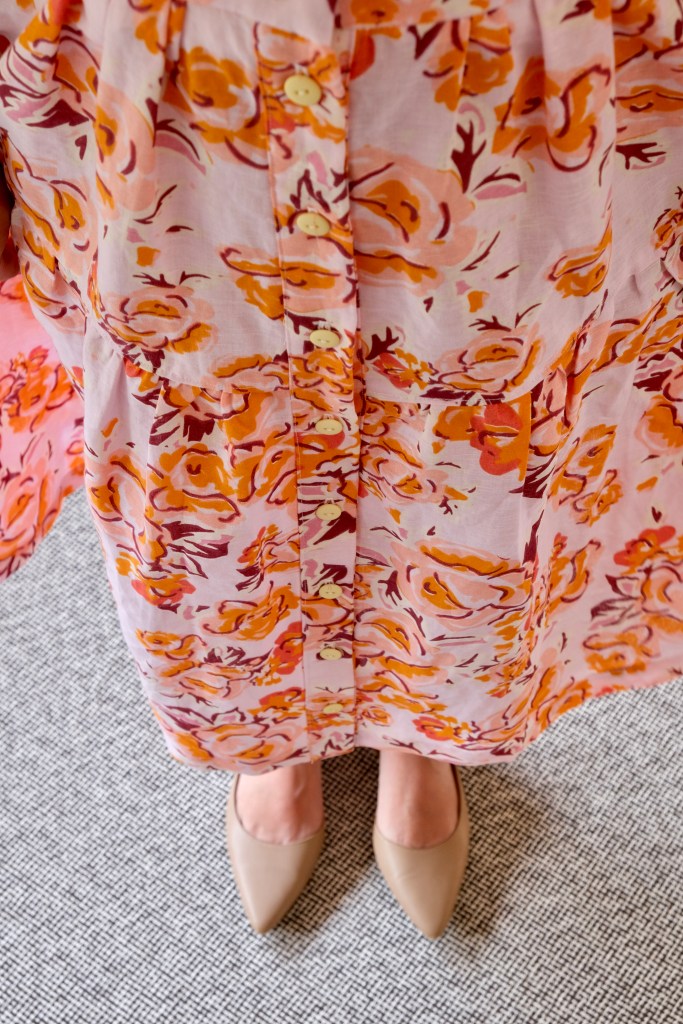
When I photographed the dress, I realised that the fabric is slightly gauzy and sheer. It’s still perfectly modest without needing lining. The linen is very lightweight; from memory it’s under 5 oz or 150 gsm and had a generous width of 150cm. I can’t wait to wear the dress when the weather starts to warm up. Linen is just so comfortable in summer. Looking at the Johanna Ralph collection, I think it’s going to be a hit with those bold, abstract prints.

Thanks for reading and happy sewing!

X Em

*Full Disclosure: The fabric was provided for preview and Instagram content. No blog post was required but I share everything on my blog and love documenting all my makes. All opinions remain my own.

Arcadia Dress

It’s always exciting to get onto the Sew to Grow testing team. Lindsey designs sewing patterns that are stylish and easy to wear for daily life. Among her many talents, she is also a sewing teacher so her patterns are always logically constructed and made to fit beautifully. I’ve been sewing her patterns from the start of my sewing journey and have learnt so much from them. 

The Arcadia Dress is a versatile pattern that comes as a top and a dress. It can be sewn as a sleeveless or long-sleeved tiered dress with a front tie on a lined split V bodice. I made two versions, a sleeveless short version and a long-sleeved maxi version. I love the relaxed vibe of the pattern and it’s such a versatile pattern.

I sometimes find tiered dresses to be very oversized and worry about swimming in volumes of fabric, but the Arcadia Dress is sized to fit in a flattering way. My measurements of 38-inch bust, 33-inch waist and 40-inch hips fit into the size 12 and I found the pattern true to size. No modifications were made except for my maxi version. To achieve the maxi length, I doubled the width of the bottom tier. 

The sleeveless dress used about 2.5 meters of fabric and my maxi version required about 4 meters of fabric. Luckily, there was a good sale on rayon fabric at Spotlight! I decided on rayon because the pattern is made for woven fabrics, and I thought the patterns would be showcased best by something lightweight and billowy. I also generally find rayon to be so comfortable to wear in the Australian climate. I think my sleeveless version will get a lot of wear in summer, but my maxi dress will get worn all year round.

There are so many positives of the pattern. I’m often pulling up straps with my sloping shoulders so I’m always trying to modify straps to sit on my shoulders. Well, I think I’ve found the perfect strap design because I haven’t had to worry about that with my Arcadia Dress. My straps on the sleeveless version stay put because the straps join onto the neckline with a long length of bias binding, and they seem to sit perfectly without any chance or length for them to slip off the shoulder.

Another nice feature is the v-opening with the ties which eliminates need for zip or button instalments. It’s a great dress to slip over the head and go. The bodice is lined too which gives the dress a beautiful quality finish. It’s these little details that make sewing your own clothes so worthwhile.

I’ve loved seeing the other tester versions emerge and there’s been a few tops that have been made. I’d love to come back to this pattern in the future to make one. This will be added to my TNT (tried and true) patterns. Lindsey was such a pleasure to test for. It was nice help her bring this pattern to life.

Thanks for reading and happy sewing!

X Em

Jackie Top

Have you ever come across a pattern that is made for both woven and knit fabric? The Dutch Pattern Studio released the Jackie Top which is made for both types of fabric. This is quite a rare phenomenon. I have seen people hack woven fabric patterns sometimes to suit knit fabric and vice versa. It’s also a pattern that has a few variations so it can be a summer top or a dress.

I had some leftover fabric from making the pattern test I did for the Maker Haus Nadine skirt and so I thought that rather than sticking it back into the cupboard and letting it sit there to oblivion, I would instead use it to make the Jackie Top. I picked the top with the ruffled sleeve openings because I thought it would make quite a cute matching set with the Nadine Skirt. Let’s see if I find an occasion where I can wear it as a set. 

So, because my version is made with woven fabric, I had to install an invisible zip into the side seam. I don’t mind installing zips, but I thought that if I added a back seam and a keyhole opening, I might be able to forgo a zip which would make it easy to slip the top over the head. I did this by adding a one-centimetre seam when cutting the back bodice rather than cutting the piece on the fold. Then when I went to sew up the blouse, I stopped the sewn seam at the level of the sleeves and left the seam above that open. I then extended the bias binding for the neckline so that I could have a tie closure.

It was a bit of an experiment because this make was a wearable toile as well as a bit of a hack. I basted the side seams together after I had created the back keyhole closure. At this stage, I had also decided to leave off the fisheye darts in the back bodice. It was possible to pass the top over my head, but I found it a bit snug getting in and out because the waist actually pulls in and fits quite close. There wasn’t enough ease in it to forgo the zip. So, once I had established that I wasn’t going to work, I then installed the invisible zip the left side seam. I left the keyhole opening because it looks like I would have needed to make a broad back adjustment. I also left the fisheye darts but now looking at the how the fabric bunches, I would include these in my next version of this.

I felt the sizing was quite true to size. My measurements of 38-inch bust, 33-inch waist, 40-inch hips fitted between size 42 and 44. The thing that confused me was that the measurements were given as a range. I printed and cut the 42 because the 44 was quite a jump in sizing on the printed pattern. I now wish that I had graded between the two sizes. I needed to grade to the 44 at the waist. I wasn’t keen because the pattern uses French darts rather than the usual bust dart’s folded construction, it is open and starts lower, so I wasn’t quite sure how to get around that. I was intrigued by the construction of the French darts, and I feel that they give a beautifully fitted look. 

In the end, I’m quite pleased with the final result. I feel that the pattern probably leant towards a woven construction. I’m not quite sure about doing the French darts and fisheye darts on a supple knit. It would probably work for a lightweight knit but then there would be the stretch of the fabric to consider. There wasn’t a stretch ruler or guidance on the type of knit you would use so I’m not sure what to advise. I should also mention that although a confident beginner could work out the instructions, it does not come with illustrations, and I couldn’t find any sew along tutorials. The instructions are perfectly good for someone with some sewing experience under their belt.

This is a comfortable and pretty pattern that I would be happy to return to. Some of my favourite features are the French darts and adding the ruffles to the sleeve openings with the neat finish of the binding. My neckline binding stands up a bit because I had to use the binding differently to add a tie closure but it’s something I’m happy to live with!

Thanks for reading and happy sewing!

X Em

Nadine Skirt

The Nadine skirt is the inaugural pattern released by The Maker Haus. Laural is the talented designer, and she says on her Instagram profile that she is sewing a Doen inspired wardrobe. I had to google Doen and I found out that it’s a Los Angeles based line of clothing that is inspired by the nostalgia of a decades past California. They feature touches of romantic, bohemian detailing like embroidery, ruffling and retro-inspired silhouettes. The Nadine skirt is a gorgeous skirt that has two variations. The first is a midi skirt which leaves off the ruffled hem and gathers. The second is a maxi that features those ruffles. I tested Version A. Both skirts feature gathered tiers, shaping around the hips and sits at the natural waist. There is also a button placket running down the centre front.

Laural was awesome to test for. She took her time modifying and correcting any fit issues and was quick to respond to feedback. She has worked hard and produced an outstanding pattern with detailed instructions and diagrams. I got a lot out of testing this pattern. The most exciting feature for me was learning about receiving tucks. Of course, like everyone, I usually buy patterns that I like the look of, but I always try to find something I can learn and progress my sewing with. 

My trial for the receiving tuck.

My skirt sizing is the size 14 waistband for my waist measurement of 33 inches because my sizing falls between the size 12 and size 14. I used the size 12 skirt pieces for my hip measurements of 40 inches. I made a toile to adjust the sizing. I could have graded between the two sizes and because it’s a fitted waistband, it is better to toile. I like the curved waistband but if you want a straight waistband, Laural has included instructions for adjustments to do this.

The Nadine skirt is drafted for woven fabric. It’s great for lightweight to medium fabric. I found a beautifully printed linen. I wanted to make my skirt summer appropriate, so I shortened the top tier by two inches and the bottom tier by one inch. Again, these adjustments were made on my toile when I was making the tester version so nothing to do with the fit of the pattern. In fact, when reading any post on tester versions, it’s important to note that the designer will share the final pattern with the Testers before launch but there might not be time to sew up the final version yet which is the case here.

I’m keen to return to the pattern and am currently keeping my eye out for the right fabric. I want to try Version B with the cute ruffles! This pattern is feature packed. I love learning how to do a receiving tuck which is such a neat way to finish the gathered tiers. In fact, the whole skirt now has instructions for French seams so it’s neat inside and out. It’ll be great for very lightweight fabric.

Congratulations to The Maker Haus for the launch and creation of a beautiful pattern! 

Thanks for reading and happy sewing!

X Em

Mia Dress

I’m so happy to be starting on my winter wardrobe. I wonder if anyone else finds themselves at the start of winter thinking that they should have added a few winter items in their summer sewing months. That’s probably me every year. I must admit that I probably sew more summer than winter items but that’s because our summers are longer. When Casey from Patternscout Studios reached out to ask if I wanted to test her latest design, I was so excited because it’s a winter dress. An item that is lacking in my wardrobe.

The Patternscout Mia Dress is a turtleneck knit fabric dress. It has raglan sleeves and a fit and flare high-low skirt which is a midi length. The pattern test went smoothly except I told Casey that my big head needed a slightly larger neck opening which she has adjusted. I made the size 12 graded to a 14 at the waist and hips and I used the Cup B pattern. This is why I’ve sewn so many Patternscout patterns and am happy to test for her. The sizing is spot on each time, and I love that she includes the different cup size options. It’s also great that printing the pattern is made so easy because you have a different PDF for each cup size option. My measurements are 38-inch bust, 33-inch waist and 40-inch hips. I think I could have just sewn a straight 12 being a knit fabric garment but I feel more comfortable when garments are not so “clingy”. 

I did make some adjustments for my own liking after I had submitted my toile and was sewing my “real” dress. I shortened my bodice 1/2 inch and shortened my skirt by 1-inch as the dress is for someone slightly taller. I also shortened my sleeves by 3-inches. These adjustments are usual for me so not to do with the fit. 

The fabric is a rayon-spandex from Spotlight Stores. There wasn’t a really big range to choose from at my local store. I would love to find a dark coloured plain rib knit like the one that Casey has modelled. Although, because our winters are mild, I might not get as much wear of my dress if the knit fabric is too thick. It is recommended for two-way and four-way medium weight knits with at least 50% horizontal stretch.

In other news, my second-hand Bernina that I scored on Facebook marketplace had to be retired. She has served me well but there is something wrong with the tension dials. When I purchased the machine, I was told about this problem, but I took the risk and bought it anyway. It was such a bargain price that I thought even if I had to pay for a service, it’s a worthy machine. So, that was five years ago, and this is the first time it’s shown some serious signs of failure. I will be repairing it at some stage. In the interim, there happened to be a great sale on overlockers at my local Spotlight store, so I decided on the Elna. It seems to have a few good reviews. I’ll wait a few months before posting my review.

Many sewists have said that they sew their knit garments fully on their overlockers. The Mia Dress pattern instructions assume this, but it can also be fully sewn on your machine and the instructions accommodate this. Armed with new overlocker, I decided to try this. Usually, I use both. The thing that confused me was the seam allowance. When you sew on your machine, you know where the allowance falls. On the overlocker, I’ve read that you account for the loss of 1/8 inch, a scant amount of loss which the blade removes when you are sewing with the overlocker. I think this is included within the 3/8-inch seam allowance. I hope, because that’s what I did. I did use my sewing machine with the twin needle to finish my sleeve hems and skirt hem.

Overall, if you’re like me and new to sewing knits, this would be a great dress to try out. It took me half a day to put together from cutting the fabric to finish. That’s quite a quick sew in my book. I would grade it as an intermediate pattern. In terms of fabric consumption, it didn’t take as much fabric as I thought it might. The chart is quite accurate assuming there is no pattern matching needed. I used 2 meters.

I’m looking forward to getting some wear out of this and I think I’ll be looking for some other similar patterns to try in knit fabric. I should also mention that Patternscout instructions are always great and accompanied by illustrations but if you want videos, she is has quite a huge catalog of YouTube videos.

Thanks for reading and happy sewing,

X Em

True Bias Blair Skirt

A while back, I was part of the testing team for this skirt. I really love the look. It was released for their autumn collection, but I think it looks great all year round. As part of a paid collaboration for Instagram, I was asked if I could make another version of the True Bias Blair Skirt

The skirt comes in three lengths, mini, midi and maxi. I’ve made the midi again because it’s versatile seasonally and I know I’ll reach for it many times. The general design is a skirt that is fitted over the waist and hips which then goes straight down to the hem. It has a front button placket and comes with the option of adding pockets with an inverted pleat, belt loops and a belt. I added all the extras! 

My sizing fell into the Size 12 range with my measurements of 33-inch waist and 40-inch hips and 167cm height. I didn’t feel that I needed to make any modifications. I think that the main watch point for fitting is the hip measurement because there is limited ease in the pattern. It’s true to say that I found the pattern true to size.

Fabric choice is quite straightforward for this pattern. Anything medium to heavy weight woven would be the way to go with the main fabric so I chose a light-coloured denim. This beige denim suits my style, and I wanted this skirt to be a staple in my wardrobe. I love colour and pattern but against a backdrop of something that is neutral. There is a bit of lining fabric needed for inner side of the waistband and the pockets. I used some beautiful scraps from Melco Fabric. It’s worth saving all the scraps from your sewing projects!

My skirt needed nine buttons for the button placket and two for the pockets. I feel I’m making some progress with button installation. I like how the pattern includes a guide for the buttonholes and button placement. It helps to take the guesswork out of the equation. I am tempted to get the button measuring gauge but wonder how useful it is. I’m starting to get quite a collection of useful sewing tools. Unfortunately, my buckles ordered from Amazon have not arrived at this time. When it finally arrives, I’ll be making the matching belt to go with the skirt. I’m quite keen to make my first proper belt!

Sewing the True Bias Blair Skirt was a pleasure. I’ve made many True Bias patterns and so glad I came across their patterns as a novice self-taught sewist. I learn so much from Indi patterns like these. No hiccups but also, I am learning that it’s important to go back and sew the patterns a few times. I feel that I could understand the pattern better and made some decisions of my own for my version. Simple things like using a blind hem stitch for the skirt hem, reversing the instalment of the button placket so I could stitch in the ditch because I preferred to minimise my stitch lines. My next version could be the complete opposite where I use top stitching to highlight all the stitching. The point is, sewing is such a superpower because we can customise what we’re making.

Thanks for reading and happy sewing!

X Em

Full Disclosure: Paid collaboration with True Bias for Instagram but all opinions remain my own.

Marigold Dress

I’ve been a long admirer and follower of Stitchmaiden Patterns but never brave enough to attempt a pattern because they look so technically hard. When Stitchmaiden reached out to me, I took it as a sign that it was time to stretch out of my comfort zone and I was so pleasantly surprised with the outcome. 

Firstly, the pattern I chose was the Marigold Dress. Each pattern draws inspiration from a period in history. The Marigold is from the Romantic Academia Collection. It is a pattern that keeps on giving because of the multitude of combinations possible with just a switch of one or two features. There are three versions which are suggested for the seamstress. The basic concept is a square neckline with princess seams and a fitted waist. I chose the suggested Version A which has a slim fitted skirt, but I chose the butterfly sleeves from Version C, and I left off the ruffled hem. There is also a belt that is sewn in which I chose to keep.

With this many options, I thought that printing and putting together the pattern was going to be time consuming and difficult but there is a comprehensive table, and it made the whole process quick and painless. There are two ways to print the pattern, one is without the seam allowance and the other is with the seam allowance added. I’m more used to having my seam allowance included so that is the one I chose. This is where it got interesting for me … I mistook the sewing line for the cutting line. I had printed the size 42 and size 44 because I fell between those two sizes and needed to grade the pattern. In the end, I decided to only cut the size 44 and grade from there but as mentioned, I cut the sewing line! To make matters worse, I cut into my “good” fabric thinking I had enough seam allowance and ease with the larger size to then “fit” it once I had cut the fabric pieces.

The dress has an invisible zip closure, so I did the usual basting stitches on my side seam and basted my zip. Imagine my panic when I couldn’t zip up the dress and there was no amount of ease or seam allowance that could help! It really puzzled me for the afternoon then I went back to the pattern and thought I’d start again, and this time make a better toile. When I reprinted the pattern, I realised my mistake which was actually a relief! It was me, not the pattern.

I chose the size 42 and 44 for my measurements of 38-inch bust, 33-inch waist and 40-inch hips. I graded the bodice from the 42 to the 44 waist and hips. The dress is a tailored fit with moderate ease, and I felt that this worked well for me. When I make the dress again, I might adjust the princess seams as well.

Initially, I was going to use a beautifully printed linen but because of my mistake, that fabric will now be made into a dress for my daughter. Instead, I had this green crepe the chine which my husband bought me that I’ve been keeping for a special make. He bought me 5 meters of this fabric of which I’ve used about 3.5 meters. The crepe the chine is drapey and light which is beautiful to wear. It highlights the skirt, the gathered front and butterfly sleeves nicely. I actually think this fabric was a better match in the end.

The pattern comes with some of the most extensively detailed instructions and illustrations which are great to learn from, but they also provide a summarised set of instructions for the more experienced sewist. I used the detailed instructions and appreciated the two pages of Basic Workmanship which is great for those looking to extend their sewing repertoire.

Stitchmaiden Patterns have a vintage vibe and draw inspiration from history but they really are timeless classics. This will be a dress that transcends passing trends and I’ll be wearing it time and time again. It’s a pattern that can be changed easily with so many mix and match options, so it is a “TNT” (tried and true) pattern for me. Oh! And another thing, please now refer to me as Stitchmaiden Emily.

Thanks for reading and happy sewing!

X Em

* This pattern was provided for a review with no obligation for a blog post.

Valentine Ruffle Top

This is the latest pattern from Peppermint Magazine in collaboration with their sewing partner Spoonflower. The pattern is a romantic, ruffle blouse. It can be worn on or off the shoulder. We used to call this a “peasant blouse” in the 80s but I’m not sure if that term is still used. There’s no buttonholes or zips. It’s a pull over your head blouse with the elastic all around the top of the top. The pattern is offered with a subscription to the magazine or downloadable from the website with a pay-what-you-can option.

The pattern is drafted for woven fabric. I decided to use two remnant pieces from my stash and combined a broderie anglaise with a cotton slub which were both in white. I was pretty happy with the outcome but there is quite a lot of volume in the bodice. In fact, I was quite worried when I was making the top that I had printed the wrong size. Next time, I would choose an even thinner and drapier fabric like rayon, viscose or georgette.  

My measurements of 38-inch bust, 33-inch waist and 40-inch hip, fitted the size F. The most important measurement is the bust measurement as there is a lot of ease with the waist size and the hip measurement isn’t really relevant. I increased the elastic length from 73.4cm to 100cm because I found that the original length would not allow me to wear the blouse off the shoulder. This is all included in the pattern instructions.

So, did I need to worry about the fit of the blouse? Not really! Once the elastic goes in, the blouse magically shrinks to the right size. As a compulsive overthinker, I find it difficult to trust the process. Sewing has been good for me and has taught me to be better at having a go. I also need to take more breaks in my sewing. I think I reached that stage of the elastic casing, and the illustrations were not making any sense to me. It was a good place to stop and everything made perfect sense when I returned to it the next day.

I’m really happy with how it’s turned out. I had a peasant blouse when I was in Grade 6. I wore that blouse everywhere. Now I get to recreate it with this pattern! It’s a great pattern for a beginner and the instructions are good to follow. I’ve styled with my Vanessa Hansen Carrie Skirt and the ELOH patterns Sorrento Shorts. It’s an easy piece to style. I wonder if I could hack it into a playsuit?

This is my official last pattern for 2024! I am looking forward to some down time with family. I’m excited to make some plans for 2025 but I’ll share those in a separate blog post. Thanks so much if you’ve been following my sewing journey. 

Thanks for reading and happy sewing!

X Em

Ritual Dress

Featuring Fabric from the Devonstone Fashion Summer Abroad Collection by Lindsey Rae

So excited to feature the latest fabric collection from the immensely talented Lindsey Rae @sewtogrow. It’s currently available for wholesale through Devonstone Fashion. It was hard to pick which design I wanted but I settled on the Cornwall Oceanside Print in a luxe linen cotton blend. It is fifty-five percent linen and forty-five percent cotton, 180-185 gsm and 145cm wide. The pattern is reminiscent of wildflower fields. I love the riot of colour in this collection. Best of all, it will also be available in a variety of substrates like rayon, poplin, and jersey to name a few.

Cornwall Oceanside Print

The pattern that immediately came to mind when I received the Cornwall Oceanside Print Linen was the Swimstyle Ritual Dress. I had bought this pattern last year but was waiting for the perfect fabric to match it. It’s basically a shirt dress but with the additional features of the drawstring waist casing in a maxi length. I haven’t had the opportunity to sew many collars and cuffs, so this was another consideration in my choice. The instructions for these are superb for entry level sewists.

As with any other sew, I washed the linen cotton on a cold cycle and popped it on the medium setting in the dryer. There was no noticeable shrinkage and no fading of the dye. I like how the addition of the cotton to the linen helps to reduce wrinkling and cuts down the time it takes to iron. I do appreciate that relaxed vibe that wrinkling in linen can give but I prefer to start wrinkle free and earn the wrinkles along the way.

Of course, I also checked my needle. I left it on the universal 90/14 gage needle that I had been using. I matched the fabric with the Gutermann CA 02776 thread. I’m not sure the colour of the print shows up in the photos, but the print consists of shadows of mauve flora on a background of green. 

The Ritual Dress has quite a lot of ease in the pattern sizing, so I chose my usual Size L for my measurements of 38-inch bust, 33-inch waist and 40-inch hips. I did not make any modifications. My height is 167cm. I felt the pattern was true to size and fitted comfortably. Perhaps the sleeves could have been shortened slightly but I wanted to have the full-length sleeve and a properly maxi dress. I guess I’m great at sewing summer outfits, but I really need to make items that will see me through the cooler weather. I think this dress fits the bill nicely.

The collar and cuff instructions were great if you lack experience in this area. It’s really made for novice level and can highly recommend it. The Summer Abroad linen cotton has been such a good quality fabric to sew with. It still has that slight stiffness that linen starts with so it feels a little bit course on the skin but that will soften with a few washes. I know that’s sometimes a concern with linen, but it really doesn’t take long for it to season to a soft and pliable garment.

Hopefully, the Summer Abroad collection will be available for purchase soon from your favourite fabric store! Currently, it’s available for wholesale through Devonstone Fashion. Keep your eyes out for it from the Sew To Grow newsletter.

Thanks for reading and happy sewing!

X Em

Ele Skirt

It’s been a minute and a half since I’ve sat down to do some sewing. I decided that when my all my kids finally graduated from school, I would treat myself to extending some of my own education. It turned out to be extremely challenging but satisfying and was happy to pass my course. I’ve had to turn off all my social media just to concentrate and avoid the temptation to sit at my sewing machine. Now finally, I’m happy to be back sewing. I realised that I have come to rely on sewing to relax and decompress.

The pattern I chose to sew first was the Sewing Therapy Ele Skirt. I got it when it launched and it’s the perfect skirt weather with our weather warming into spring. It was a relatively quick sew and has great instructions. Again, Sara keeps all her instructions concise but detailed. She also includes great sew along videos on YouTube which I did watch.

I like the Ele skirt design of the flat front and elasticated back waistband. It’s more comfortable these days to wear items that have a bit of flexibility in the waistband. Hands up fellow endo sufferers and perimenopausal women. I want structure but comfort, if that makes sense. The fit is true to size. I made the size 12 with no modifications. My measurements are 33-inch waist and 40-inch hips. The pattern advises using the hip measurements to choose your sizing. 

The fabric I’ve used is a 100% cotton lightweight poplin. Even though I have largely stopped shopping ready to wear, I sometimes pop into Uniqlo to browse and I really love that style of shirt-fabric skirts that they stock. I’m happy with the choice except for a minor hiccup when I discovered that the narrow fabric did not fit the skirt’s pattern piece. To compensate, I trimmed the pattern piece and took a wedge off without affecting the hip or waist measurements. I’ll need to be more careful to find a wider piece of fabric when I make it again.

The pocket construction was one of my favourite features of the pattern as well as the list of options for the front pleats. I chose to make the big, inverted pleats but there was also a gathered option, knife pleats, reversed knife pleats. It’s fun when a pattern can be customised to your liking. The pockets are large enough to fit you hand and phone. Very useful indeed!

Another successful pattern from Sewing Therapy. I’m embracing neutrals and solid colours currently. I’m trying to make things that would match and balance out my more colourful, patterned makes. 

Thanks for reading and happy sewing!

X Em