Andi Set Top

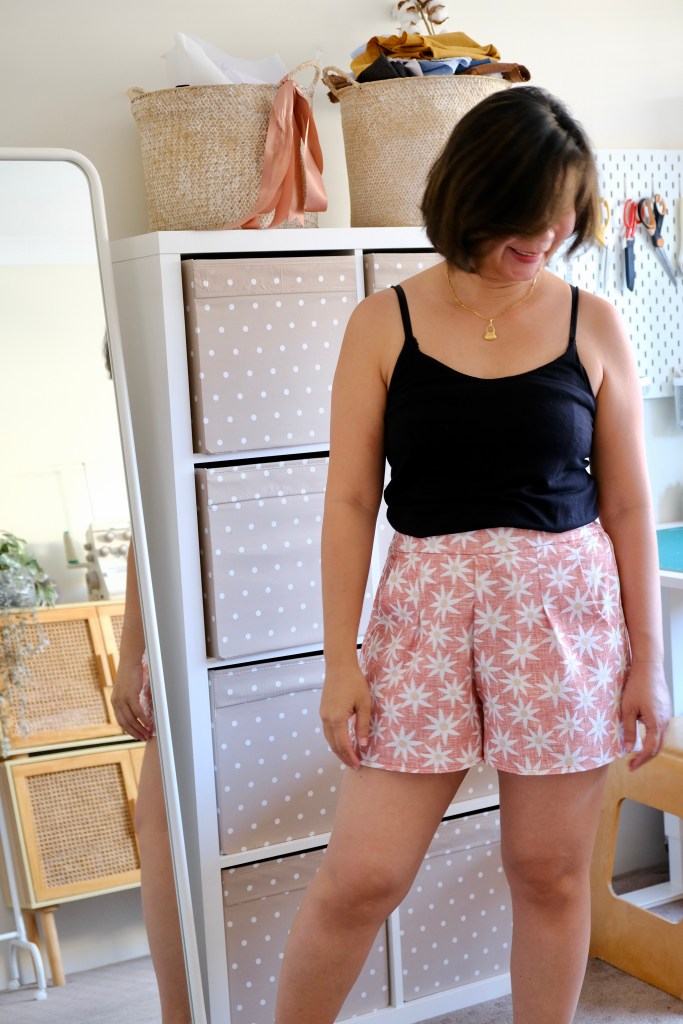
So, have you ever made something thinking it might not exactly be your style and it ends up being something you absolutely love? This is the Andi Top from the Swimstyle Andi set. I was curious about the design, which is what made me apply to be a Swimstyle Ambassador in the first place. It has a certain style and flair that is so unique and when you see the drafting, you’ll know what I mean.

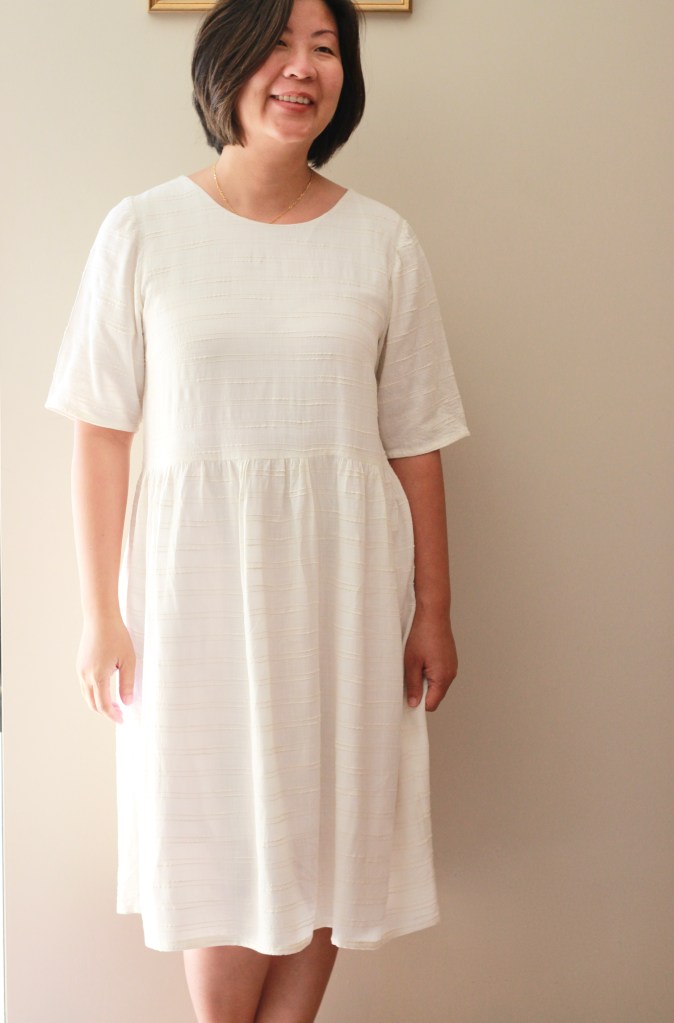
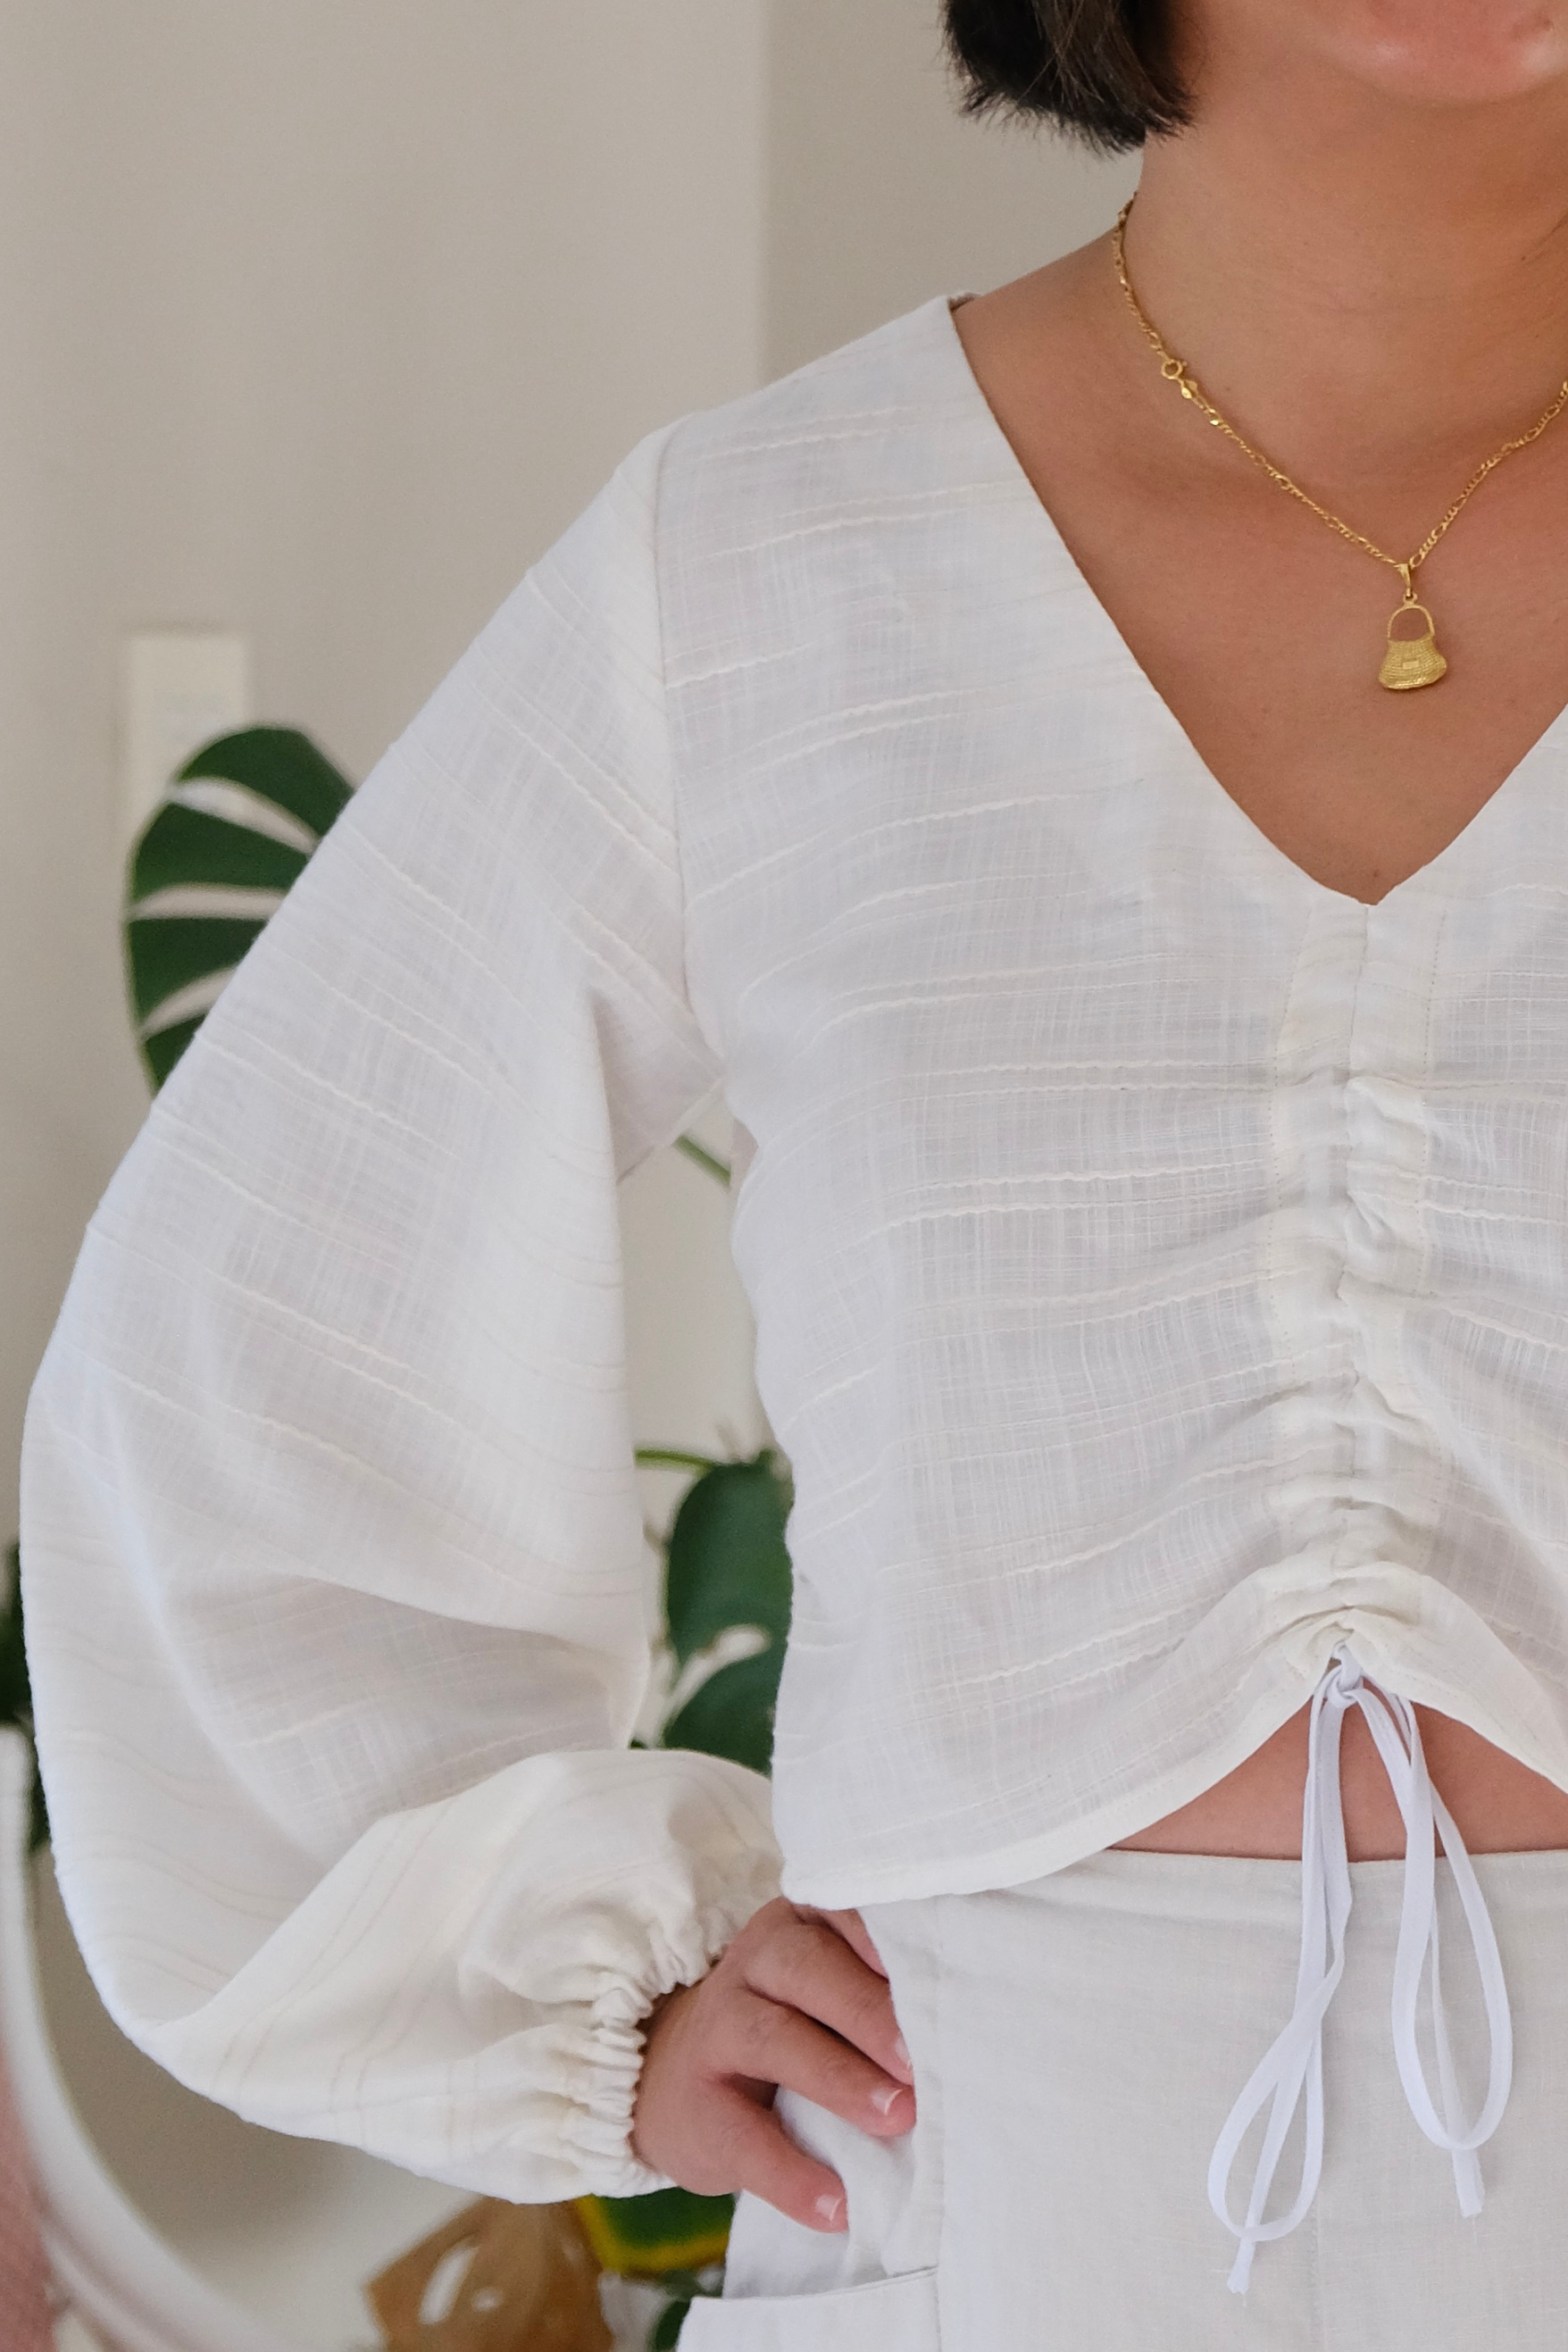
My version of the Andi Top has these billowy long sleeves that are attached to a bodice with a deep V and these ties that can be adjusted. I have quite a modest amount of tummy showing but the main idea is that it gives shape to the bust area without needing darts. It’s a very flattering top. I’m positively happy about the ruching created by these ties and the channels in the front. 

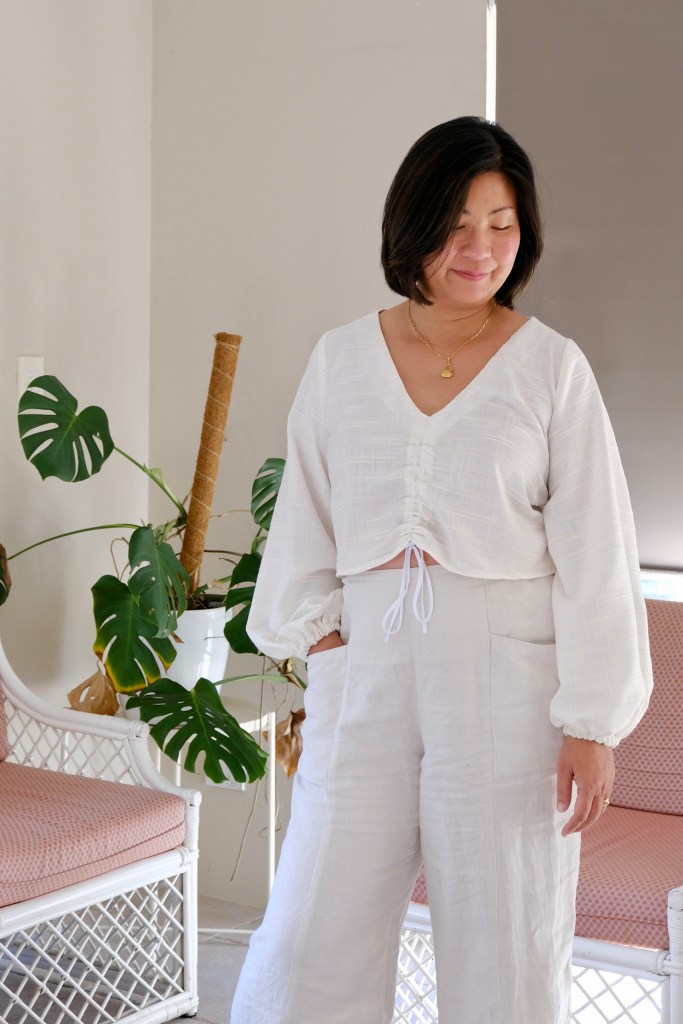
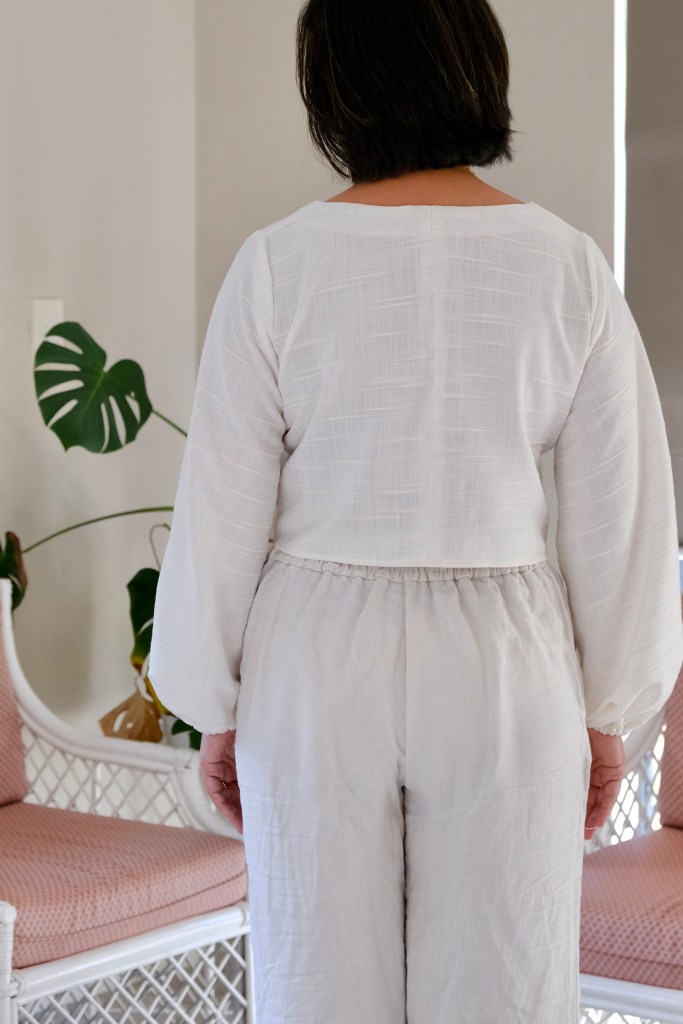
For my measurements of 35-inch high bust, 38-inch full bust and 33-inch waist, I’ve made the Size L. It’s a great fit but it’s quite cropped so next time, I would lengthen by an inch. For this top, I sewed a narrow hem or a cheat’s rolled hem by sewing a straight stitch ¼ inch from the bottom of the hem and then pressing the hem up twice.

If you’re like me and can’t work a loop turner for all the money in the world, you could use some bias binding to make the tie for the blouse. It really saved my sanity. I know everyone has their special tool or technique, but it really stresses me out when I have to make a narrow rouleau. I simply folded the long edge to the middle and then folded over again in half and edge sewed the tie.

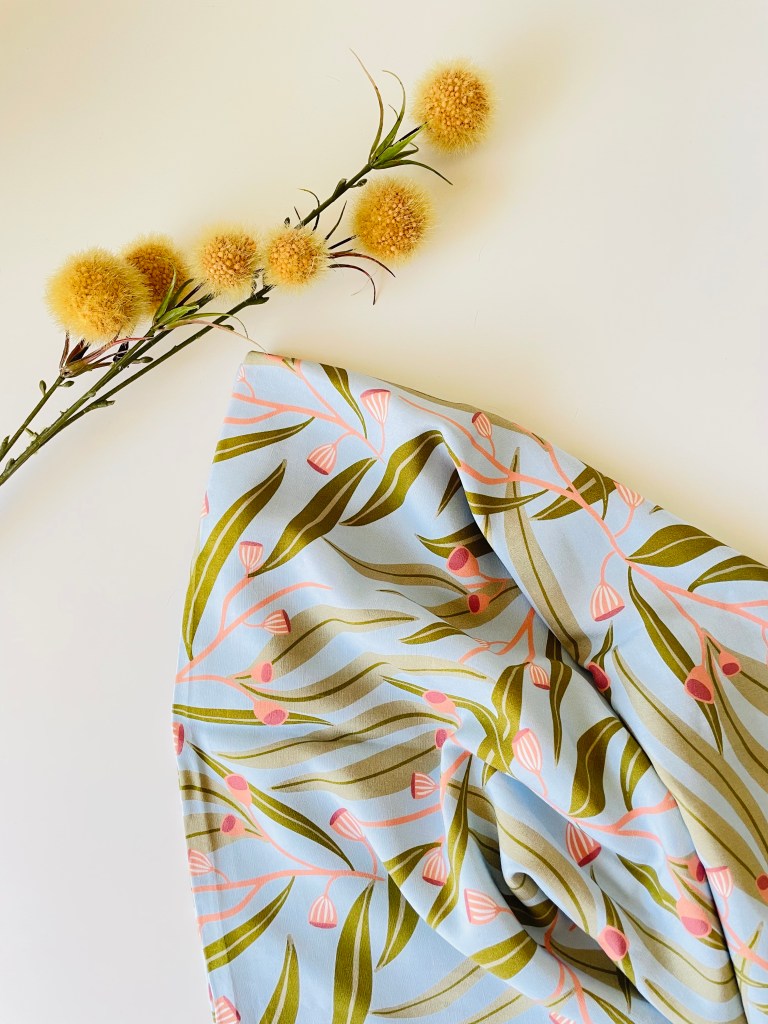
The Andi Top is made for woven fabric. My fabric is a sheer lightweight textured cotton. I had this on my Make Nine 2024 list where I wanted to use up nine pieces of fabric from my stash. I thought it was a perfect pairing because it’s very easy to gather this fabric. I also love the subtle texture woven into the fabric. The top probably appears quite white, but it is more of a soft beige.

I will definitely be sewing the matching skirt to this Andi Set. It’s been such an enjoyable sew. I noticed that Swimstyle Patterns have some unique features like the tabs that make it so easy and accurate to match up the pieces. I was grateful for this because my fabric did not really have a right side or a wrong side, so these tabs made it easy to tell where the pieces needed to be attached. The comprehensive illustrations helped there as well!

Thanks for reading and happy sewing!

X Em

Lanti Swing Dress Again

I can’t believe it’s been almost two years ago when I was a tester for the release of this Sew to Grow Lanti Swing Dress pattern. I’ve always meant to come back and sew it again because I do wear the two that I’ve made a lot especially my flax-coloured version. I have really enjoyed coming back to make the pattern as I knew the modifications I wanted to make, and I was already familiar with the sizing. Also, the pattern pieces are already put together which meant I could get into the sewing part faster.

For this version of my Lanti, I wanted to use this Yarn Dyed Linen Grid Check which I bought from Megan Nielsen Patterns when she still had a shop. It’s such a beautiful quality linen that I have been hesitant to use it and also when you buy fabric ahead of time, you have to see if the pattern’s fabric requirements match your available fabric. I had 2 meters x 150cm available. The Lanti Dress comes as two versions, one is the smock style dress and the other is an A-line version. Initially, I thought I would take the opportunity to sew the A-line however, it would have wasted ¼ of the fabric. After looking to Pinterest for inspiration, I decided I wanted to make the smock style but add quite a lot of length to the skirt and to make it with short sleeves. 

The smock dress has an empire waist with a boxy bodice. I kept to the size 12 that I previously made for my measurements of 38-inch bust, 33-inch waist and 40-inch hips. I modified the pattern by lengthening the skirt to 30 inches and narrowing the width of the skirt by 4 inches. I wanted to make the dress a midi length and I needed to narrow the width because the linen had a bit of body to it. It probably sits between the light and medium weight gage. Another small modification was to swap a button and button loop closure for a tie closure.

The instructions and illustrations with Sew to Grow patterns are well set out and written. However, I found myself deviating and sewing the pattern from my own preferred construction. I think that is a natural progression as you gain experience. Small things like pocket construction, seam finishes or attaching facings can all be sewn in different ways with the same outcome. 

Needless to say, I’m happy with the outcome. My new Lanti Swing Dress will be easy to layer with leggings or with a cardigan thrown over. I was also experimenting with shoes. Chunky white sneakers or something neutral. The dress is so versatile and I’m looking forward to adding it to my autumn/winter capsule wardrobe.

Thanks for reading and happy sewing!

X Em

Tallulah Top

Last week, I received the very exciting news that I was part of the Swimstyle Patterns Ambassador Program! For my first pattern, I thought I would get onto sewing some resort wear for my upcoming holiday. The cutest pairing popped into my mind with the Tallulah Tie Top and the Tamarama Pants, the latter being part of its own set. I’m focussing this review on the Tallulah Top and will save the Tamarama for its own review.

The Tallulah Top is a boxy shaped top with a deep tie. It can be worn with the tie in the back or in the front. It has grown on sleeves, and it is finished with biased binding which can be ready made or there’s very detailed instructions on how to make your own. This time, I’ve chosen to save time and fabric by using ready-made.

I was quite nervous cutting into my fabric because I’ve not sewn Swimstyle Patterns before, so I was wondering about the accuracy of sizing. There was no need to worry as it was spot on for me. For my measurements of 35-inch-high bust, 38-inch full bust and 33-inch waist, the closest fit was the size L according to the sizing chart. I feel very comfortable with the fit. I decided that I’m more comfortable with the tie in the back and it falls in the perfect position to cover my bra strap.

Fabric choice is something I’m still learning about, so I was really happy that Swimstyle Patterns include an extensive list of specific suggestions. The pattern is made for woven fabrics, and it suits something lightweight and with fluid drape. I had a stash of rayon fabrics from East Coast Textiles which I had bought in anticipation of sewing something for the humid weather I’ll be travelling to. I decided it would be fun to use the Banana Leaves in Green. 

The instructions printed with the PDF pattern, and I was worried that they would be too brief for me because there weren’t many pages. However, the patterns instructions are well set out with excellent illustrations that accompany the instructions in a clear and logical way. There were also photographic instructions that I could access which are a great additional reference. The pattern pieces were marvellously drafted. It felt quite architectural, and I was amazed at how everything came together. It was so enjoyable to sew something drafted in such a unique way. You can tell that this is drafted by someone who has had many year of experience in pattern drafting.

I’m looking forward exploring more of this unique drafting with my collaboration with Swimstyle Patterns. 

Thanks for reading and happy sewing!

X Em

Avola Top

Another great pattern from Cashmerette! I love this wide strapped version of this camisole top from Cashmerette. I wanted a plain white camisole top, and this is such a well-fitting top. I’m also very happy with the length as I prefer to wear my tops untucked so this lands at just the right spot for me.

I’ve used the Cashmerette sizing calculator, and it has been so accurate that I have been confidently skipping the toile. Not that it’s recommended but I’m sewing for an upcoming trip and this sizing calculator has not let me down yet! For my measurements of 35HB: 38FB: 33W, it was recommended that I sew a C Cup, size 10 bodice grading to a size 14 waist. I think it’s very comfortable and the only adjustment needed was to trim 1.5 inches off the straps.

The fabric is from my stash. It’s a beautiful white linen/cotton blend with subtle texture created by the weave.  For the lining, I’ve used a white muslin. I tend to use muslin for lining because it’s very light and the weave is loose, so it’s works very comfortably as lining. Sometimes, if the lining is made from stiff cotton, it can pull the shell of the top or dress out of shape. Whatever, you use for lining must be loose and have some give.

This pattern also comes as a dress. I have some fabric earmarked for the dress. This pattern is lovely as a slip dress. I want to use the other strap option which is a narrow strap and uses rings and sliders to make it adjustable. That would be something new to try as I’ve never sewn that before.

A future Avola Dress?

This top will be a great core item in my closet. It’s fun to make colourful dresses but it’s items like this which are the workhorse of a closet! Happy to be adding to my basics collection.

Thanks for reading and happy sewing!

X Em

Sorrento Shorts

When Eloh Patterns released the Sorrento Shorts pattern, I was quick to jump on and buy it because I love the look of that flat front and I find semi elasticated trousers and shorts to be quite comfortable. Anything that doesn’t squeeze me in the middle! These shorts come with the bonus of extra big pockets, and I love the little flare facilitated by the pleats in the front.

It’s a straightforward pattern to sew and fit. I made a size 12 with my waist measurement of 33 inches and hip measurement of 40 inches. I did receive an email after my purchase with updated instructions about choosing the right size as the waistband is narrower than the hips. I usually look at both hip and waist measurements before deciding on a size. Sometimes I grade between sizes. I was unsure why that instruction had to be updated in the pattern? I did my usual try on before attaching my waistband and everything worked out fine in the sizing.

The pattern suggests medium weight fabric, so I chose to use some leftover poplin from my stash. Feeling very pleased that I’m working through my stash this year. If I’m honest, the motivation to get through the stash is so I can justify buying some great fabric that I’ve bookmarked. Just waiting for sales! The poplin has worked very well for the pattern.

Seam allowances. This pattern has 2cm as the seam allowance due to French seams. I must be honest and say that I overlocked my seams as I only tend to use French seams with thin, lightweight, or delicate fabrics. I know it’s the choice of the seamstress and the pattern maker but I was wondering if the French seams would be bulky in this category of fabric? I ended up trimming all my seam allowances down to 1cm to reduce bulk. I guess you can argue that 2cm is not that far from a 5/8-inch seam allowance which is quite standard for woven fabric patterns so I didn’t necessarily have to trim the seams down. 

Generally, my one little criticism is a storm in a teacup because overall, Eloh patterns has impressed me. The fit, design and instructions that included illustrations are an excellent standard. I won’t hesitate to purchase more of her patterns. It was a really relaxing sew which is much needed after a stressful week. I love how sewing focusses my mind on something completely different for a while. Also, straight after sewing, I put them on, and they are superbly comfortable to wear! Great for the heatwave we are experiencing.

Thanks for reading and happy sewing!

X Em