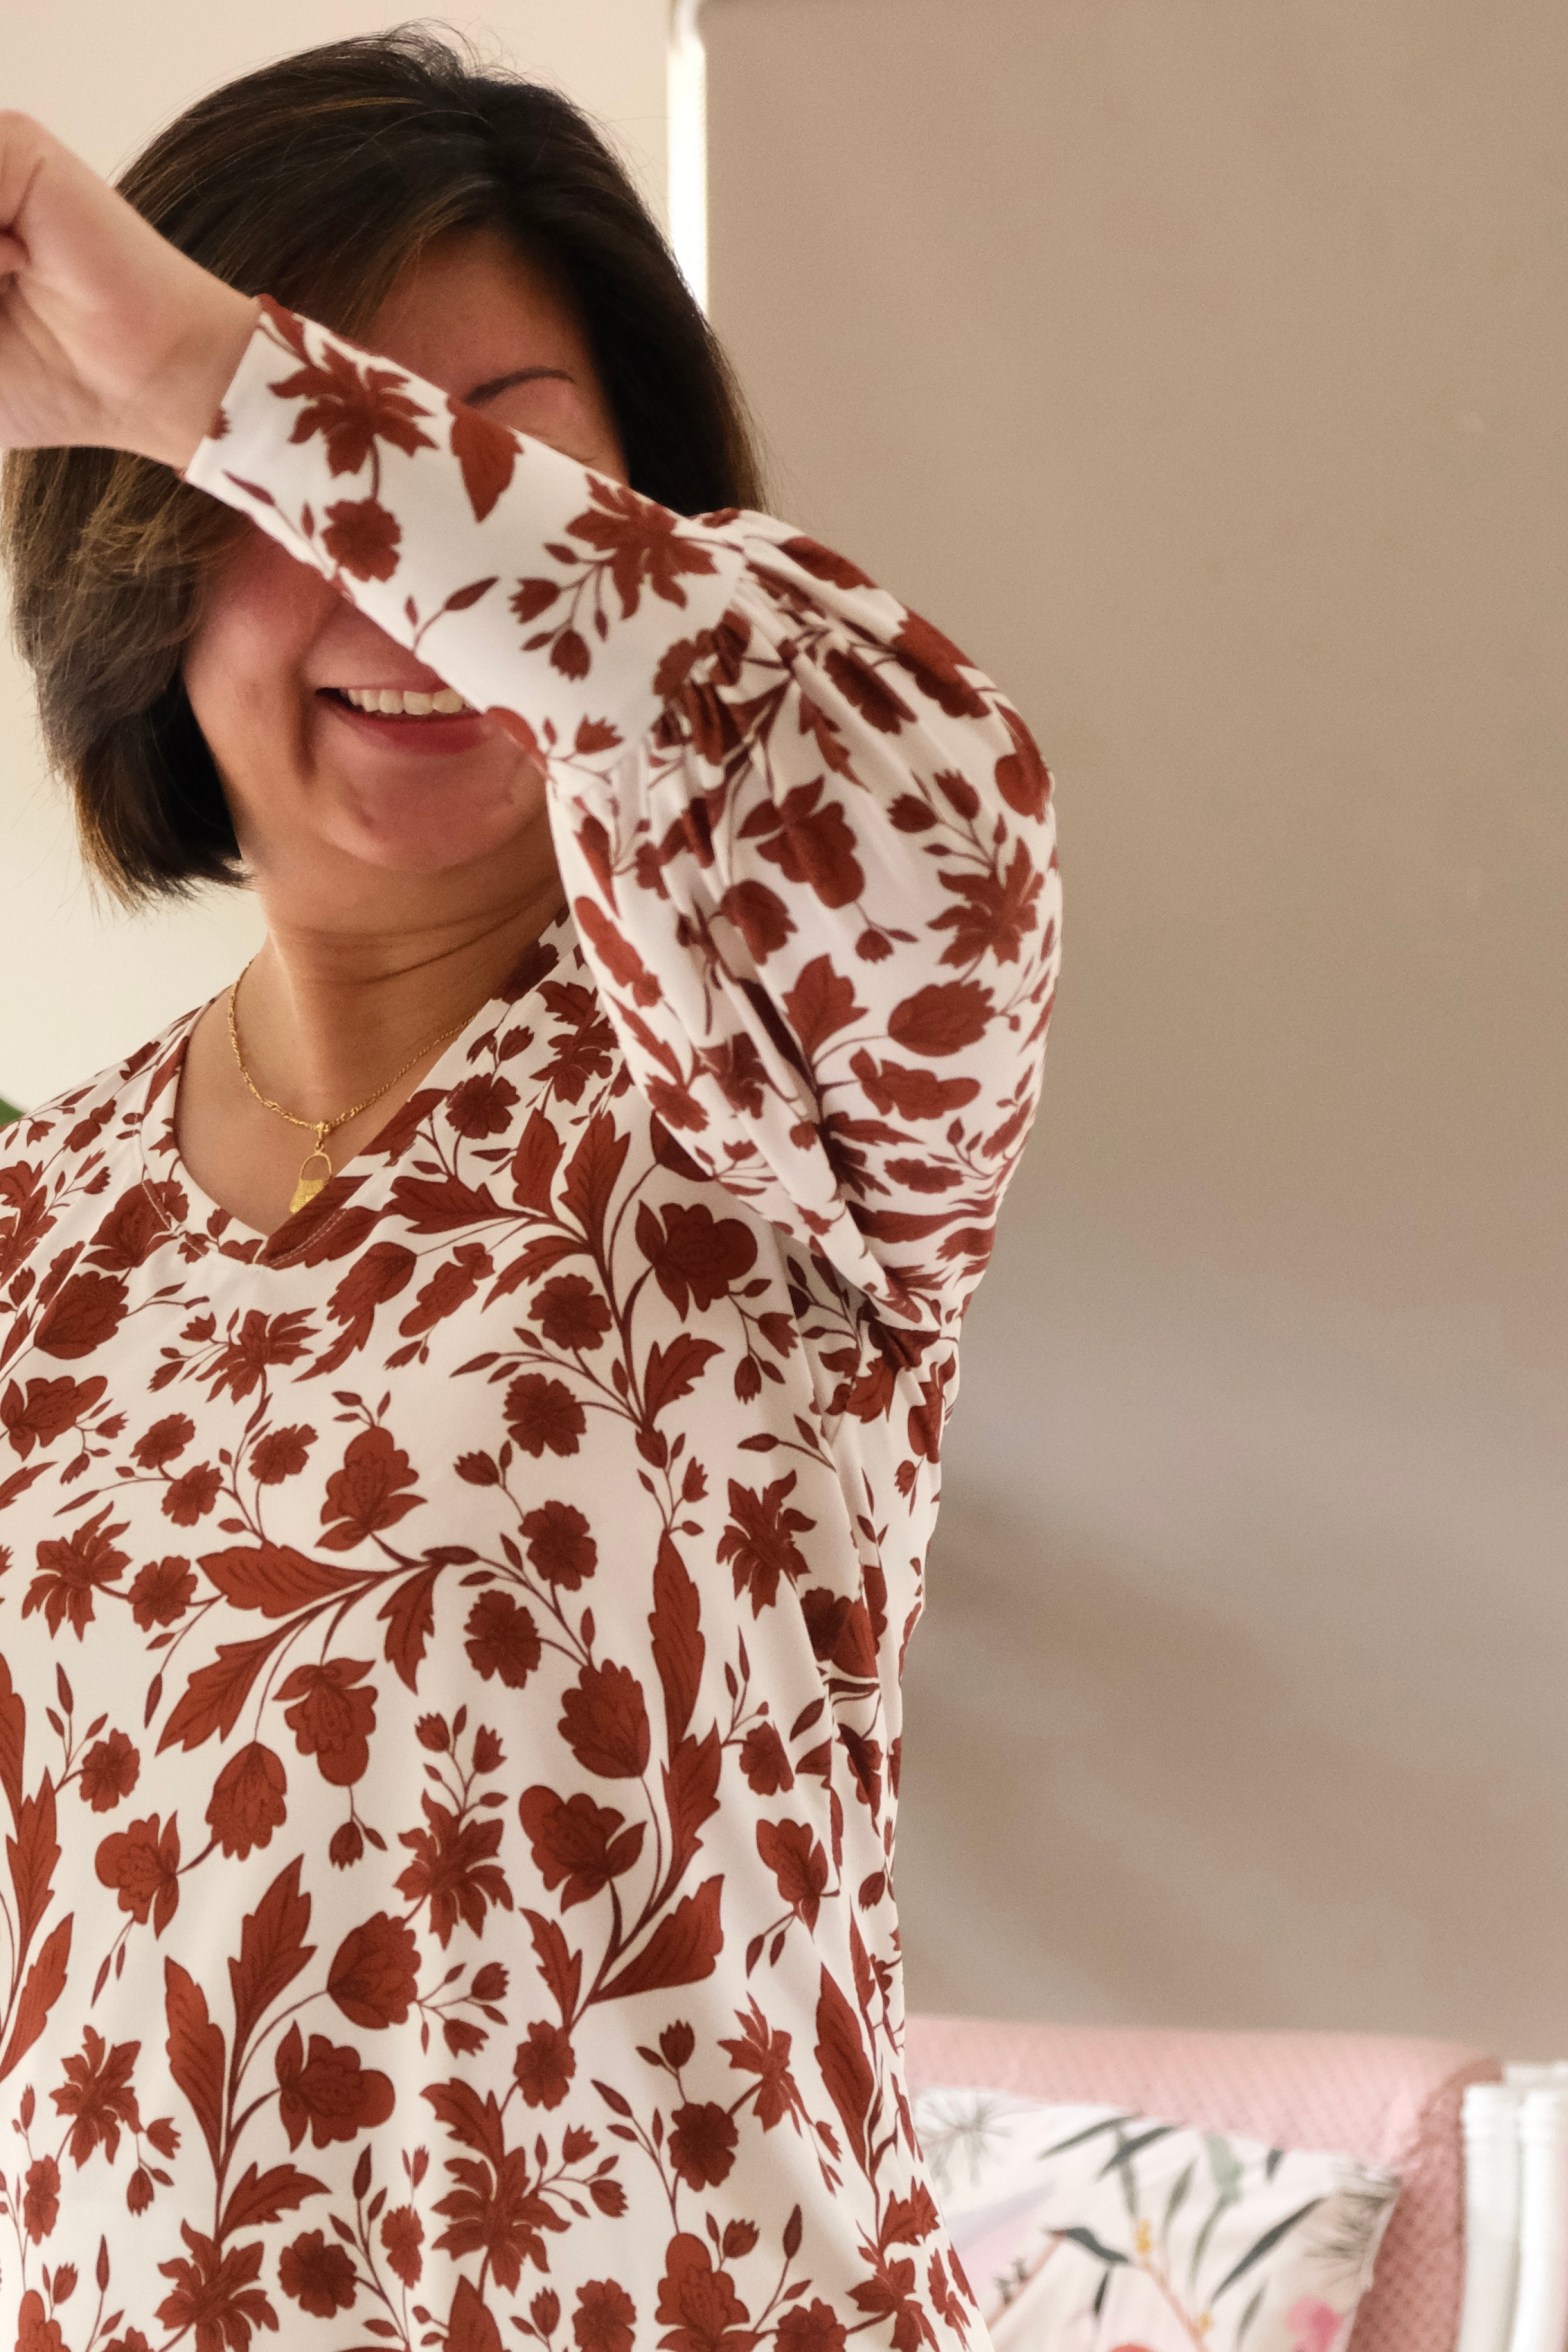
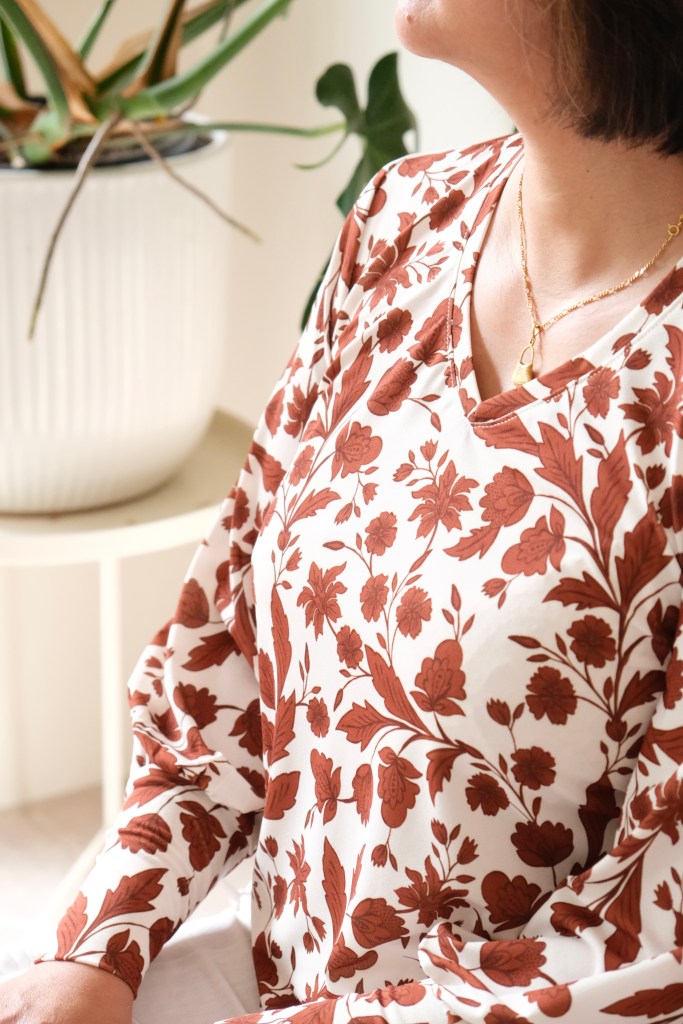
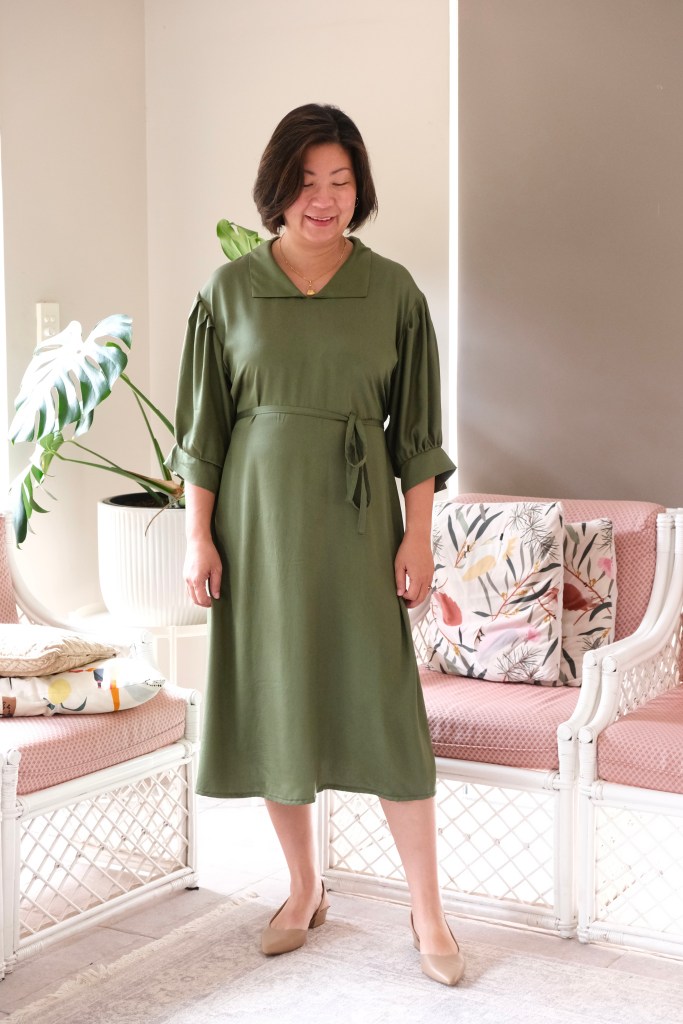
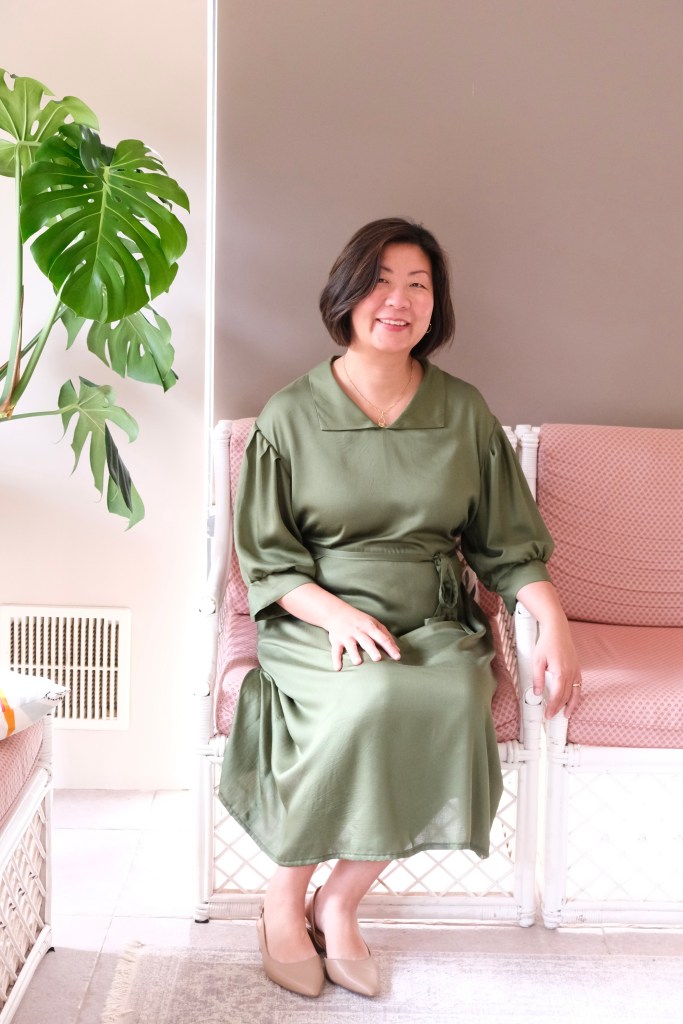
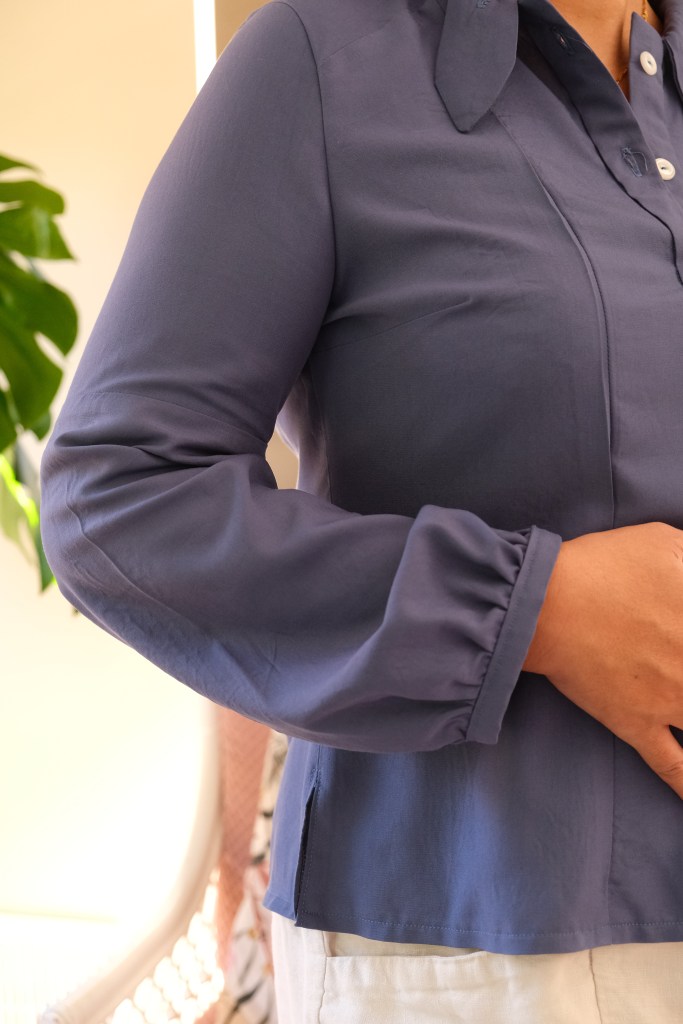
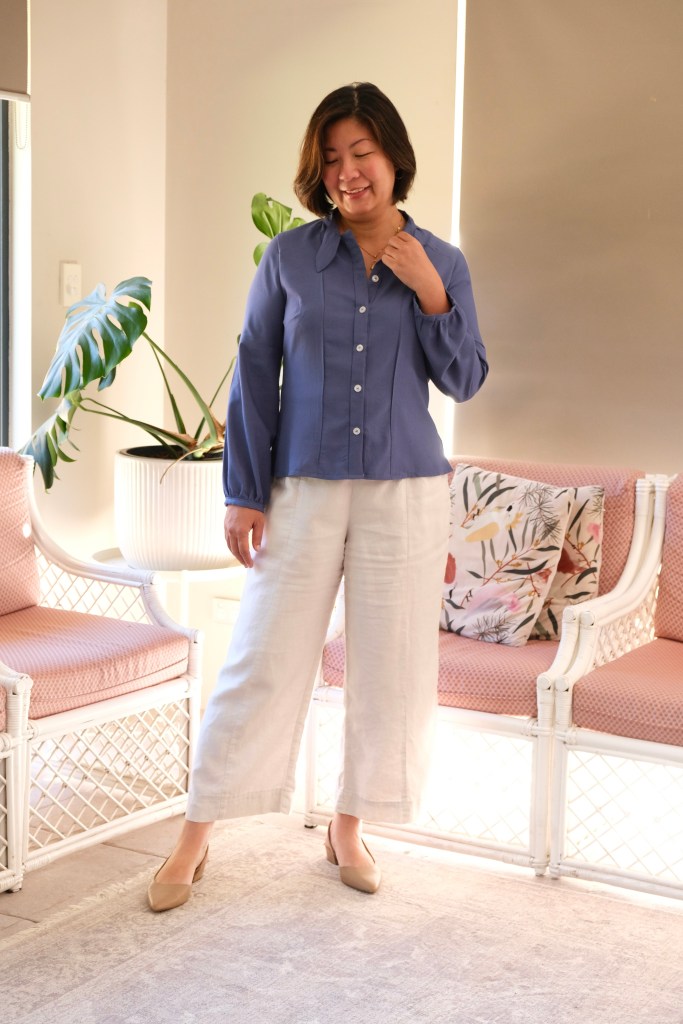
I’ve been trying to be more adventurous with knit fabric. I came across this floral stretch crepe jersey fabric from The Fabric Store Online which has a beautifully fine texture with good drape. I bought a 125cm x 150cm wide piece which I thought would be lovely for the Vera Knit Top pattern from Forget Me Not patterns. I’ve been meaning to sew this lovely top featuring bishop sleeves using the long cuff option for a while and finding the perfect fabric has prompted me again. One of the suggested fabrics was viscose knit which is why I thought the crepe jersey would be a good match.
Floral Stretch Crepe Jersey (White Coffee)
Forget Me Not has generously offered this as a free pattern to the sewing community and it includes all the detailed instructions that come with her other patterns. There are no short-cuts just because it’s a free pattern. It is a great way to sample their incredible patterns.
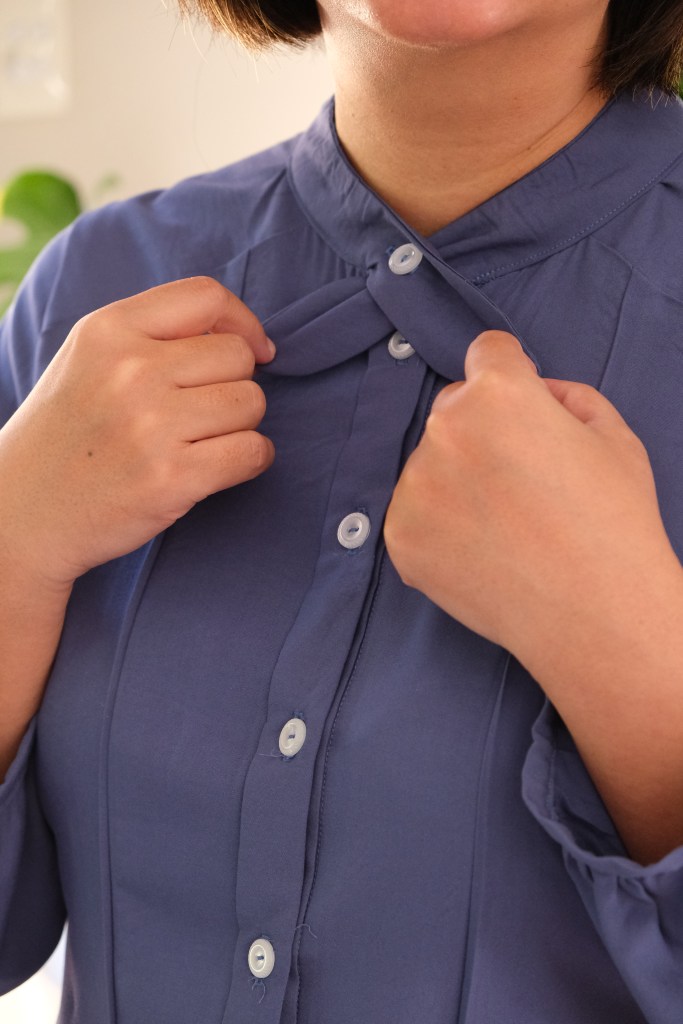
The blouse is based around a B-cup bust. My measurements of 38-inch bust, and 33-inch waist and 40-inch hip sits between a size 38 and 40. The pattern is nested which make it super easy to print. I decided to print both sizes and graded from the size 38 to 40 and added one inch to the length from the bottom of the blouse. The top features a V-neck and it’s fitted in the bust with more ease around the waist.
Features of the Vera Knit Top
Knit fabric is always a bit tricky for me. I’m still gaining experience with handling the stretchy qualities of knit fabric. The instructions are excellent with tips all the way on how to handle the fabric, which needle to use and what stitch to sew with. It really takes all the guess work out which is so helpful. Another quality of the fabric I should mention is that there is more stretch one way than the other which has been fine for this blouse as the pattern is quite versatile. I would love to make a winter version with merino wool or something similar.
Vera Knit Top
I’m excited to add this top to my Spring Capsule Wardrobe. I’m hoping to sew a skirt as well to wear with this, but I think it will match quite a few items I have. I know I’m categorising my sewn items into different capsules but obviously any item can be worn for any season. With my love of neutrals and browns, everything could fit into an Autumnal theme. I’ve just been organising my sewing this way to get a better cross section of items into my handmade wardrobe.
I’m feeling more confident with knit fabric coming away from this. I want to practise with this pattern a few more times so I’ll be on the lookout for more fabric suitable for this pattern.
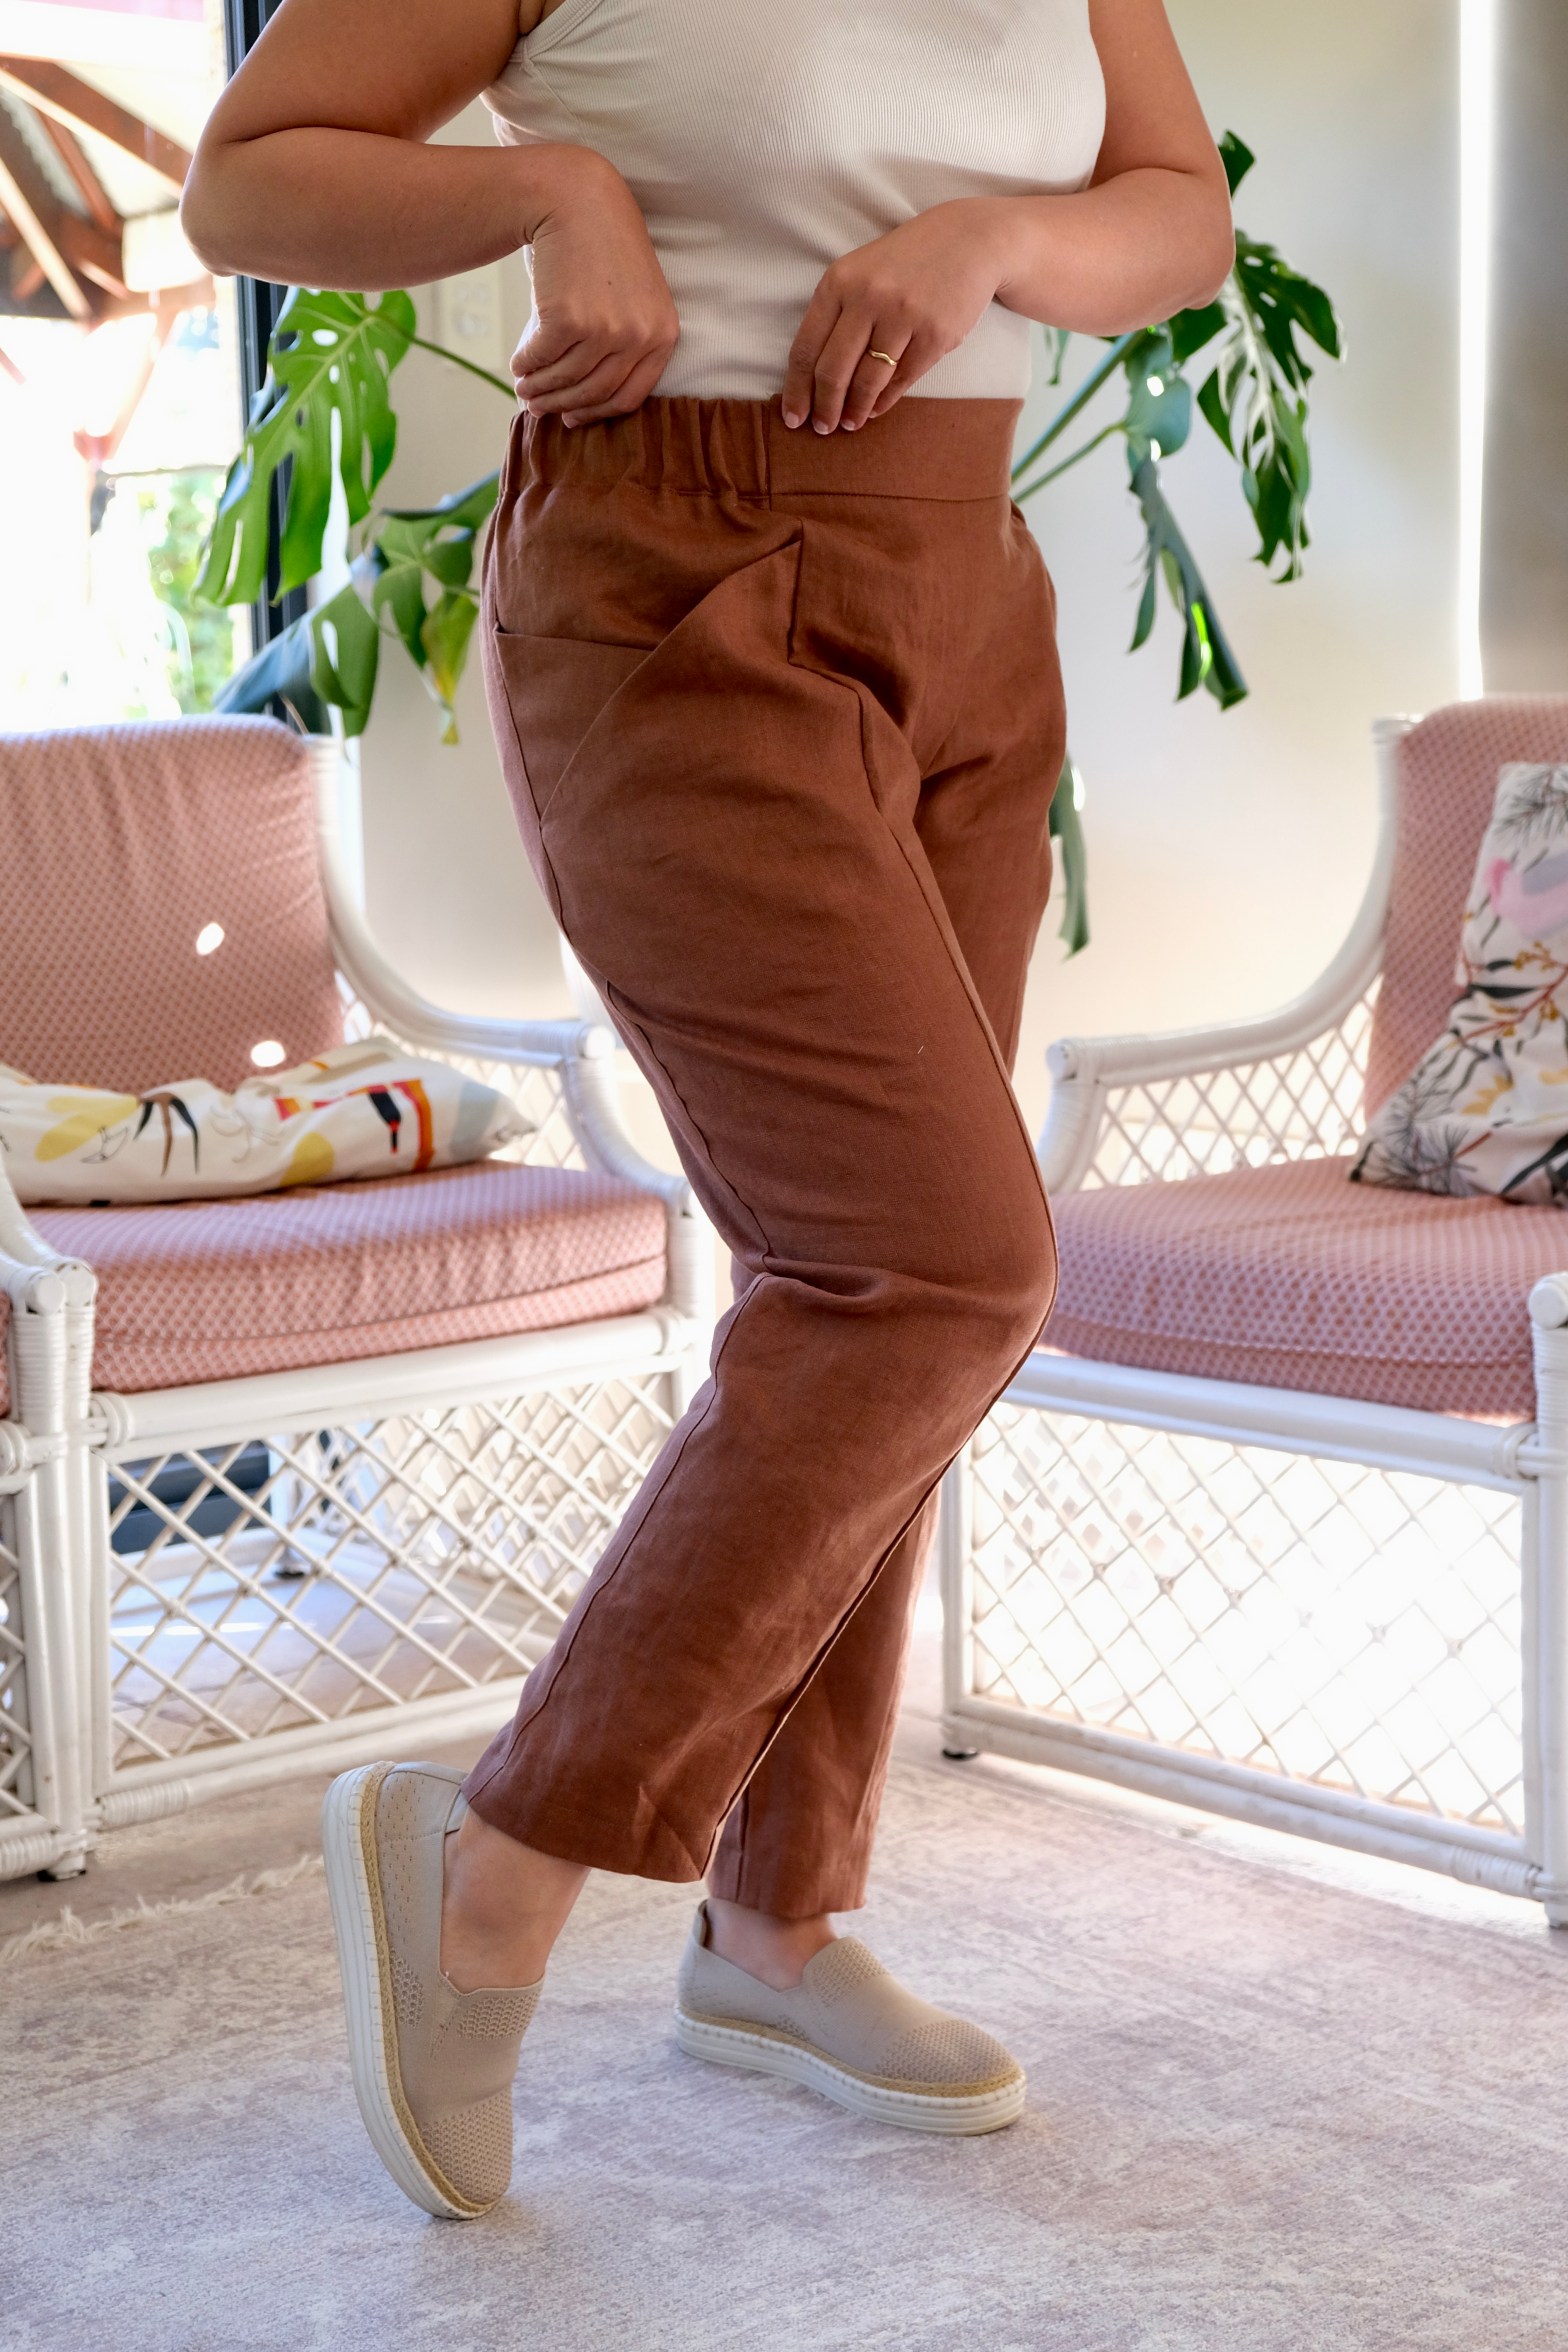
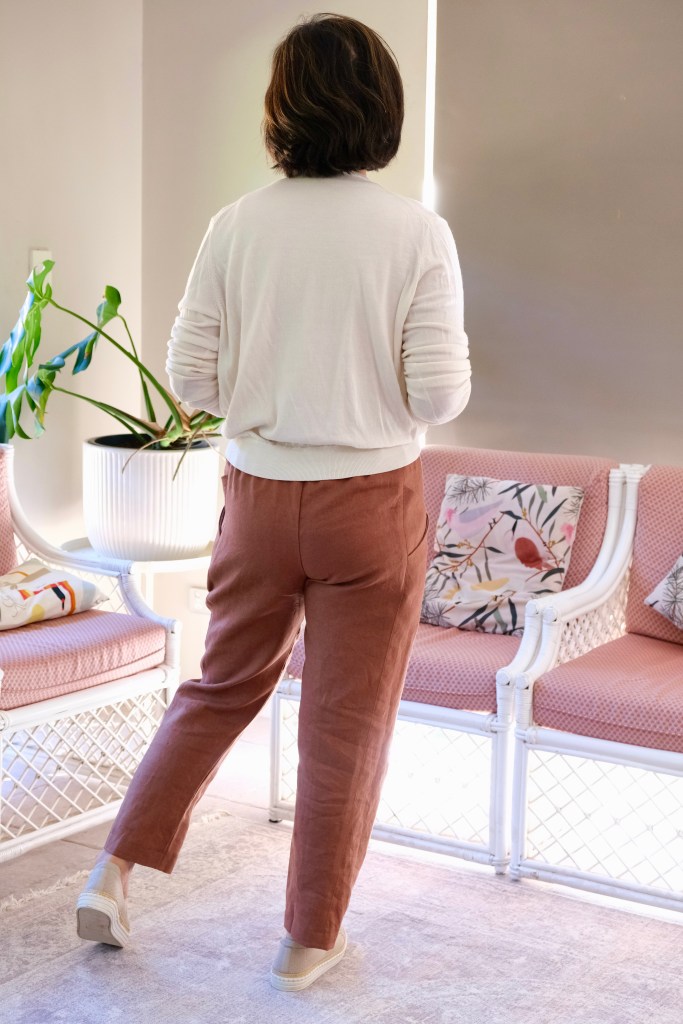
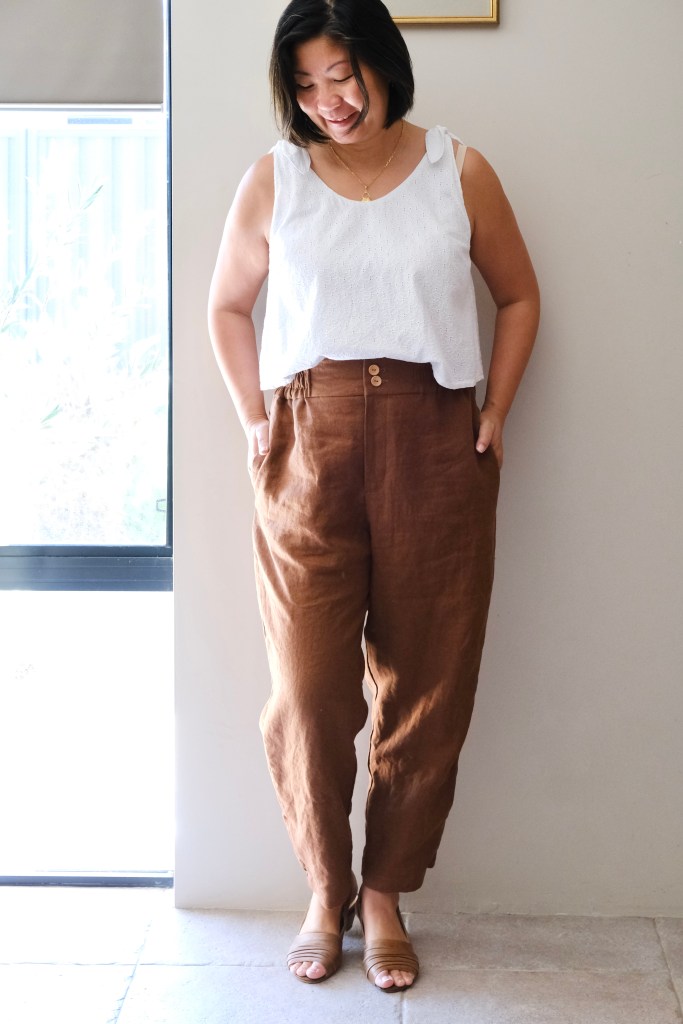
It’s been a nice slow start back into my sewing. I wanted to do some planning and organise my sewing in this second half of the year. Sewing ad hoc can be fun and spontaneous but during Me Made May this year, I realised that I was short on a few essential items. Also, before my travels, I was madly sewing trousers so I could pack them. I want this second half of my sewing year to be calm and I want to be prepared before the season starts. Another part of my planning involved looking through all my patterns. I’m hoping to sew the unsewn patterns and to return to some which brings me to this Papercut Pattern classic, the Palisade Pants.
My first version of the Palisade Pants
I made these about 2 years ago when I collaborated with Maai Design for their Lyocell Twill fabric. I get a lot of wear and have always meant to return to sew them. The unique pockets are the highlight of the design, and it is a popular pattern in the sewing community. The pants taper elegantly down to the ankles and is a slim fit but made comfortable by the semi elasticised waistband.
This version of the Palisade Pants is made with suiting linen. What’s the difference between linen and suiting linen you ask? Suiting linen is thicker and the weave is tighter. I didn’t realise the difference and have made trousers in the past from what I thought was standard linen, but they tend to lose their shape sooner and it isn’t as hard wearing as pants need to be.
When I first sewed this pattern, I toiled it using the shorts pattern. In hindsight, it wasn’t a good idea because the shorts are wider at the thighs. The pants are quite narrow fitting with less ease so I should have used toiled using the actual pants pattern. I remember sewing the size 4 with the original version but had to narrow the inner leg seams to make everything fit. This time, I cut and sewed the Size 5 without any modifications except to shorten the pants by 2 inches. When I re-read my previous blog post about the Palisade Pants, I said I sewed the size 5 but when I looked at my pattern pieces, they were the size 4 so I must have mistakenly thought I made the size 5. I reprinted and used the size 5 this time for my measurements of 33-inch waist, 40-inch hips.
The pockets are not the only unique feature of this pattern. Instead of side seams, there are centre front and back seams. It’s an interesting feature and I think it works well in making a clean, slim silhouette. It also helps with the pocket feature. In past toiles, I would baste the side seams and inner leg seams so that adjustments are fast to make but following the pattern, I couldn’t use that same method. Luckily, the size 5 was true to size for me once I had made the length adjustment and the waistband was easily adjusted because of the elastic.
I have sewn a lot of Papercut Patterns for good reason. I feel that so many items match my style, and the instructions and fit are always spot on. I really felt good about this sew and happy to tick another item off my handmade spring capsule.
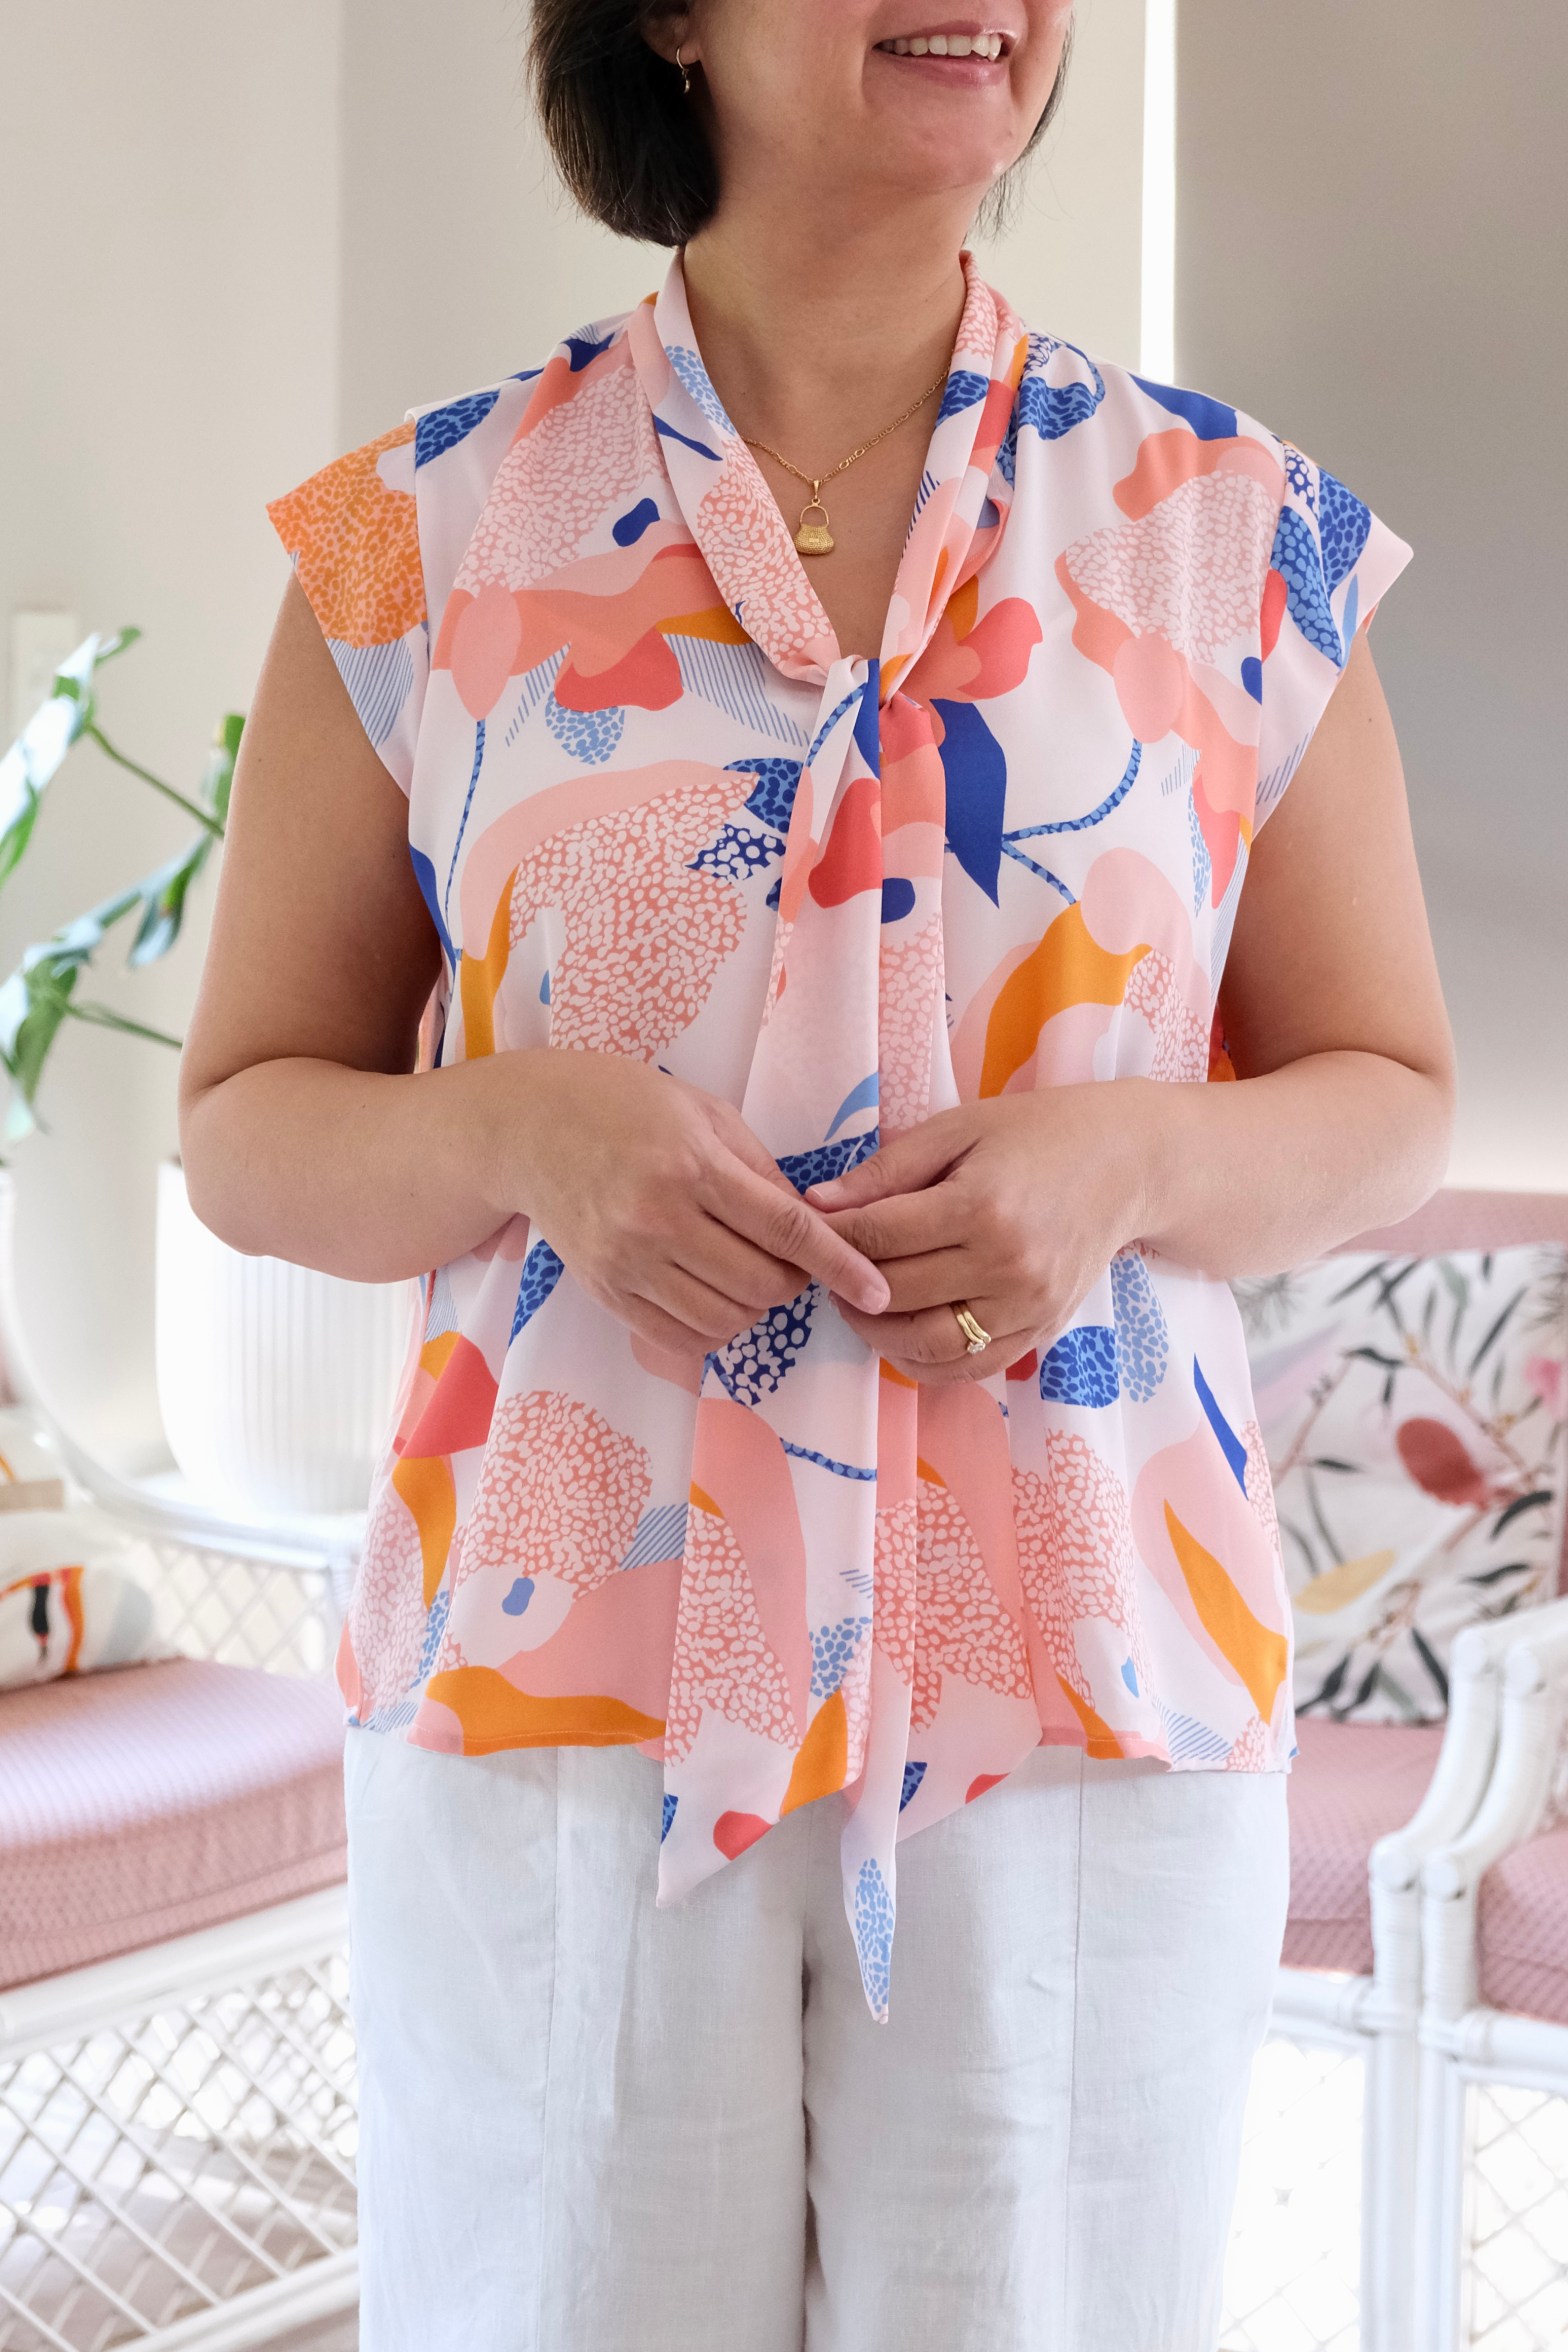
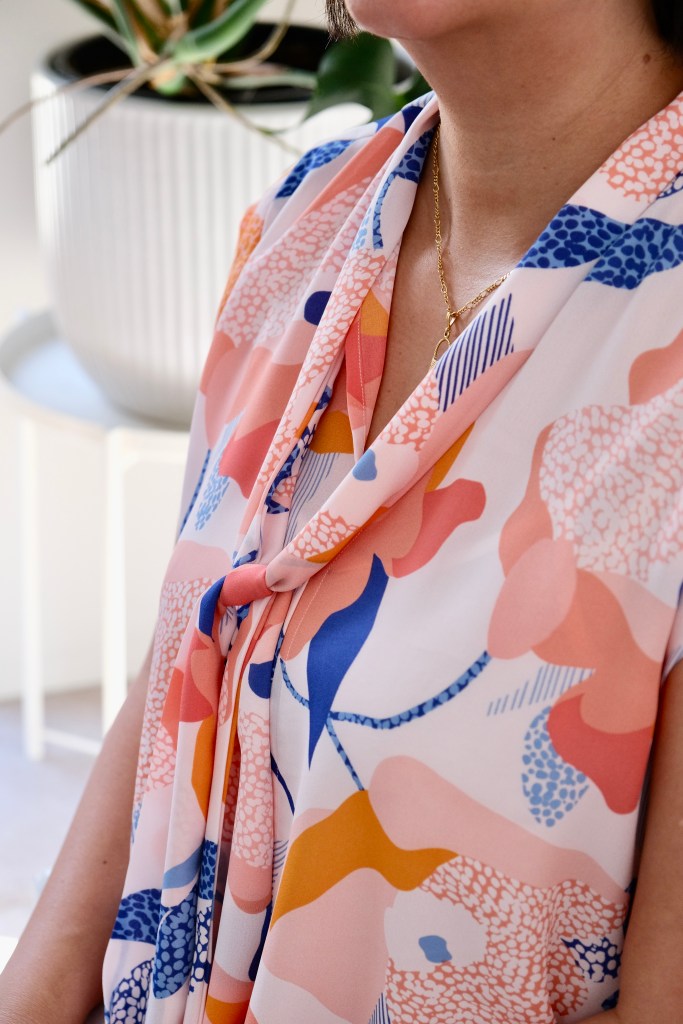
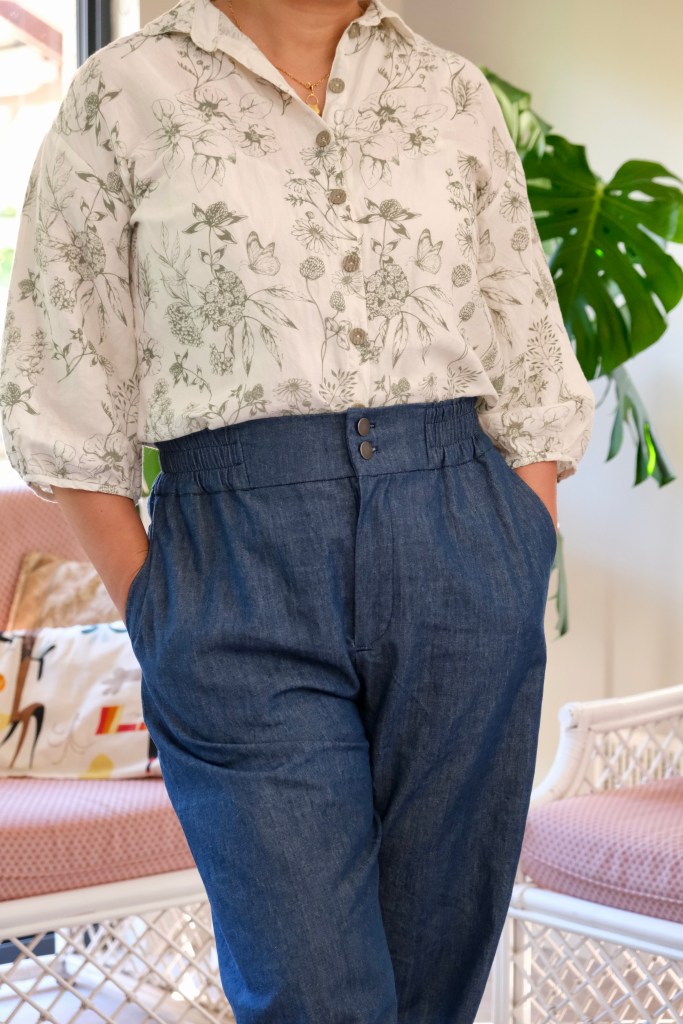
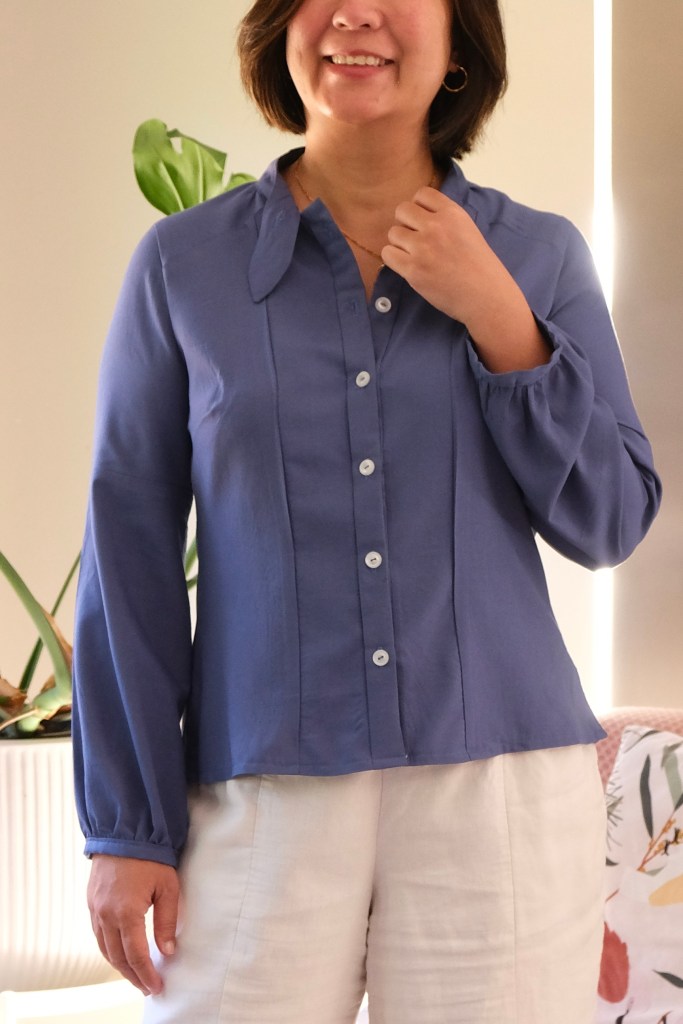
There has been a lot of chatter about Pattern Emporium patterns in my sewing circle, so I’ve been keen to try them out. When the Spill the Tea blouse was released, I loved the design and thought it would fit into my Spring Capsule Wardrobe. I’ve been thinking more about how to make my handmade wardrobe more cohesive, so I’ve been playing around with collages on Pinterest. I’ve picked some highlight colours that I’d like to feature in the capsule.
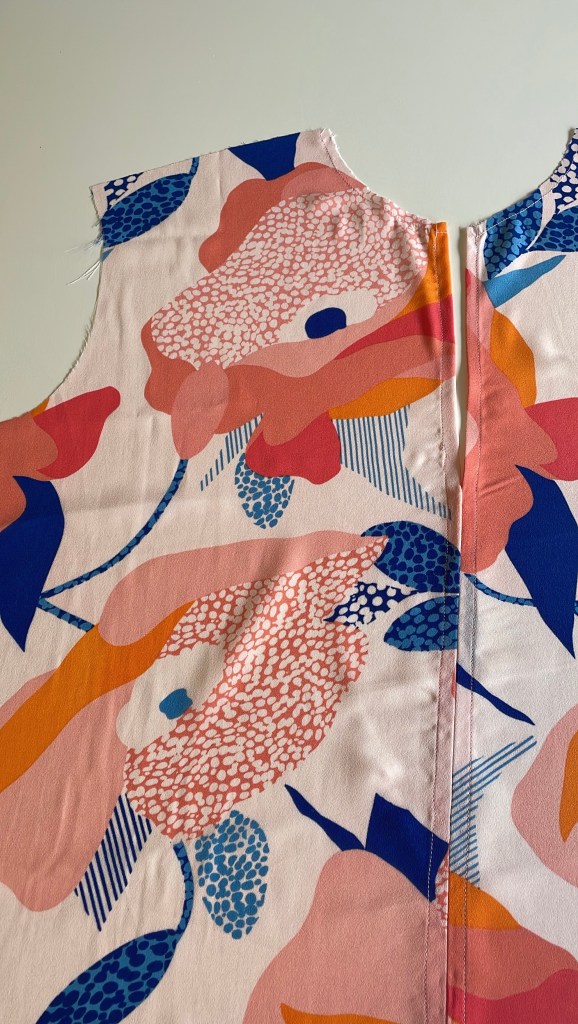
The Spill the Tea Top is a tie neck top with two back options, two sleeve options and two length options. I chose to make the gathered back with a yoke, the cap sleeves and tall length. I wanted the option of leaving the top out for a more casual look. It’s so impressive at the number of options available and best of all, printing it was made very logical and easy. I really liked that it wasn’t necessary to print every page, only the relevant ones which was a good paper saver.
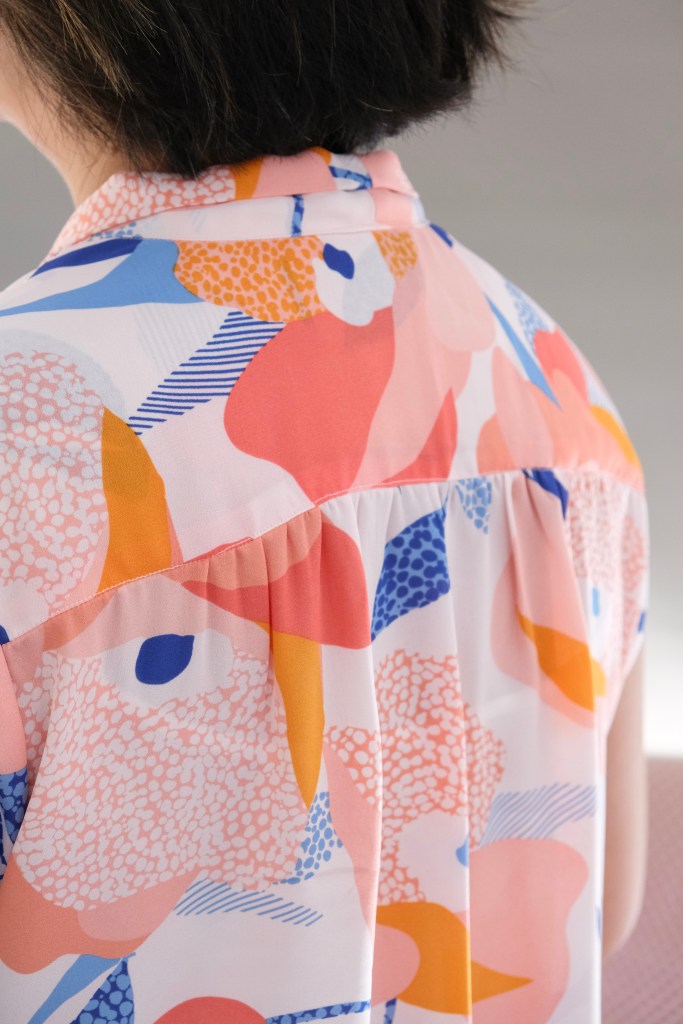
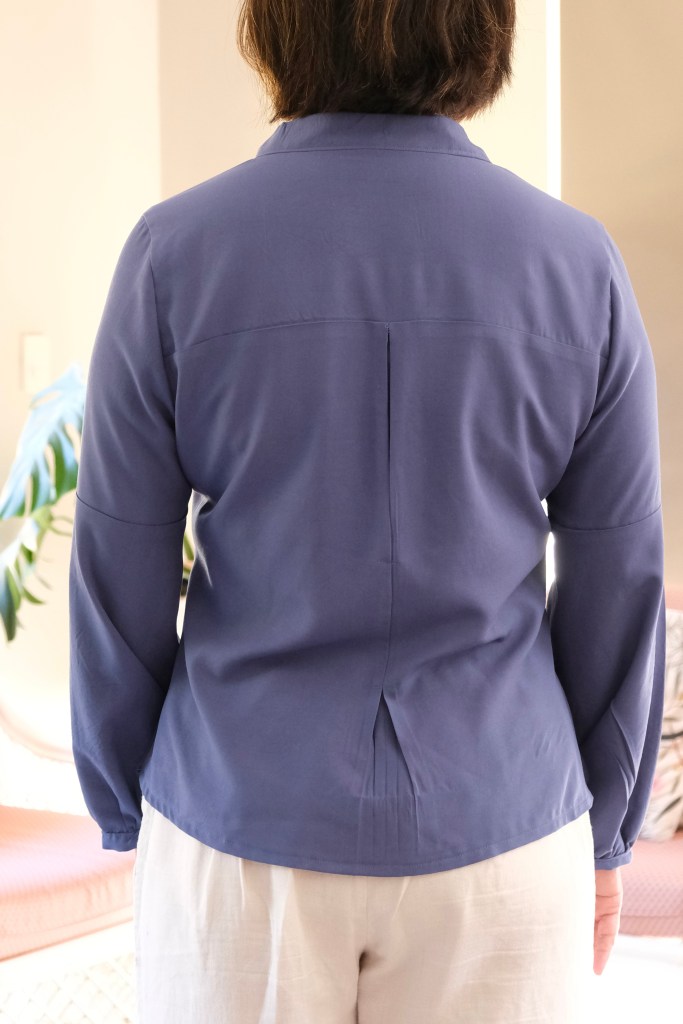
Yoke construction on Spill the Tea Blouse
The pattern is made for woven fabric and is quite versatile. I had a piece of georgette fabric in my stash that I bought a while ago but was a bit afraid of sewing. I thought it was a good match for the pattern because of the high drape. Excitingly, there was enough of it for the top which required about two meters. I was making the size 12 for my measurements of 38-inch bust, 33-inch waist and 40-inch hips. I love the fine quality of georgette fabric, but it does add some difficulty to sewing. I tested the fabric on the overlocker and decided to use French seams because the fabric frays very easily.
Apart from the seams, I had to solve the issue of the yoke and how to finish it. I decided it would be best to cut two so that the yoke could line itself. I’ve tried to describe what I did in the steps below because I deviated from the instructions.
1. Finish the FRONT BODICE as instructed2. Attach FRONT BODICE to the YOKE (YOKE pieces are WRONG SIDES FACING)3. Attach the BACK BODICE piece to the OUTER YOKE4. On the Inside, cover the seam with the INNER YOKE
I also finished the sleeve seams with French seams, but I think it would have been thick enough for the overlocker. French seams do give a satisfyingly neat finish. The other tips I learnt when sewing with georgette fabric is to reduce the stitch length and changed the needle to a 70/10 gage. It was also handy to use the rotator cutter for the curves.
The Pattern Emporium instructions were very detailed. It is made for reading on a screen because the illustrations are photos. The bonus is that everything is clear with contrast fabric. The instruction booklet was like a mini magazine, and I love the inclusion of all the different people modelling the blouse. I like printing my instructions but at 50 pages, I limited my printing to the sewing instructions only. I found myself deferring to the photographs when I came to the attachment of the ties. The construction was very enjoyable with the precise pattern pieces and instructions.
Overall, it was easy to see why my sewing friends fully endorse Pattern Emporium patterns. It’s been a fantastic sewing experience and a good one to get my sewjo going again. I’ll hope to share more soon about my sewing plans for my handmade Spring Capsule Wardrobe.
I’m not much of a shopper when I travel. In fact, I hesitate to even buy souvenirs for myself because I worry about dusting around those knick knacks. However, I had some recommendations from a friend who had recently had success on her trip so I thought that I would try especially since Korean fabric is famous for its quality especially linen and cotton. With a little research, I found two markets that I wanted to visit which were Gwangjang Markets and Dongdaemun Market. The only difficulty I saw was that I was tied to the schedule of the tour which would limit the window to get to these markets.
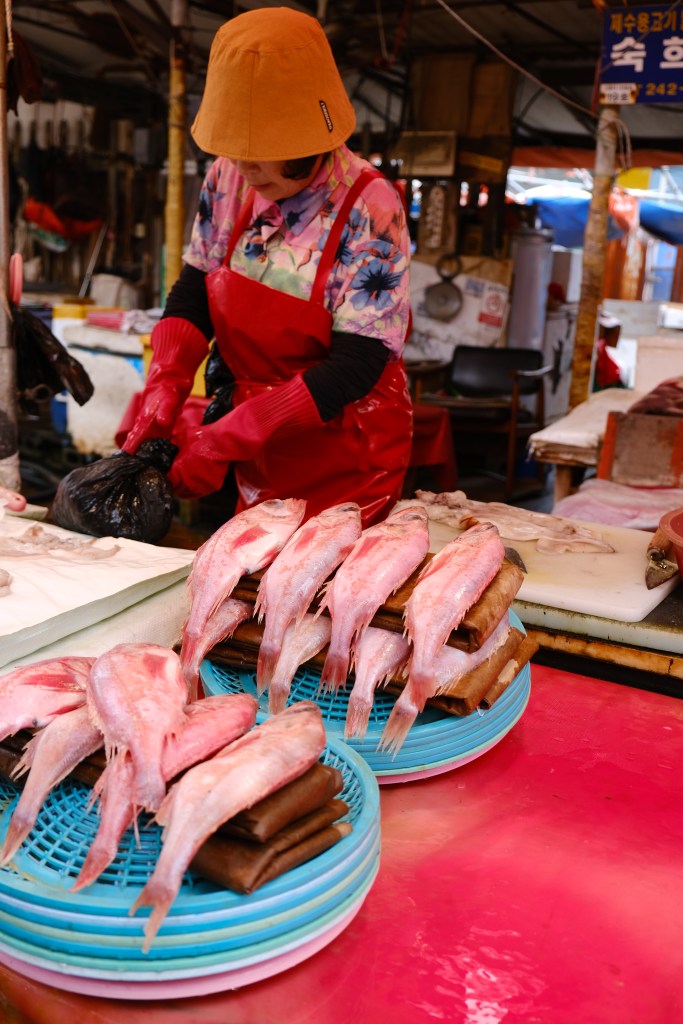
We had a few market visits in the tour which were fantastic. The highlight was Jagalchi Market in Busan which was located on Nampo Port. It’s also right next to the Busan International Film Festival Square which also has shops and street food lining the roads. Alongside enjoying a great lunch and being fascinated by the fish market, I kept an eye out for fabric stores. I thought I might come across some small fabric stalls like you do in Southeast Asia but was surprised that there weren’t any. I’m sure that the locals might know of some, but I found an overwhelming number of Olive Young Stores but sadly no fabric shops in sight.
Jagalchi Market
I’m a pragmatic person so when I got back to my hotel, I got in touch with Linen Lab Co which I knew was based in Seoul and I have seen many people using their fabric especially their linen. I sent a DM asking them if it would be okay for me to order online and then get the fabric delivered to my hotel on the return leg of my trip to Seoul. I thought that if I couldn’t find a physical store, I might still be able to at least save on shipping. Also, when browsing the shops, I did find that prices for a lot of brands were better so I was keeping my fingers crossed that it would be the same for fabric. Linen Lab really came to the party and were so accommodating. Usually, their orders would be dispatched as the orders came in, but I had tricky timing because I couldn’t have anything delivered when I was travelling internally because the baggage allowance drops to 15kg on internal flights and I was only arriving back to Seoul on the weekend. I don’t know how they organised it. I was just told by them to have a great trip, and everything was waiting for me when I arrived back in Seoul. I was so happy with the beautiful fabric that arrived. I could never get the same where I live. I also felt so grateful with that I wasn’t charged shipping and for the great customer service I received.
From Seoul to Home
Even with the challenges of the Tour Schedule, I did get to both Gwangjang Markets and Dongdaemun Markets. We walked to Gwangjang Market from our hotel in Insadong. It was a Sunday, and we got there at about 3pm only to discover that the part of the market selling fabric was closed. I did go into a section I thought might be for fabric, but they were selling fabric for making Hanbok and I was looking for cotton or silk. Gwangjang Market is famous for being one the oldest and largest markets in South Korea. It’s worth a visit for the food section which was bustling and teeming with tourists on a Sunday afternoon. Sadly, after speaking to one of the shopkeepers selling Hanboks, and working our way through the maze of shops, we were empty handed from that venture. There was definitely a Fabric Mart quite close to the main entrance (opposite side of the Food Quarter) but the doors were firmly locked.
Gwangjang Market
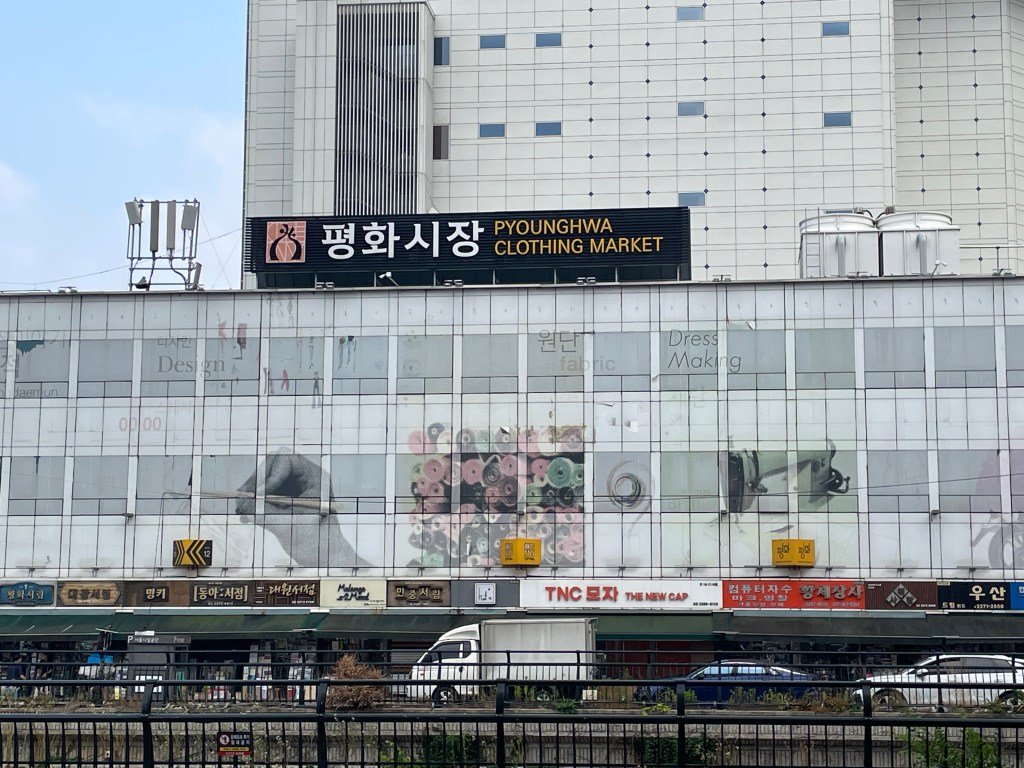
On the last day of the tour, I had been talking to our lovely tour guide about the fabric in South Korea. I shared with her my interest in sewing and on the last day, she included the area of Dongdaemun Markets. I soon discovered that Dongdaemun is quite a big commercial area. There is huge modern shopping complex which we mistakenly went into at first but realised it wasn’t Dongdaemun Market. We then headed across to Pyounghwa Clothing Market which covered a whole city block but was more of a Flea Market containing all the knockoffs you could ever need. We realised then that we needed to cross the road to another building that could cover a city block which had the fabric. It didn’t have any signage or clear marking on the map so I couldn’t take a proper photo of a main entrance or anything. I’ll attach a photo below which is what you would see standing at the entrance of this building.
Not This OneView from the first entrance of the fabric buildingJust to give you an idea of the commercial scale of the shopsClosing TimeThe layout of the shopsGetting a bit lost in this huge buildingView from the fabric mart but don’t go into that one for fabric
Sadly, we were met with disappointment again as most of the shops had closed. Unlike the markets in South-East Asia, this market is mainly based on commercial trade. If you’re a designer wanting to pick out your fabric, then this is the premium destination. You can imagine the scale of things were quite overwhelming with about five floors of closely packed shop stands. The ones that were still open were brimming with fabric and samples. I felt that for the small amount I was buying, I didn’t think it would be fair to get the shop to go to the effort of sending a runner to get the fabric cut, then to bring it back and all within the half hour that was remaining on my tour. I decided it was enough to see the place. If I return, I will allow at least a day and arrive in the morning. This area didn’t seem to be walking distance from my hotel in Insadong, but I was a bit lost at this point.
I was surprised that I didn’t come across any small fabric shops amongst the many stores. Most shops sold k-beauty and there were local dress shops. Maybe I might have saved a little bit by being able to buy fabric at the markets, but I felt quite overwhelmed when I was in those markets and by having to communicate though my phone translator. I doubt I would have found the same quality fabric that I had ordered from Linen Lab Co in the short time that I had to look around. I would say that it really needs someone with more local knowledge and language to be successful. Saying that, I’m delighted by the experience of seeing the fabric markets. It was a wonderful country to visit with so many unique experiences. It was fun to add fabric hunting alongside photo taking on our trip.
Thanks to everyone who took the time to make recommendations. Thanks for reading and happy sewing!
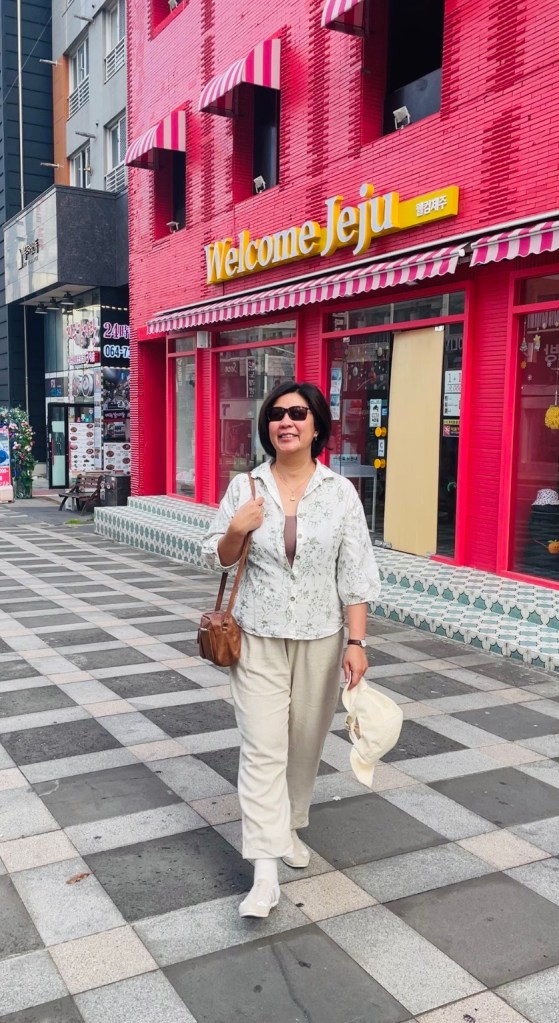
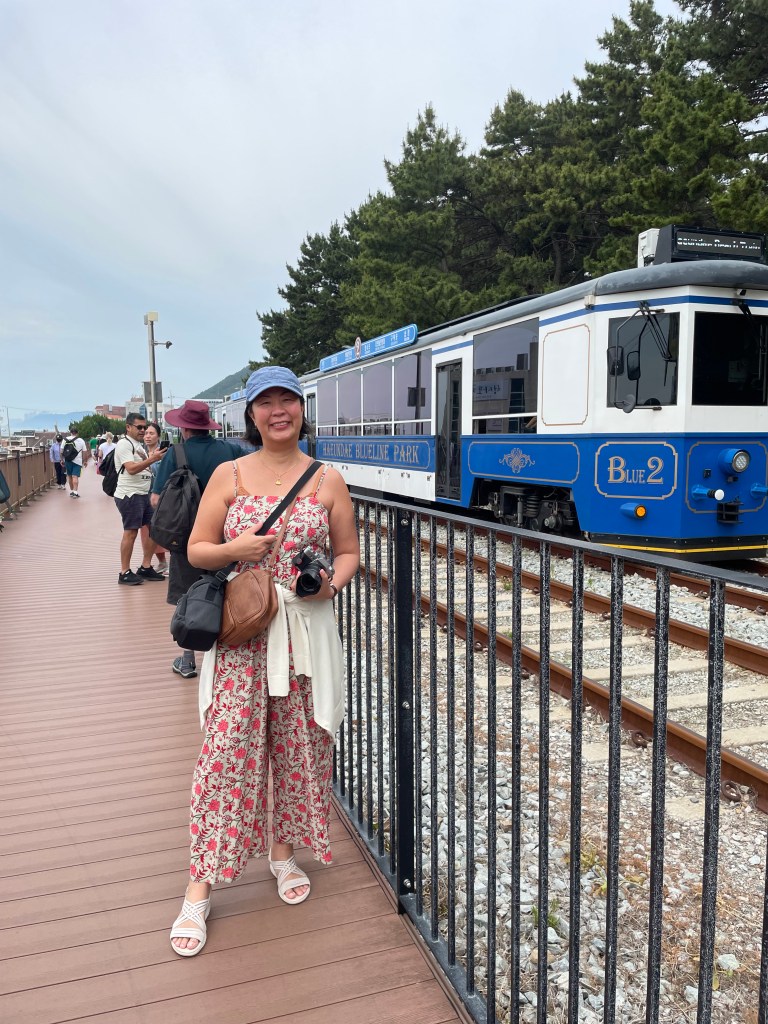
The first thing that everyone asked me when I mentioned that I was heading to South Korea was, “Are you going to go see BTS?” and, “Do you love K-Drama?”. Although I do enjoy all those things about Korea, my husband and I were mainly interested in experiencing something culturally different and were looking forward to the amazing cuisine and indulging in a bit of photography. It didn’t disappoint and in fact, overdelivered in so many ways. For the first time, we decided to join an organised tour which was a great way to see more in the short time that we had available. There’s pros and cons with the tour set-up. The downside was the constant time pressure. We landed very late and were on the bus by 8am the next day for the first round of sightseeing which meant we did not have time to orientate ourselves with maps and e-sims which we figured out a bit late into the trip. Our tour started in Seoul and from there we flew to Jeju then from Jeju to Busan and then to the old capitol of Gyeongju and then back to Seoul. We did forgo the optional tour of the DMZ to have some free time just exploring Seoul on foot which we enjoyed immensely especially at our pace as photography enthusiasts.
Packing List
I’m sure there are a lot of travel blogs out there which are better for the sightseeing elements of travel so I thought I would focus on what I packed and found useful with clothing because those were the blogs I was searching for before leaving. I had come across a few general blogs about Korean weather, but I’ve never experienced the climate that we came across in Korea. It was explained to us that generally we can consider that Korea has 4 seasons but there are 24 traditional seasons based on the location of the sun. We were in Mangjong which meant that the mornings and evenings were cool, but the humidity and temperature were high from mid-morning to evening and we also hit the start of the rainy season. It’s basically summer which coincides with the monsoon season. It would rain and then the sun would come out and everything was humid and steamy.
So, here was my mostly me-made packing list:
Tops
Sewlala Alea TopTrue Bias Ogden Cami Uniqlo Cotton Shirt Uniqlo shelf-bra cami top x2 Swimstyle Velma Top Cashmerette Brattle Top x 2 H&M Sleeveless Top Ash Cami Top
Pants
True Bias Dani Pants x 3 Closetcore Pietra Pants Big W Shorts x 1
Dresses / Jumpsuits
Closetcore Amy Jumpsuit True Bias Darla Jumpsuit Sewing Therapy Tie Dress Sew To Grow Arcadia Dress Sew To Grow Lanti Swing Dress
Outerwear
Uniqlo White Cardigan K-mart Beige Cardigan Rain jacket
Shoes
White sandals Sneakers
Other
Swim wear
Outfits & Outings
Everything was worn except the shorts! All three of my Dani Pants were worn and the denim and drill versions were worn more than once.
Very versatile group of Dani Pants
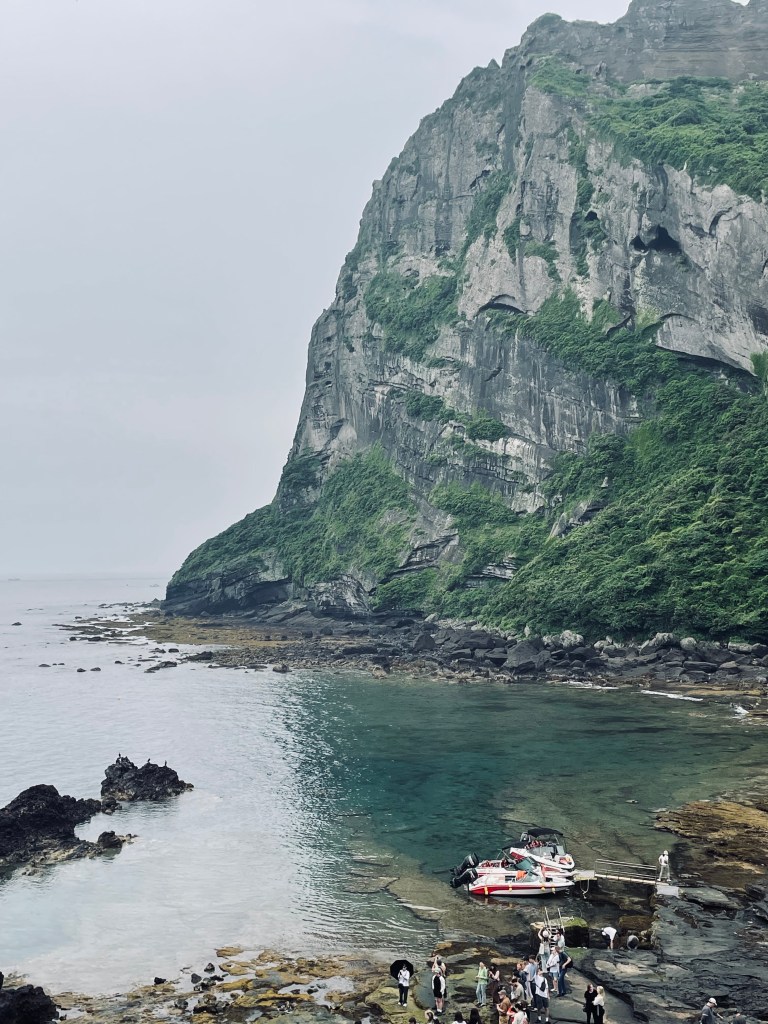
I wore the linen version of my Dani Pants on a day when we hiked up Seongsan Sunrise Peak which was steep. It was extremely hot and humid which was intensified when it started to drizzle as we climbed to the top. I was thankful that I had layered a linen top over a cami which made the humidity more bearable.
Seongsan Sunrise Peak
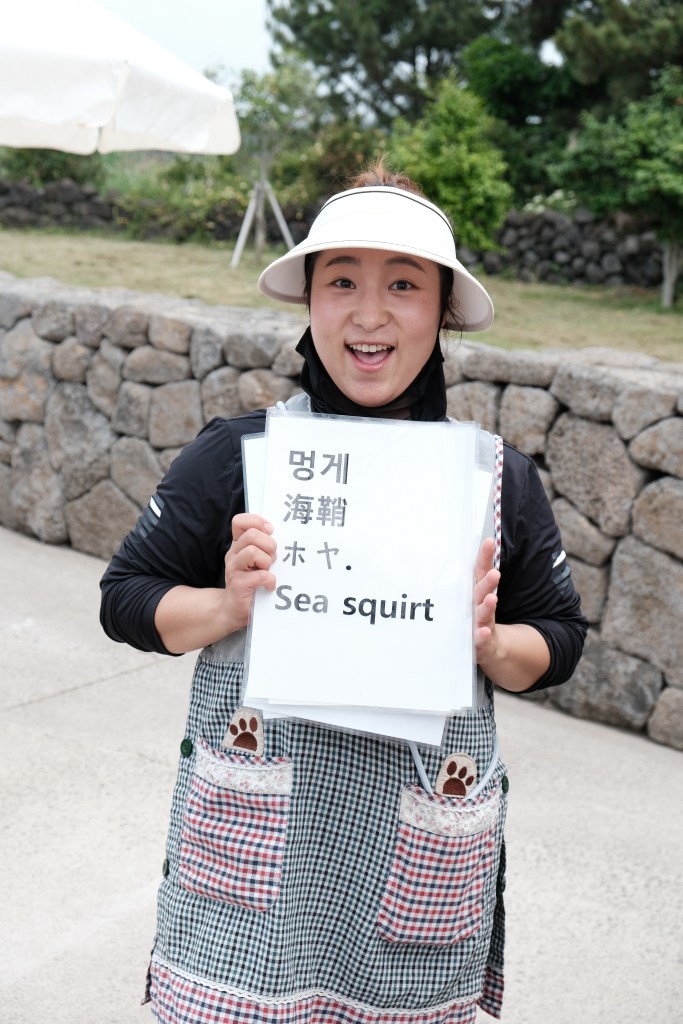
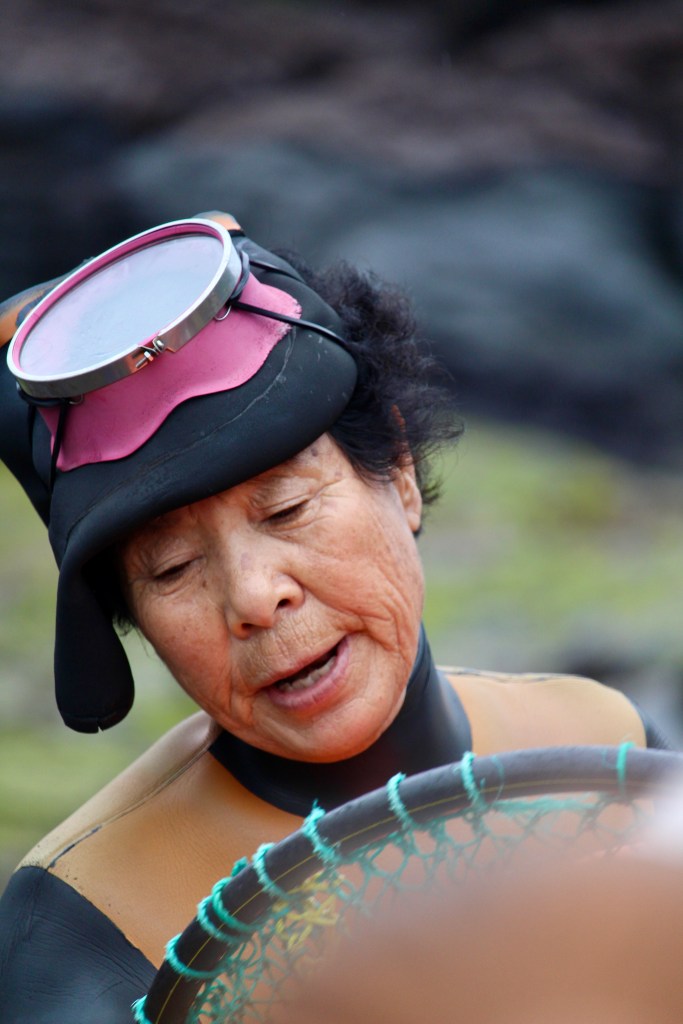
This is also where you can see the Hae Nyeo Show which is the traditional female free divers of Jeju. We were lucky enough to try some sea squirt from a diver who is part of a new generation of Hae Nyeo.
Hae Nyeo Female Free Divers
South Korea is full of natural beauty and can be enjoyed by anyone who loves hiking. There are gardens and parks everywhere to enjoy. Jeju, in particular, was very beautiful with Oreums (extinct volcanoes and craters) scattered throughout the island.
Natural beauty of South Korea
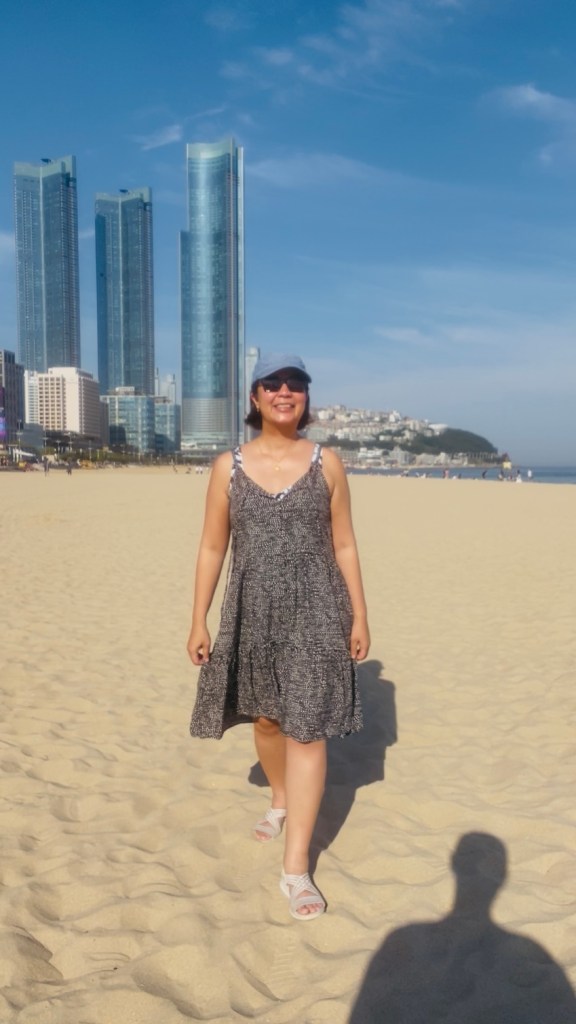
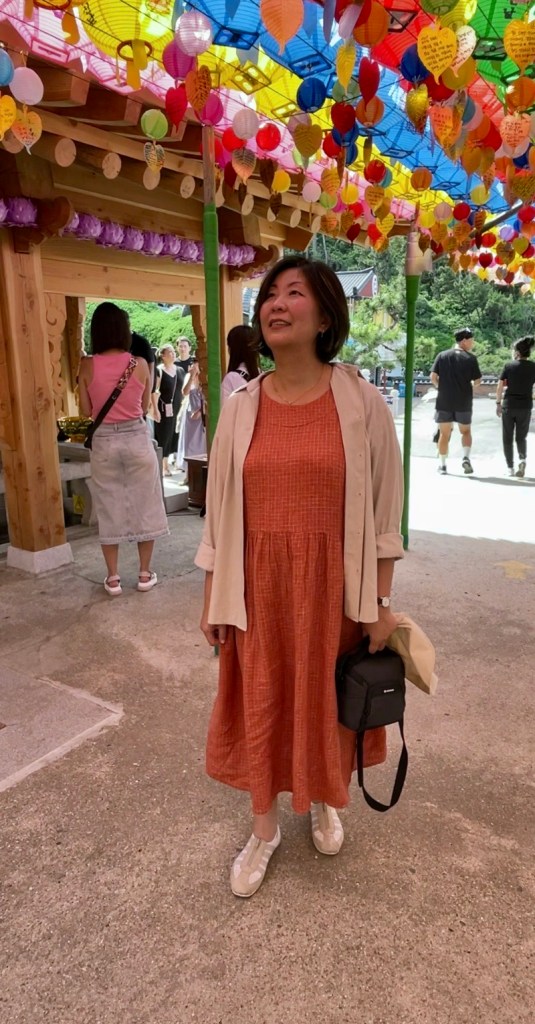
I’m so glad that I packed my dresses and jumpsuits which I could again, layer with a thin cardigan. Surprisingly, in Busan, there is a fantastic beach under the skyscrapers and I actually went for a swim so it was worth packing the swimmers.
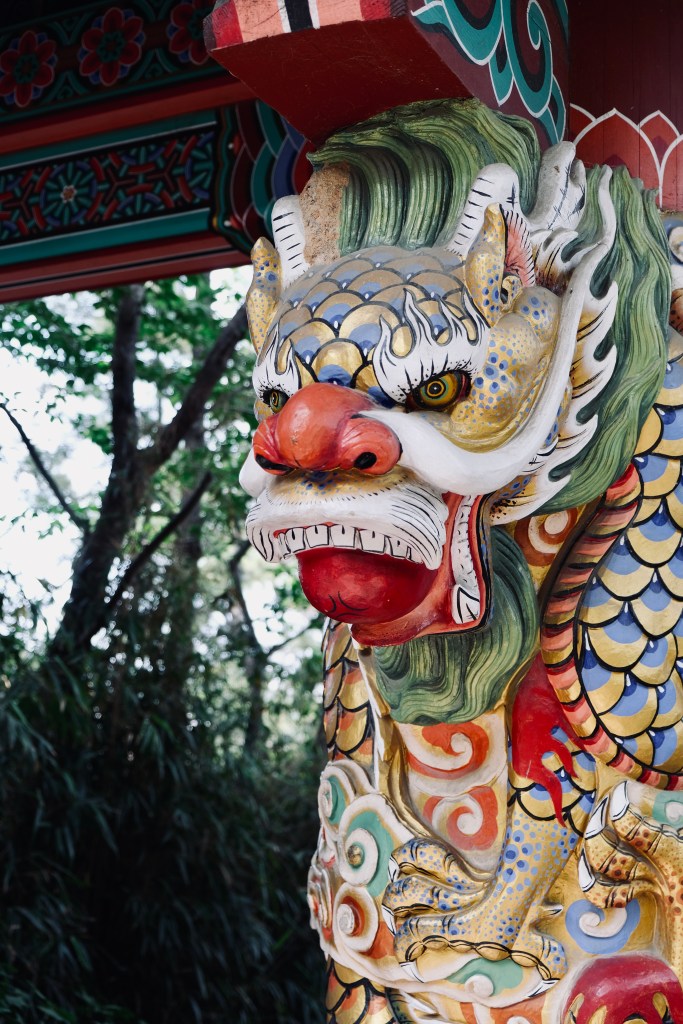
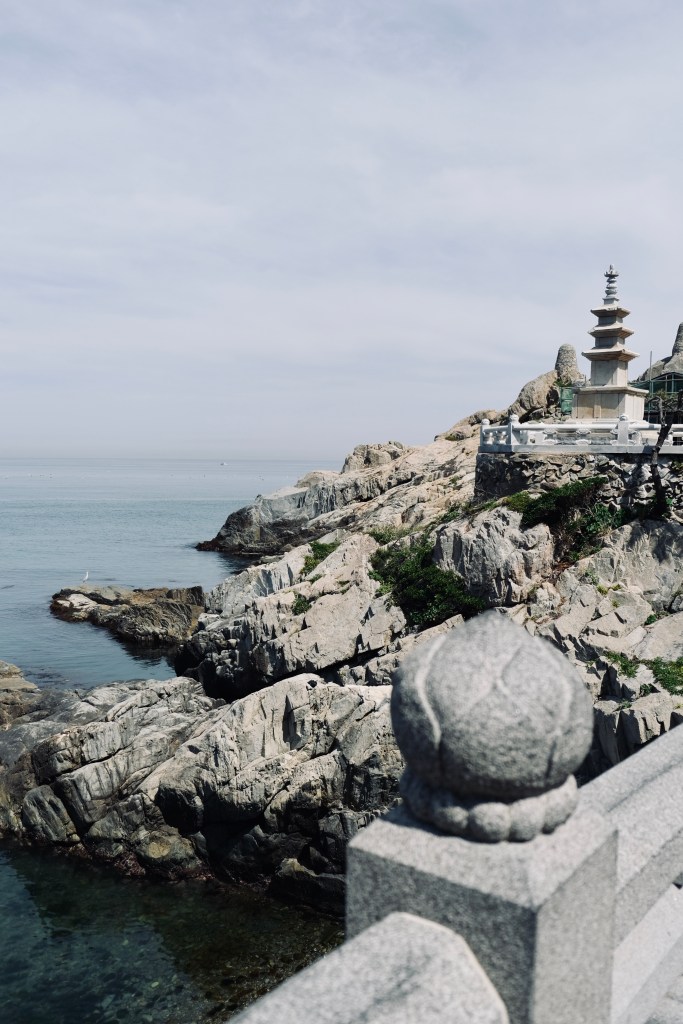
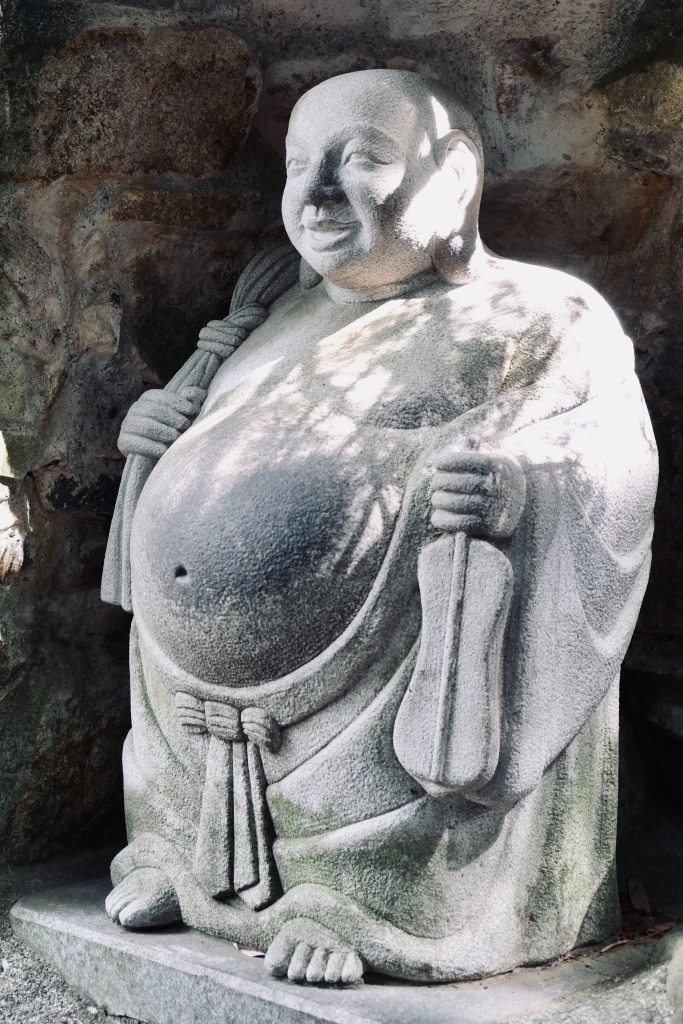
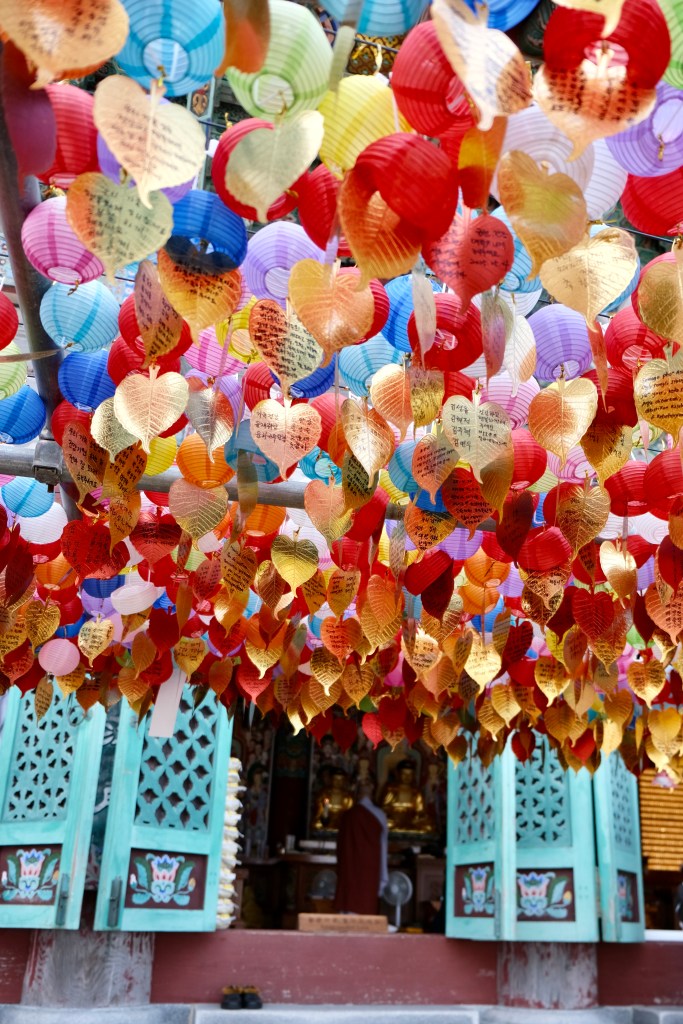
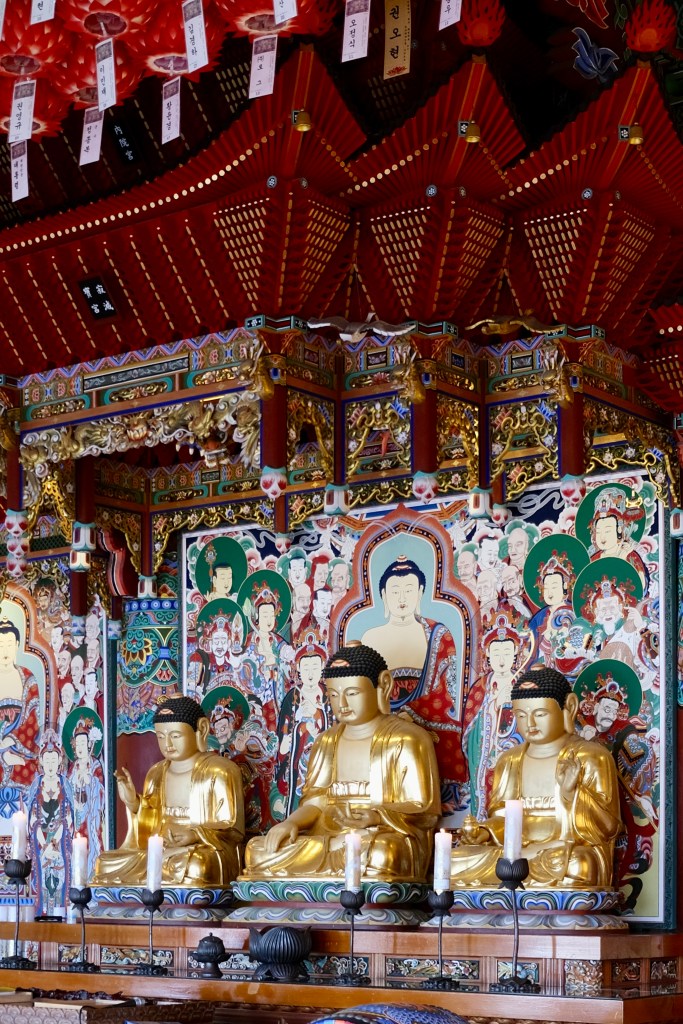
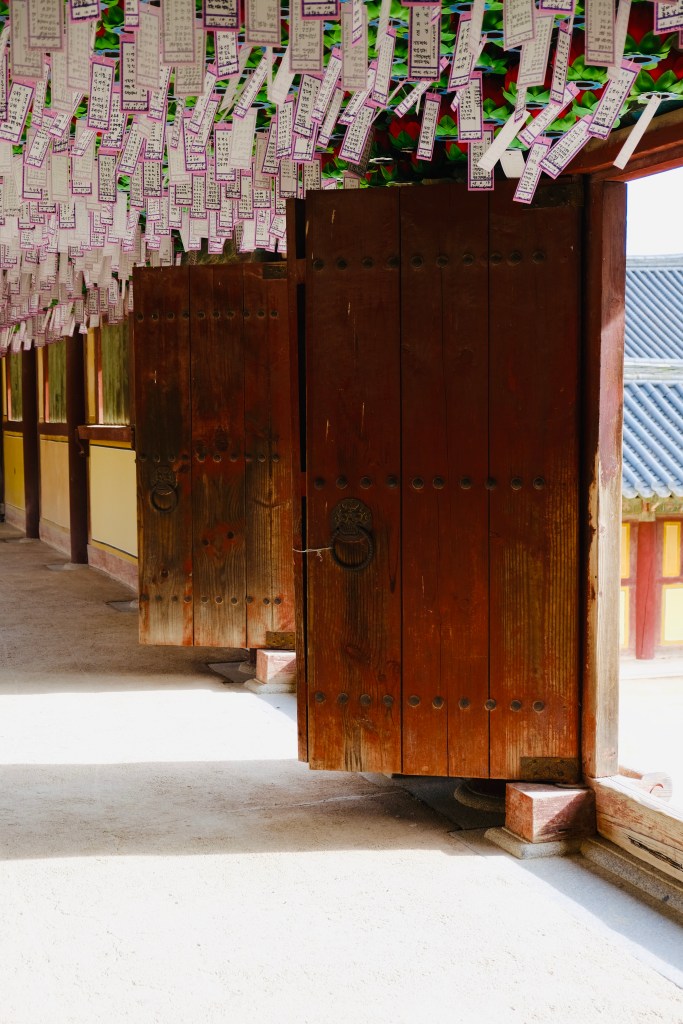
I felt that the shorts didn’t get any wear because it felt out of place in a city setting. The other consideration with shorts and tops is that there is generally a dress code for visiting the beautiful Buddhist temples. I especially enjoyed visiting Haedong Yonggungsa Buddhist temple which is by the sea. There was also Bulguksa Temple in Gyeongju and we were lucky enough to see the Seokguram Grotto in the rain which made the experience exquisitely magical.
Sew To Grow Lanti DressBuddhist Temples of South Korea
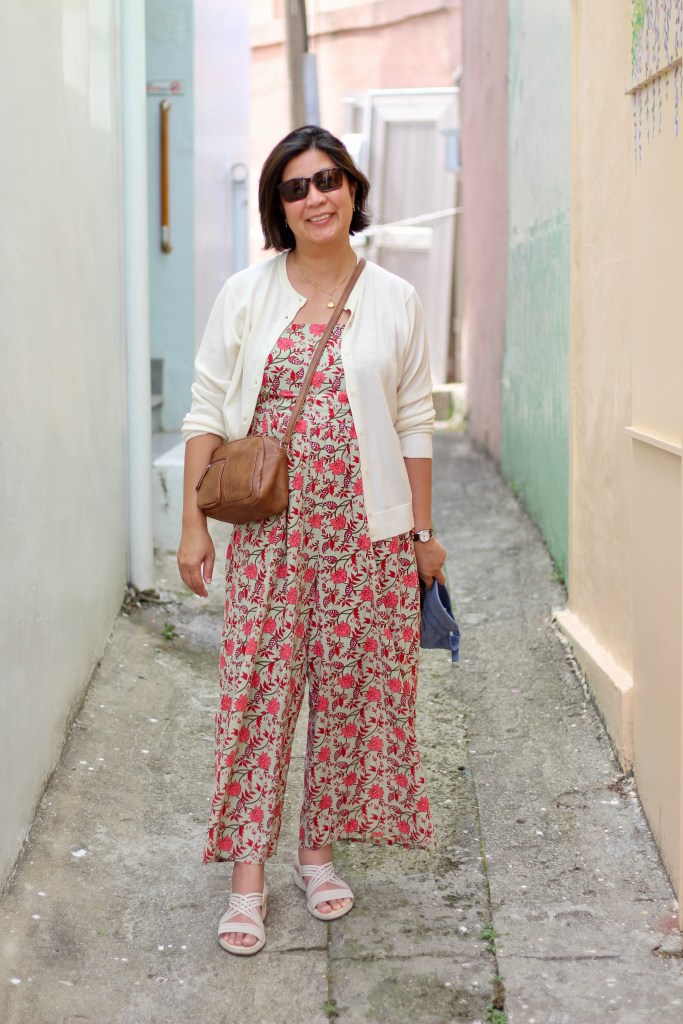
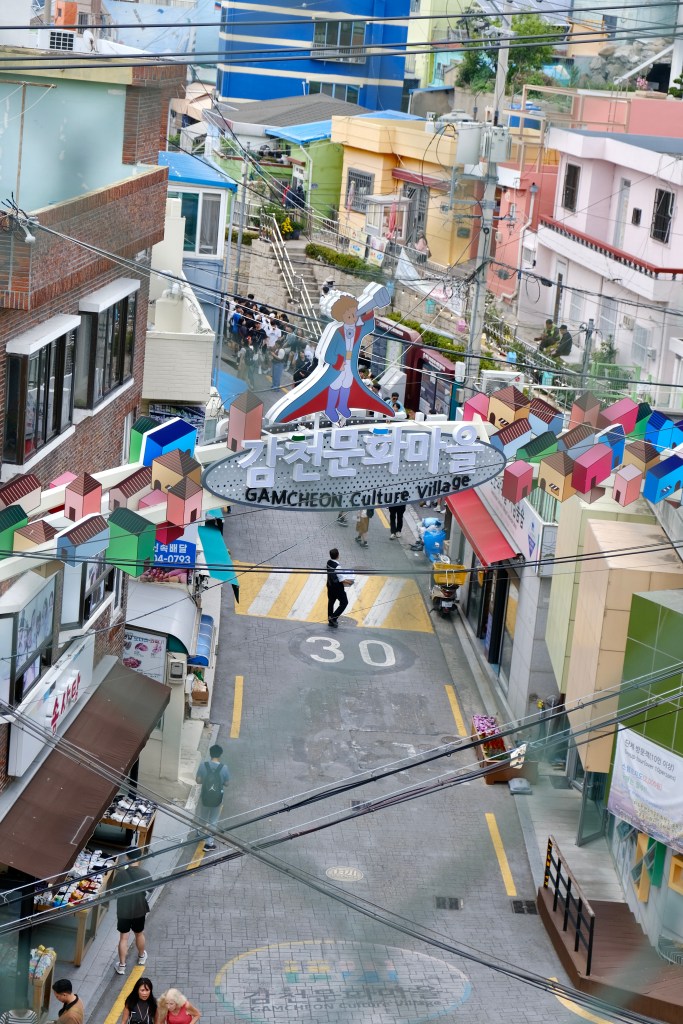
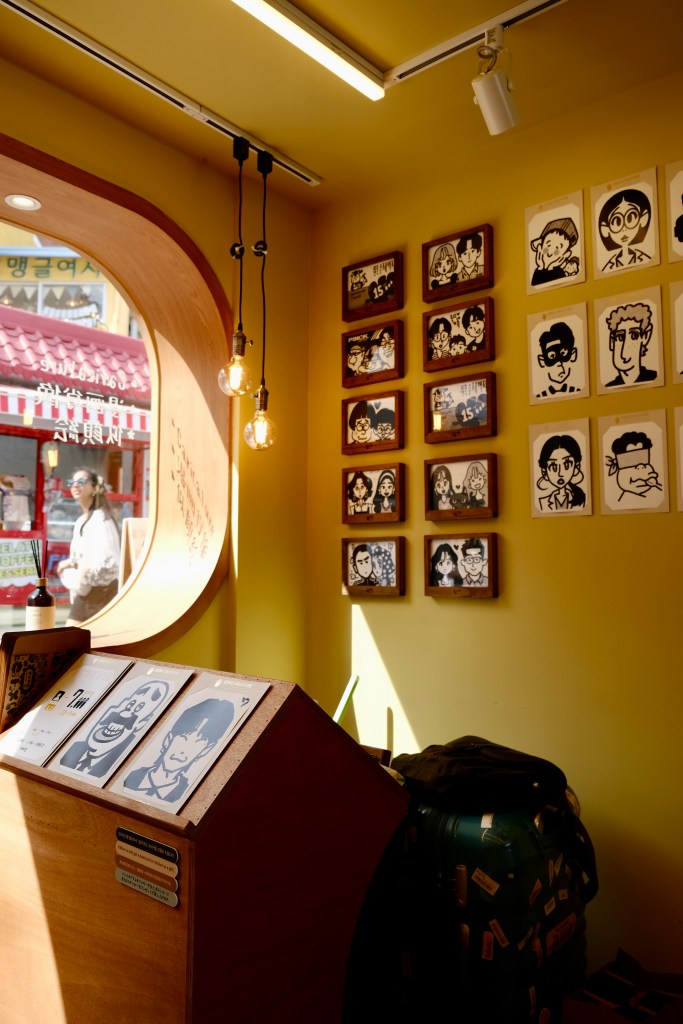
Often, Asian tours are synonymous with Temple Overload but I thought we had the perfect amount. There were a lot of cultural and historic areas to visit. It was hard to pick a favourite but I narrowed it down to two. Gamcheon Village in Busan was gorgeous and an engaging place to visit. I loved getting off the beaten track down narrow alleyways, visited the shops and we had our portrait drawn by a talented caricature artist!
The colourful alleyways of Gamcheon Cultural Village in Busan
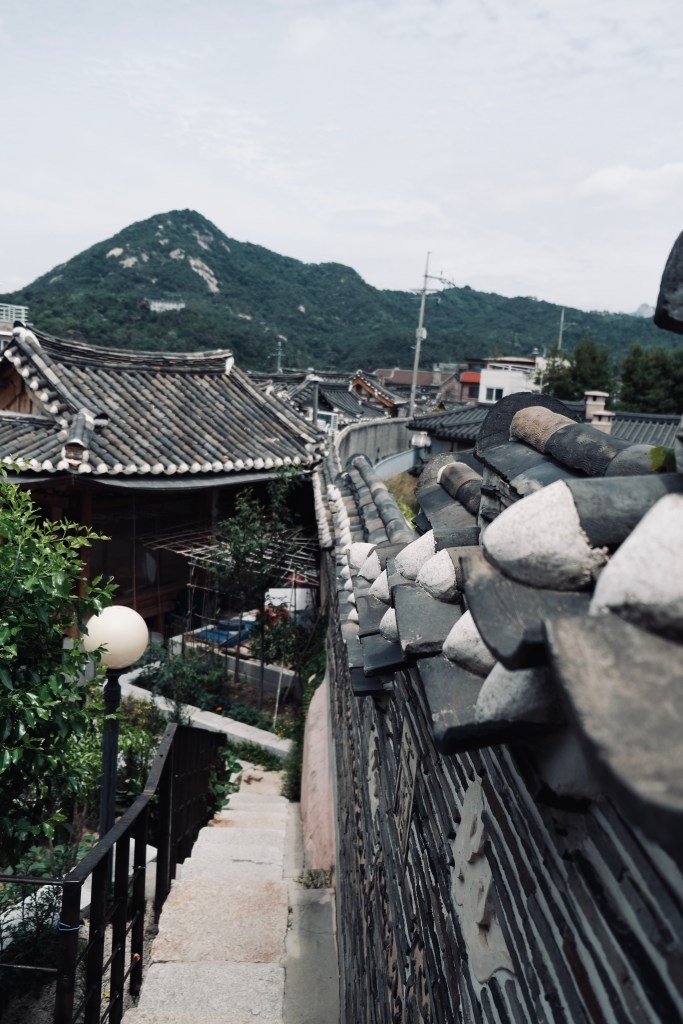
Bukchon cultural village is worth a visit as well with the amazing group of traditional houses. It has a curfew and opens from 10am and closes at 5pm because there are residents who live in this village. I think that there is one street in particular made famous by social media which has created most of the headache for residents. Not sure why everyone crowds in the one street when you could get equally good or better photos in the street next to it. The best thing we did was going into the Bukchon Cultural Museum and Observatory. It’s at a high point so you can look out over the rooftops and get a nice cool iced tea which is free with entry.
Sewing Therapy Tie DressBeautiful Bukchon Hanok Village in Seoul
There was such a variety of sights and activities in South Korea from the lively tourist hub of Myeong-dong where you can try street food and shop till you drop, to the narrow and charming alleyways of ikseong-dong crammed full of restaurants and trendy cafes.
I ended up with just over 700 photos because everything is so picturesque in South Korea. It’s definitely worth a visit or two or three.
Closetcore Amy Jumpsuit
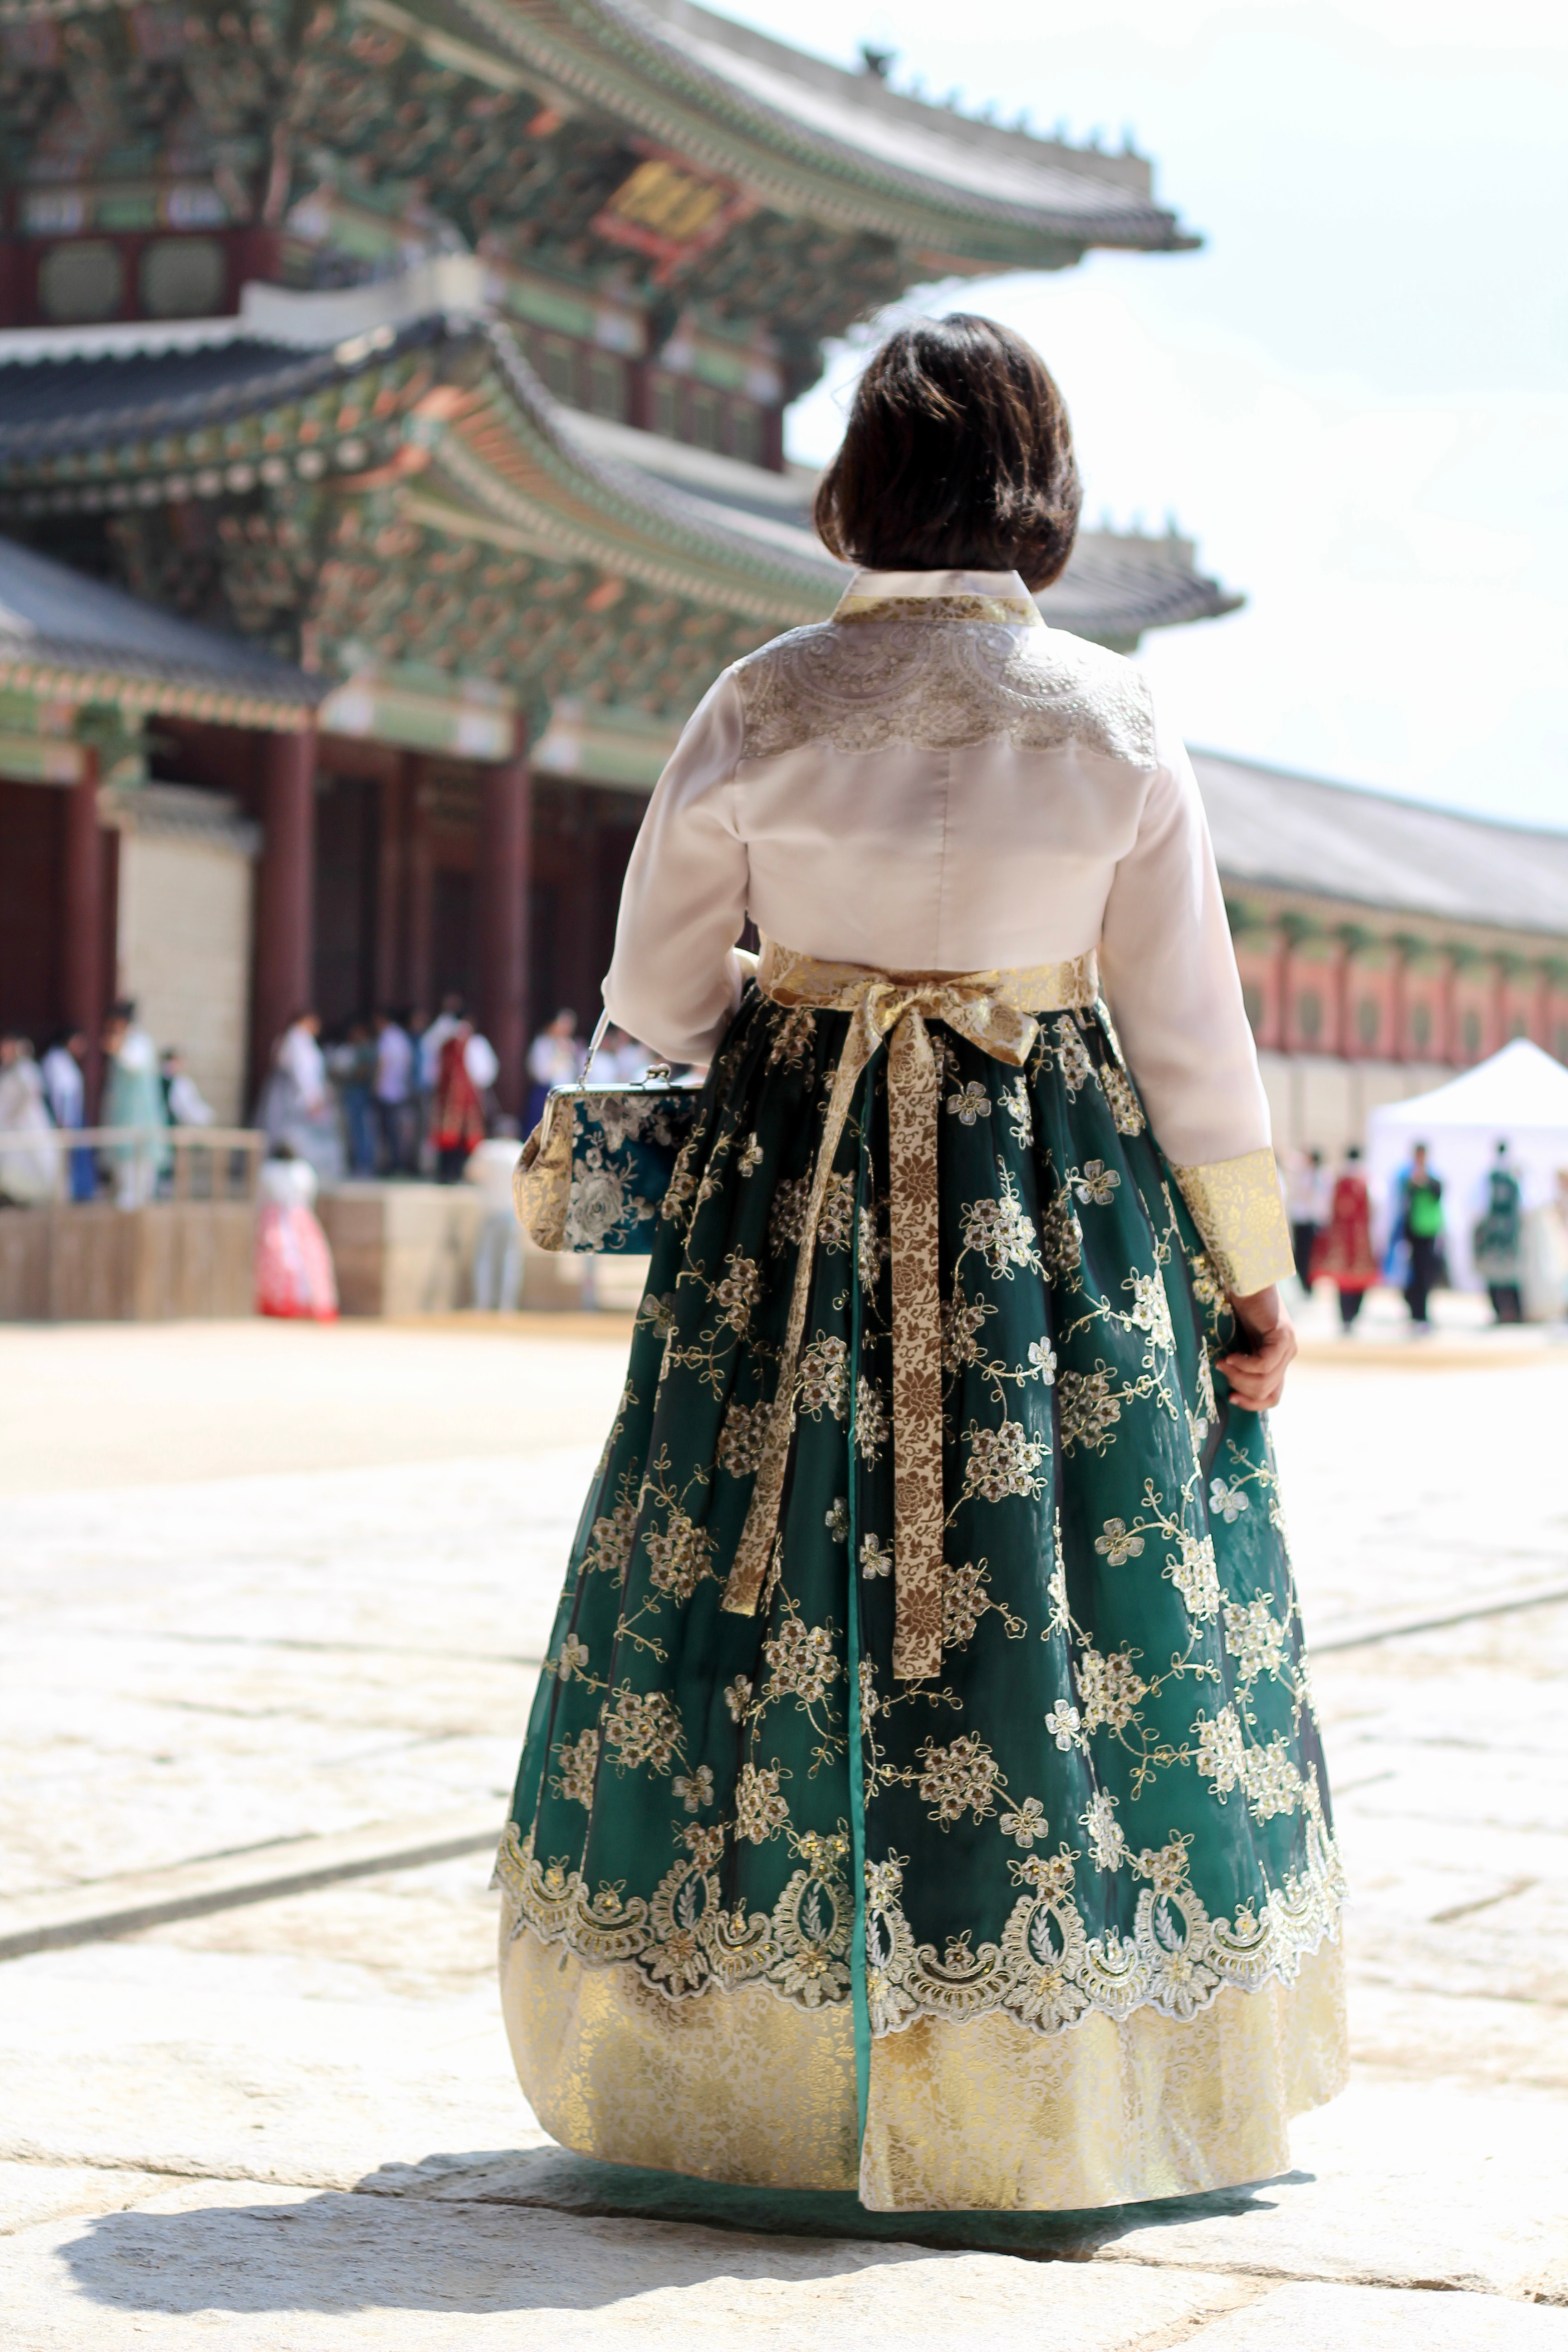
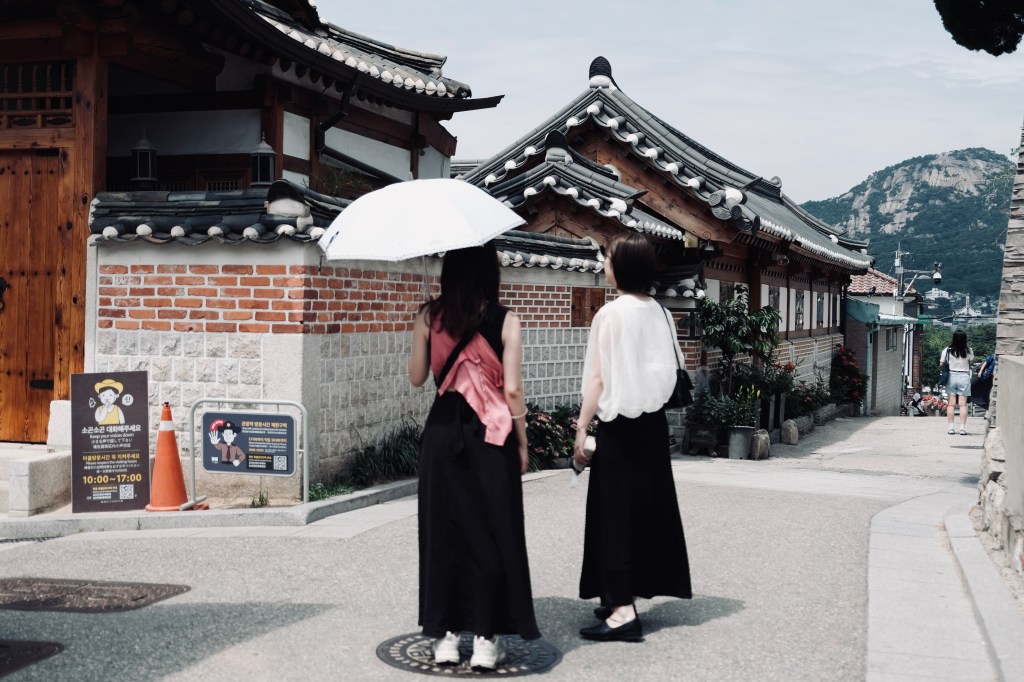
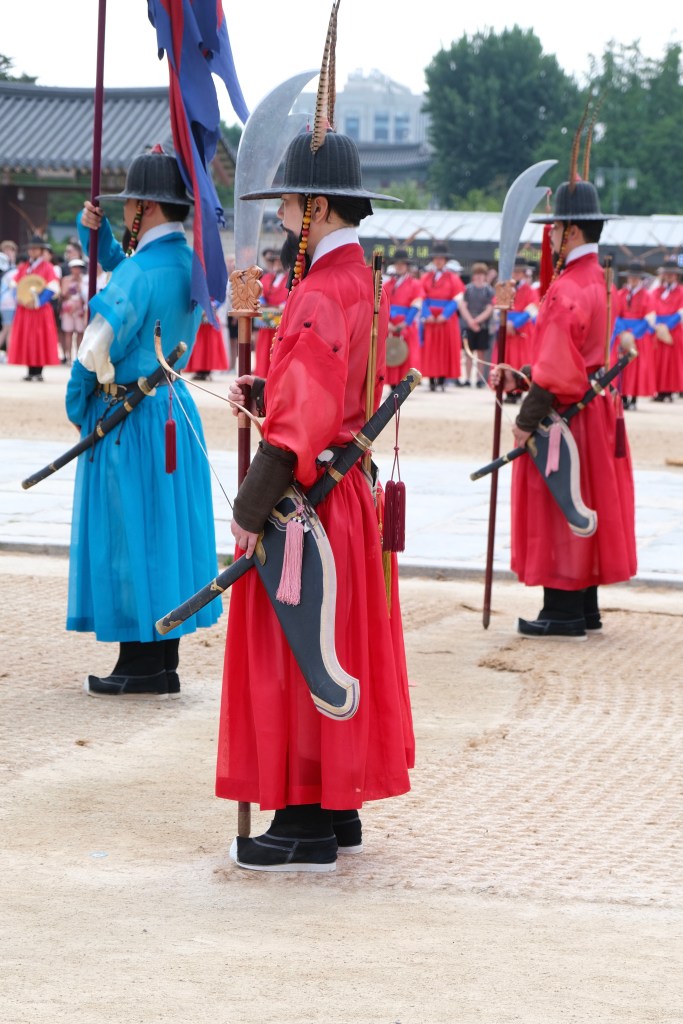
Final note on a favourite memory was dressing up in the traditional Hanbok and I’m so glad that my husband joined me too. I can highly recommend Hanbok Day Rental which is just around the corner from Gyeongbokgung Palace where we went to see the changing of the guards and strolled through the palace grounds. We did this on the first day of our visit and it really set the tone for the rest of our stay.
Thanks for reading my extremely long blog post and happy sewing!
X Em
PS I will be following up with a blog post about fabric shopping in South Korea. There was too much to unpack in this one!
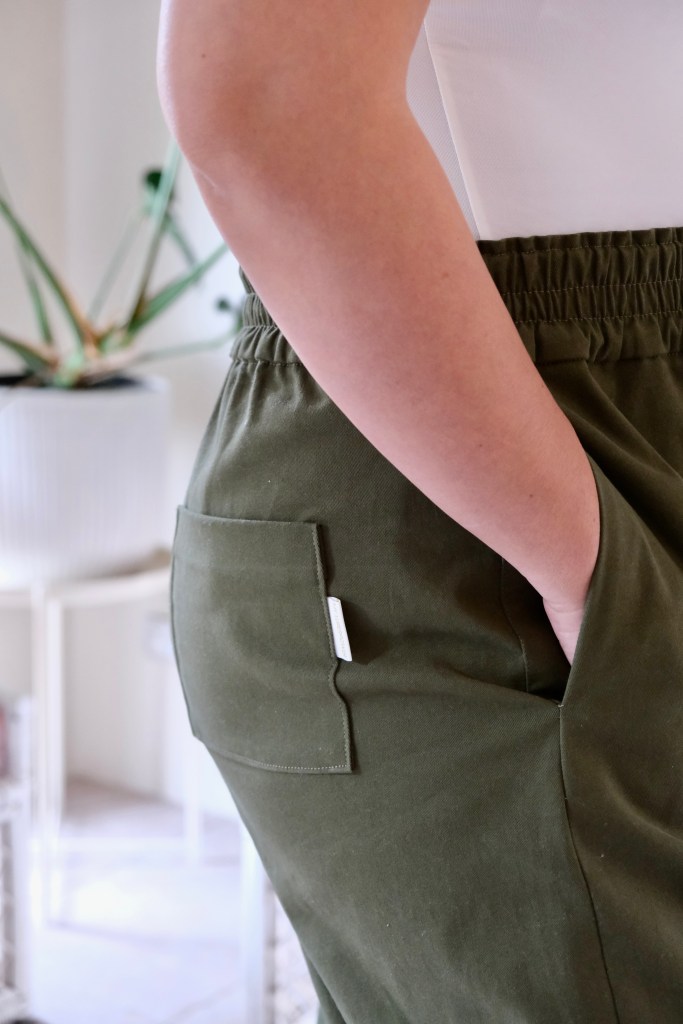
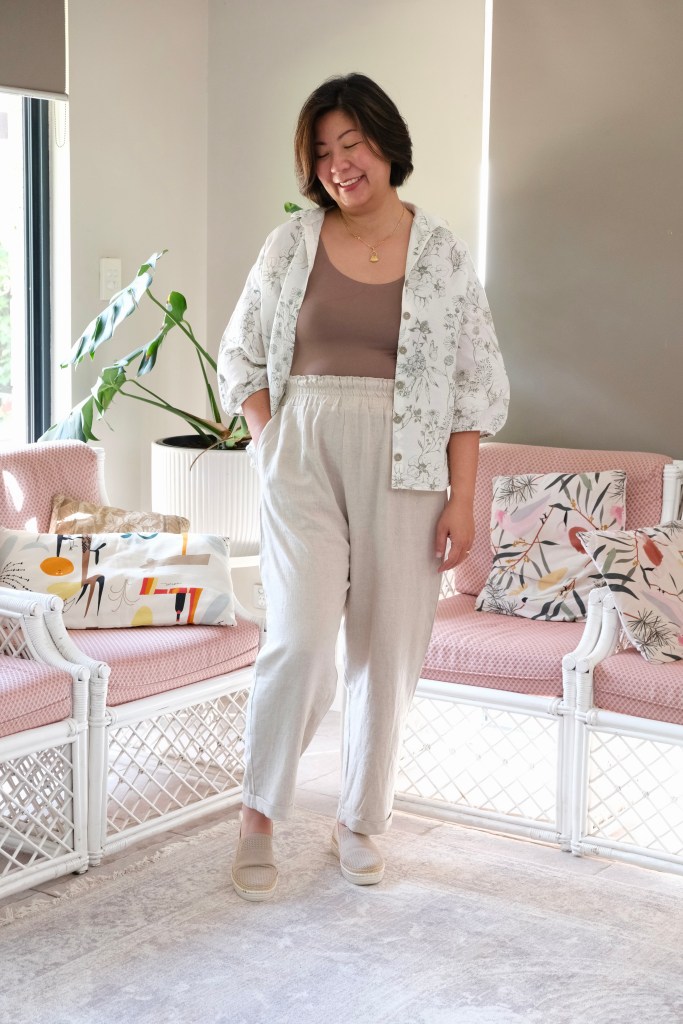
Me Made May has gone by in a flash this year! This year, I decided to record what I was wearing every day in a one take video which I shared to my Instagram Stories and saved in my Highlights. It is a very successful exercise which I use to review what I’m making every year. I realised that even though I am drawn to making dresses, my daily wear mainly consists of pants and shirts. Of all the pants that I was wearing, I found that I liked the True Bias Dani Pants for the style and the fit the best. So, for my upcoming travels, I decided to make three pairs. One in denim, one in a stretch drill and one in linen using Version D of the pattern.
First pair of Dani Pants
My very first pair which I made a couple of years ago was a linen version. I’ve worn it so much, but I felt that the linen I used was not the right weight and I can see some wear around the zip and seat area. This time, using version B again, I went for a 9oz weight denim which is lightweight enough to cope with the elasticised waistband but gave good structure to withstand the zip and button front. The buttons are jean buttons that were leftovers from making my Dawn Jeans.
Denim version of Dani Pants
This was also why I chose a khaki stretch drill for the second version. I love how soft this stretch drill feels. It was a real bargain find at my local spotlight store with only $10 per meter, the fabric only cost $30 which is pretty good for a pair of pants these days. Something I didn’t do with the stretch drill which might be a bit controversial is that I didn’t wash it before sewing. I only washed it after. I felt that the stretch in the drill, even though light, made the fabric less structured. I didn’t want to change the sizing for the pants, and I knew that I would be throwing these into the dryer with washing, so I didn’t mind if the fit was on a slight looser side to begin with. I’m not saying that it was a whole size bigger, but it was a loose size 12 and after washing and putting in the dryer, it has stiffened up to the perfect fit for me.
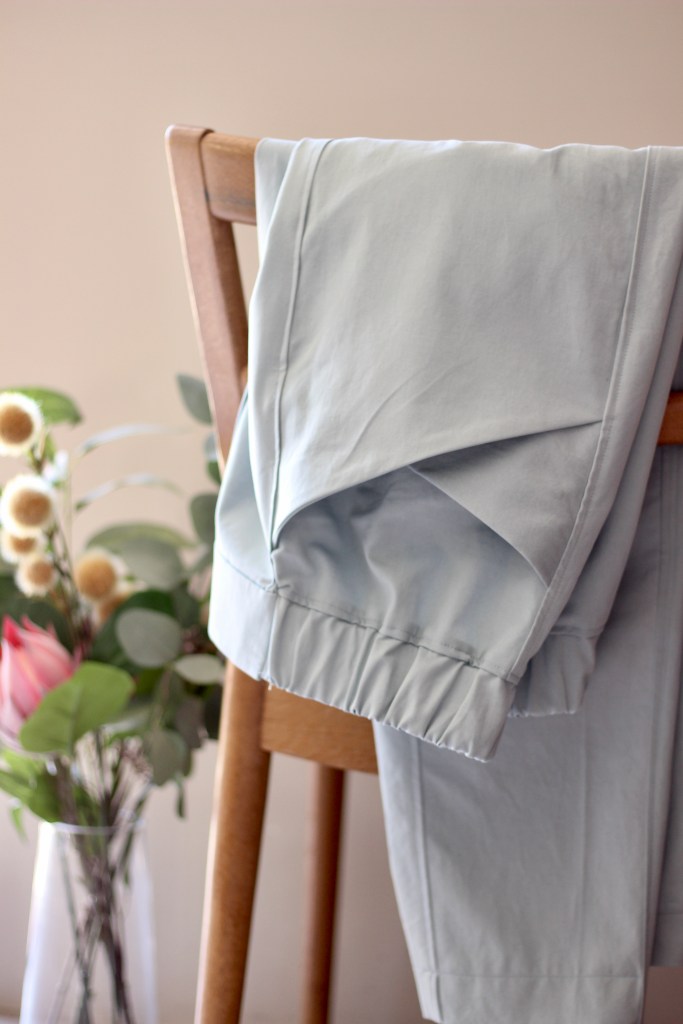
The final version was made with a drapey linen. This time I did wash the linen and popped it in the dryer before sewing. It really softened up the linen beautifully. I decided to make Version D which eliminates the button fly and zip. It has a full elasticated waistband. I thought that with travelling, it’s always good to have something you can pull on quickly that still looks smart. I loved adding the cuff and pockets to this.
When I first made the Dani Pants, I found the zip fly quite difficult. It’s nice to come back to a pattern after two years to find that I can now confidently install a zipper and the zip fly easily. I could understand the instructions a lot better now that I’ve had more experience sewing. Slowly and without me realising, my sewing skills have been improving. It’s a happy discovery. I feel so grateful to pattern makers like True Bias who have put so much detail and effort into their patterns which have helped self-taught sewers like me to gain these skills.
There’s nothing like a bit of last-minute sewing to add to the excitement for an upcoming trip. It’s funny how packing for a trip now includes a bit of last-minute makes. I should also mention that all my pants were made in the size 12, shortened by 2 inches for my measurements of 33-inch waist, 40-inch hips and 164cm height.
Maai Design have done it again. They have released their Artist Collection Drop 2 featuring surface artist and illustrator Myriam Van Neste famous for her bold and playful designs. I was one of the lucky to receive a 120cm sample of the “Pressed Florals” in a rayon lawn fabric for a pre-release review.
Pressed Florals by Miriam Van Neste
I’ve never sewn with rayon lawn before but what a discovery. It’s beautifully soft with a lot of drape. The colour of the print really pops and there was no fading, or colour runs when I washed my fabric in cold water. I did line-dry my fabric because that would be the normal way that I like to dry my clothes, so I didn’t experience any noticeable shrinkage of the fabric.
It didn’t take me long to decide to sew the Cashmerette Selwyn Top. It’s a lovely pin-tuck shirt with button placket and a ruffle that drapes over the bias lined arm openings. The top can be sewn without the ruffle, but I love how the ruffle softens the silhouette and adds a bit of feminine detail into the blouse. So, in order to add it, I had to do a bit of pattern piece Jenga. Luckily, the width of the fabric was a generous 150cm! It was a win because the fabric requirement chart recommended 1.8m for View A with fabric 140cm width. I was very pleased with my pattern piece Jenga.
Often with rayon, I find it’s best to use a rotary cutter for curves and to mark the notches before you move the fabric. I think it’s quite difficult to mark those notches accurately once it’s been moved. Also, it can help to lightly spray the fabric with starch. I skipped this step because I’m quite used to handling rayon, but I did make sure to staystitch and pinned excessively. Before sewing, I changed my machine needle to a 70/10-gauge needle.
I made the same size as I did the first time, I sewed the Selwyn Top which is the size 10 for my measurements of 38-inch bust, 33-inch waist and 40-inch hips. It’s very comfortable. I used some scrap rayon that I had to make the sleeve facings because I wasn’t able to squeeze making my own out of what fabric I had remaining.
I love the silky softness and the movement that the rayon lawn allows. I’m so glad that I managed to get these ruffles on my top.
Cashmerette Selwyn Top
Maai Design meticulously selects collections of high-quality fabric. I was very scared of buying fabric online when I first started sewing but Maai Design is one of the stores that I have repeatedly trusted and return to. I’m grateful to have found it early in my sewing.
Thanks for reading and happy sewing!
X Em
Full disclosure: I was provided this sample for a preview but no blog post was required and all opinions remain my own.
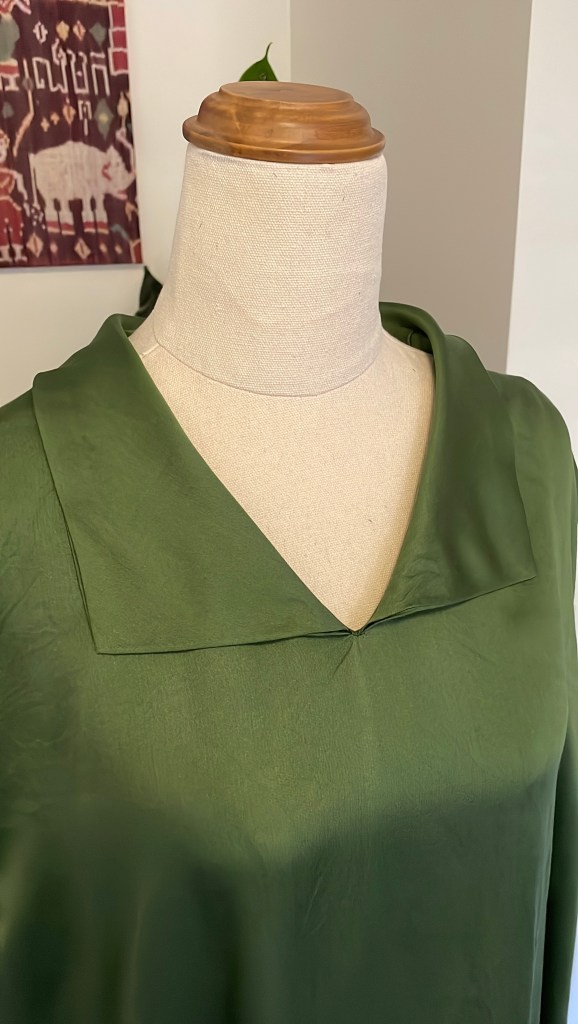
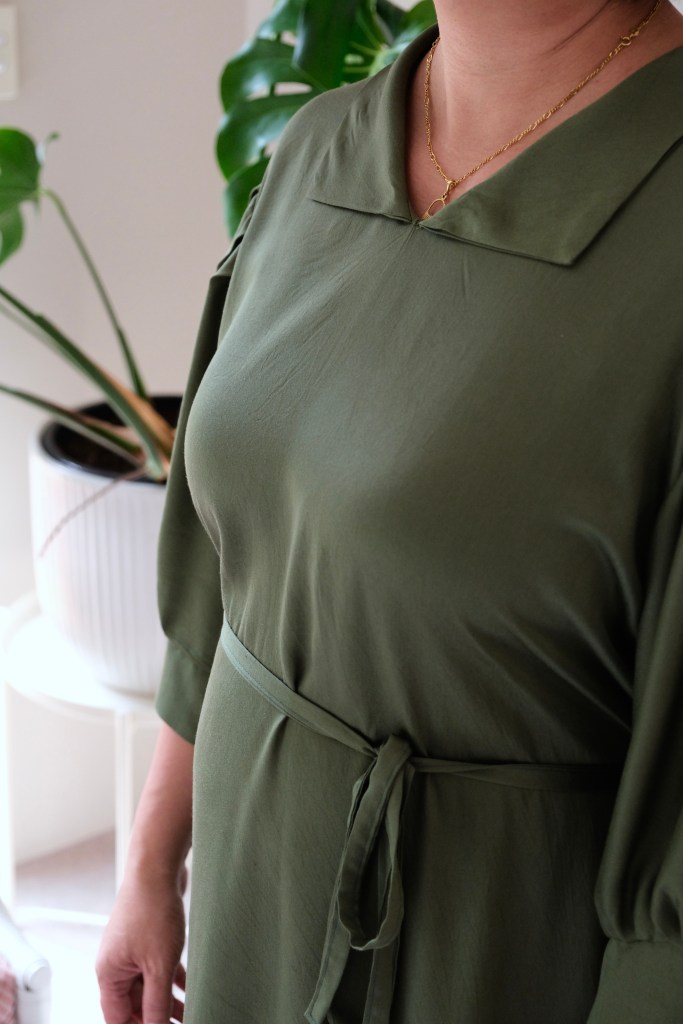
Do you start with your pattern and then buy the fabric or is it the other way around? I’m sure you’re like me where it’s a mix of both. In this case, I had bought this silky looking rayon but had no plans for it. It has beautiful drape, and I loved the colour, so I’ve had 3 meters of it sitting in my stash. Then I saw the Roma dress. I’ve noticed the recent trend for sailor’s collars so when Sewing Therapy released this pattern, I wanted to try it and thought it was a good match for this rayon.
Small Sailor’s Collar
Now, when you look at this fabric, both sides look almost identical, but one side is slightly shinier than the other. I’ve read that this is from the satin weave that can be used which leaves one side shiny and the other matte. What I have learnt from using this is to mark the wrong side at the start. I didn’t which was made more difficult when I decided to tackle a few parts of the project at night. I should have used my KATM sweary label for this one when I had to unpick pieces newly sewn with the wrong side up!
None of that swearing came from using the pattern which was made very easy by Sara’s sew along video. They are well captioned and her written instructions, although brief, are also very good for an experienced seamstress. Basically, the pattern comes as a dress or top with a choice of a big or small sailor’s collar and drop sleeves with cuffs or can be sewn with elastic instead of the cuffs.
For my measurements of 38-inch bust, 33-inch waist, 40-inch hips, I made the size 12 (L) which had a good amount of ease so even though my waist measurements would put me into a size 14, there was no need to grade. I’ve sewn a few Sewing Therapy patterns now and because her patterns tend to include that ease, I felt comfortable skipping a toile. Usually, if a sewing pattern maker is new to me, I would toile with the blouse option. I do find her patterns are true to size for me.
For me, the most difficult point of this pattern was not the collar as she indicated in her video. I found those instructions to be superb. It involved both the facing and the cuffs. The facing had to be sewn down once the collar was attached. My fabric was super slippery and so I had to deviate a bit to make it work for my fabric. I decided not to stitch the front neckline facing down because it would have spoilt the seamless look in the front. I did attach the back neckline facing but I’m still unhappy with it because it’s not symmetrical. I had basted around the back facing then followed with the top stitch, but the fabric still shifted. I will be unpicking and trying again soon.
Difficult points in my sewing
The cuffs were also tricky for me. I misunderstood the markings for the cuffs and initially overlapped them at the wrong spot. Luckily, I had only attached one when I tried it on to check. I felt the cuff was tight and when I rewatched the tutorial, I realised my mistake. I’m sure that has not happened to anyone else. The other challenge for me was placing the cuff onto the sleeve. I’m still not sure if I have the opening of the cuff in the right spot. I think I would have liked a notch somewhere to help me line it up. Then, when everything was attached and finished, I looked at the overlap in the cuffs which were now both facing the same way instead of opposites. Small detail, I know, but I will wait to see if it still bothers me down the track.
Despite these difficulties, I love my Roma Dress!
Lastly, I wanted to mention that I sewed this over a period of a couple of weeks which is not routine for me. I wanted to try spacing my sewing out a little bit more. Not sure if I was successful because I found myself making more mistakes. I tend to space things out like printing the pattern, sticking together the pattern, toiling, cutting fabric, markings but when it comes to sewing, I usually like to set aside one continuous session. I found that putting a project down, then having to find my spot again was probably not as productive and enjoyable as I thought it would be. I think I’ll have a mix of projects in the future, I do still have my Nova Coat that I have been slow sewing in the background using denim scraps and recycled jeans. So, it’s true to say that this “Roma” was not built in a day.
As you know, I have been sewing Stitchmaiden Patterns this year as a collaborator. I have been working through their extensive library of patterns which are all inspired by history and it’s been so enjoyable. The patterns have a high level of detail and I’m finding them to be quite technical in execution.
April is #SewAprilBlouse sewing challenge month where you can sew a blouse to enter. It’s a fun challenge hosted yearly by Cloth Edit and various Co-Hosts. This year, it’s co-hosted by Sewn On The Tyne. I had chosen the Clover Top as my next collaborator project with Stitchmaiden and thought it would double perfectly as an entry for the challenge.
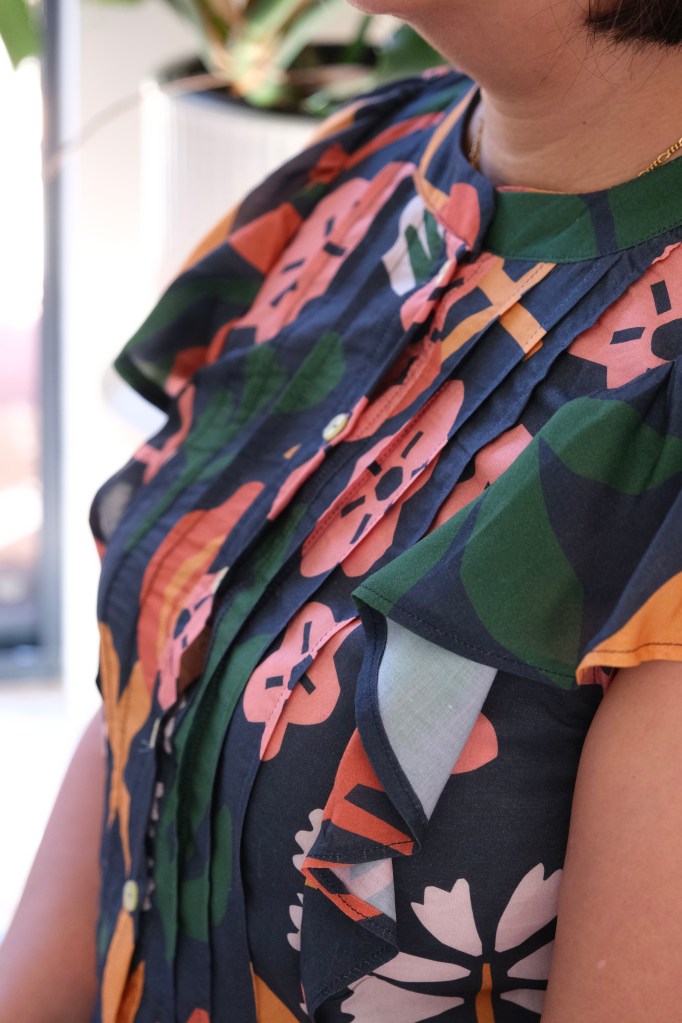
The Clover Top by definition could be called a shirt pattern, but I think, what turns it into a blouse are the details like the little tie, the feminine cut of the shirt which includes bust darts, the bishop sleeves and the shaping continues to the back of the shirt with the centre pleat. Stitchmaiden always include many variations which can be mix and matched to create something new every time you sew the pattern. I decided to make a simple Version A as my first iteration of the pattern. I decided to go ahead and make the blouse without a toile because we’re at the end of the month and the challenge ends!
Features of the Clover Top
I felt that my past makes have shown me that the patterns are true to size for me so with my measurements of 38-inch bust, 33-inch waist and 40-inch hips, I chose to make the size 42. I love that the patterns are nested, and you can choose to just print the size that you need. I also really like it that you have the option to include the seam allowance and don’t have to remember to add it when cutting the fabric. I remembered from the first time to check which was the line I had to follow for that!
So, a shirt or blouse seems like a simple item to sew until you realise that it can be the more technical item. It’s like cooking. The simpler the look of the dish, the harder it is to get perfectly correct. I felt that it was like that with this blouse. The instructions and the illustrations are beautifully written and explains everything so well, but I did find myself making mistakes. I think it’s a pattern that gets better the more times you sew it. Also, I sewed this in a day when I really should have spaced out each stage.
Ok, what was hard? I found the collar construction difficult because my fabric is slippery rayon, and the pattern demands accurate clipping and sewing. My fabric kept slipping and I found myself seam ripping the collar twice because it had slipped to leave an unacceptably big gap. In the end, I hand basted before machine stitching which seemed to do the trick. The next mistake was the button placket. I think I kept confusing View A and View B in my brain. View A needed one placket to be left longer at the top so that it could be folded over the ties to make a cute bow. I only realised at the end what I should have done, so to solve the problem, I made a buttonhole in the tie, and it still works but not as neatly as intended. I think I would wear the blouse unbuttoned anyway. Lastly, I did a minor change from sleeve cuffs to bias bound cuffs. I think on a practical level, I like them better, but I need to fiddle around with the size of them as they are a bit big.
Happy with my Clover Blouse
As I said, it’s the first iteration and I think the first of any project tends to wear the most mistakes. I have used a drapey rayon fabric which is lovely and soft to wear but I’d like to try a cotton or something sturdier especially if I want to make the version with the pintucks.
Stitchmaiden patterns have been such a surprise to sew. I feel that these patterns are exceptional and have had so much research and work put into them. They are very technical and hence something that will advance your skill level. The Clover Blouse is beautifully formal and from the Wonderland Collection. I love how even though it’s form fitting, it’s so comfortable to wear (no dinosaur arms when you’re out to dinner). Another beautiful design from Stitchmaiden.
Thanks for reading and happy sewing!
X Stitchmaiden Em
Full Disclosure: Pattern was gifted for collaboration with no requirement to blog. No affiliate link. All opinions remain my own.
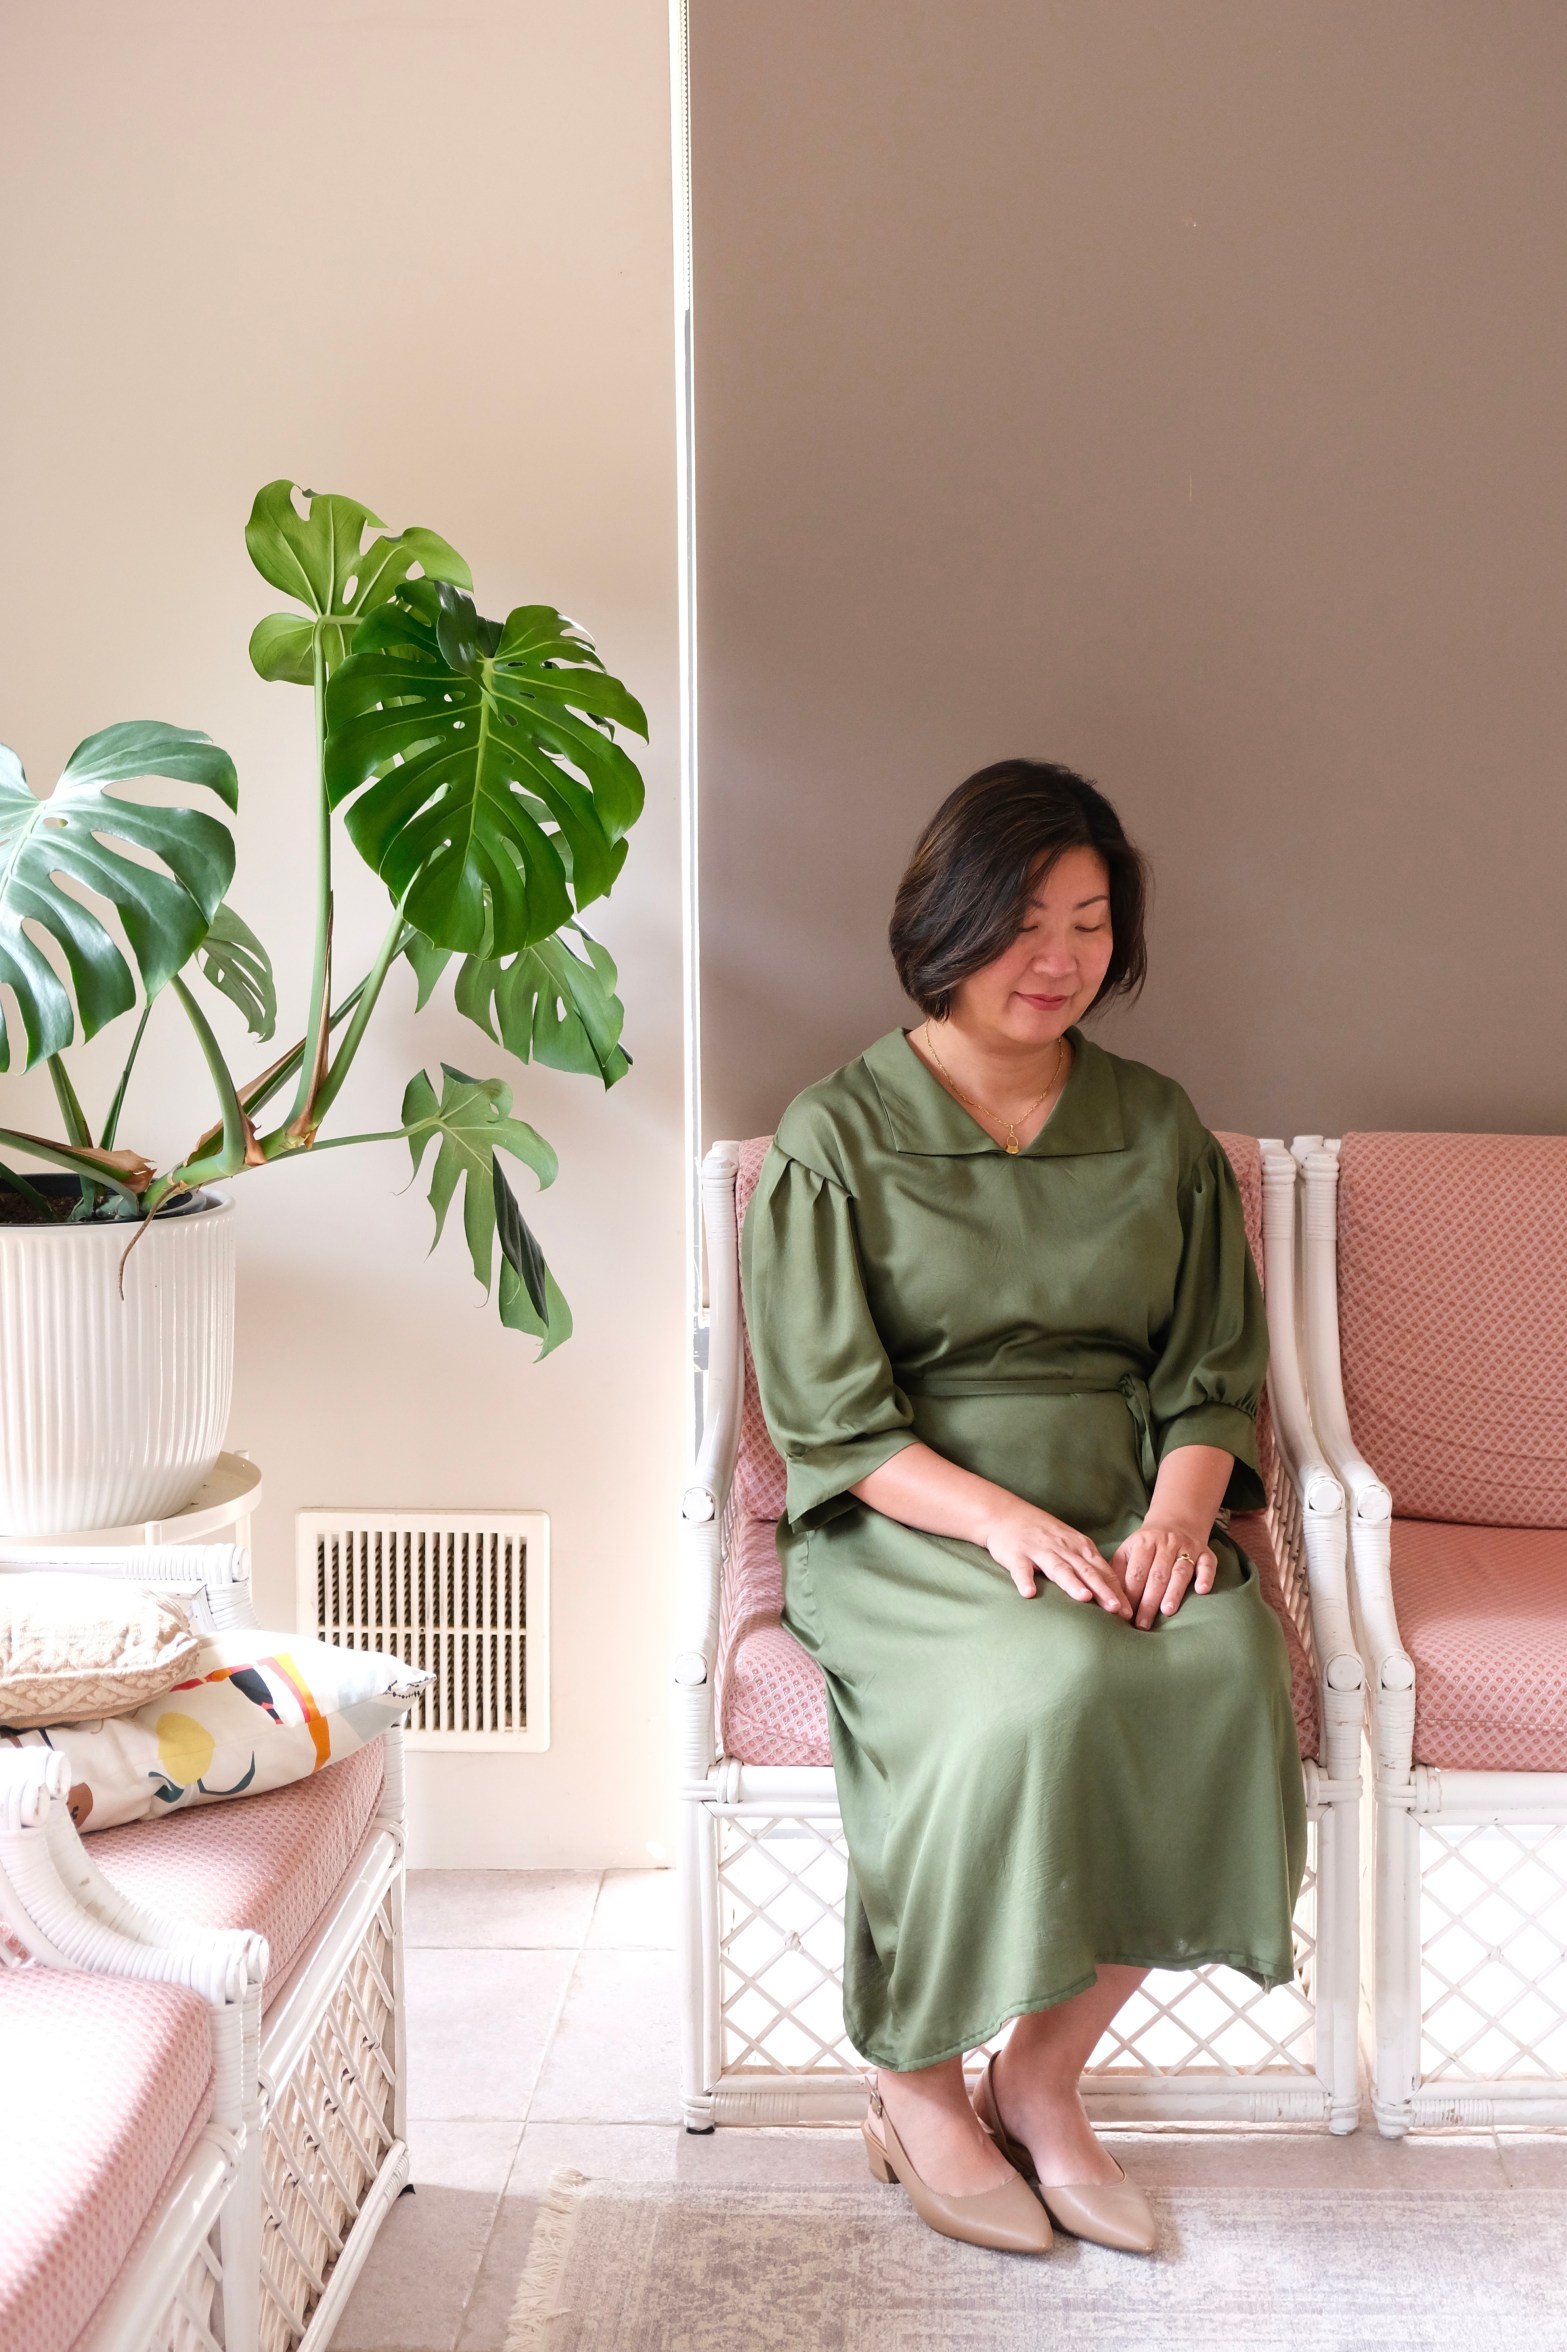
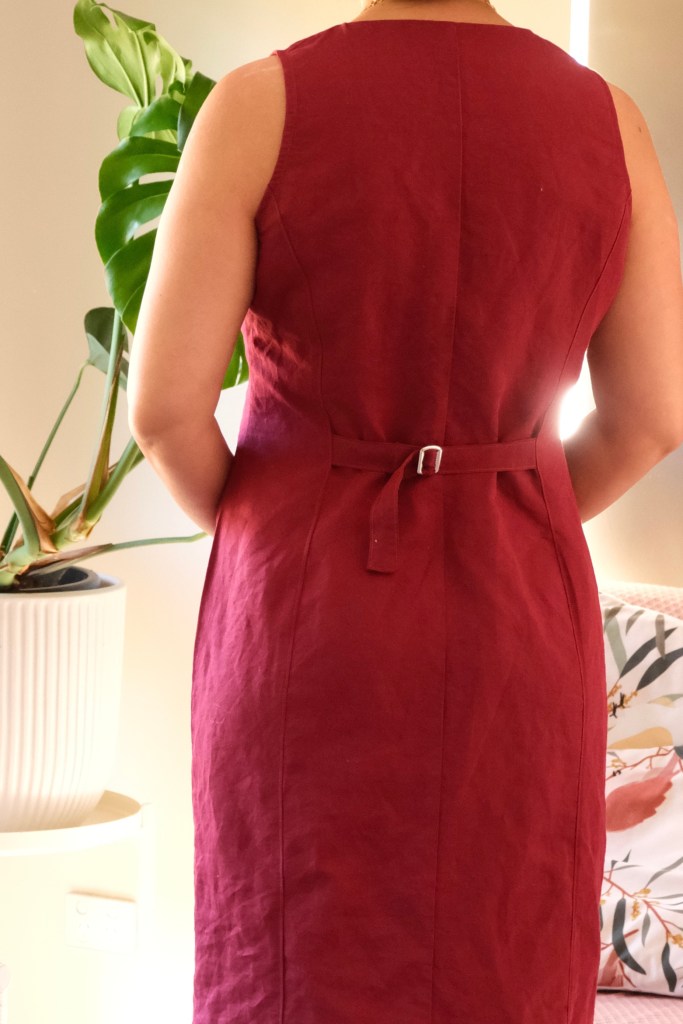
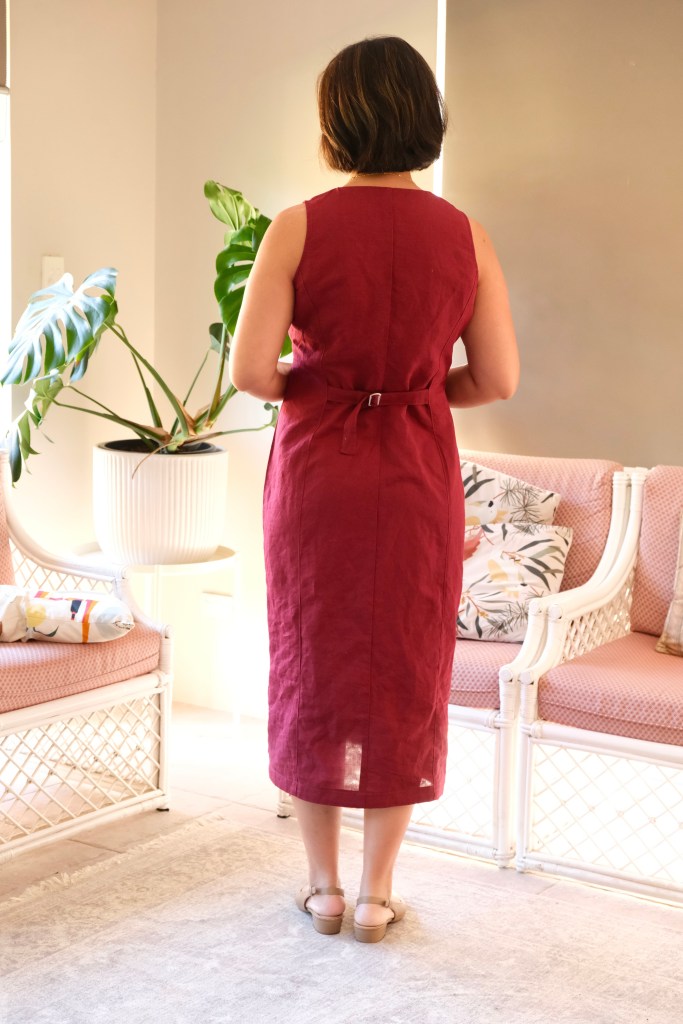
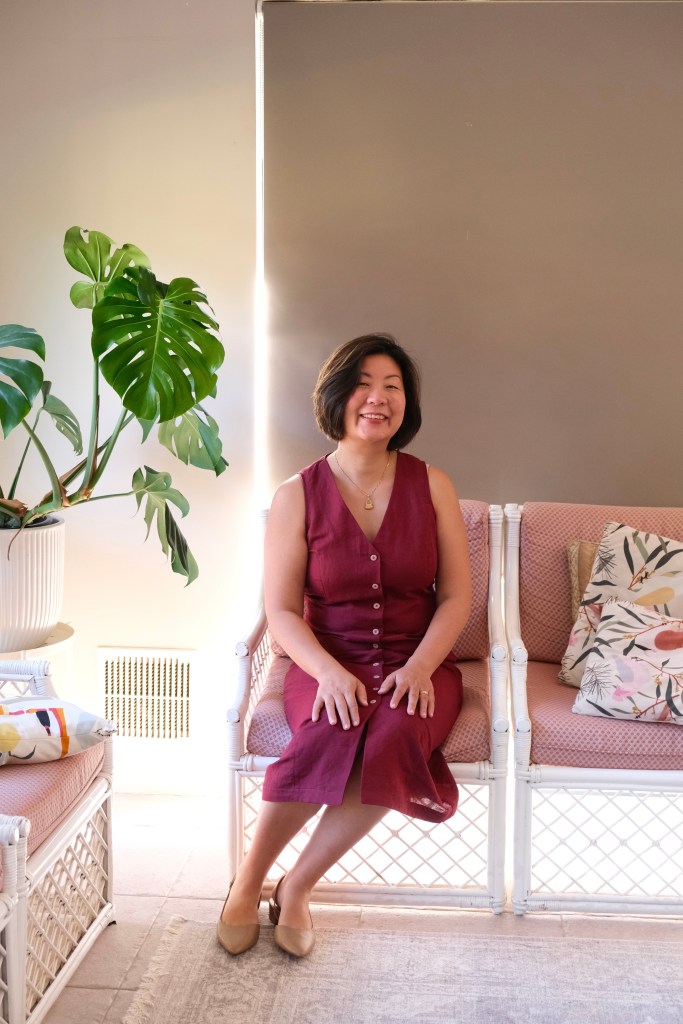
It’s been so exciting to collaborate* with True Bias this year. I have been sewing their patterns for a long time and I was thrilled to be invited to test for them. Especially since this is a dress that I would have rushed to put in my shopping cart. The Quinn dress is based on the design of the vest but taken to 4 lengths. There is the cropped length, the mid-hip length, a short dress and the midi dress. I chose to sew the midi dress. The pattern features a princess seam, V-neck, button placket, and has the vest tie in the back which lets you cinch in a little at the waist.
Button PlacketVest TieV-NeckFeatures of the Quinn Dress
I chose to sew the Size 12 for my measurement of 38-inch Full Bust, 33-inch Waist, 40-inch Hips. An upper bust measurement is included in the pattern which is important for a princess seam. There is also mention of height in the pattern. I did not need to make any adjustments. I’m 5’6” in height and liked where the dress ended on me. The pattern was true to size for me.
The feature that I’ve come to know True Bias Patterns for is their neat finishing. The dress was not lined but it used a combination of bias binding and facings. This included the hem of the dress which means that everything is perfectly clean and neat.
The pattern is for woven fabrics. I used a maroon-coloured linen-cotton. It was quite a lightweight linen which is so comfortable in summer and the hotter months. I would love to sew one in denim and make the stitching a feature of the design. Again, with the built-in facings and finishing instructions, this would be the perfect dress for some featured topstitching.
There is a vest tie on the back panels of the dress. I managed to find a vest sliding buckle, unfortunately not very pretty. I was hoping to get a different colour but with my next make, I would try a few more stores. There is also online but they always sell these things by bulk.
Testing went very smoothly, and I really enjoyed the whole process. I really enjoy the way True Bias set out their instructions which include very good illustrations. I feel like this is a short review because all the pieces fit. I did a quick toile with my marron linen in my usual way of basting all the main pieces together to check the fit. I’ve been toiling this way for a while now and find that I can save on cutting into “toiling fabric”. This comes with a quick disclaimer that I am very familiar with True Bias patterns and have worked out my sizing from past makes. This is probably why it’s good to sew a few patterns from the same pattern drafter.
True Bias Quinn Dress
Once the last button was sewn, I excitedly tried it out for a long lunch with my husband. It’s very comfortable to wear and there were no issues sitting for a lovely lunch. It’s also a way to repay my husband for all his help with the photography!
On a more personal note, I’ve really enjoyed participating in pattern tests this year. I decided that since my kids are transitioning into independent young adults, I would use my spare time to indulge in my sewing this year. Happy to still be needed but also grateful to regain a bit more time!
Thanks for reading and happy sewing!
X Em
*Pattern was gifted and paid for testing with no obligation to post. All opinions remain my own.