Calvin Wrap Dress

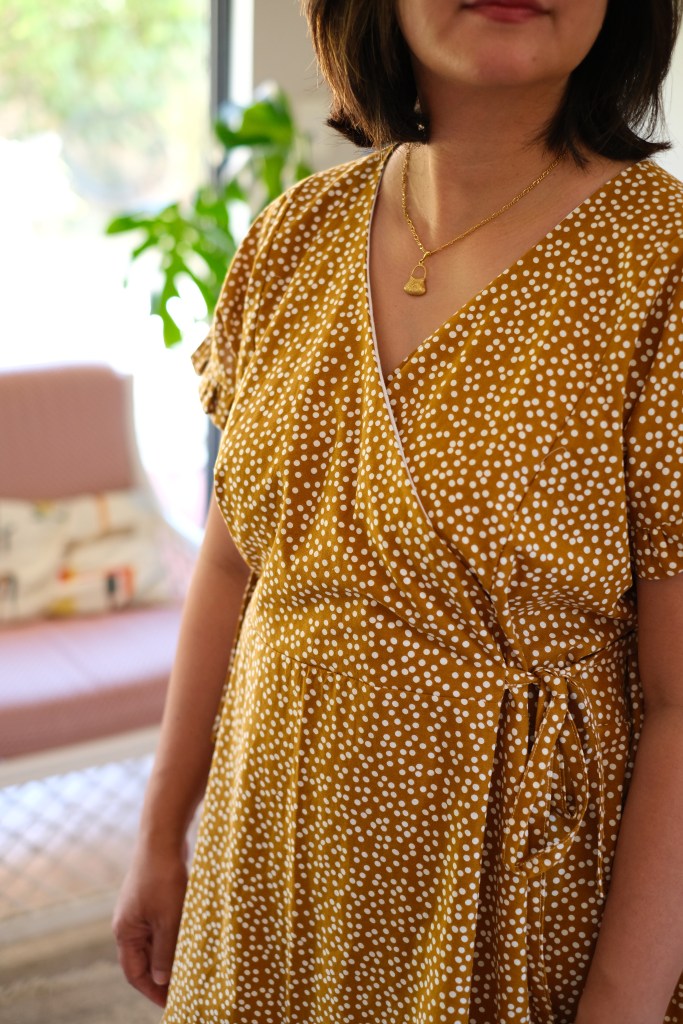
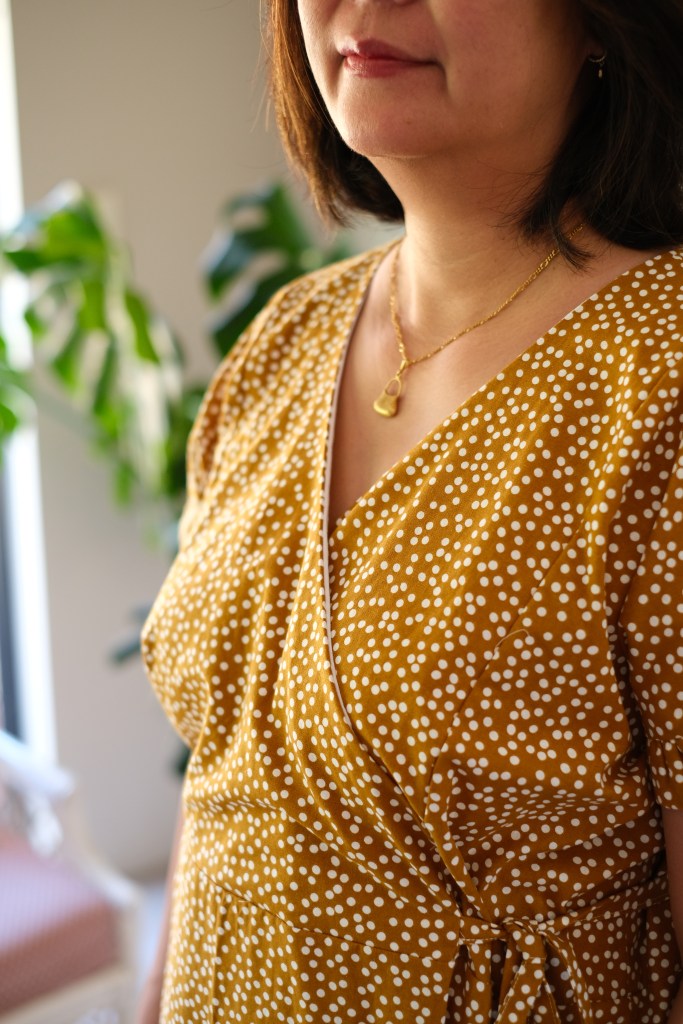
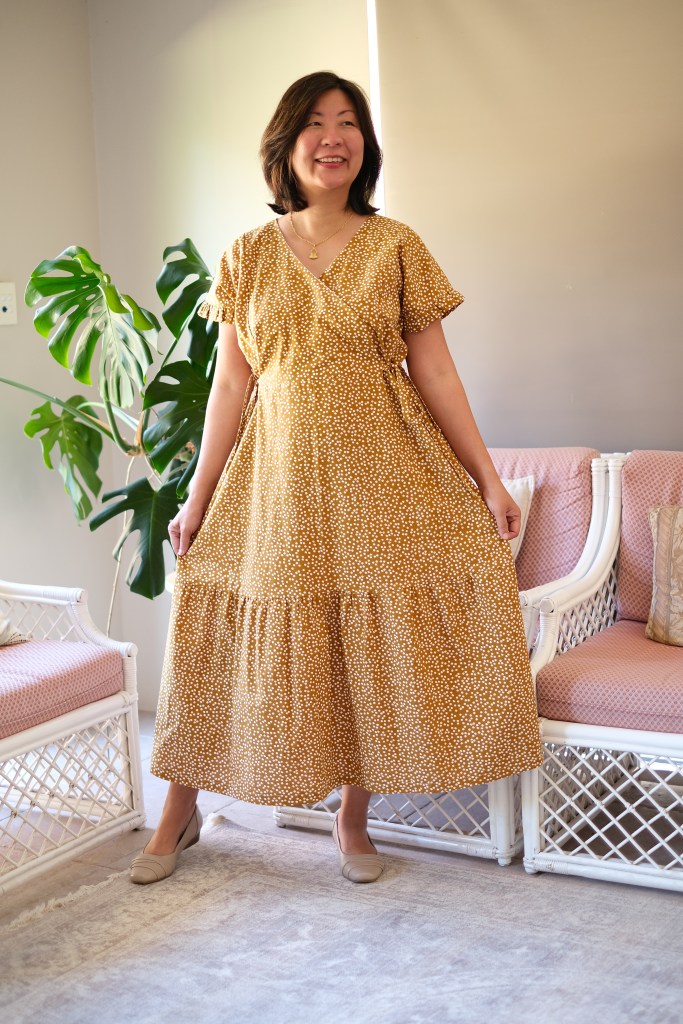
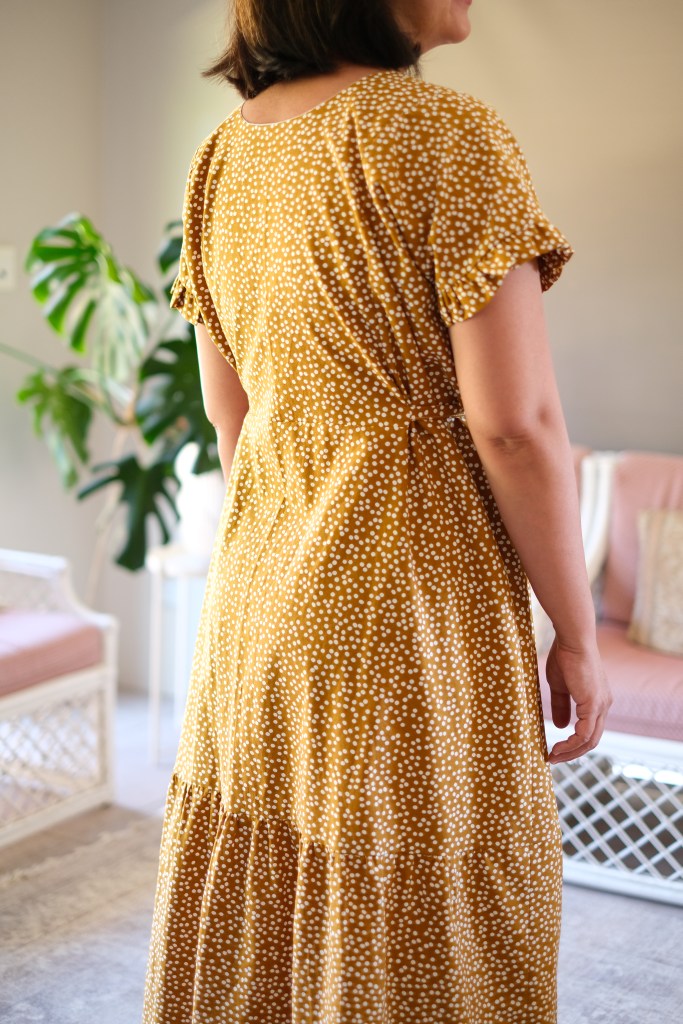
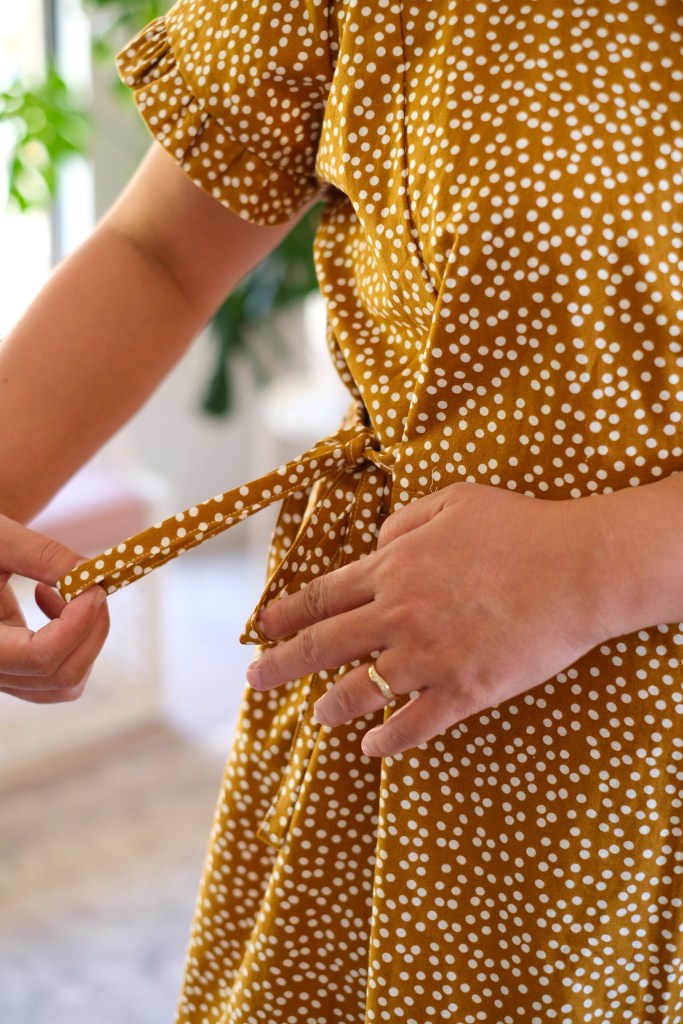
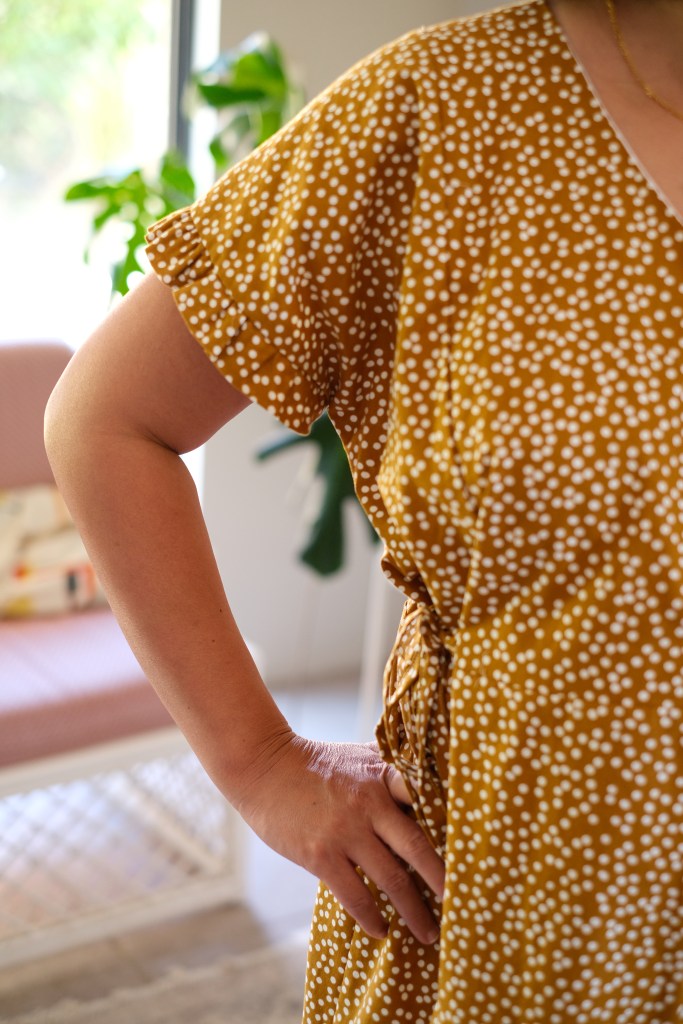
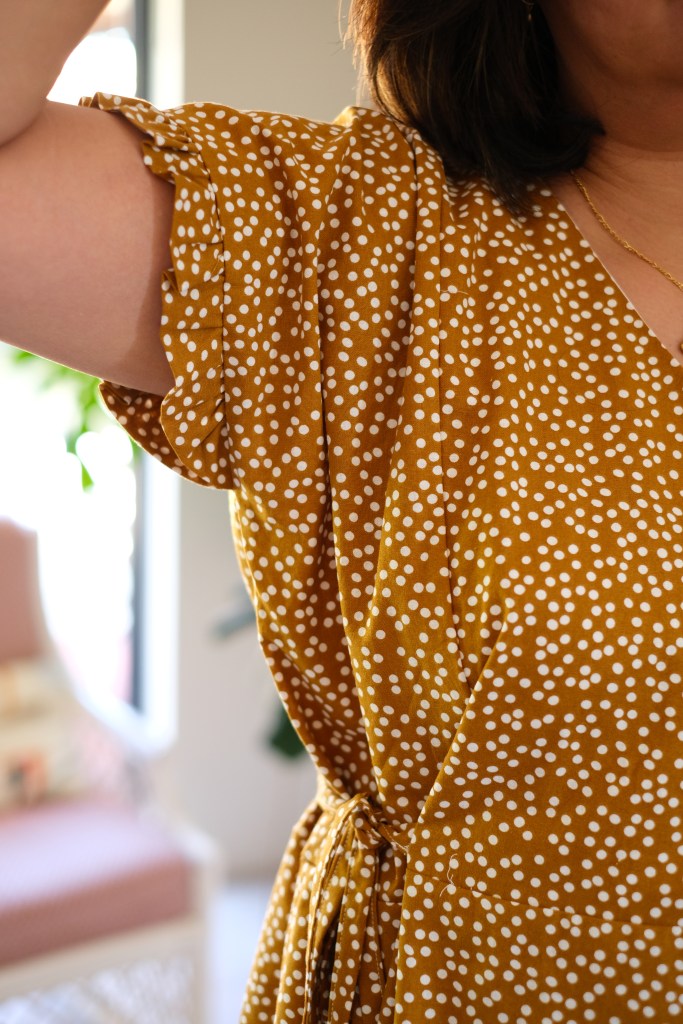
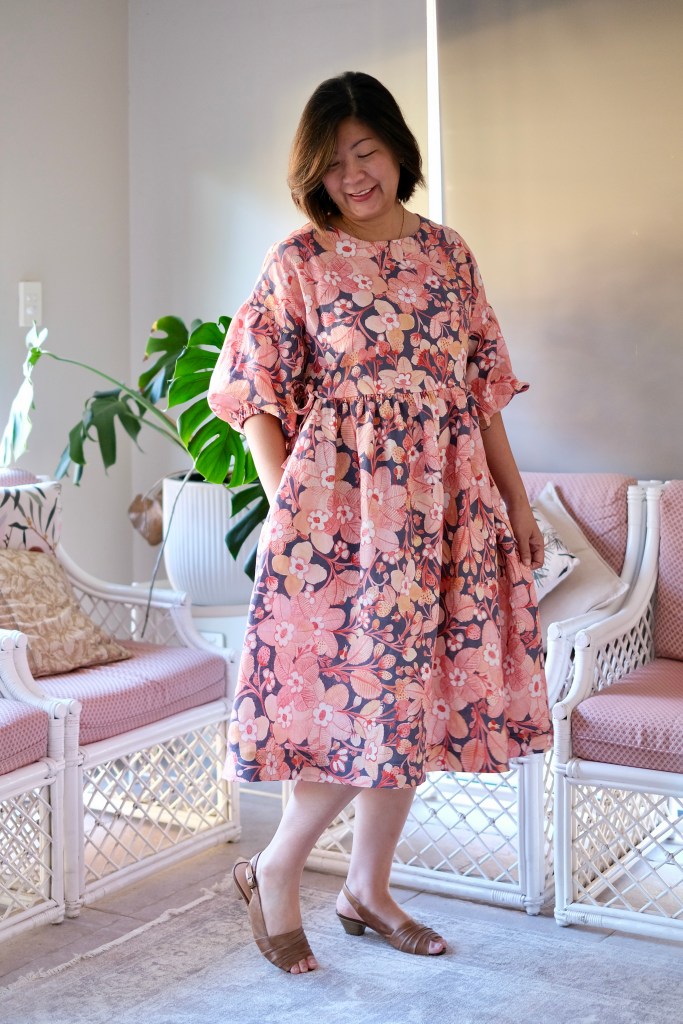
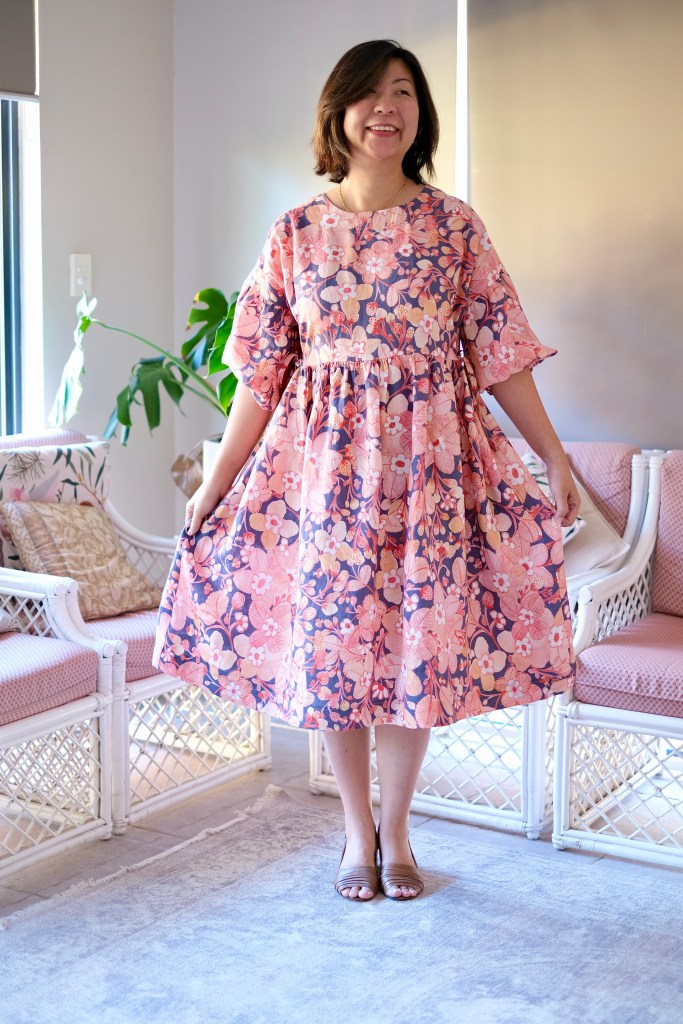
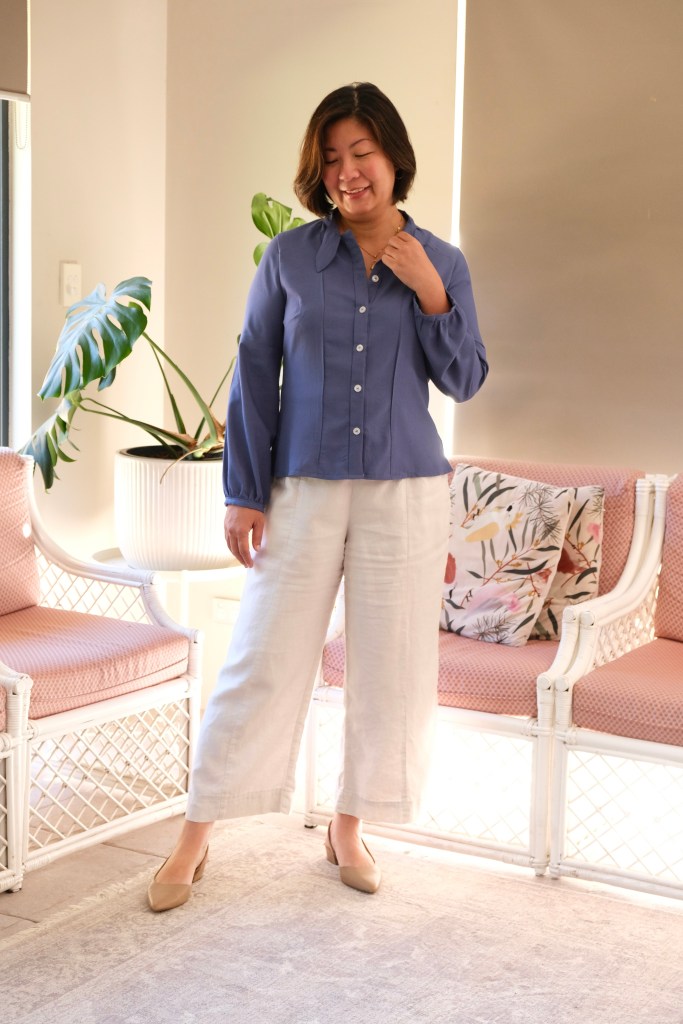
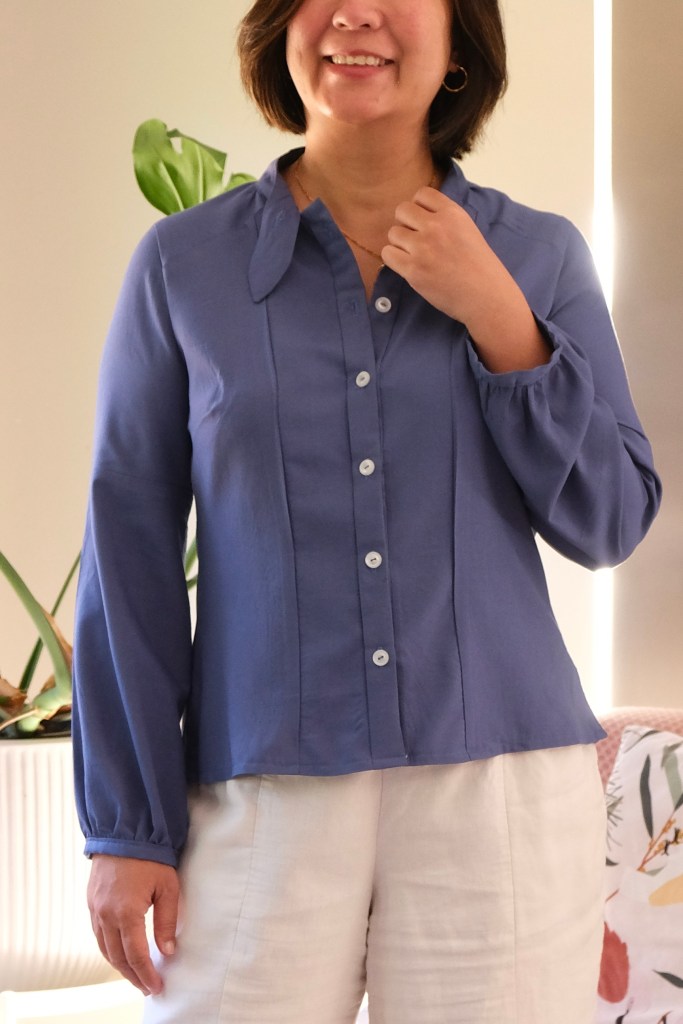
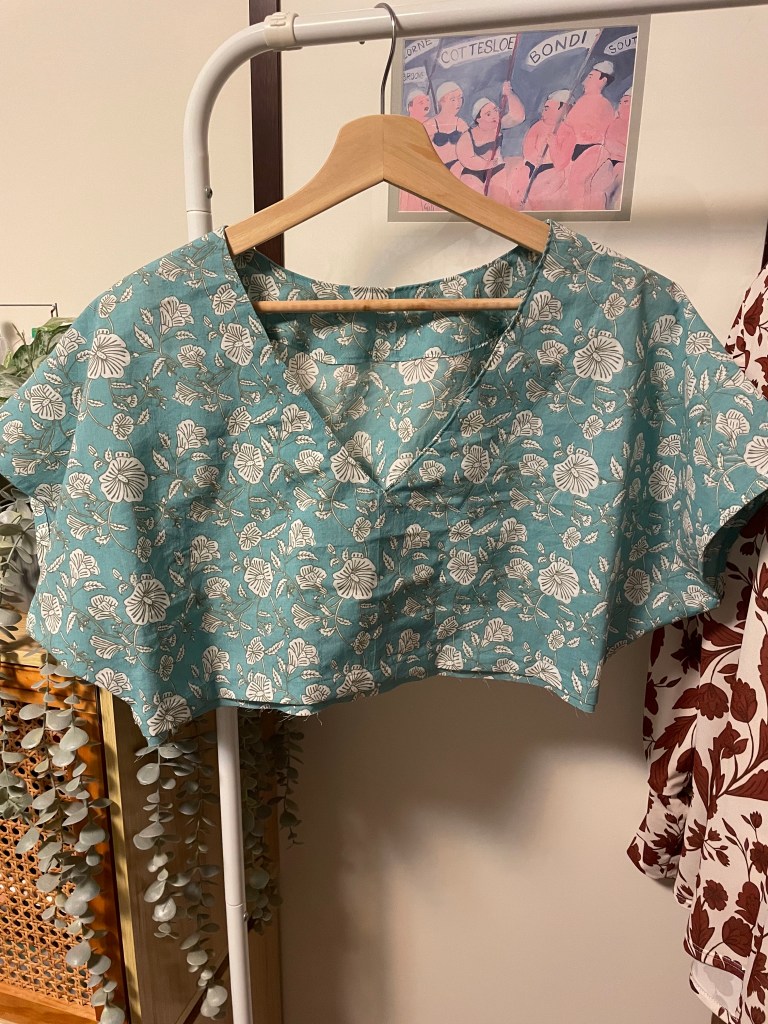
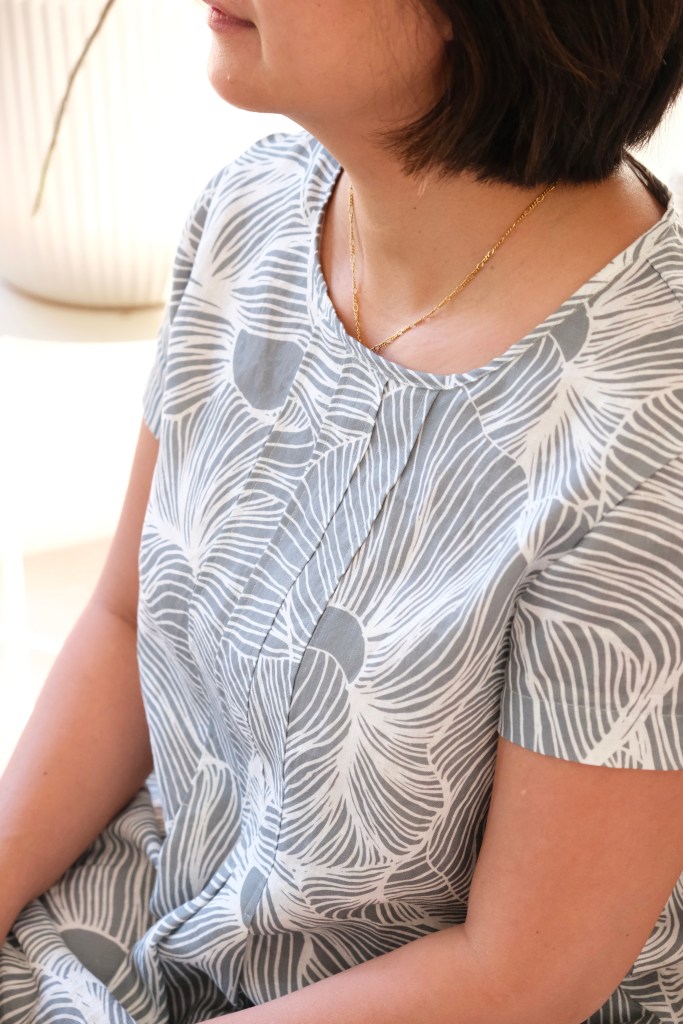
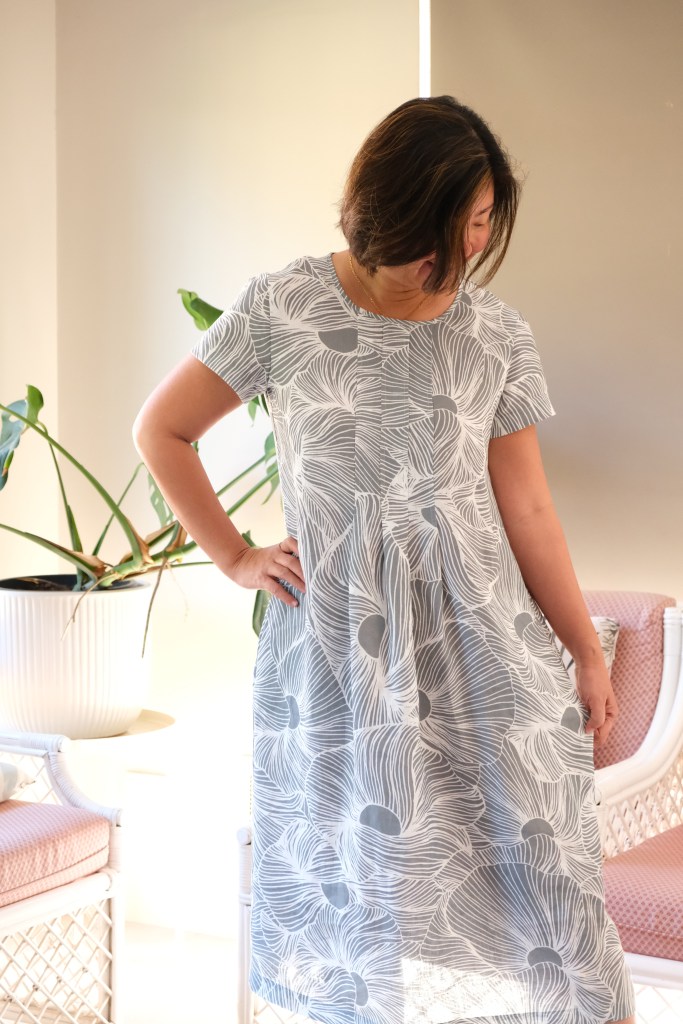
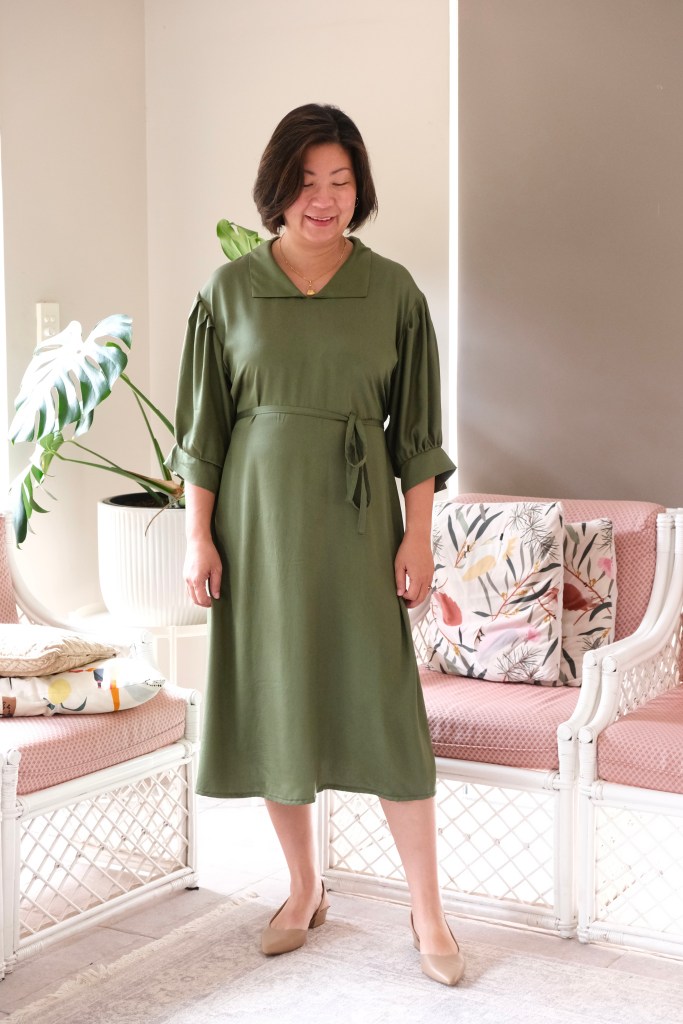
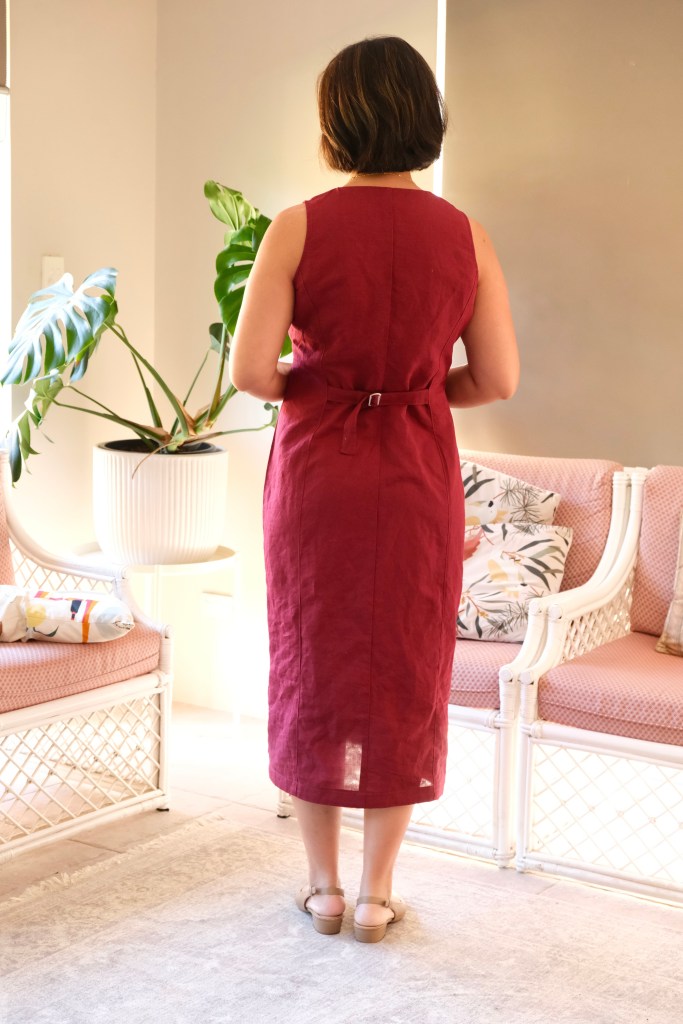
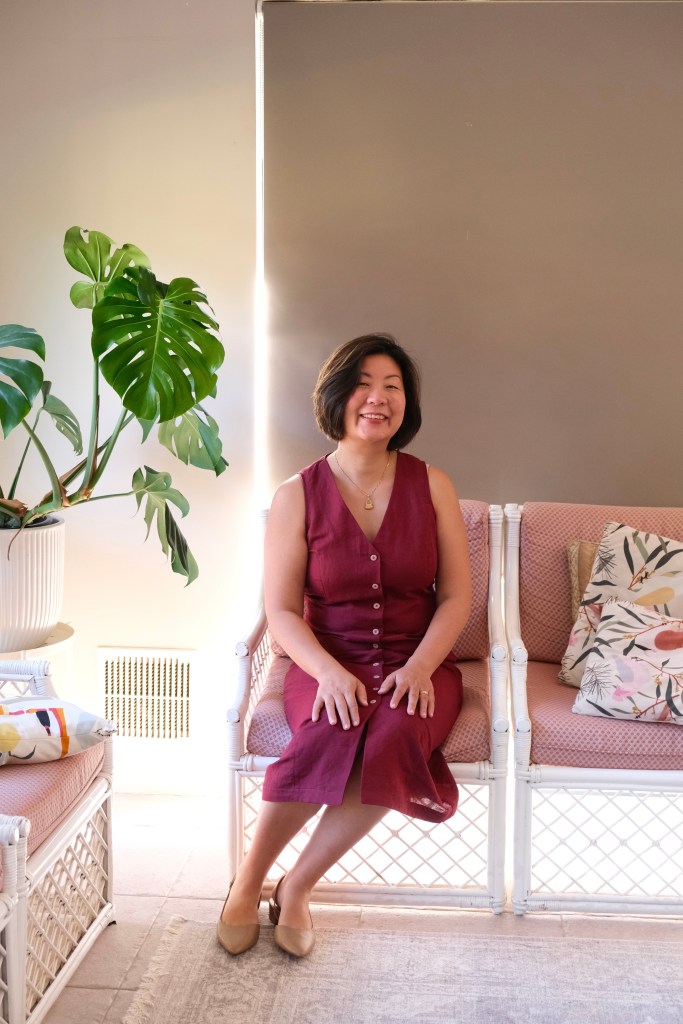
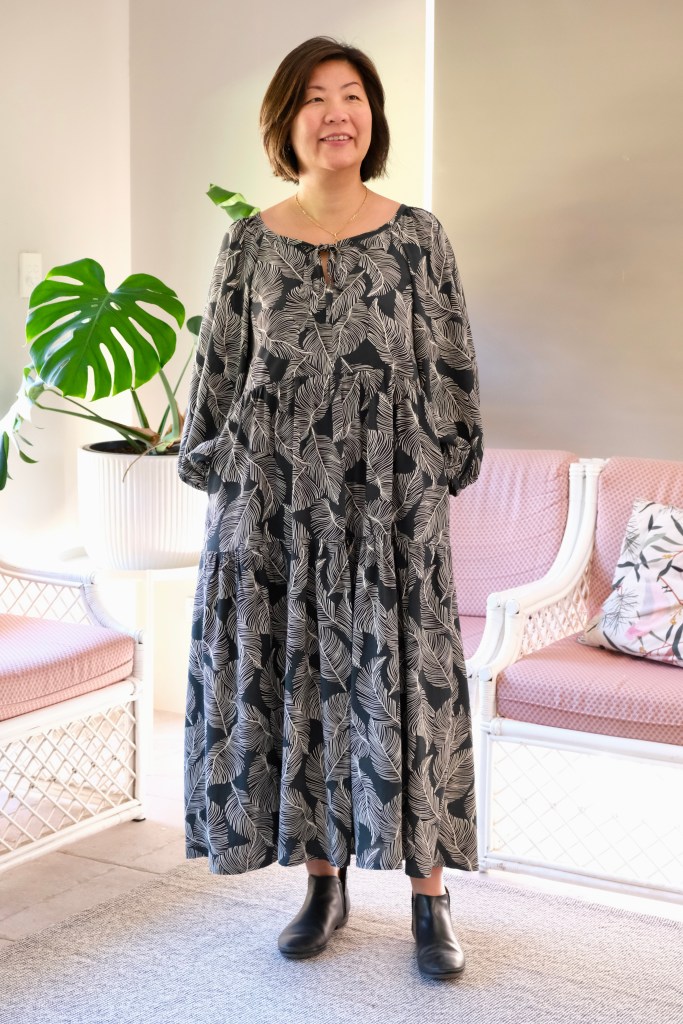
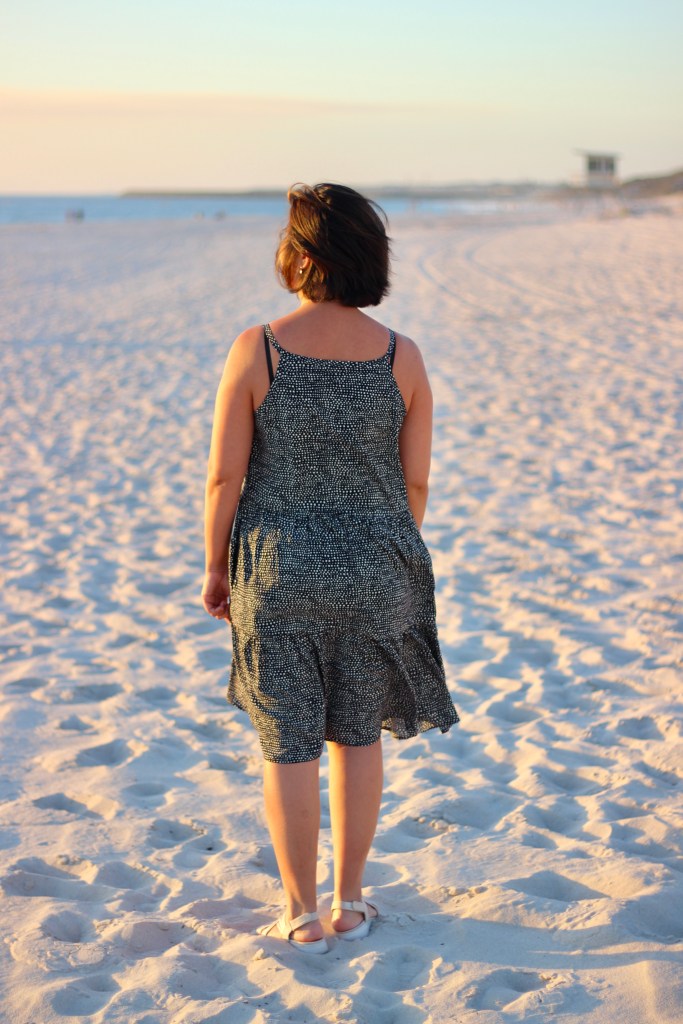
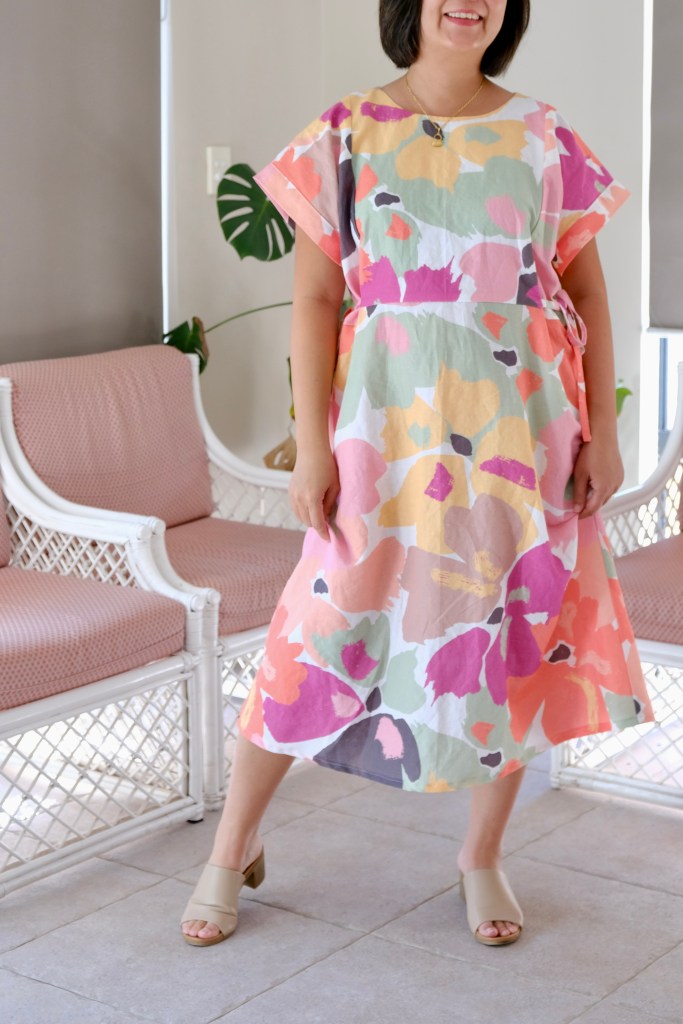
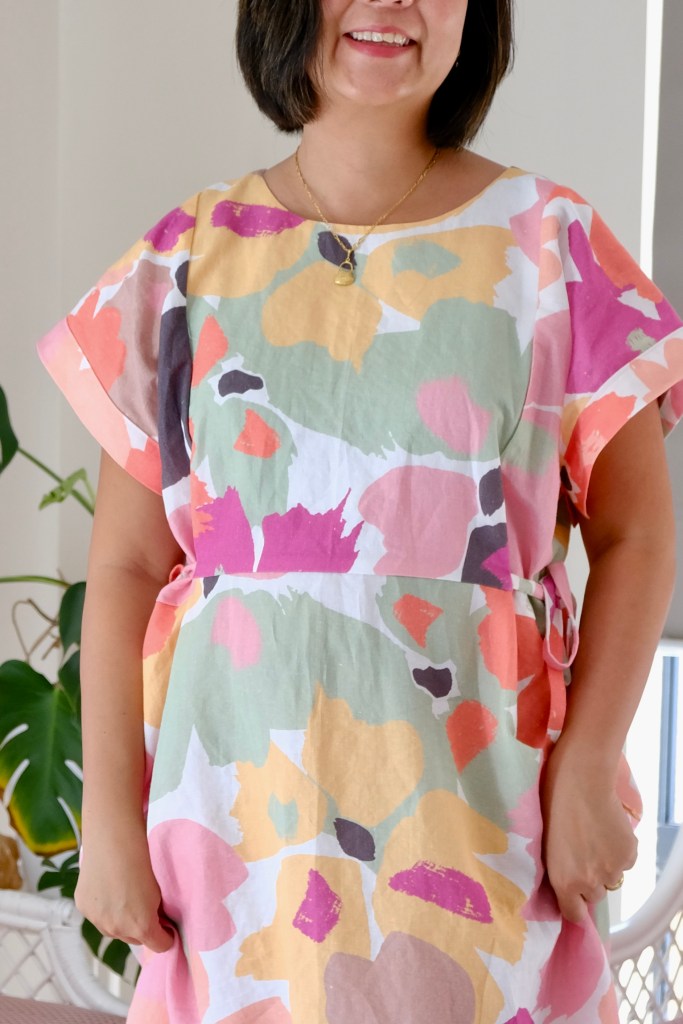
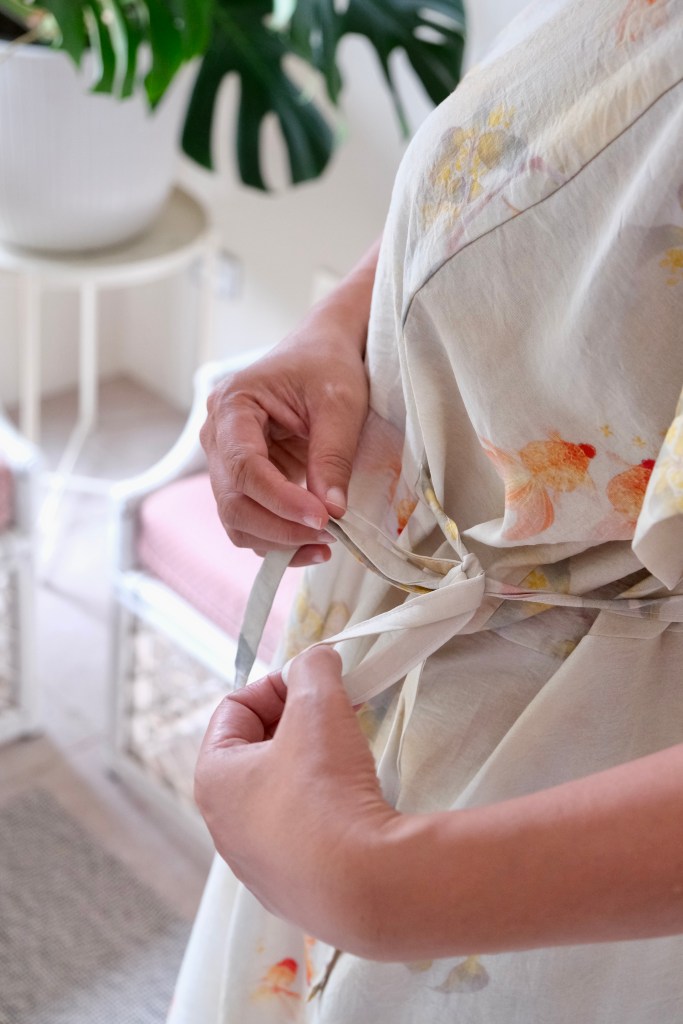
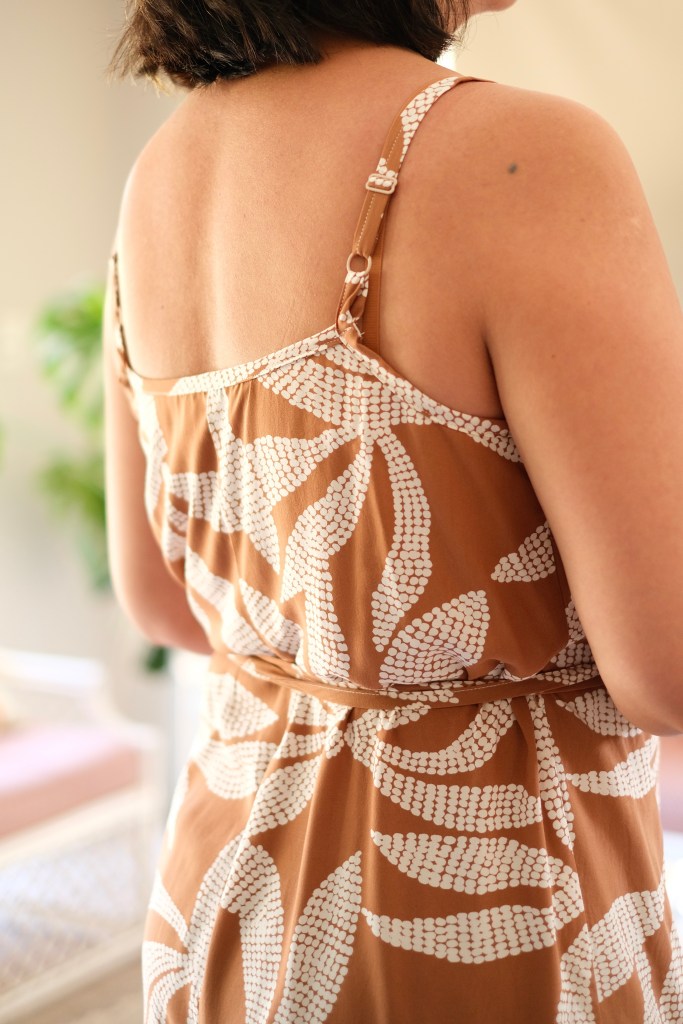
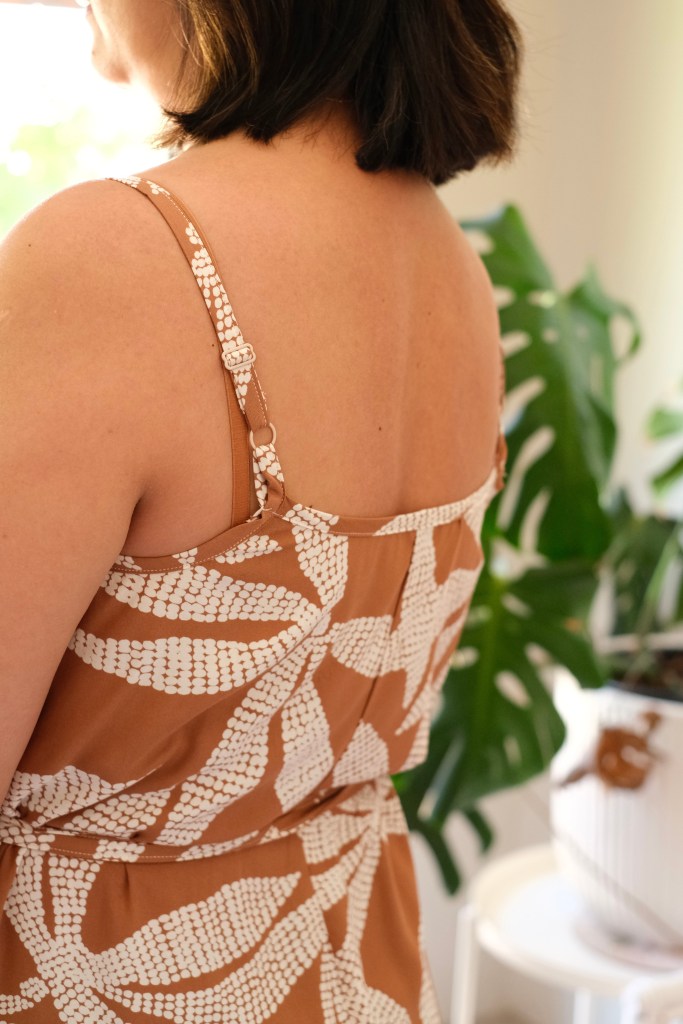
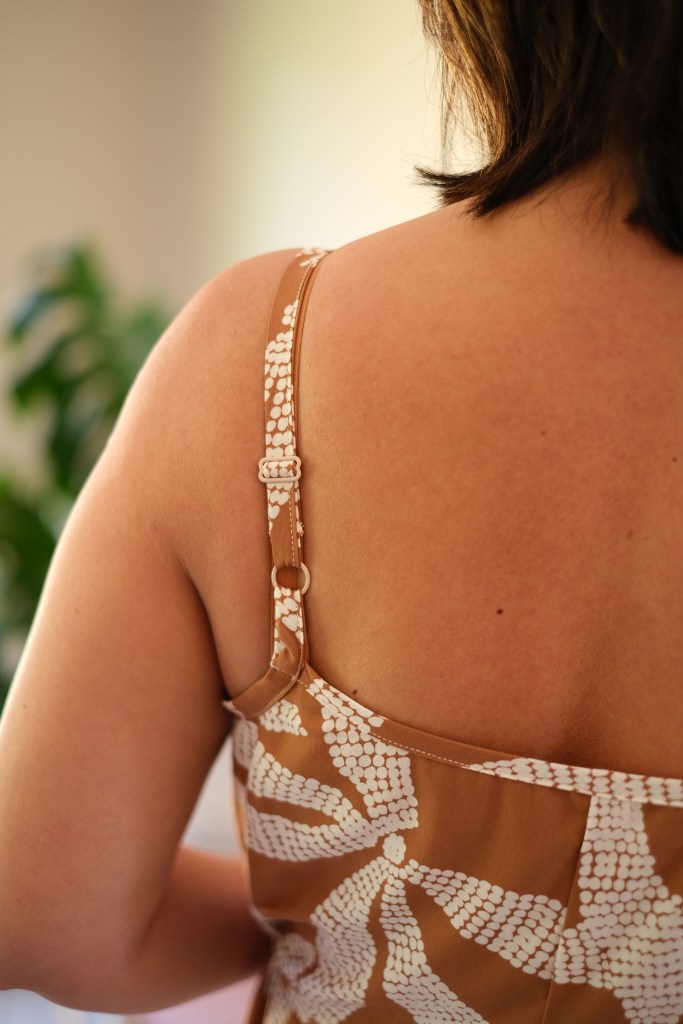
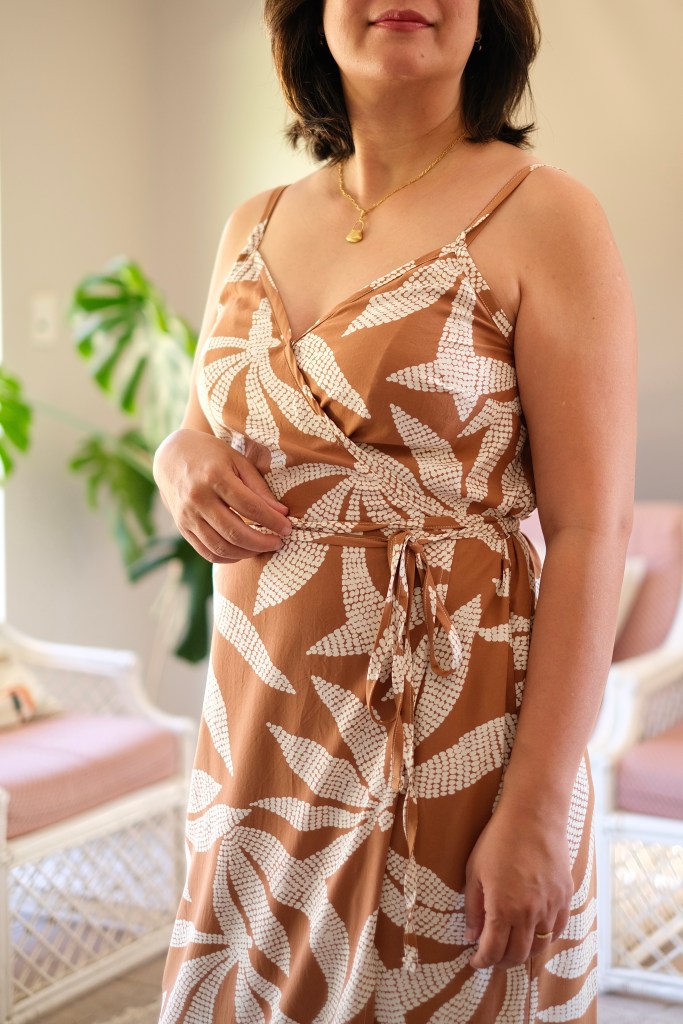
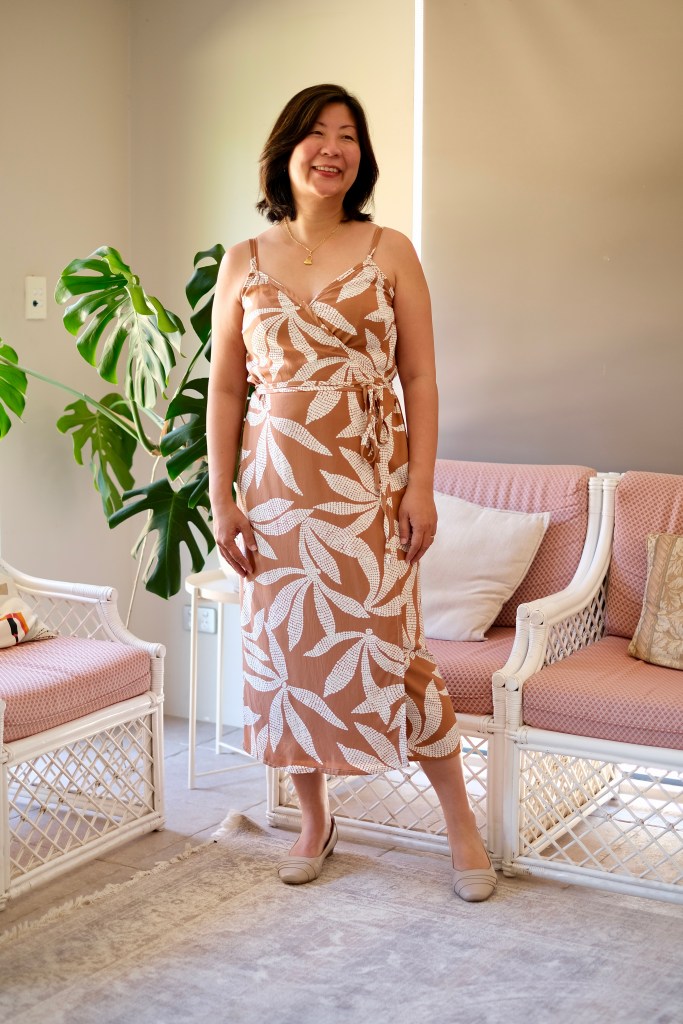
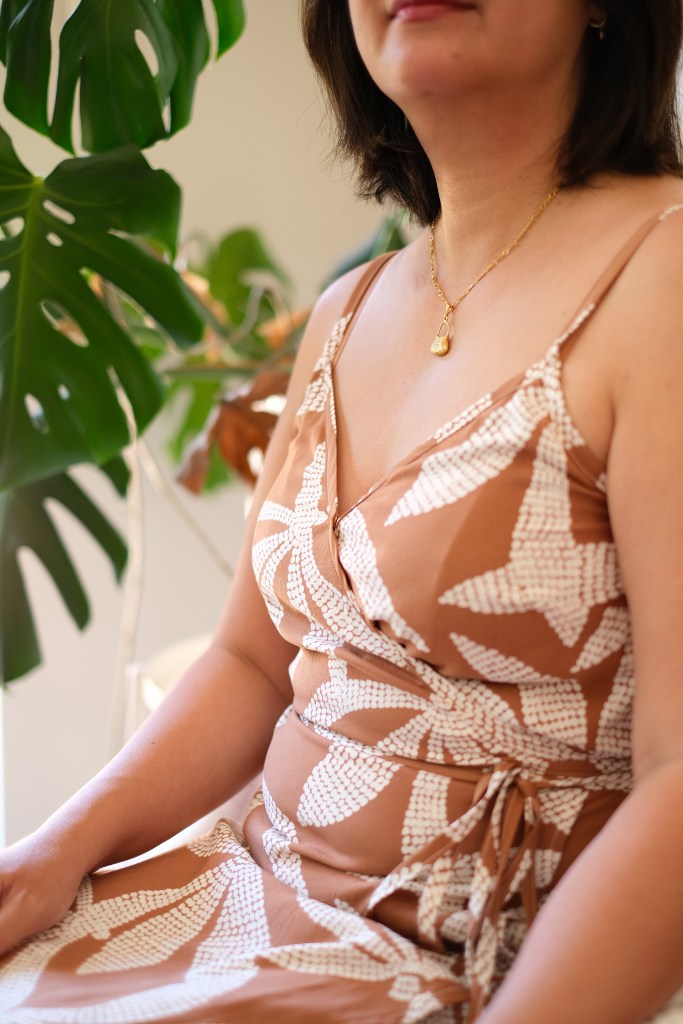
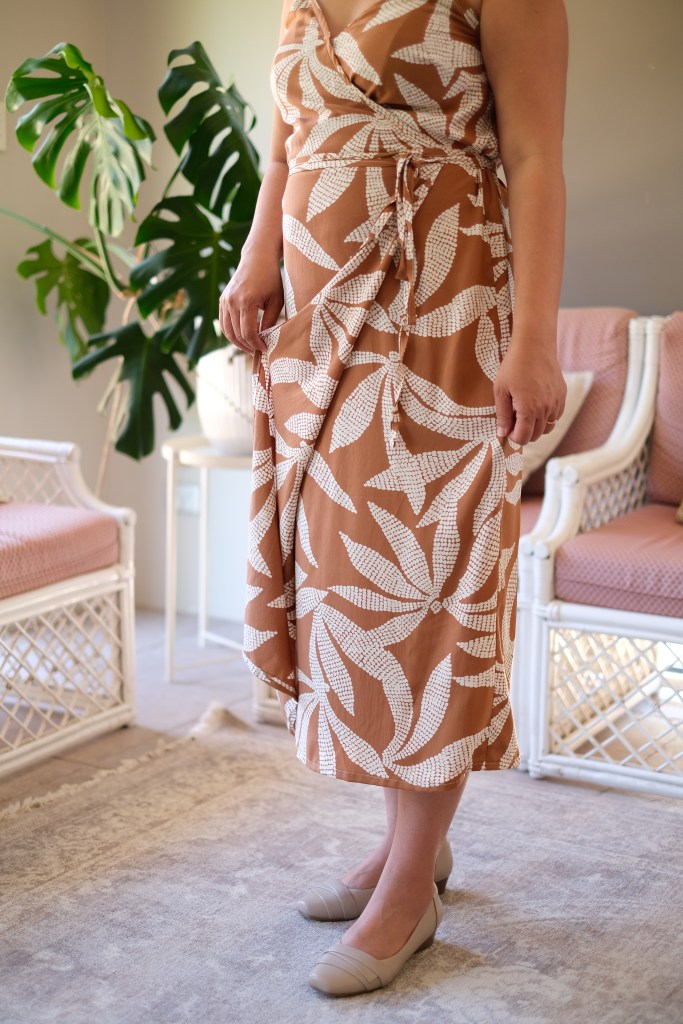
Having made the Calvin Top a couple of weeks ago, it was a quick job to bring it together for the dress. The True Bias Calvin comes as a top and a dress version. The pattern features exposed bias binding that becomes the ties of the dress. The dress is midi length with a generous wrap front. My favourite feature and what I bought the pattern for, is the adjustable straps.

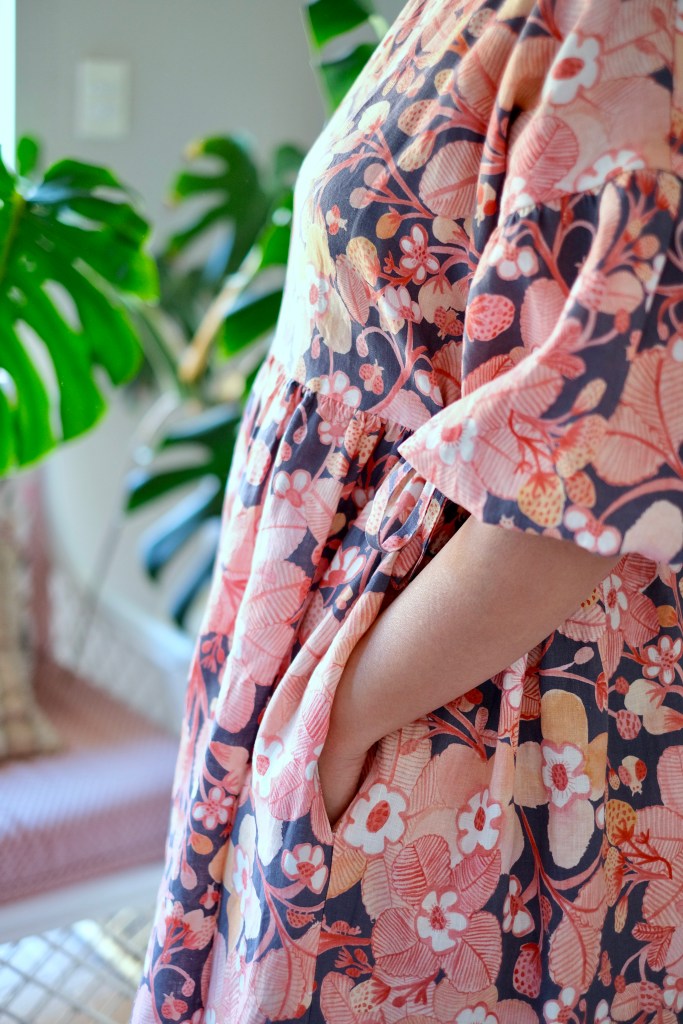
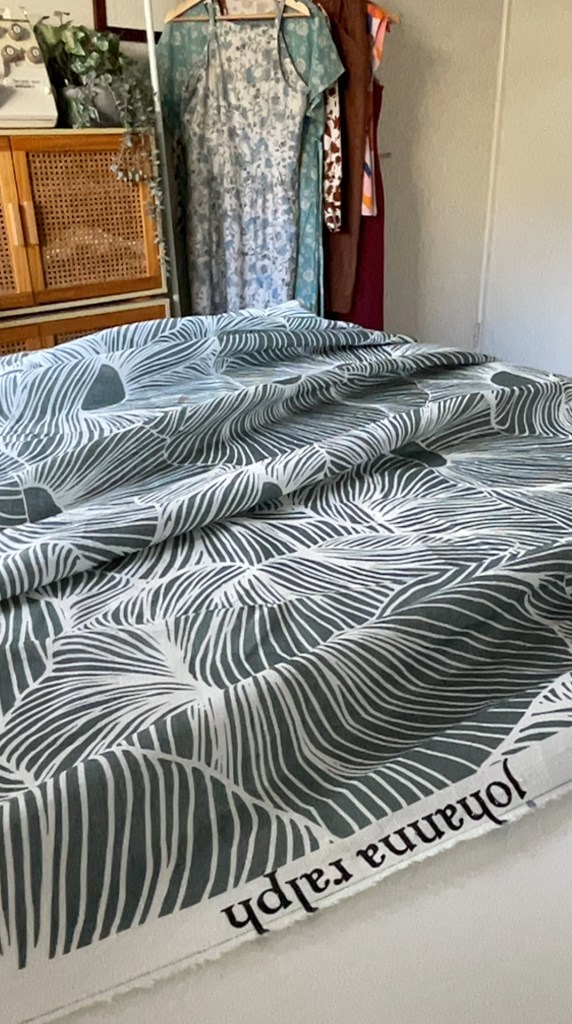
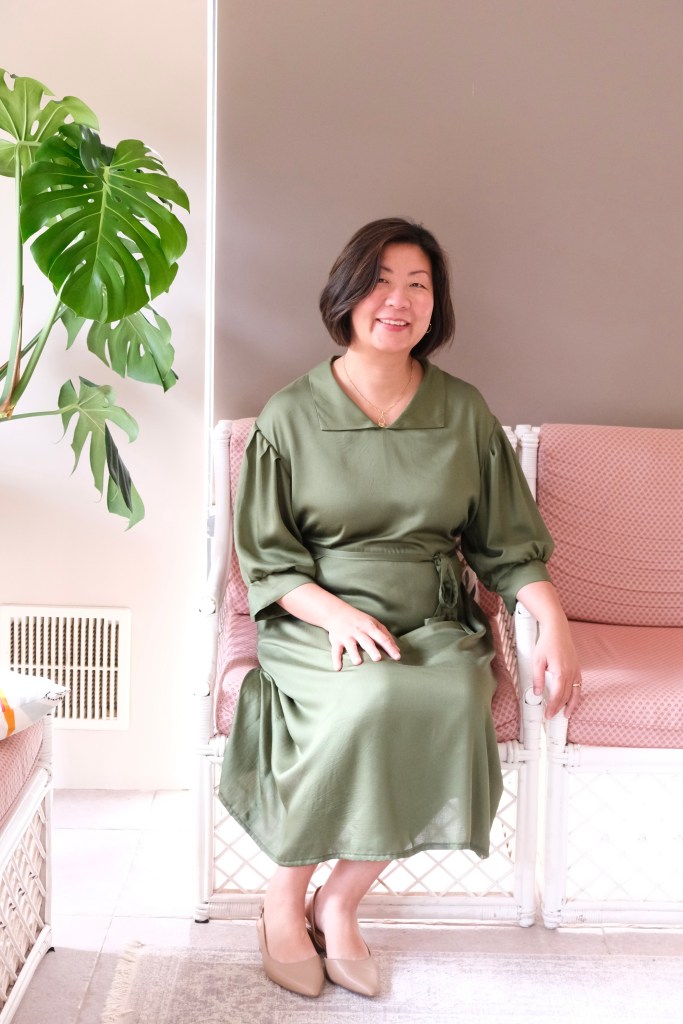
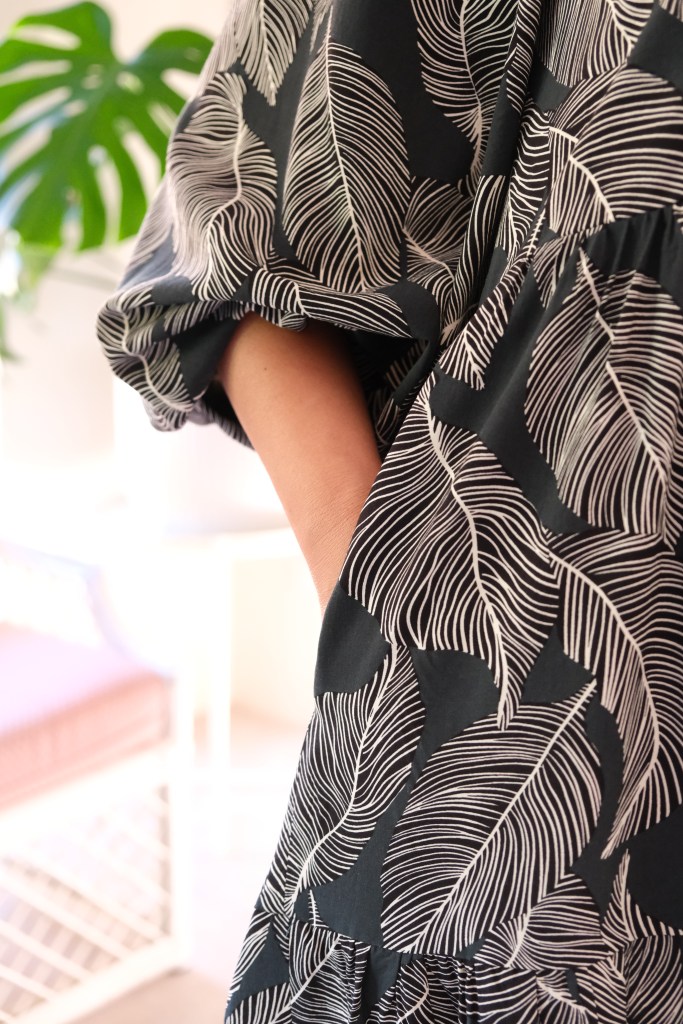
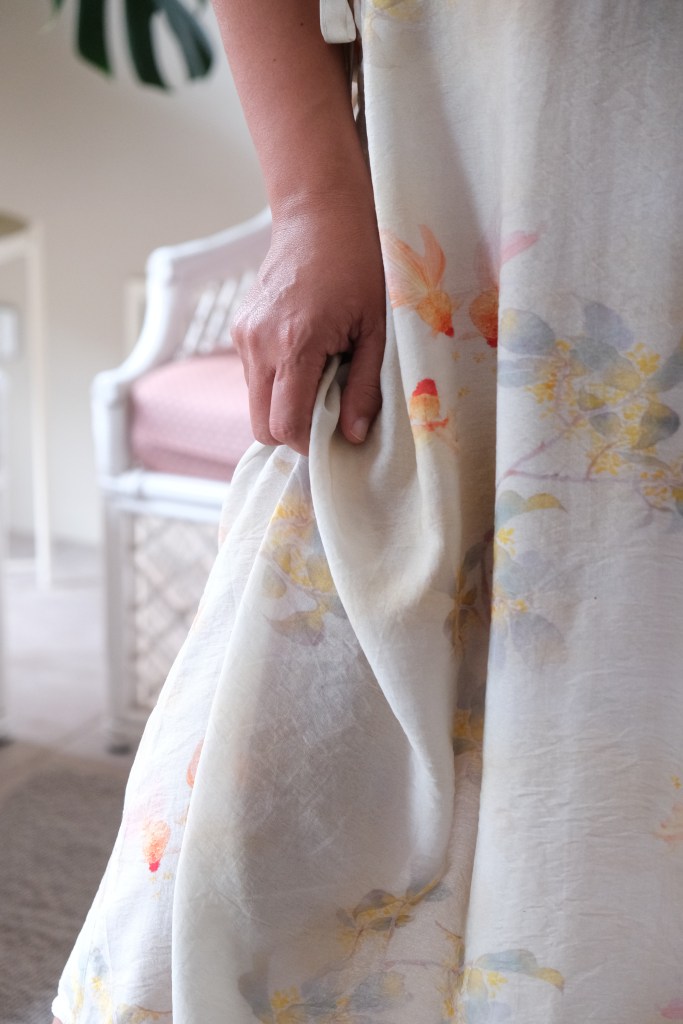
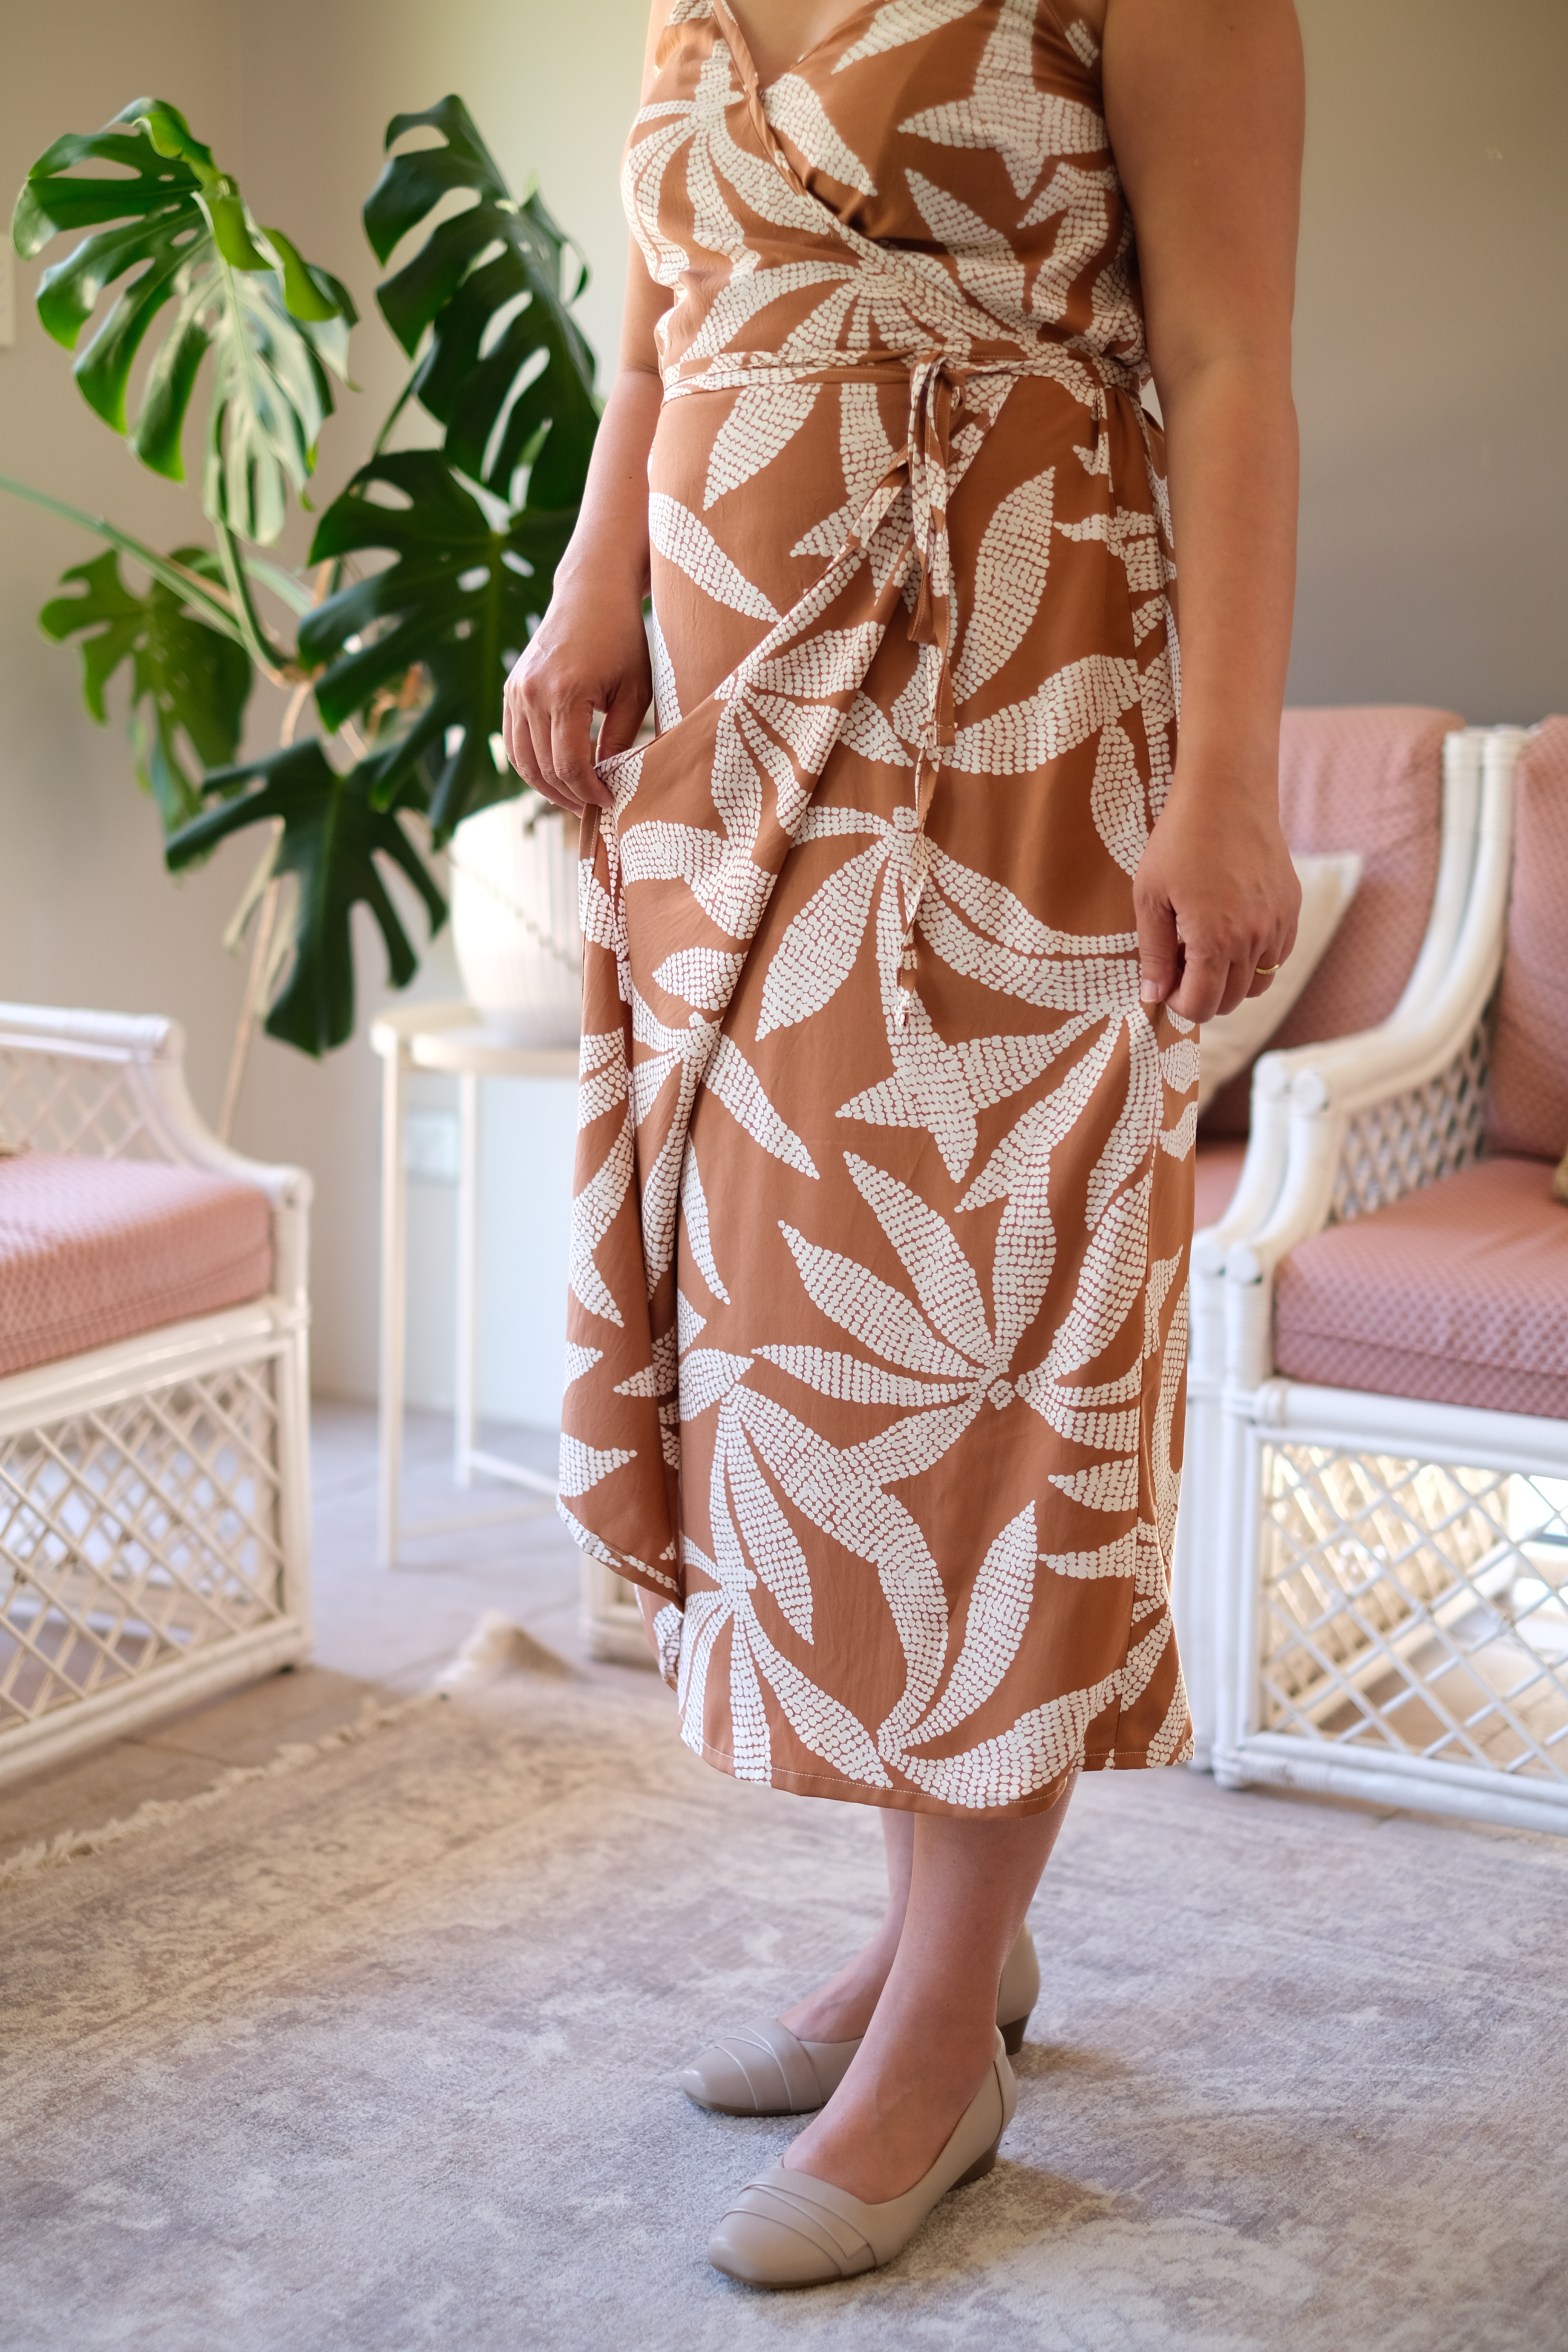
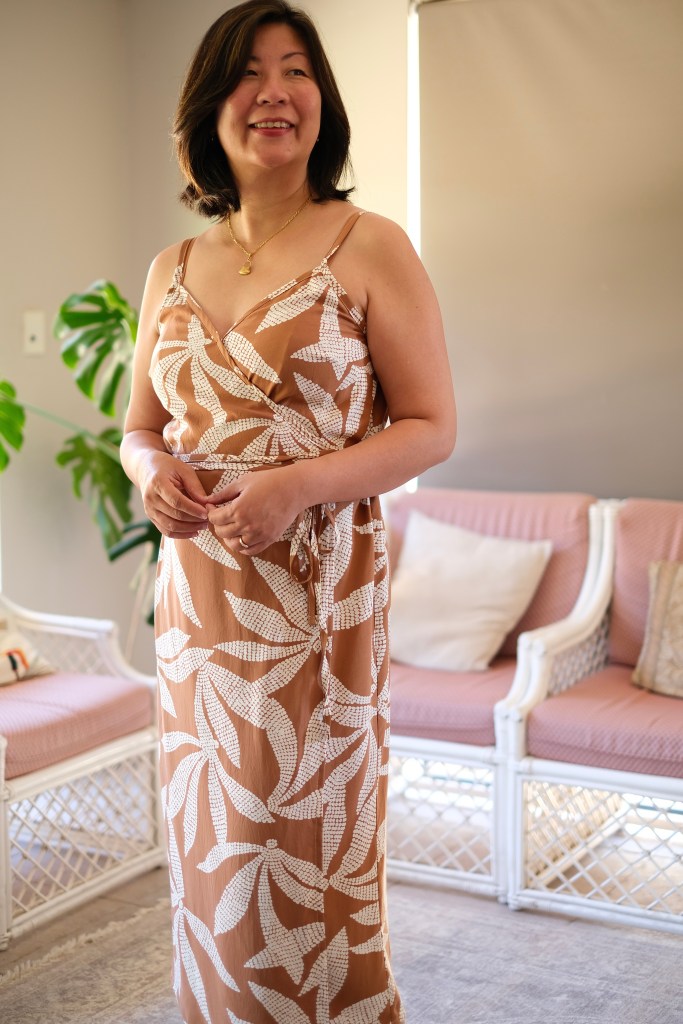
The bonus of making the top as a wearable toile was being able to test out fabric choice as well. The linen worked really well for the top but once I had worn it, I decided I wanted a drapier fabric for my dress version. I’ve always loved the Atelier Brunette brand of fabric. I was so happy to find 3 meters of the Kaola Pecan Pie in Viscose from Maaidesign online fabric store. They stock such a huge range of beautiful fabric.

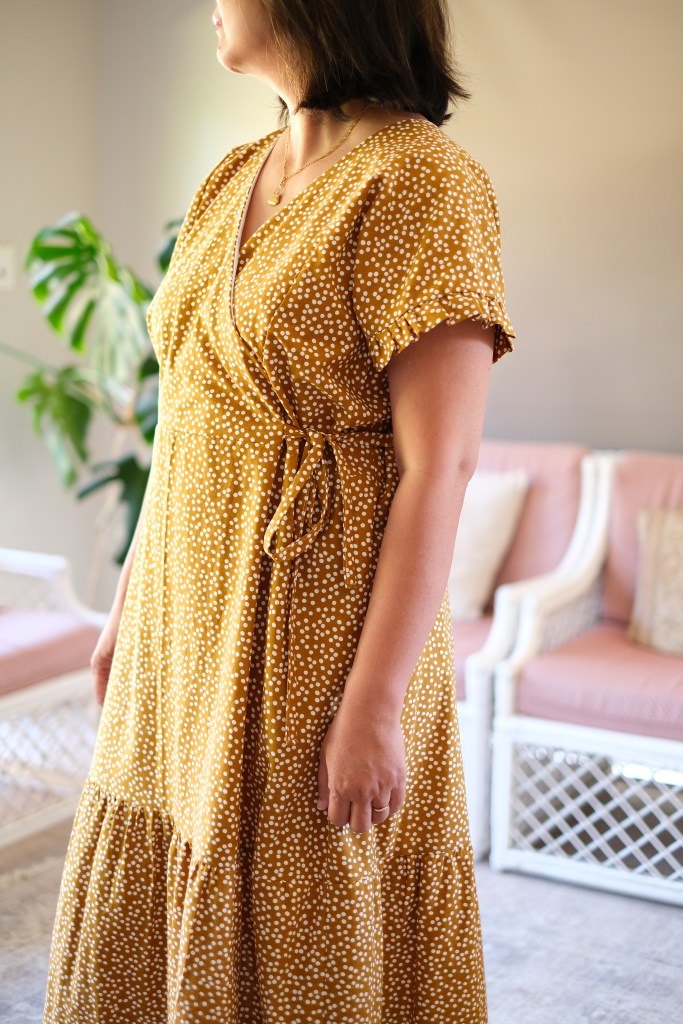
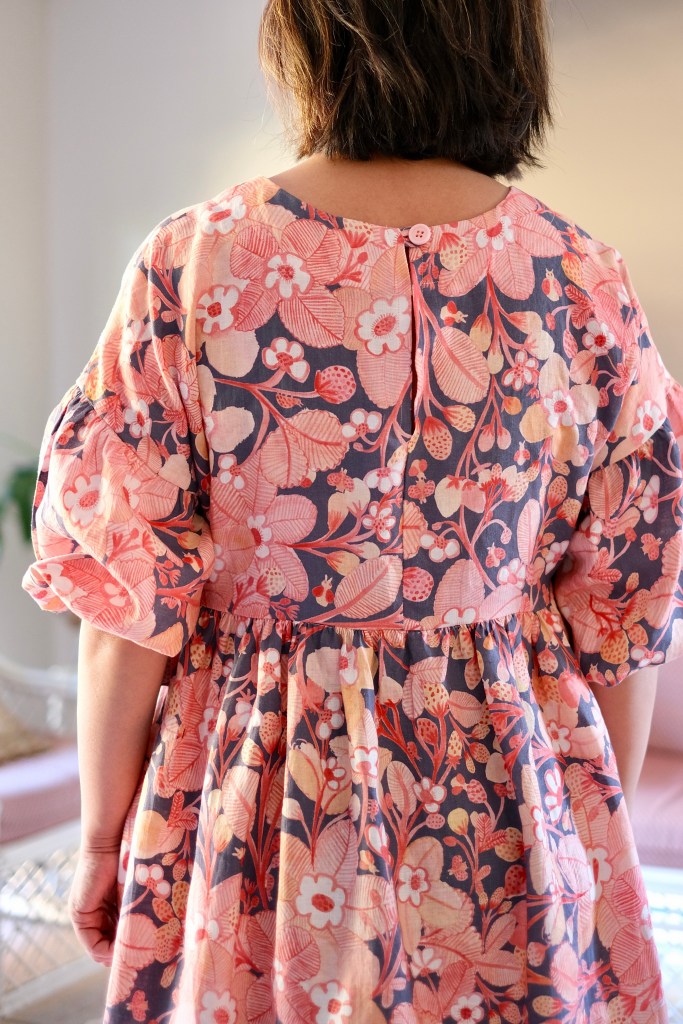
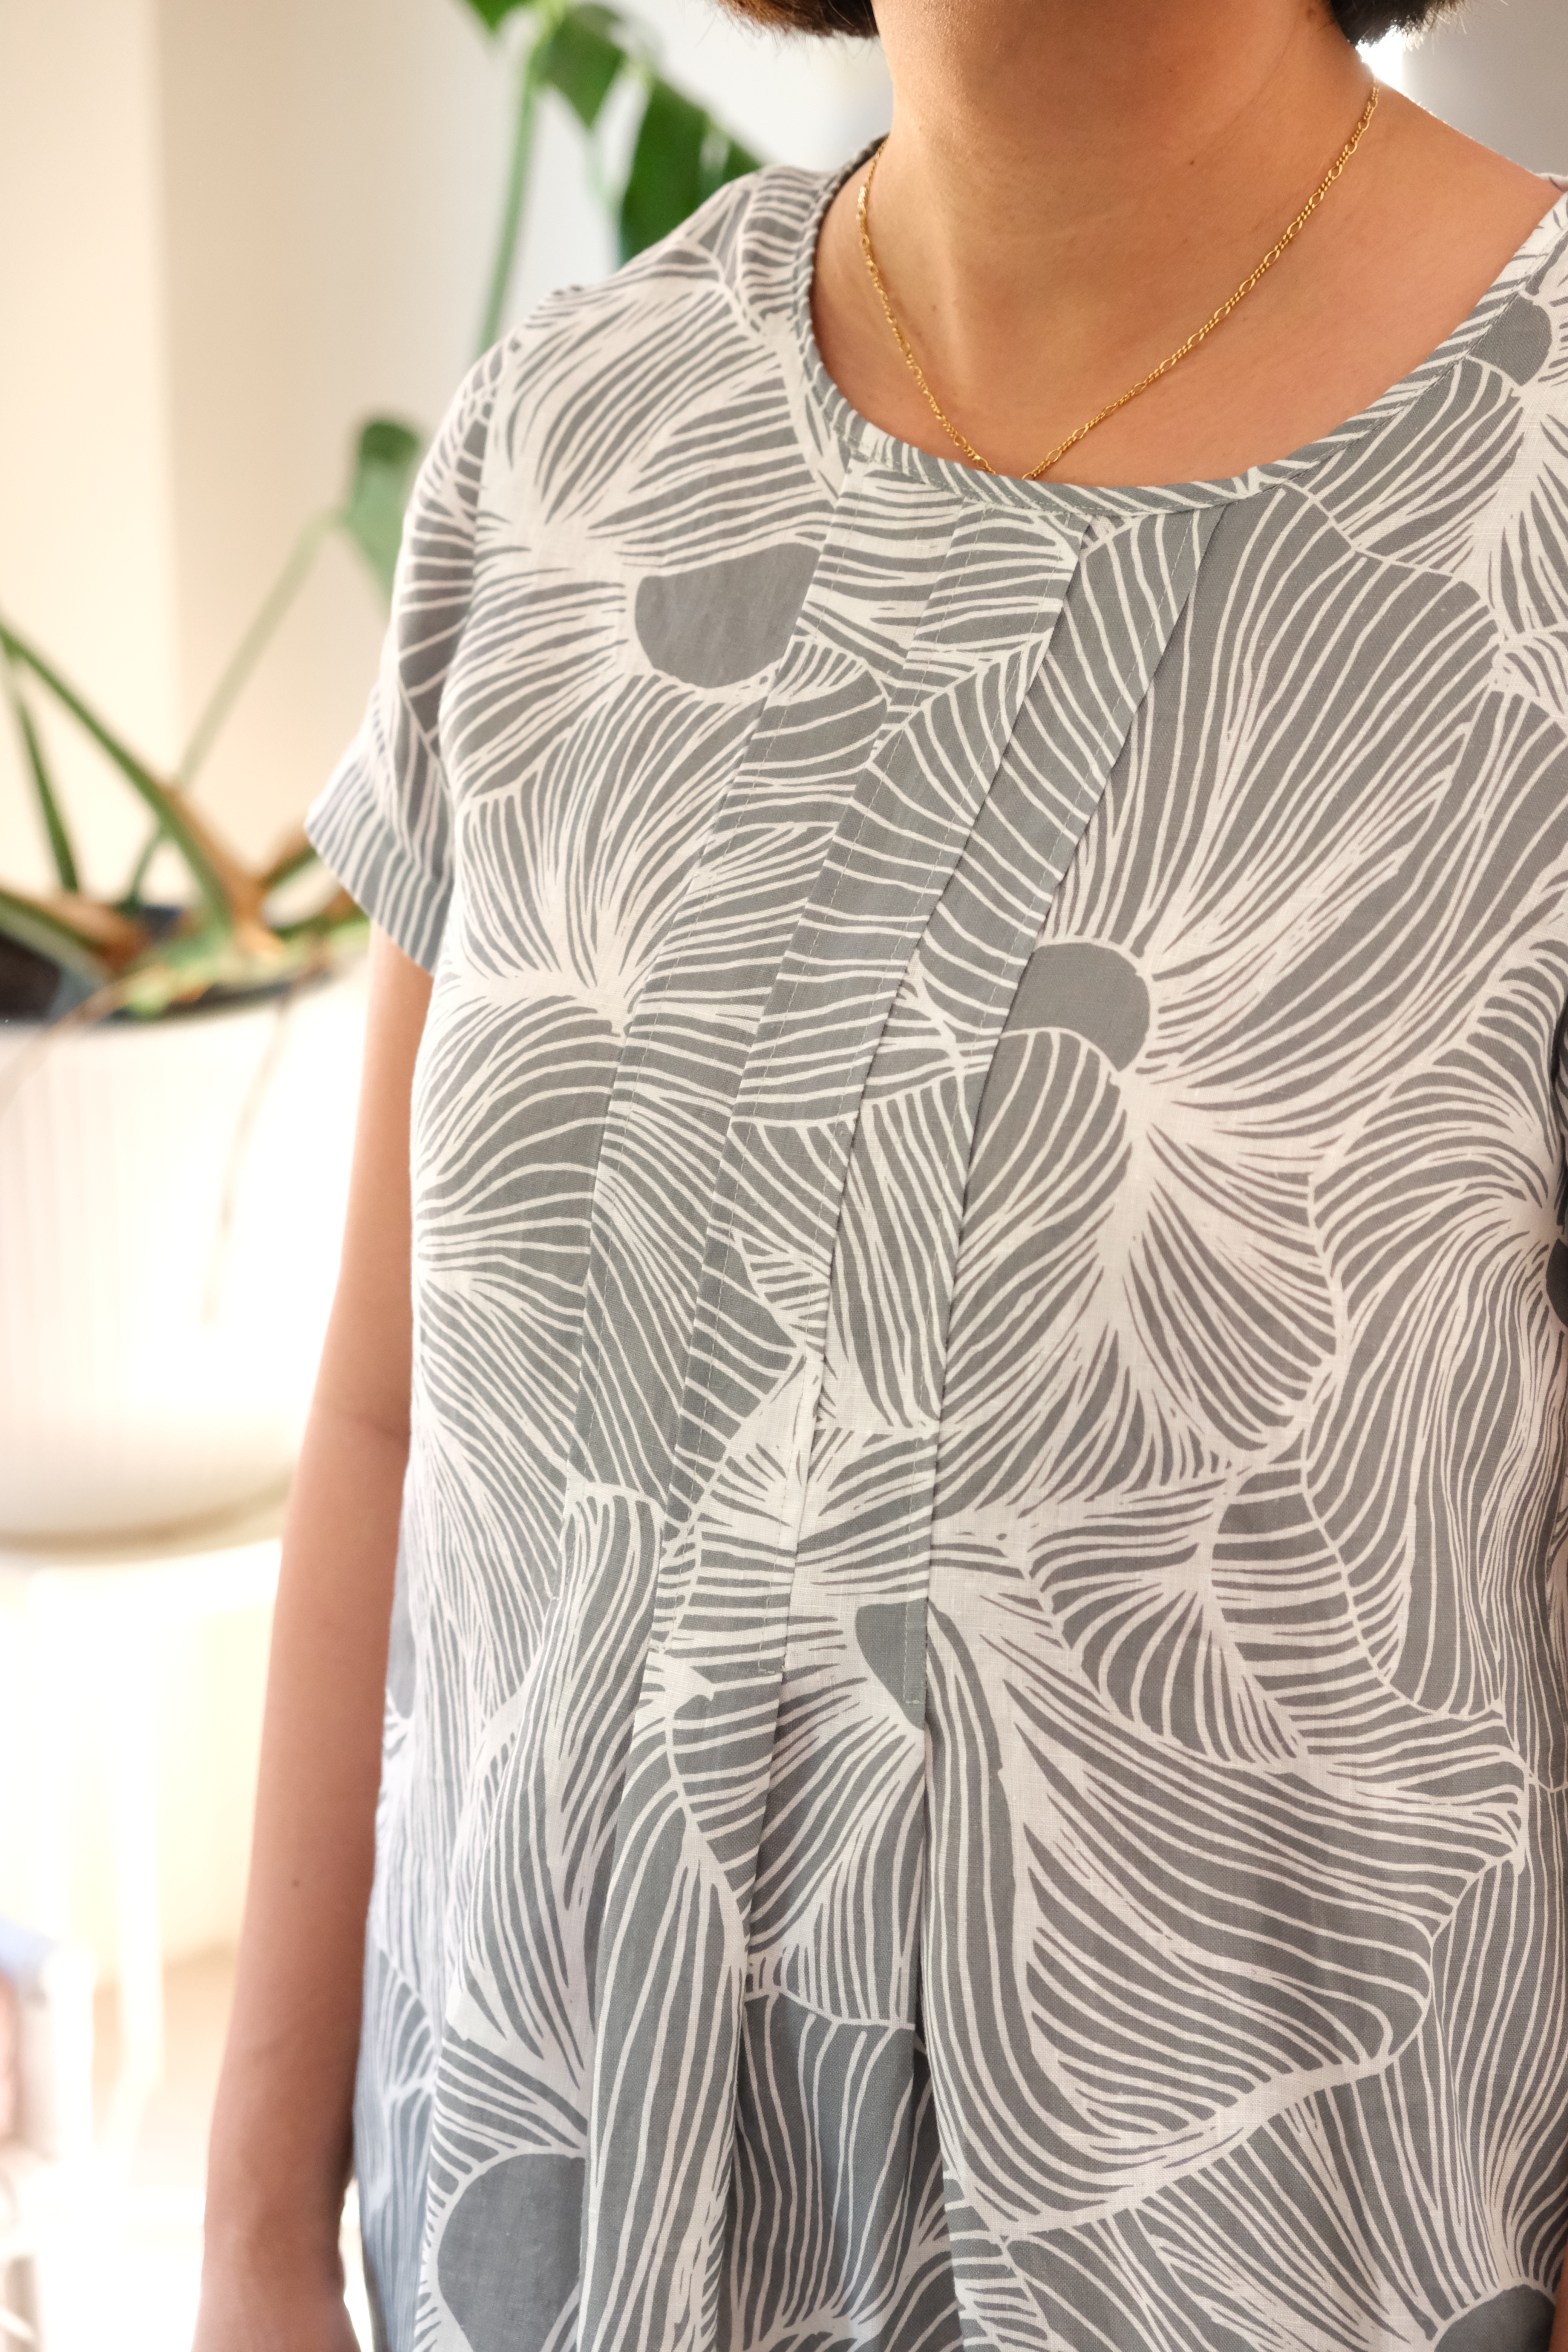
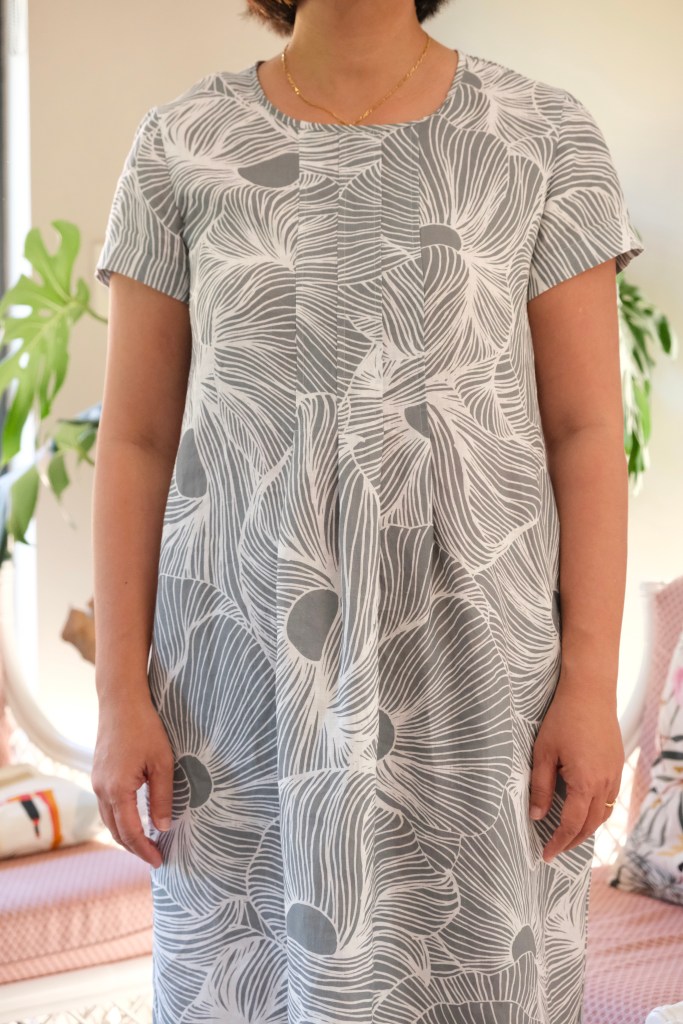
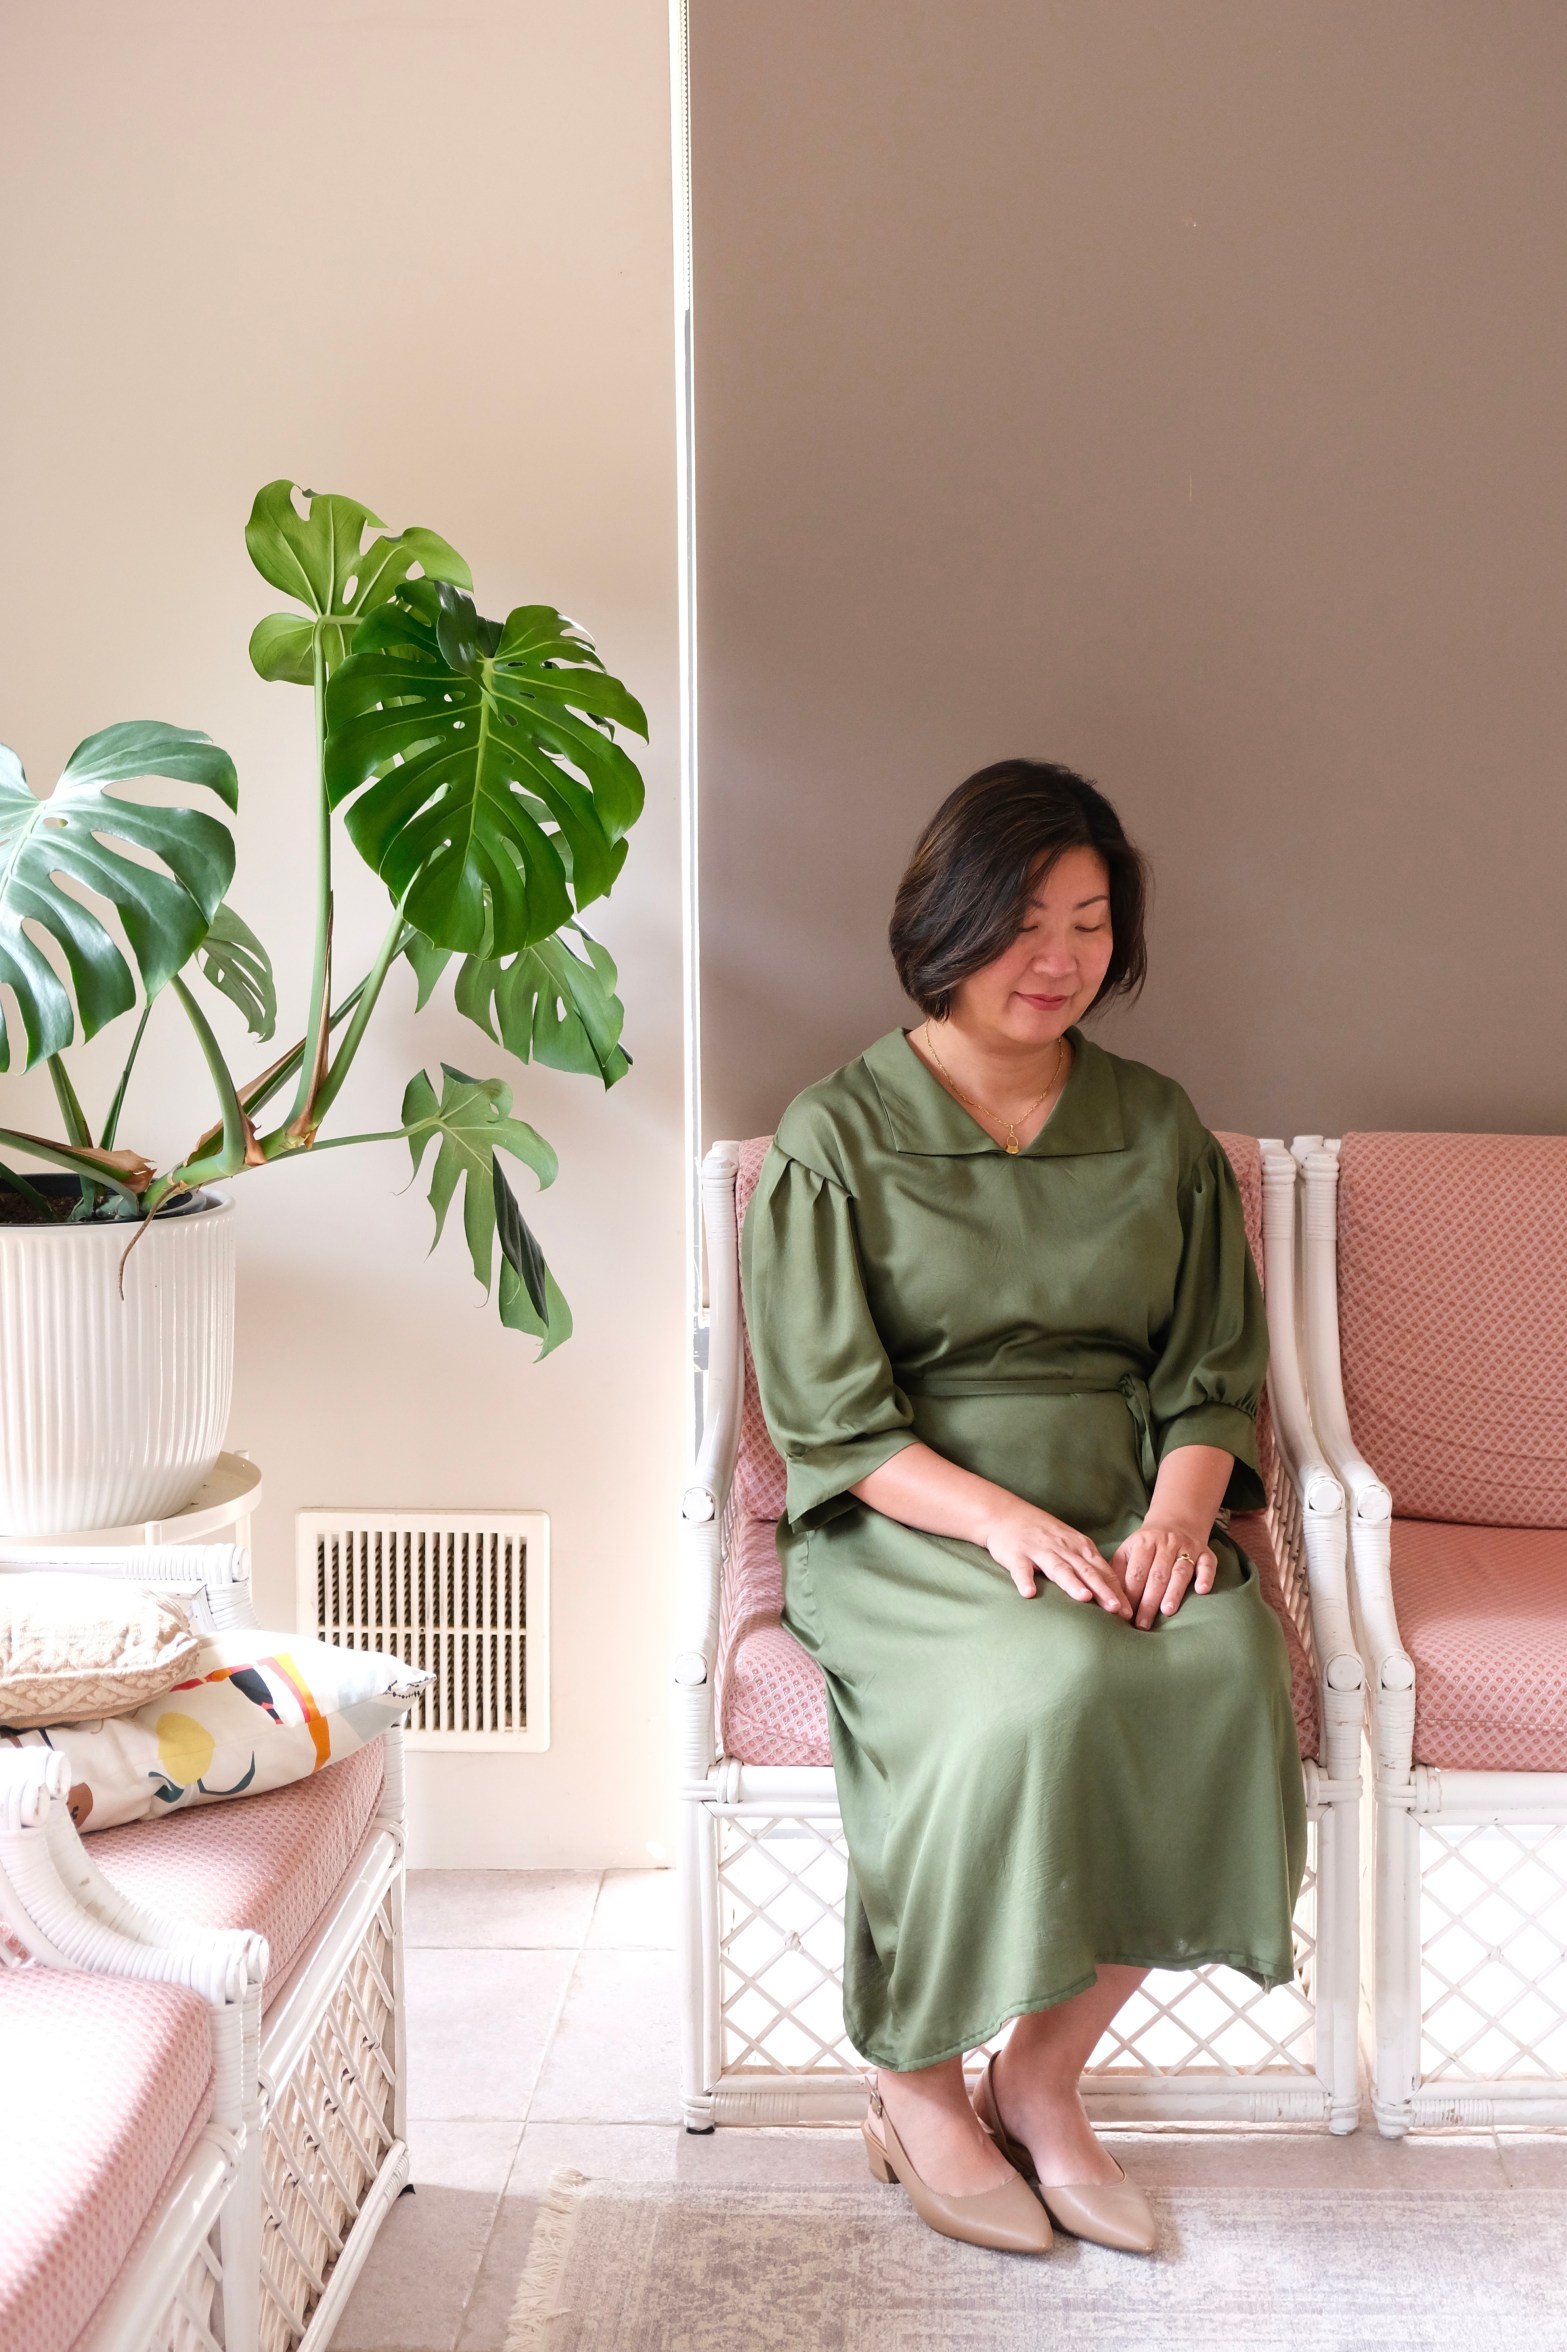
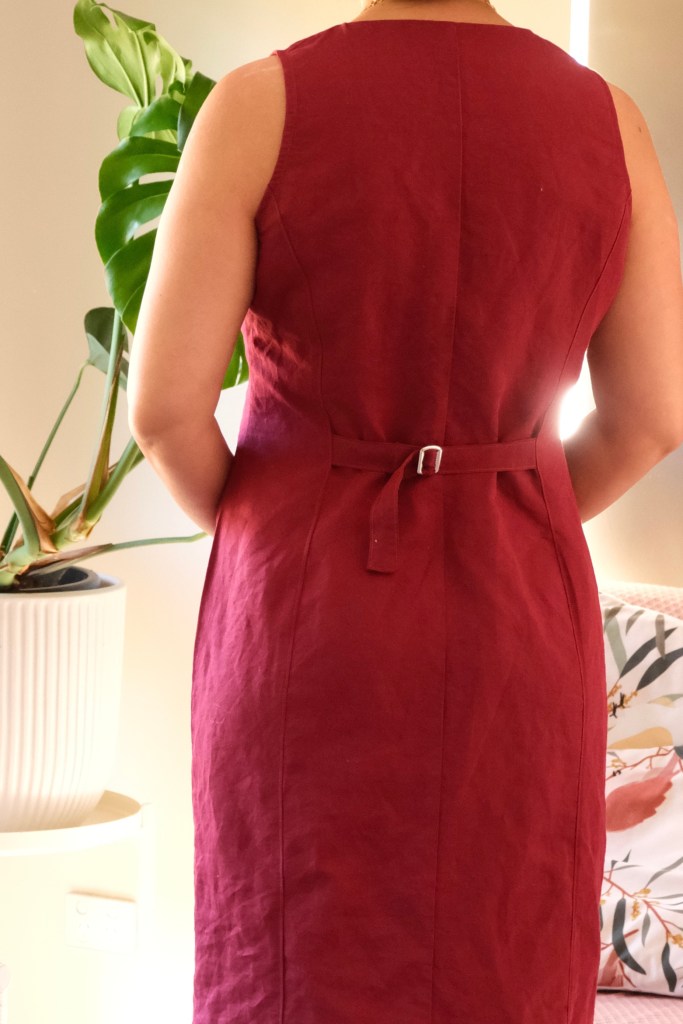
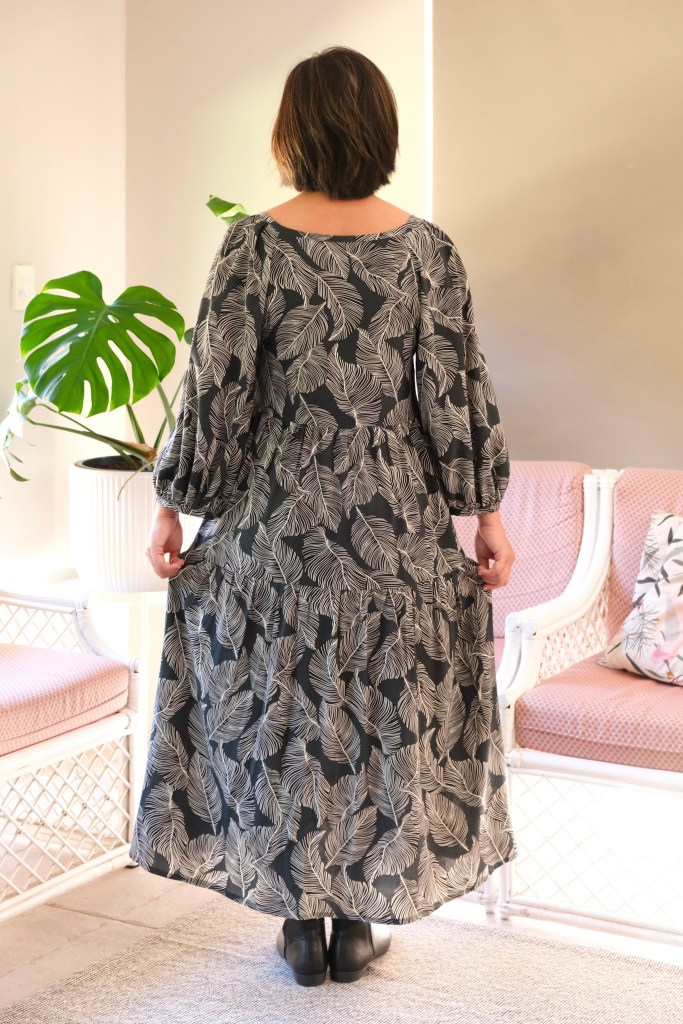
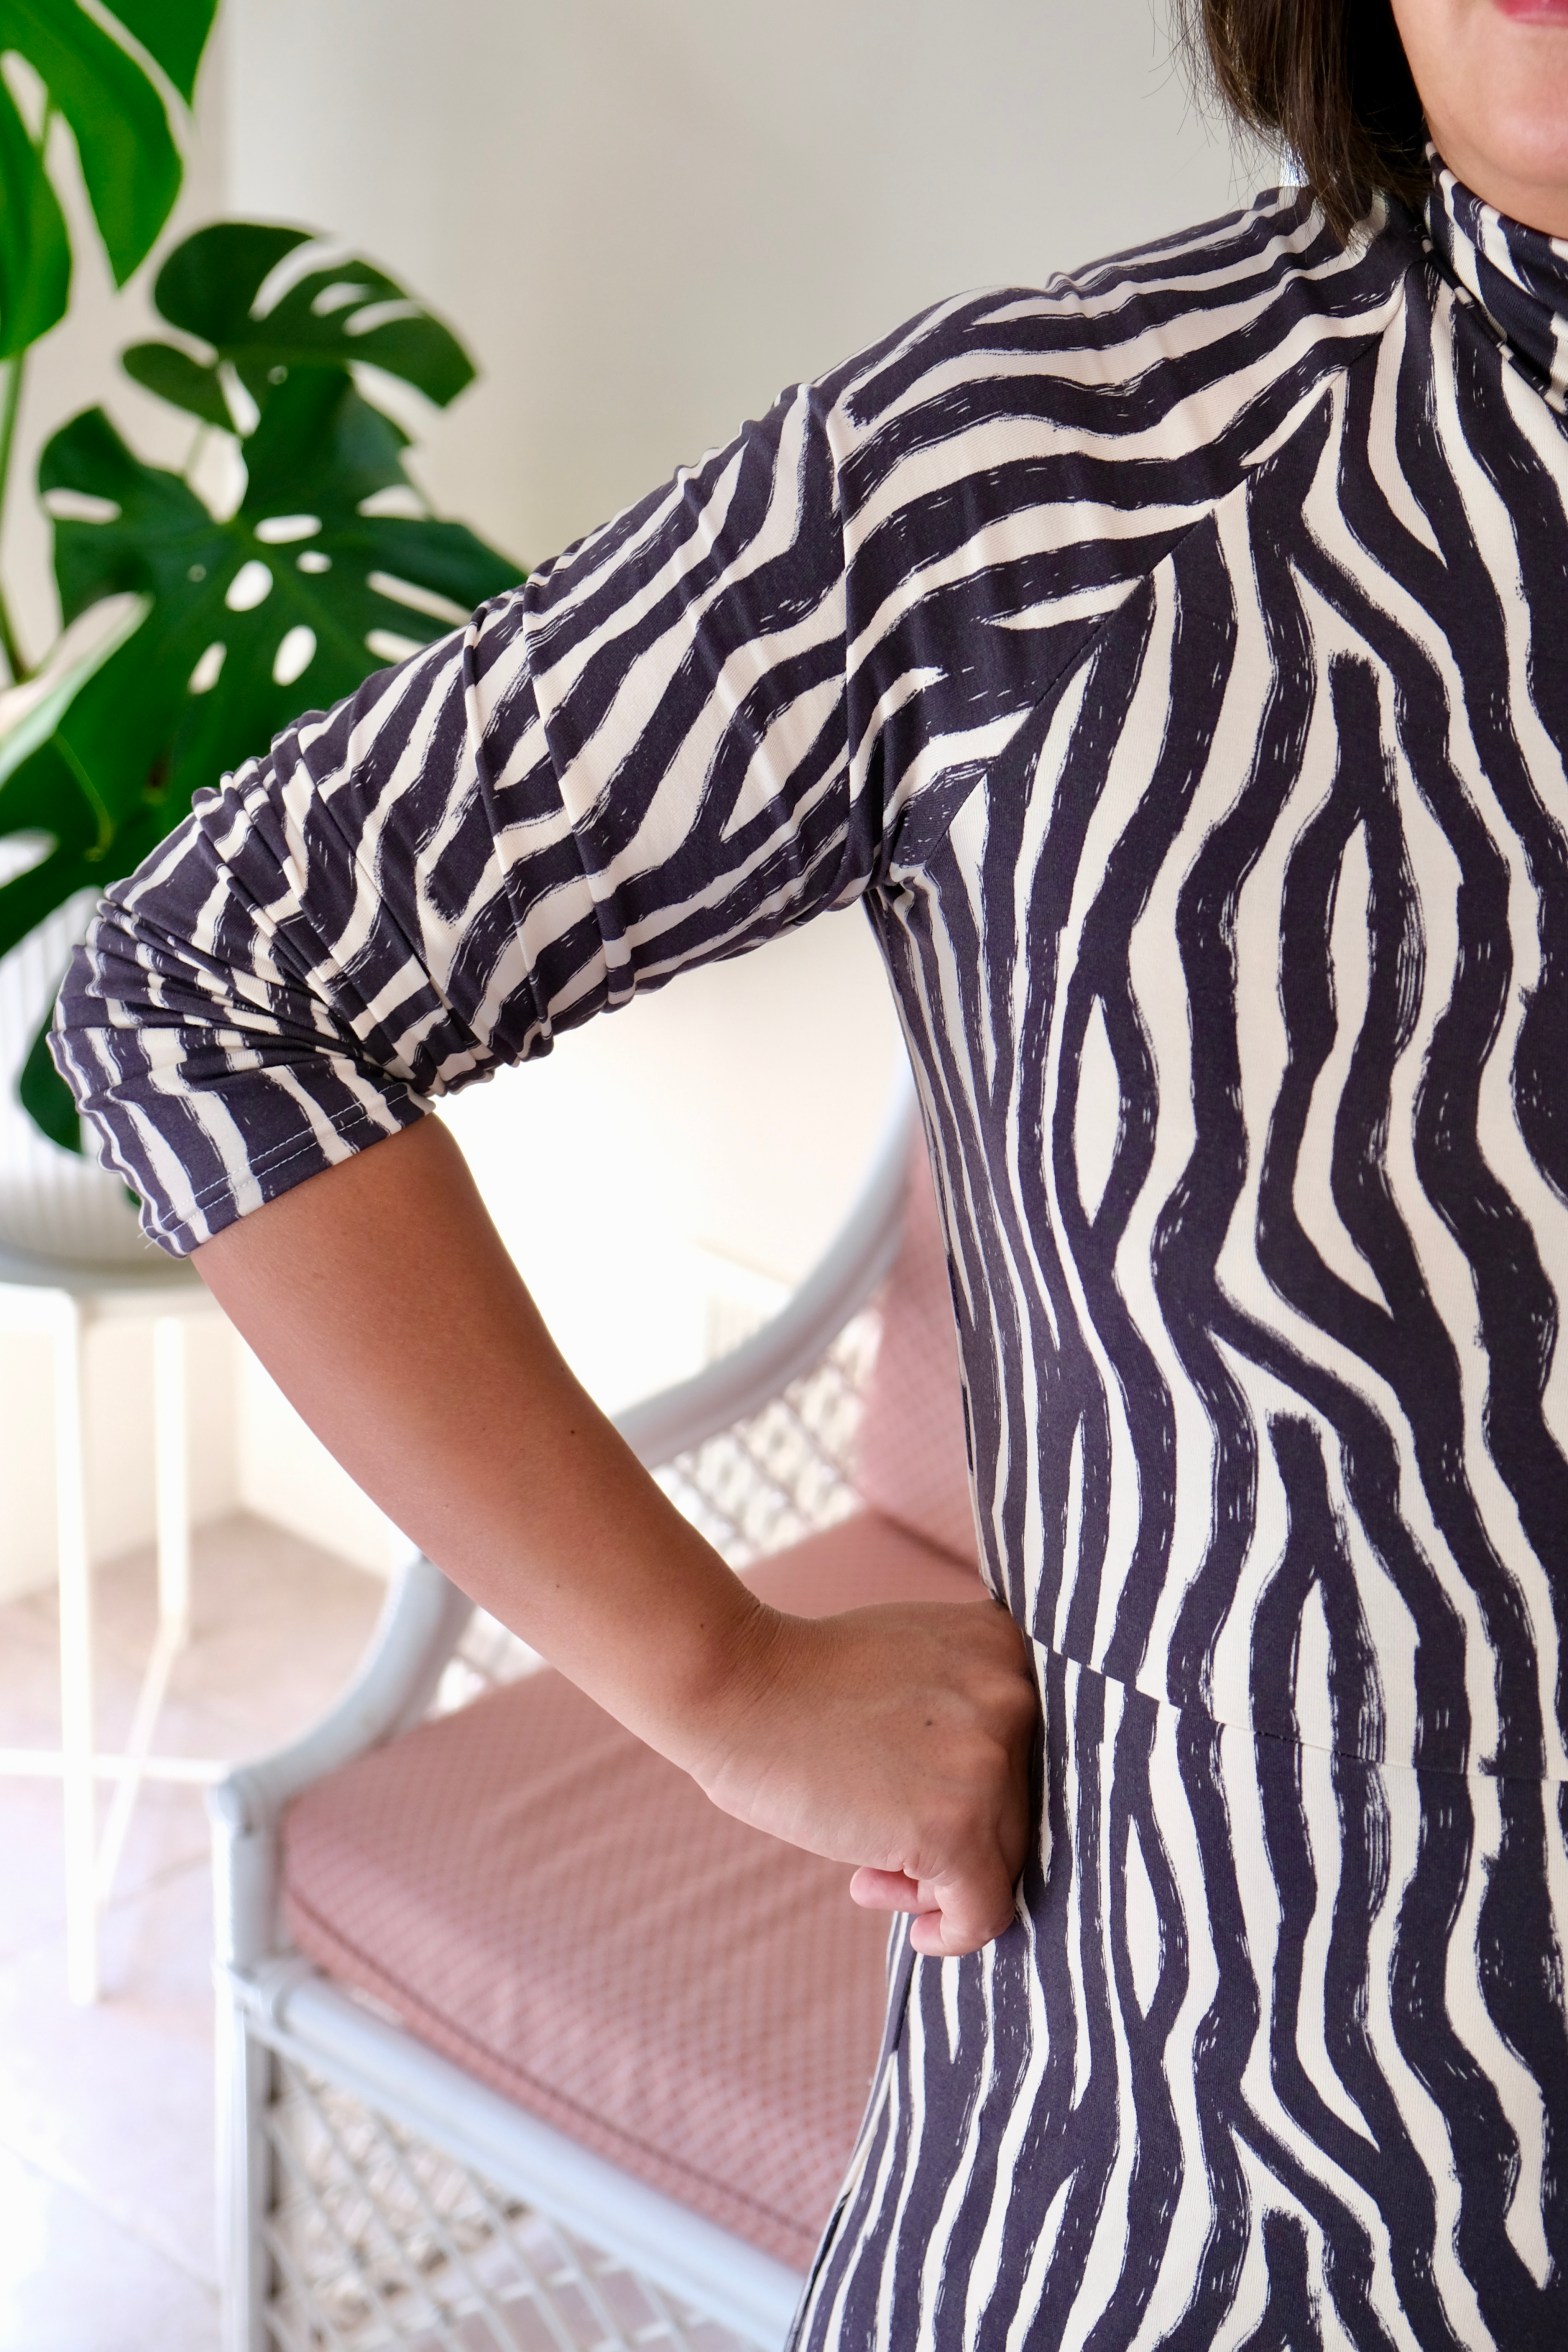
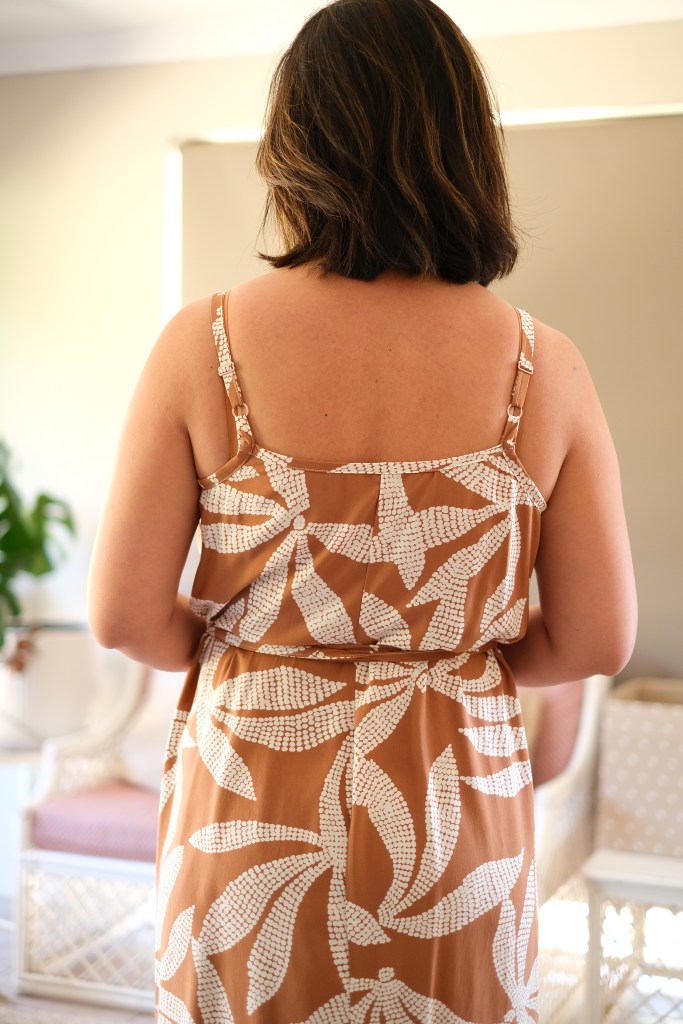
I made the size 12 for my measurements of 38-inch bust, 33-inch waist and 40-inch hip. Wrap dresses have the advantage of being adjustable so it’s easy to adjust. The pattern is interesting because the back panels have a slight curve to it which makes it skim the body in a flattering way. 

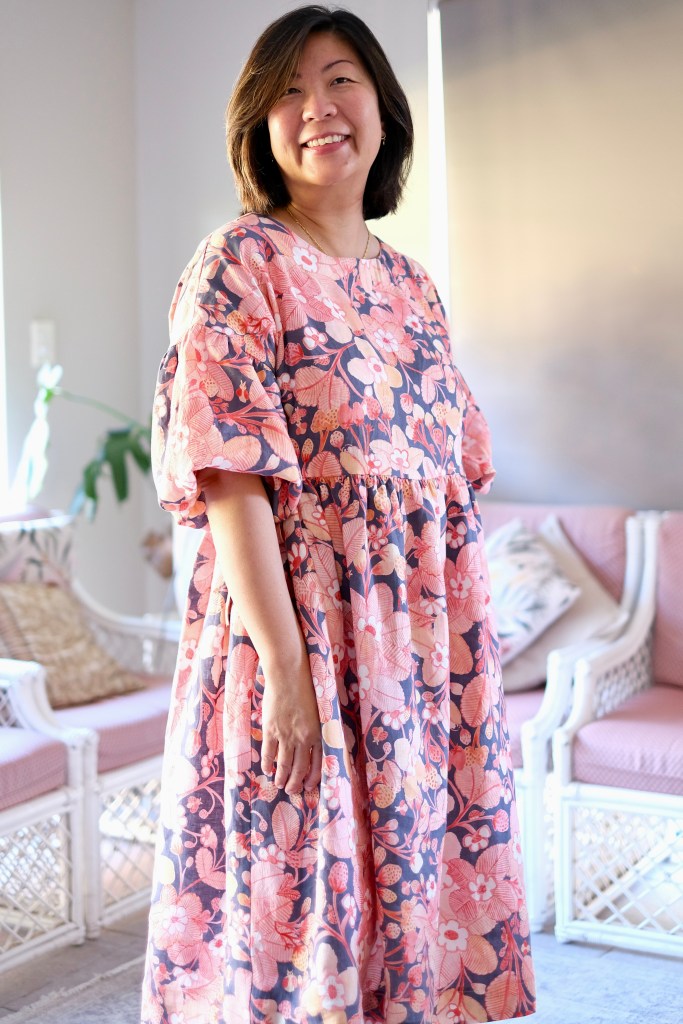
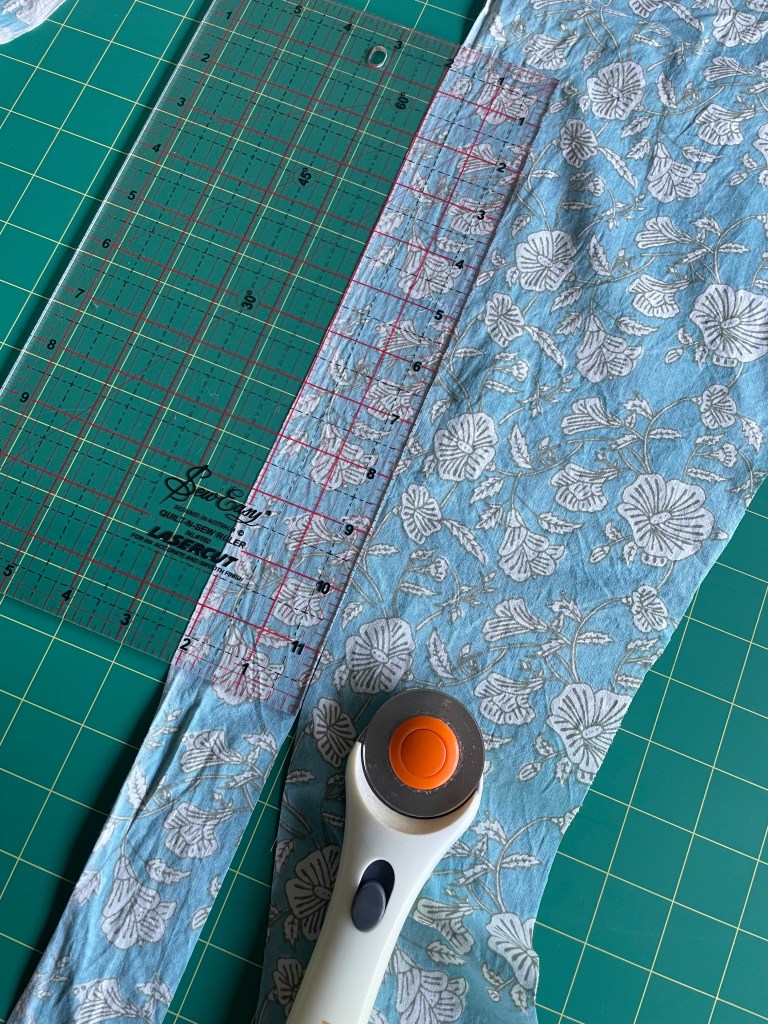
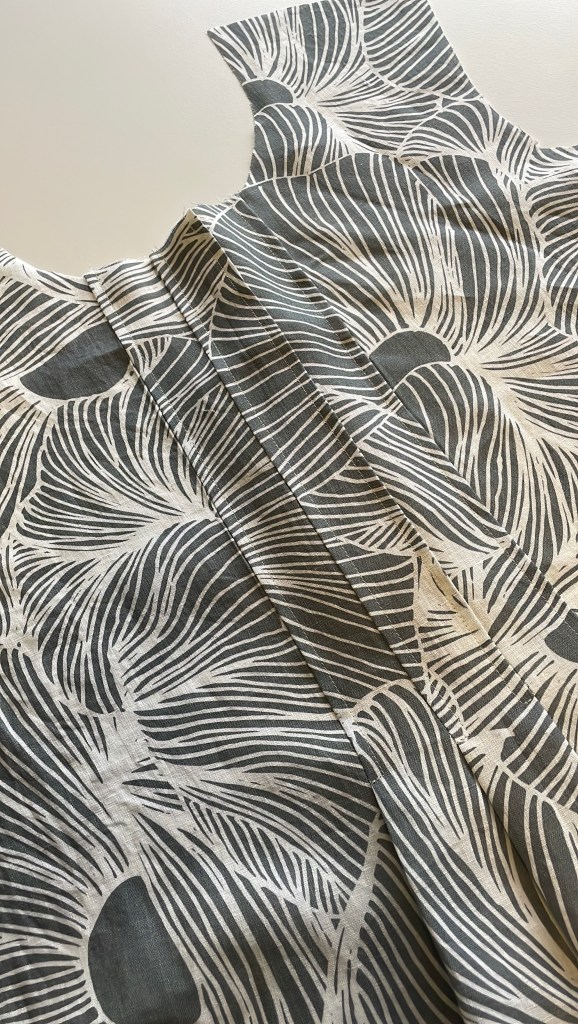
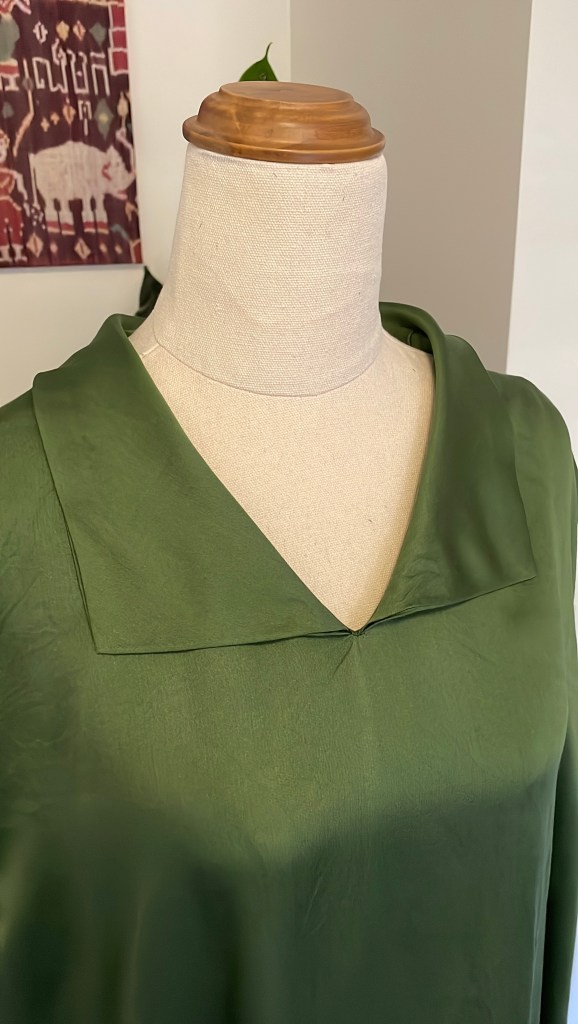
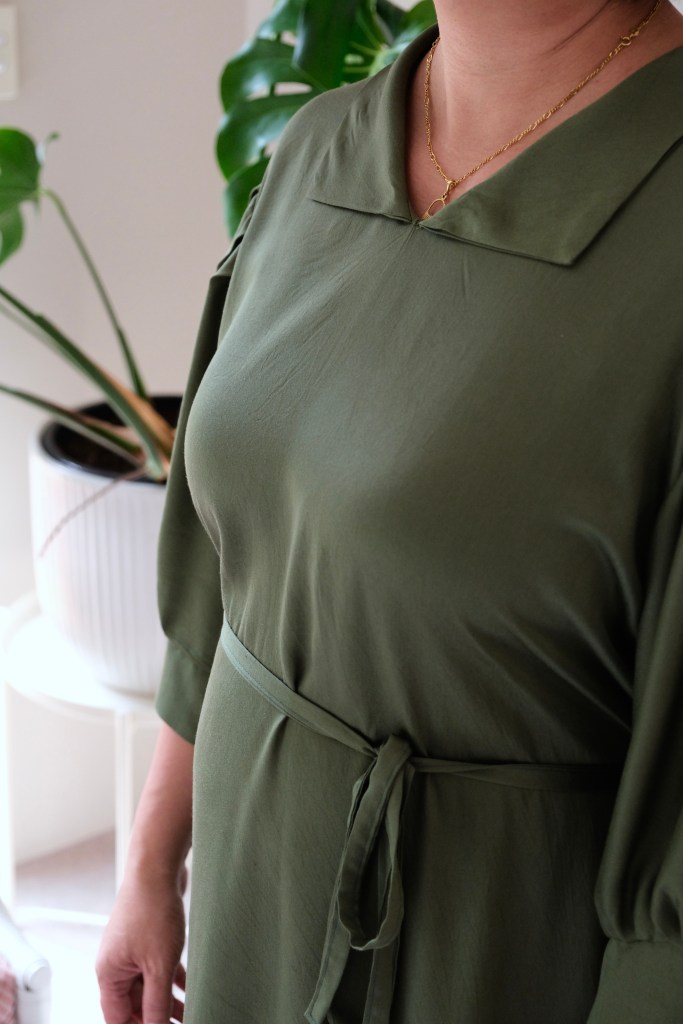
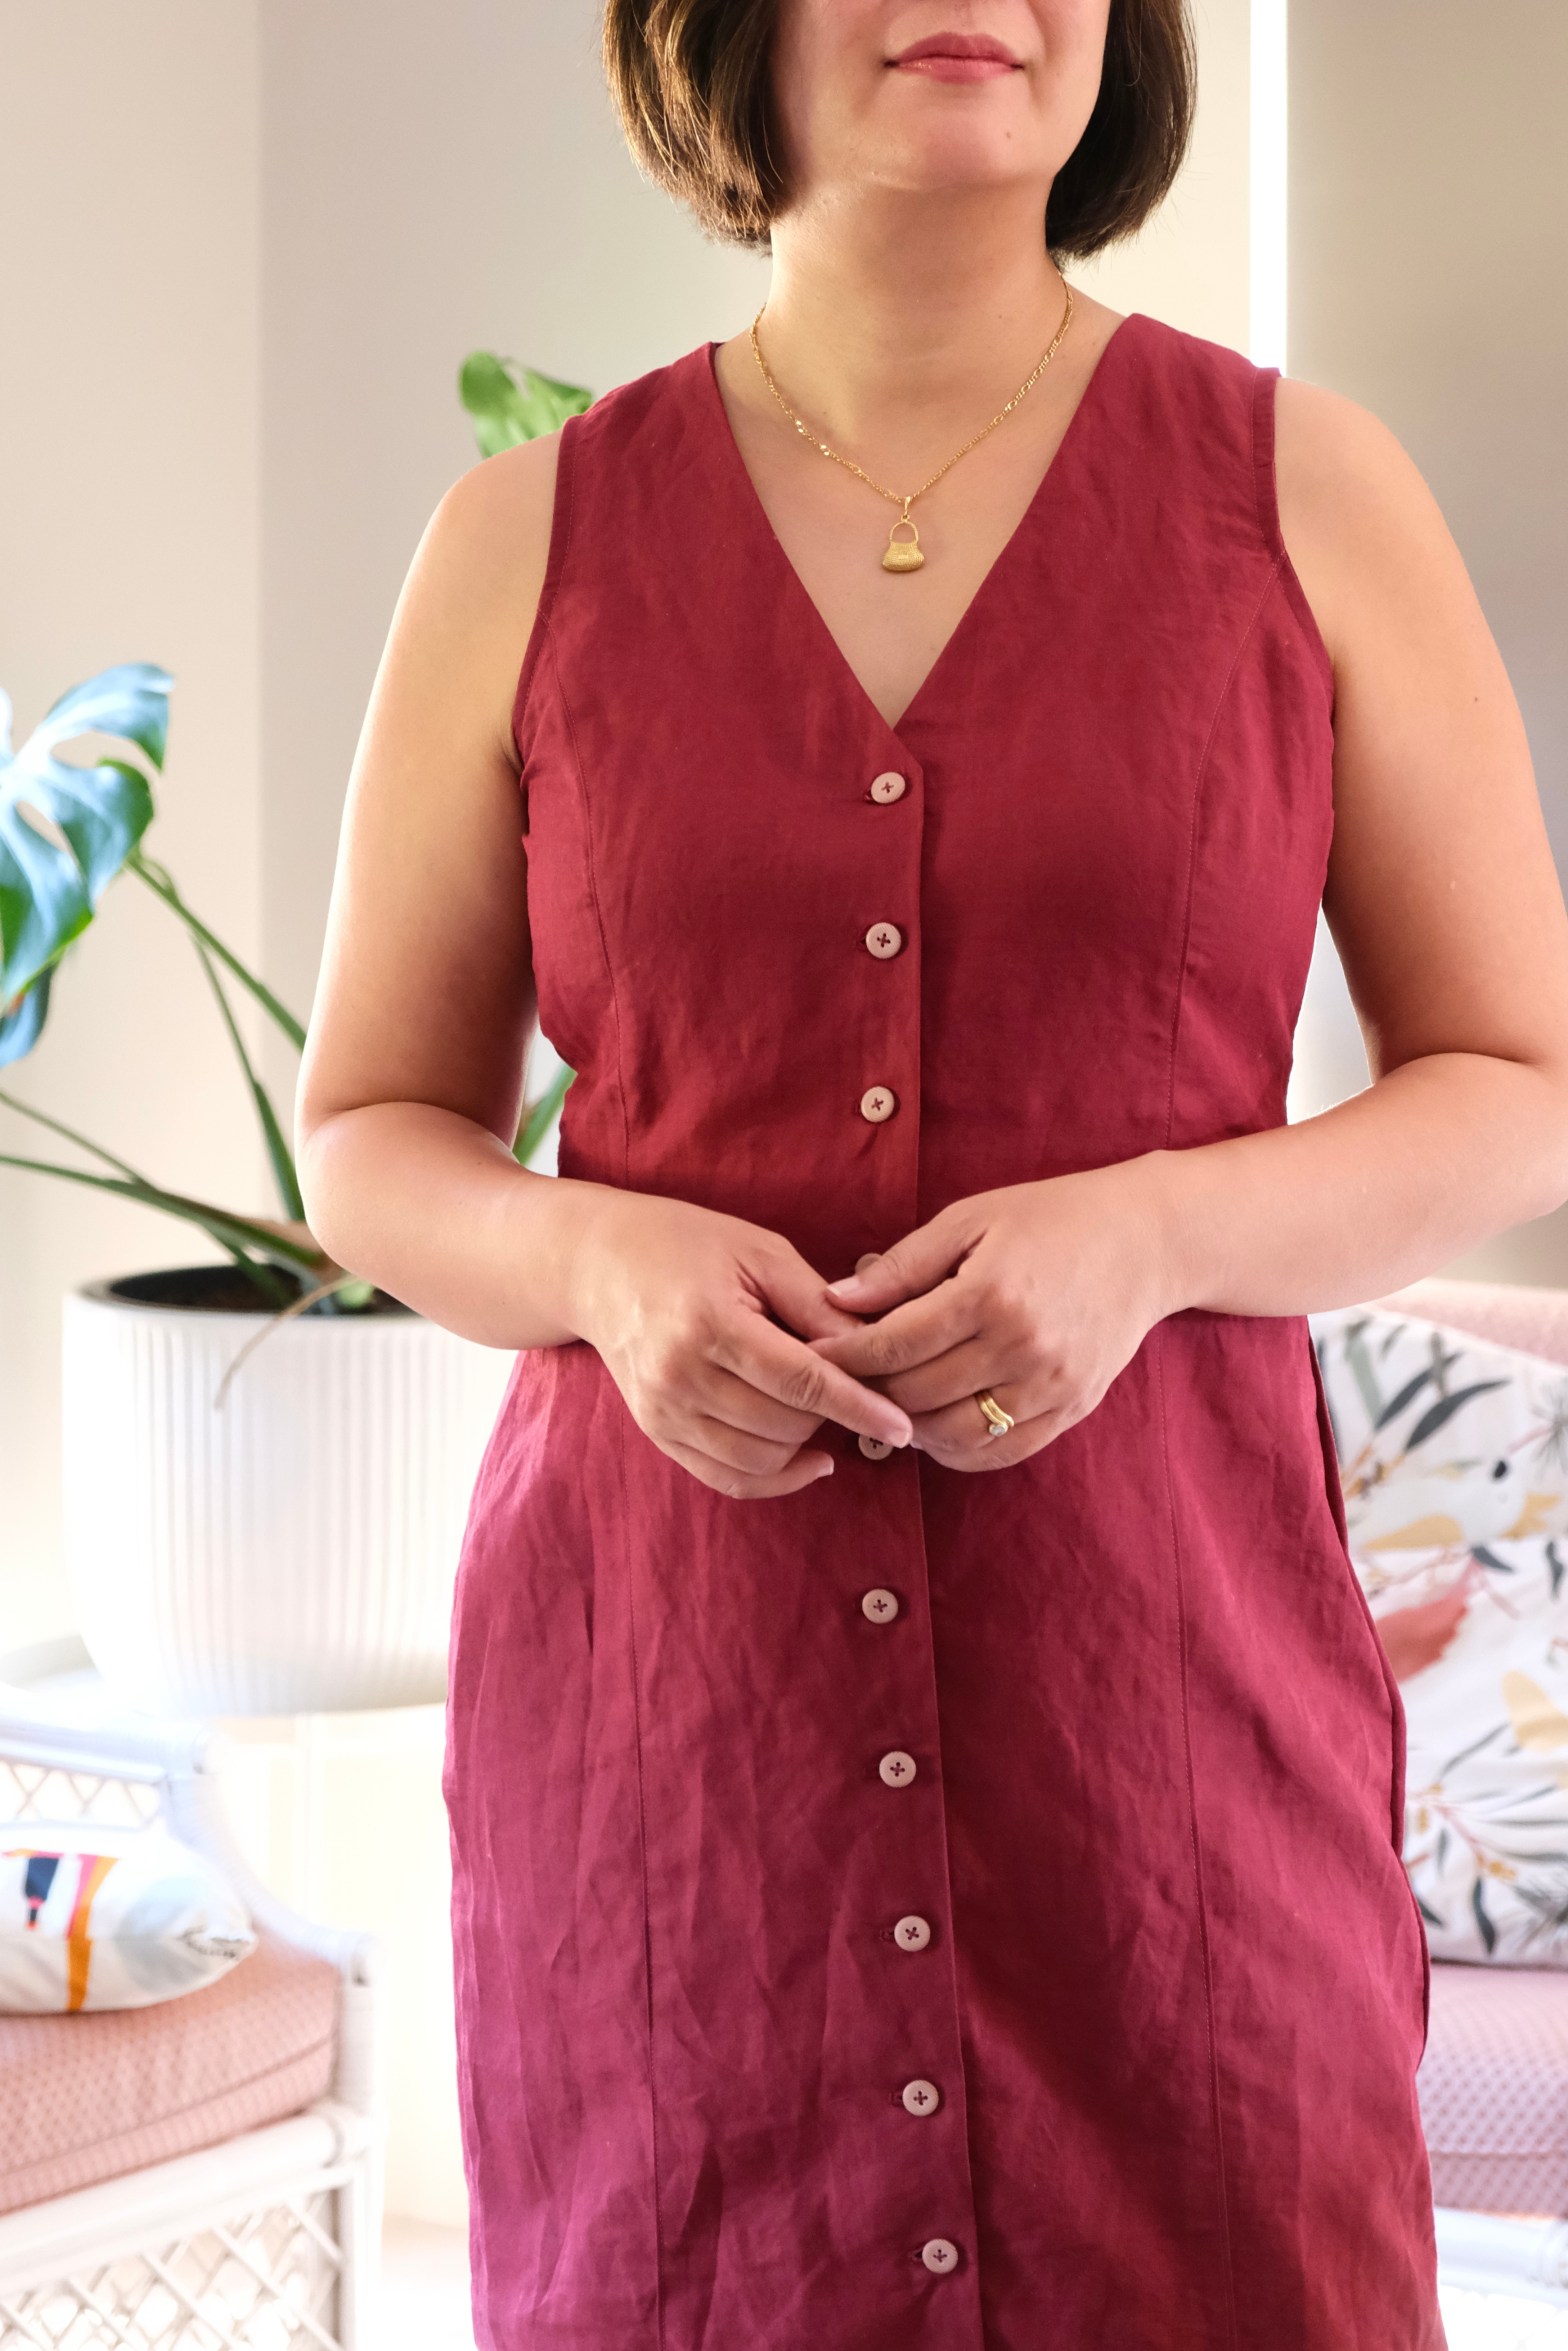
I used the same fabric to make the bias binding. The exposed bias which become the straps and there is a fair amount. I was just mindful that I wanted to use my fabric with the least amount of waste, so I angled the binding just slightly off bias. I was very happy with the result, and I still have a small amount left for a future project.

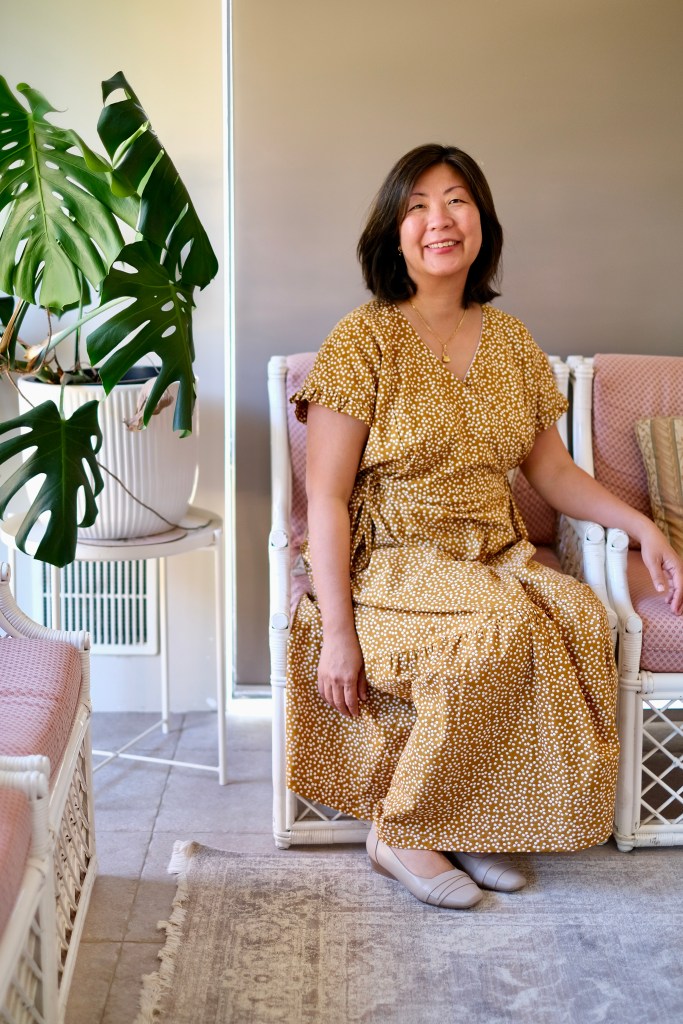
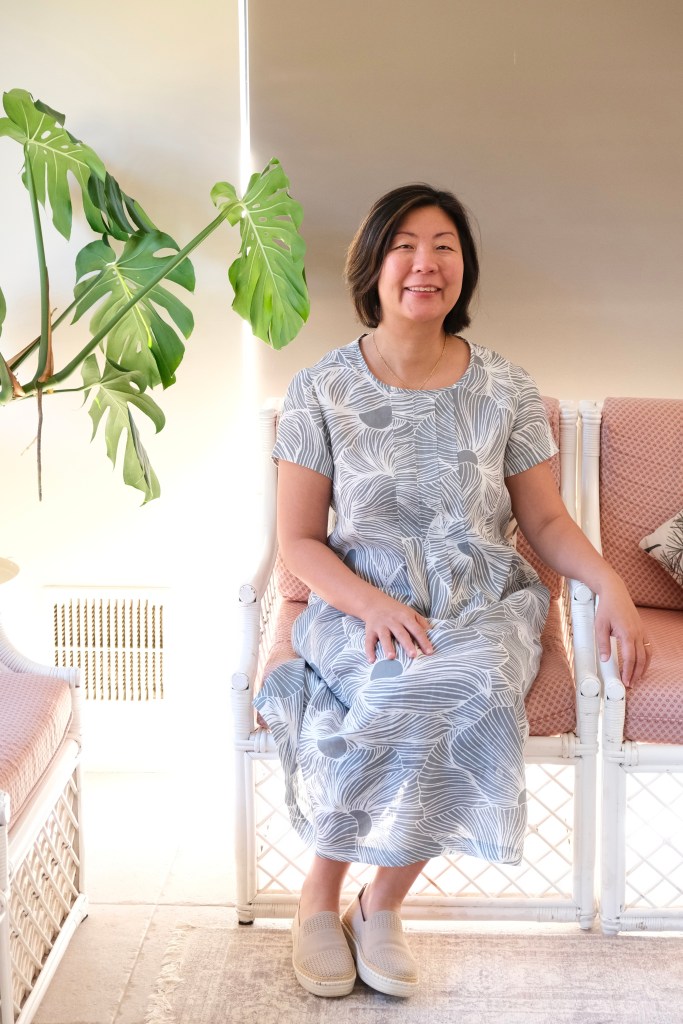
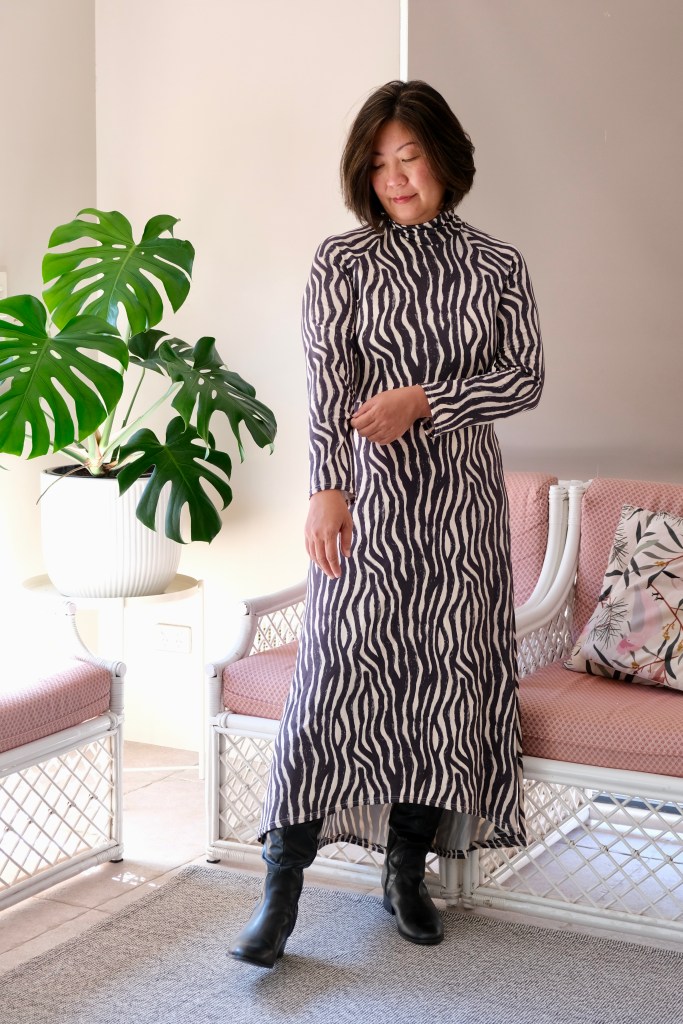
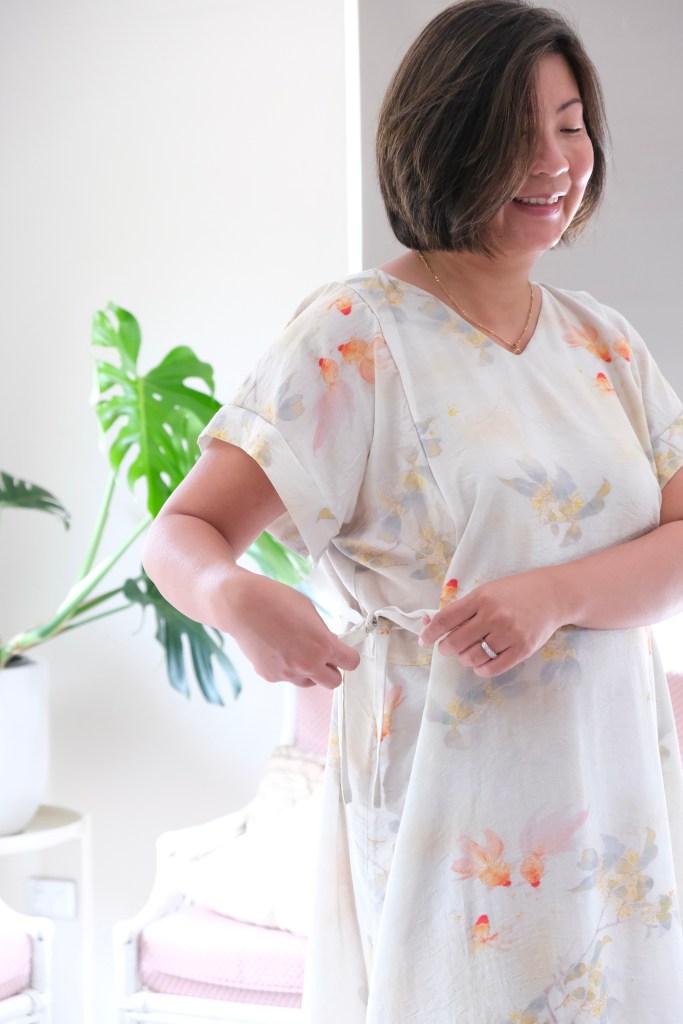
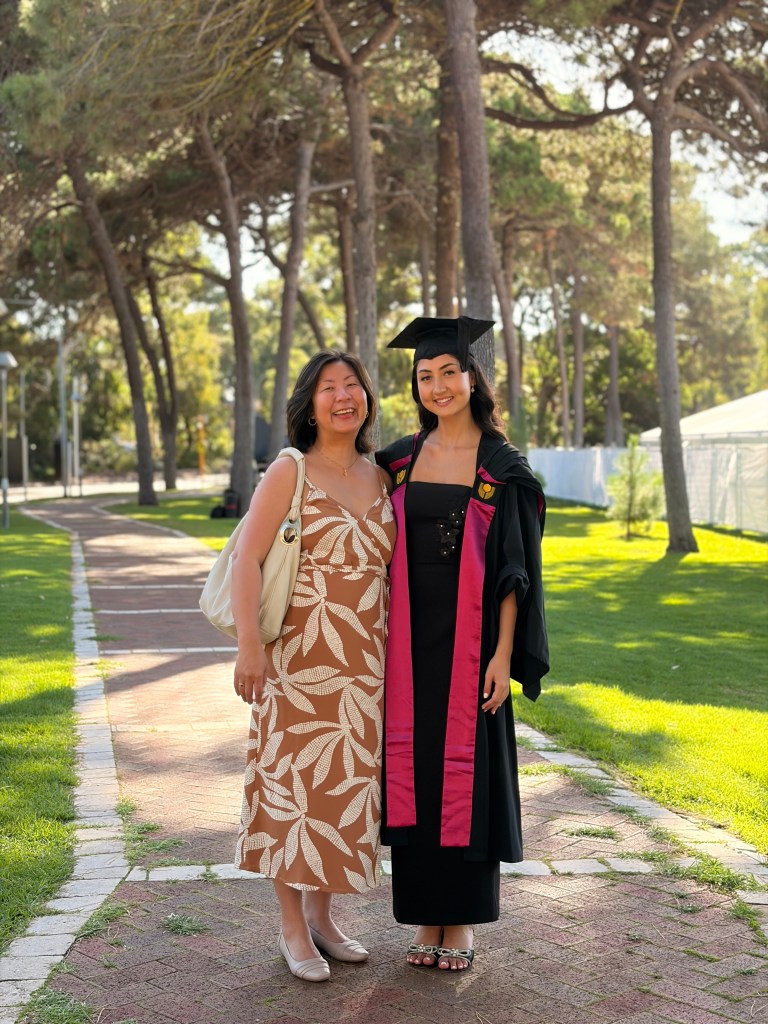
This dress deserved special fabric because I was making it to wear to my daughter’s graduation ceremony. It just feels like yesterday that I was dropping her off at kindergarten, and it feels surreal that we are passing this milestone. The ceremony was held outdoors, and it was a hot and windy afternoon. Luckily, the wrap in the front was generous and there was no risk of wardrobe malfunction. I had also put in the optional snap to avoid any chance of gaping in the bodice, but it felt very secure anyway.

It felt so good to make and wear this dress. True Bias patterns are one of my most sewn patterns because they are reliable and truly elegant designs. The instructions and illustrations are excellent and I was able to sew this in one weekend. I love that now this dress will be a permanent reminder of this precious milestone for our family.

Thanks for reading and happy sewing!

X Em

Tie Dress No 2

When Sara asked for testers for the Sewing Therapy Tie Dress No 2, I immediately put my hand up because the Tie Dress has been one of my tried-and-true patterns for a while now. I just love how adjustable the ties are and it’s a dress that is always comfortable. This second version of the Tie Dress comes with a button placket or a wrap front. There is also an option for short sleeves or long sleeves. I decided to test the wrap front, short sleeve version but I will probably be going back to sew all the versions.

Testing is always breakneck speed because Sara is an incredibly hard-working creative. She has produced a vast catalogue of patterns, each one beautifully drafted and detailed and each one come with written instructions and sew along videos accompanying them. She produces everything to a superb quality. It’s the same with her testing, she responds to questions and feedback so quickly that I think, did she have time to sleep yet? I hope so! Being on the other side of the world, I was always amazed at how promptly she could reply. The thorough testing means that the pattern comes together perfectly for the person sewing and the construction is logical and easy to follow. 

My version is the Size 12 without any modifications for my measurements of 38-inch bust, 33-inch waist and 40-inch hip. I really like how the wrap sits and there is no risk of it gaping. The dress is midi length or short. I was testing length and I left mine slightly longer than the midi it was drafted for. 

The Tie Dress No 2 is drafted for woven fabric. I was excited to find some midweight linen-cotton which was perfect for the pattern. I did also put together another dress for the test which I will finish soon where I used up a mix of gingham fabric. I think any stable woven fabric is great for this dress.

Sara has done it again with this dress pattern. I see myself sewing this pattern again with the longer sleeves when the weather starts to cool down. I love how this version of short sleeves are ruffled which is a cute feature. I’m loving how comfortable this dress is to wear as well. Having the adjustable ties means that there will never be a day where this dress is too tight or big to wear. I think that’s why I keep returning to make the tie dress. It’s been great to be sewing and testing again especially in a supportive and creative environment.

Thanks for reading and happy sewing!

X Em

Fern Dress

Featuring Linen from Maaidesign Artist Collection

Maai Design have launched the third drop of their Artist Collection; this time featuring Gabriela Larios and Alison Willoughby. For the collaboration, I was offered three meters of fabric of my choice. I decided on the Strawberry Poem in Linen by Gabriela Larios. I thought it would be the perfect match for the By Galia Patterns Fern Dress which needs a lightweight to medium woven fabric with soft drape.

Strawberry Poem by Gabriela Laros

The Fern Dress is a classic dress design featuring round neck and a gathered skirt. It’s loose fitting which is adjustable with waistline ties that can be tied front and back or on the sides. Galia has included so many options with this dress. It’s something that can be sewn in so many ways and each version could be different. I decided to sew the half-length puff sleeves with elasticated hem. I went with the button closure in the back. Best of all, there are pockets!

There is something about Galia’s patterns that makes you feel so good. The fit description is so accurate. With my measurements of 38-inch bust, 33-inch waist and 40-inch hips, I sewed the size 10. My waist measurements do fall between the size 10 and size 12 but I decided not to grade as there is a lot of ease in the pattern (looking at the finished measurements). The dress is midi length which I did not have to adjust for my height of 167cm. I love how the dress falls below my knees at mid-calf.

Linen is so easy to sew with. I always start by washing and ironing my fabric. I love to line dry my fabric but throw it in the dryer at your own risk, the care instructions do not recommend it. The fabric is quite broad at 140cm but it’s important to note that the pattern does not go all the way to the end. The Fern Dress pattern used most of the fabric which was a relief. 

The fabric is 150g/m2 (5oz) which sits at the top end of lightweight and bottom end of medium weight. I used a universal 90/14 gage sewing needle which worked well for the fabric. I finished the seams on an overlocker without any issues. The skirt needed quite a bit of gathering and again, there were no issues doing this with the linen. 

Sewing By Galia’s patterns is such a pleasure with her detailed instructions. I feel that as a home sewist, I really appreciate the extra details that Galia puts into her pattern instructions. For example, she instructs double stitching under the arm. The first time I sewed By Galia patterns, the illustrations were hand drawn but for the Fern Dress she has chosen to use photographs which also work well. I only have a black and white printer and I’m not great at following written instructions on the computer while I sew so I printed the instructions but when needed, I referred to the photos as needed on the computer.

It was wonderful to sew this dress. I didn’t make a toile because I felt so confident in Galia’s fitting notes. It’s always a pleasure to collaborate with Maai Design because they consistently curate the most beautiful designs to marry to the best quality fabric. They also allow creativity and choice in the collaboration which means that I will wear my dress for many more years to come. I’ve been a faithful subscriber to Maai Design since I started sewing and I’ve never been disappointed. Sewing with good fabric is an investment. Cut that good fabric and enjoy it!

Thanks for reading and happy sewing!

X Em

Vanja Dress

Earlier this year, I entered The Cloth Edit sewing challenge called Sew April Blouse, and I won a PDF pattern from Monsterfabriken. I was so excited to win the pattern amongst all the beautiful entries and was also excited to discover a new designer. The thing I admire most about Monsterfabriken is their philosophy of making their sizing adjustable to ensure that once sewn, those garments will last therefore helping to reduce clothing waste. 

It was hard to choose a pattern from their beautiful library of patterns but in the end, I settled on the Vanja Dress which is a V-neck dress or top. It has an adjustable waist with ties, or it can also be sewn with a wide belt. I made the dress version which stops at mid-calf. There are slits on the side and of course, pockets! I jumped straight into the dress version, but I do love patterns that include a version that can be toiled. I didn’t make a toile because I thought that the sizing system was so good.

Talking about the sizing system, here is where Monsterfabriken is unique. Instead of the traditional sizing system which can vary from brand to brand, they base their sizing on primary measurements of the body. The tops are then based on the chest measurements, and the bottoms are based on the hip measurements. All the other measurements are secondary. It’s all very comprehensive and in the end, you’ll end up with a garment that fits the way you want it to. Once all the measurements are done, it’s an easy process to print the only size you need and there is an option to include seamlines. I chose to print without because I have confused myself before when it was an option and ended up cutting the wrong lines.

I did hesitate a little when I had finished sewing the bodice. It was fine once I had attached the skirt and does fall at the natural waistline. This always seems to be the point where I worry the most when I’m sewing something new.

The fabric is drafted for woven fabric. I had a Jamuna vegetable dyed handblocked cotton from Spotlight which was perfect for this dress. It’s beautifully lightweight and it’s great for hot weather. I am drawn towards the cooler colours for summer with blues, greens and whites. I’ve have found picking colours for the season helpful when putting together my sewing plans. 

The Vanja sewing instructions were fantastic and the illustrations also helpful. It’s important to note that Monsterfabriken is a Swedish company and I was using the English translated instructions. The layout of the instructions is logical and excellent. I also downloaded the extra instructions which you’re given a passcode for however, I didn’t need to use them because the instructions that came with the pattern bundle was sufficient.

There was one point of the instructions that did confuse me. It was in the construction of the slit. I wondered if the original pattern might have had a seam allowance of 2cm but was changed to 1cm without changing the instructions. In the end, it was easy to modify. I just continued the overlocking down the side seam. This was then turned twice to finish the slit.

I love the design of the Vanja Dress. In this version, I made matching ties for the dress. I would love to make the wide belt version and have contrasting fabric for the neckline and hem. The best past is knowing that any small size changes will be easily accommodated because of the clever design by Monsterfabriken.

Thanks for reading and happy sewing!

X Em

Milenda Dress featuring Johanna Ralph collection from MaaiDesign

Maaidesign is launching a new fabric brand called Johanna Ralph* and I was super excited to receive a preview of the Silent Bloom print. It’s a beautiful abstract graphic married with elegance. I chose to preview the linen, but the print comes in other substrates. When this luxurious linen arrived, quite a few patterns sprang to mind. I settled on the Milenda Dress because I thought that the linen would feature the linen beautifully. Linen is great for items needing structure.

I tried making this dress about five years ago. I had just started sewing and I loved the look of the dress. Even though the pattern advises that it’s for intermediate level sewist, I jumped in and tried to sew it. I used a double gauze and instantly started making mistakes like not adding the pattern pieces to make the right length, I confused the pleat construction, I didn’t attach the bias binding or the pockets the right way. However, despite all that, I was super proud, and the Milenda Dress has ended up being a dress I’ve reached for repeatedly.

The Milenda is a classic shift dress that can be pulled over the head. The design these features pleats in the front and back which release into a skirt. These pleats are a clever feature and really help to shape the dress in a flattering way.

When this beautiful 100% linen fabric arrived from Maaidesign, I knew I had to make the Milenda Dress again. I started by giving it a cold wash and then a cool dry in my dryer. I then changed my machine needle to a universal 90/12 gage needle. Linen does wrinkle so a good press is essential before sewing. I don’t mind the wrinkles once it’s sewn but it’s good to iron it to make sure the pattern pieces remain accurate.

For my measurements of 38-inch bust, 33-inch waist and 40-inch hip, I made the size M. No modifications were needed. I was so happy that I could follow the instructions to the tee! I guess I am making progress with my sewing. On a little side note, the Tessuti instructions are excellent, but the pictures are photographed not illustrated so it’s easier to follow the instruction on the computer. Everything is logical and the construction is excellent.

Don’t you love a dress with pockets? I loved how these pockets were constructed because they sit to the front. Also, the pockets are at the perfect level and are properly deep.

When I photographed the dress, I realised that the fabric is slightly gauzy and sheer. It’s still perfectly modest without needing lining. The linen is very lightweight; from memory it’s under 5 oz or 150 gsm and had a generous width of 150cm. I can’t wait to wear the dress when the weather starts to warm up. Linen is just so comfortable in summer. Looking at the Johanna Ralph collection, I think it’s going to be a hit with those bold, abstract prints.

Thanks for reading and happy sewing!

X Em

*Full Disclosure: The fabric was provided for preview and Instagram content. No blog post was required but I share everything on my blog and love documenting all my makes. All opinions remain my own.

Roma Dress

Do you start with your pattern and then buy the fabric or is it the other way around? I’m sure you’re like me where it’s a mix of both. In this case, I had bought this silky looking rayon but had no plans for it. It has beautiful drape, and I loved the colour, so I’ve had 3 meters of it sitting in my stash. Then I saw the Roma dress. I’ve noticed the recent trend for sailor’s collars so when Sewing Therapy released this pattern, I wanted to try it and thought it was a good match for this rayon.

Now, when you look at this fabric, both sides look almost identical, but one side is slightly shinier than the other. I’ve read that this is from the satin weave that can be used which leaves one side shiny and the other matte. What I have learnt from using this is to mark the wrong side at the start. I didn’t which was made more difficult when I decided to tackle a few parts of the project at night. I should have used my KATM sweary label for this one when I had to unpick pieces newly sewn with the wrong side up!

None of that swearing came from using the pattern which was made very easy by Sara’s sew along video. They are well captioned and her written instructions, although brief, are also very good for an experienced seamstress. Basically, the pattern comes as a dress or top with a choice of a big or small sailor’s collar and drop sleeves with cuffs or can be sewn with elastic instead of the cuffs.

For my measurements of 38-inch bust, 33-inch waist, 40-inch hips, I made the size 12 (L) which had a good amount of ease so even though my waist measurements would put me into a size 14, there was no need to grade. I’ve sewn a few Sewing Therapy patterns now and because her patterns tend to include that ease, I felt comfortable skipping a toile. Usually, if a sewing pattern maker is new to me, I would toile with the blouse option. I do find her patterns are true to size for me.

For me, the most difficult point of this pattern was not the collar as she indicated in her video. I found those instructions to be superb. It involved both the facing and the cuffs. The facing had to be sewn down once the collar was attached. My fabric was super slippery and so I had to deviate a bit to make it work for my fabric. I decided not to stitch the front neckline facing down because it would have spoilt the seamless look in the front. I did attach the back neckline facing but I’m still unhappy with it because it’s not symmetrical. I had basted around the back facing then followed with the top stitch, but the fabric still shifted. I will be unpicking and trying again soon.

The cuffs were also tricky for me. I misunderstood the markings for the cuffs and initially overlapped them at the wrong spot. Luckily, I had only attached one when I tried it on to check. I felt the cuff was tight and when I rewatched the tutorial, I realised my mistake. I’m sure that has not happened to anyone else. The other challenge for me was placing the cuff onto the sleeve. I’m still not sure if I have the opening of the cuff in the right spot. I think I would have liked a notch somewhere to help me line it up. Then, when everything was attached and finished, I looked at the overlap in the cuffs which were now both facing the same way instead of opposites. Small detail, I know, but I will wait to see if it still bothers me down the track.

Lastly, I wanted to mention that I sewed this over a period of a couple of weeks which is not routine for me. I wanted to try spacing my sewing out a little bit more. Not sure if I was successful because I found myself making more mistakes. I tend to space things out like printing the pattern, sticking together the pattern, toiling, cutting fabric, markings but when it comes to sewing, I usually like to set aside one continuous session. I found that putting a project down, then having to find my spot again was probably not as productive and enjoyable as I thought it would be. I think I’ll have a mix of projects in the future, I do still have my Nova Coat that I have been slow sewing in the background using denim scraps and recycled jeans. So, it’s true to say that this “Roma” was not built in a day. 

Thanks for reading and happy sewing!

X Em

Quinn Dress

It’s been so exciting to collaborate* with True Bias this year. I have been sewing their patterns for a long time and I was thrilled to be invited to test for them. Especially since this is a dress that I would have rushed to put in my shopping cart. The Quinn dress is based on the design of the vest but taken to 4 lengths. There is the cropped length, the mid-hip length, a short dress and the midi dress. I chose to sew the midi dress. The pattern features a princess seam, V-neck, button placket, and has the vest tie in the back which lets you cinch in a little at the waist. 

I chose to sew the Size 12 for my measurement of 38-inch Full Bust, 33-inch Waist, 40-inch Hips. An upper bust measurement is included in the pattern which is important for a princess seam. There is also mention of height in the pattern. I did not need to make any adjustments. I’m 5’6” in height and liked where the dress ended on me. The pattern was true to size for me.

The feature that I’ve come to know True Bias Patterns for is their neat finishing. The dress was not lined but it used a combination of bias binding and facings. This included the hem of the dress which means that everything is perfectly clean and neat.

The pattern is for woven fabrics. I used a maroon-coloured linen-cotton. It was quite a lightweight linen which is so comfortable in summer and the hotter months. I would love to sew one in denim and make the stitching a feature of the design. Again, with the built-in facings and finishing instructions, this would be the perfect dress for some featured topstitching.

There is a vest tie on the back panels of the dress. I managed to find a vest sliding buckle, unfortunately not very pretty. I was hoping to get a different colour but with my next make, I would try a few more stores. There is also online but they always sell these things by bulk. 

Testing went very smoothly, and I really enjoyed the whole process. I really enjoy the way True Bias set out their instructions which include very good illustrations. I feel like this is a short review because all the pieces fit. I did a quick toile with my marron linen in my usual way of basting all the main pieces together to check the fit. I’ve been toiling this way for a while now and find that I can save on cutting into “toiling fabric”. This comes with a quick disclaimer that I am very familiar with True Bias patterns and have worked out my sizing from past makes. This is probably why it’s good to sew a few patterns from the same pattern drafter.

Once the last button was sewn, I excitedly tried it out for a long lunch with my husband. It’s very comfortable to wear and there were no issues sitting for a lovely lunch. It’s also a way to repay my husband for all his help with the photography!

On a more personal note, I’ve really enjoyed participating in pattern tests this year. I decided that since my kids are transitioning into independent young adults, I would use my spare time to indulge in my sewing this year. Happy to still be needed but also grateful to regain a bit more time!

Thanks for reading and happy sewing!

X Em

*Pattern was gifted and paid for testing with no obligation to post. All opinions remain my own.

Arcadia Dress

It’s always exciting to get onto the Sew to Grow testing team. Lindsey designs sewing patterns that are stylish and easy to wear for daily life. Among her many talents, she is also a sewing teacher so her patterns are always logically constructed and made to fit beautifully. I’ve been sewing her patterns from the start of my sewing journey and have learnt so much from them. 

The Arcadia Dress is a versatile pattern that comes as a top and a dress. It can be sewn as a sleeveless or long-sleeved tiered dress with a front tie on a lined split V bodice. I made two versions, a sleeveless short version and a long-sleeved maxi version. I love the relaxed vibe of the pattern and it’s such a versatile pattern.

I sometimes find tiered dresses to be very oversized and worry about swimming in volumes of fabric, but the Arcadia Dress is sized to fit in a flattering way. My measurements of 38-inch bust, 33-inch waist and 40-inch hips fit into the size 12 and I found the pattern true to size. No modifications were made except for my maxi version. To achieve the maxi length, I doubled the width of the bottom tier. 

The sleeveless dress used about 2.5 meters of fabric and my maxi version required about 4 meters of fabric. Luckily, there was a good sale on rayon fabric at Spotlight! I decided on rayon because the pattern is made for woven fabrics, and I thought the patterns would be showcased best by something lightweight and billowy. I also generally find rayon to be so comfortable to wear in the Australian climate. I think my sleeveless version will get a lot of wear in summer, but my maxi dress will get worn all year round.

There are so many positives of the pattern. I’m often pulling up straps with my sloping shoulders so I’m always trying to modify straps to sit on my shoulders. Well, I think I’ve found the perfect strap design because I haven’t had to worry about that with my Arcadia Dress. My straps on the sleeveless version stay put because the straps join onto the neckline with a long length of bias binding, and they seem to sit perfectly without any chance or length for them to slip off the shoulder.

Another nice feature is the v-opening with the ties which eliminates need for zip or button instalments. It’s a great dress to slip over the head and go. The bodice is lined too which gives the dress a beautiful quality finish. It’s these little details that make sewing your own clothes so worthwhile.

I’ve loved seeing the other tester versions emerge and there’s been a few tops that have been made. I’d love to come back to this pattern in the future to make one. This will be added to my TNT (tried and true) patterns. Lindsey was such a pleasure to test for. It was nice help her bring this pattern to life.

Thanks for reading and happy sewing!

X Em

Mia Dress

I’m so happy to be starting on my winter wardrobe. I wonder if anyone else finds themselves at the start of winter thinking that they should have added a few winter items in their summer sewing months. That’s probably me every year. I must admit that I probably sew more summer than winter items but that’s because our summers are longer. When Casey from Patternscout Studios reached out to ask if I wanted to test her latest design, I was so excited because it’s a winter dress. An item that is lacking in my wardrobe.

The Patternscout Mia Dress is a turtleneck knit fabric dress. It has raglan sleeves and a fit and flare high-low skirt which is a midi length. The pattern test went smoothly except I told Casey that my big head needed a slightly larger neck opening which she has adjusted. I made the size 12 graded to a 14 at the waist and hips and I used the Cup B pattern. This is why I’ve sewn so many Patternscout patterns and am happy to test for her. The sizing is spot on each time, and I love that she includes the different cup size options. It’s also great that printing the pattern is made so easy because you have a different PDF for each cup size option. My measurements are 38-inch bust, 33-inch waist and 40-inch hips. I think I could have just sewn a straight 12 being a knit fabric garment but I feel more comfortable when garments are not so “clingy”. 

I did make some adjustments for my own liking after I had submitted my toile and was sewing my “real” dress. I shortened my bodice 1/2 inch and shortened my skirt by 1-inch as the dress is for someone slightly taller. I also shortened my sleeves by 3-inches. These adjustments are usual for me so not to do with the fit. 

The fabric is a rayon-spandex from Spotlight Stores. There wasn’t a really big range to choose from at my local store. I would love to find a dark coloured plain rib knit like the one that Casey has modelled. Although, because our winters are mild, I might not get as much wear of my dress if the knit fabric is too thick. It is recommended for two-way and four-way medium weight knits with at least 50% horizontal stretch.

In other news, my second-hand Bernina that I scored on Facebook marketplace had to be retired. She has served me well but there is something wrong with the tension dials. When I purchased the machine, I was told about this problem, but I took the risk and bought it anyway. It was such a bargain price that I thought even if I had to pay for a service, it’s a worthy machine. So, that was five years ago, and this is the first time it’s shown some serious signs of failure. I will be repairing it at some stage. In the interim, there happened to be a great sale on overlockers at my local Spotlight store, so I decided on the Elna. It seems to have a few good reviews. I’ll wait a few months before posting my review.

Many sewists have said that they sew their knit garments fully on their overlockers. The Mia Dress pattern instructions assume this, but it can also be fully sewn on your machine and the instructions accommodate this. Armed with new overlocker, I decided to try this. Usually, I use both. The thing that confused me was the seam allowance. When you sew on your machine, you know where the allowance falls. On the overlocker, I’ve read that you account for the loss of 1/8 inch, a scant amount of loss which the blade removes when you are sewing with the overlocker. I think this is included within the 3/8-inch seam allowance. I hope, because that’s what I did. I did use my sewing machine with the twin needle to finish my sleeve hems and skirt hem.

Overall, if you’re like me and new to sewing knits, this would be a great dress to try out. It took me half a day to put together from cutting the fabric to finish. That’s quite a quick sew in my book. I would grade it as an intermediate pattern. In terms of fabric consumption, it didn’t take as much fabric as I thought it might. The chart is quite accurate assuming there is no pattern matching needed. I used 2 meters.

I’m looking forward to getting some wear out of this and I think I’ll be looking for some other similar patterns to try in knit fabric. I should also mention that Patternscout instructions are always great and accompanied by illustrations but if you want videos, she is has quite a huge catalog of YouTube videos.

Thanks for reading and happy sewing,

X Em

Tie Dress Featuring Longan Craft Linen Chinoiserie Fabric.

Like an artist choosing a palette of paint colours, the right pattern must be paired with the right fabric. So, when this beautiful Linen Chinoiserie fabric was kindly sent to me from Longan Craft, I had to make a choice of what to sew with this fine and lightweight linen-tencel fabric. 

Initially, I had thought of a different dress on my summer make list. However, when the fabric arrived, it was drapier and finer than I anticipated. It reminds me of raw silk which was the material of my wedding dress, and it has the lustre and sheen of silk. There is also a subtle print of koi and flowers which I wanted to highlight so I didn’t want a pattern that would break that up with gathers or too many pattern pieces that break up the beautiful print. Searching through my files, I realised that the Sewing Therapy Tie Dress was the pattern that fit the bill! I was on the testing team for this dress and have made two which I constantly reach for, especially the short-sleeved version. 

As usual, I started by washing my fabric. Even though it looks delicate, I found that it was okay to wash it in my washing machine on the cold cycle with a detergent for delicate fabric (one without enzymes). I then air dried it which is the normal way I would treat it once the dress is sewn. There was no loss of colour or changes to the fabric which was a relief.

The next step was to test a small piece of fabric on my machine and the overlocker so that I could decide on the type of seam finishes and the needle I needed. I did change my machine needle to a 70/10 gage needle which is great for finer fabric. Testing the fabric with the overlocker also worked out without any changes. I’m still learning about overlocker settings on my second-hand Bernina. Being second-hand, it didn’t come with a manual but luckily, I could find the manual online.

The Tie Dress is an elegant design with versatility in mind. The ties can be played around with, so the wearer can tie it in multiple ways to adjust for a loose or snug fit, be tied to the front and back or to the sides. It can also be worn as a v-neckline or round neckline. I’ve never known a pattern like this. I guess that’s why it has been worn so much. There’s never a time when I have avoided wearing it due to changes in my tummy size. Talking about sizing, I made the size 12 with my measurements of 38-inch bust, 33-inch waist and 40-inch hips without any modifications.

Sewing the dress is made easy by the instructions which are included with the pattern. It is also helpful that Sara has included a sew-along video on her YouTube channel called Sewing Therapy. It’s my go-to channel for sewing inspiration and a great resource for the sewing community. 

I’m so grateful to be given the opportunity to showcase this delightful fabric from Longan Craft. I learnt a new word from my husband. When he saw the dress, he said that the fabric is diaphanous. According to google dictionary, it’s an adjective (especially of fabric) light, delicate, and translucent. It’s a great description of this fabric. The fabric composition is 60% linen and 40% Tencel but has the feel and lustre of silk. It comes in 59-inch width which is a lovely wide 150cm fabric. It’s beautifully lightweight at 92 gsm which converts to 2.71 oz. Longan Craft is a well-established online fabric store since 2020. The delivery of the fabric was prompt and I’m so impressed by the quality of the fabric. It has been a pleasure to sew their linen chinoiserie fabric, but they have a wide range of fabrics which cater for sewists and crafters from novice to professional level. 

For my lovely readers who have read all the way to the end, Longan Craft have provided a discount code which you’re welcome to use! It’s not an affiliate link and doesn’t add to the cost of your shopping cart so don’t worry. The code is emsewhappy which will give you a 15% discount. Happy shopping!

Thanks for reading and happy sewing!

X Em

Disclosure: Fabric was supplied for review with no obligations to write a blog post. All opinions remain my own.