I’ve been having a bit of a crush on Matchy Matchy Sewing Club Patterns, so it was no surprise that when Rose from Devonstone Fashion reached out about some small samplings from their new Hasting Street Linen Range, I reached for the Collage Top pattern. This linen collection from Devonstone Fashion features linen cotton and yarn dyed linen. I gravitated towards the yarn dyed linen because I wanted to test some colour blocking. The yarn dyed linen is made from threads individually dyed before being woven into fabric. I just loved the slight two-tone character of the linen which gives it a more natural and slightly textured look. I was generously gifted 1m mauve, 0.5m olive and 0.5 oyster to make whatever my heart desired.
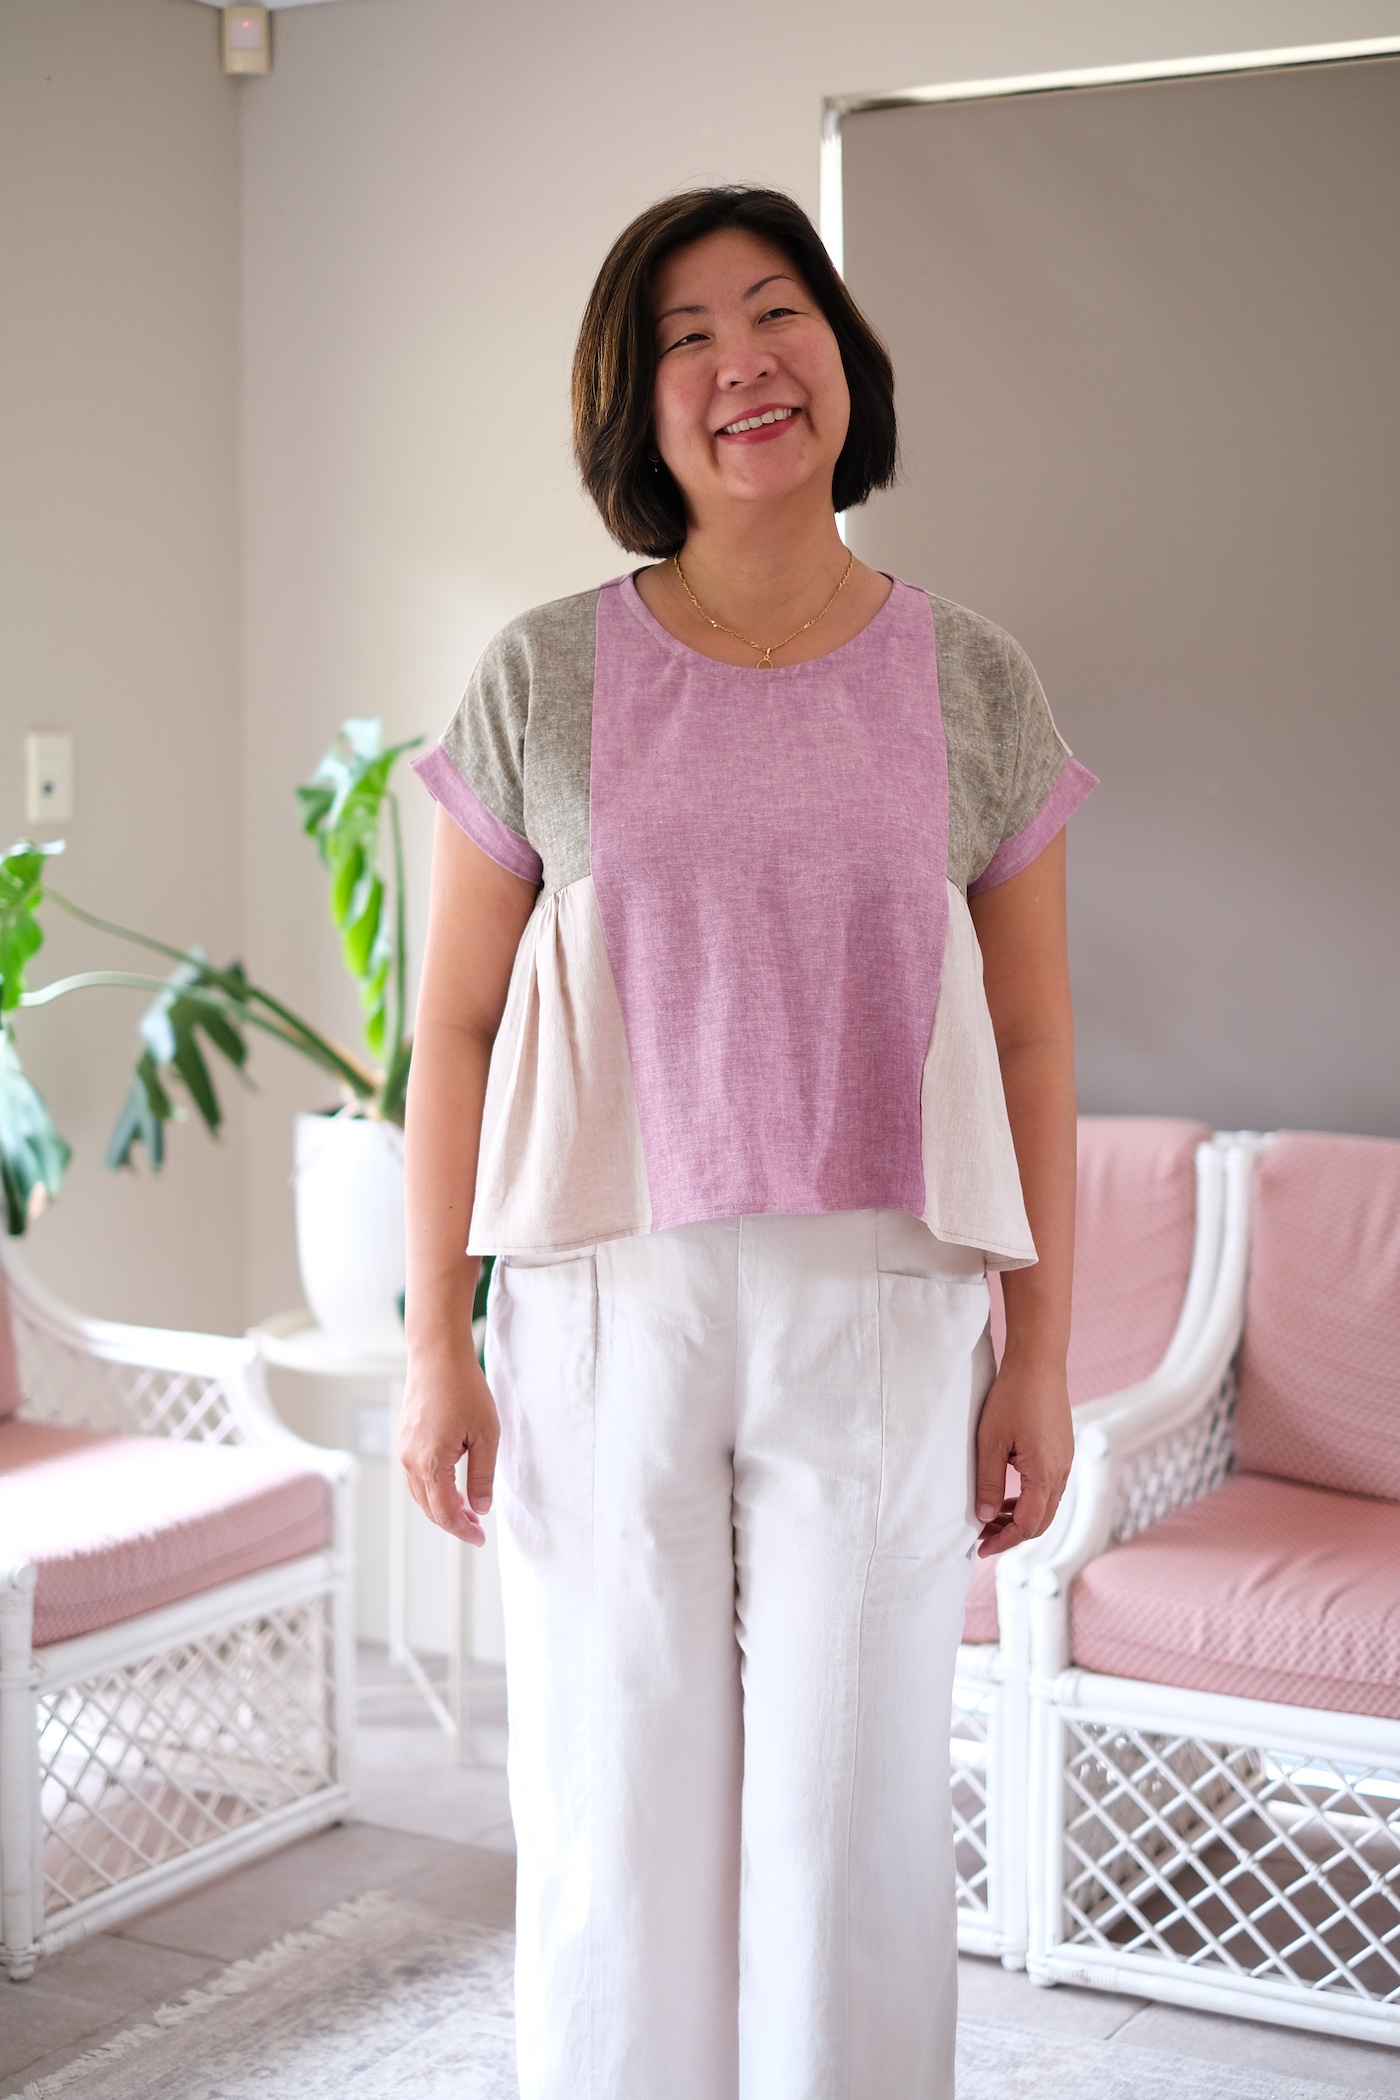
The Collage Top features centre front and back panels which attach to side panels that have a gathered lower panel. I had enough fabric for the short-sleeved version. The sleeves are grown on and feature a cuff. The boxy fit of the top was what drew me to the pattern. I like how the top sits just below my natural waist. It’s so fun playing with the colour blocking and I love the colours on this linen.
I always prepare the fabric by washing and drying it. I overlock the cut edges before throwing it in my washing machine. People have told me that they often skip the washing and even though these pieces arrived in pristine packaging, I still wash the fabric just in case of shrinkage. The linen was then ironed before cutting and sewing. It handled beautifully when sewing. Linen is a stable woven fabric so it’s easy to sew and okay for overlocking. This linen is 55% Linen, 45% Cotton, 5.6oz/189.8gsm and 112cm wide.
My sizing sits between the M and L in the Collage Top Sizing Chart. I decided on the M which was the perfect relaxed fit for me. I wish I had lengthened the top by 1 inch so as it currently tents out. I did take a risk and sewed this without a toile, but I felt it was similar enough to the Skipper Top. The linen gives the top a lovely crisp and structured look which is what I was hoping for.
It’s going to be easy to style this top with so many items in my closet. It’s not even summer yet and I’ve already started to wear it. I’m currently matching it with high waisted pants, but I’ll be sewing up some shorts soon for beach weather and this will be on high rotation.
As mentioned earlier, the trio of linen pieces are samplings from the Hasting Street Linen collection curated by Devonstone Fashion and Devonstone Collection which are divisions of Two Green Zebras. I’m so grateful and enjoyed every moment of sewing my Collage Top. The yarn dyed linen feels super soft already and I know it’ll only soften even more with repeated washing. It’s a bonus that because each yarn is dyed individually, there won’t be any colour fade as the dye is locked into each strand. I’m loving the natural variation in the tones of this fabric.
It’s been a joy to add this to my handmade wardrobe. Thanks for reading and happy sewing!
X Em
* Fabric was gifted but all opinions remain my own.