It’s been a minute and a half since I’ve sat down to do some sewing. I decided that when my all my kids finally graduated from school, I would treat myself to extending some of my own education. It turned out to be extremely challenging but satisfying and was happy to pass my course. I’ve had to turn off all my social media just to concentrate and avoid the temptation to sit at my sewing machine. Now finally, I’m happy to be back sewing. I realised that I have come to rely on sewing to relax and decompress.
The pattern I chose to sew first was the Sewing Therapy Ele Skirt. I got it when it launched and it’s the perfect skirt weather with our weather warming into spring. It was a relatively quick sew and has great instructions. Again, Sara keeps all her instructions concise but detailed. She also includes great sew along videos on YouTube which I did watch.
I like the Ele skirt design of the flat front and elasticated back waistband. It’s more comfortable these days to wear items that have a bit of flexibility in the waistband. Hands up fellow endo sufferers and perimenopausal women. I want structure but comfort, if that makes sense. The fit is true to size. I made the size 12 with no modifications. My measurements are 33-inch waist and 40-inch hips. The pattern advises using the hip measurements to choose your sizing.
The fabric I’ve used is a 100% cotton lightweight poplin. Even though I have largely stopped shopping ready to wear, I sometimes pop into Uniqlo to browse and I really love that style of shirt-fabric skirts that they stock. I’m happy with the choice except for a minor hiccup when I discovered that the narrow fabric did not fit the skirt’s pattern piece. To compensate, I trimmed the pattern piece and took a wedge off without affecting the hip or waist measurements. I’ll need to be more careful to find a wider piece of fabric when I make it again.
The pocket construction was one of my favourite features of the pattern as well as the list of options for the front pleats. I chose to make the big, inverted pleats but there was also a gathered option, knife pleats, reversed knife pleats. It’s fun when a pattern can be customised to your liking. The pockets are large enough to fit you hand and phone. Very useful indeed!
Ele Skirt
Another successful pattern from Sewing Therapy. I’m embracing neutrals and solid colours currently. I’m trying to make things that would match and balance out my more colourful, patterned makes.
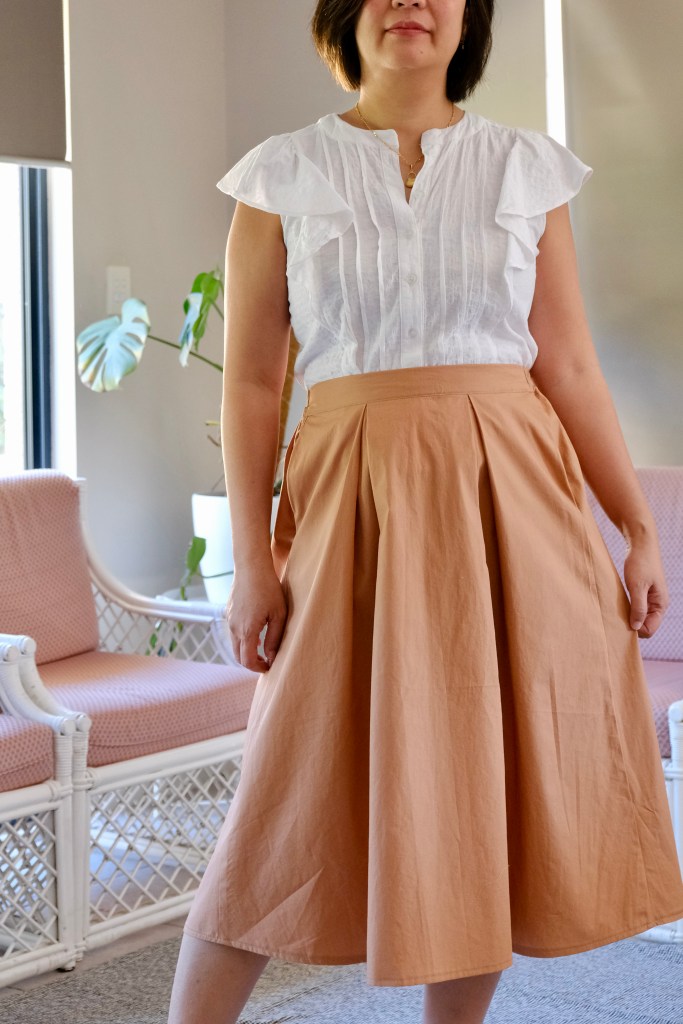
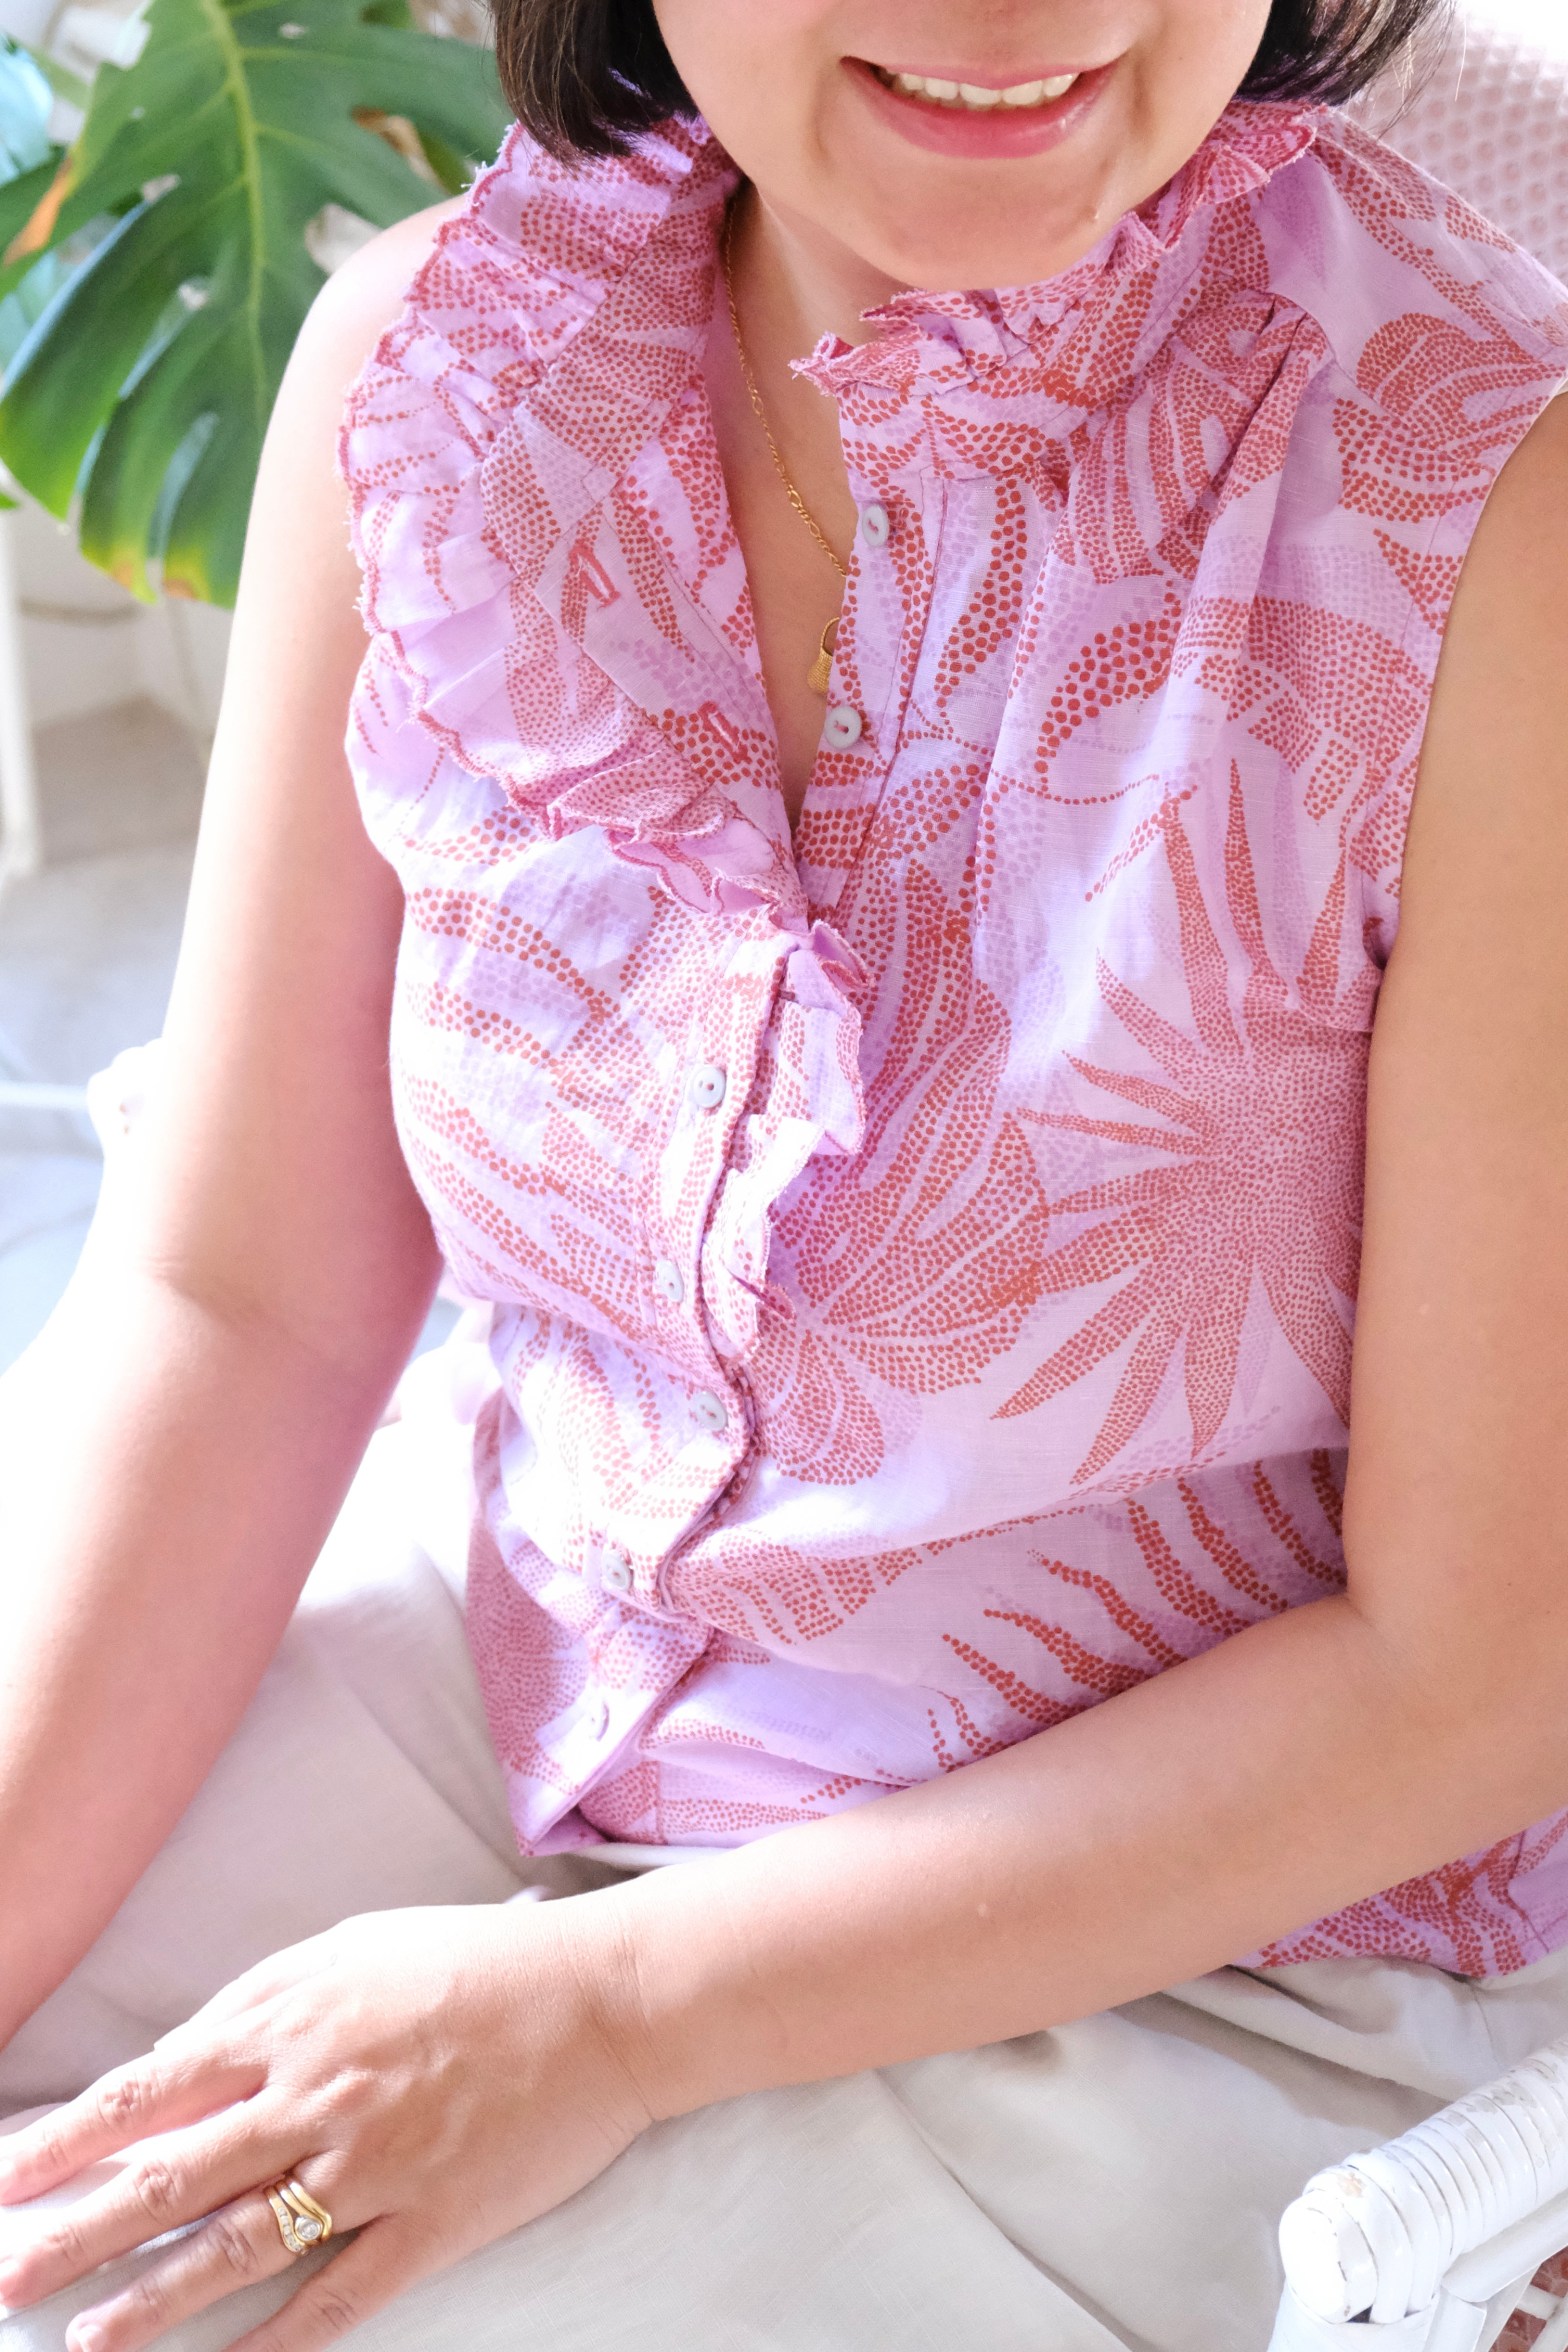
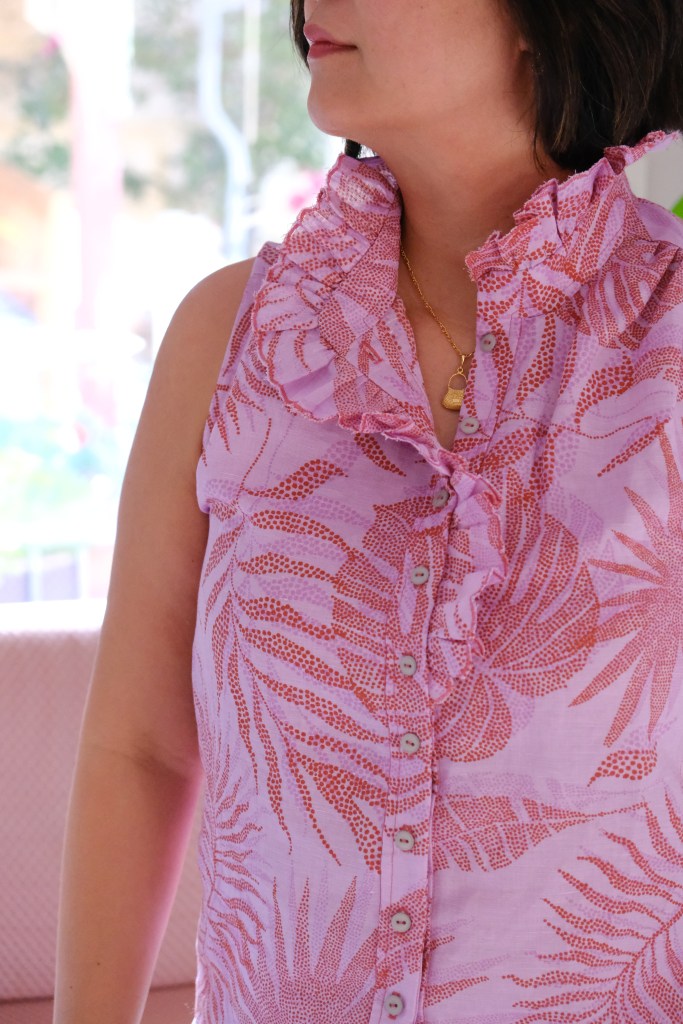
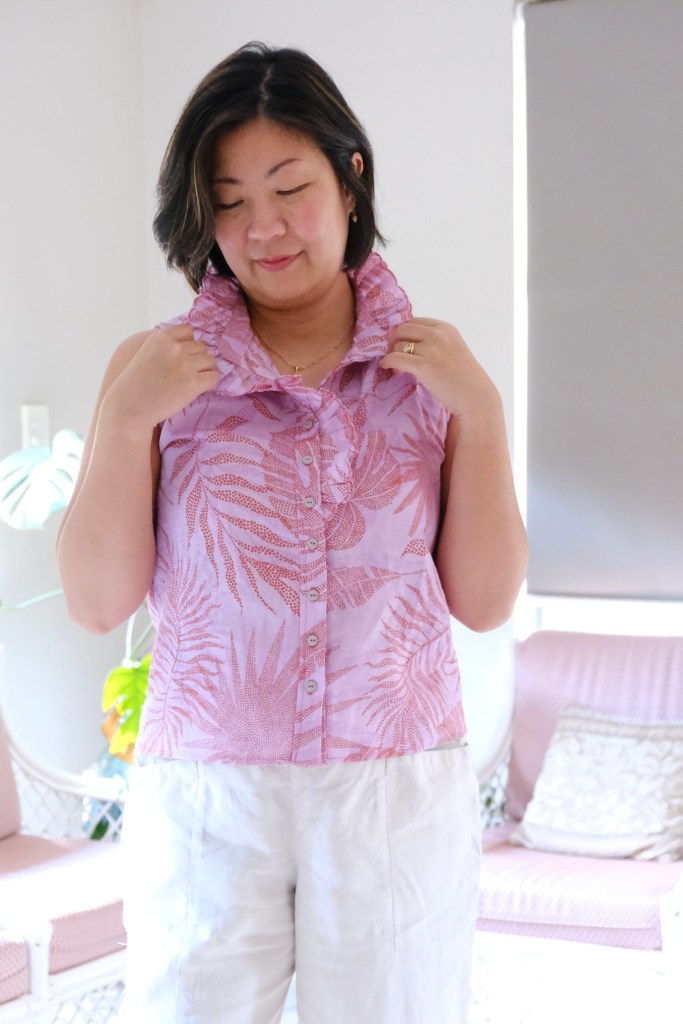
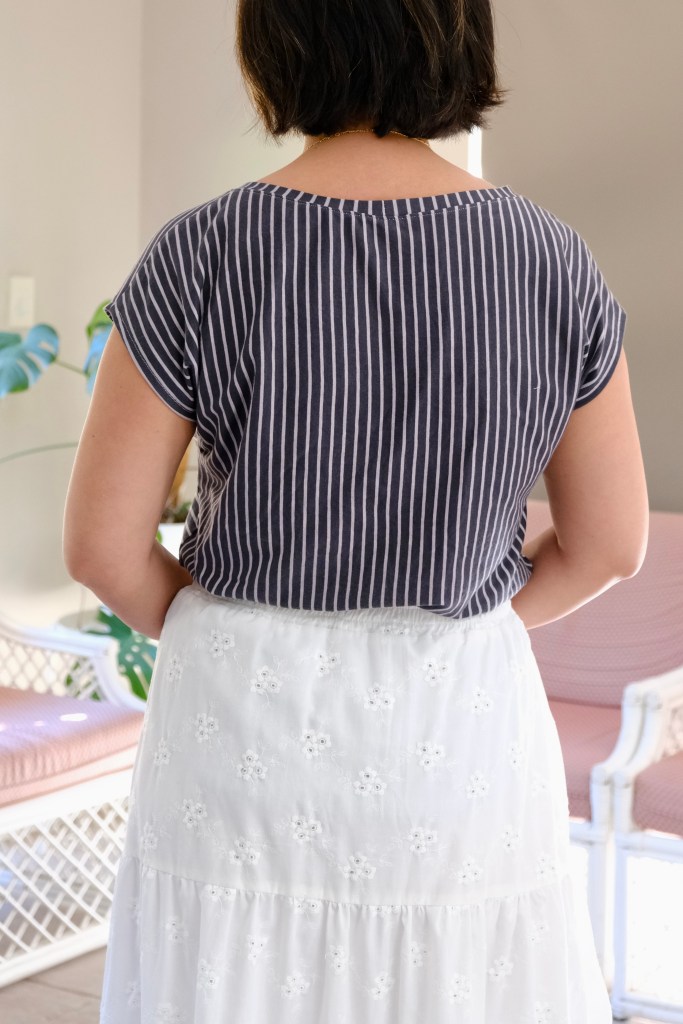
Lovely Nasrin from Needle Eye Patterns sent me the Aveiro Shirt* for a review and I’m so glad she did. The Aveiro Shirt is a button up, sleeveless shirt with a ruffle that wraps around the collar and halfway down the placket. The ruffle details give this top a beautiful feminine look especially when embroidery details are added to it. I was thrilled to learn how to add a scalloped edge to the ruffle. I was also impressed with the detailed finishing instructions which makes the blouse neat on the inside as well as the outside.
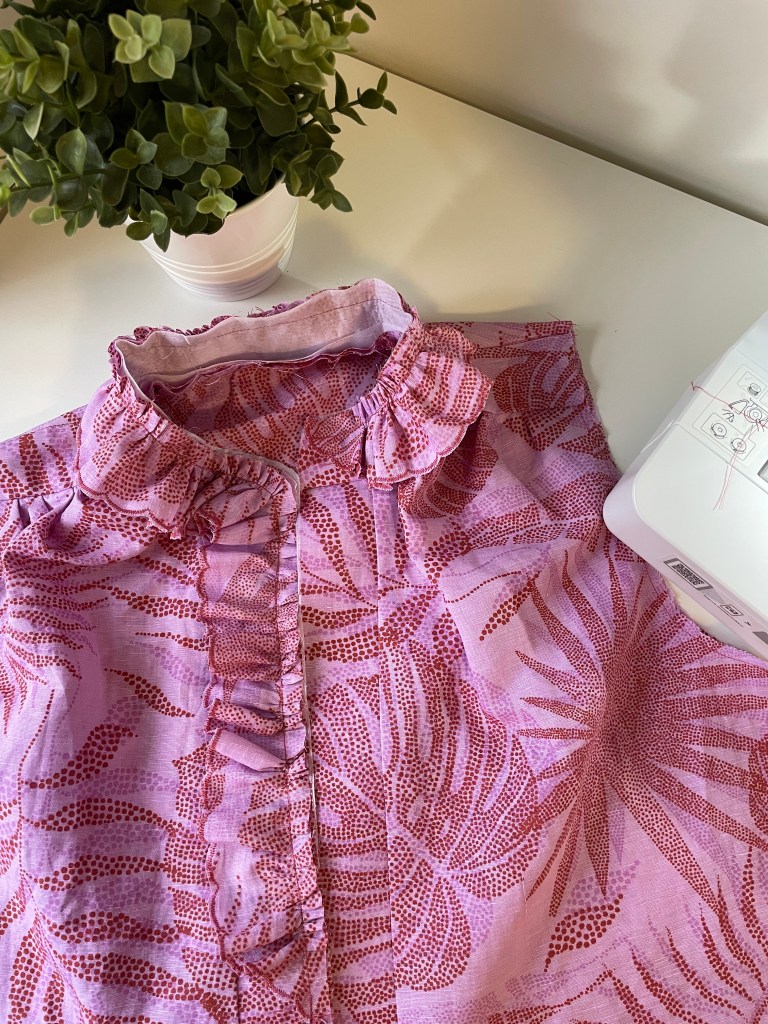
Work In ProgressRuffles on the Aveiro Shirt
The top is suitable for woven fabric. I’ve made two versions of this top. My first was a wearable toile with a Swiss-dot, lightweight cotton. My “good” version of the top was made with a patterned linen which is still lightweight but has medium drape with more of a structured feel to the fabric. Both were appropriate for the pattern, but I feel that the linen will need more wearing in and washes to take on the shape of the top. The shoulder yokes have gathers which still sit away from the body. I know from experience that linen will soften, and it will sit better after that.
My measurements of 38-inch bust, 33-inch waist sat between the size 10 and size 12. Looking at the amount of ease in the pattern, I decided that the size 10 would be fine without grading. I did toile the pattern and it felt like a comfortable fit. I find that the pattern is true to size.
Instructions for the pattern were fantastic. It’s uniquely written from the point of view of a seamstress without assuming background knowledge of the person using the pattern. I found out from the Needle Eye Patterns website that Nasrin is not only a designer but a very experienced sewing teacher which explains why the instructions are written in a very clear and non-ambiguous manner. At no point did I have to stop to look up a technique or instruction. In addition to the written instructions that were paired with great illustrations, there is also a YouTube video sew along. With all these resources, this pattern is suitable for someone who is a beginner to an expert.
One part that I enjoyed the most but also the part I sewed wrongly in the first toiled version was the ruffles. It doesn’t state in the pattern which side (right or wrong) of the fabric to cut on and it’s not possible to tell on the video with the fabric being used. So, initially, I cut from the good side of the fabric, and it meant that my longer side of the ruffle ended up on the left side of the blouse. Women’s shirts button from right to left, that is, buttonholes on the right and buttons on the left. So, on my toiled top, the buttonholes are on the left with the ruffles and the buttons on the right. It still works but it was something I had to pay attention to in the linen version. This time, I cut the pattern pieces from the wrong side of the fabric, and it worked out fine. This mistake was not a reflection on the pattern but just me forgetting which way women’s tops button up. Who decided this in the first place anyway?
Aveiro Shirt
The finishes on the top are so neat. Almost all the seams are French seamed. Bias binding finished the sleeve opening. I used a serger for the hem of the shirt and then sewed and turned the bottom corner of the placket. It’s a very satisfying sew and I learnt a few new things. Overall, a happy outcome. I’ll be finishing my toiled version and sharing it soon. I’m thrilled with my Aveiro Shirt and can’t stop admiring the scalloped edge on my ruffle!
Thanks for reading and happy sewing!
X Em
*Pattern was gifted for a review but all opinions remain my own.
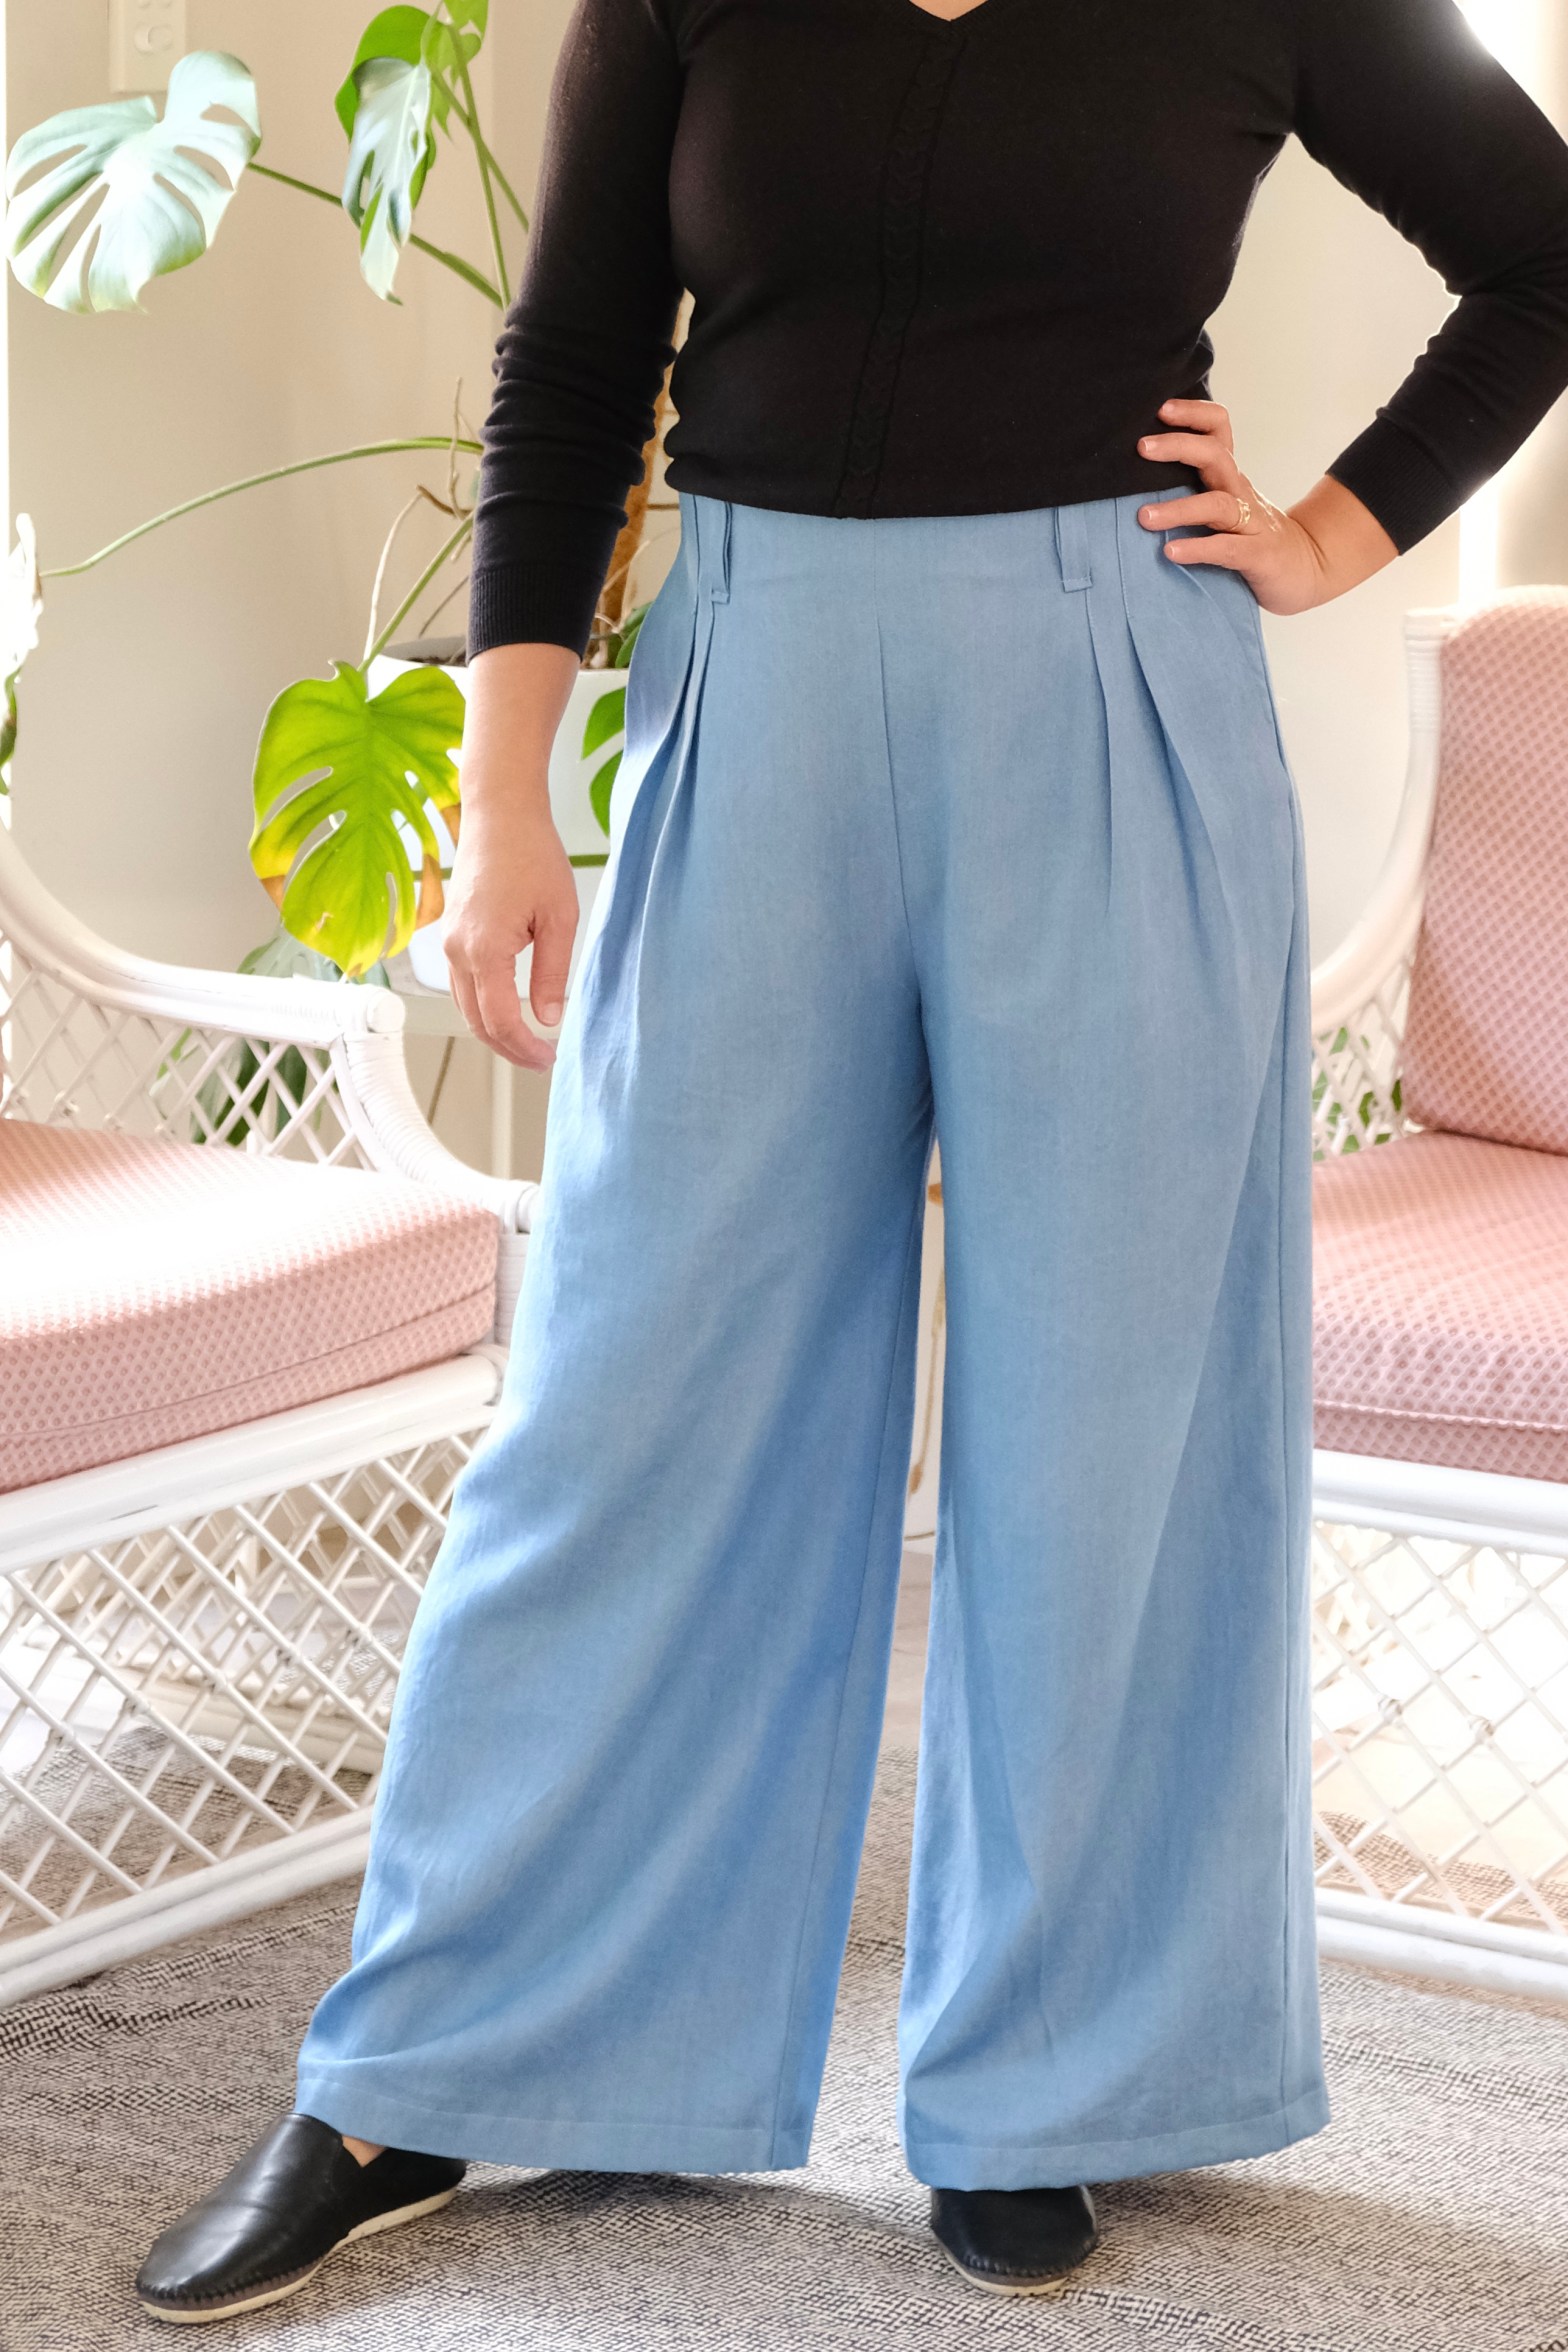
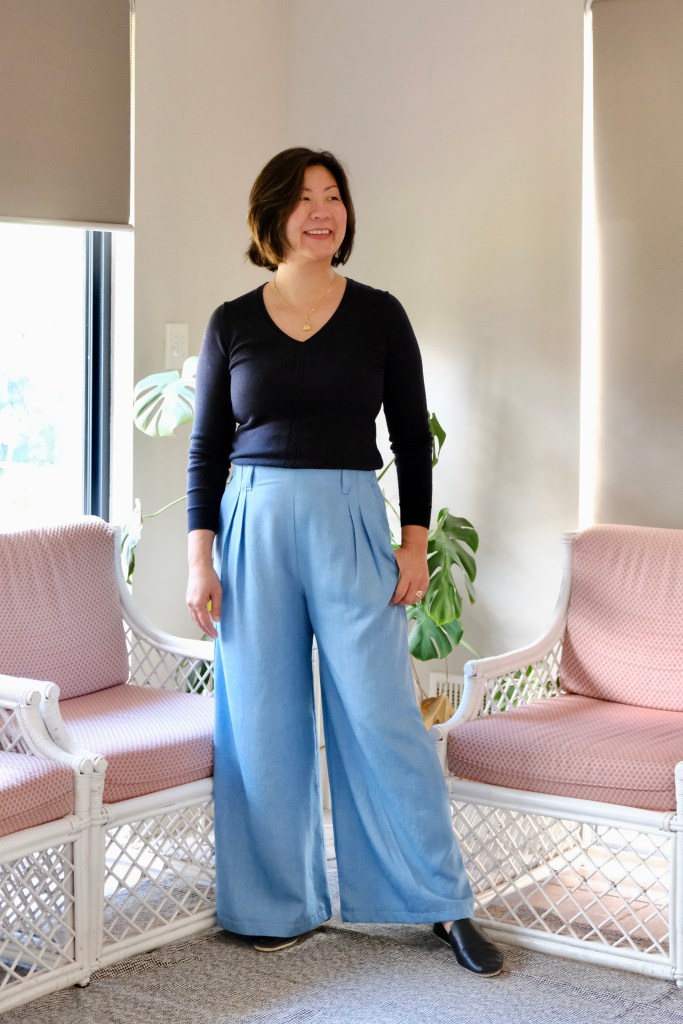
Sewing my first pair of jeans has now got me on a roll for sewing fitted pants. I feel that a lot of fear for sewing pants comes from fit issues. Well, at least that is the case for me. I thought this would be a good pattern to try because the fit is determined by a series of darts and pleats without a waistband. I also love the pattern for its classic tailored silhouette. As a Swimstyle Patterns Ambassador, I am gifted with the pattern, but all opinions remain my own.
Swimstyle High Waist Pants
This pattern is designed for lightweight woven fabrics, so I picked up a denim Tencel fabric which has smooth drape. I was a bit naughty and did not toile this pattern. I would usually have sewn the shorts version first but it’s winter here and I wanted to sew something I could start wearing straight away. The other reason I didn’t toile was because the darts and pleats can be adjusted to fit the waist. The wide leg style of the pants means there is quite a lot of ease which is easier to adjust. The bonus of the generous 5/8-inch seam allowance is that it’s more forgiving when trying to fit a pattern the first time.
In the other Swimstyle Patterns that I’ve sewn, I have found the drafting true to size. My measurements of 33-inch waist and 40-inch hips means that my size falls between L and XL. I decided to sew the L and to adjust the seams if needed. In the end, I did not have to make any adjustments, and the L fitted me perfectly. The pattern does include belt loops which helps with sizing when you’re wearing the pants, but I can happily wear the pants without a belt. My only adjustment was the length of the pants. I shortened the pattern by 3 inches. This was done by trimming 3 inches from the bottom of the pants.
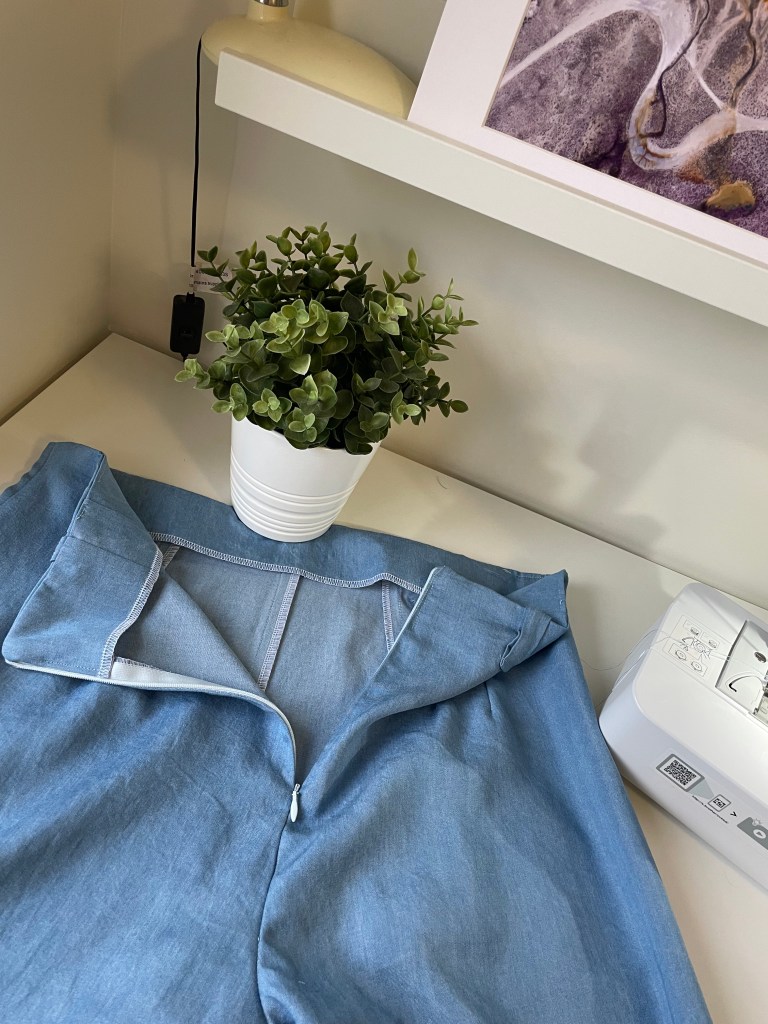
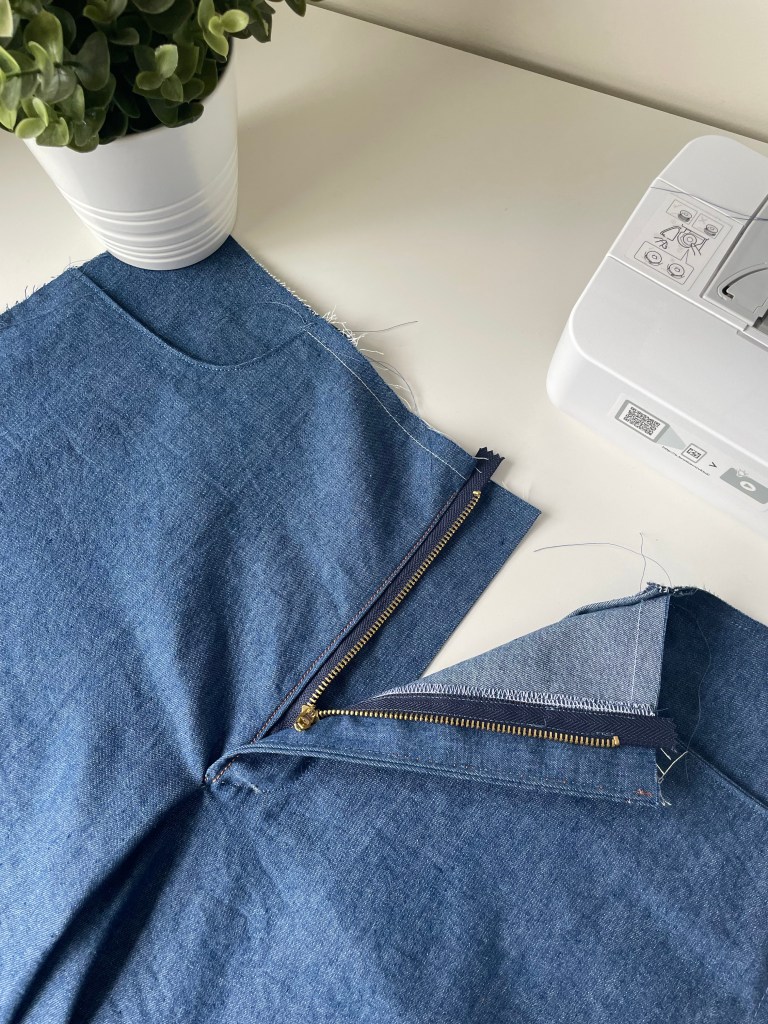
PocketsKnife PleatsInvisible Zip
The sewing went smoothly with the fantastic instructions. Until the end. I realised when I was doing the final press of the pants that my front knife pleats were facing the wrong way! They were facing centre front rather than towards the side seams. It was an unfortunate time to find this mistake because I was out of motivation, I had already packed everything away and I could not face having to unpick the waist facing and trying to reattach it. The consequence of this mistake is that the front doesn’t fall the right way when I sit. I am not too bothered by it and will still wear my pants, but I will make sure I correct this in my next iteration of the pattern. My next pair of this will be in linen.
I’m so happy to finally have the confidence to sew pants. I was doing a happy dance with the installation of my invisible zip. I used to be so afraid of zips especially invisible zips, but I have worked out my favourite method which works for me. I’m so glad that I jumped in and I’m looking forward to sewing more pants.
I made jeans! I’ve had this pattern now for about three years. Each year, I take the pattern out to put on my “Make Nine” list and then chicken out and the whole cycle starts again the following year. The barriers have been slightly varied each year including needing a better sewing machine, needing more skill, denim can be expensive, so I didn’t want to outlay the cost only to be disappointed. In the end, this has been the right year for me to attempt this pattern.
The Dawn Jeans comes in four variations, and I’ve chosen to sew the wide leg version. There is also the straight leg version which I will return to sew as well. I love that everything is customisable and there are lots of suggestions on how to do this. I started out thinking I would use a contrasting brown topstitch but after seeing on the zip-fly, I decided to use matching thread for a more modern sleek look. This was also because it’s my first iteration of the pattern and I was more interested in making sure the fit was right.
So, the pattern has a vintage inspired fit with minimal ease at the hips and is high waisted. I was worried about fit because I’ve never had a comfortable “ready to wear” pair of jeans. I find that I often don’t fit into high waisted fitted pants because of my belly. Measuring myself just at the waist and hips does not really give me a good guide to how my body would fit so I went to the Cashmerette site and used the measuring guide for the Creston Jeans. I haven’t made those jeans yet, but I love the guides on fitting that Cashmerette provide. I’ve put my measurements in the table below, but you can also check out the Cashmerette Blog for their guide. I used the elastic band method to get my measurements.
Natural Waist
33”
At Waistband
36”
Crotch length
27 ¾”
Rise
12”
In seam
28”
Hip
40”
My Measurements
Using those measurements, I decided to grade the Dawn Jeans from a size 14 waist to size 12 at the hips and to use the regular full inseam. The sizing options cater for tall and crop inseam as well. I couldn’t decide if I should sew the shorts first as a toile, but impatience made me jump into the deep end.
The pattern is drafted for non-stretch denim, so I chose a rigid ring spun 6oz (200gsm) denim. It’s a lighter weight denim which still holds its shape but easier on the sewing machine. I’m ordering a 10oz (338gsm) vintage denim for my next attempt.
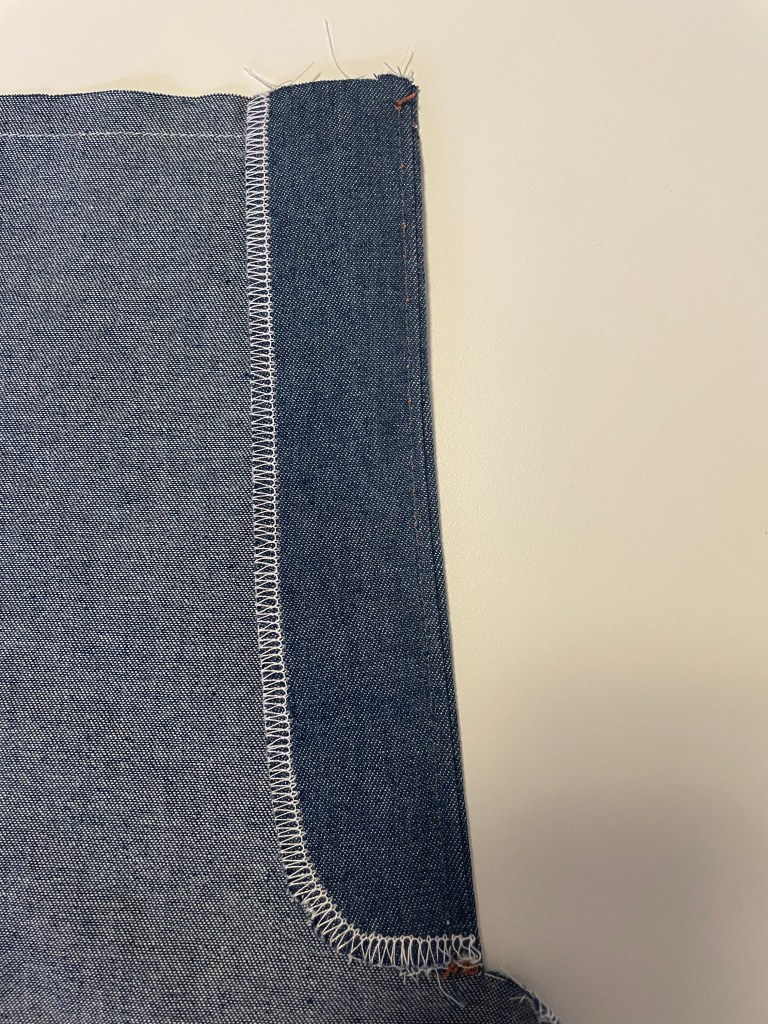
Making jeans was not a weekend project for me. It took several weeks to work through all the details which made it thoroughly enjoyable. I love how the first thing you tackle in the pattern is the zip fly. I’ve only ever done this once before when I made the True Bias Dani Pants. It was a lot easier this time. I haven’t made a comparison of the methodology, but my zip extension sits very neatly, and I was so happy with the result. I think slowing down also helped.
The Zip Fly Construction
I did attempt to topstitch but the sound that my machine made stressed me out. I did learn that to have neat topstitching I needed a longer stitch length and a slight increase in tension. It would also be handy to use a second machine for the topstitching. This will be something I return to in the future. The instructions for the topstitching are incredibly detailed and it will give it a “classic jeans” look. Instructions throughout the pattern were very comprehensive with illustrations. I found the online photo tutorials were very helpful and referred to them often. Luckily, I had saved the initial email sent when I bought the pattern with all the links because I couldn’t find them by myself on the website. It’s because the Ash Jeans are used for the Dawn Jeans as well.
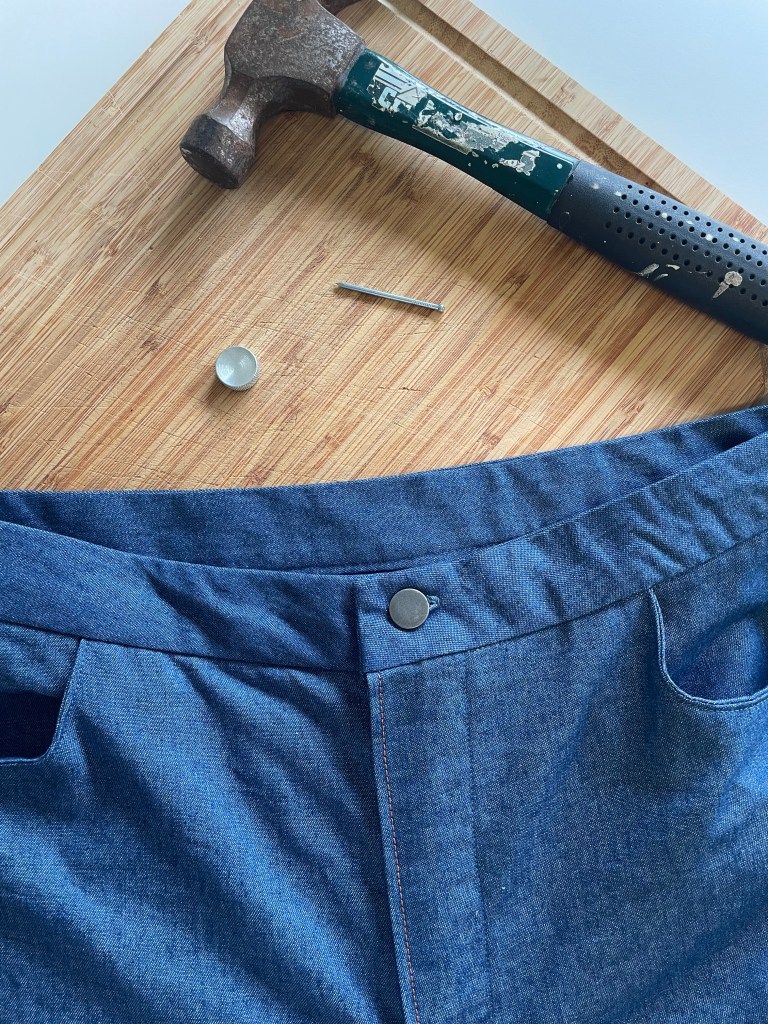
Attaching the shank jean button was not as difficult as I thought it would be. I bought the button kit a while ago when I bought the Dawn Jeans pattern. My pattern came with a few options and a separate instruction booklet for these options. There’s a button fly, exposed button fly, and zip fly options. My toolbox did not have an awl, so I used a nail which worked fine.
Jean Shank ButtonClipped Crotch Seam
There are a few things I would like to improve the next time I make this pattern. There are instructions to clip into the curve of the front pant seam. I followed the instructions, but I regret this as I think this will weaken the seam and might disintegrate with laundering. I wish I had left it unclipped. Would anyone know why this was instructed? I’m going to try the contrast stitching but using two spools or maybe I’ll be brave and use the topstitching thread on my spare machine. Oh! Also, I put the coin pocket on the wrong way so now it’s a secret pocket. It faces inwards instead of out. I was so sure that the instruction says to put the pocket facing and pocket bag wrong sides together, but it was too late to correct it by the time I realised. I’m not too upset, I think it’s handy to have a secret pocket.
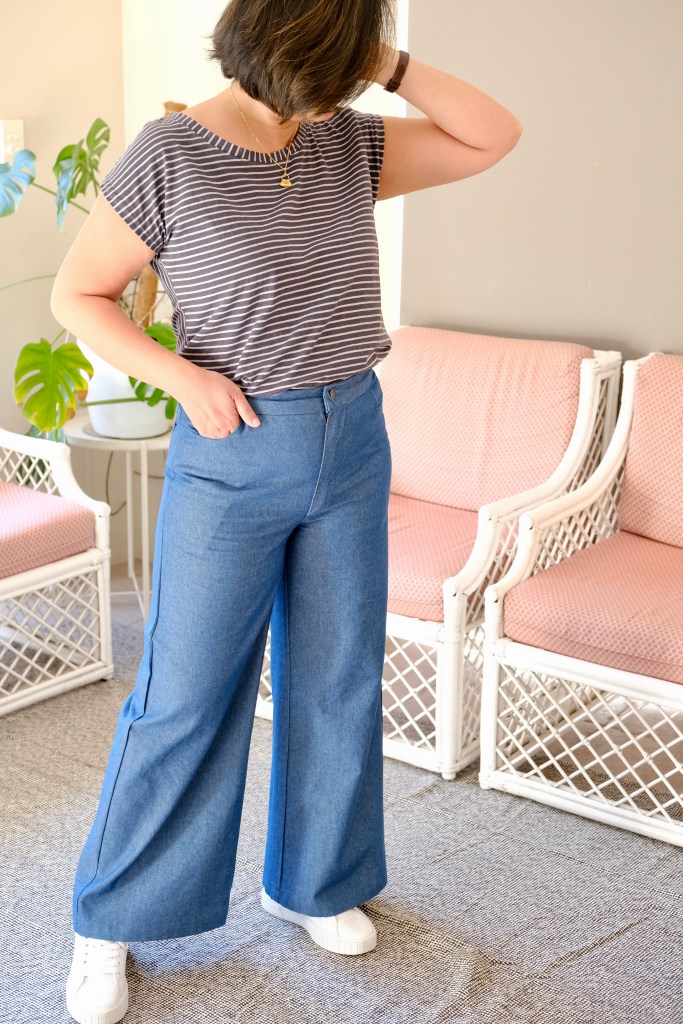
The Dawn Jeans!
I’m not going to wait so long to make this again. I’ve really enjoyed the challenge and the details of this pattern. Hopefully this will give you a push if you’ve been wanting to try sewing jeans.
Featuring Fibers to Fabric Hand-blocked Cambric Cotton
It was so exciting to receive this beautiful hand-blocked cambric cotton from Fibers to Fabric for a review. The first thing I had to find out was, what was cambric cotton? It’s sometimes known as batiste and it’s a beautifully sheer fabric that’s great for summer. It reminds me of the handkerchiefs my grandmother used to hand embroider. It’s a natural fabric and usually made from either linen or in this case, cotton. It’s popular because it can be dyed easily so it’s perfect for the Fibers to Fabric hand-block.
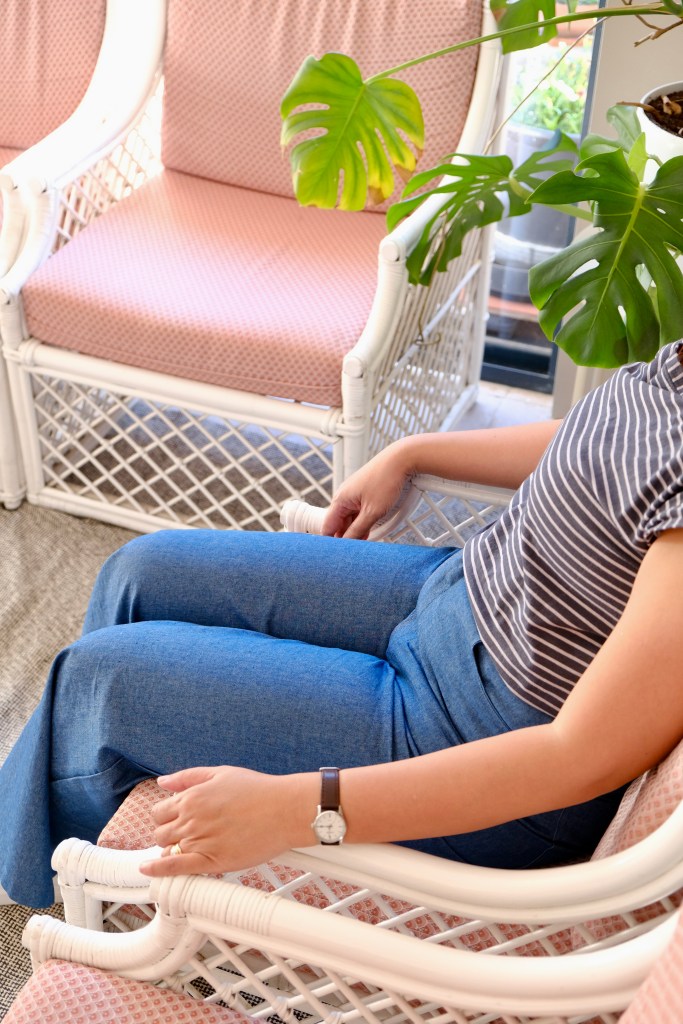
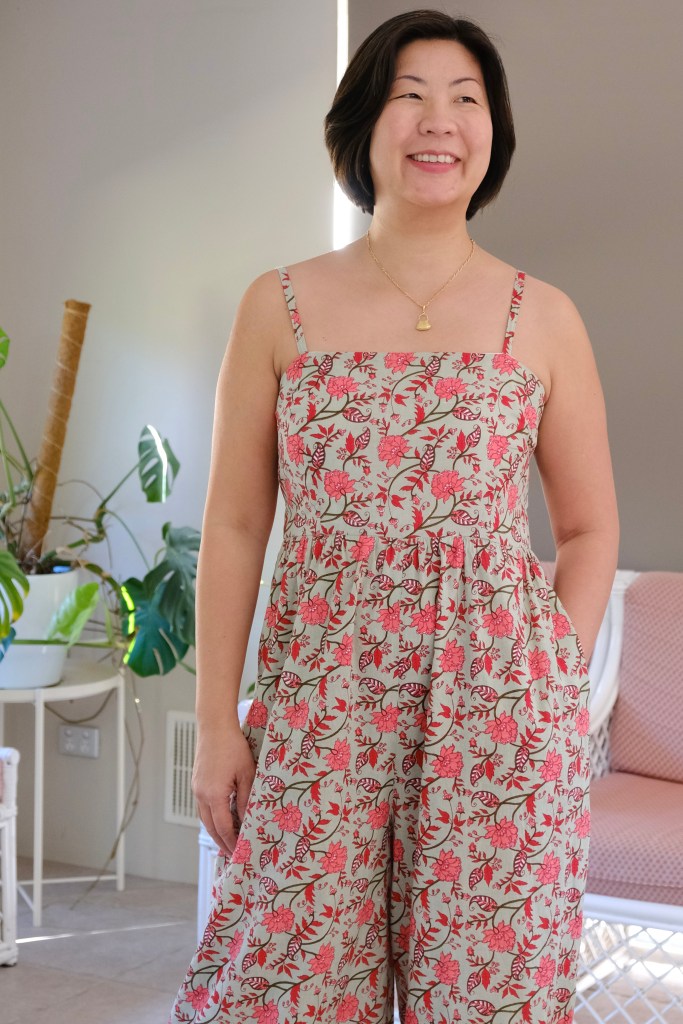
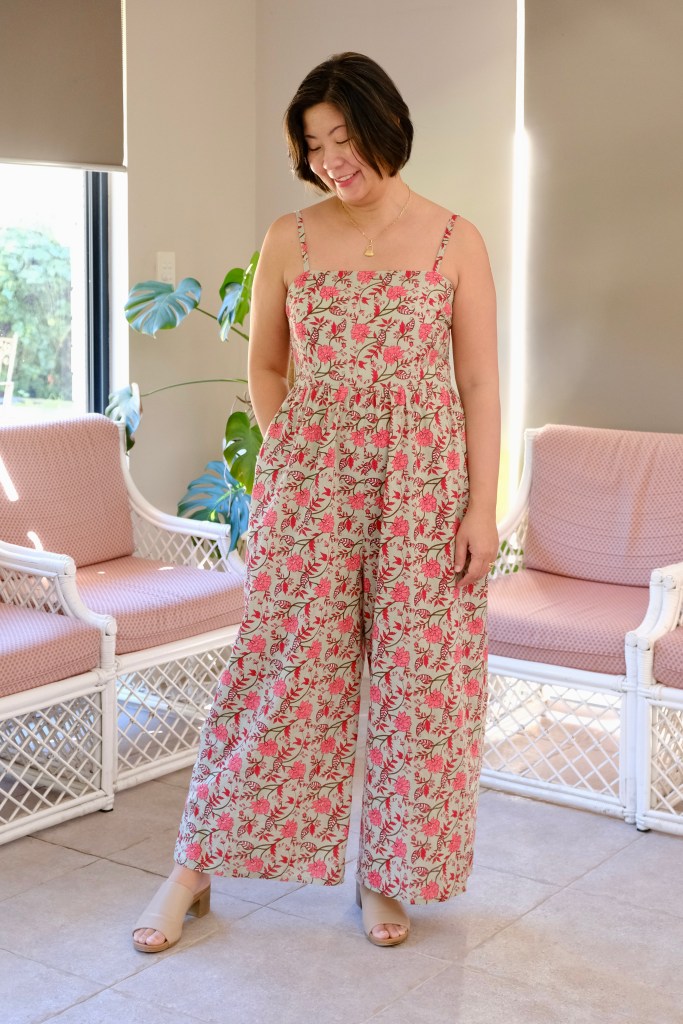
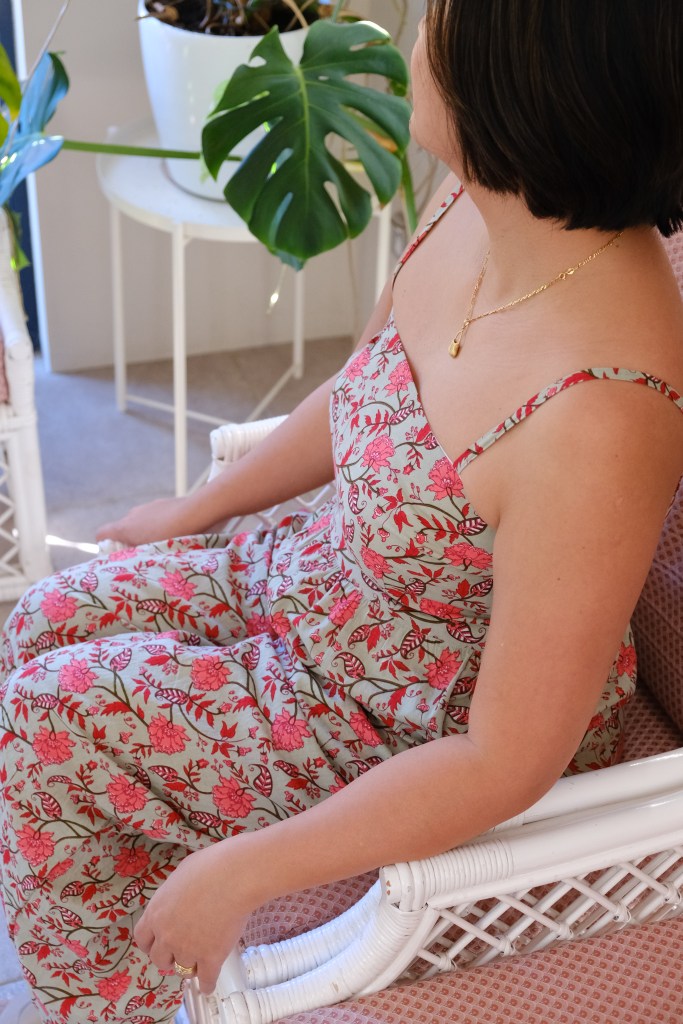
My first challenge was narrowing down what I was going to make with it. The fabric width is 42” (107 cm) and I had 3 meters. The design of the hand-block was non-directional. I narrowed it down to the True Bias Darla Jumpsuit because I wanted to maximise the use of every square inch of this fabric. With a bit of creative cutting and use of a white muslin for the liner, I managed to cut the maxi with classic bodice version of the Darla. Gloriously, this included the pockets!
To prepare the fabric, I overlocked both cut ends of the fabric before soaking and washing it in cold water. Once out of the wash, I air-dried it then finished with a warm iron. The benefit of cambric cotton over plain cotton is the tighter weave which makes it more resilient with frequent laundering. It’s stands up better to being washed without compromise to the lightness of the fabric.
While my fabric was drying, I gathered my supplies for my Darla Jumpsuit. There are four versions of this pattern. It can actually be sewn as a dress and comes as a maxi or mini. There are two bodice options. One is a tie back or the classic with the invisible zip. I decided on the classic, so I needed an invisible zip. When I was at Spotlight, I also bought the invisible zipper foot. The pattern calls for lining which can be from the same fabric. I used a white muslin and interfacing which was already in my stash. To prepare my machine, I changed my needle to a new size 10/70 needle which is great for lightweight fabrics.
Now, I’m not brave when it comes to cutting straight into “good” fabric with a new pattern. I toiled the Darla bodice with a remnant thin cotton and had to make some adjustments. I recommend this especially since the Darla has a fitted bodice. For my measurements of 35” HB:37.5” FB:33” W:40”H, I made the size 12 and I did have to adjust the bust. It says in the pattern that it is drafted for a C Cup so my measurements would put me between the B Cup and C Cup. The structure of the bust is made from two darts, one from the side (underarm) and one from bottom (under bust). Without going into too much of the math, the dart can be adjusted to be narrower for a smaller cup or wider for a fuller cup. I adjusted the side seam to compensate for the adjustment and I only adjusted the underarm dart. The main message is to toile, and I always adjust on my body and then measure. I’m terrible at doing it the proper way which would be more accurate. I find the Darla pattern true to size.
This hand stamped floral block print was a dream to work with. It’s very stable to sew and easy to handle. I used an overlocker to finish the seams which worked fine. Some finer fabric would need French seams, but the cambric cotton tolerated the overlocking. True Bias instructions and order of construction is excellent. It was a joy to bring together this pattern and the fabric. I just need a bit of sunshine and heat to wear it. Is it okay to book a tropical getaway so you can wear an outfit? Asking for a friend.
Thanks for reading and happy sewing!
X Em
Full disclosure: Fabric was gifted for a review but all opinions remain my own.
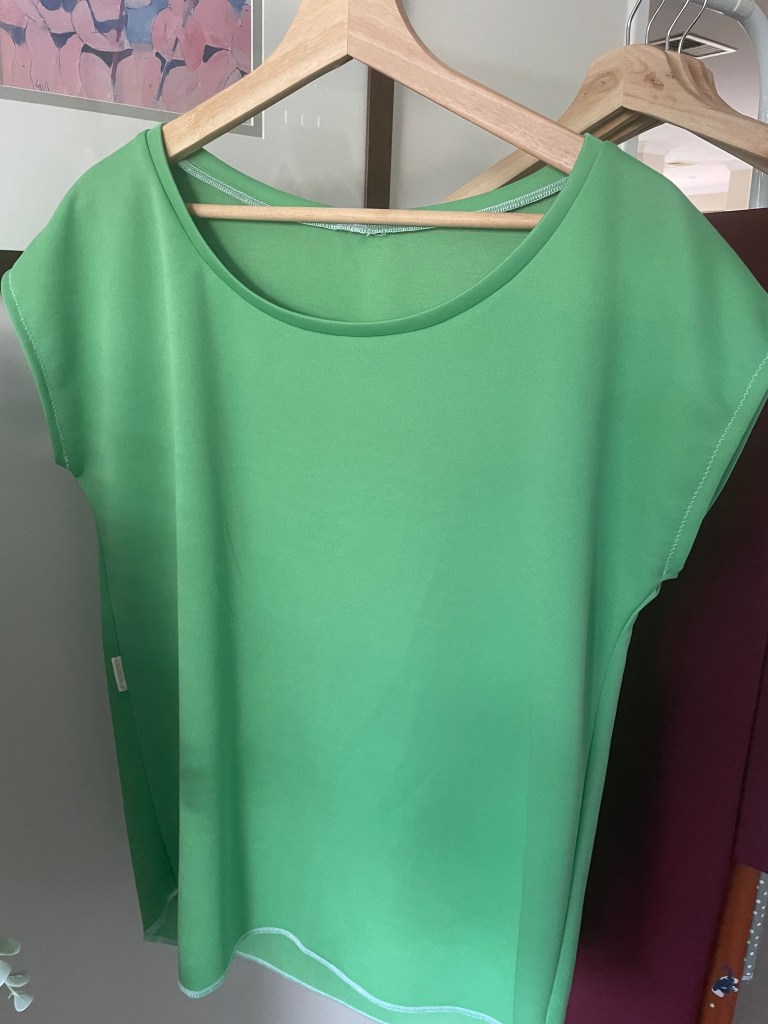
Life has been hectic lately. I’m in that middle age group where we’re still tending to the needs of our children and also looking after elderly parents. It’s not a complaint, in fact, I consider it quite a blessing, but it does leave very little time for hobbies. I really needed to have a bit of sewing time so last weekend, I sat and made three Swimstyle Pattern Velma Tops. It was such a good pattern to sew and I’m glad I made the effort to batch sew. The rhythm of repeating the sew was very soothing and relaxing on the mind.
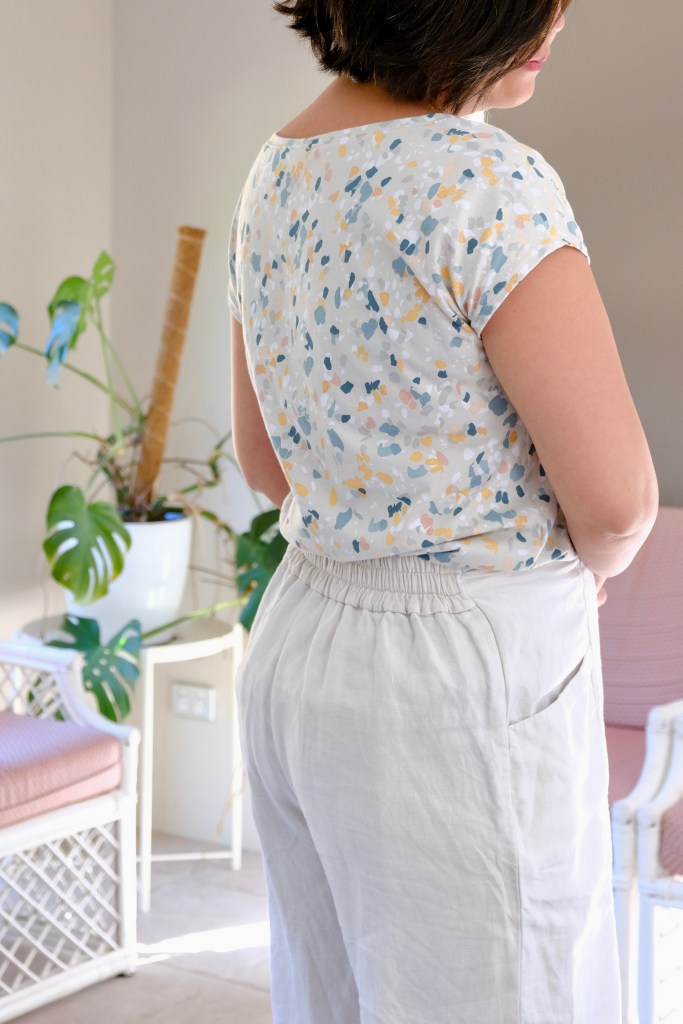
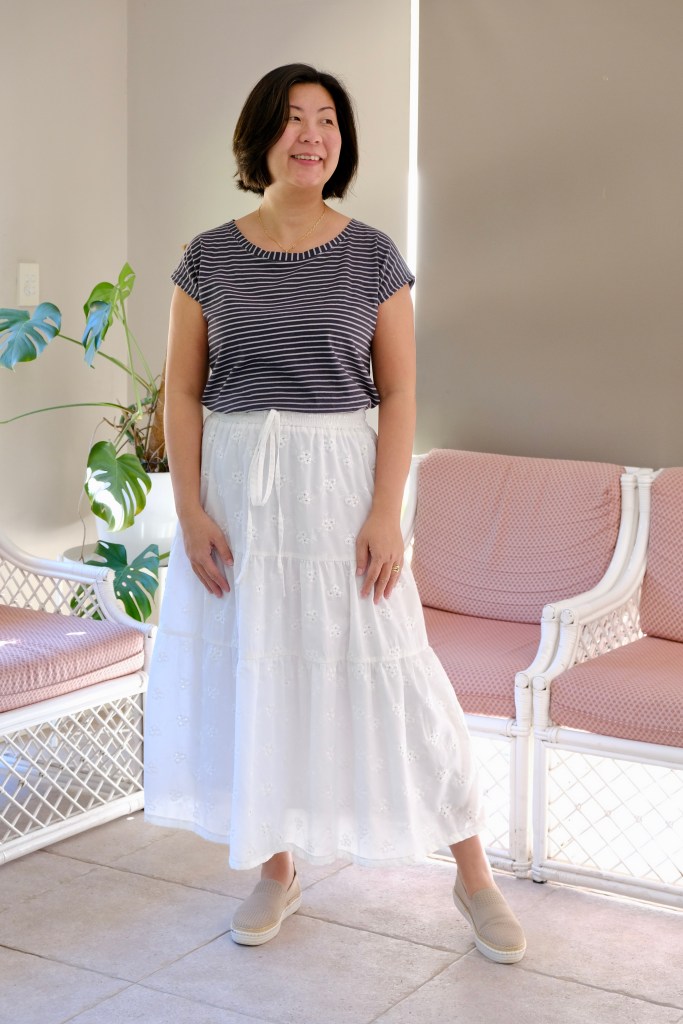
The Velma Top is a semi-knitted top which has a scooped hemline ending about hip level in front and is slightly longer in the back. I’ve sewn the round neckline version, but it’s also drafted for a V-Neck. The sleeves are extended from the bodice so there’s no tricky sleeve seams. The pattern is great for anyone who is a beginner at sewing knit fabric or generally, anyone who is a beginner.
I made the size L for my measurements of 38B/33W/40H. No modifications were made, and I found that the pattern is true to size. I chose three different types of knit because I’m still new to sewing with knit fabric. The first is a brushed knit which has minimal stretch, the second is an organic cotton jersey and the third is a rayon scuba. I’m very happy with the cotton jersey and brushed knit but I’m not enjoying the rayon scuba. This pattern is great for a wide range of knit fabrics, but my rayon scuba was a bit thick. Also, I couldn’t work out which was meant to be the right side of the fabric. In the end, I chose the softer side to be on the inner side and the shiny side is on the outer side. This was based on what I thought would feel better against the skin. The pattern is great for remnants as well as it’s very economical, only requiring about 1 meter for my size.
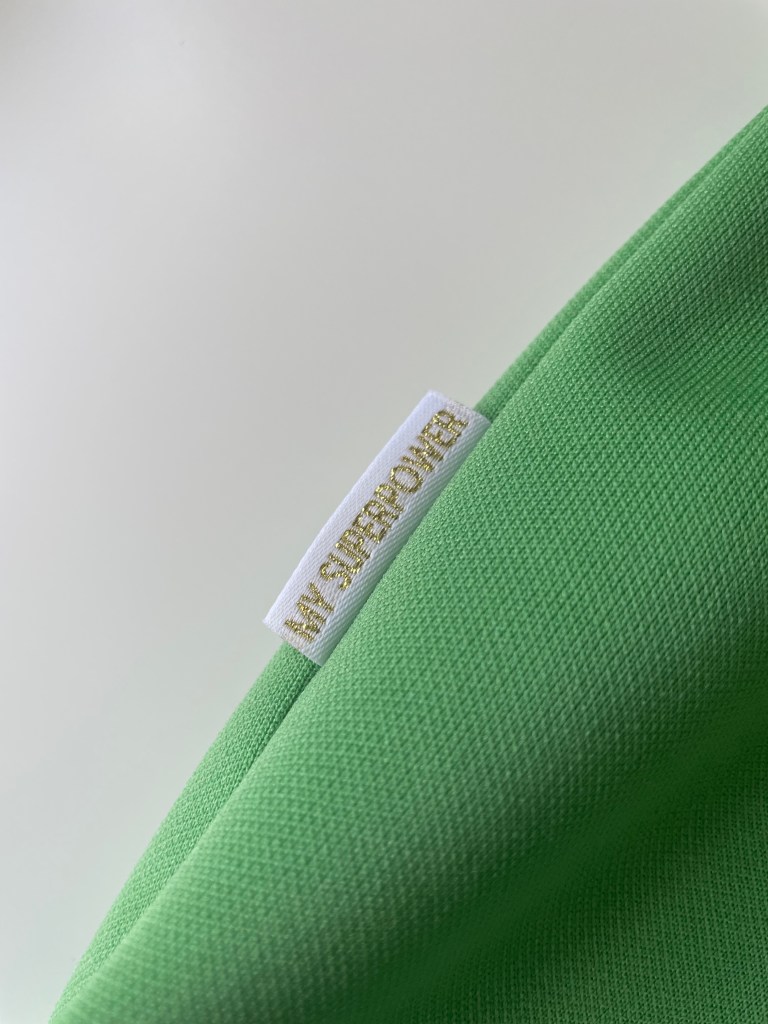
Lost motivation to finish the hemSewing is my superpower so I will get it done!
My favourite set of instructions was for the attachment of the neckband. It was very clear and it’s something that I have struggled with in the past, so it was such a relief to have great instructions for this section. Swimstyle Pattern instructions are comprehensive and are always accompanied by relevant illustrations. I receive the pattern as part of the ambassador program, but I have bought their patterns previously and find them to be great with sizing and instructions. I’m keen to go back to sew the V-Neckline once I find more knit fabric. I think the V-Neck would suit fabric with more drape and a bit more stretch than the knits I’ve used for the round-neck versions.
Sewing tees is not as glamorous as sewing dresses but it’s equally enjoyable with a good pattern and the luxury of the time to sew it well. It was satisfying to be able to get the little things right like the neckband. The Velma is a great addition and a core item for the closet.
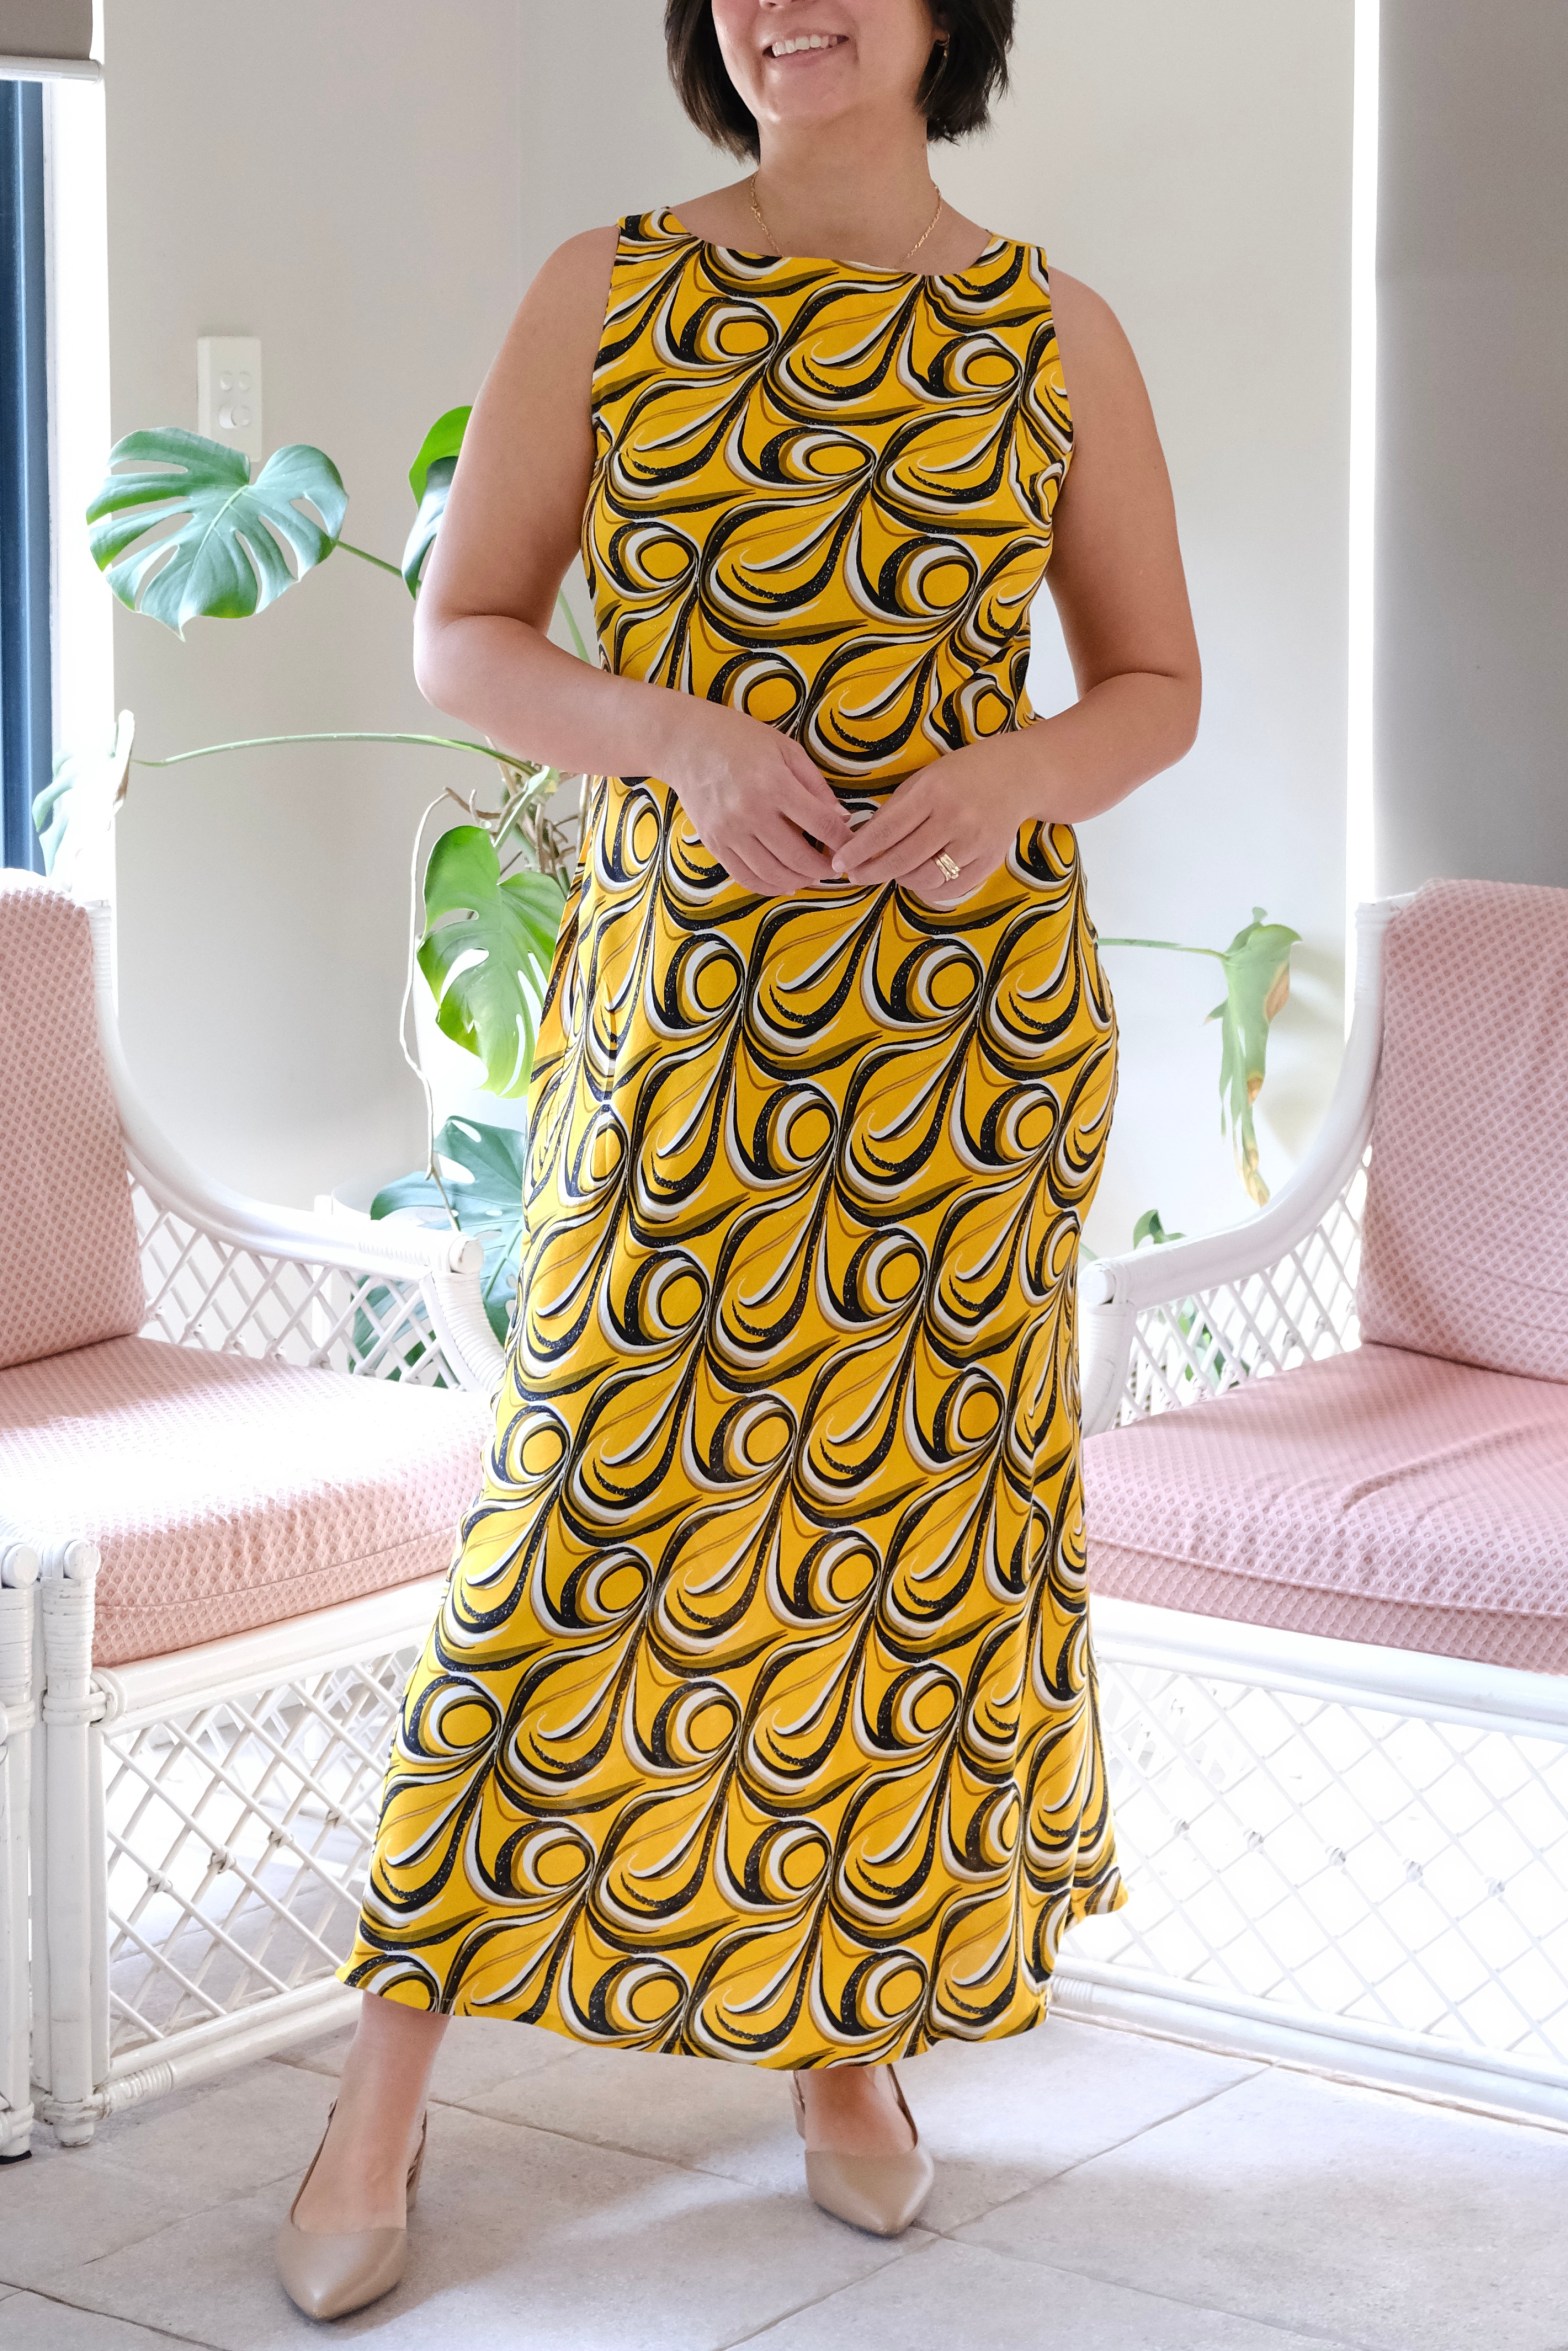
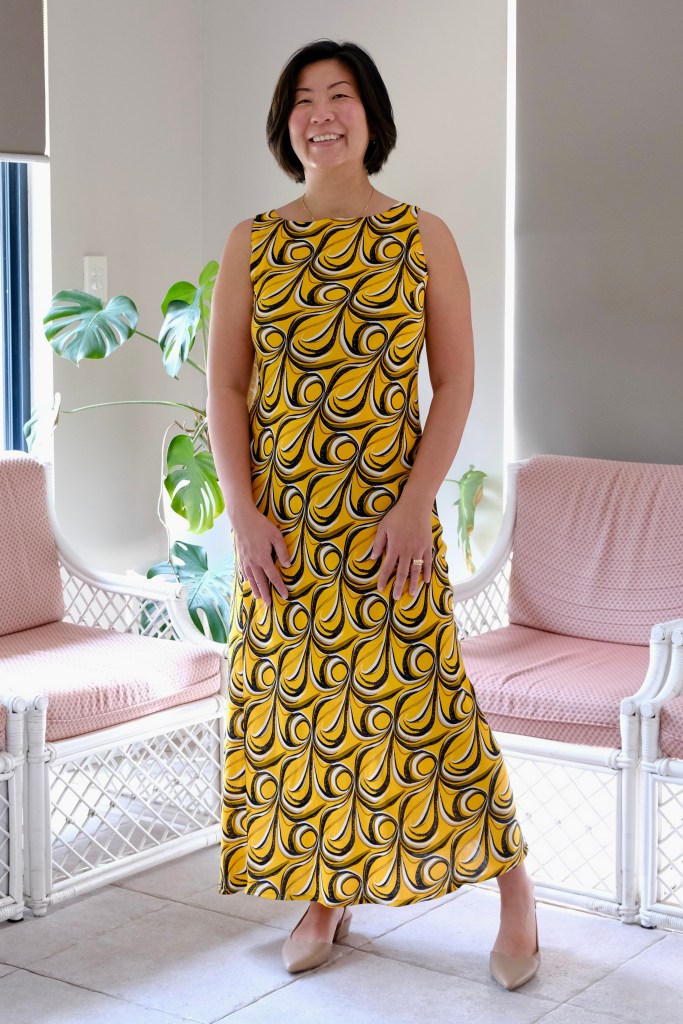
Pattern Scout has done it again! This is the newly released pattern from Pattern Scout, and it hits the mark of a timeless classic. The Ella is a sleeveless shift dress which can be sewn on the bias, so it just skims the curves. It’s a classic with the boatneck midi dress. If you’re looking for a pattern with some skill building features, there are instructions for French seams, sewing on the bias and installing the invisible zip.
I was lucky enough to get onto the testing team. I really like testing for Casey and have sewn many of her patterns. The instructions are always comprehensive and easy to follow. The illustrations are great, and she also has a YouTube Channel which is another great reference. I’m sure she will be providing some great sew along videos for the Ella Dress. I also like the sizing especially the inclusion of cup sizes.
This pattern is drafted for woven fabric. It would suit anything light to medium weight with fluid drape. I used a rayon from East Coast Textiles. I had discovered East Coast Textiles through some sewing friends and really love their rayon. Luckily, a new batch had arrived when I was doing this pattern test. I had three meters available which was perfect for the pattern to be cut on the bias. The pattern can also be sewn straight grain which can be a fabric saver.
My measurements of 35HB:37FB: 33W:40H fits the size 12, B-cup. The pattern is drafted for an average height 5’9” (175cm). I’m slightly shorter but decided not to shorten the length with this make because I was testing the piece. There are always good instructions about fit and how to modify the pattern included with Pattern Scout Patterns. Without shortening the length, the dress does look more maxi than midi on me. I have decided to leave it as a maxi because I would wear it more.
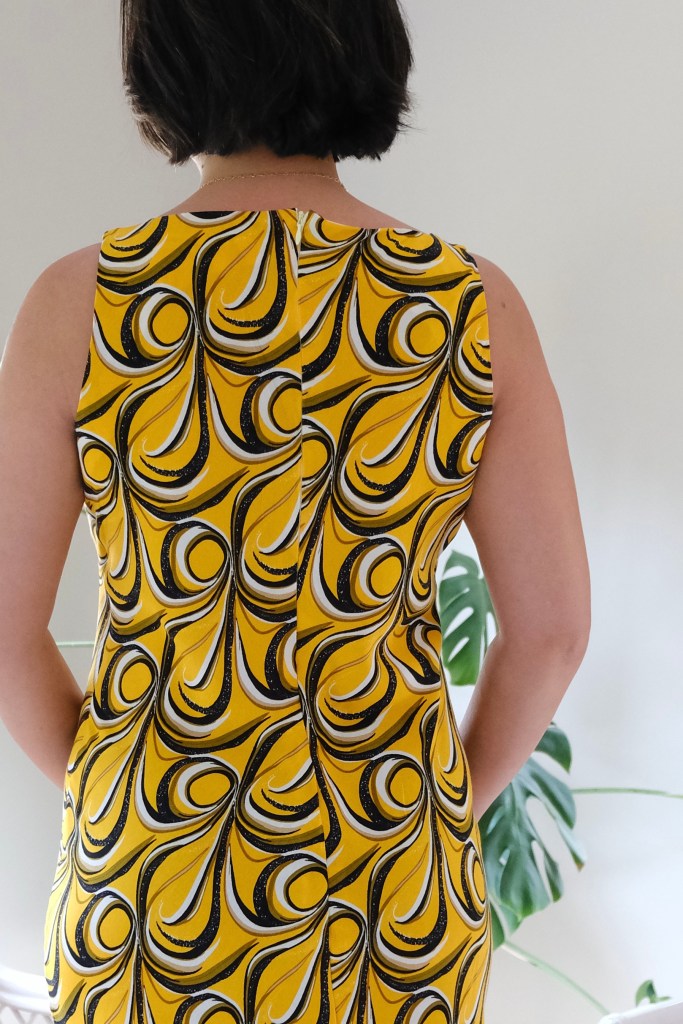
The dress is neatly finished off with French seams and the neckline and armholes have facings. I feel like this is a great pattern for practicing some of those advanced sewing skills. I also liked the instructions for installing the invisible zip. I still haven’t bought myself an invisible zipper foot, but I think I’m used to it now. I use a normal zipper foot, but I make sure that I iron open the zip tape to sew as close as possible to the zipper teeth.
It’s nice to have a wardrobe staple like the Ella Dress. I feel that this silhouette is a classic and doesn’t date. It’s something I will return to sew again and again. I can’t wait to wear this in summer. Maybe I’ll make one that will be suitable for winter layering and add lining.
Brunching with other ladies who sew can be dangerous for the budget. It was during one of these brunches when I discovered East Coast Textiles and their fantastic selection of rayons. They also have other fabric, but I was mainly interested in the rayon which I bought three pieces at a bargain price. The one I’m featuring has a border print which I wanted to challenge myself with. Initially, I thought of making another pair of flint pants or a pyjama set but when I was sewing up my Andi Set Top, I thought of how this fabric would pair so well with a sleeveless version of the full Swimstyle Patterns Andi Set.
So, I set about researching how to sew with border prints. First, I had to decide how to use the border print. Seeing as there was no seam running vertically in the front of the skirt, I decided to use the border to emphasise the bottom of the blouse and the skirt. I think this was a nice way of pairing the set and adds a bit of matching detail.
The second challenge was cutting the fabric. The border runs along the selvedge on both sides, so I had to cut the pattern cross grain. We don’t usually cut cross grain because there is more stretch to the fabric this way but since the pattern pieces are not too heavy and allow for lots of drape, it’s okay for this pattern.
This was good in theory but challenging in execution. It took me a whole afternoon to figure out how to align and modify the pattern pieces to fit the border nicely. Rayon is very slippery fabric so another challenge was cutting everything accurately so the seams would line up and not interrupt the border print. I’ll try to describe what I did. For the top, I lengthened it by 1 inch but when sewing the side seams of the top, I did not match the sides according to the notch provided but by the border print. This gave me an uneven bottom edge, so I then trimmed it to even it up before finishing the bottom hem. The side seam of the Andi Top has gathers on the front bodice piece, so this is how I was able to modify it. For the skirt, I cut the pattern as it is drafted but left the bottom of the skirt straight. When I had matched and sewn the side seams, making sure my border print had matched up, I trimmed the bottom raw edge following the curve of the pattern piece before finishing the hem of the skirt. There are probably a few ways of doing this but, I found that this worked best for me. This skirt has two side splits, so it wasn’t too difficult to use the border print for this.
The sizing was true to size. I sewed the Size L for the top and the skirt without any modifications. My measurements are 38-inch bust, 33-inch waist and 40-inch hips. I decided to make the long tie for the top. I finally worked out how to use my loop turner properly which make the process a lot easier and faster. I swear that the loop turner I bought came with gave me completely different instructions which is why I’ve struggled in the past!
Instructions and illustrations are excellent with the pattern which makes it so enjoyable to sew Swimstyle Patterns. I have been gifted the pattern as part of their Ambassador Program, but they are excellent instructions and all opinions in this article remains my own. One small annoyance is that I think the pattern is made more for people who like to trace their patterns not the people who cut into them like I do! No hate please, do as you like but I tend to print the size or sizes I need and then cut accordingly. There are no size layers when you print and there’s also no differentiation of the cutting lines so it’s a bit easy to get lost. I mention this because I did! I started with the line for size L and then somehow was cutting the size M. Luckily, I had noticed quite quickly and could stick the paper to repair it.
The design is superb, and you can tell that these patterns are designed and drafted by someone with a lot of experience. The set has a beautiful look and fit. Even though the skirt has an elasticised waist, it looks sleek and well fitted. I also love the elongated tie which is an elegant part of the design. So happy with how this set turned out. I love sets because of how versatile they are. Whether you wear each piece styled independently or together.
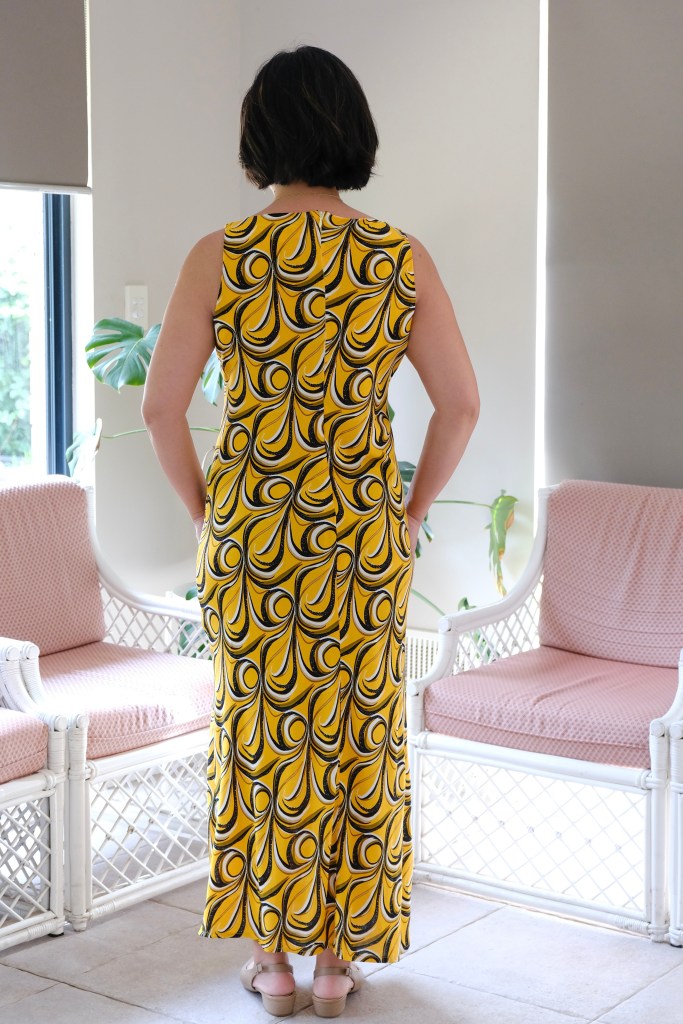
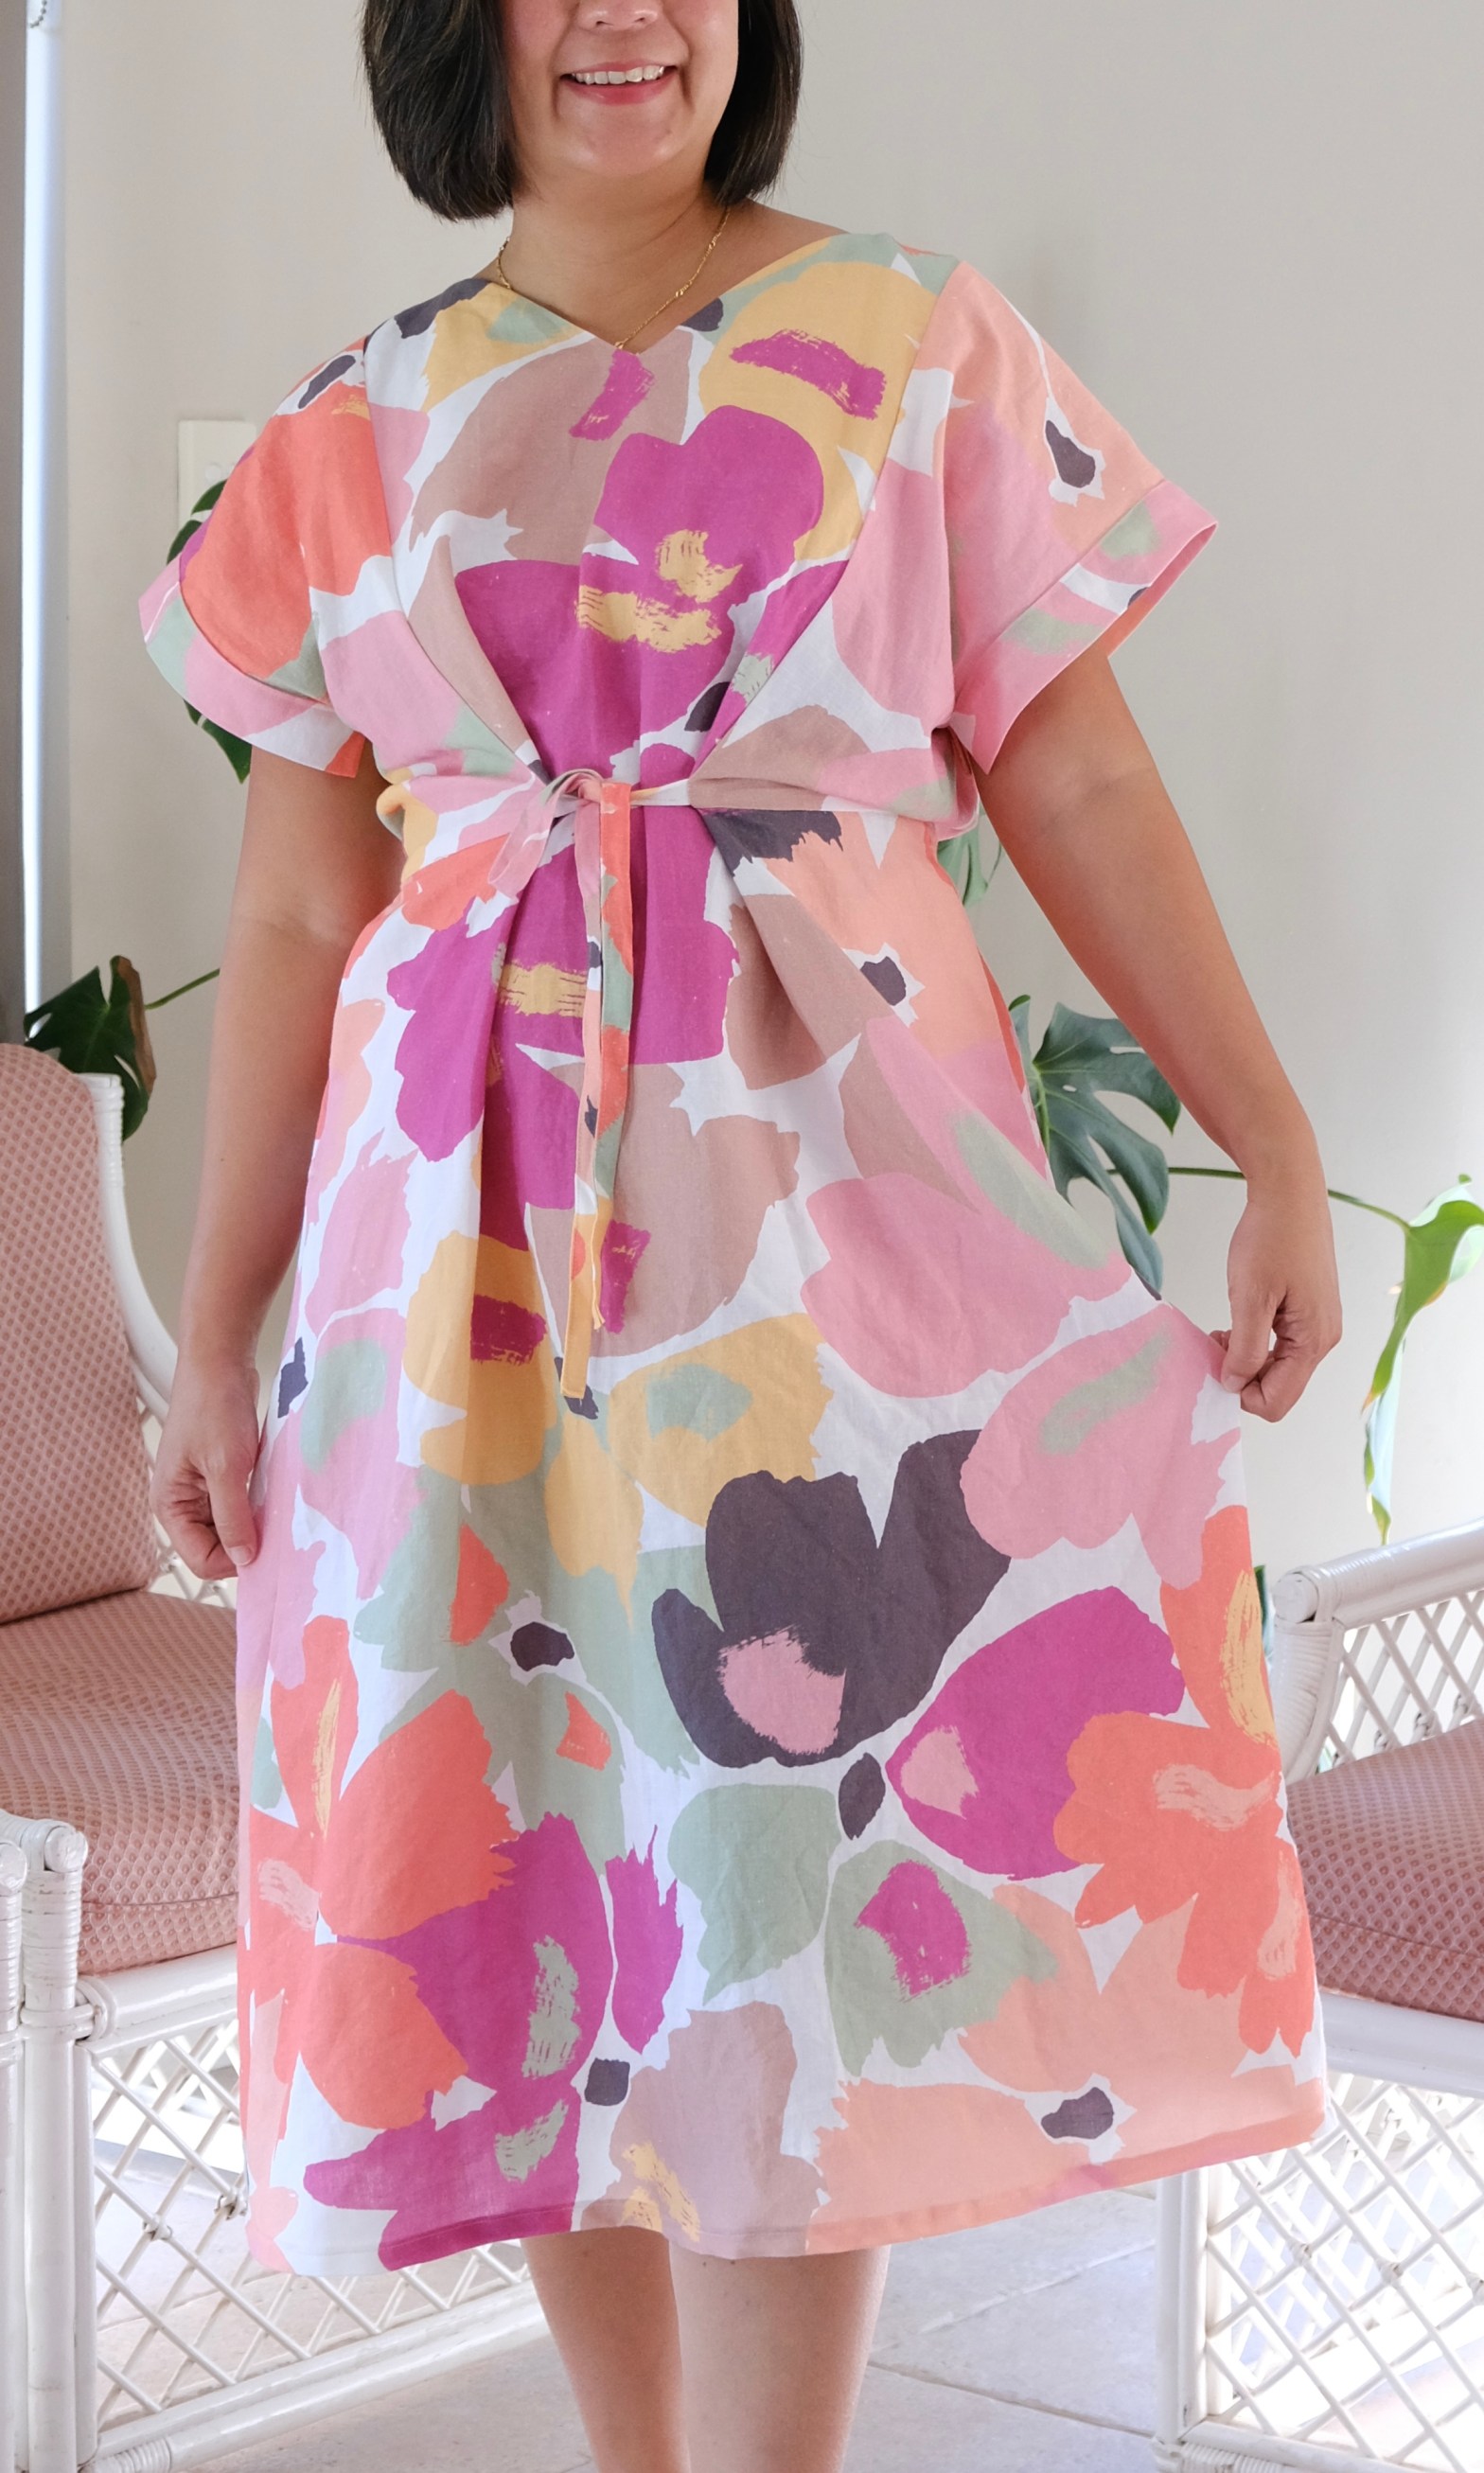
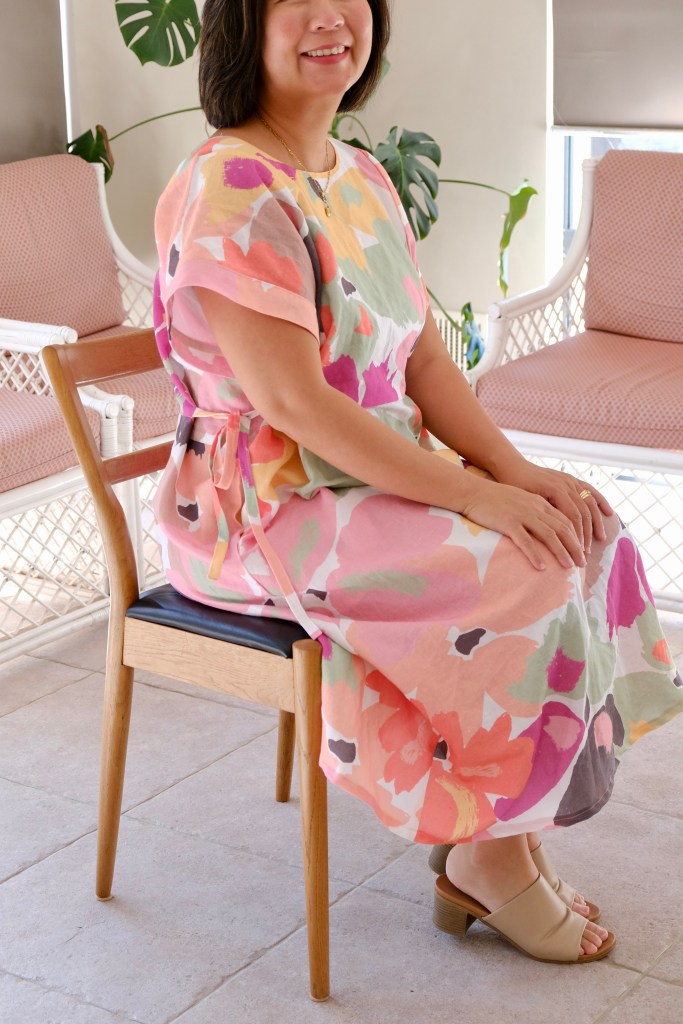
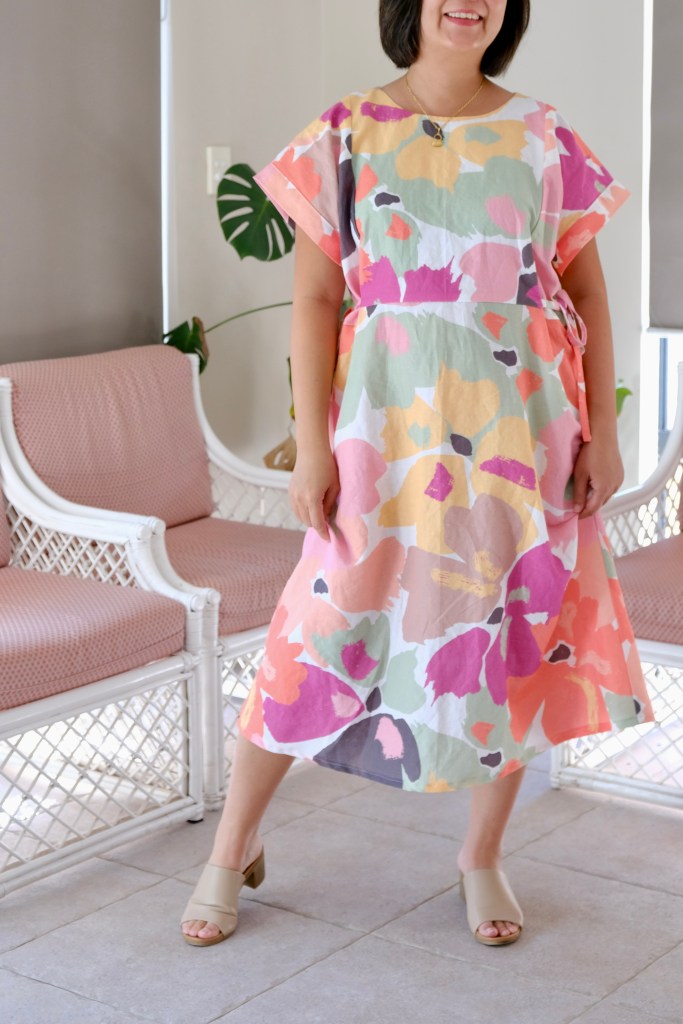
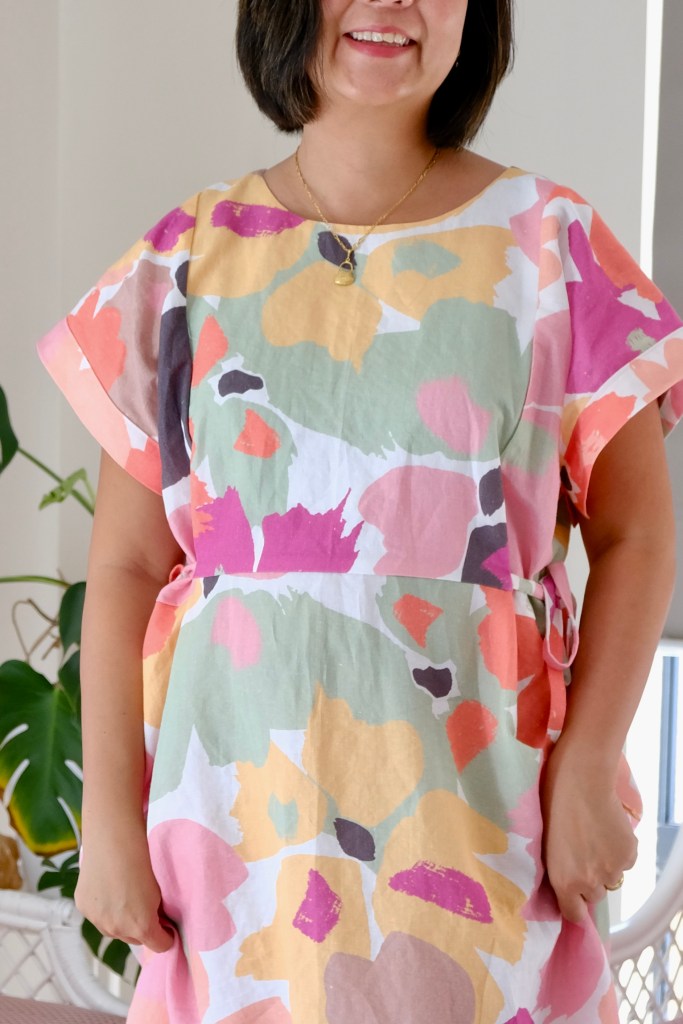
Catching up with my latest make which is this beautiful newly released Tie Dress from Sewing Therapy. So, if you have been following Sewing Therapy on YouTube, you’ll also be following Sara on Instagram under the handle @yoursara_k and you can find it in her Two O Nine Fabric Etsy shop. Okay, now that you know where to locate everything, let’s talk about this uniquely versatile dress which features four ties and comes as short or long sleeves. The ties can be tied in a multitude of ways to create a different look.
It’s always a short testing period with Sewing Therapy Patterns. I’m fine this as long as it spans over a weekend. When I signed up, I was so excited to get into the testing team because it was a long weekend here in Australia. This was until I got to the fabric store and realised that it was closed for the public holiday! Luckily the store reopened the next day when I found this beautiful linen/cotton blend fabric. I love the bright large floral print. The print is bright but is also muted. Not quite pastel but halfway there.
The pattern is a great beginner’s pattern and Sara has created very comprehensive sew along videos. It’s important to know that there are written instructions but there are no illustrations in the pattern. If you are not great with videos or have no access to YouTube, then it might not qualify as a beginner’s pattern. I did find the written instructions to be logical and easy to understand but I did appreciate the videos that Sara released early to the testers especially for the attachment of the short sleeves and the ties. The methodology for the construction of the short sleeves was quite novel to me.
My sizing was fine for the test but there were some adjustments made for the larger sizes. I like testing for Sara because she’s quick to respond to testers questions and she always gives us feedback or updates as we sew. I made the size 12 (38B:33W:40H) and I would happily sew the same size again. I’ll be making the dress with the long sleeves to wear over winter.
Styling this dress is so much fun because of the ties and, you can wear it with the V neck or Boat neck. It’s never boring! The dress will also be great for layering which is why I hope to make another one soon.
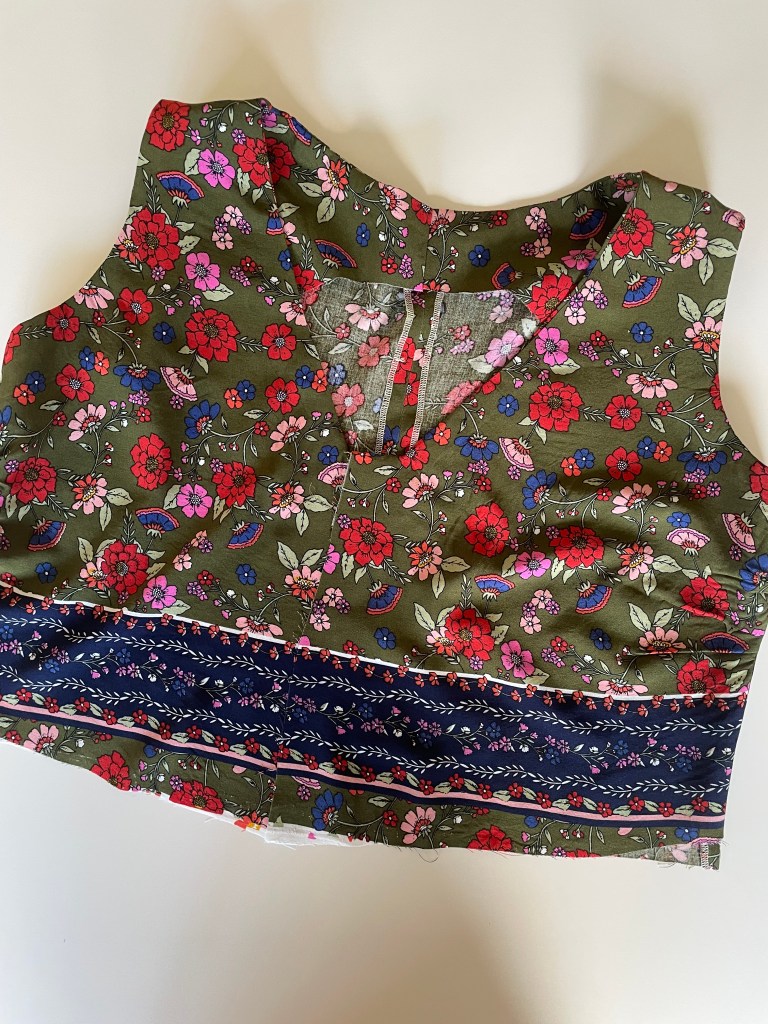
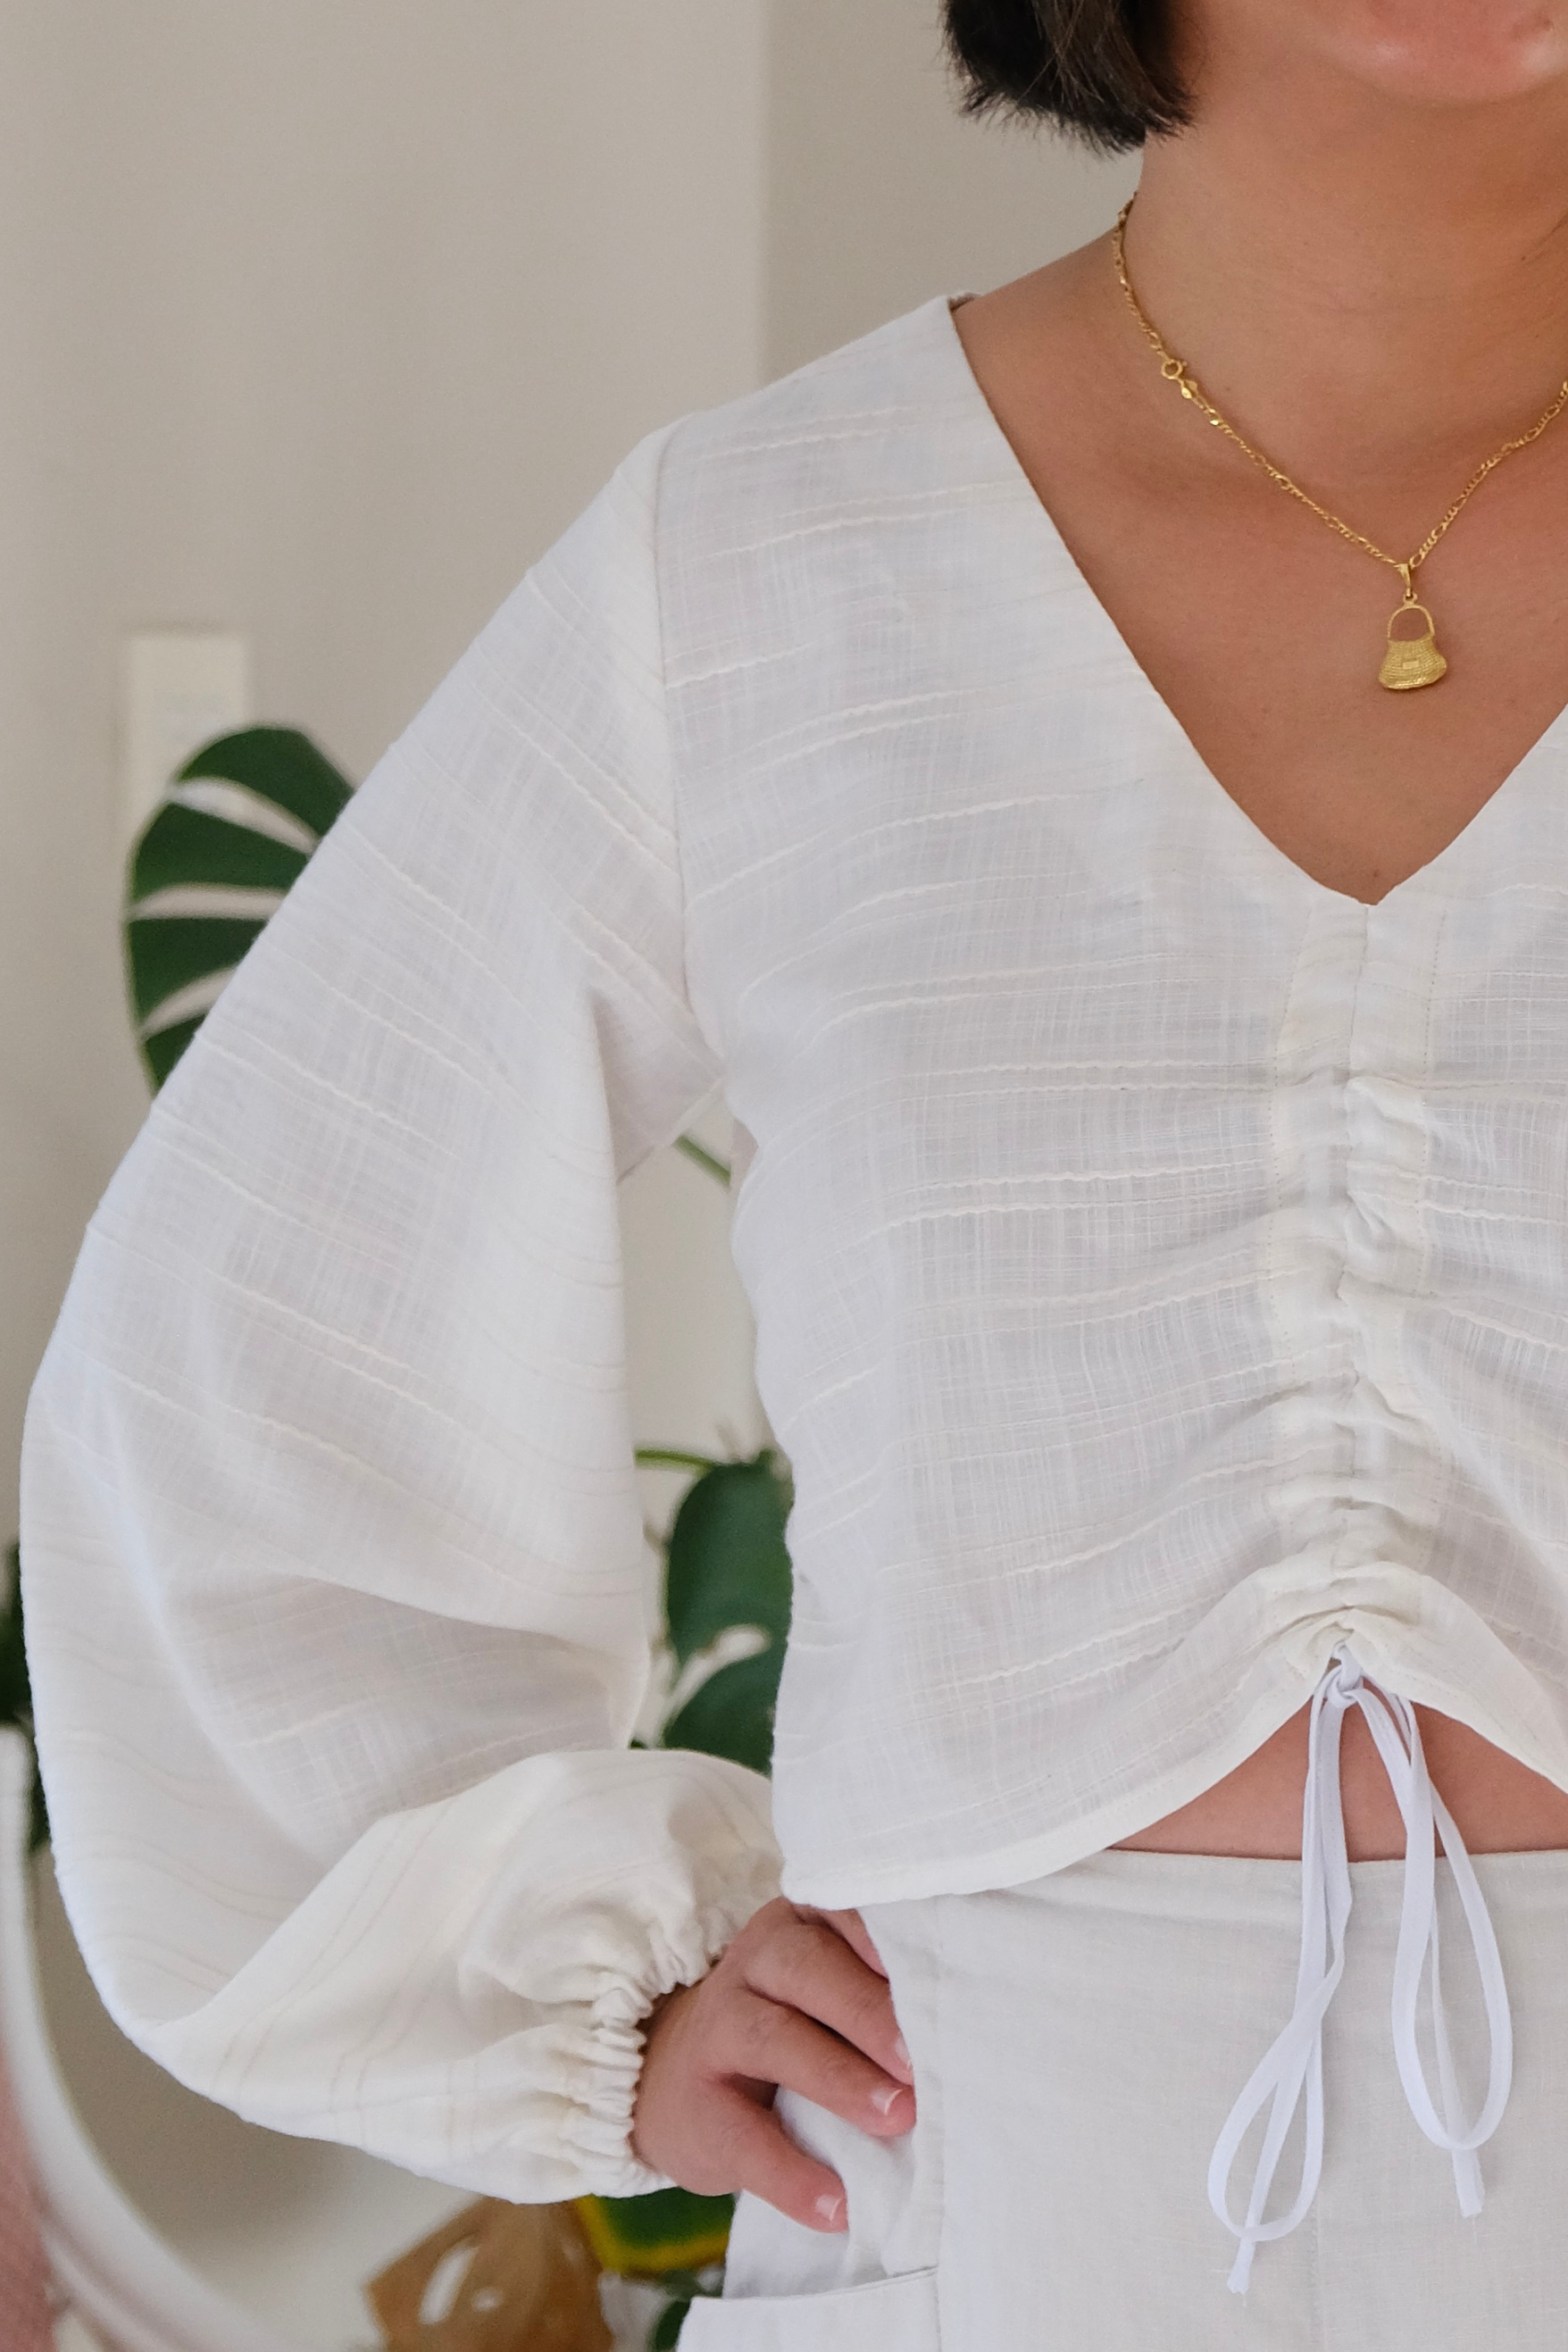
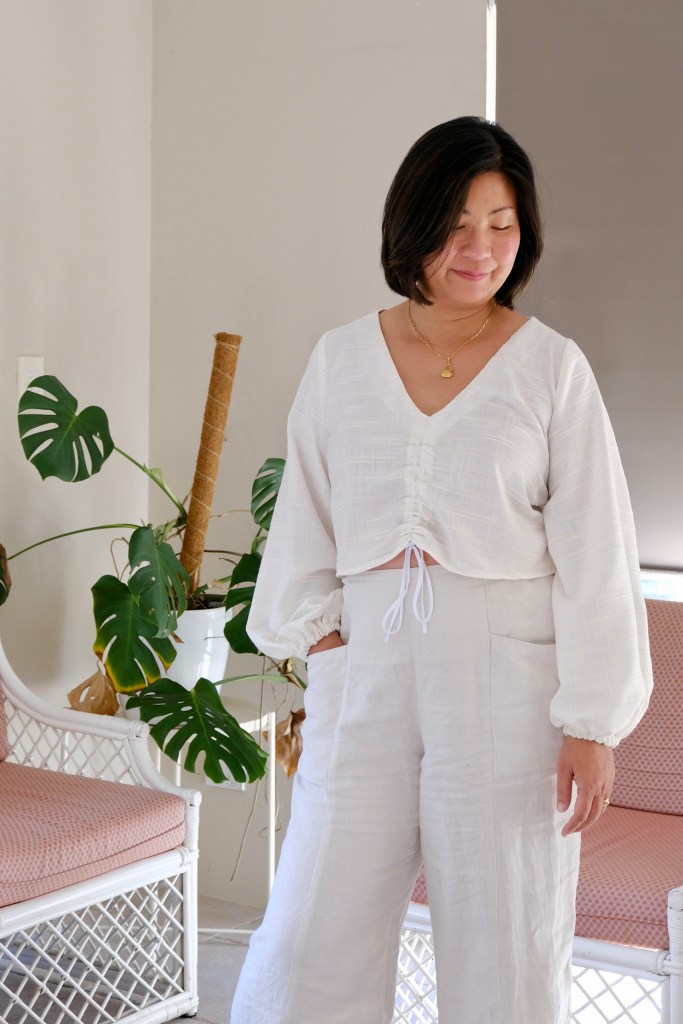
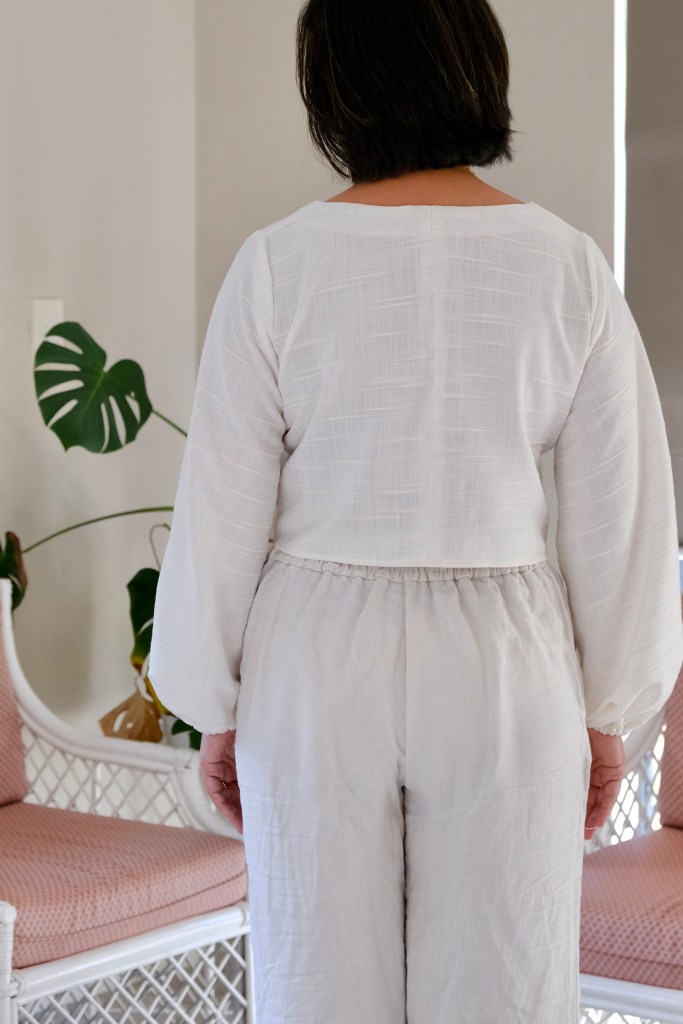
So, have you ever made something thinking it might not exactly be your style and it ends up being something you absolutely love? This is the Andi Top from the Swimstyle Andi set. I was curious about the design, which is what made me apply to be a Swimstyle Ambassador in the first place. It has a certain style and flair that is so unique and when you see the drafting, you’ll know what I mean.
My version of the Andi Top has these billowy long sleeves that are attached to a bodice with a deep V and these ties that can be adjusted. I have quite a modest amount of tummy showing but the main idea is that it gives shape to the bust area without needing darts. It’s a very flattering top. I’m positively happy about the ruching created by these ties and the channels in the front.
For my measurements of 35-inch high bust, 38-inch full bust and 33-inch waist, I’ve made the Size L. It’s a great fit but it’s quite cropped so next time, I would lengthen by an inch. For this top, I sewed a narrow hem or a cheat’s rolled hem by sewing a straight stitch ¼ inch from the bottom of the hem and then pressing the hem up twice.
If you’re like me and can’t work a loop turner for all the money in the world, you could use some bias binding to make the tie for the blouse. It really saved my sanity. I know everyone has their special tool or technique, but it really stresses me out when I have to make a narrow rouleau. I simply folded the long edge to the middle and then folded over again in half and edge sewed the tie.
The Andi Top is made for woven fabric. My fabric is a sheer lightweight textured cotton. I had this on my Make Nine 2024 list where I wanted to use up nine pieces of fabric from my stash. I thought it was a perfect pairing because it’s very easy to gather this fabric. I also love the subtle texture woven into the fabric. The top probably appears quite white, but it is more of a soft beige.
I will definitely be sewing the matching skirt to this Andi Set. It’s been such an enjoyable sew. I noticed that Swimstyle Patterns have some unique features like the tabs that make it so easy and accurate to match up the pieces. I was grateful for this because my fabric did not really have a right side or a wrong side, so these tabs made it easy to tell where the pieces needed to be attached. The comprehensive illustrations helped there as well!