We’ve just seen a close to the end of Ogden Cami Month. It’s been so inspiring to follow along the True Bias blog. This is such a well-loved pattern in the sewing community. There is a plethora of clever hacks for this pattern. From the True Bias website, the Ogden Cami is described as, “The Ogden Cami is a simple blouse that can either be worn on its own or as a layering piece under blazers and cardigans. It has a soft V neck at both center front and center back necklines, and delicate spaghetti straps. The neckline and armholes are finished with a partial lining for a beautiful, high end finish.”
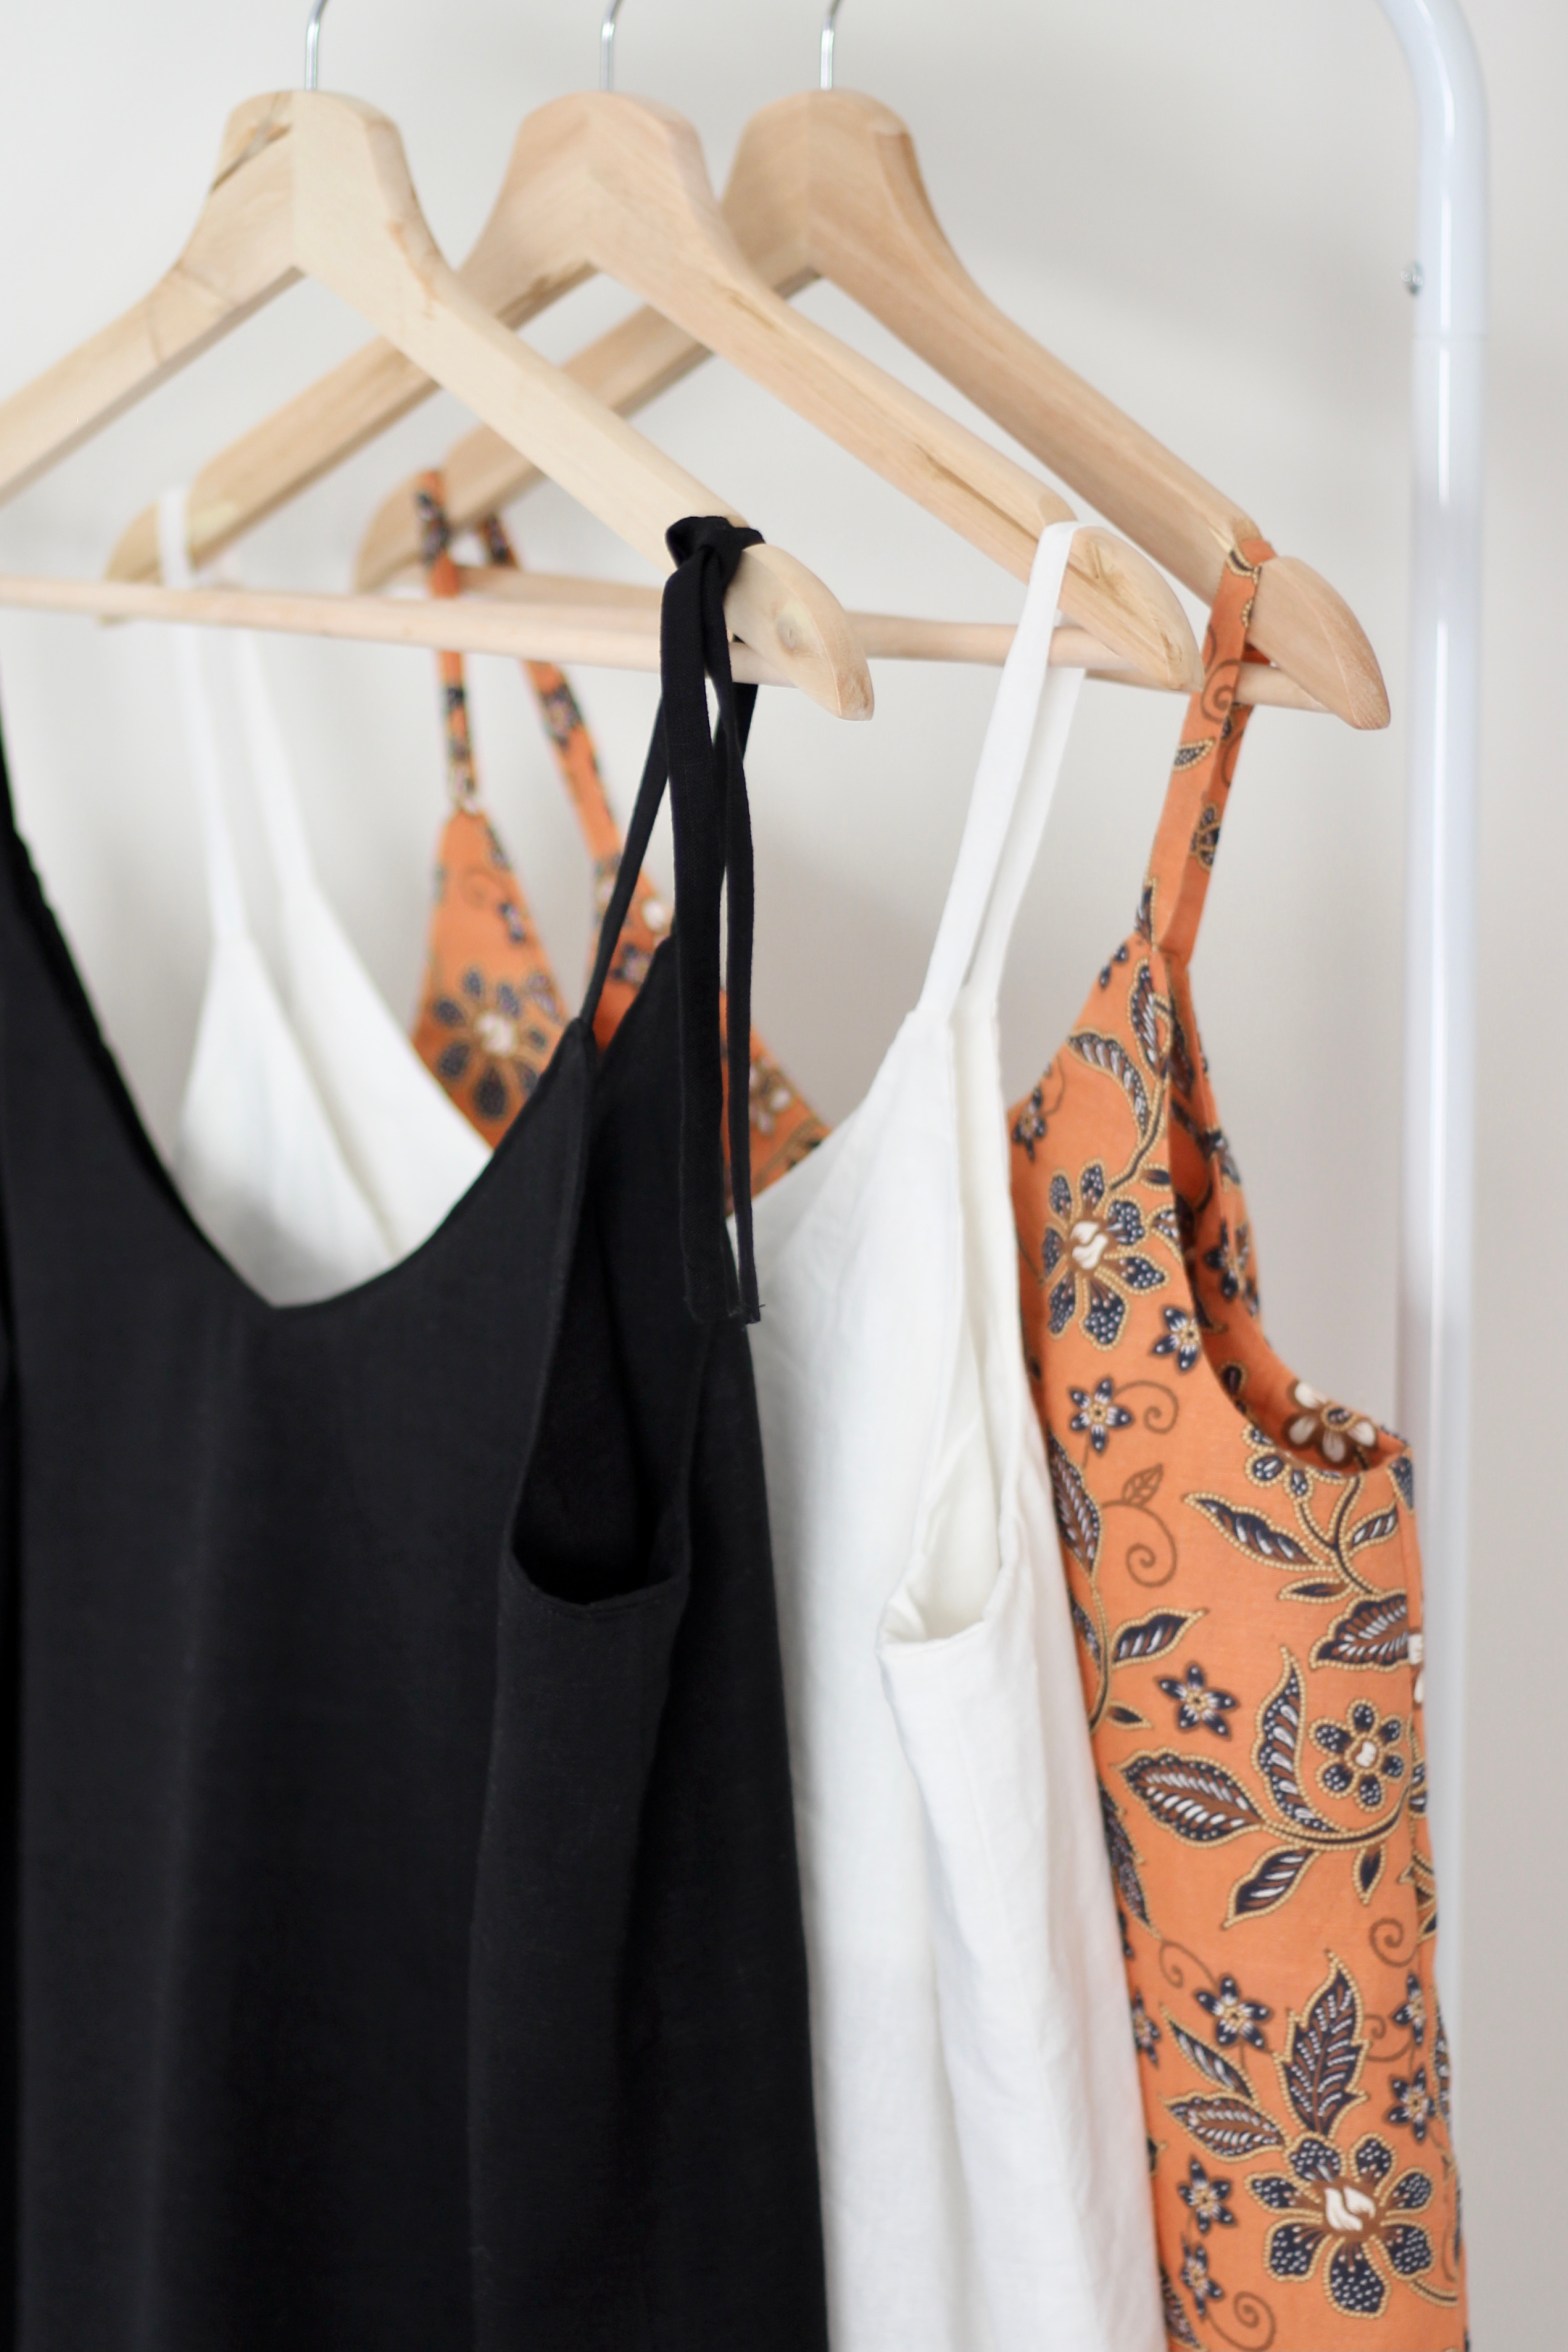
Batik Cotton Linen Version
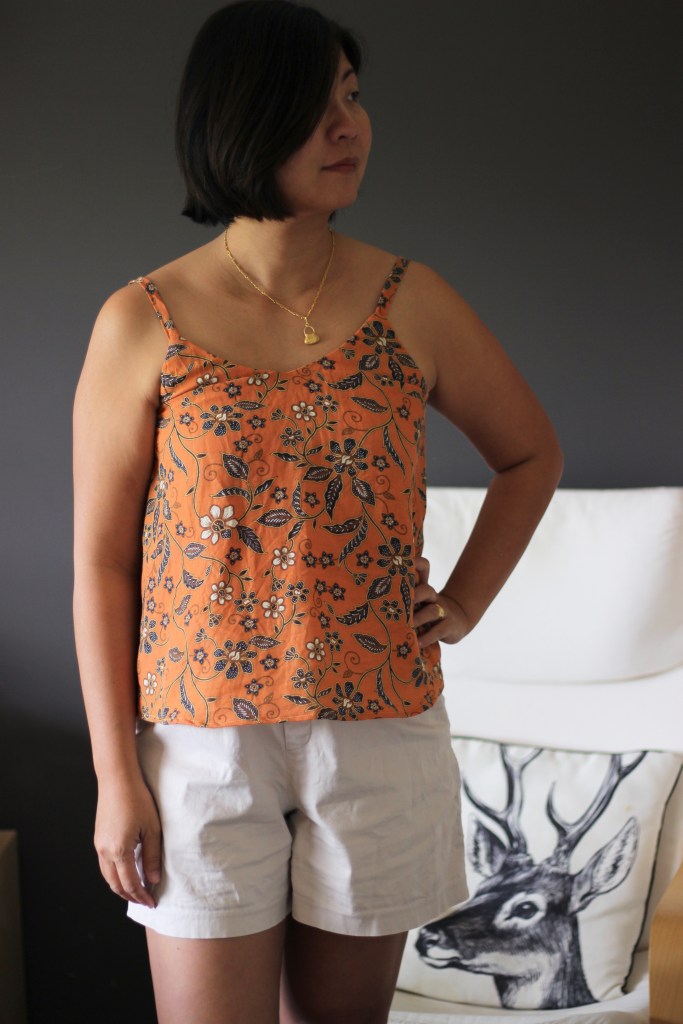
I’ve loved wearing the cami as a layering piece, but I’ve also loved it as a stand-alone piece on those really hot, sticky humid days. I’ve made three of the Ogden Camis with linen which is so breathable and such a great fabric for those days. I’ve also hacked the Ogden into a summer dress using very lightweight rayon for both.
Dress Hack Ogdens
The sizing was spot on for me. There were no adjustments needed which was great! I sewed up the Size 8 and my measurements are B37:W33:H38. When deciding on sizing, I usually look at the sizing chart and in addition to that, the finished garment sizing. It’s also handy to consider the fabric you’re sewing with. I could have possibly sewn up a size if I had chosen a very stable fabric but I found that linen “grows” so you can end up with a slight increase in the “give” of the fabric. On the finished garment chart, the sizing range is from bust size 33 inch to 59.5 inch but be aware the sizing is divided to two ranges.
It’s definitely great core item for your closet and it’s a pattern that keeps on giving! After this Ogden Month, I’m even more inspired for a few more creative hacks for next year.
Last year, I had been keenly following Ankara Appreciation Week on Instagram which was hosted by Lena King @thatlenaking and Juliet Uzor @julietuzor_ so, when it came around again I was keen to sew something in this beautiful fabric.
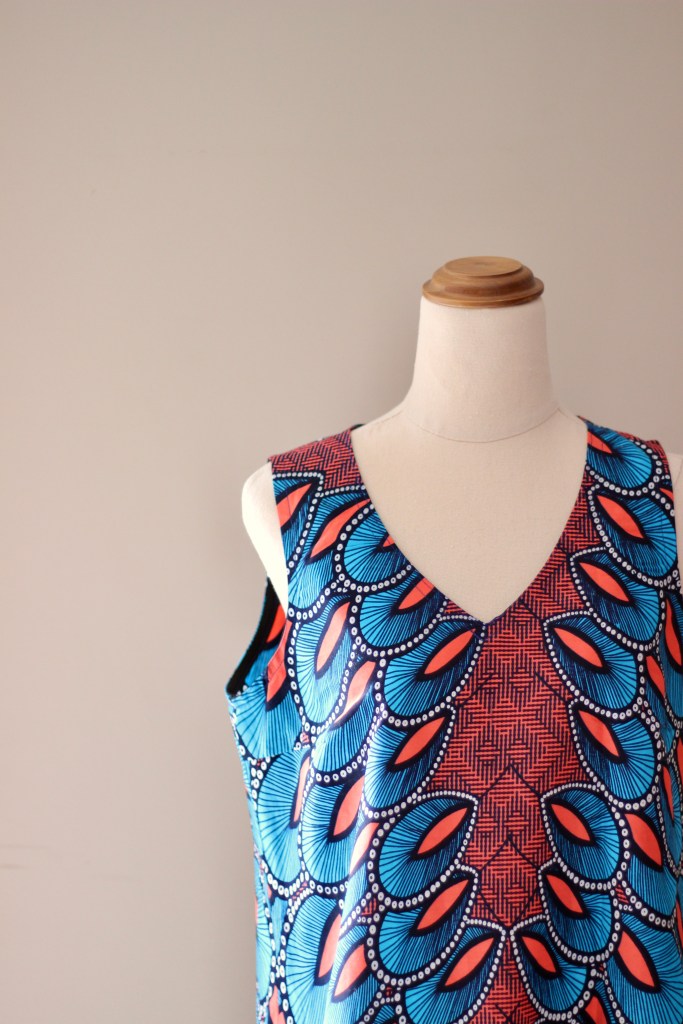
Close up of my Ankara Fabric
Briefly, Ankara Fabric is a wax print cotton fabric which is deeply cultural to Africa. It is called by different names depending on where it comes from so Ankara mainly refers to the wax fabric from West Africa. The prints and the patterns themselves can have symbolic meanings. I bought my fabric from Mapalo Store and when I asked to buy some Ankara fabric I discovered a fellow sewing enthusiast! Her family owns the store and she was so kind in telling me about the fabric. We eventually ended up on her Pinterest looking at some ideas on what I could do with the fabric I had chosen. The main point that stuck in my mind was that with Ankara Fabric, it’s the pattern which determines what you sew up. Pattern matching is crucial to making the most of the fabric. Sewing is such a universal language! I was so touched that she took the time to give me some tips on how to sew up the fabric and now that I have a little experience, I’ll definitely be going back for more fabric to sew up.
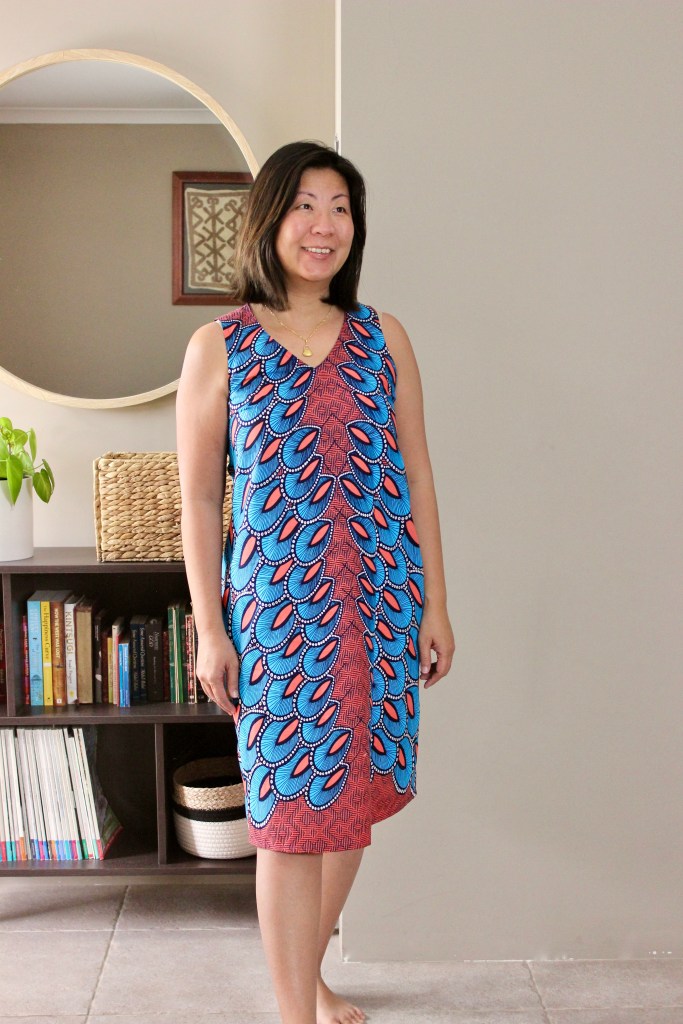
Keeping those handy tips in mind, I ended up choosing the Hana Tank Dress by Pattern Scout. The Hana Dress has simple lines so I felt it would let the fabric “shine”. It’s also a dress that I loved wearing in summer and was one that I wanted to sew a few more of for the coming summer. I sewed the size 12 and the only modification I made was to lengthen the dress.
The Ankara Fabric I chose had these cascading repeating blue eyelet pattern on a red background. The blue eyelets actually remind me of peacock feathers. Cutting the fabric was a challenge as I initially thought the pattern was mirrored exactly symmetrically but it wasn’t. Once I realised this, I found a central point of the fabric to coincide with the waist and centre front of the dress. I also made sure the length accommodated to the cascading “feathers” to end with a band of red background around the base of the dress.
Choosing the centre point
The Ankara cloth is such a great fabric to sew. It behaves very well so it’s an easy fabric to sew. It is light but still has structure to it. It’s a very bright fabric so it surprised me when I found it hard to tell the right side from wrong side! Have a look at all the great makes on Instagram under the hashtag #sewankarafabric21
It’s winter in Perth but I just couldn’t wait to sew up the Frankie Tankie which is a pattern by Vanessa Hansen Studio. Vanessa worked for many years in the London fashion industry and she has posted some of the designs she has been involved in on her Instagram Page. She is extremely talented and her patterns are one of a kind.
The Frankie Tankie is so cute with the tied strap detail. I’ve made the hacked shift dress version but I can see myself making this pattern a few more times! It’s just one of those patterns that will be easy to refresh and reinvent. Vanessa has acknowledged this by giving instructions for not one but TWO dress hack versions! This is such a cool inclusion in a pattern.
Cute Shoulder Tie Detail
The pattern is beginner friendly. She has very detailed instructions with lots of explanations. It feels like she is holding your hand through the sew with easy-to-follow tips along the way and includes a bit of humour which makes it fun to follow. It felt like she looked into my brain when one of the steps said, “… do not use your scissors to push even if it is tempting”.
My dress version was simple to do. I’ve just increased the length of the tank by 15 inches. The lengthen and shorten lines are included on the pattern pieces which makes it easy to do this. In fact, there is quite a lot of detail for different options which I enjoy. Choices are given for if you want to use a facing, a lining or to make it double sided.
Details of my Frankie Tankie
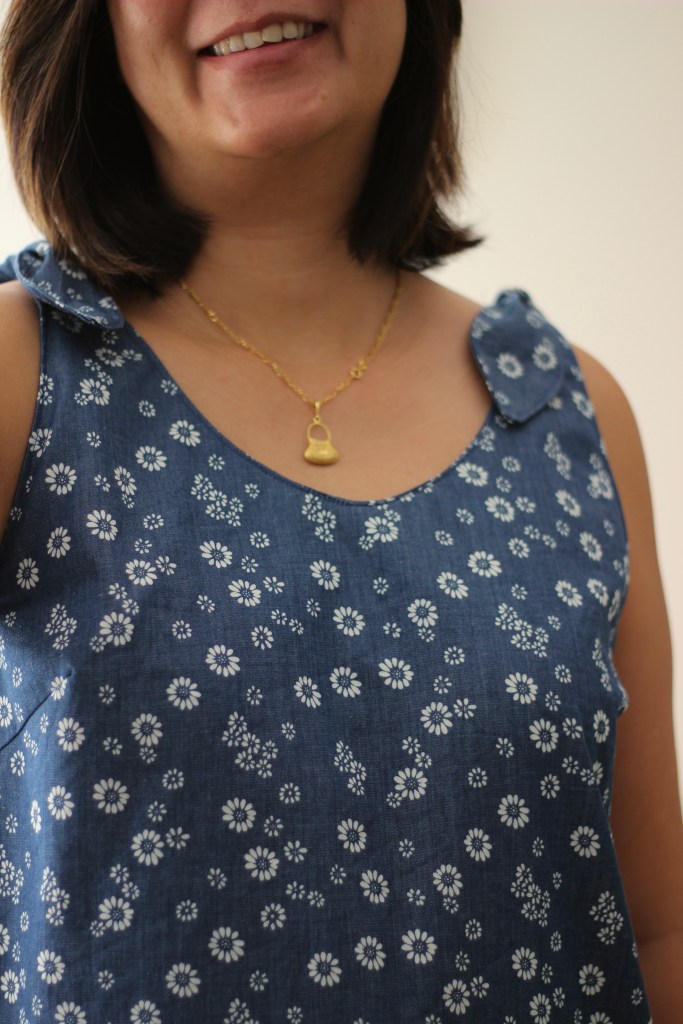
Sizing was spot on. I made the UK 12 B Cup. My measurements are 37 inch bust, 33 inch waist, 38 inch hip. No modifications were needed. Size range for garment measurements are from 34 ¾ inch to 41 ¾ inch full bust, 38 ¼ inch to 45 1/8 inch waist. The pattern is drafted for three different sewing cup sizes A, B and DD.
I really can’t wait to sew this again. I used a light denim fabric with a ditzy daisy print to make this version of the Frankie Tankie dress. I’d love to make another with an even lighter drapey woven like cotton lawn, silk or rayon. The options are endless. Definitely one that I’ll enjoy wearing on a hot summer day.
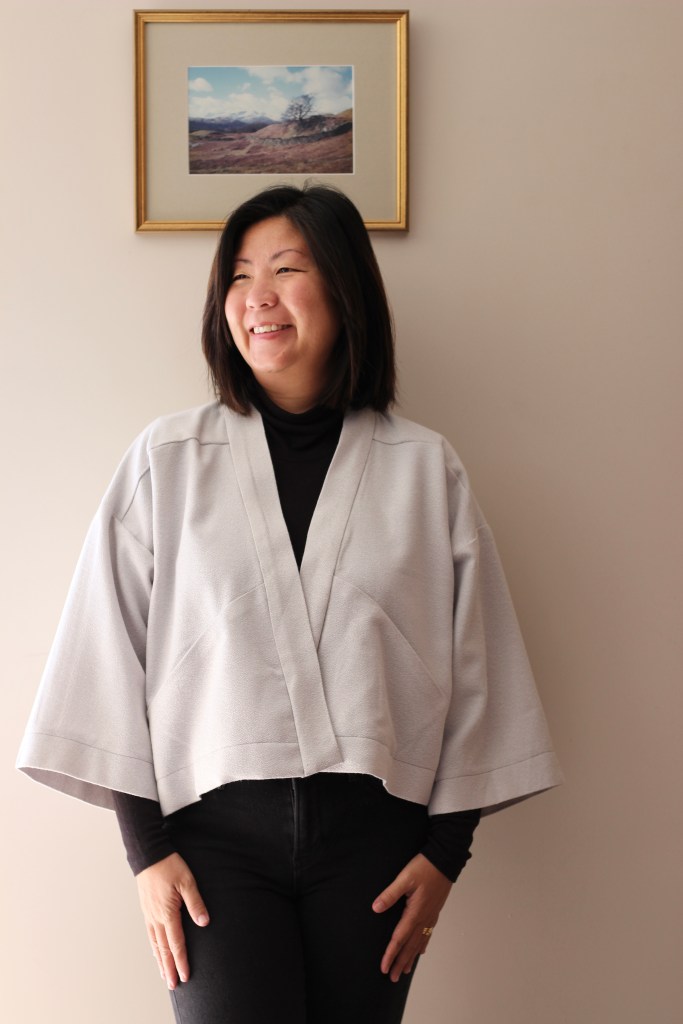
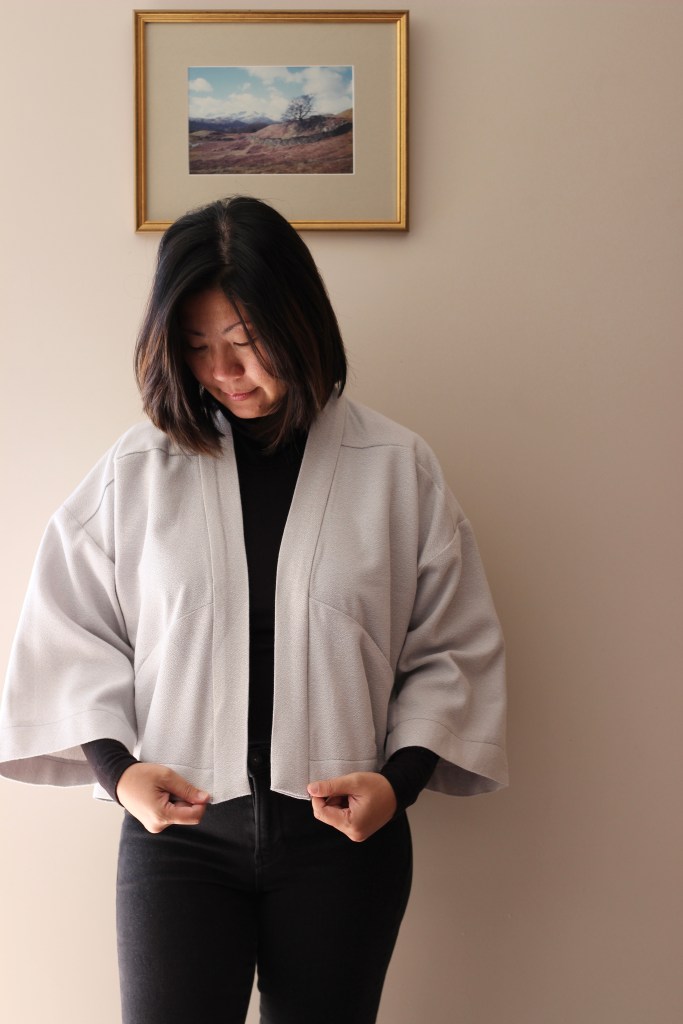
The Wooster Jacket is a timeless addition to any wardrobe. I was lucky enough to be gifted this beautifully designed piece by Sewing and the City. The description of the pattern is, “The Wooster is a loose-fitting unlined jacket with yoke detail, front slit pockets, bracelet length sleeves and a wide neck band.” This is my first time sewing a pattern from Sewing and the City and I daresay it won’t be my last.
Sewing and the City offers tutorials for those who may be just starting out in their sewing but I found the instructions comprehensive enough for the short time I’ve been sewing. I decided to challenge myself to sew this jacket in a “Sew Everyday” challenge where I sewed for 15 minutes daily. This was such a fun way to sew and it helped me plan and understand the processes of putting this piece together. Here was my sewing process for the jacket:
Complete all stay stitching
Attach pockets to front panels
Join front top and bottom panel
Join yoke to back panel
Sew on sleeves
Sew side seams
Sew hem
Add neckband
Sew sleeve hem
Sewing step by step
Just a few notes from my version, I sewed the size M which fit exactly as I liked. This pattern has a size range from 42 1/2 inch bust to 55 1/4 inch bust. I used a wool blend fabric to make my Wooster Jacket as it’s an unlined jacket so I chose a fabric that would sit softly against the skin. This fabric has a bit of polyester in the mix which made it hard to press and so when it came to attaching the neckband I stitched-in-the-ditch rather than topstitching it on. Also, there are no indications in pattern of when to overlock / serge the seams so I just noted where to do this when I read through the pattern. Other than that, it turned out exactly as the pattern promised!
This make was inspired purely by my much anticipated annual leave. I know that the lounge set trend came about because of people working from home but being a healthcare worker rules that out for me. So, all I’ve thought about was a couple of weeks of sitting home lounging, eating, napping, reading and lots of sewing. The weather has also helped as temperatures have dropped and rains have settled in.
I chose to sew the Comfi Lounge Set as it’s a Pattern Scout Pattern and from past experience, all her patterns have been pure joy to sew. I do love a challenge when I sew, like doing a good puzzle, but in this case, I just wanted a relaxing, uncomplicated sew. It definitely turned out to be exactly that! A very easy, relaxing sew and it does exactly what it says on the tin. The guesswork for sizing and the choice of fabric is all taken care of.
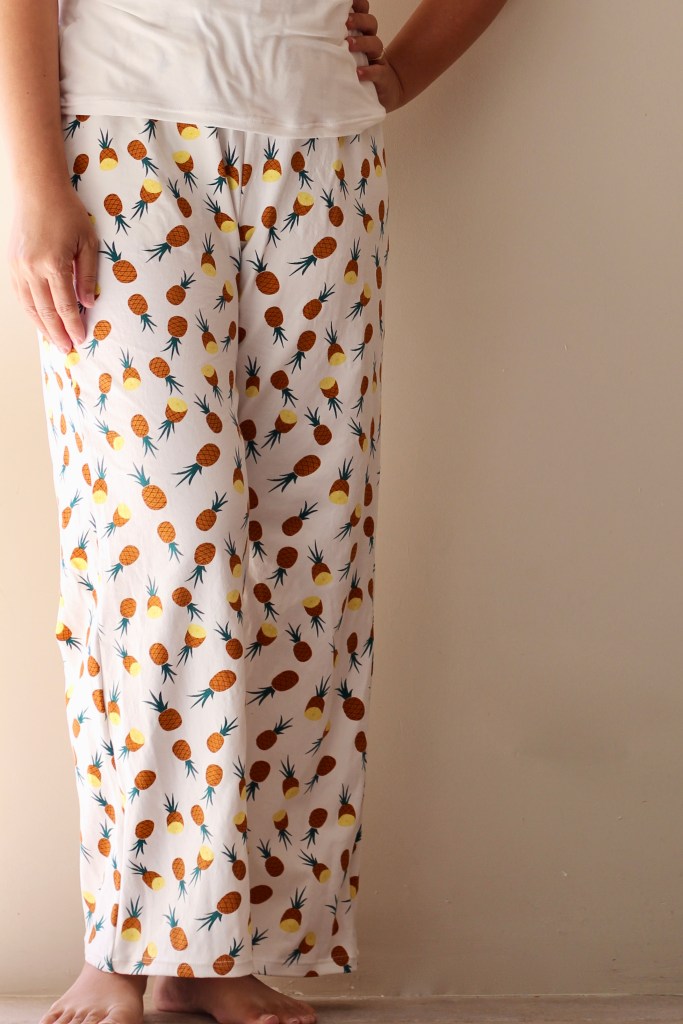
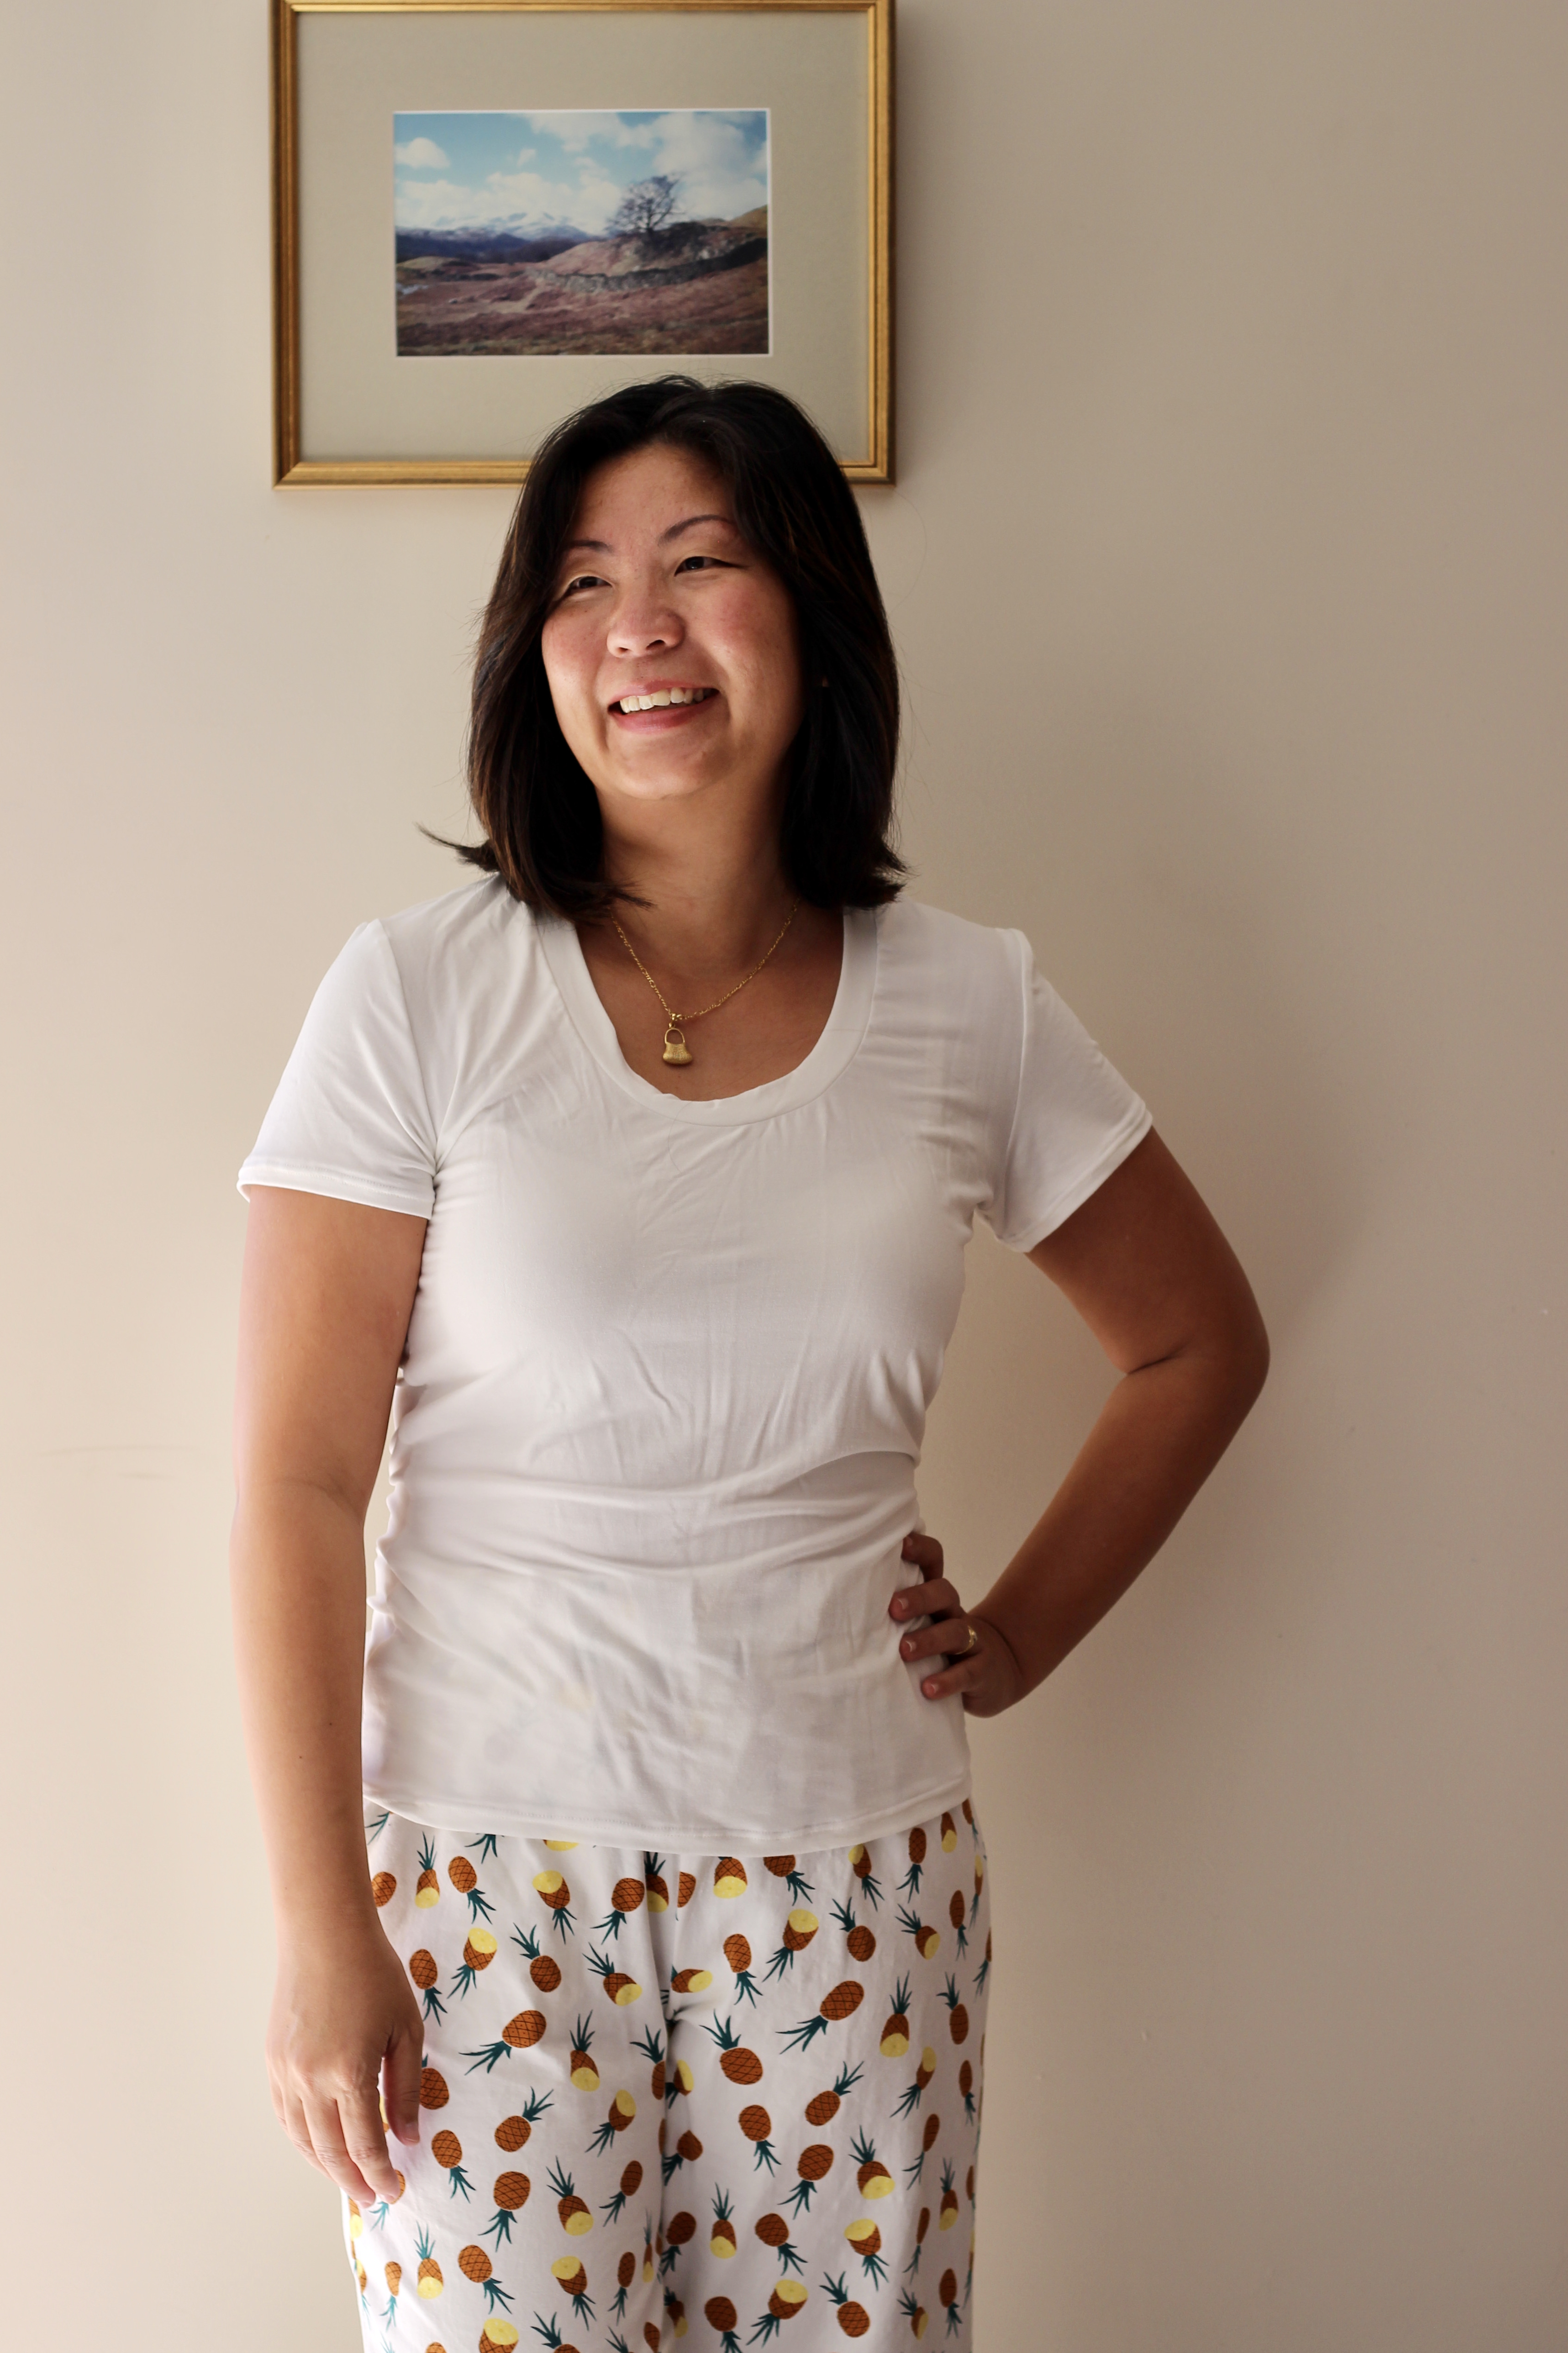
My husband is an avid supporter of my sewing hobby. He often comes along fabric shopping with me and was the one that spotted this pineapple print cotton jersey fabric.
Who can resist pineapple print?
I cut out and brought along the stretch ruler that Pattern Scout provided in the pattern instructions which made it so easy to pick the fabric especially if you’re new to knit fabrics as I am. I used this medium weight knit for the Comfi Lounge Pants and as a surprise for my husband, I also sewed up the pineapple print jersey as a sleep shirt for him (this is not included in the pattern, his shirt was self-drafted). For the Comfi Lounge Tee, I’ve sewn up the basic short sleeved tee version and I’ve used a lightweight stretchy white cotton spandex fabric.
Instructions were great as usual and the size 12 was a perfect fit for my measurements. All seams were sewn up on my overlocker and the hems and sleeves were finished with twin needles. I’ve seen some beautiful versions of this pattern on Instagram and it’s definitely one that I’ll revisit. The next time I sew this, I’d love to play around with fabric choice.
On a side note, sewing this has been such a joy and in general, sewing is such a joyful pastime for me. It has also been fun (and funny) to document these makes along the way. I hope joy and creativity is something that everyone can make time for in their lives. Sewing and having a hobby is something that really contributes to my wellbeing. Hopefully, whatever you’re facing or doing, I hope you’re able to find some joy in it.
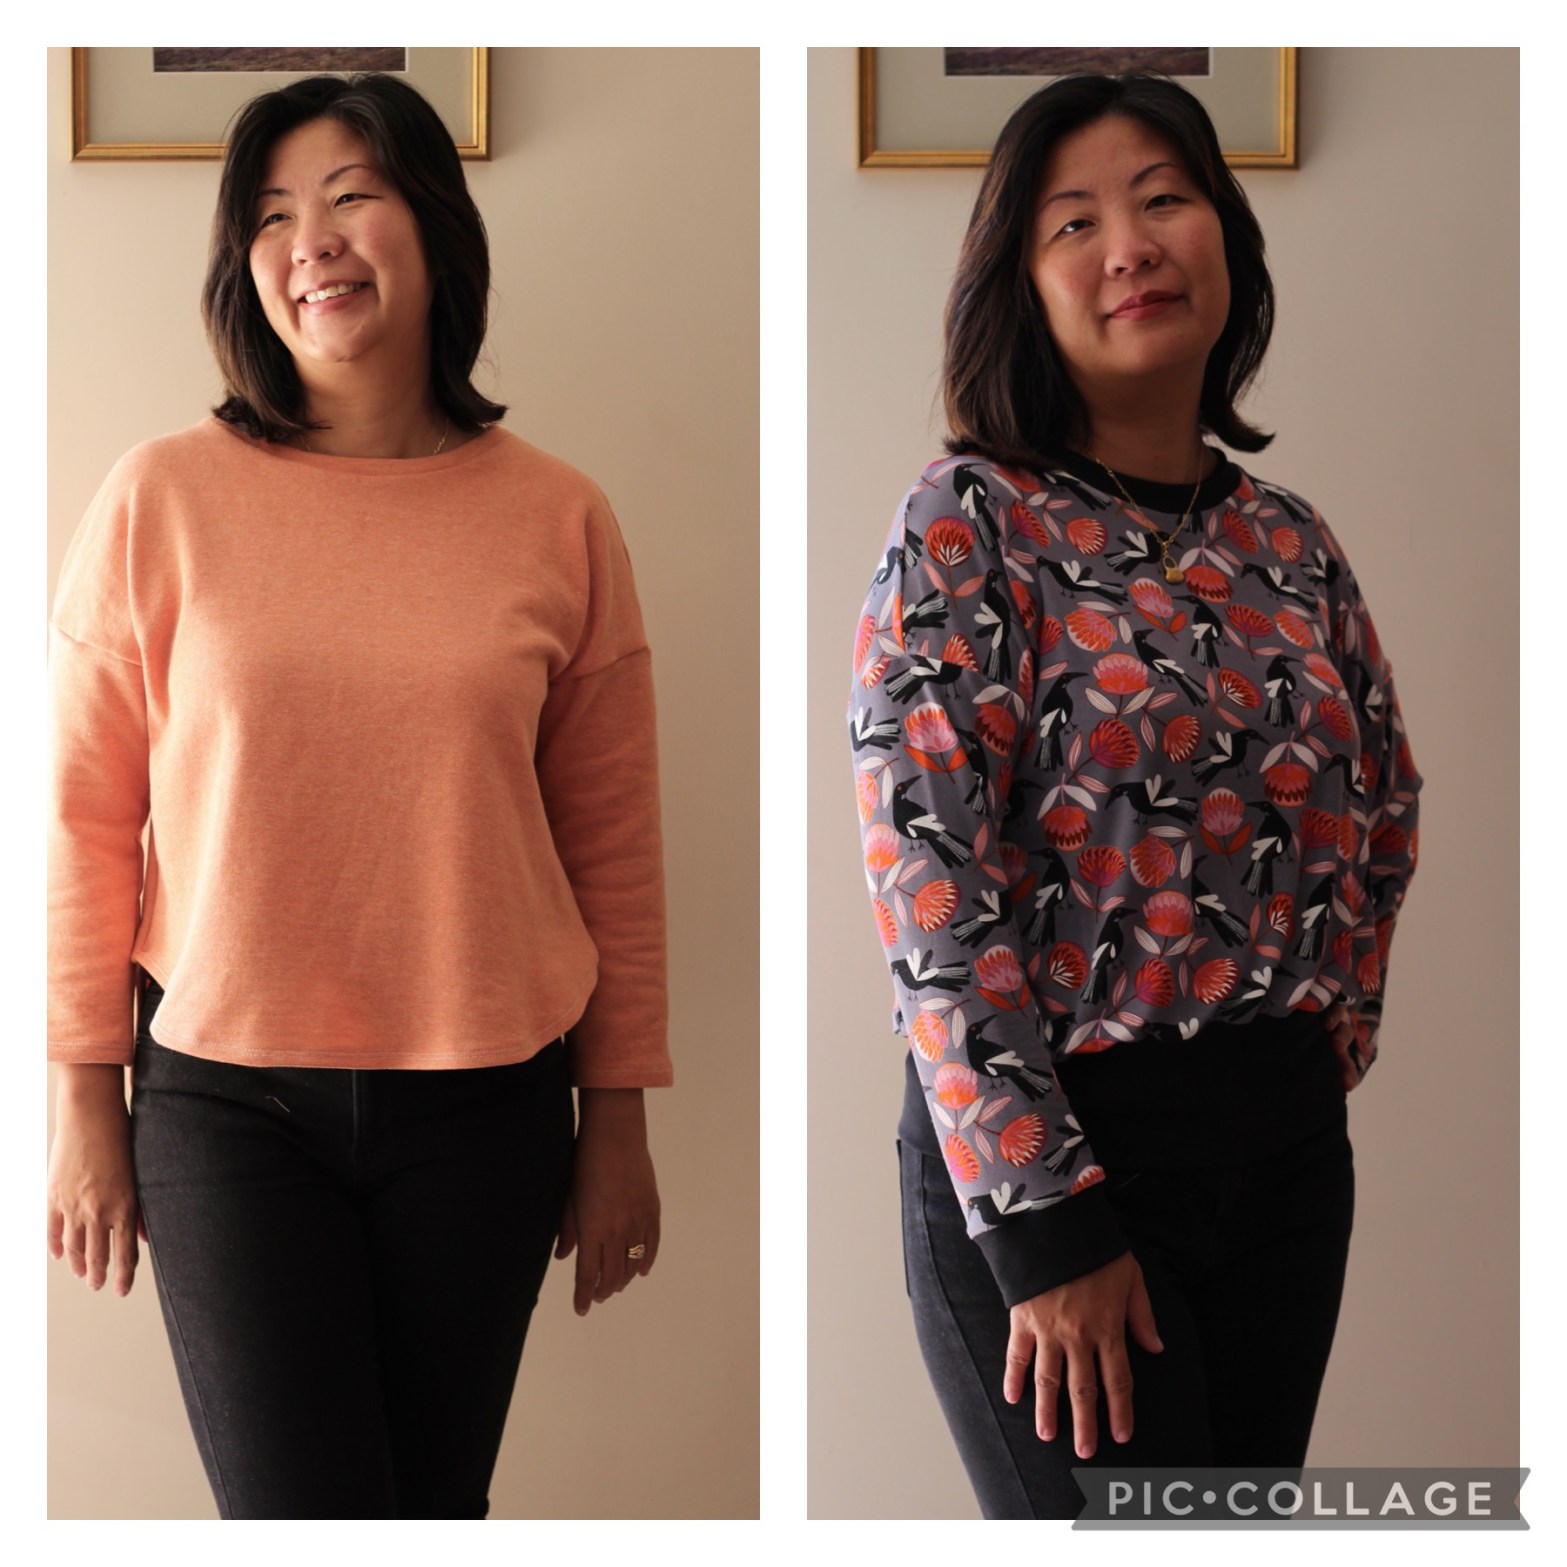
The Jarrah is a pattern by a beloved local Perth Designer Megan Nielsen and comes with so many options due to the fact that it’s a modular pattern. This allows you to mix and match the different bodice options with different neck band and sleeve options. This is such a feature with Megan Nielsen’s patterns as she offers many variations making her patterns such good value. I’ve now sewn the Jarrah pattern a few times producing a different look each time. The Jarrah is such a comfortable loose-fitting sweater. I also love how the look of the Jarrah changes depending on the fabric choice so I decided to explore this by making two versions. In the first version, using a fleece lined knit and a rayon spandex with the second.
Both were sewn up in the Size 12 without any adjustments as these were the closest to my measurements. There is a lot of ease in the pattern so you could look at the finished measurements and size down for a narrower fit but I personally liked the generous give in the fit as it feels so comfortable and great for lounging in. For both versions, I had 1.5 meters of fabric which turned out very well. I did try to see if I could use less but had to take into account the direction of the stretch in the first version and the pattern placement in the second version. With the second version, I also needed some black ribbing. You don’t need much, about half a meter should be plenty.
The choice of the fleece lined knit was just right for a sweatshirt style sweater. The fleece I chose is smooth on the outer side and has a loose nap on the underside which is just so soft and plush. It will be so warm and soft to wear against the skin. The peach is a delicious pop of colour that I just couldn’t resist! Testing the stretch of the fleece, it has a tight stretch one way and is quite a stable knit. I made View B with the high-low hemline. It has an interesting curve along the hemline and is the longest option so very good to style with jeans or even activewear.
The peach is a beautiful colour but it was difficult to find any ribbing to go with the colour so I had to make my own neckband. I did this by cutting a longer than needed strip of the same fabric along the stretch of the fabric. You could also cut along the bias to make it stretchier, however, I felt that it had enough stretch without doing that. I then measured the band against the neckline and subtracted about 20% in the neckband so it could give some tension to the neckline and sit flush when worn.
To finish the cuffs and hem, I used a twin needle. The cuffs were easy to sew up but it was a bit trickier with the curved hemline. I found it hard to pin the thick fabric especially going around curves so I used some quilter’s tape. Also, a word of warning when you first start sewing with twin needles, go slowly! I was chugging along full speed and didn’t notice the thread getting tangled and broke the needle. Luckily the sharp part was still attached to the thread. It really made me consider getting some safety goggles for my sewing.
The second sweater I made was with the Jocelyn Proust Magpie Printed Rayon Spandex Fabric. This is currently exclusive to Spotlight Stores. Jocelyn Proust designs are so recognizable for the Australiana flora and fauna featured in her designs. I love the unique call of the Magpie bird so I fell in love with this design straight away.
The rayon spandex knit is a very soft drapey fabric and has amazing stretch recovery. It has quite a luxurious feel and although I’m making it for my winter wardrobe, I think this fabric is also quite good for summer. The look I wanted was a long-sleeved cropped blouse sweater so I used View A. Cropped sweaters were all the rage in the 80s so I thought it would be fun to recreate that look. I used black ribbing for the neckline and cuffs and to recreate the cropped look without exposing my belly button. I doubled the height of the hem cuff and shortened the width so it would cinch in the fabric at the waist.
This time, everything was sewn up using only the overlocker. It was incredibly fast doing it this way. I worried about the strength of the seams but after testing a bit of off-cut fabric I felt that the stitches held very well. However, I’m very inexperienced with knit fabric so please don’t take my word for it. Personally, I felt that for the speed and convenience, I was happy to take the risk of sewing up with the overlocker.
The Jarrah is such a versatile pattern and it was fun playing around with all the options. I made my first Jarrah a year ago and I know it will be one of my “tried and true” patterns. It has also been an interesting exercise coming back to a pattern that I made at the start of my sewing journey. I feel that I’ve made huge progress and the finishes, although not perfect, are getting so much better.
If you’ve been following me on Instagram, you’ll probably notice that I’ve sewn up quite a few Pattern Scout patterns. That’s why when there was a call for pattern testers for the Ava Dress on the Pattern Scout Newsletter (always sign up for the newsletter because this is where all the good stuff is!) I signed up to do the testing immediately. I suffered a bit of self-doubt for a moment. I mean, who starts a new hobby as complex as sewing then signs up to be a pattern tester as a beginner? But I guess Pattern Makers would need testers from a wide range of skill levels and I was lucky enough to get in!
So, what is the Ava Dress? From Pattern Scout, “The Ava Dress is a sleeveless, popover dress with a faux wrap bodice and elasticated waist designed for woven fabrics”. In my own words, I would describe it as a wrap dress with a more minimalist aesthetic. It has a very neat silhouette which can be worn for work or play. It comes in two lengths which also increases the versatility of the dress and the sleeves are designed to just peep over the edge of your shoulders which is very flattering and very chic.
The testing turnaround was a week. I have no idea if this is the normal time given for pattern testing but I suppose if you’re about to put a pattern out, you need your testers to be giving you their feedback in that short amount of time to finalise your adjustments for the pattern. It might also prevent details of the pattern leaking out before launching. It was exciting to imagine that I was part of a secret mission and team that were tasked to secretly make this fabulous pattern and then wait for the release to be able to finally let our friends and family know that we contributed (in some small way) to helping the birth of a beautiful new garment.
But let’s be clear that the design is completely the work of the Designer, in this case the very talented Casey Sibley of Pattern Scout. Pattern Testers are asked not to “hack” the pattern during the testing. We sew up the pattern and simply give feedback on the instructions, garment fitting, pattern pieces and the feel of wearing the garment. There was also an inspiration board on what fabrics other Testers were sewing with. I chose a cotton linen to sew up the shorter version of the Ava Dress. According to my measurements of High Bust of 36 inches, Bust of 37 inches, Waist of 33 inches and Hips of 38 inches, I fitted best into the Size 12 B. Like with most new patterns, I made a toile of the dress to check the fit and it seemed that I didn’t need to make any adjustments. When I made the final piece, I just added an inch to the elastic for the waist and also left the hem a bit longer by folding over by 1cm twice rather than folding over by 1cm then by 1 inch. These are just personal preferences and not really to do with designer’s fit of the garment.
As a beginner sewing enthusiast, I tend to look for extra skill sets I can learn from a pattern. I look at purchasing patterns not just as items I’d like to wear but for the skill set that I can gain from sewing those patterns. In the Ava Dress Pattern, I love that Casey gives such clear instructions on how to french seam the garment, how to interface the facings in a neat way and the flat felled seam was also a first for me.
Would I do pattern testing again? Yes! Without hesitation if I’m lucky enough to be selected. But I would have to feel comfortable and I would have to love the design, as I do here. It does come with a little bit of pressure due to the time frame so it’s important not to let the designer down by not completing the mission (should you wish to accept). Other than that, the other sewists were so knowledgeable with their fitting expertise. It was inspiring to be in the same space (albeit, a virtual space). I felt so supported and included all the way in this community of sewing experts.
Facing lockdown again, there has to be an upside and that upside is time. Time to indulge in a bit of sewing and to do something I’ve never attempted before. A mash up of two sewing patterns and to start a new hobby … blogging.
Patternscout and Marshastyle are two seriously talented independent sewing pattern makers. I’ve sewn quite a few of the Patternscout patterns, they are beautifully drafted and as a beginner, I find the instructions easy to follow and I’ve just learnt so much by sewing her patterns. The sizing is also always a great fit for me. I came across the Leila Dress by Marshastyle last year when I had just started out on my sewing journey. What’s not to love with the beautiful boho look of this dress? The statement sleeves are so unique and so was the tiered gathered skirt. The combination was just too hard to resist!
When I sewed the Leila Dress, I made a blouse hack to try out the bodice and discovered that the v- neck neckline was a bit too low for me. When I wear it, I usually have a cami top underneath so I found myself not reaching for this in summer when Perth hits 40 degrees celsius. As a result, I didn’t sew up the dress. I knew I would come back to it when my skill level improved and in fact, Marshastyle did a blogpost on how to modify the neckline to move it higher.
Fast forward to the start of 2021, I found the Hana Dress Pattern from Patternscout. This is a lovely shift dress and she has given two options for the dress. One is a simple pull over the head shift dress and the other is made with a button placket starting from the neckline all the way down to the hemline. I have reached for these over and over again. I think what I love about the Hana Dress Pattern how the bodice fits me. The neckline is especially flattering on me which gave me the inspiration to try this mash up.
When I came across this beautifully spring patterned Japanese cotton lawn, I immediately thought of the Leila Dress again. The fabric is so soft and lightweight. I haven’t had much experience sewing with cotton lawn but it would be the perfect warm weather fabric. I decided that I would use a muslin to line the dress as the fabric was quite sheer due to being so lightweight. The muslin also provided me with the chance to test the fit without cutting into that beautiful Japanese cotton lawn. The original pattern is not lined but lining a dress can be thought of as just an extension of the facing. From the Hana Dress, I used the bodice pattern pieces (front and back) measuring about 6 inches from the bottom of the sleeve hole (armscye) and cut straight across. From the Leila Dress, the tiered skirt was cut out but the sleeves were left off for the muslin.
From there, it was a simple matter of trying on the muslin for fit and then using the same pattern pieces, now including the sleeve pieces, for the shell of the dress. The lining is attached to the shell via the neckline and the arm holes (armscye) and there we have it! A mash up of the Hana and Leila Dress. If you love the Leila Dress as much I do then check it out at www.marshastyle.com and enjoy her fabulous blog.