Palisade Pants

Featuring: Cotton Lyocell Drill from Maai Design

Getting more experience with sewing trousers has been high on this year’s agenda so when Maai Design contacted me about their Cotton Lyocell Drill, I took it as a sign and jumped in. I received a beautiful package from Maaike, with all it’s personal touches. When I opened the package and felt the fabric for the first time, I was surprised at how soft the Cotton Lyocell Drill felt. Drill is usually a lot coarser and associated with workmen’s clothes, but with the blend of Cotton and Lyocell, it’s still really strong but has a softer feel. It also felt a bit more lightweight than the usual full cotton drill. Back when I had just started sewing, buying fabric online was quite overwhelming. Maai Design has a very easy website and best of all, there are YouTube videos accompanying each type of fabric. You can find out more about the Cotton Lyocell Drill here.

Feeling how lightweight this Cotton Lyocell Drill was, I was tempted to make another Kalle Shirtdress or Pietra Wide Leg Pants, but I had the Palisade Pants from Papercut patterns in my stash. I was excited to try sewing those unique pockets and I wanted the challenge of a closer fitting pair of trousers. 

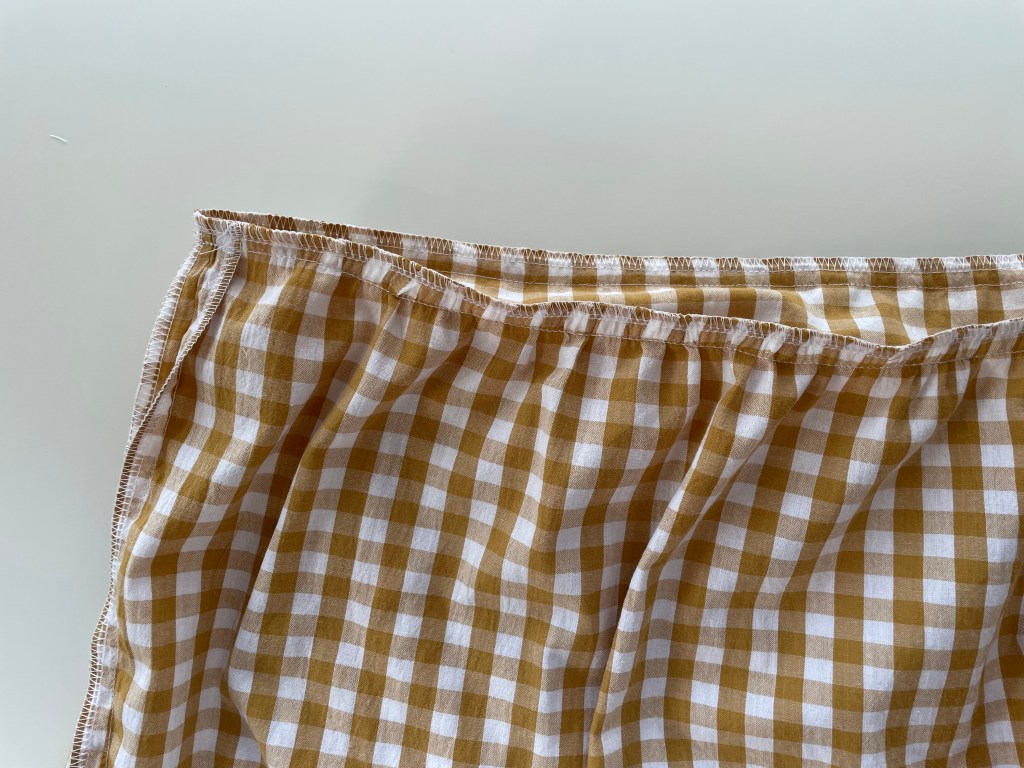
The first step in any sew is to wash the fabric. Being made of natural fibre, I made sure it was washed and dried on a cooler cycle. There wasn’t any obvious shrinkage or any loss of this beautiful pale mint blue colour. I love the colour-ways of the Cotton Lyocell Drill in the Maai Design collection! There are nine altogether and it was very hard choosing but I think this mint blue is great for the summer.

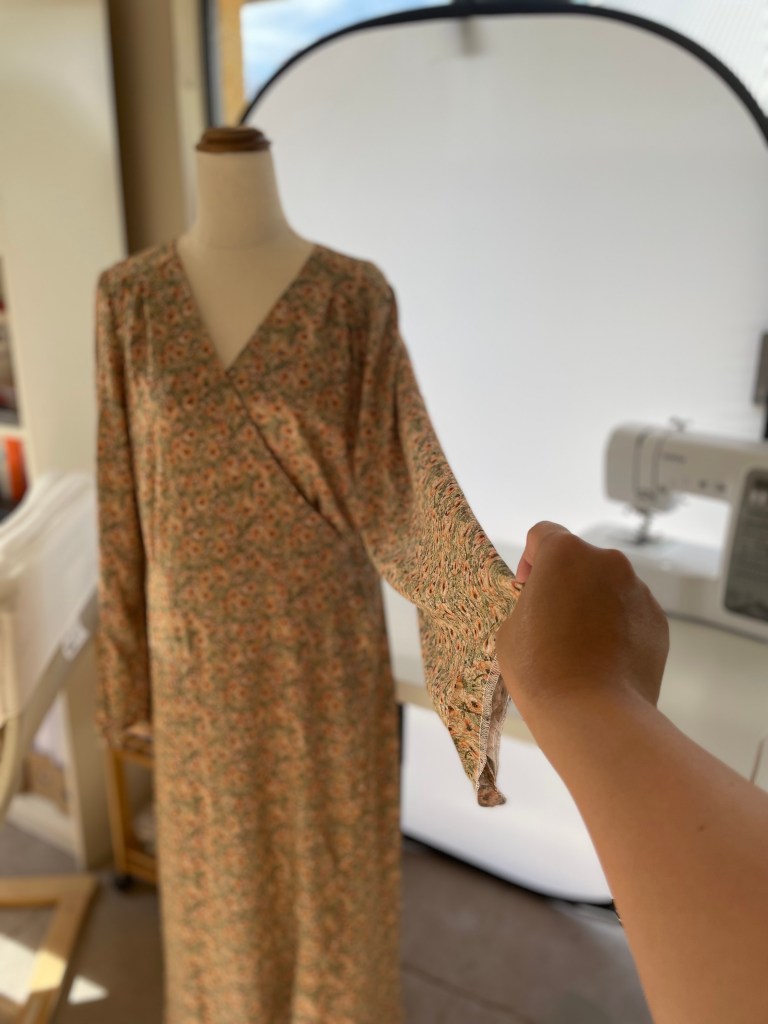
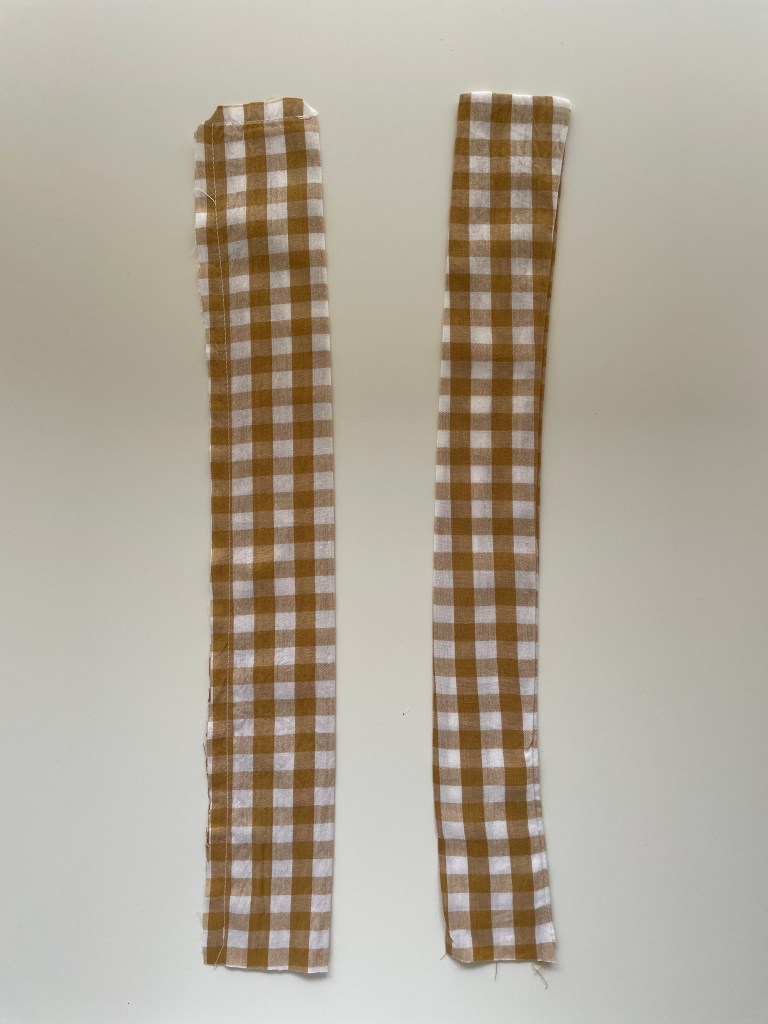
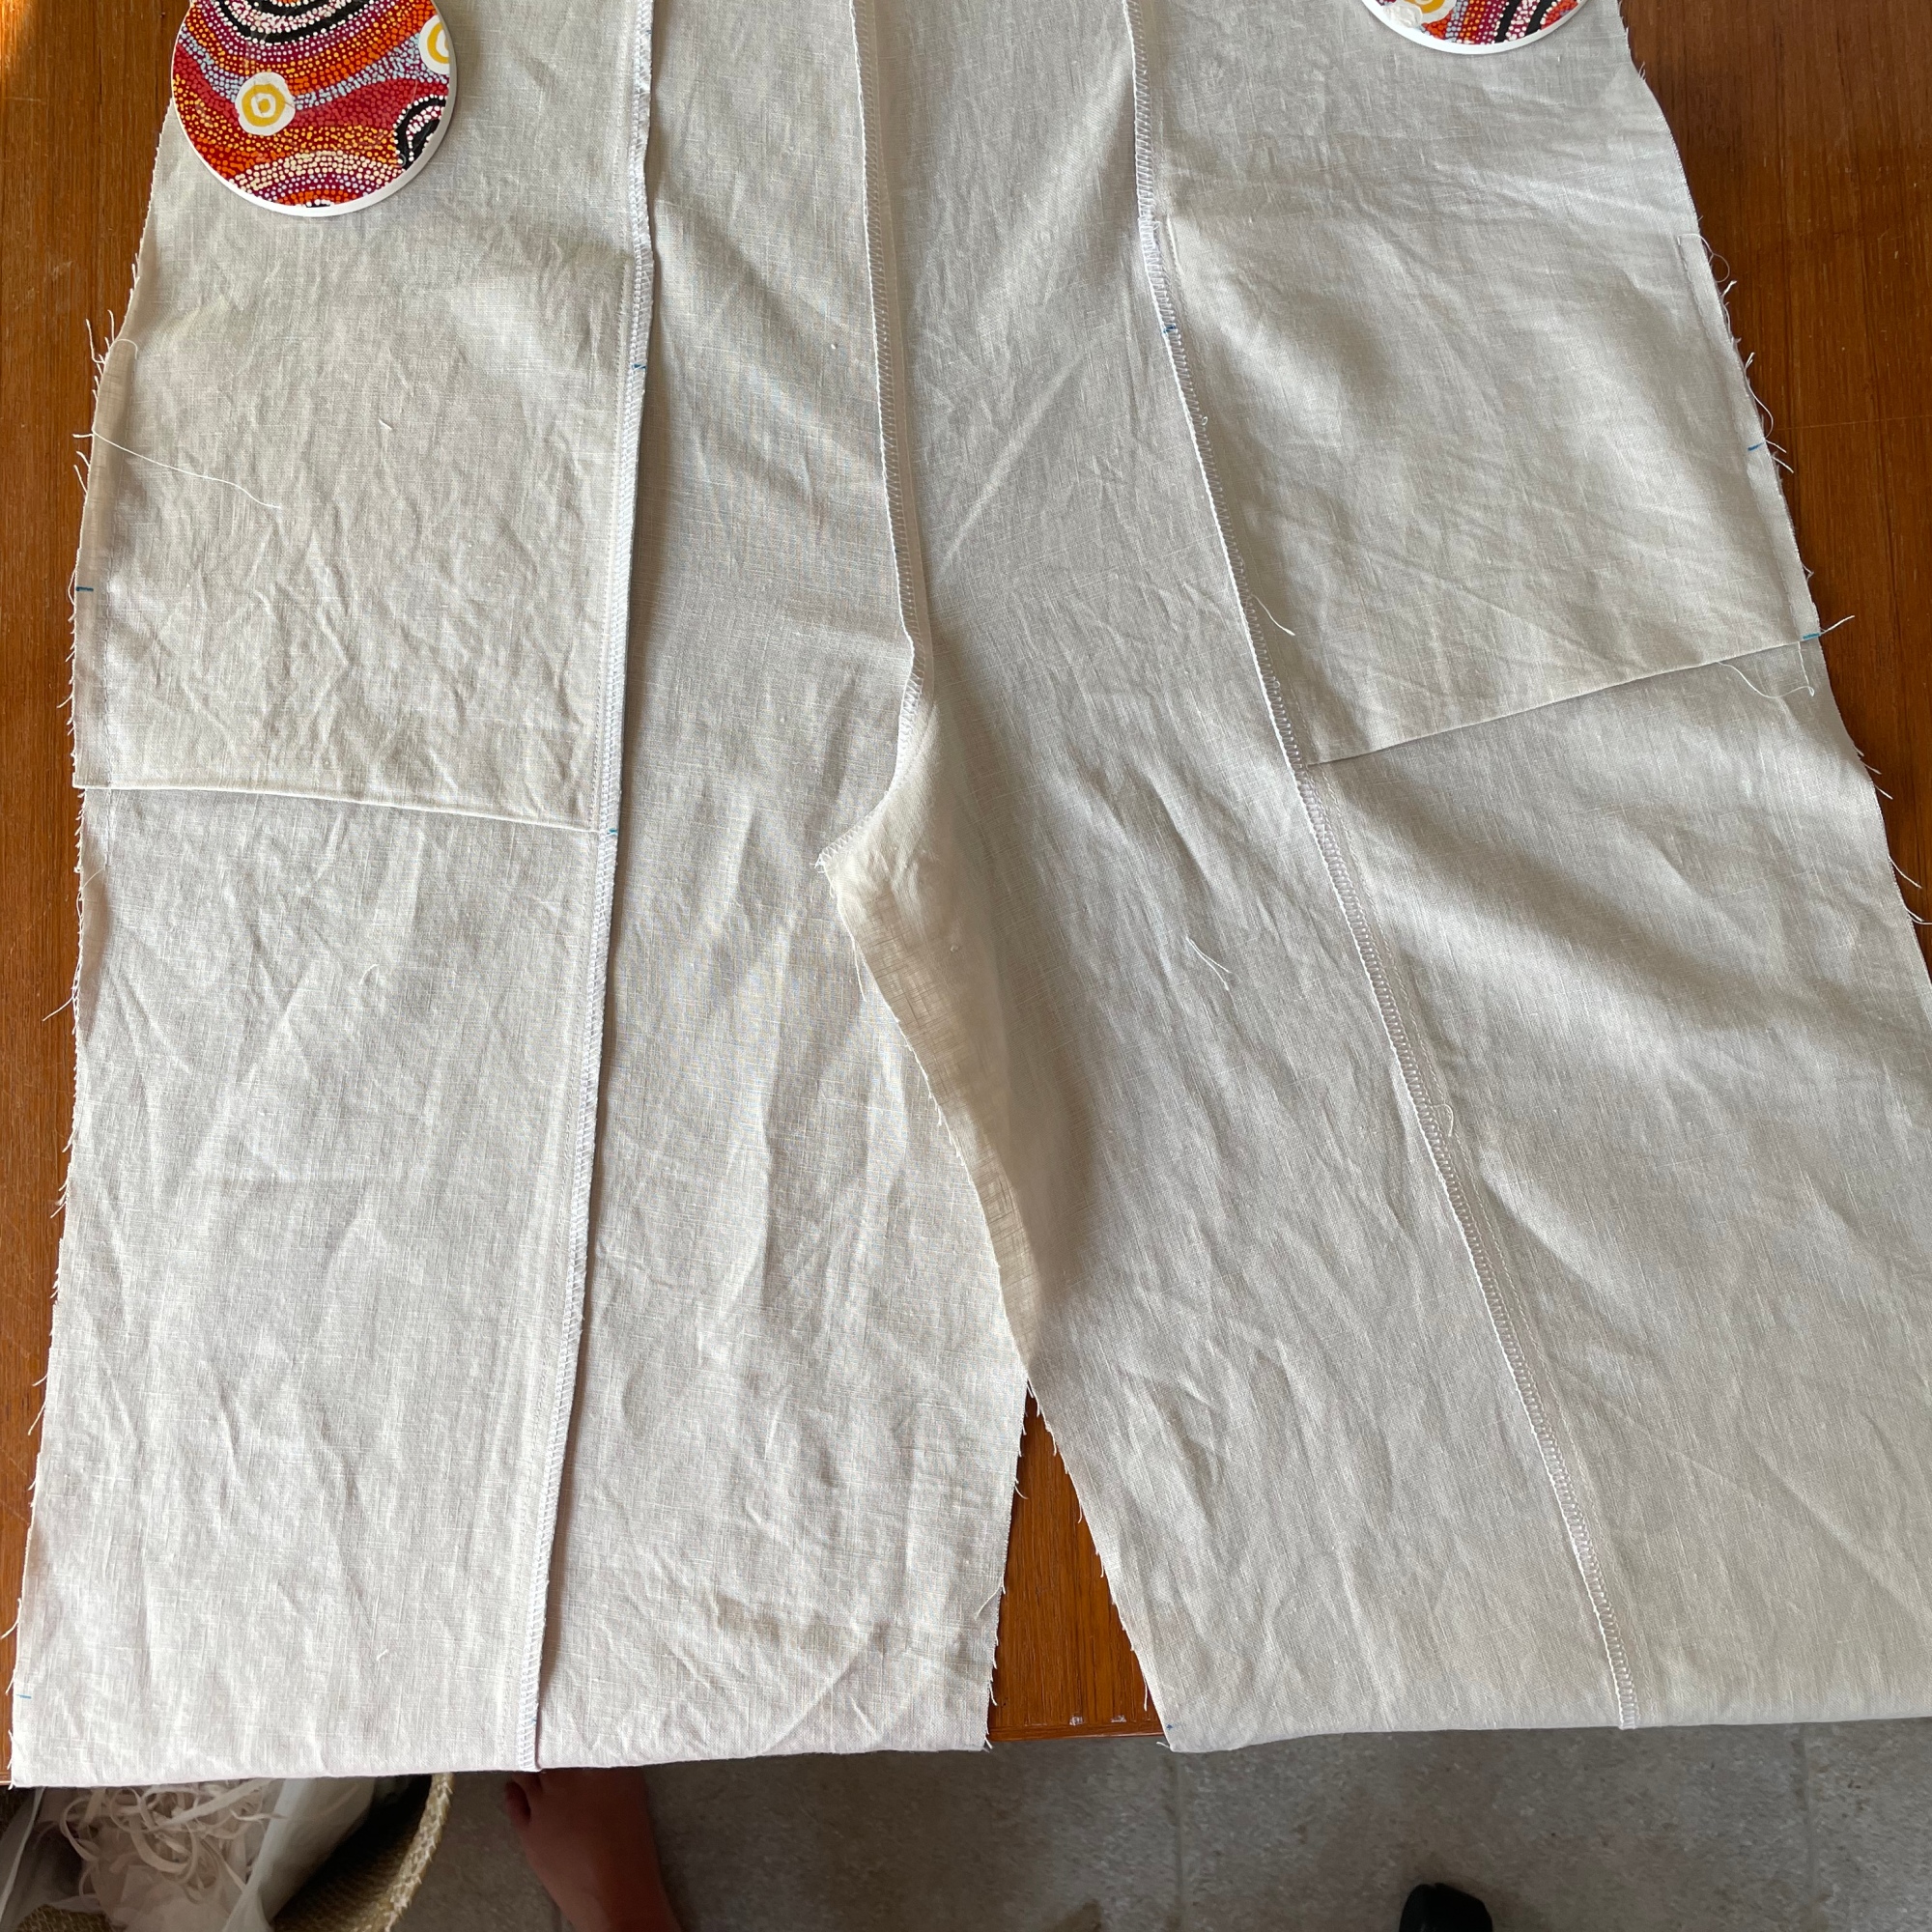
When it was time to cut, I made sure that all my pattern pieces were running the same way, paying close attention to the grainline because drill has a diagonal weave. Drill has a smoother side and a side where you can see the diagonal weave more obviously. Most people would consider the smoother side the wrong side of the fabric, so I just put a pin on the wrong side to make sure that I didn’t accidentally mix this up! Cutting the Cotton Lyocell Drill is very beginner friendly. It doesn’t shift like rayon, and it doesn’t fray like double gauze. I would say, it’s a great fabric for beginners.

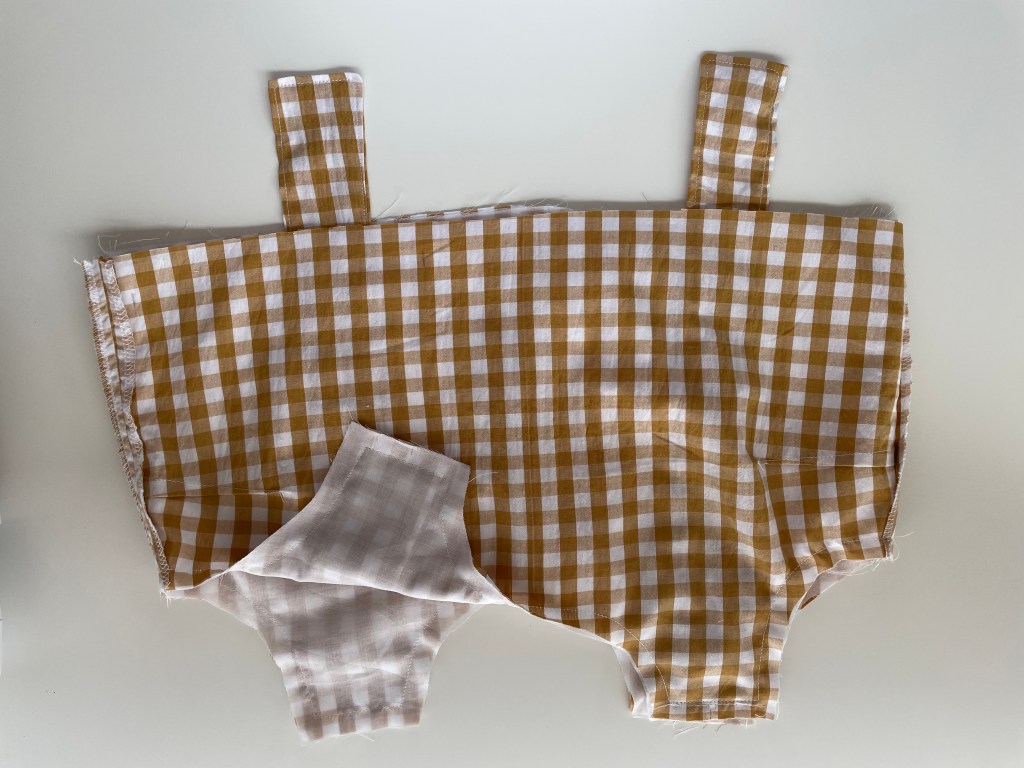
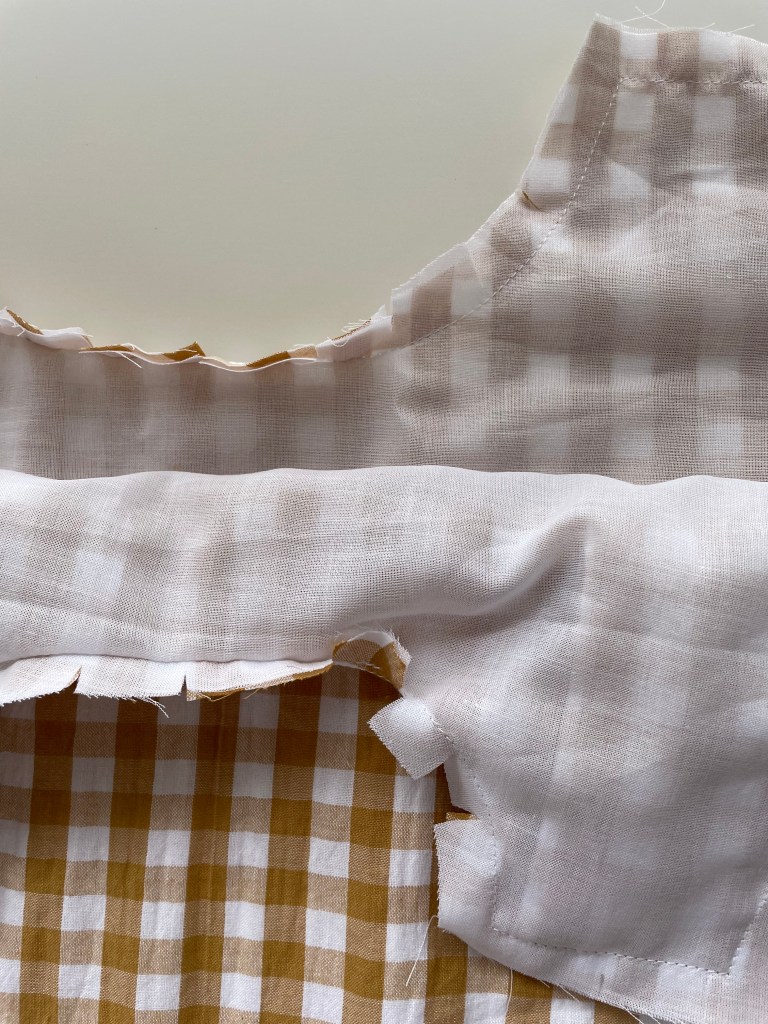
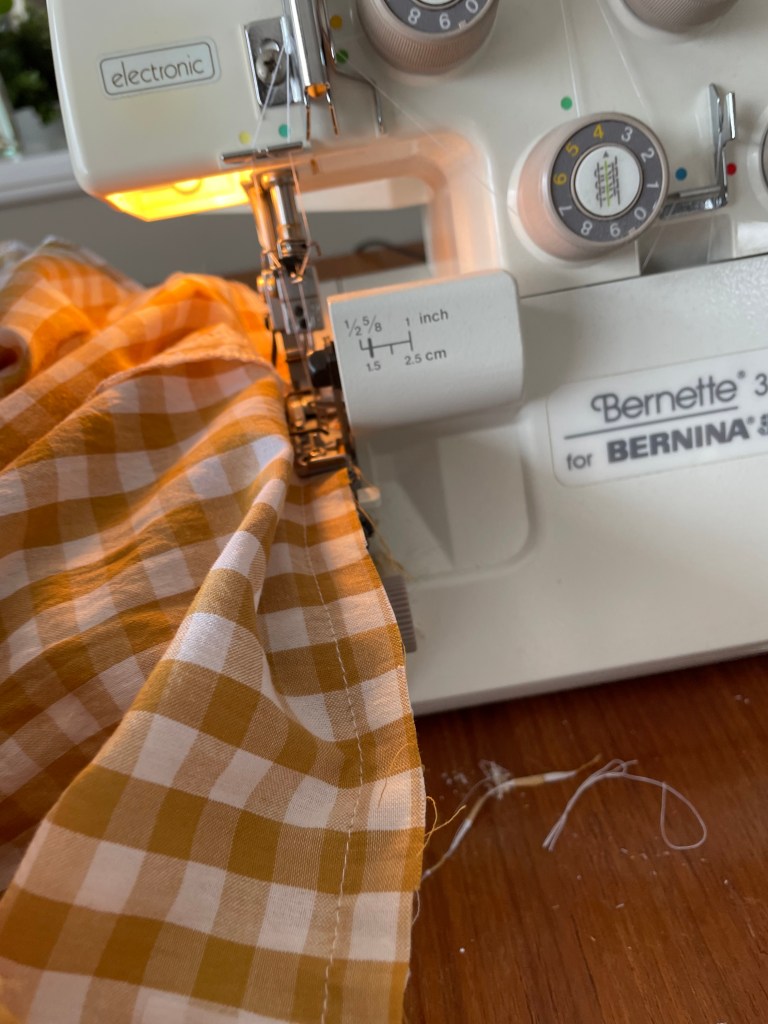
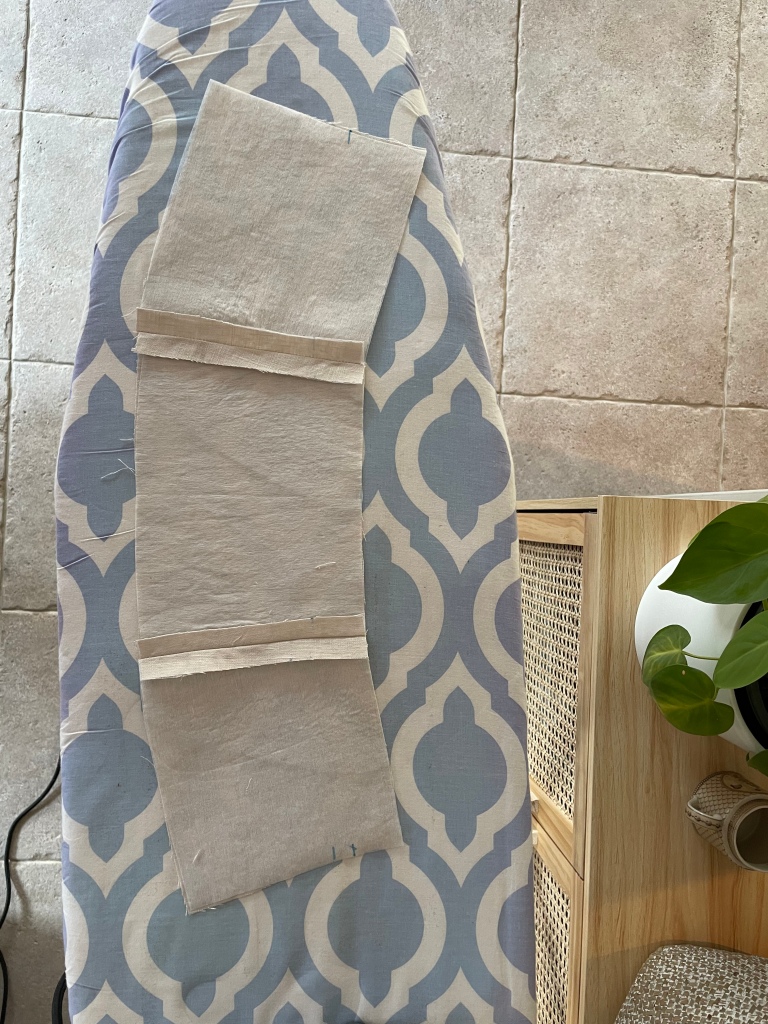
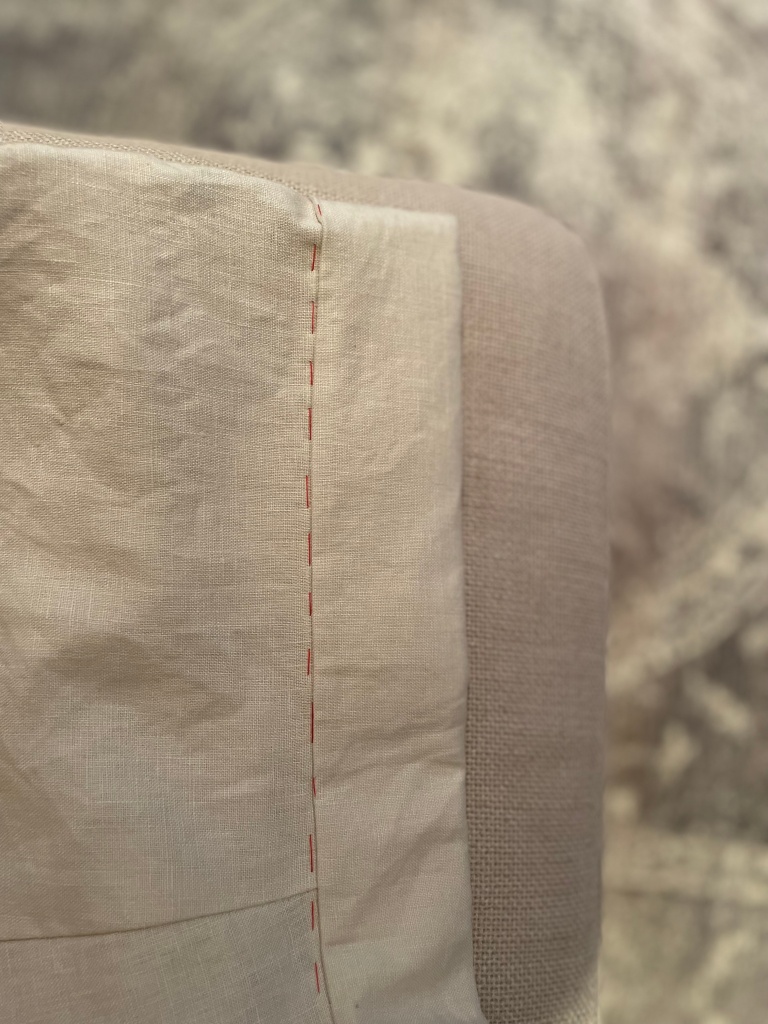
At the sewing machine, I just made sure my machine had a 90/14 needle in situ. I then checked to see that I was using a stitch length of 2.5mm. The next thing to note is that the seams of the Palisade Pants are sewn at 1cm not the usual 5/8 inch. Once all the various interfacing pieces were attached, I started to put together the pocket pieces. I found that the fabric was a bit bulky once each of the pocket bag pieces were layered so it was better to use these quilters clips. (They’re also handy for delicate fabric where you don’t want to pierce the fabric). Piecing together the pocket requires a lot of accuracy so I ironed at each stage to get crisp lines.

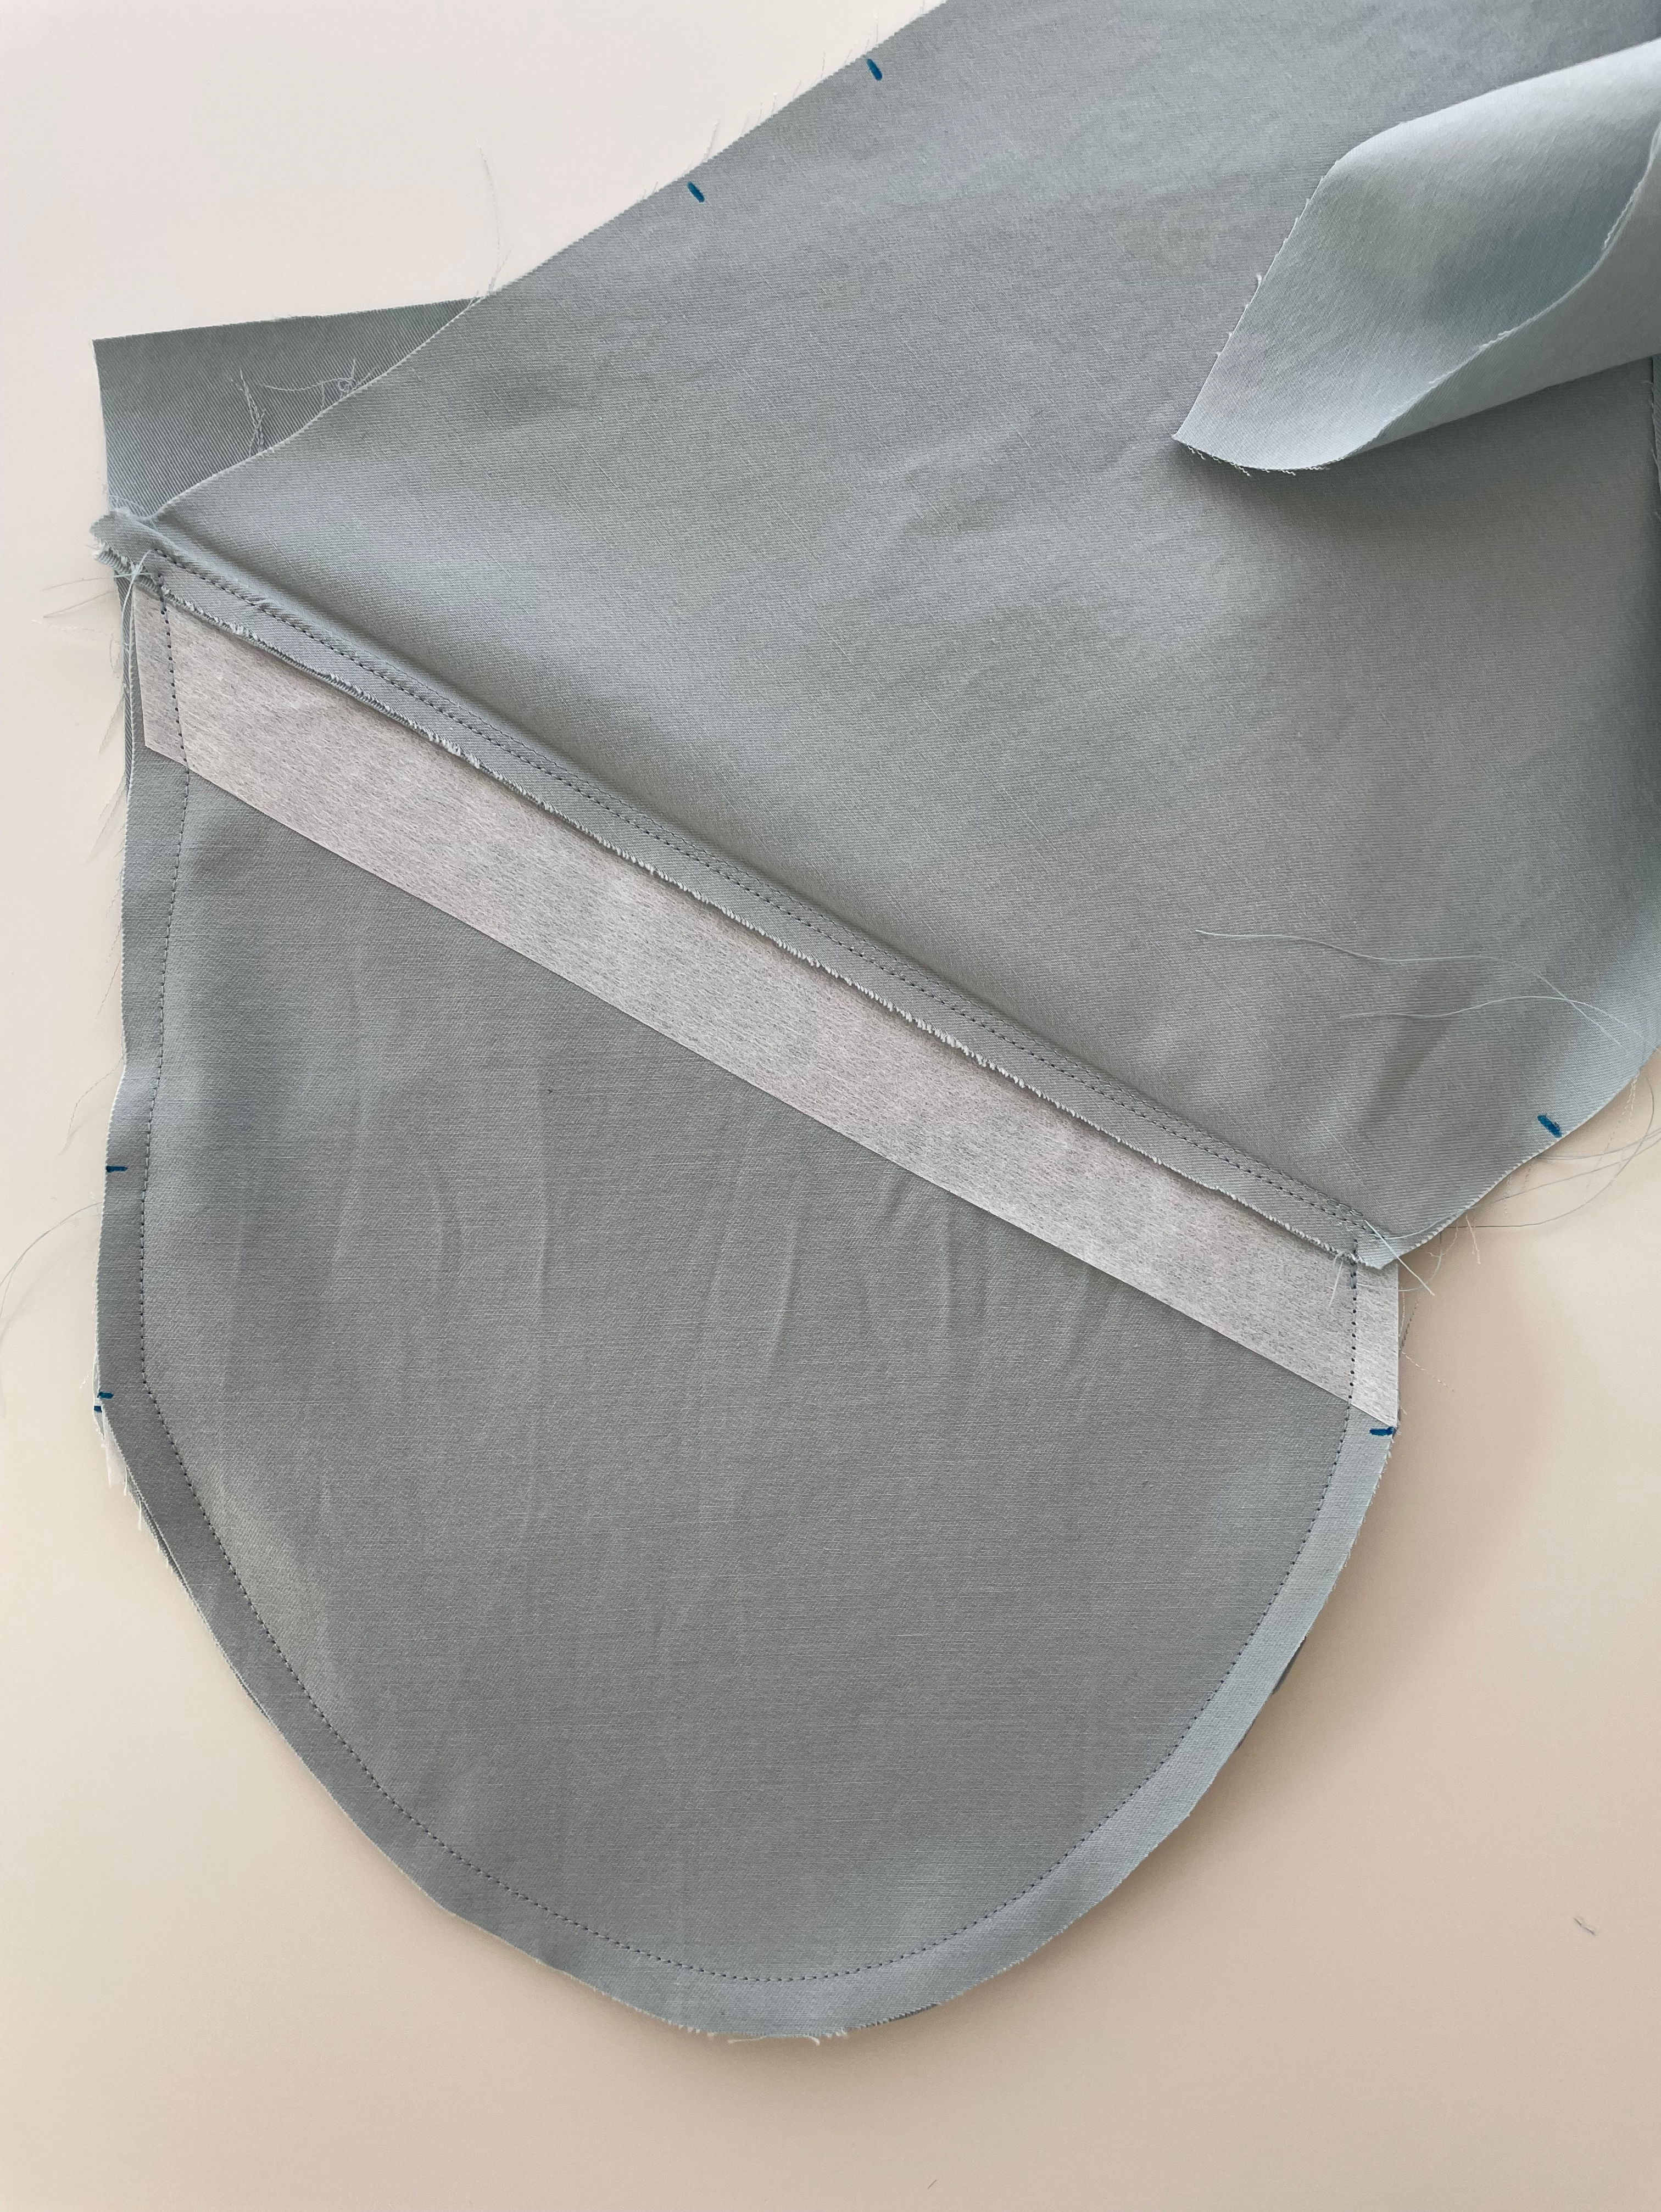
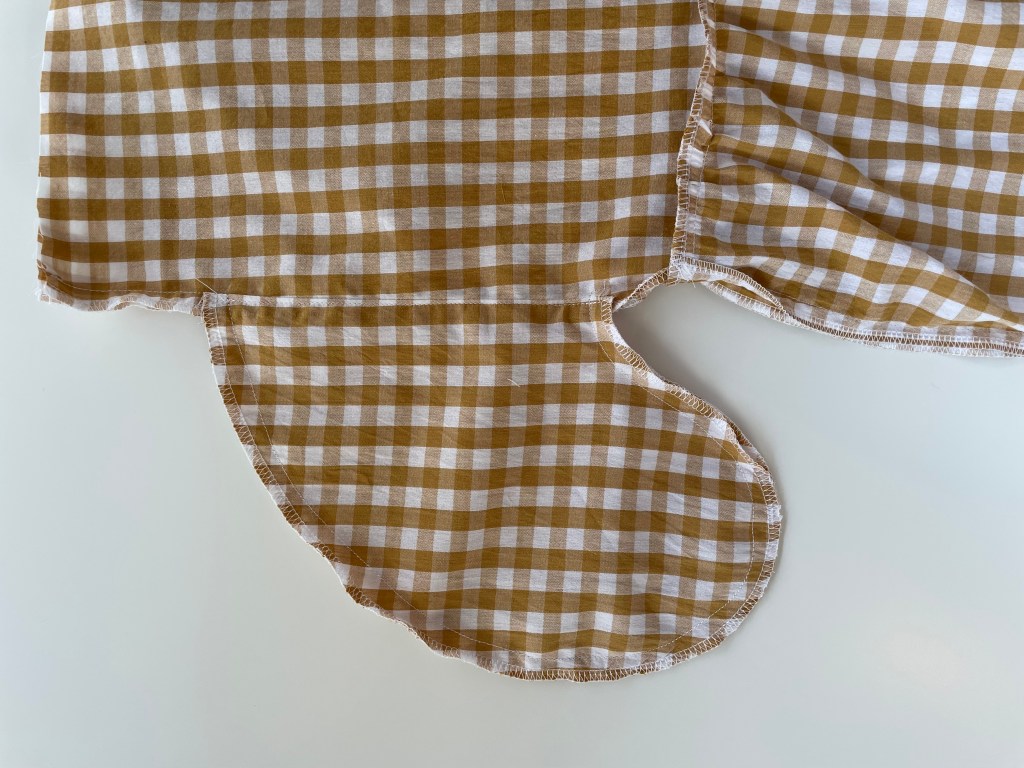
Once I worked out the pocket bags and how to attach that to the side leg panel, the rest came together quite quickly. I attached the back panel piece and then the back waistband. This part had me a bit worried because I didn’t know if the Cotton Lyocell Drill would tolerate the partly elasticised waistband. I was afraid it would have that puffed up look that some lounge pants have with elasticated waists, but to my relief, because it has a little bit of drape, the fabric sat flush when the elastic was inserted. The rest of the sew went smoothly, and as usual, papercut pattern instructions were great to follow.

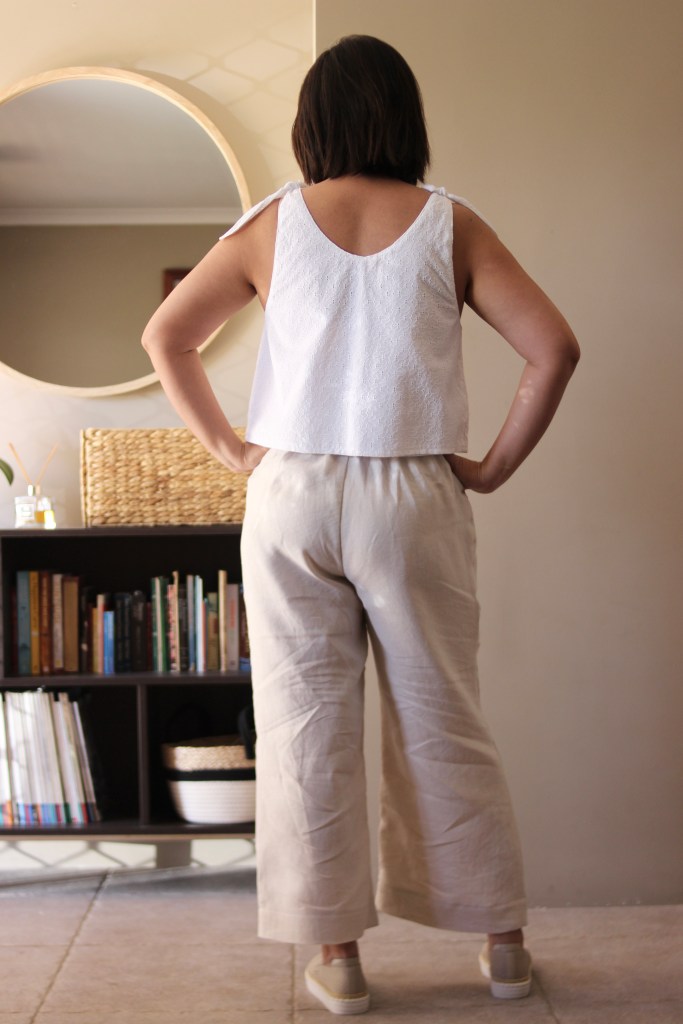
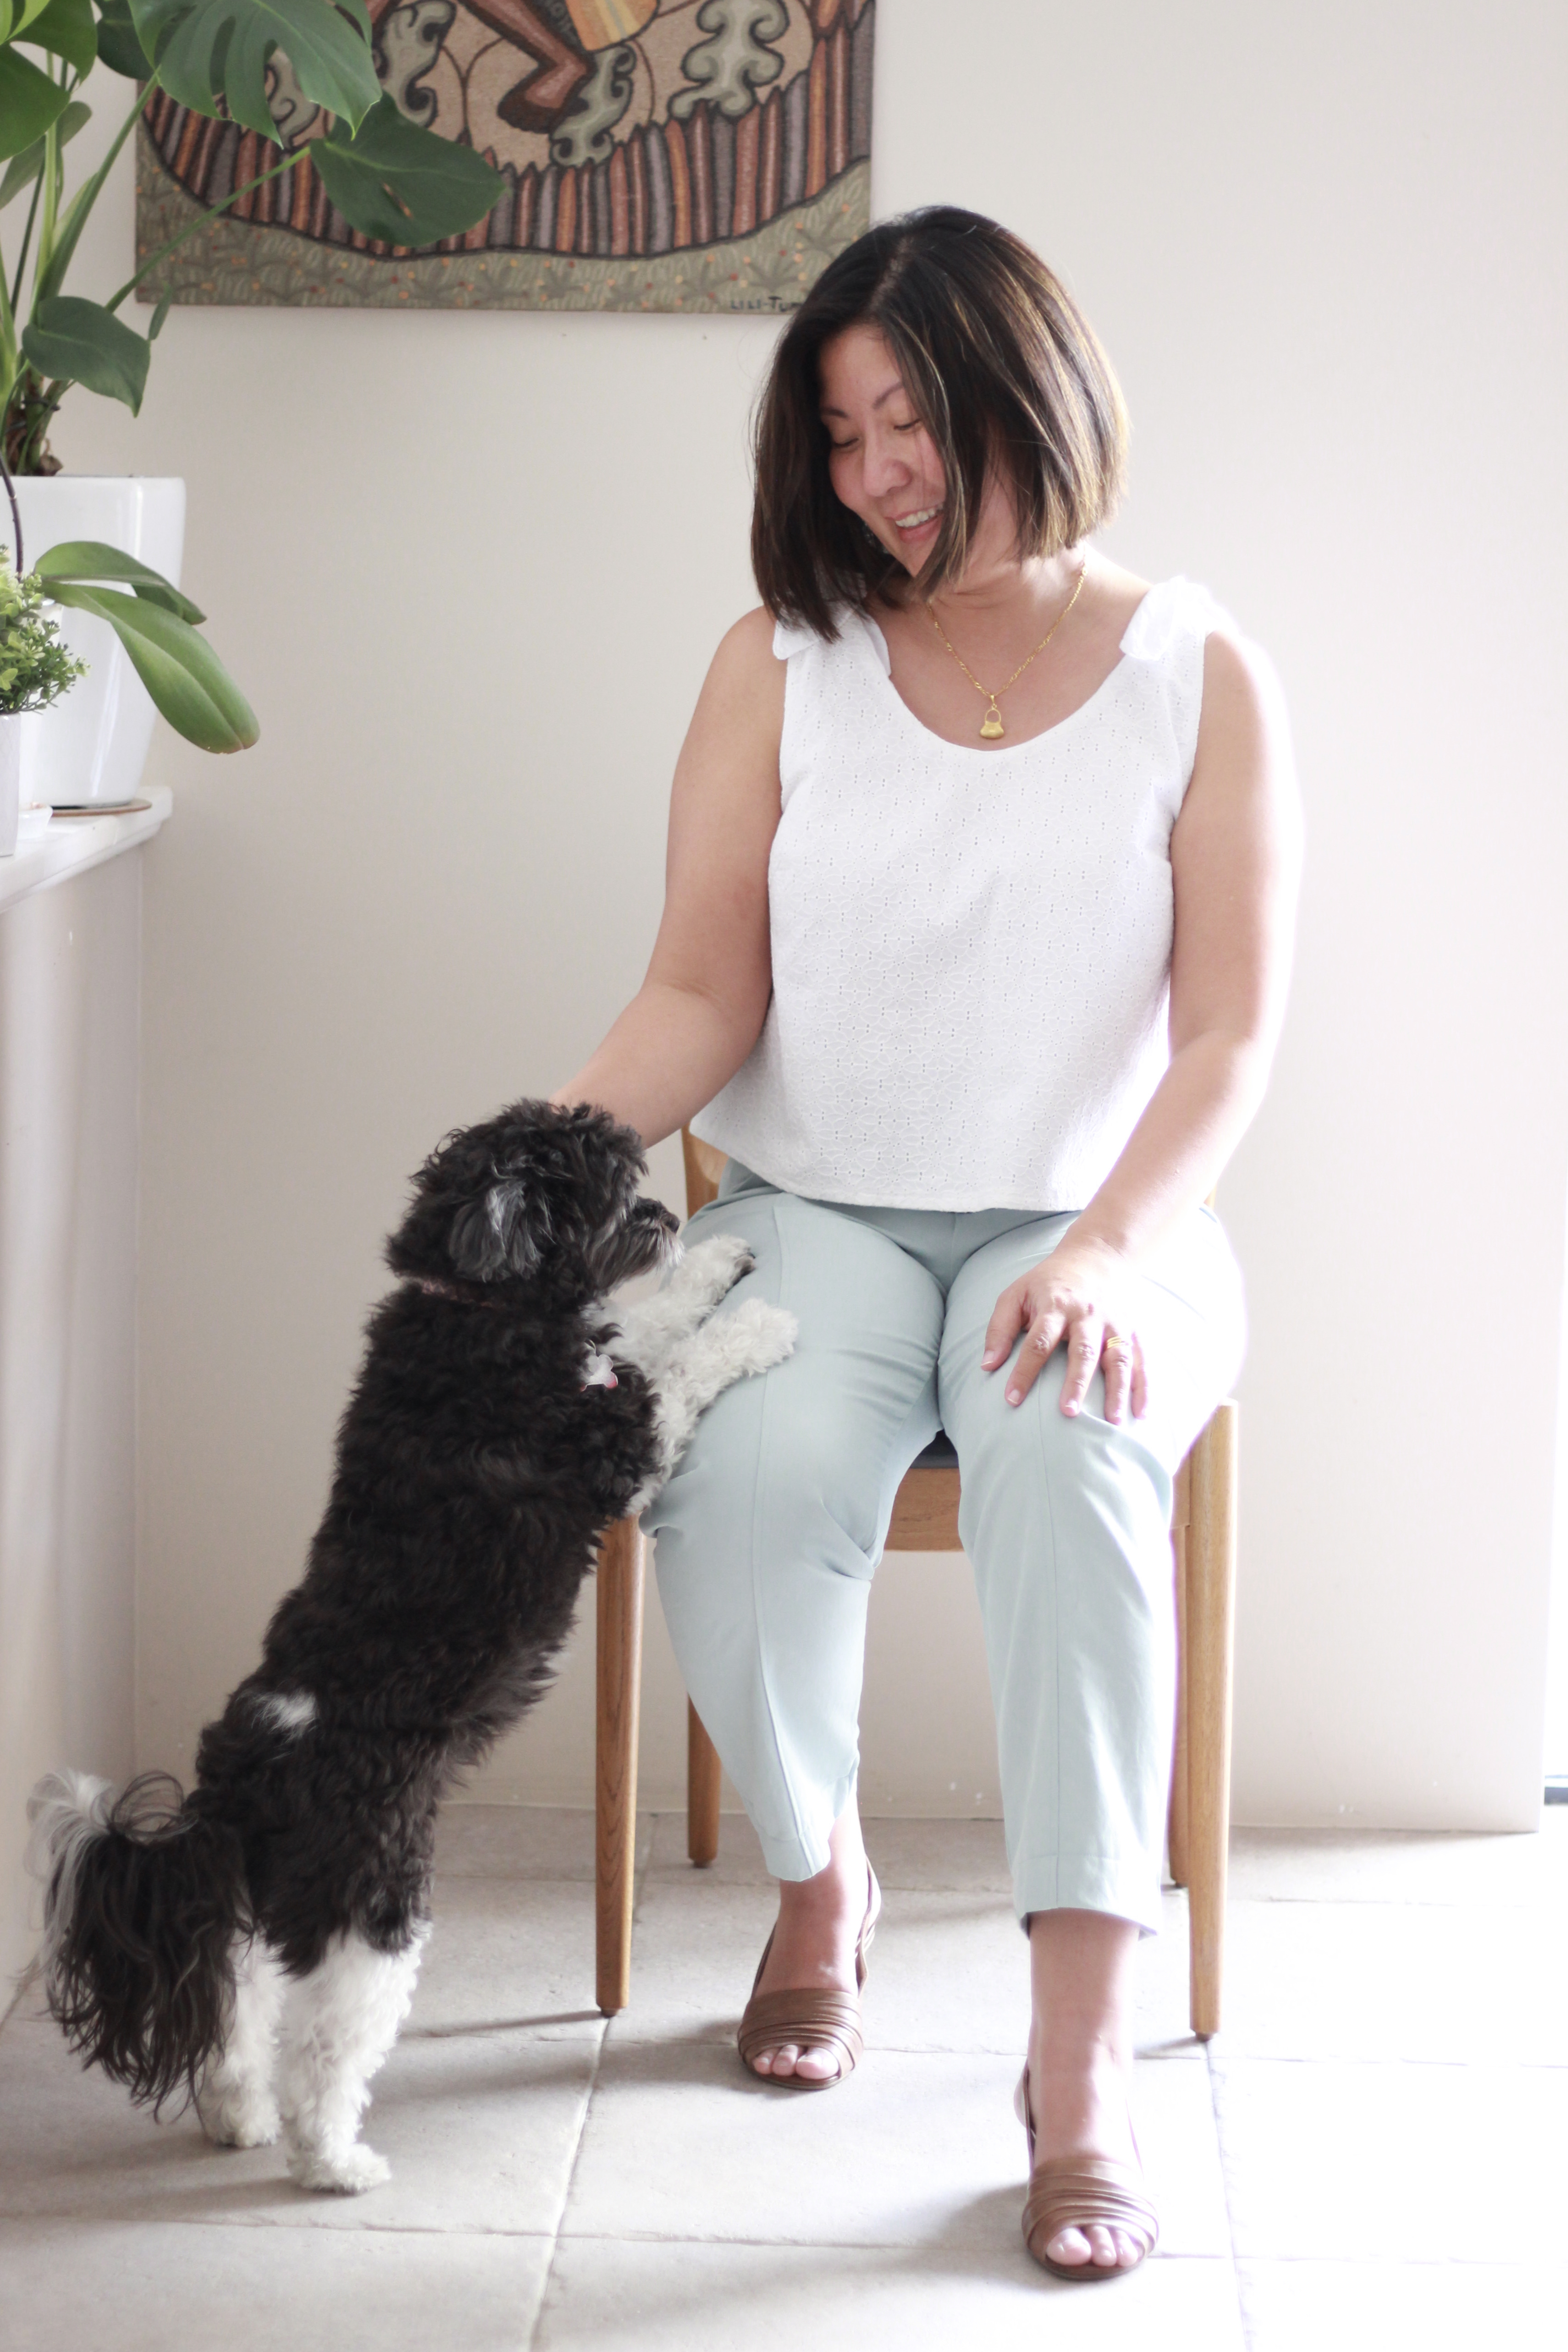
Some sizing notes, I made the size 5 to fit my 33-inch waist and 38-inch hips. When I first pulled on the Palisade Pants, I noticed that I was getting a few horizontal folds in the front and some bagging out along the front panel. I’m a real novice when it comes to pant fitting, but it was curious because I had toiled this before making. (Apologies for not taking photos of these fitting issues).

I was using thrifted fabric for my toile so there were two factors I forgot to take into account. Firstly, there is no stretch in the Cotton Lyocell Drill. Secondly, in my toile, I did not make up the full pocket bags which probably took up more of the ease leaving me with not enough ease around my hips. To adjust the fit, it was an easy case of letting some of the seam out at the hips. The flaring at the front was also simply solved. I realised when I looked closer at the pictures on the pattern that the length of the trousers was slightly cropped at the ankle. So, I removed an inch and a half from the bottom of the hem which made it sit better.

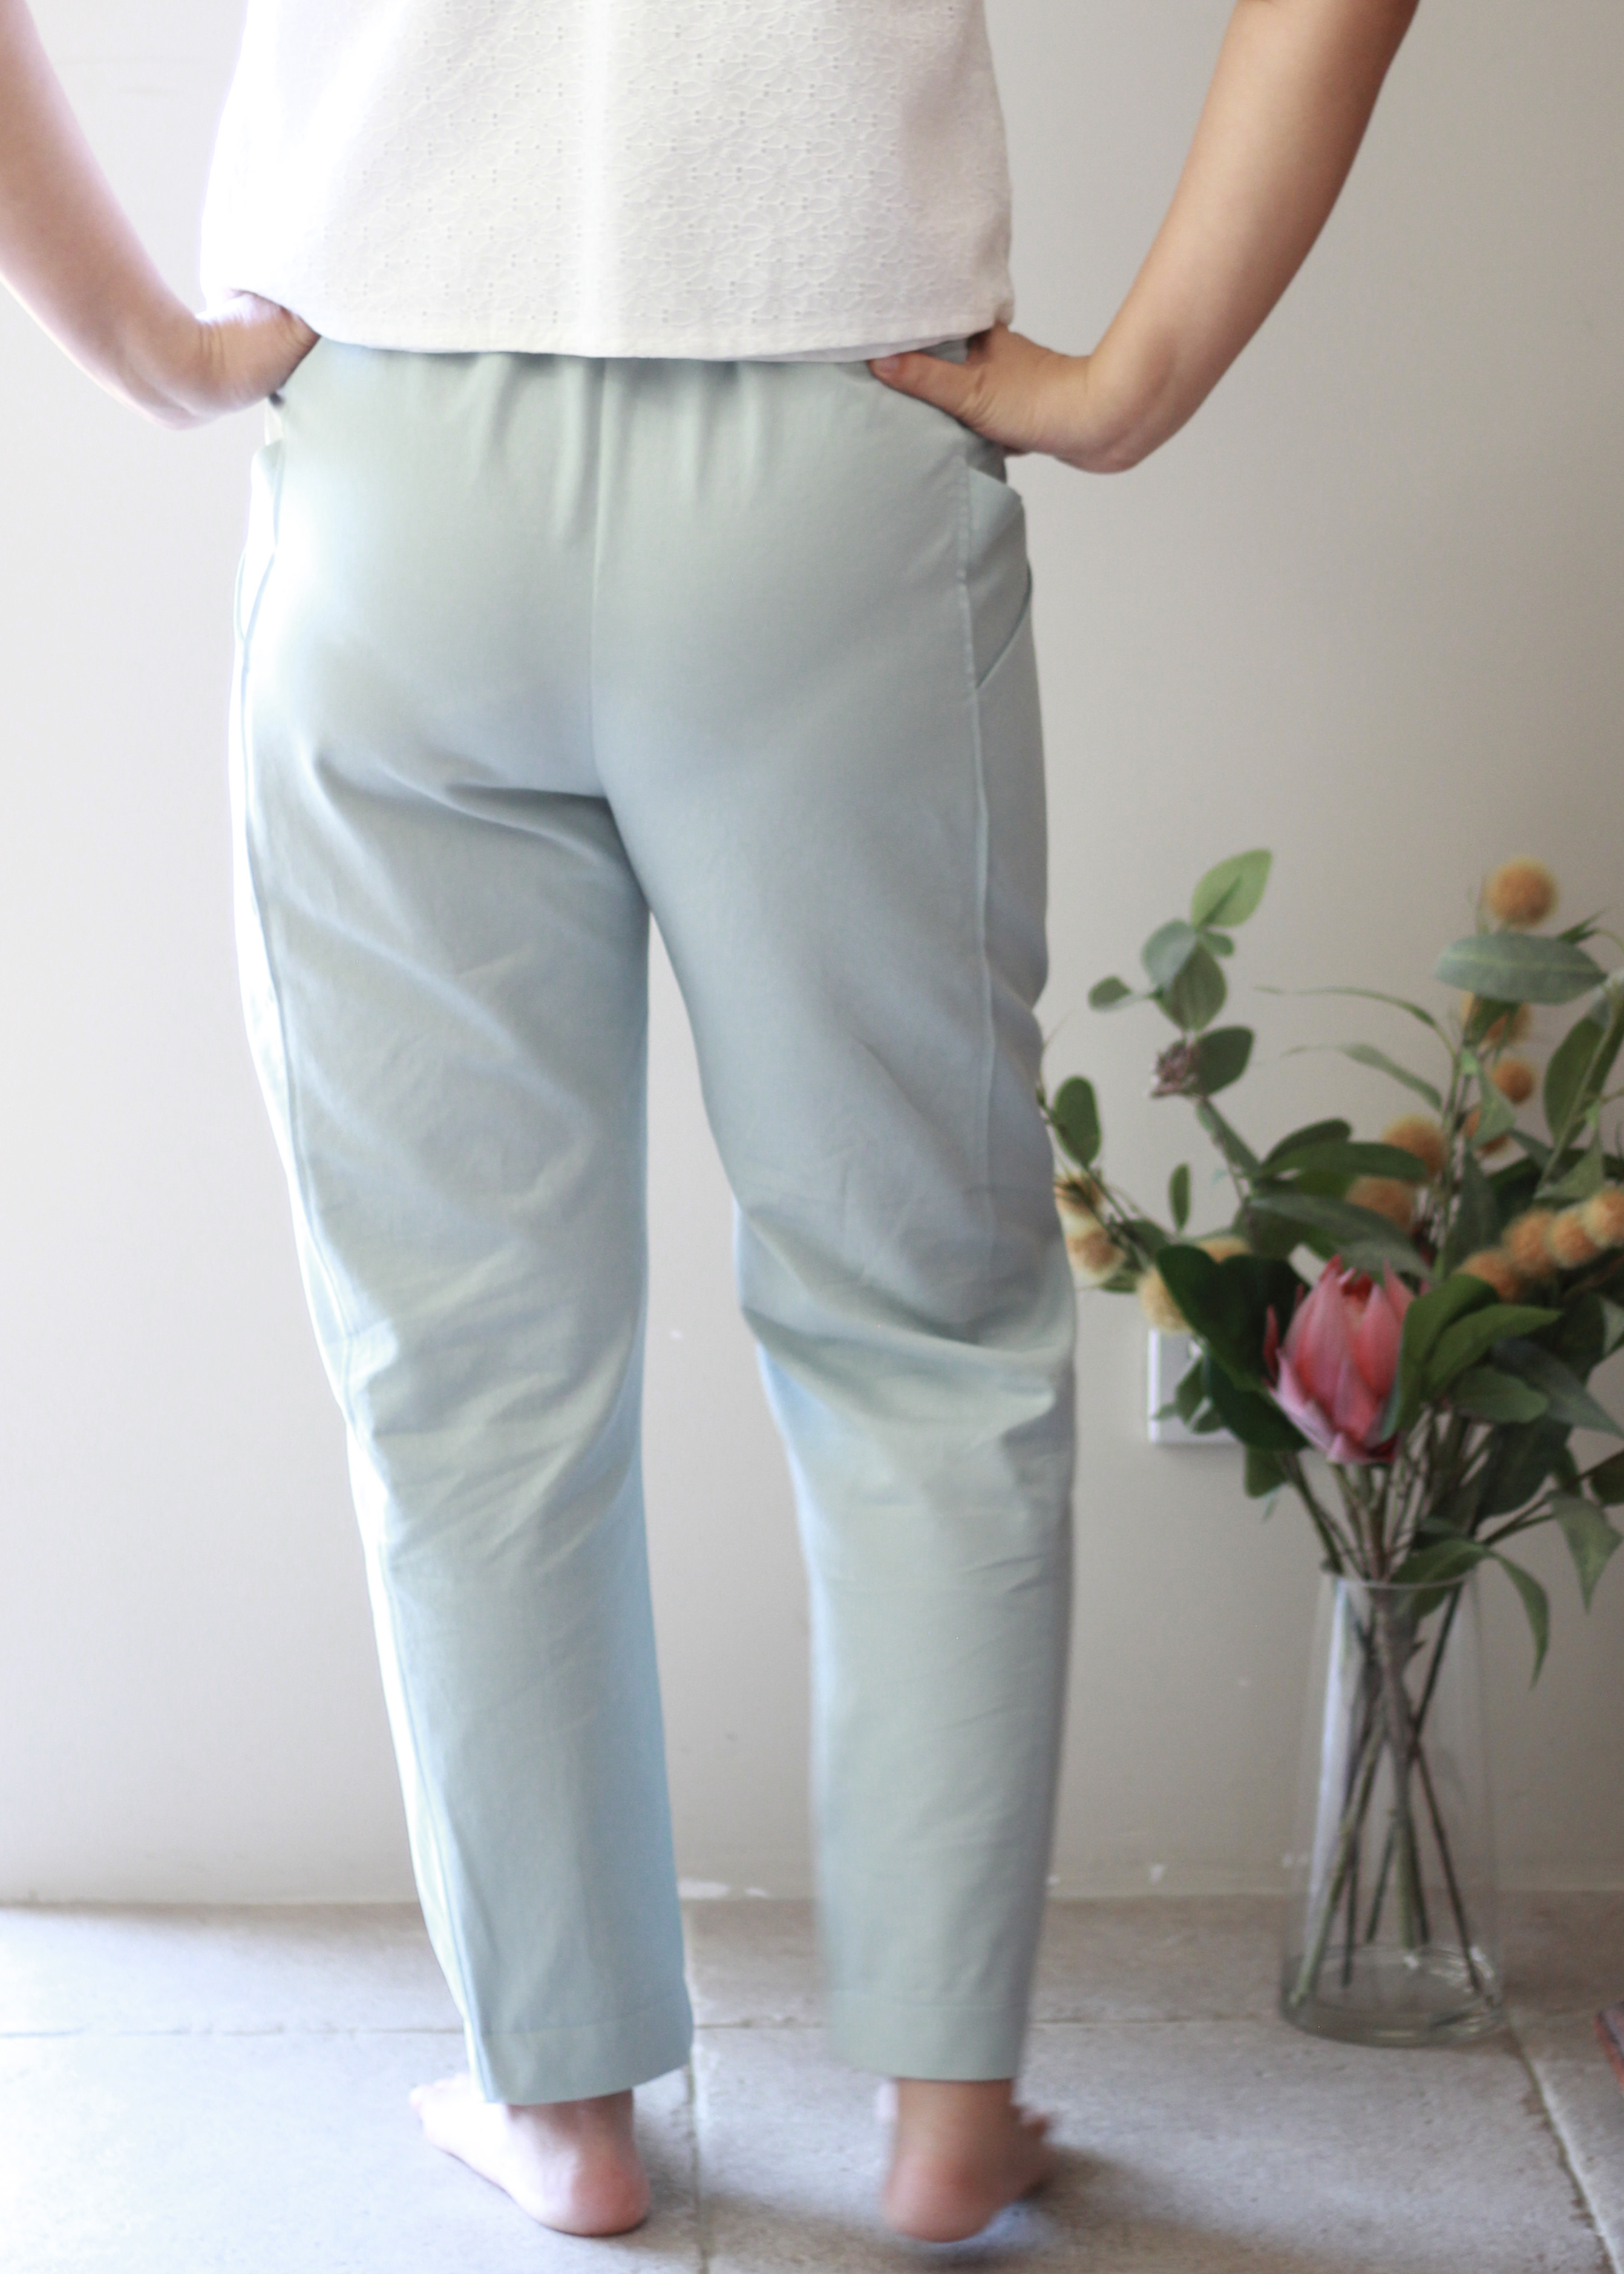
Overall, sewing with the Cotton Lyocell Drill was an eye opener. Maai Design has stocked it in a beautiful array of fun colours. It’s a finer quality drill which is lighter weight than normal drill and it has a softer feel which is great against the skin. My Palisade Pants will be getting a lot of wear in summer! It’s soft and breathable and doesn’t wrinkle as easily as linen.

Thanks for reading and happy sewing!

X Em

Full Disclosure: The Cotton Lyocell Drill fabric was kindly gifted to me in exchange for posts on Instagram and a blog post however all opinions expressed are my own. 

Grace Dress as a Pinafore

First of all, I’d like to say that I love the design of the Grace Dress as it is. The Grace Dress is a result of the creative collaboration of Taree Marsh of Masha Style and Abby Huston of Abby Sews. You can see my previous version of the Grace Dress on the blog. I have finally got some holidays coming up and I wanted something that will be good to wear with the current changeable weather. I love how the pinafore can be paired with a t-shirt or tank top for warmer days or a long-sleeved shirt or turtle neck for cooler days. It’s such a versatile garment. So, when I came back to sew Version A of the Grace Dress, it occurred to me that it could easily be hacked into a pinafore.

Version B Grace Dress

Before I get into the hack, have you ever thought about personalising your garments with a bit of embroidery? On a whim, I thought I would try it. Embroidery isn’t as difficult as I thought it would be. I’m definitely hooked so I’ll be putting together a bit of a “how-to” in the future. Make sure you don’t miss out by tapping on the follow button for future blog posts!

Trying out embroidery

Basically, the pinafore was invented as a protective garment for your dress. It was like an apron that could be worn over your “good” clothes. Very practical at a time when washing your clothes (especially heavy dresses) meant hard labour and was done with muscle power not a machine. Of course, that application no longer applies and we’re now lucky enough to be able to do our laundry by pressing a few buttons. As mentioned earlier, I like the pinafore for its versatility as a garment.

Okay, I started the hack by thinking about the front bodice neckline and the armscye. It is usually worn over another dress or shirts so there needs to be enough room to fit over whatever is worn underneath. So, I started by scooping out the neckline and the armscye. The neckline was deepened by two inches and I graded back to the curve to make sure that the neckline was not widened with that. 

The armscye was a bit more difficult. I was a bit fearful at first and made quite a shallow cut. Probably only deepening it by 1.5 inch but I later deepened this leaving 4 inch from the bottom of the bodice. I realised that the deepened “arm opening” was quite a distinct feature of the pinafore. Now that I had deepened the armscye, it is natural that the dart was no longer required. It’s important to meet the back armscye with the front so I went ahead and matched that up.

Essentially that was the only modification needed! I told you it was simple. Version A of the grace is fastened by these cute ties on the shoulders. I’ve sewn them together so they stay fastened without any risk of unravelling. It would also be cute to do the buttoned version of the shoulder strap!

Thank you for reading and happy sewing!

X Em

Romy Wrap Dress

Dress Hack

I first made the Romy Wrap Top from Pattern Scout last year when I had only been sewing for about 6 months. It’s a testament to her fantastic instructions that I could make such a beautiful top with my rudimentary set of sewing skills. I’ve since also sewn the dress version as well. The Romy Wrap dress is uniquely fastened with buttons and has a slender silhouette. 

This time, I wanted to use the pattern to make a maxi dress with the sleeve expansion that was released for the pattern. I’ve been seeing a lot of ground skimming, floor length dresses inspired from the sixties. I found a beautiful rayon crepe from Spotlight Stores which had a beautiful field-of-poppies print in a mix of clementine and yellow on a field of green. Rayon crepe is beautifully sheer with a slight texture. It also has some weight to it, so it has a beautiful drape which just skims over the body in the most flattering way. However, it has a bit of “bounce” so if you’re a beginner like me, just be careful not to stretch the fabric as you’re sewing. Also, when cutting, it might be better to use a rotary cutter especially for tricky curves. My final tip is not to skip the stay stitching (don’t learn the hard way!)

There is a very comprehensive tutorial on the Pattern Scout Blog as well as a YouTube video so have a look there when you sew along but this is an account of my sewing process.

Firstly, I needed to lengthen the skirt piece. I didn’t have a firm idea of the extra length needed but I estimated about 10 inches and lengthened from the hem grading the curve as I approached the waistline. This was repeated for the back skirt piece as well. 

Then I went ahead and added the stay stitching around the neckline and the armscye as well as all the tucks on the front and back bodice pieces.

I also wanted to add another tip, which is to iron as you go. It just neatens the seamlines which can get a bit wavy with this bouncy fabric.

Ironing will save you when you’re pinning!

Once I attached the skirt pieces to their corresponding panels, I then pinned and attached the front interfaced facings. The corner was a bit tricky, so I just sewed slowly and I found it easier to sew with the interfaced side up. 

The next step was to sew on the yoke. The yoke is the piece that attaches the front panels to the back bodice and skirt. The instructions are very detailed, and I just followed them but I have heard that other people have used the “burrito” method which I have also used in other patterns. Maybe this is something I could try in the future but with my lengthened skirts, it could be too bulky.

Now, getting the sleeves on was initially confusing because I kept getting extra fabric and I thought I had cut the wrong size. But when I compared the expansion pack instructions to the initial pattern, I realised that there was a bit of instruction missing. In the original, the sleeve is gathered along the yoke seam and don’t worry, I’ve contacted Casey at Patternscout so she knows. So happily, with this sorted, I could attach the sleeves and finish them. I love bishop sleeves for the fullness in the cuffs. 

The final part was to finish the hems before making buttonholes for the buttons. Now, I always must resist sewing up the hem too soon. With fabrics that have a bit of stretch, or with dresses cut on the bias, the dress should be allowed to hang on a hanger or dummy for at least a few hours. I had to trim the hem to even up the hemline before sewing up.

Thanks for reading and happy sewing!

X Em

Meridian Dress II

This is the Meridian Dress Mark II. I have already shared my previous version of this lovely dress, but I just wanted to share another one as I’ve sewn a version with sleeves, which is as intended by the original pattern from Papercut Patterns. Because I had made a toile, this did not take much time to sew up.

The fabric I’ve used is a Tencel Twill fabric that was snapped up at the Megan Nielsen in-store sale back in June. I was assisted by Belle (she models the curve range and blogs on the Megan Nielsen site) who was so helpful and lovely. I had already earmarked the Meridian Dress to sew but was looking for the right fabric. She brought out the Tencel Twill which had the drape I was looking for and of course, the dusky pink colour is so beautiful and hard to resist. When I bought ready to wear, I never really thought much about fabric. Of course, I enjoyed the colour and the pattern as well as the feel of the fabric but never really investigated what would match a certain design. 

So, what is Tencel? I was so surprised to find out that Tencel is made from wood pulp! Such a bonus to know that it’s a natural fibre. It’s also known for being breathable and highly absorbent so it’s great for any season being cool for summer and warm in winter. Wait, there’s more! Apparently it’s stink proof because bacteria can’t stick to its smooth surface.

I used 2.5 meters of fabric to make my Meridian Dress. Again, I made the size 4 and the only adjustment was to shorten the sleeves to ¾ sleeves. The wrap front bodice does give a lot of ease in the fit so definitely stick to the suggested sizing. If I were to make it again, the only minor adjustment that I would make is a full biceps adjustment. I always forget this and have sadly experienced “dinosaur arms” but it’s not too bad on this so I’ll leave it as is.

Oh! And, can I just make special mention of my invisible zipper installation! I’m so much happier with this. Comparing between my first and second make there has been 100 percent improvement. I always tell my kids that practise makes progress!

Thank you for reading and happy sewing

X Em

Matilda Dress

How is it the end of October already? The Matilda Dress caught my eye in the recent re-release by Megan Nielsen Patterns. I loved the version with sleeves, and I felt that it would be a great dress for the autumn or spring seasons where you can have warm days and cold nights. This has been a bit of a marathon sew and like all marathons, some parts were challenging but it felt like a satisfying achievement in the end.

The challenges mainly came from the fabric I chose. Firstly, the fabric I chose was a cotton blend linen but the weight of it might have been too heavy. Secondly, the fabric was a bit shifty. I think the weave must have been quite loose and without a walking foot, the fabric shifted quite badly when sewn. The loose weave also meant that the fabric frays quite easily. Next time, I will be looking to sew the Matilda with shirting fabric as suggested in the pattern! Despite this, I do love this soft fabric and as it’s slightly thicker, it will be getting a lot of wear until the weather warms up properly.

Packed full of features like pockets and collar

Okay, so onto the features of the Matilda Dress. Basically, I would describe it as a fitted shirt dress. It has two types of pockets, a yoke, collar with collar stand, has a waistband and princess seams. It was so interesting to have so many features in a dress and I was so grateful for the clear tutorials included with the pattern. I needed to refer to it when I was sewing the breast pockets and pocket flaps. I also referred to it again when I was installing the collar and the collar stand. I find that every time I’ve sewn a Megan Nielsen pattern, I learn something, and my skill level grows.

For my measurements of 37:33:38, I sewed the Size 14. No modifications were needed. Interestingly, in the past I’ve usually sewn the size 12 from Megan Nielsen Patterns but the size 14 fits better. I can still wear my other dresses made in the size 12 so I’m not sure if there have been some changes in the drafting? If you know then comment below. 

I managed to get all my pattern pieces from a 3-meter length fabric (I think it was 130cm in width). There were a lot of pieces, so I spent quite a lot of time playing pattern piece Jenga! The linen fabric was from my stash which was why I wanted to spend the time fitting all my pieces in. 

Full length of the dress

I’m not sure I’ve mastered this pattern yet. It will definitely need revisiting in the future but I’m happy to have made the attempt!

Thanks for reading and happy sewing!

X Em

Grace Dress

“Cottage core” is a term that I was introduced to by my daughter when I started to point out these beautiful dresses reflective of an idyllic rural lifestyle which have recently become more popular since last year. I’ve read that it’s society’s reaction to recent global events, making a wholesome, clean lifestyle more attractive. The Grace Dress definitely falls into this category with its vintage vibes. It’s what you imagine wearing if you had a field to roam in carrying a basketful of wildflowers with a backlighting of sunshine (inspiration for my picture).

The Grace Dress is a collaboration between Taree from @marshastyle and Abby from @abby_sews. When they started promoting this, I immediately saved it and waited for the much-anticipated pattern release. I’ve sewn the View B of the dress which has a multi-tiered gathered skirt, buttoned shoulder straps and a casing for some waist-ties (very flattering). Oh! I also have to mention that it has generous pockets!

I made the size 8 with my measurements of 37 Bust, 33 Waist and 38 Hips. It has a great size range from 31:24:34.5 to 59:52:62.5 and after saying that I usually try to make a toile in my last blog post, I must confess that I just went straight into it without a toile with this sew because of the ease in finished garment. I’ve used this mustard yellow gingham fabric from Spotlight Stores. Gingham adds to that idyllic county aesthetic that I wanted with this dress. 

To start the sew, I prepared the straps and put together the bodice. Pretty standard construction with darts for the bodice. I used a white muslin for the lining pieces. The Grace Dress Pattern has lovely instructions for French seams, but I decided to finish with an overlocker. 

When you move onto the skirt, you’re putting in the pockets from the side seams. As mentioned above, I’ve decided to use an overlocker to finish my seams. To do this, I neaten my pocket pieces and neaten the skirt side seams on my overlocker. Then I attached the pocket pieces to the skirt pieces – make sure you keep the paired pocket pieces on the same side and be careful that you have the pocket markings at the same level for the front and back skirt pieces otherwise you’ll be frustrated by wonky pockets.

Skirt pieces are then gathered, and the longer bottom tier is attached to the top tier of the skirt. Now, how long is too long? This is a pattern made for 5’7 height which I did not modify. I really wanted a maxi dress and crave that swishy feel of a long skirt. 

The most interesting part of the dress in View B is making this channel for waist ties. Skinny straps and ties are the bane of my sewing life. Yes, I have a loop turner. No, it doesn’t make it any easier. Yes, it still took me about an hour and a lot of swearing. Anyway, that doesn’t take away from this interesting little feature. This little feature sets it apart of from other tiered dresses as it cinches the fabric in at the right spot to make a very flattering silhouette. I chose to hand baste the lining before using the stich-in-the-ditch method to finish. 

The final part was to sew the buttons in to finish the shoulder straps. In my initial try-on of the dress, I realised that I have slightly sloping shoulders which made the straps gap quite badly. After some thought, I decided to sew the straps on a slight angle which also ensures that there won’t be any wardrobe mishaps. I’ve still attached the button as I had already sewn the buttonholes.

Here are some close-ups of the beautiful Grace Dress!

Thanks for reading and happy sewing!

X Em

Meridian Dress

With the onset of spring here in Perth, I thought I would tackle The Meridian Dress by Papercut Patterns which has been on my Make Nine Sewing Challenge List. The dress has a beautiful silhouette with an easy to fit wrap front. I jokingly told a friend that I was making this dress to go to dinner parties with because the wrap front makes it easy to adjust for a full belly! But actually, it really does work to make it a very comfortable dress to wear. Like most women my dress size can go between two sizes in one month – I work in women’s health and this is a common complaint. This is also often why we’re sometimes caught out with, “nothing to wear” when a last minute event pops up and we haven’t had a chance to check the current fit of a “going out” outfit.

I’ve sewn the size 4 for my measurements of 37 Bust, 33 Waist, 38 Hips. The finished measurements range from B34.6:W24.4:39.2 to B51.2:W40.9:H55.7. No adjustments were needed for my sew. The front wrap bodice had a very interesting construction and the main thing to watch out for is the attachment of the front bodice to the skirt. There is a chance of a hole if you miss catching the panels of fabric where the wrap meets so just go slowly and I also hand basted that part with a coloured thread to make sure I wouldn’t miss it.

The fabric I used was a thin polyester crepe which was a beautiful green with small flowers. I chose it because of the wrap front. I felt that a bulky fabric might spoil the silhouette. This also meant that I had to modify how the facing was sewn. It was attached in the usual way at the neckline and zipline, but I didn’t sew down three inches from the edge. Instead, I stitched in the ditch at the waistline and the shoulder seams.

Also, I think it’s time I invested in an invisible zip sewing foot. I’m still attaching mine with a normal zipper foot and I found it a bit difficult this time. It might have also been the needle as I was using a 70/10 for the fine, delicate fabric but perhaps should have sewn the zip with a heavier needle. Do you change your needles when sewing? Comment below. Anyway, it came together in the end and I love the back view of this dress. I’m hoping to find a prettier button for the dress in the future.

So, this is actually my wearable toile for this pattern. Sometimes I toile with spare cheaper thrifted fabric and sometimes I dive in with a cheaper fabric that’s wearable but I try to always toile. This fabric was a real bargain at $9 per meter from Spotlight Stores so I bought about two meters. I only had enough for the dress without sleeves which I’ve ended up really liking. I wear cardigans all the time, even in summer so sleeveless is often more comfortable for me. I will be making this dress again and I will be attaching the sleeves in the next one. To finish the armscye, I made some bias binding. It’s such a satisfying process! 

The Meridian Dress is such a flattering, elegant dress and I’m definitely giving it 10/10 for design and instructions. A very satisfying sew and good for an advanced beginner.

Thanks for reading and happy sewing!

X Em

Fern Top and Dress Hack

September brings with it the promise of sunshine and finer weather. So, naturally, I’m starting to think about a summer wardrobe. I do often wonder if I should start working on my summer wardrobe in winter and sew up my cold weather wardrobe in summer. Anyway, I had always meant to sew up another Fern Top from Pattern Scout Studios. I then saw a mention of a dress hack so I decided to go ahead and do this!

The original pattern is a pretty top that has a central panel with a round collar which the dolman sleeve pieces attach to. Then Pattern Scout released the square neck extension pack which was what really sold me. I really love a square neckline! So, my first version of this pattern was the square neckline version of the top. 

This time I’ve sewed the square neckline again but decided to use the free tutorial for the flutter sleeves. So, most of the hard work for this hack was actually done! I just added the skirt by using two rectangular pieces and gathering the top of the skirt and attaching this to where the “skirt” of the top would’ve attached to.

I should also mention that I had fully lined my dress with muslin. I used a divinely floaty, sheer, lightweight “seaweed stripe” linen that I was lucky enough to score at the in-store sale at Megan Nielsen’s shop in June. I didn’t know at the time what I was going to make out of the fabric but it was too good to pass up and I’m only just starting to feel confident enough to invest in my fabrics. I bought two meters of this linen which was just right for this make. So, getting back to the sheerness of the fabric, it’s beautiful and light but quite see-through so for modesty’s sake and so my family don’t disown me in public, the muslin was a perfect pick to line the dress with.

This dress is so comfortable to wear. It’s not quite warm enough yet but the baby-doll style is great for those sticky and humid summer days. Hopefully this will inspire someone to give it a go! The Fern Top is great as-is but such a wonderful bonus with so many options to customise it.

Thanks for reading and happy sewing!

X Em

Pietra Pants

Just for something different, I thought I would write about my sewing process. I first came across the Pietra Pants by Closetcore Patterns last year and hadn’t really tackled sewing any trousers. Sewing pants is intimidating because of some of the fit issues that I’d read about but it was recommended to me because it has a fitted flat front look but fit issues are less of an issue because of the half elasticised waist. This is Version A and is the cropped version.

So, the sew starts with the interesting pocket construction. When I sewed this last year, I felt like it was a bit of a puzzle or origami but seemed straight forward in this sew. This is about the fourth time I’ve made this pattern so I should’ve worked it out by now.

Once the pockets are attached then it’s a simple matter of attaching the two front panels together.

This is then added to the front waistband which is made up of three pieces.

We now then move onto the back panels and sew them together and then attach this to the back waistband. At this stage, I was a bit panicked thinking that I had chosen to sew the wrong size as it looked rather large but just remembered that it is elasticised so most of the volume will disappear!

The next part is to attach the front panels to the back panel. I’ve taken a few more pictures of the waistband here because when I first sewed this, I had to read the instructions about ten times. I’m still not sure I have it exactly correct but it worked out so I’m happy. Also, when you attach the elastic on, just remember that to check that you haven’t accidentally flipped it causing a twist in the elastic.

The elastic is then encased in the waistband with some blind stitching. This used to freak me out because when I first started sewing I had a very basic machine without any speed control. So, I would line up the seam and hang on and pray for a straight line. Now, I’m blessed with a new machine my husband bought me for my birthday (that I dropped about a hundred hints for) which comes with speed control so I just take it very slow here. To help get a neat finish I also hand baste the waistband.

Finally, before hemming the pants, I sew up the elastic as pictured. Definitely not something to skip because it helps to shape the back of the pants. 

So excited to have this in my Spring/Summer wardrobe! I’ve paired it here with my Frankie Tankie. It’s going to be a great staple especially in this neutral colour.

Thanks for reading and happy sewing!

X Em

Sandeep Dress

Lately, my sewing has had to take a backseat to other commitments. Sewing has become my go to activity for a bit of “me-time” so in the face of a busy month, I decided to pick a pattern that I could sew a little at a time but also something a bit different and challenging. By Hand London is well known for their beautiful dresses. I recommend it to anyone who needs a special occasion dress! From BHL, the Sandeep Dress,“ has a close fitting bodice with V shaped darts, raglan flutter sleeves and a square faced neckline. Two asymmetric circle skirts are joined to a straight underskirt at the waist and mid thigh …”. For me, this pattern falls into the country chic, prairie chic or cottage core aesthetic. 

Okay, this pattern uses a lot of fabric. I ended up using about 5 meters! So, needless to say, a toile was essential. I decided to toile the bodice. My measurements of 37 Bust, 33 Waist and 38 Hip put me in the Size 14 (UK) range. The bodice fit well but the raglan flutter sleeves needed a slight adjustment. I brought the front sleeve seams in by 1 cm and that made it sit well without the sleeves falling off my shoulders. I love all the tips given in the pattern on adjustment and sizing. The BHL website also has great free resources. Despite these tips, I still managed to make a big rookie mistake which was that I didn’t realise I needed to iron the rayon crepe fabric before sewing! Also, another mistake was that I’d made the toile in a different fabric. I used a cotton for a toile which was stiff so initially I thought my sizing was a UK size 16. This resulted in a bodice that was too big so I had to restart the dress (a couple of weeks lapsed before the restart as I tried to figure out how to fix it and realised that restarting was the only way to move on).

I’m thrilled with the dress! It was worth all the effort and I really enjoyed taking it slow with my sewing and working on all the details. I love styling the dress with these ankle boots. It’s a little bit of a juxtaposition being paired with such a feminine dress. 

Thanks so much for reading and happy sewing!

X Em