Helmi Blouse II

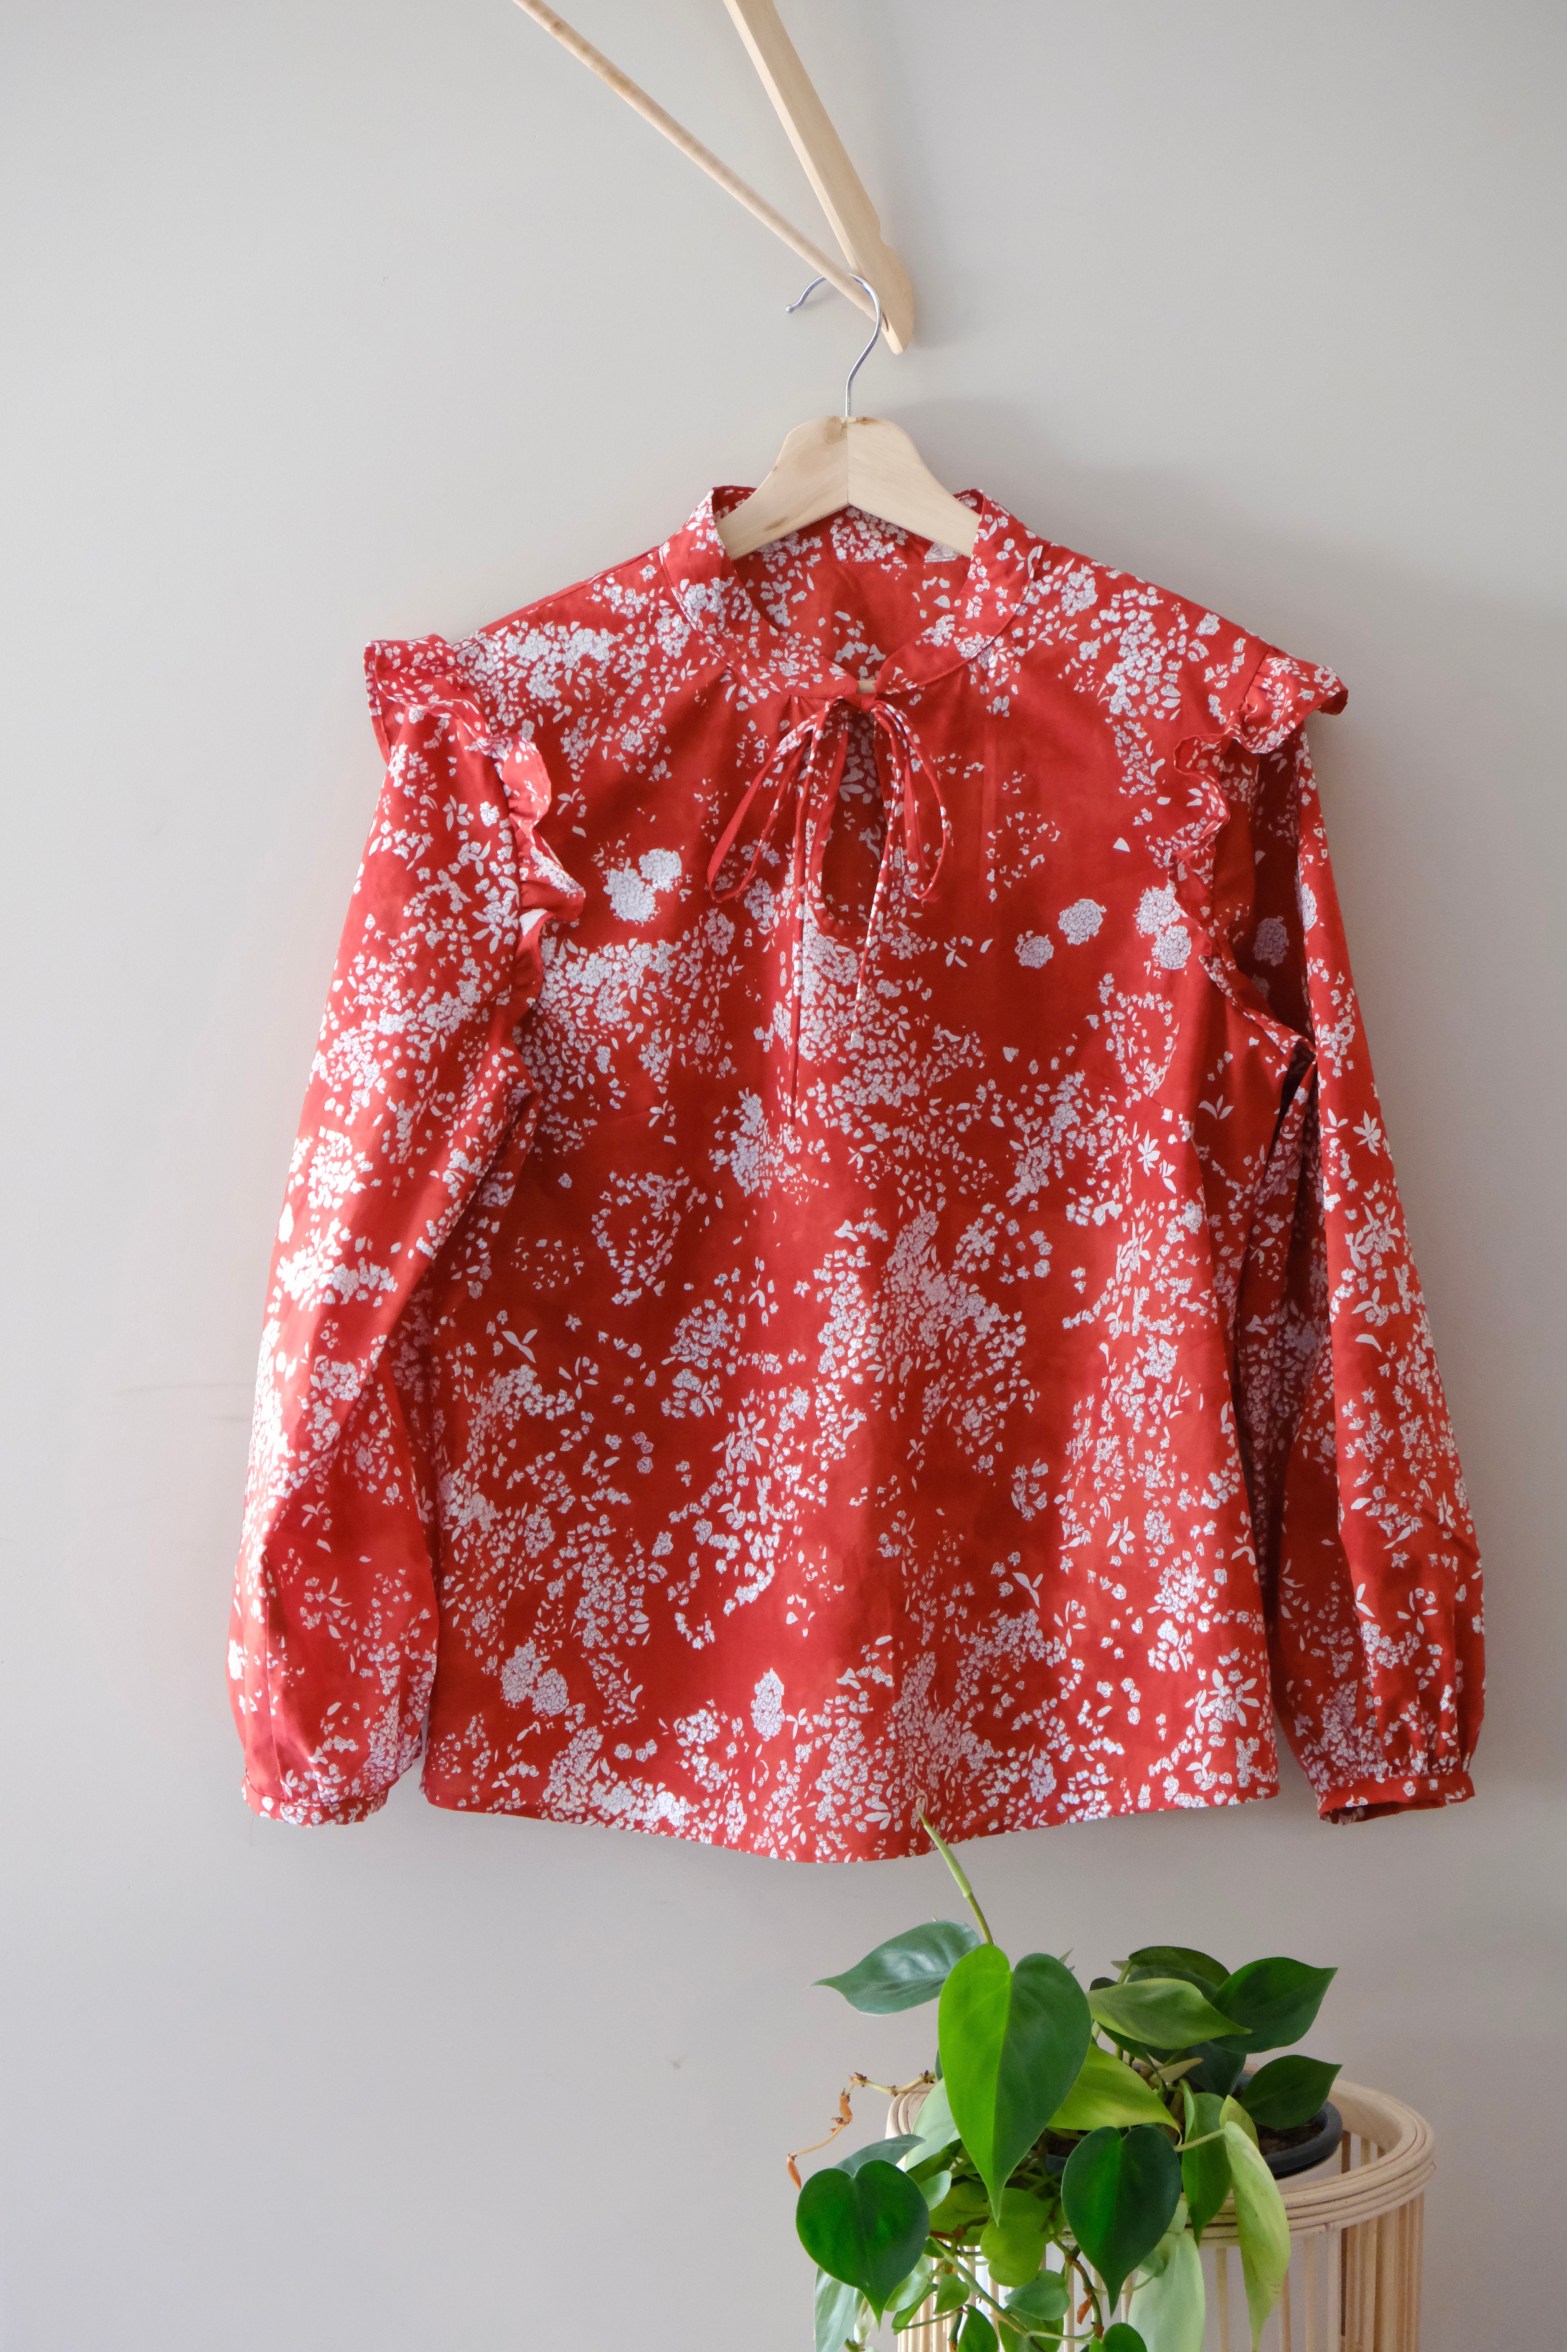
Featuring Nani IRO Lei Nani Organic Cotton Lawn Fabric from DIY District

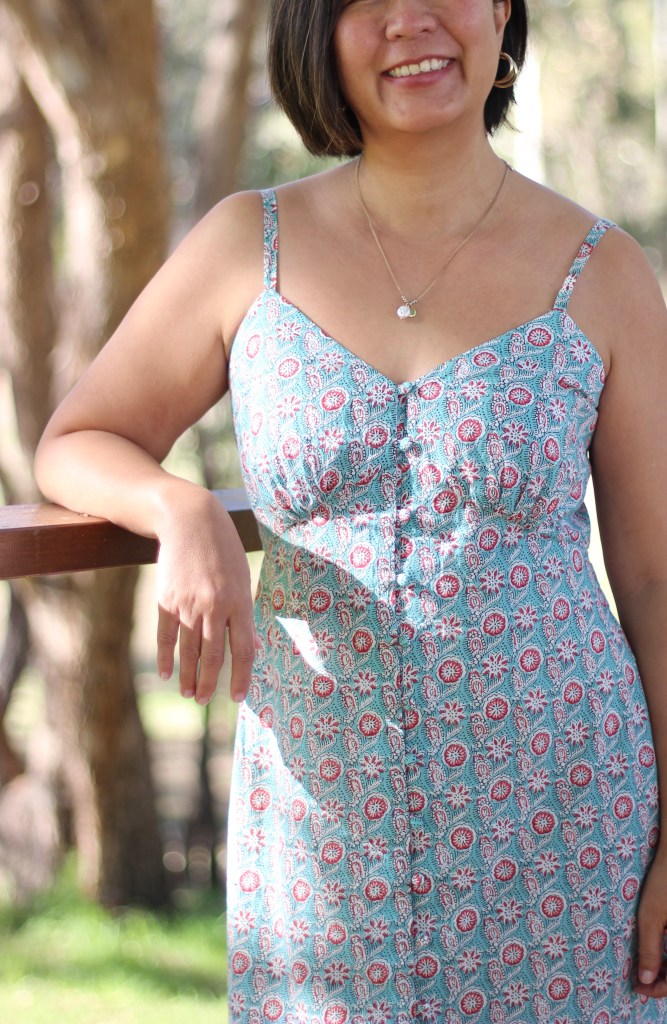
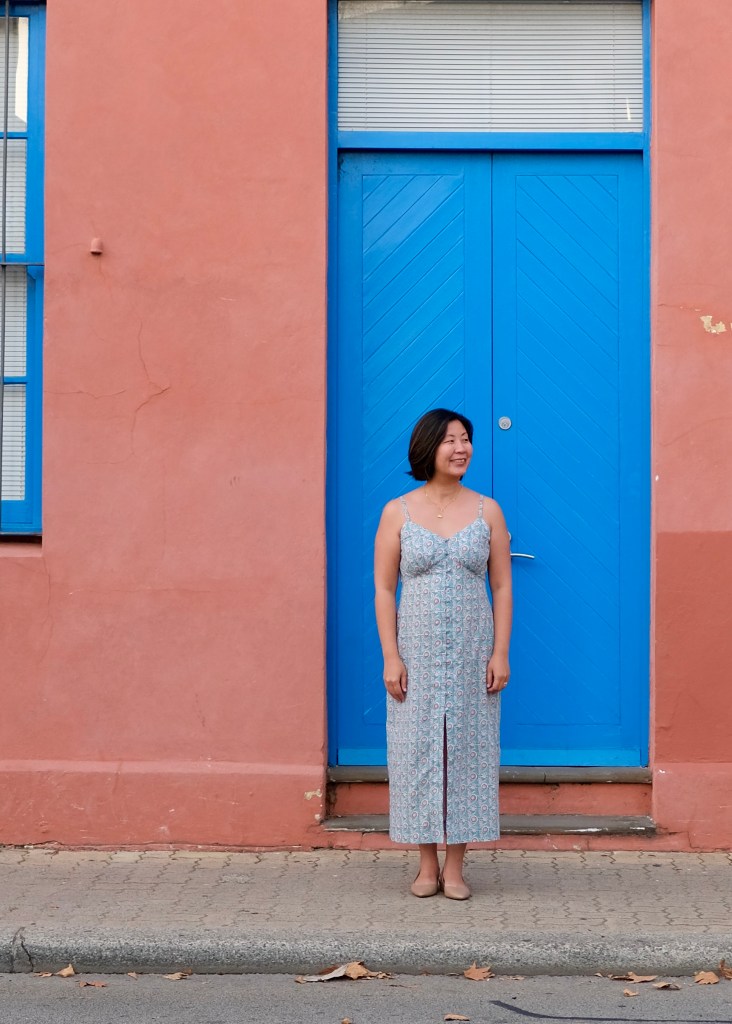
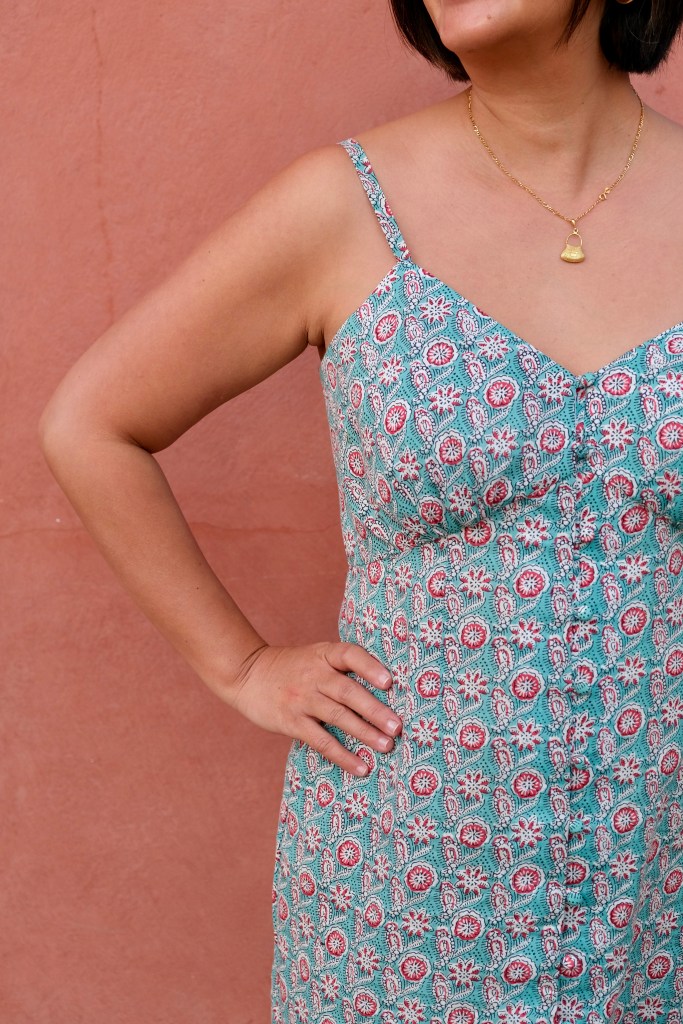
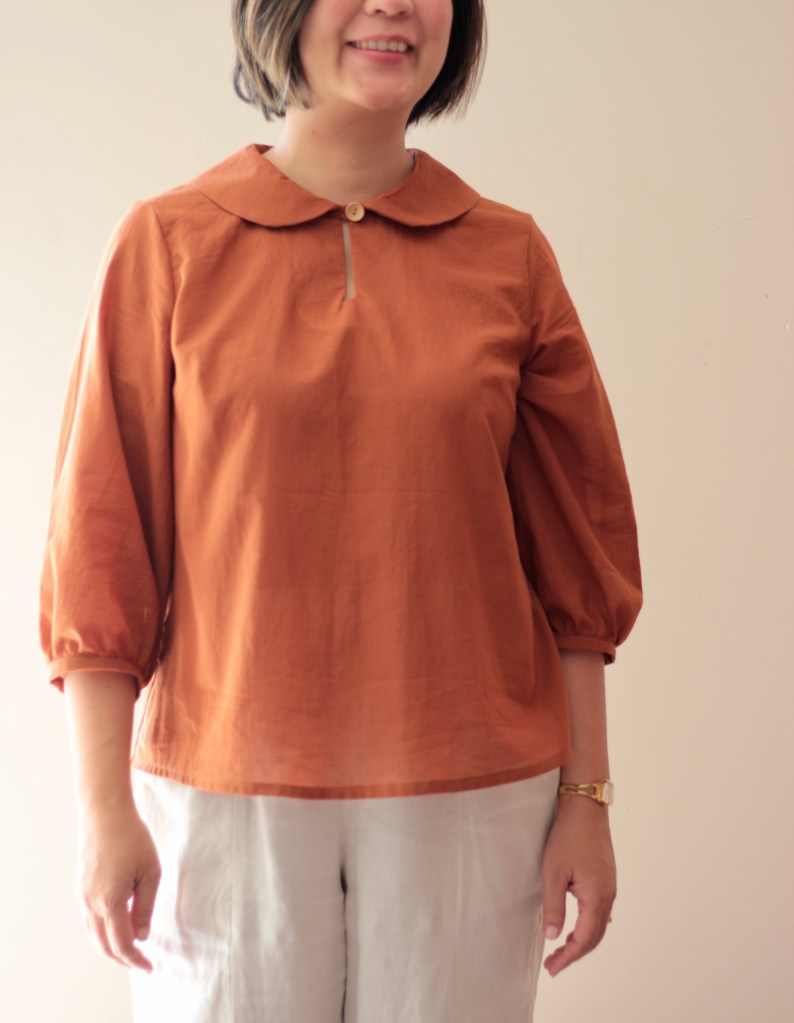
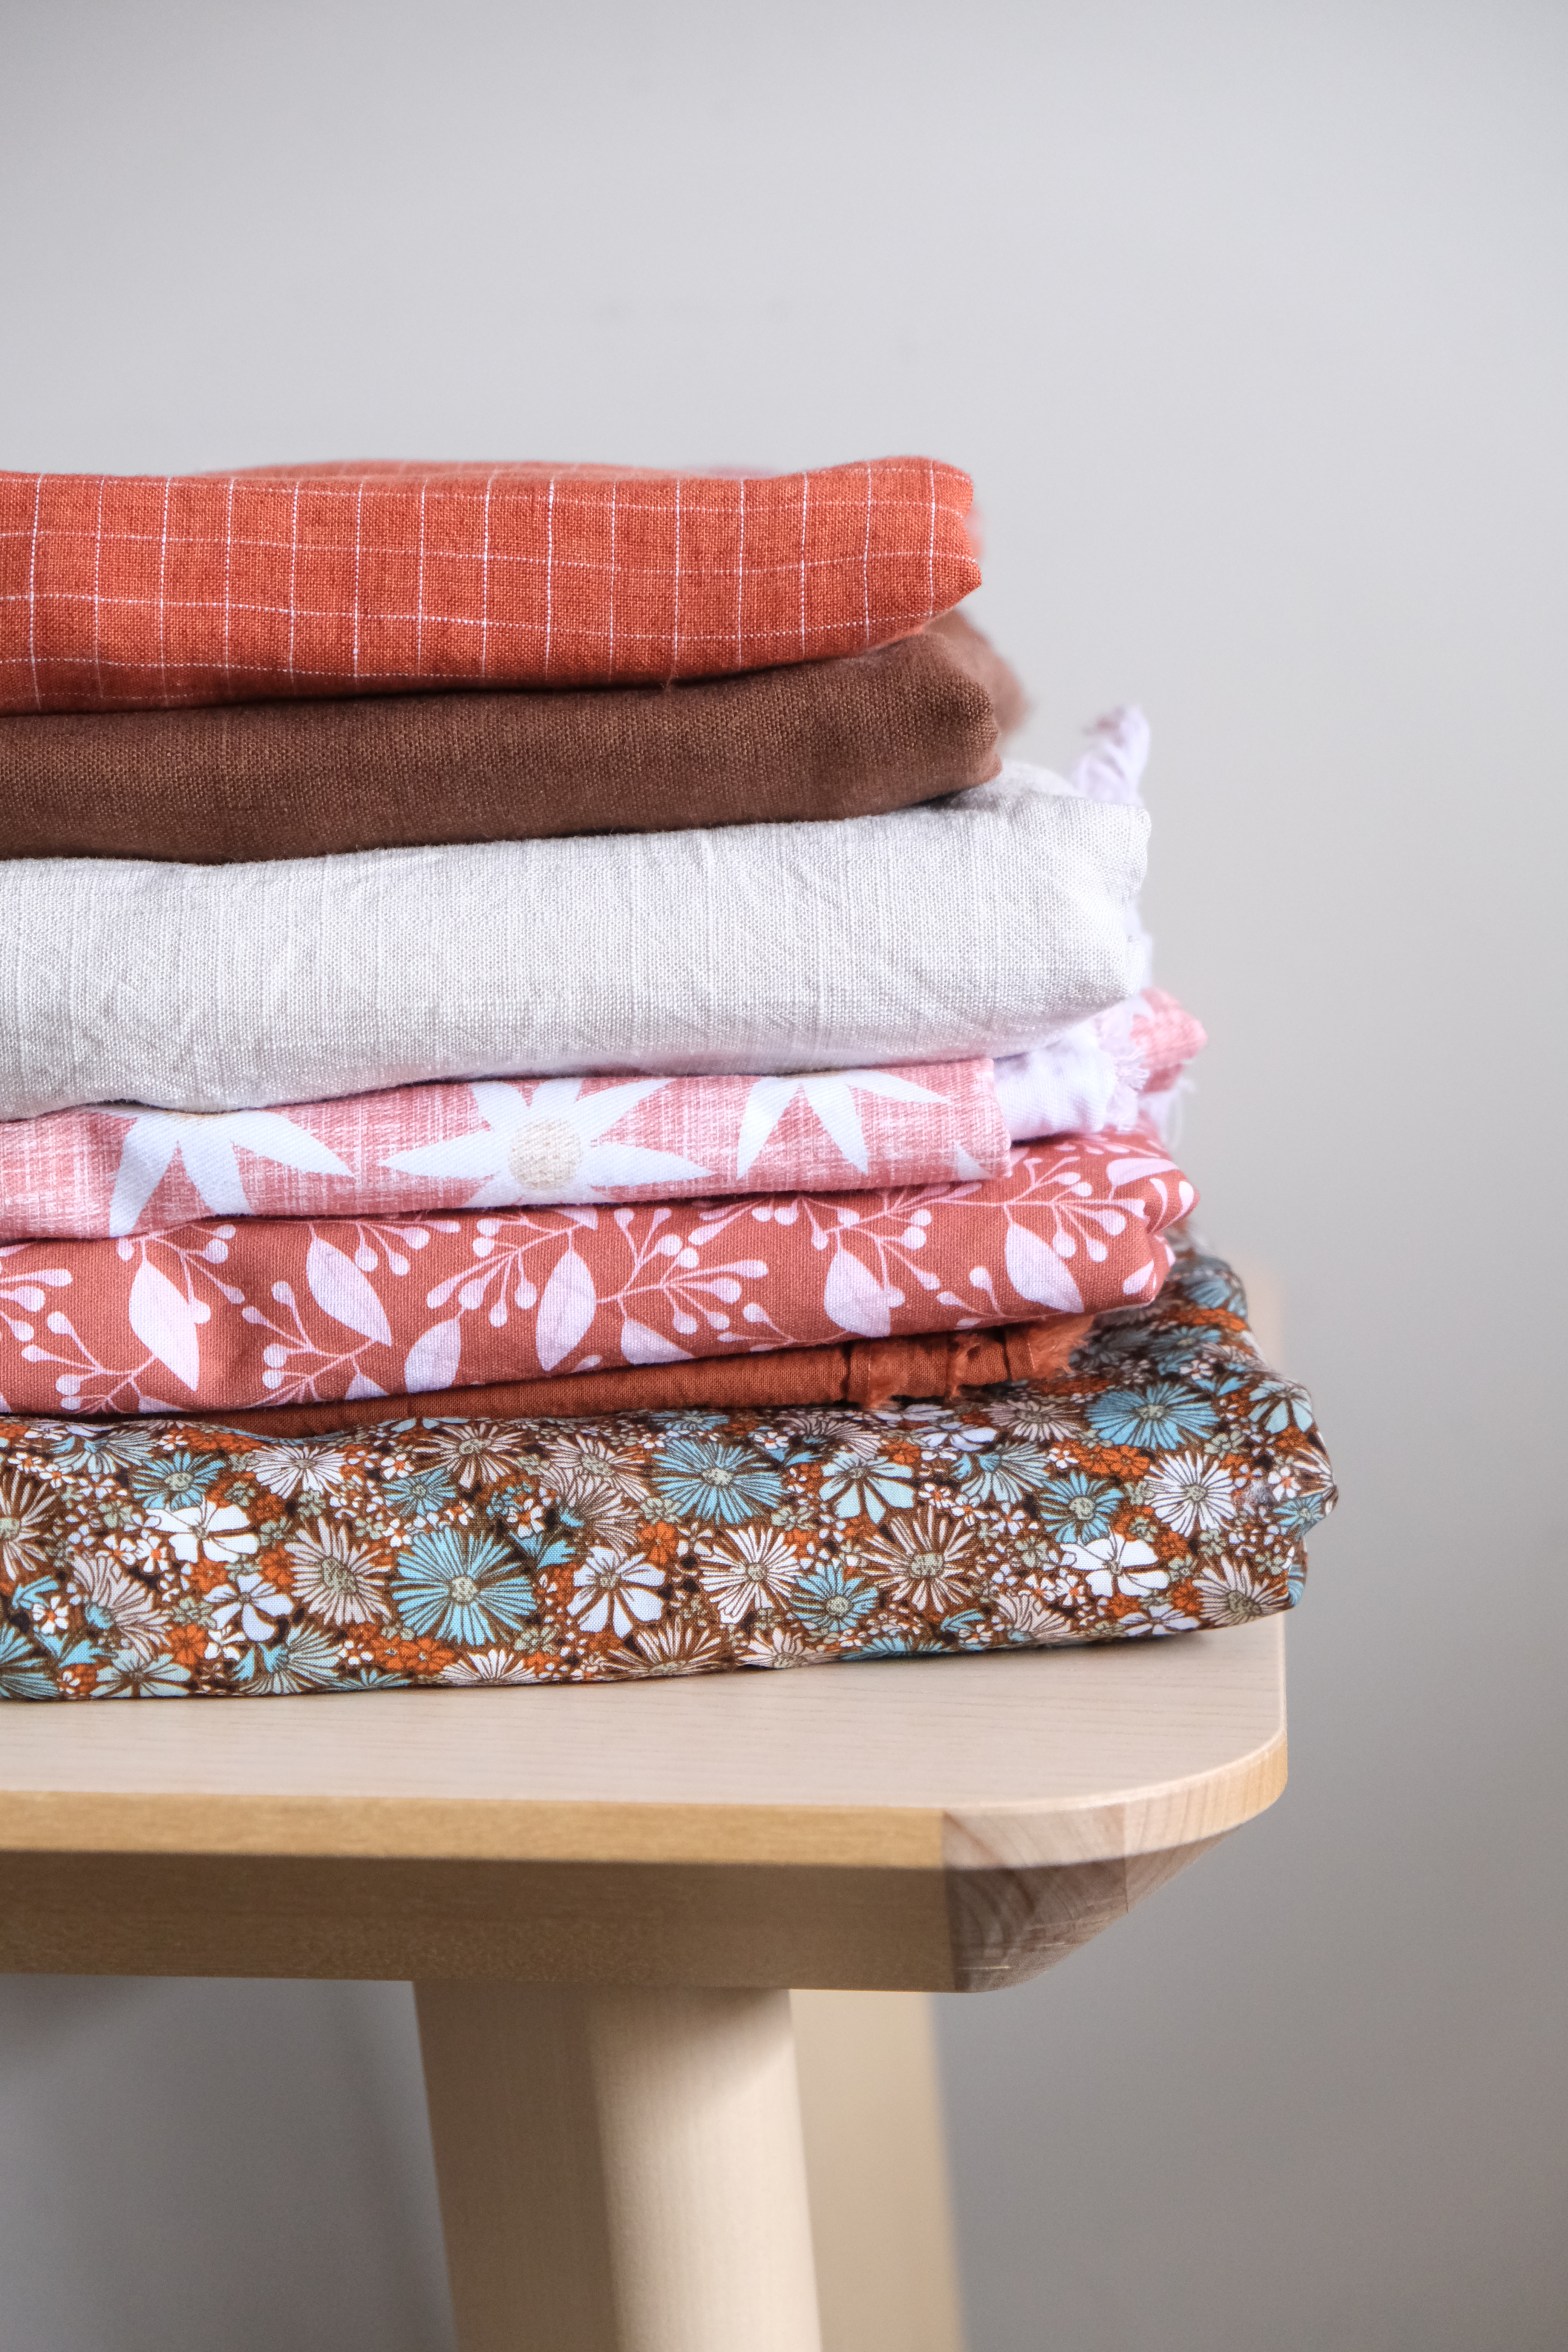
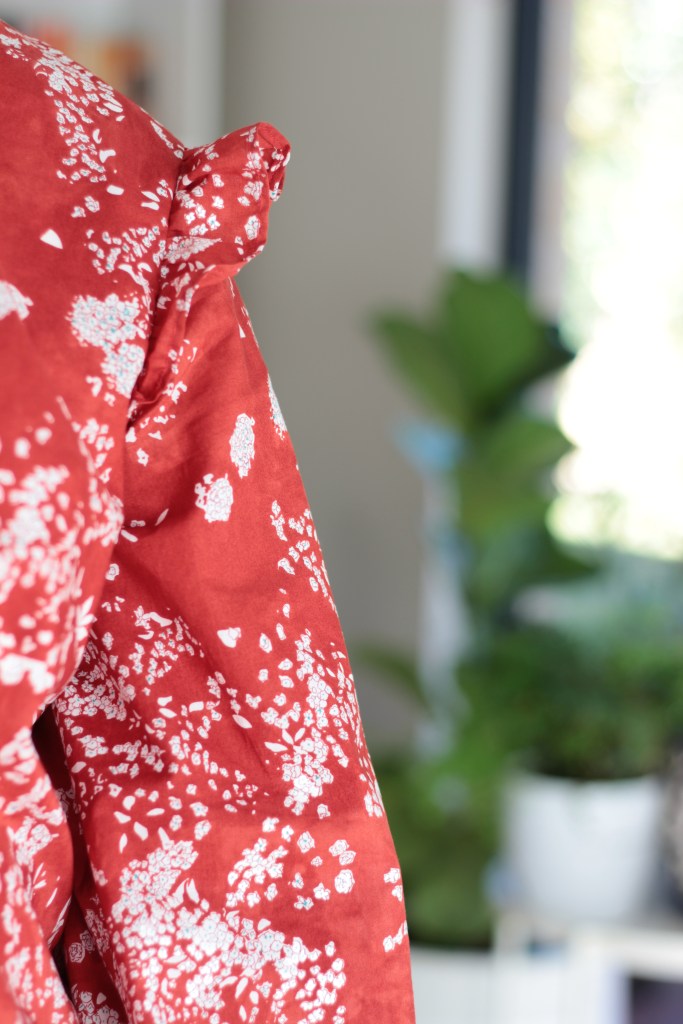
When Diep from DIY District Fabric reached out regarding their online fabric store based in Kyoto, Japan, it was hard to choose only a few pieces with the wide selection of high-quality premium fabrics on offer. This beautiful Nani IRO Lei Nani Organic Cotton fabric in red was kindly gifted from DIY District in exchange for an honest review. It is made from one hundred percent organic cotton and is beautifully sheer and lightweight being around 100gsm (3.5oz) which made it perfect for another Helmi Blouse. I was drawn to the vibrant red of this cotton lawn. The fabric reminds me of a watercolour painting with a red background and a random distribution of blossoms in white and a hint of shimmery silver through the blossoms.

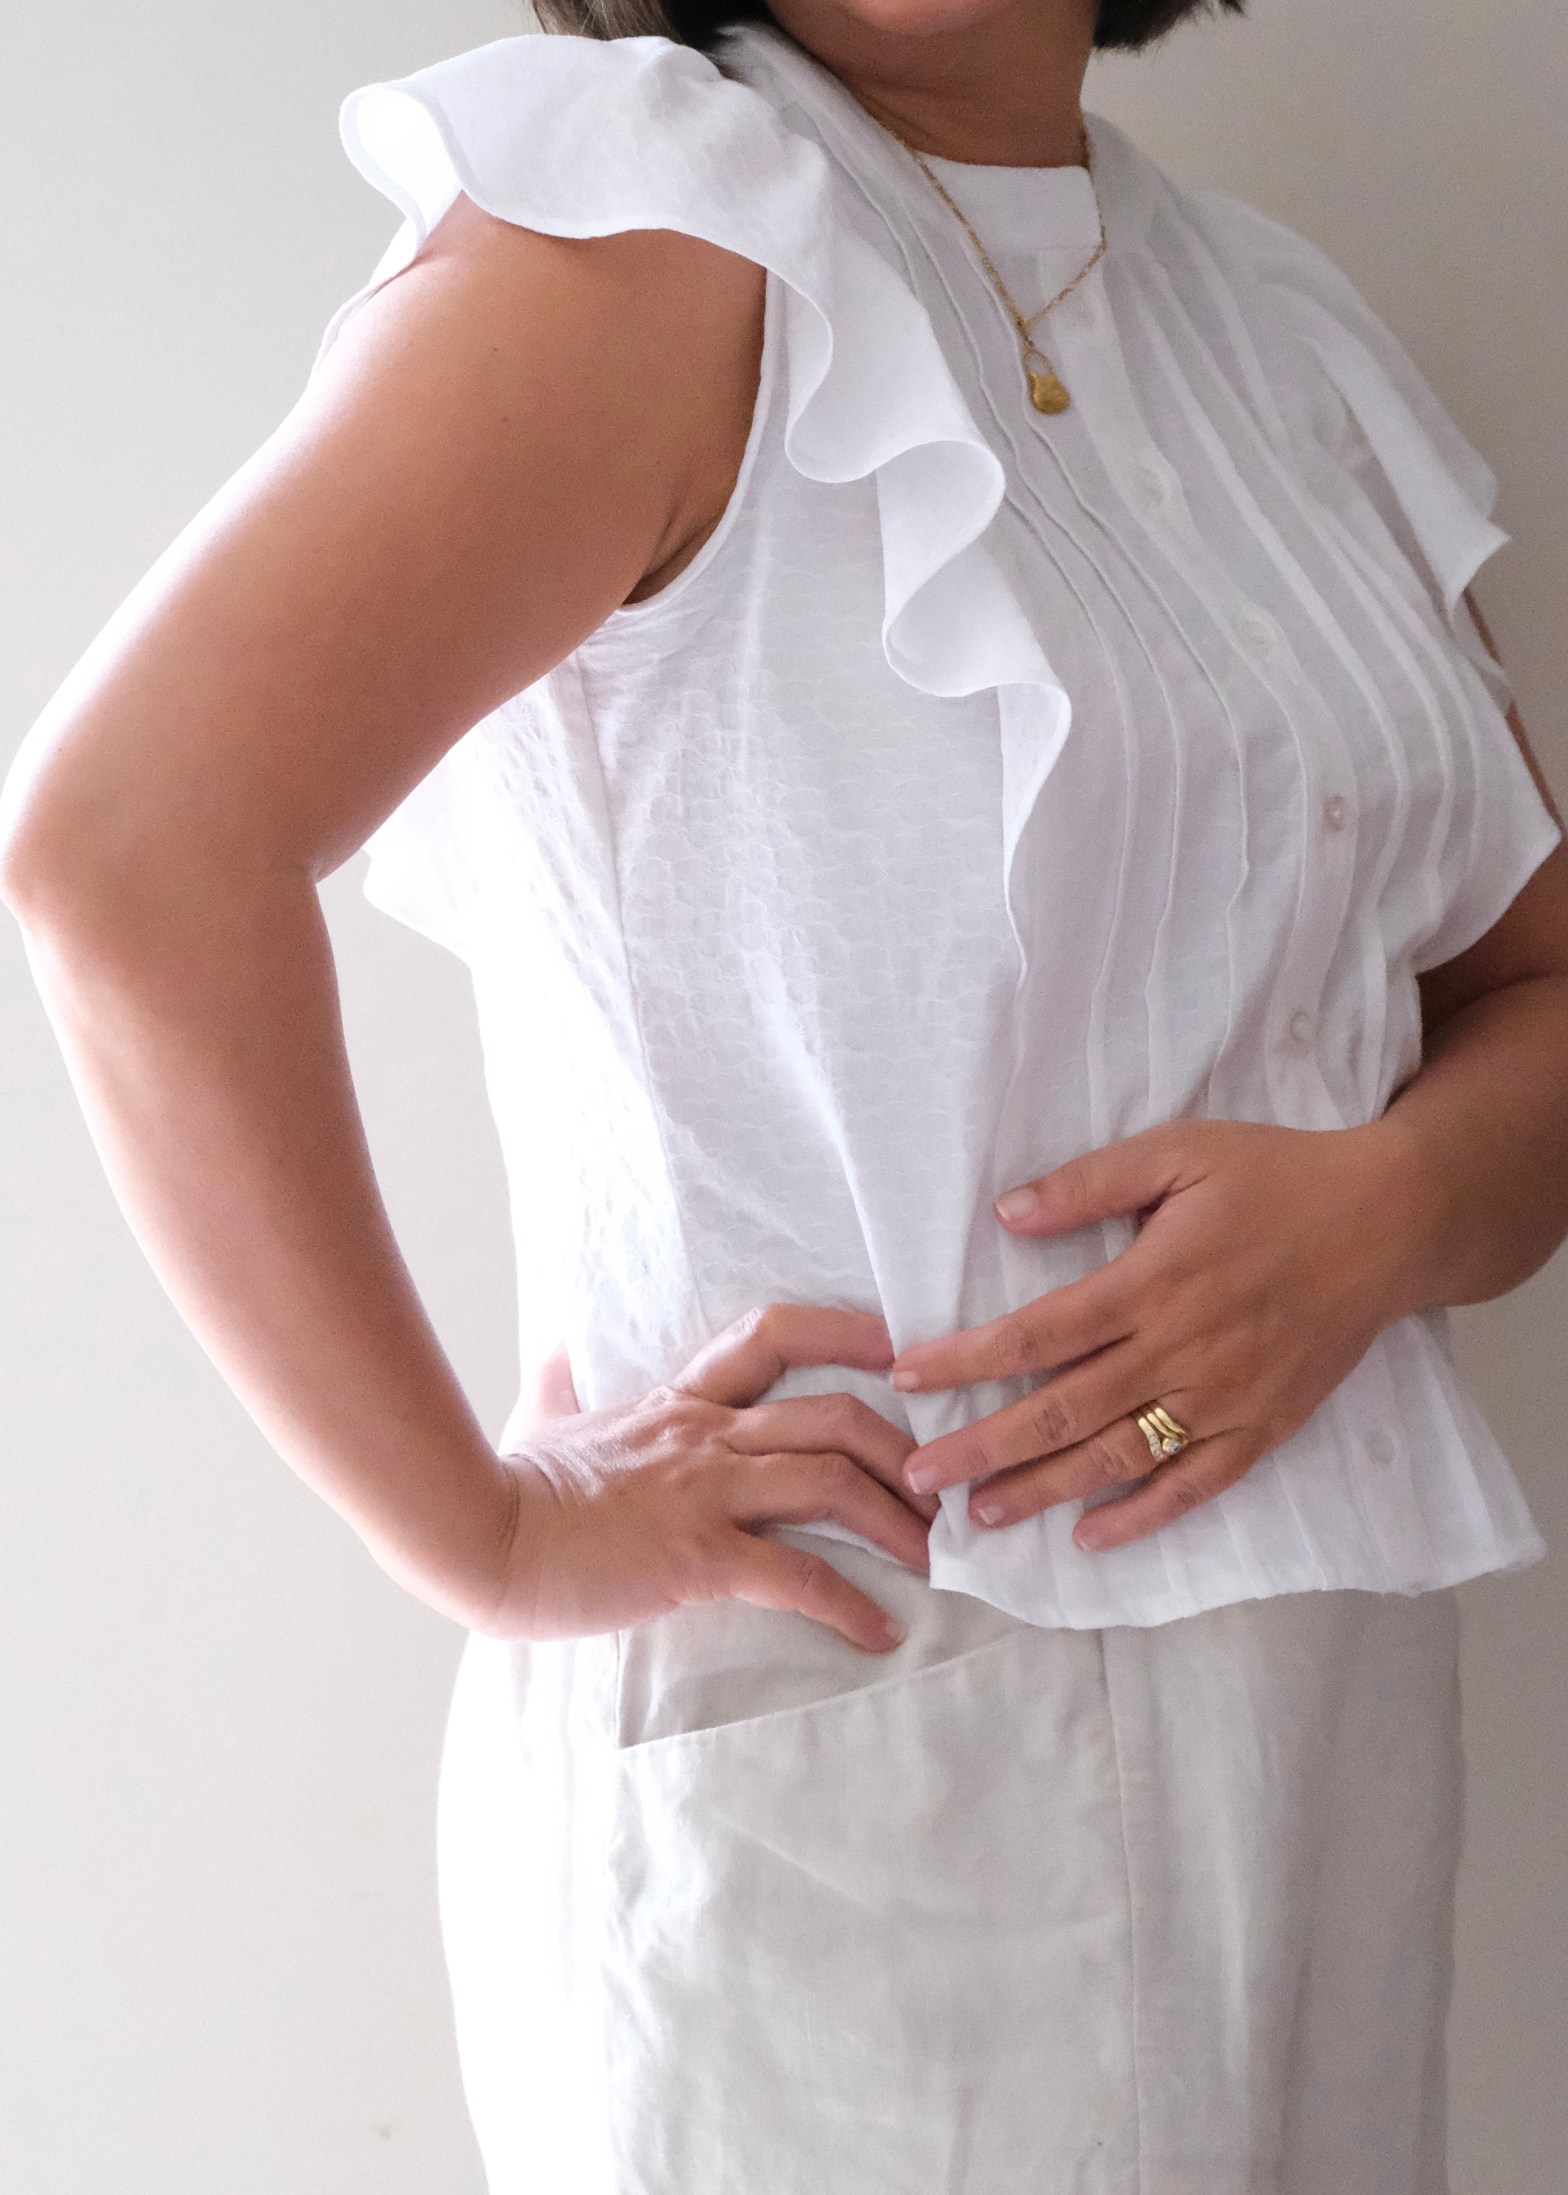
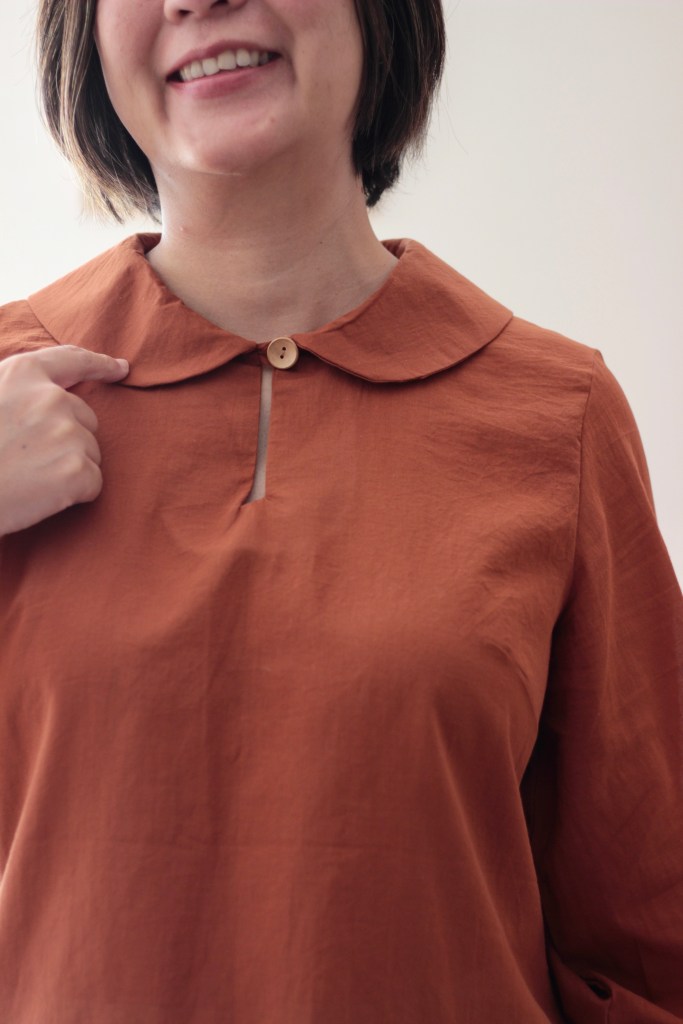
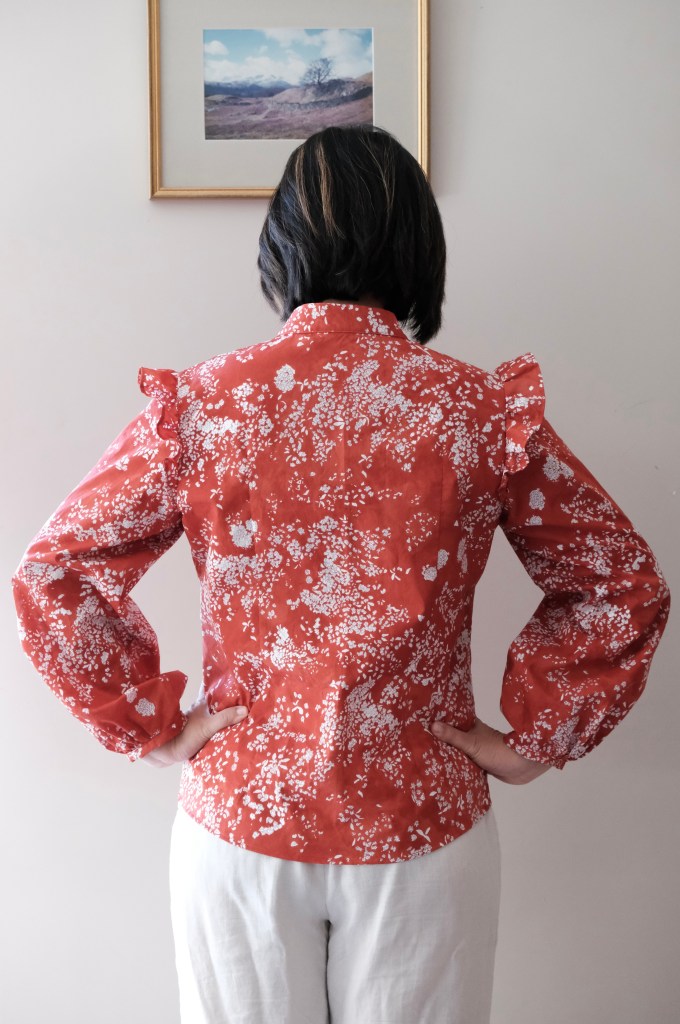
I had made the peter pan collar version with ¾ sleeves previously in a lightweight muslin fabric. This time I’m sewing the full sleeved version featuring ruffles along the shoulder seams and a stand collar. I thought I would focus my blog on sewing with this lovely fabric.

As mentioned, this fabric is 100 % organic cotton, so my usual procedure is to overlock the two cut ends of the fabric before washing. To avoid shrinking the cotton, I made sure to only use the cold wash with an organic detergent. I then air dried the fabric and once dry, I ironed it with a medium heat iron. Impressively, there was no loss of colour and the fabric has kept it’s shape well after washing.

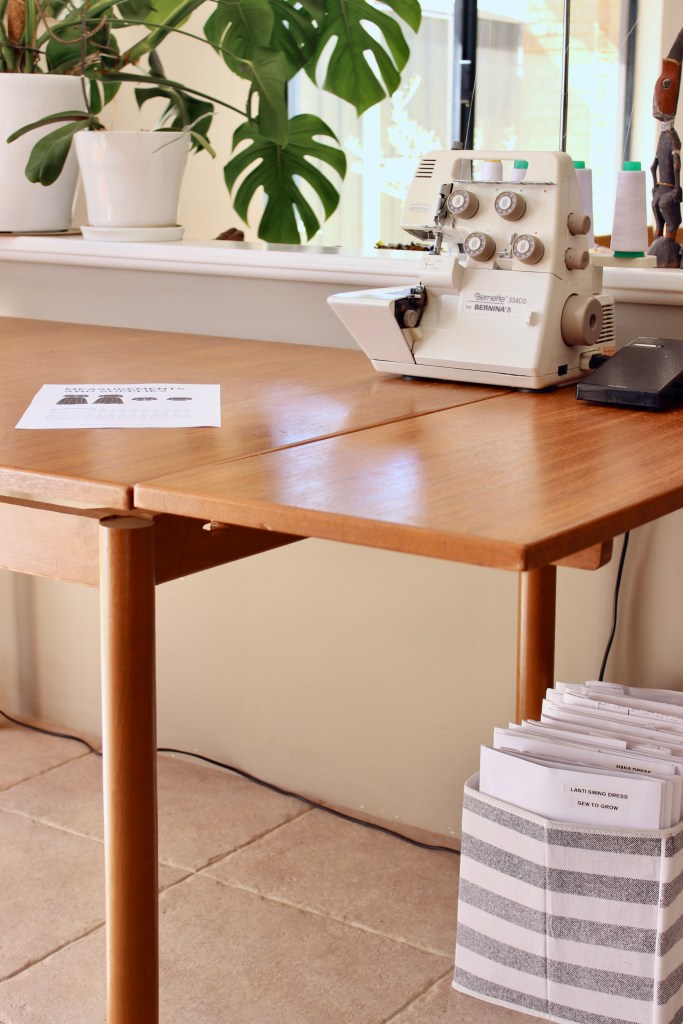
Moving on, I prepared my machine by threading a matching red cotton thread. Due to the fineness of the fabric, I changed my needle to a 75/11 needle which is great for lightweight fabrics like cotton voile, silk, synthetics, Lycra, and Spandex. It’s always nice to start with a fresh needle with a new make which ensures there’s little chance of the fabric snagging. 

The Helmi Blouse requires about 2.6m/2.9yards of a fabric measuring 114cm/44inch in width. Now, here, it’s important to take note that the Nani IRO Lei Nani Organic Cotton Lawn Red has quite a wide selvedge which means that the pattern measured only 99cm which is narrower than the 110cm mentioned in the description. Luckily, I was sent enough of this gorgeous fabric with a bit to spare.

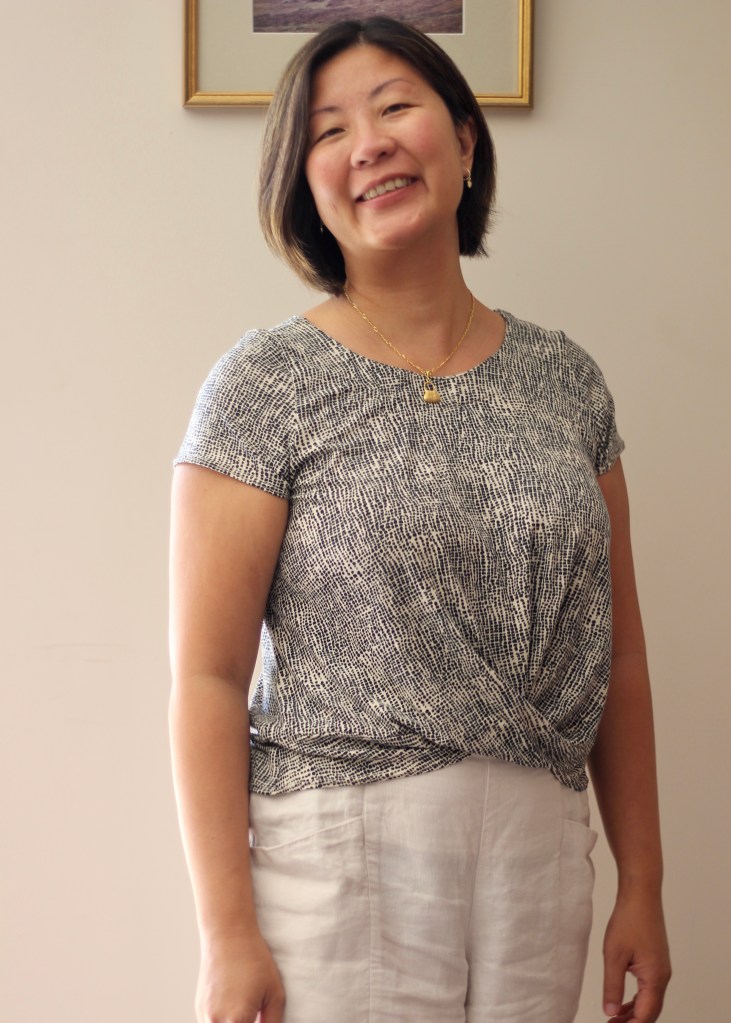
Instructions of the Helmi Blouse are great because it covers a variety of fabric types including sheer fabrics like finishing with French Seams. Testing the fabric, it also stood up well to overlocking, but I preferred the French seams with the finer fabric. I’ve made the size 36 with the medium bust as my measurements are 35-inch High Bust, 37.5-inch Full Bust, 33-inch Waist, 38-inch Hips and it’s a comfortable fit without any modifications needed.

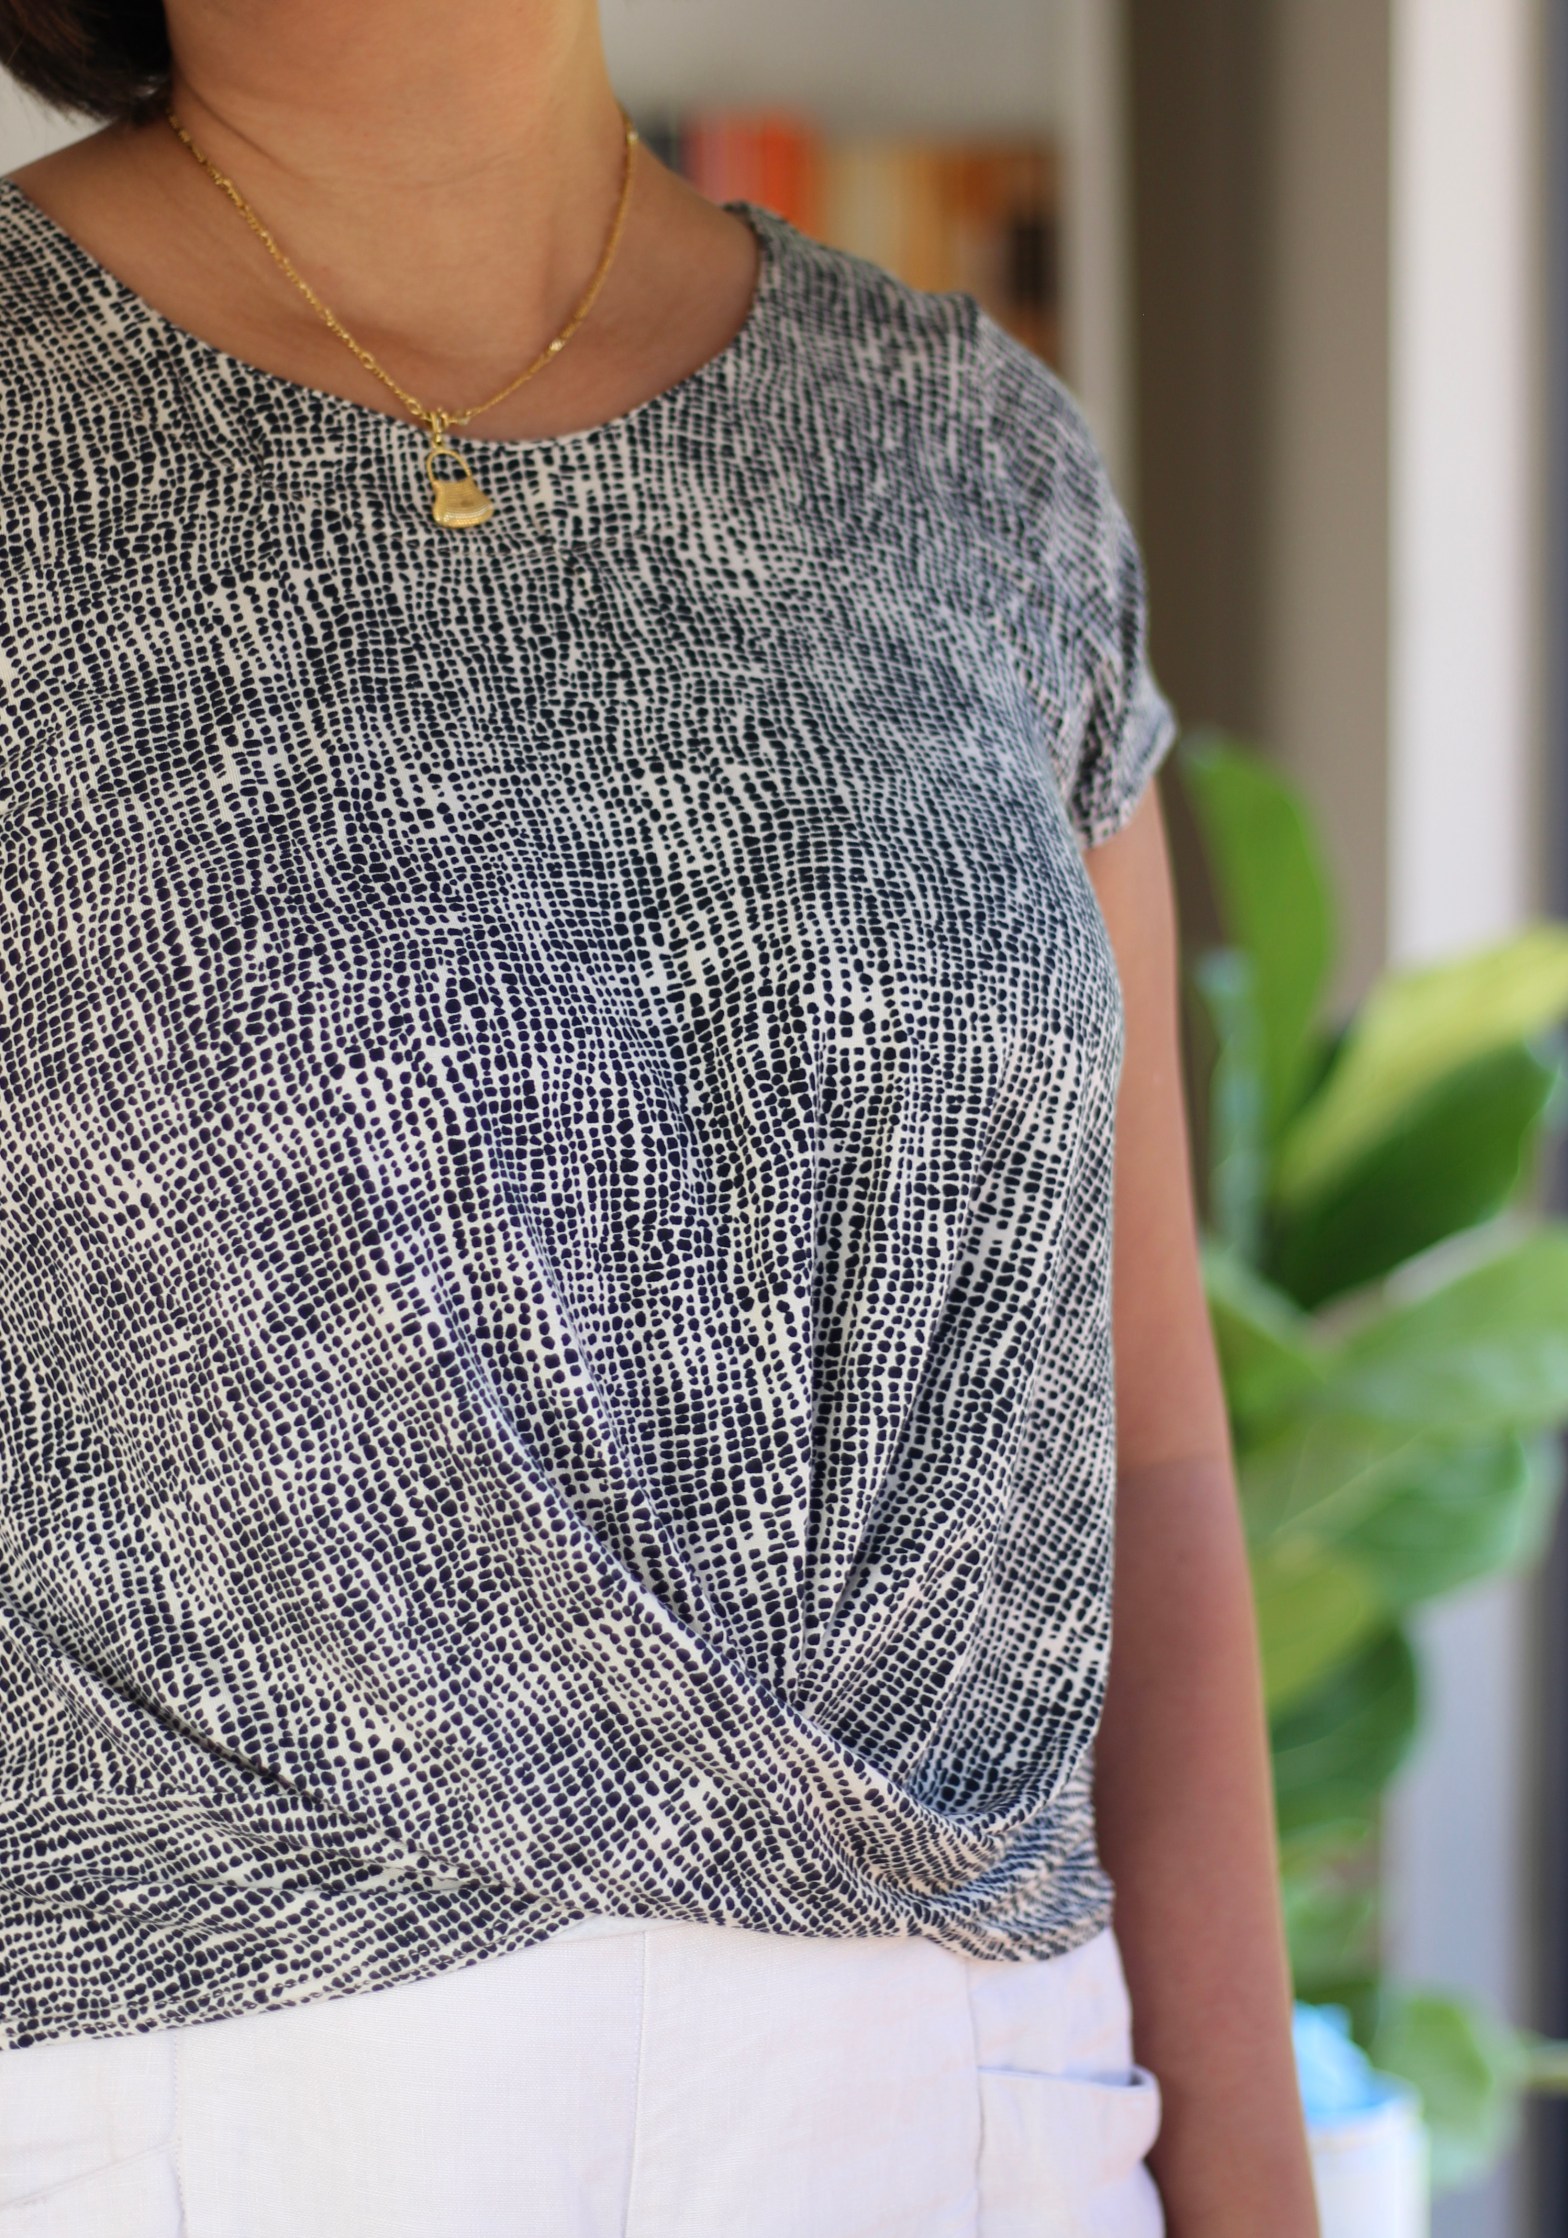
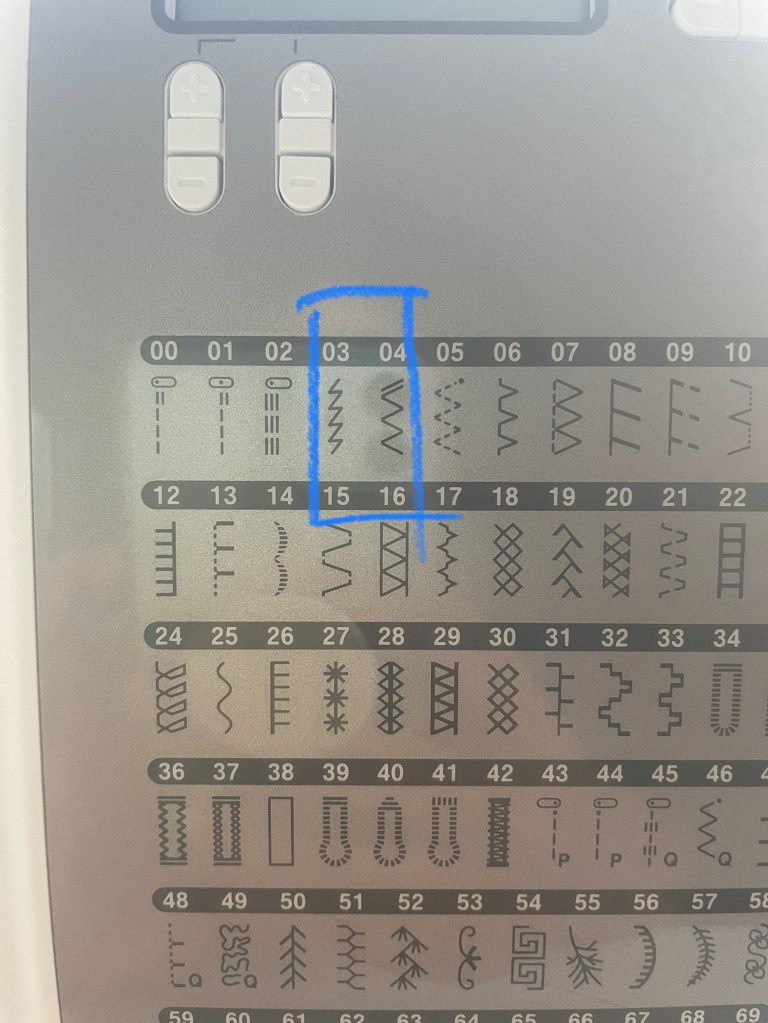
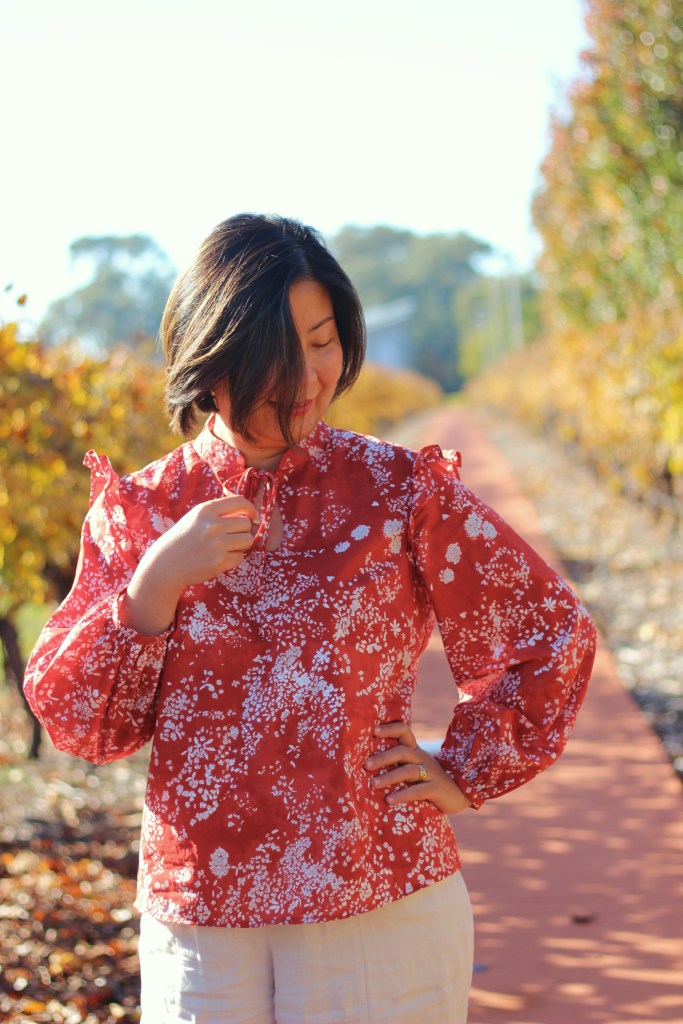
This time, I used the keyhole neckline finished with binding and included the ties rather than a button closure. I made the binding from the same fabric by cutting a 2cm strip on the bias. I found it easier to pre-press the bias strip, first in half then inwards by half to the midline. Using the pressed line as a guide, the bias strip was sewn to the keyhole opening. It was easy with the pre-pressed line to fold over and finish the binding. I also made sure I reduced the stitch length to 1.8 to sew around the curved keyhole. The rest of the sew went pleasantly with everything fitting into place.

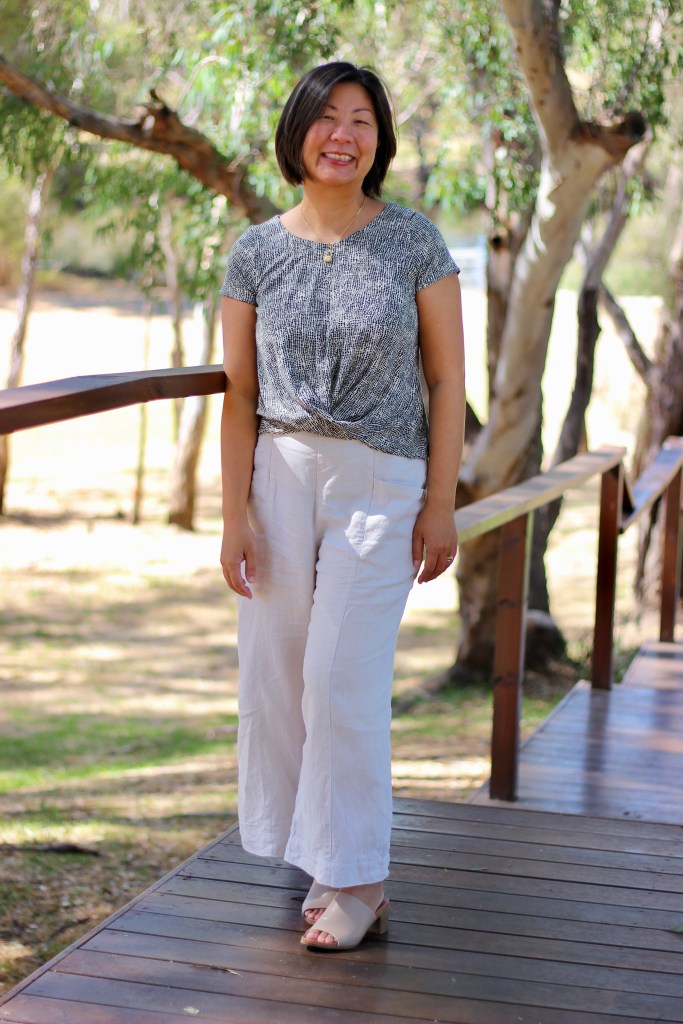
This Nani IRO lightweight cotton lawn is incredibly smooth and untextured compared to other cottons that I’ve worn. It’s very breathable but at the same time has a crisp finish. This will be great to wear in spring and summer. In fact, I’m packing this for my tropical getaway where it can get very hot and humid. When I first received this fabric, I thought it might have been a silk blend because of the slight sheen and silky-smooth feel of the fabric. I think this texture must be due to a very high thread count. I find the weave of this cotton lawn is tighter than the muslin fabric which I used for the first version of the Helmi. I hope this will mean that the blouse will be more durable without the thickness and rough texture of ordinary cotton.

Even though this fabric was gifted, I can say that I would purchase this fabric from DIY District without hesitation. The quality and the service were incredible. From the time of ordering to receiving the fabric was a matter of days and it was easy to reach out via their website which is in English as well as French. As mentioned, this fabric was gifted but all opinions remain my own.

Thanks for reading and happy sewing!

X Em

Selwyn Top

[This blog post contains an affiliate link, but all opinions remain my own.]

When I first started sewing, I searched for simple lines with few details and avoided zips and buttons when possible. Now as I rack up a few more hours of sewing, I find myself seeking those exact features in a pattern. The Selwyn Top which is the latest pattern from Cashmerette Club is full of beautiful details like pintucks, ruffles and a banded collar as well as the gape free button placket. 

This top is made for lightweight woven fabrics. I’ve used a textured white cotton voile. This is an addition to my tropical getaway capsule which I’m counting down to with the cold weather now setting in! The fabric is slightly sheer and very breathable so it’s great for humid weather. 

The sizing was easy. I didn’t use the sizing calculator this time, but it is a very handy tool to know where to start in the toiling process. Talking about toiling, I must confess that I did not toile this blouse. I’ve been sewing Cashmerette Club patterns now since February, so I felt confident about the sizing. I guess that is one of the many advantages of joining a club. Because all your patterns come from the same source, there is consistency in the fit and also there is familiarity in the pattern sizing. I sewed the blouse in a size 10 without any alterations, there is a good amount of ease in the pattern otherwise my usual alterations would have been to grade the size 10 bodice to a size 14 waist with a 1-inch small bust adjustment. I’m happy with the size 10 and I’ll be making it in the same size in the future.

Cashmerette instructions for construction are of a very high standard. I have truly found that my fitting skills have improved since joining the club. There are a lot of handy resources that I’ve accessed on the club as well as the lovely tips from other members. I have been given a discount link to share with my sewing community which I will share below if you’re considering joining. 

Overall, this is a make I’ve relished from start to finish. Even better, it’s a comfortable wear. The one detail I varied was that I left off the button in the collar band. Only because I know that I would never use it and I might even wear it with the first button undone. I also wanted to talk about button installation. I’m not sure if it’s just my machine but I always find the top buttonhole a pain to sew. I think my machine is extremely sensitive to a change in fabric thickness and it tends to get stuck. If you’ve had the same issue, my solution was to turn the blouse around so that the collar is facing you and this gets it out of the way and evens up the presser foot. My first buttonhole is not the best so don’t look too closely!

As I have disclosed in previous posts, Cashmerette Club membership was kindly gifted to me in exchange for photography of three previous club monthly patterns. I’ve been a very happy club member so I was happy that Cashmerette has set up this discount link for my readers. Feel free to use it if you are considering joining. This is an affiliate link which means that I will make a small amount from a purchase which helps support my blog. See information below from Cashmerette regarding the offer.

Thanks for reading and happy sewing!

X Em

The All Access level of Cashmerette Club is 25% off during Cashmerette’s June sale, which runs June 12th through June 19th. The discount is applied automatically, so no coupon code is needed for that.

And if you sign up during the June sale with my special link, you can get 25% off All Access AND a free regular Cashmerette PDF pattern of your choice. Here’s how it works:

  1. Go to cashmerette.com/emsewhappy and add the free gift to your cart
  2. Then go to cashmerette.com/club and add All Access to your cart
  3. Complete the checkout and within a few minutes, you’ll receive an email with a coupon code that you can use for a free PDF pattern

This offer is only available for new All Access members and only through June 19, 2023.

Lora Dress

Even though we are approaching cold weather here in the Southern Hemisphere, I really appreciate this new dress pattern from True Bias because we are planning a tropical getaway at the end of winter. The Lora Dress from True Bias * is a really flattering empire waist dress and can be sewn in two lengths. I’ve chosen the longer length here but I’m also keen to sew the knee length version. The dress has buttons all the way down the centre front which stops just above the knees. My version of the dress has the spaghetti straps but there is also a full sleeved version. All views are lined at the bodice which have underbust gathers.

Before cutting into my fabric, I toiled the bodice up to the hips because this dress is fitted through the waist and hip area and the bodice should finish snugly under the bust area. My measurements of 35-inch high bust, 37-inch full bust, 33-inch waist and 40-inch hips sat between the size 10 and size 12 on the Size Chart. I was also considering if I needed a small bust adjustment (SBA) as the cup size for the dress is a C-Cup which is a three-inch difference between the high bust and full bust. I ended up adjusting the bodice from a size 10 to a size 12 waist/skirt and shortened the spaghetti straps by 1 inch. I didn’t end up with an SBA as I felt the cups sat comfortably.

The pattern recommends light to medium woven fabric. I was grateful to be able to have a good chat to Kelli who is the lovely Director of True Bias. We discussed how the gathers of the underbust meant that the fabric would need to be lightweight like under 5oz, but it was also good to choose a fabric that had some structure like a linen or cotton. If choosing a rayon, then the dress lining would need to have some stabilising qualities like a cotton lawn as rayon can “grow” and stretch out. I had wondered about Tencel twill as well especially for the sleeved version but thought that Tencel can be quite thick and heavy which might affect the gathers. In the end, I found the perfect Hand-block/Batik Fabric which is lightweight. It’s 100 percent cotton which will be so breathable and easy to wear in hot weather. I’ve chosen to line the bodice with white muslin fabric which will not interrupt any of the gathers under the bust.

This pattern also calls for 12 shank buttons as there are twelve loop buttons along the centre front. I had made buttons before in a previous project, so I was keen to try again. In my previous attempt, I had a very easy “press-in” technique version, but I was disappointed that the cap kept falling off whenever I used the buttons so this time, I searched for a better kit to use. I found a “sewn-in” kit which I would highly recommend because the caps stay firmly in place once made. Of course, there are shank buttons that have been listed on the True Bias website or you can also use normal buttons which have been covered in a tutorial by True Bias.

I have sewn quite a few patterns from True Bias and the instructions are always logical and easy to follow. I also find that the techniques are educational, and I often refer back to True Bias patterns. Sewing and construction went very smoothly. I especially loved sewing the button loops and I also loved constructing the bodice and found it very satisfying to hand sew the bodice lining. It’s all the details that really make the pattern so unique.

Counting down now to enjoying this dress in the tropics! 

Thanks for reading and happy sewing!

X Em

*Full Disclosure, this was a Paid Collaboration for Instagram Posts with True Bias Patterns but all opinions remain my own. There was no expectation to write a Blog Post.

Hampden Dress

This was a jam-packed sewing experience! The Hampden dress is the newly released monthly pattern from Cashmerette Club*. I was so excited by the design because it would be my first princess-seam dress. It’s a lovely style of dress with the button placket which I soon found out was a faux placket so no gaping to worry about. It also has an elasticised back waistband which makes for the most comfortable sundress. 

Using the Cashmerette sizing calculator, I needed to sew and grade from a size 10 bodice to size 14 waist to size 12 hips. This is for my measurements of 35-inch high bust, 37-inch full bust, 33-inch waist and 40-inch hips. I would also need to make a 1-inch small bust adjustment because the pattern is made for c-cup upwards which usually accommodates a 3-inch difference between high bust and full bust. 

To begin with, I made a toile of the bodice but only adjusted the grading (size 10 bust to size 14 waist). I sewed this up and it did confirm that I needed to make a small bust adjustment (SBA) because there was excess fabric over the anterior portion of the bodice. This was where the fun began. I’ve never attempted an SBA before, so I looked at several tutorials. I found one that suited an adjustment for a princess seam which I will put in a different blog as it would take too long to describe here. I’ll be truthful and say that it did take me an afternoon to figure this part out, but it has been very rewarding to get the adjustment to the fit of the dress and now I’m able to transfer the knowledge to other patterns!

The pattern is for woven fabrics. I ended up making two dresses. I firstly made the straight out of the box version and then for a second version, I combined the Hampden Dress and the Holyoke Dress. For the first version, I used a coral pink lightweight linen fabric and for the second, a soft rayon fabric with a macrofloral pattern.

The pattern came together very fast once I had sorted out the fitting. It was a pleasure to sew which is another reason why I had decided to sew two versions. They are both beautiful dresses to wear and I feel so lucky that I was included in this collaboration and could sew this dress before anyone.

Upon reflection, there is one detail of the pattern that I could improve. If I were to make this dress again, I would lengthen the bodice by an inch. I had to take out that length when I made the SBA, and it didn’t occur to me to check the bodice length because everything matched up once I had done the SBA. This is an area that I could learn more in and hopefully with more experience, will be able to judge this better.

Thanks for reading and happy sewing!

X Em

*Cashmerette Club membership was gifted as part of the collaboration.

Helmi Blouse

When Forget Me Not patterns released the Helmi Blouse, I didn’t hesitate in getting the pattern. I’ve loved the return of the peter-pan collar. The blouse is slightly fitted and ends at the top of the hips. It’s easy to pull on over the head with the slit opening at the neckline. I’ve chosen to sew the three-quarter sleeve option.

Also, I’ve made this blouse in time for the sewing challenge #SewAprilBlouse23 which is hosted by Gabrielle @Cloth_Edit and Ruan @TheYorkshireSewGirl. This is a fun sewing challenge with lots of great prizes but the reason I love this challenge is I love seeing the beautiful blouses that everyone is sewing up and I find it good inspiration for my sewing.

The fabric I’ve used is a soft light brown muslin. I had thought to use it for lining when I bought it a while ago, but I love wearing the lightweight fabric so decided to use it for this blouse. This pattern is made for lightweight woven fabrics such as my muslin, but it can be sewn with sheerer fabrics. There are great instructions included in the pattern for this.

Currently, my sizing falls between the size 36 and size 38 with my measurements of 37-inch full bust, 33-inch waist and 38-inch hips. The pattern comes in three bust sizes and my measurements fell into the medium bust size. I decided to sew the size 36 without grading and the fit feels perfect.

I’ve never sewn a peter-pan collar before. I like the flat collar with its rounded corners. The collar is a golden classic and reminiscent of sweet and simple times. This version was an easy construction and is attached straight onto the bodice. The pattern has another option of collar with ruffles and a collar stand which I’d love to sew up in the future.

I made a slight mistake with the slit opening at the neckline. I wanted to sew the slit with a button closure at the collar, but I misunderstood the instructions and cut the opening too wide. If sewing this again, I would mark the opening but attach the facing before cutting the slit. As a result, I have a slightly odd-looking keyhole opening rather than the slit I was aiming for. Oh well! A good excuse to sew another one.

Thanks for reading and happy sewing!

X Em

Sewing Plans for AW2023

I always find myself scrambling when the weather cools down, looking for cosy outfits to fight the chill at sunset. The items in the wardrobe that I’ve packed away in the hotter months now need to be retrieved, aired, and prepared for wear. 

Last winter, I was happy to tackle a few projects like the Nova Coat, Marlo Sweater and Cozi Jacket. 

My “Make Nine List” this year includes the Niya Dress, Mave Skirt, Dani Pants, Courtney Dress, Dawn Jeans, Ashling Dress, Tide Dress, Bleuet Dress and tackling my ever-growing scraps collection.

Make Nine 2023

I’ve managed to sew the Niya Dress and Mave skirts which have been such great additions to my wardrobe. I’d like to concentrate on the Dani Pants (from True Bias Patterns) and the Dawn Jeans (from Megan Nielsen Patterns) for the cooler months. Making jeans have been on my wish list for a couple of years so it would be great to try the pattern this year, but I am still looking for the right fabric.

The Me Made May Challenge is also coming up. I’ve used this sewing challenge in the past to assess my makes. I’ve been doing my own Me Made Everyday Challenge. In summer, the Pietra Pants have been the hero item from my wardrobe especially the neutral-coloured wide leg pair. The Me Made May Challenge is a personal challenge where you can set your own goals. I’ve used it in the past to assess the quality of my makes and made repairs if needed. Last year, I made a look book and recorded the first week or two. This year, I’m hoping to record my daily outfits and I’m including ready to wear items that I have. I’m including ready to wear because I already had great quality items before I started sewing and I want to incorporate my sewn items into my existing wardrobe. Along the way, I’ll be taking note of any items that need replacing or maintenance.

Of course, the plans are flexible, and I might find myself sewing a dress or two for relaxation purposes! Generally, every item I’ve sewn is treasured and has been used well.

Thanks for reading and happy sewing!

X Em

Brattle Top

A beginner’s guide to sewing with knit fabric (from a beginner).

Sewing knit fabric has been something I’ve avoided in the past but since joining Cashmerette Club* and having access to their wonderful resources, I’ve gained a lot of confidence in this area. In fact, I’ve been looking for more to sew! The Brattle Top is the April pattern of the month for Cashmerette Club. It’s a tee with a twist front. It’s such a comfortable top to wear and the twist just gives it a little bit of interest. 

For those that are just venturing into sewing knit fabrics, here are a few tips that I wish I had known before starting out.

Needle

You’ll need a ballpoint sewing machine needle. The ballpoint needle will slip between the fibres of the fabric and will not snag the fabric. In my first attempt, I had tried sewing with a universal needle and it was snagging that fabric so badly that I just could not continue until a lovely person on Instagram informed me about ballpoint needles. 

Stitches

Another problem I had encountered with my first attempt at knit fabric sewing was that my stitches kept breaking off. This is because there’s elasticity in the fabric and a straight stitch just doesn’t accommodate for this stretch. I use a lightning stitch or a zig-zag stitch. I tend to use the lightning stitch for seams because it has a narrow width with longer stitch length, but the zig-zag stitch looks better for top stitching. For hemming, I use the twin needle. 

Don’t pull on the fabric

Another challenge with the elasticity of the fabric is the temptation to pull the fabric as you sew which warps the fabric. I’m just very mindful not to put tension on the fabric unless I’m attaching something like a neckband which is often a requirement of the pattern. Otherwise, I try to keep the fabric flat.

Get yourself an overlocker

Ok, this is technically not a tip! It’s not a requirement at all for sewing with knit fabric but it does make it easy if you have one. In fact, some people sew almost the entire project on their overlockers. I bought mine second hand off Facebook marketplace. It’s a very old and heavy Bernina which has not missed a beat. 

Brattle Top

The Brattle top is a great beginner’s pattern. Luckily, I had no problems sewing it. The construction is easy to follow, and it comes together quickly. I’ve made the short sleeve version, but the sleeves are also interchangeable with the Carlyle Tee. I might try a three-quarter sleeve version for the cooler months. I’ve sewn the size 10 for my measurements of 35-inch high bust, 37-inch full bust and 33-inch waist. I find this to be a great fit and did not make any adjustments.

I’m glad that I’ve been challenged to sew with knit fabric. It’s such a comfortable and versatile fabric to wear and style. I’ll be trying a few more patterns for knit fabric in the future. 

Thanks for reading and happy sewing!

X Em

*Cashmerette Club membership has been kindly gifted to me as part of a collaboration with Cashmerette.

Mave Skirt

Sewing the Mave Skirt from True Bias is on my 2023 Make Nine Plans. I’ve never been able to sew everything on my Make Nine list but I’m quite hopeful on achieving it this year as I check another make off my list! The Mave Skirt is an elastic waist skirt with lots of options. I’ve sewn the maxi, three-tiered ruffle version. 

With the seasons changing, the maxi skirt is such an easy item to wear when the weather is still so unpredictably hot or cool. I find it to be a good piece in the wardrobe for the autumn or spring months. I used to avoid maxi skirts because I felt it made me look too frumpy, but I think there is a general rule for avoiding that and that is the rule of thirds. Because the skirt is so long, it’s a good idea to wear it with a top that is shorter like a crop top or something that can be tucked in. I feel that this has made it work for my proportions.

The Mave Skirt Pattern is made for woven fabrics. I’ve made a fuller version using broderie anglaise fabric which I fully lined. The instructions for adding the lining are also included in the pattern. This pattern can be sewn in no less that eight versions! Basically, once you have this pattern, there is no need to buy any other elastic skirt pattern. 

I made the size 12 for my measurements of 33-inch waist and 41-inch hips (seated). There is obviously a lot of ease in the fit of the hips, so I mainly used my waist measurements to pick the right size. The construction was easy and very beginner friendly. Sometimes sewing something simple is exactly what you need for a relaxing sew. True Bias patterns always come with comprehensive instruction and illustrations. You never have to puzzle over the instructions.

I should mention that the elasticised waistband was a bit challenging for me. Not the fault of the pattern but my own skill levels. The waistband had to be stitched at regular intervals in four lines to even out the gathers and flatten the waistband. I had traced the lines for these elongated stitches, but I wish I had just used my machines seam guides. I think I would have achieved much straighter lines. It’s probably not anything anyone would notice unless I bother to tell them and it’s a detail I’ll soon forget as I enjoy wearing my lovely maxi skirt.

Thanks for reading and happy sewing!

X Em

Marselis Top

The Marselis Top and Dress is a new pattern from The Uncut Project.  I was lucky enough to be selected to test this beautiful pattern. The Marselis can be sewn as a top or a dress. The designers, Anna and Isabel, are from Copenhagen and their design reflects the Scandinavian aesthetic of simple lines with a modern twist. This pattern has a lot of inclusions. The flowy top or dress can be sewn sleeveless, short sleeved or long sleeved. I chose to make the sleeveless top version and I had in mind something that was appropriate for a summer night out.

Sizing ranges from 32 to 74 (European), I was between the 40 and 42 with my bust size of 37 inches so I went with the 40 as the pattern includes a lot of ease in the waist and hips. The top ended at about hip level for me. I thought the sizing was spot on! 

This pattern is made for lightweight to medium woven fabrics. At the beginning of my sewing journey, I madly bought fabric that I thought were pretty but had no idea how or what to sew with. Every time I passed the fabric store, I would go rifling through the bargain bin. It was a thrill at first until I realised, I was guiltily amassing a rather large stack of fabric that I was now responsible for. Time to put a stop to it. I now check my stash before heading to the fabric store. This chiffon felt like the perfect match for the Marselis Top because it’s soft and sheer which would show off the gathers in the pattern.

At this point, I should confess that I have never sewn with Chiffon fabric before. I’ll just share some of what I’ve learnt about Chiffon here in case anyone is wanting to recreate this. Chiffon frays like crazy. When I tried to overlocker it, there was a moment of panic as it started to disintegrate. Luckily, I was testing this on a piece of scrap. So, French seams were the best option for finishing my seams. Another thing I noted about Chiffon is that it gets easily caught in the teeth of the machine. I had to make sure I was leaving a bit of gap at the start of the sew. I could still backstitch but I have read some advice that it’s better to tie off the ends of your stitching by hand.

Putting together the pattern pieces was easy and the instructions were great. It was a bit tricky with my bias binding because I had bought the slightly smaller one inch rather than the one and a half inch that was recommended. It still worked well, and I loved how the ties were formed so neatly out of the bias binding that finished the top of the blouse. I especially love the back of the top where the ties pass through a loop and ties together. 

I remember finishing the pattern test in the same afternoon. It was one of those patterns that are so interesting, you can’t put it down. I really wanted to get to the end to see what it would look like. Needless to say, I’m in love with my new blouse and I ended up wearing it out that night for our Chinese New Year dinner and to see the lion dancers! 

Thanks for reading and happy sewing!

X Em

Elmwood Skirt

The Elmwood is the Pattern of the Month for Cashmerette Club*. I’ve always loved the classic look of the 1950s. The pencil skirt was such a staple in that era with the narrow, hip hugging silhouette with the hem just skimming the bottom of the knees. This version also has chic pockets which stay flat when sitting. 

I was lucky enough to receive a preview of this pattern as part of a collaboration with Cashmerette Patterns. I always start by making a toile of the pattern. This skirt is fully lined so it was easy to make a toile with lining fabric. Looking at the fitting chart, my waist measurement of 33 inches sits between the size 12 and size 14. My hip measurement of 38 inches sits more towards the size 10. So, I put my measurements into the Cashmerette size calculator which advised me that I could sew a size 12 waist and grade to a size 10 hip. My first toile with the graded hip felt too snug for me which I soon resolved when I re-read the instructions.

When I re-read the instructions, it tells you to measure your hip and waist in sitting. I’ve never considered this before, but I have been using some of the wonderful resources available to Cashmerette Club members regarding fitting. It seemed like a good idea as the skirt is so fitted and there isn’t much ease. I’m glad I remade these measurements in sitting because my hips were now at 40 inches. I found that sewing the straight size 12 was the best fit. So, in the future where there is only a small amount of ease in the fabric, I will continue to use this tip of measuring when sitting as well as the usual standing measurements.

The Elmwood skirt is for woven fabrics. I’ve used a wool/linen blend from Potter and Co. It’s beautifully soft in a grey/brown tone. It feels quite luxurious to wear as it’s fully lined. There’s the usual split in the back of the pencil skirt which makes it easy to move in. I’ve needed something a bit dressier for meetings and this skirt really fills a gap. I’m thinking of making a denim version for casual wear.

The instructions and illustrations are very comprehensive in Cashmerette Patterns. I found it easy to follow. One of the skills I’ve gained in sewing this pattern is learning how to do blind hems on my machine. I have hand sewn blind hems before especially with my kids’ school uniforms. Sewing the blind hem by machine works out easier and is a lot more even than my hand sewing!

Thanks for reading and happy sewing!

X Em

*Full Disclaimer: This pattern was sent to me for collaboration with Cashmerette. All opinions expressed are my own.