Poppy Blouse

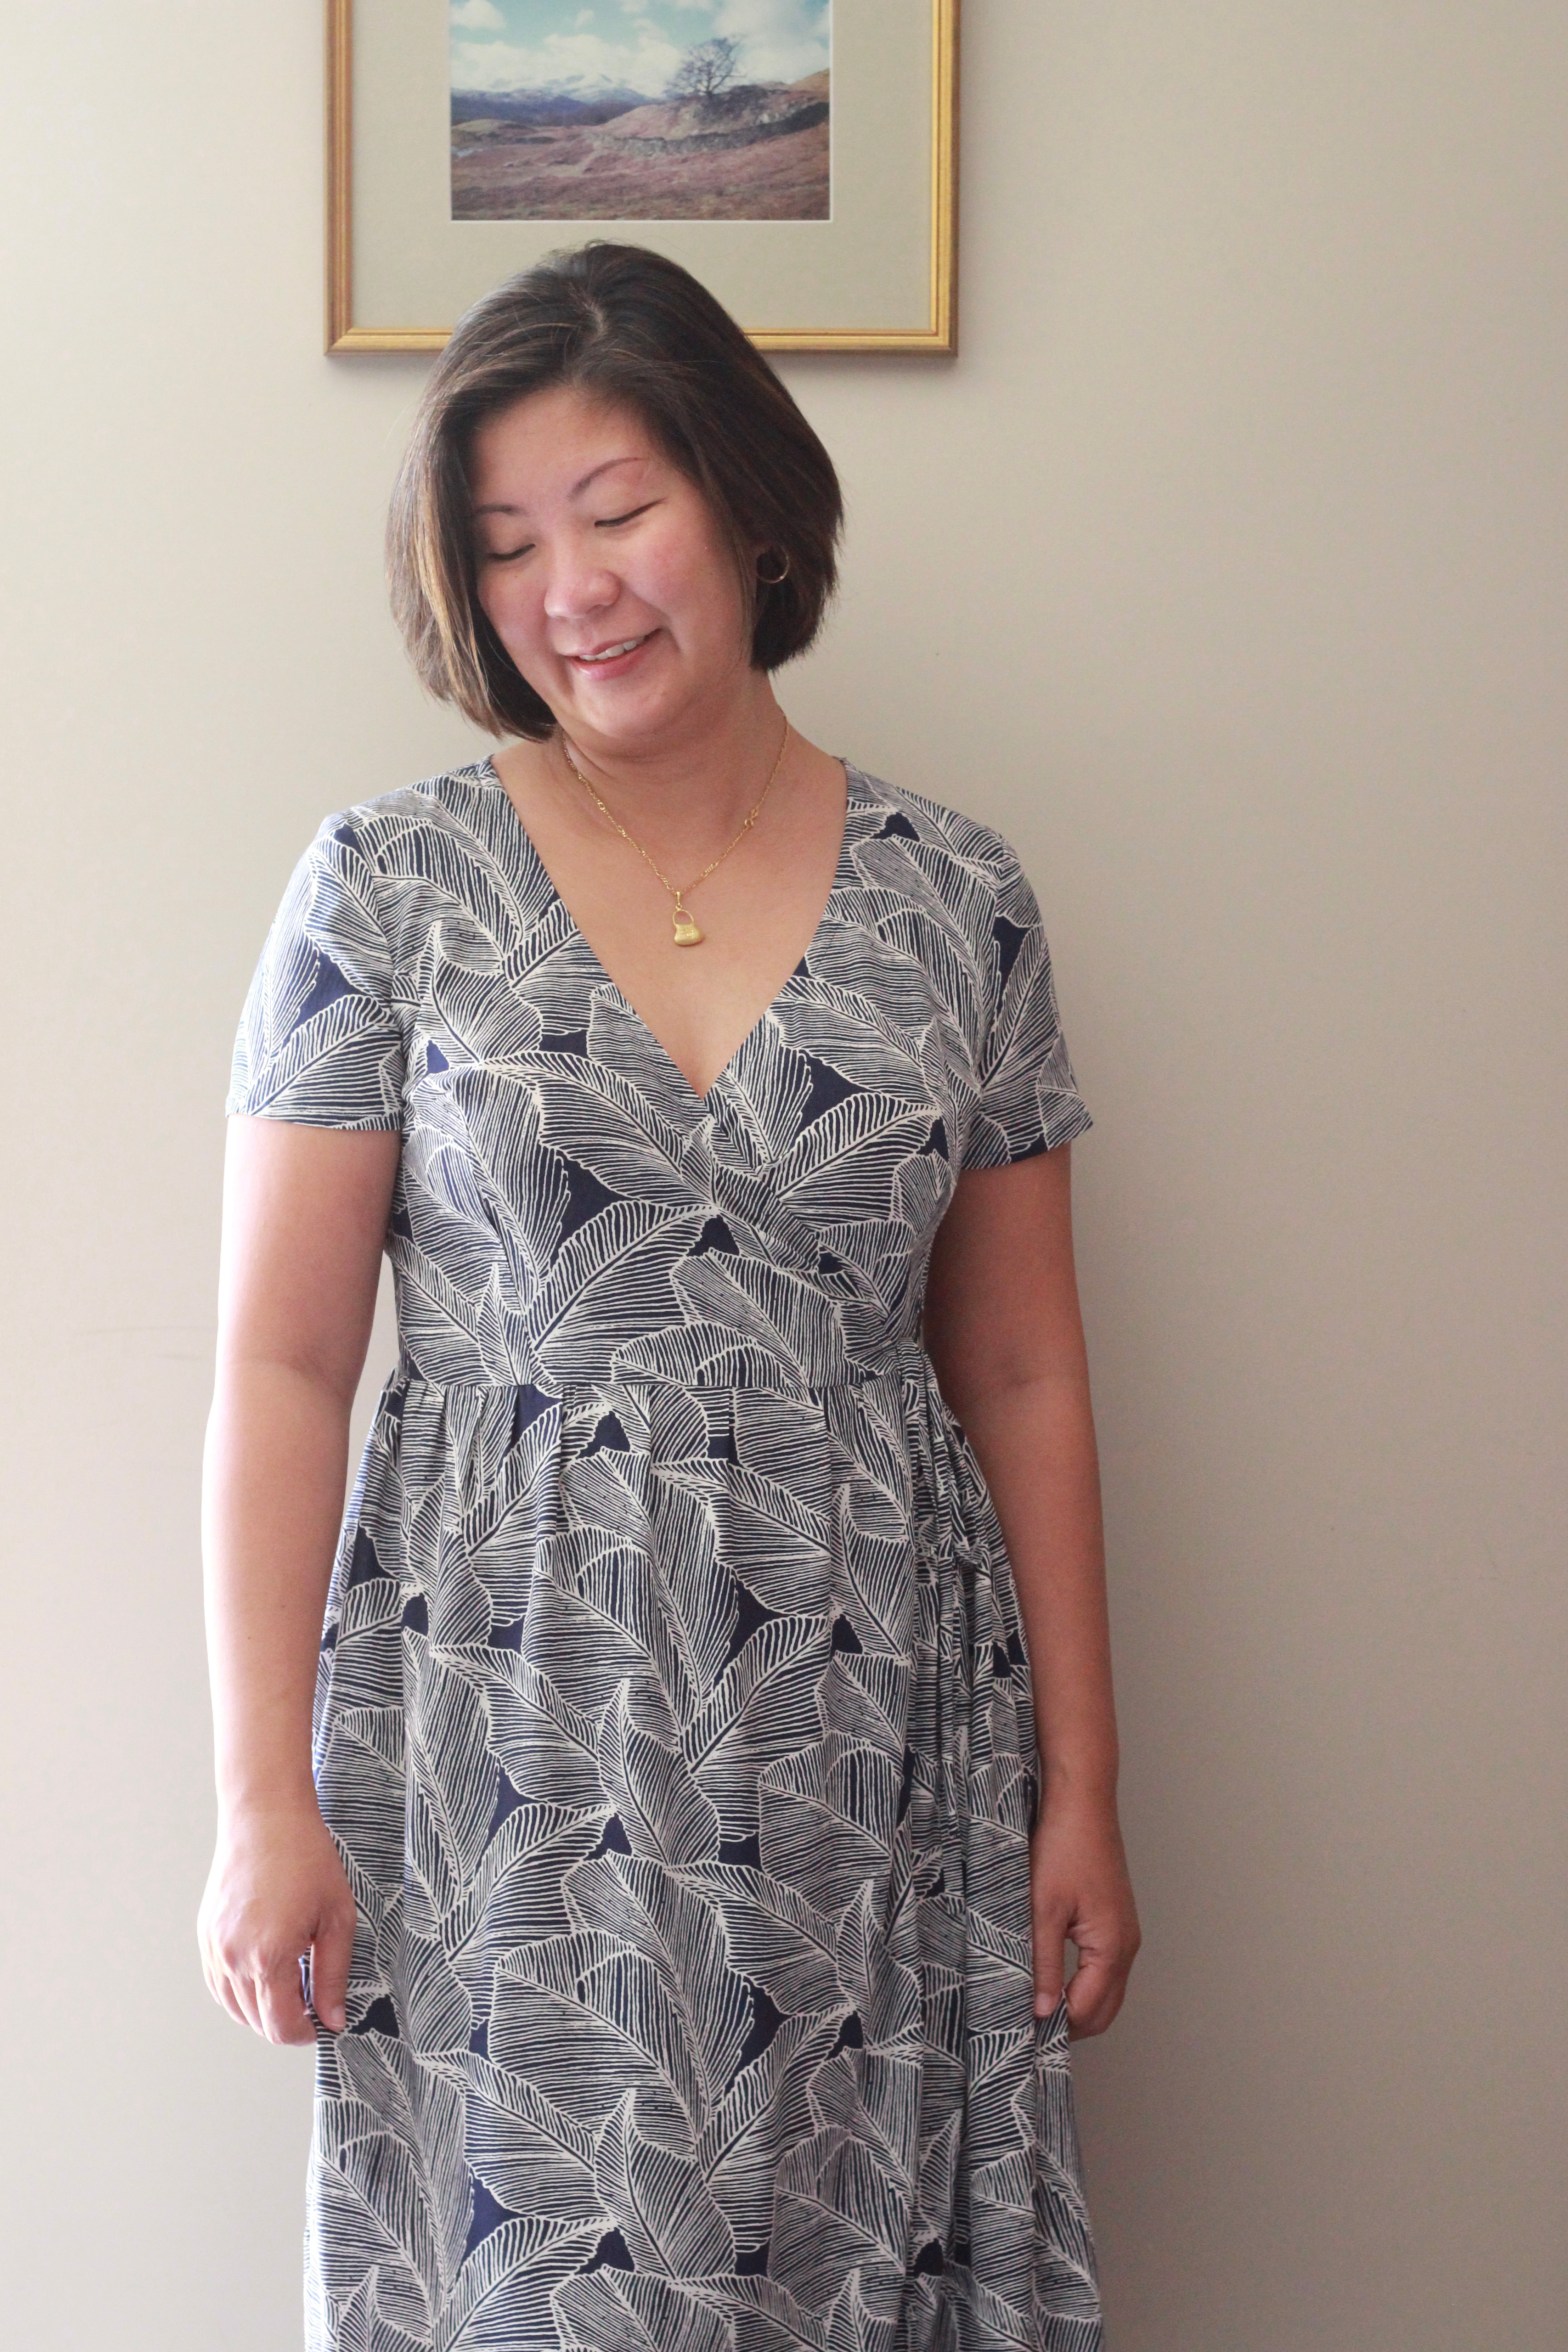
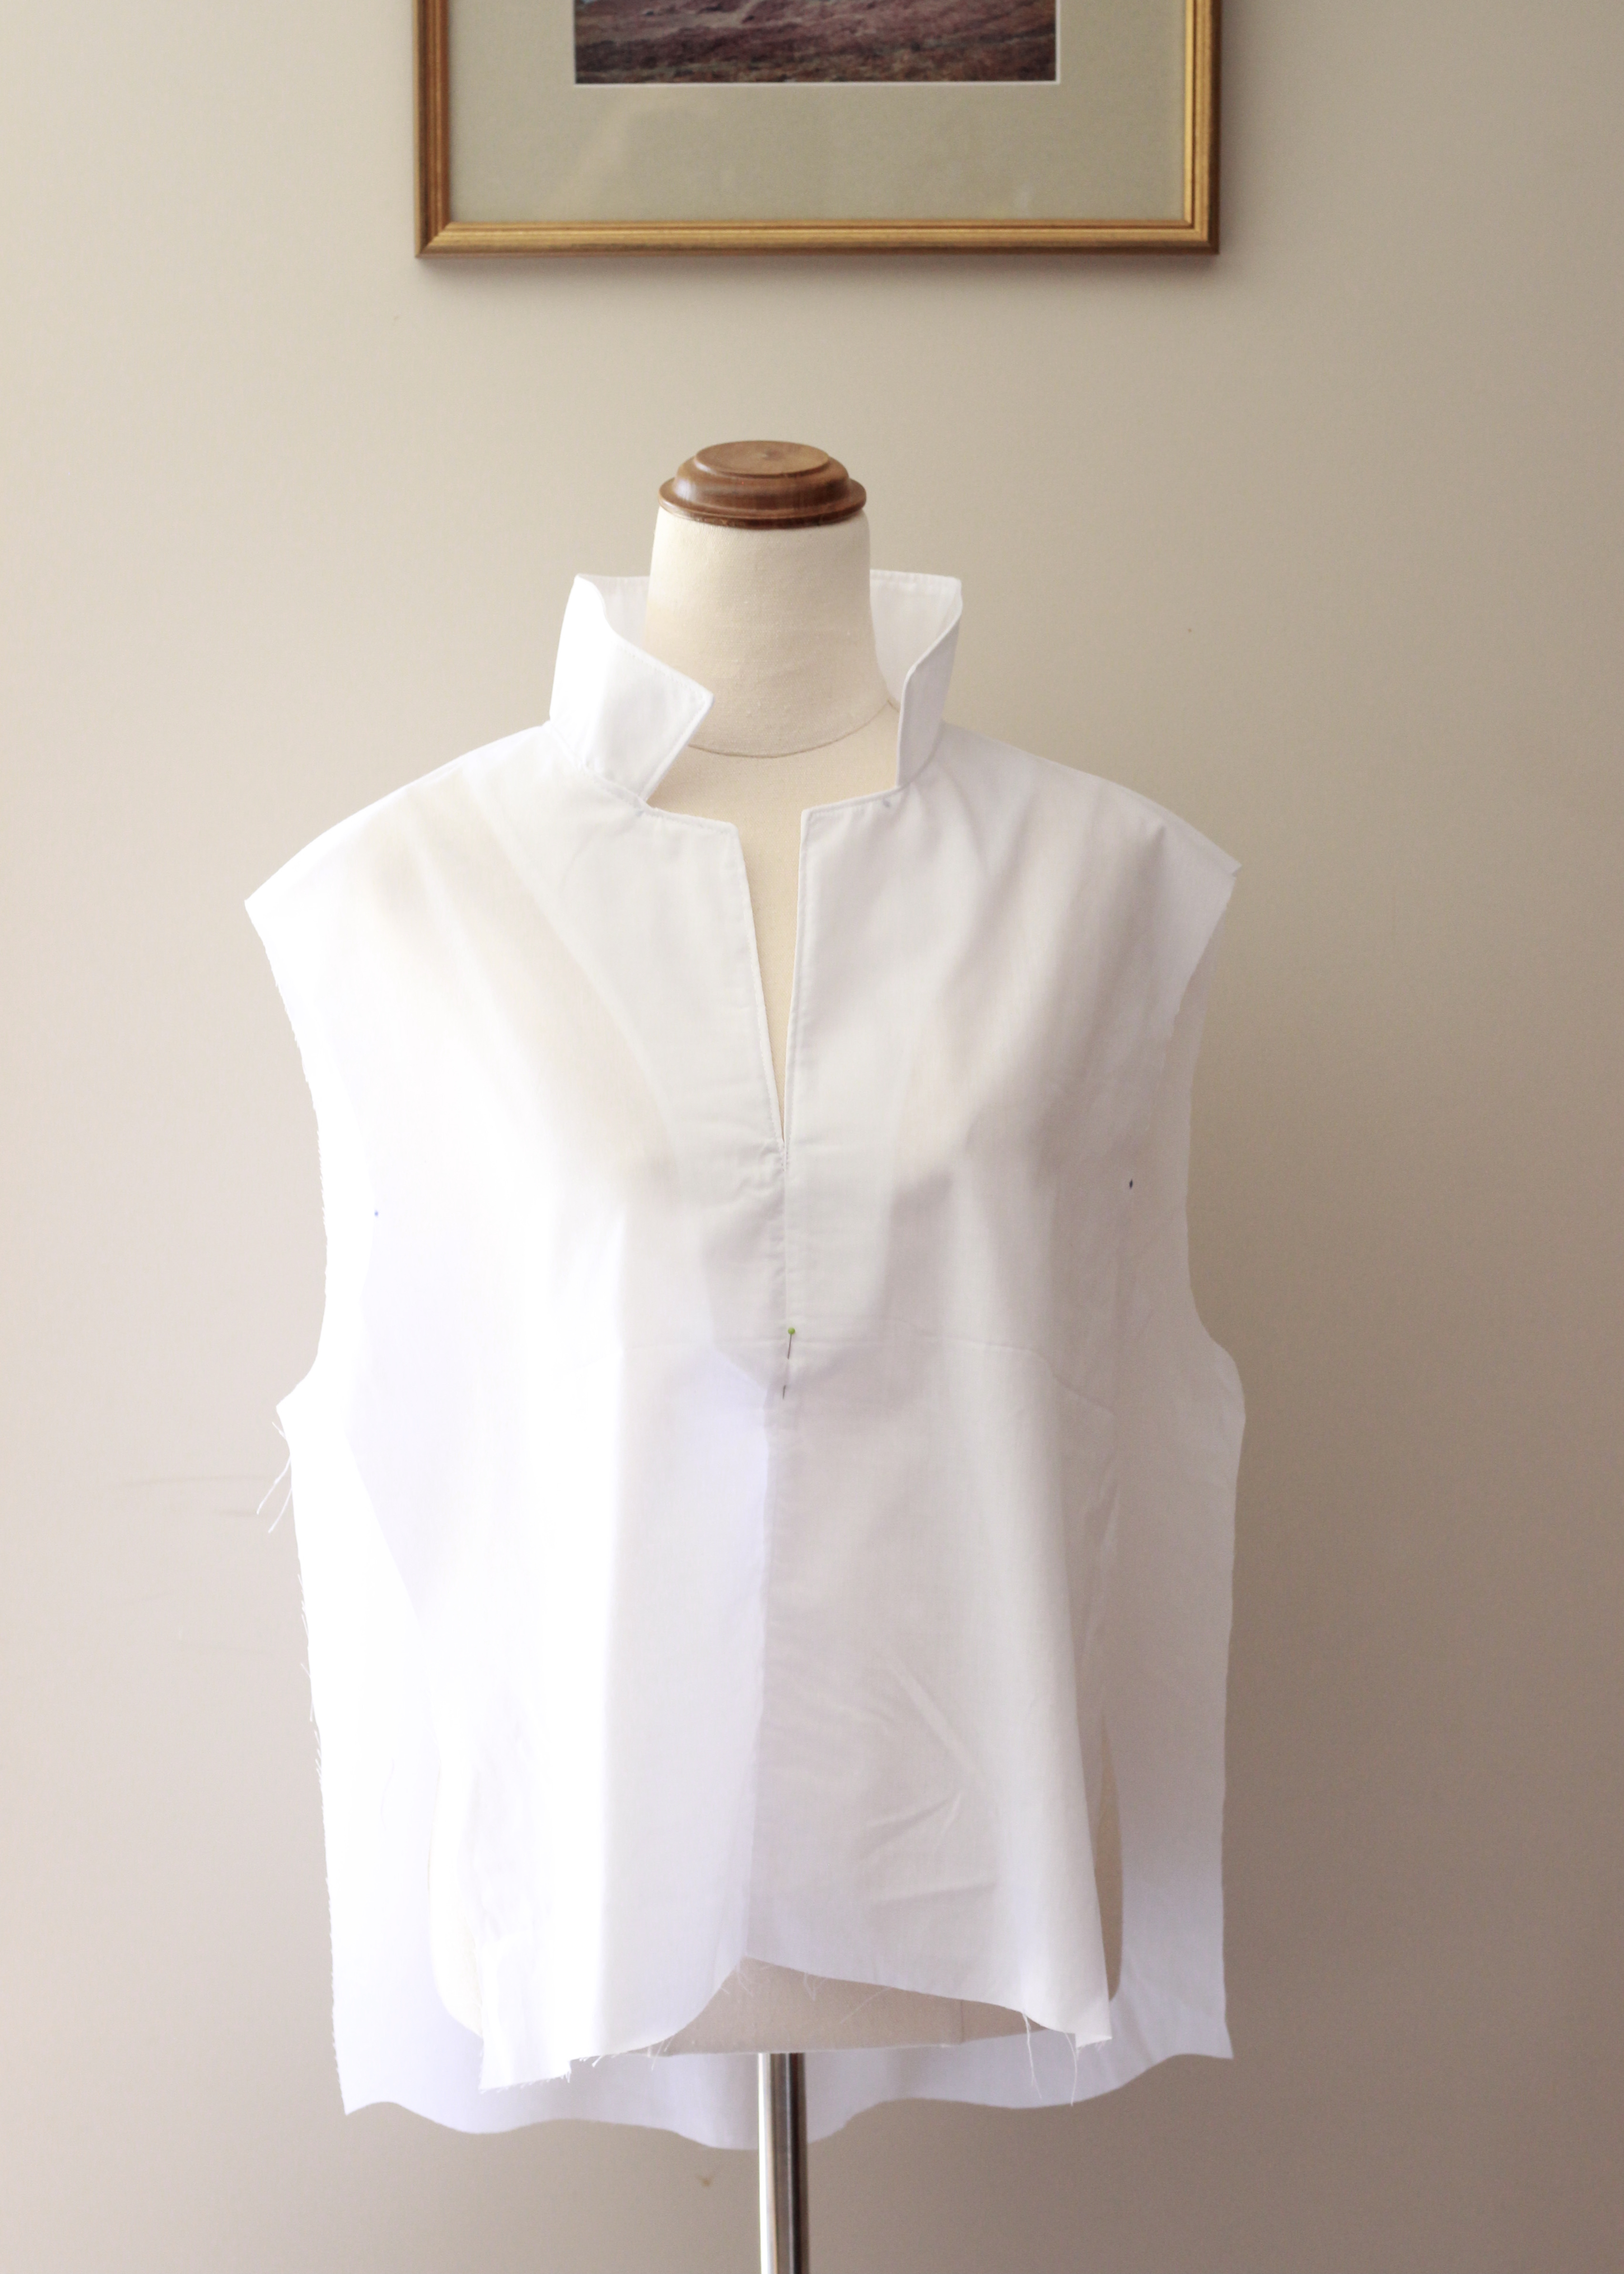
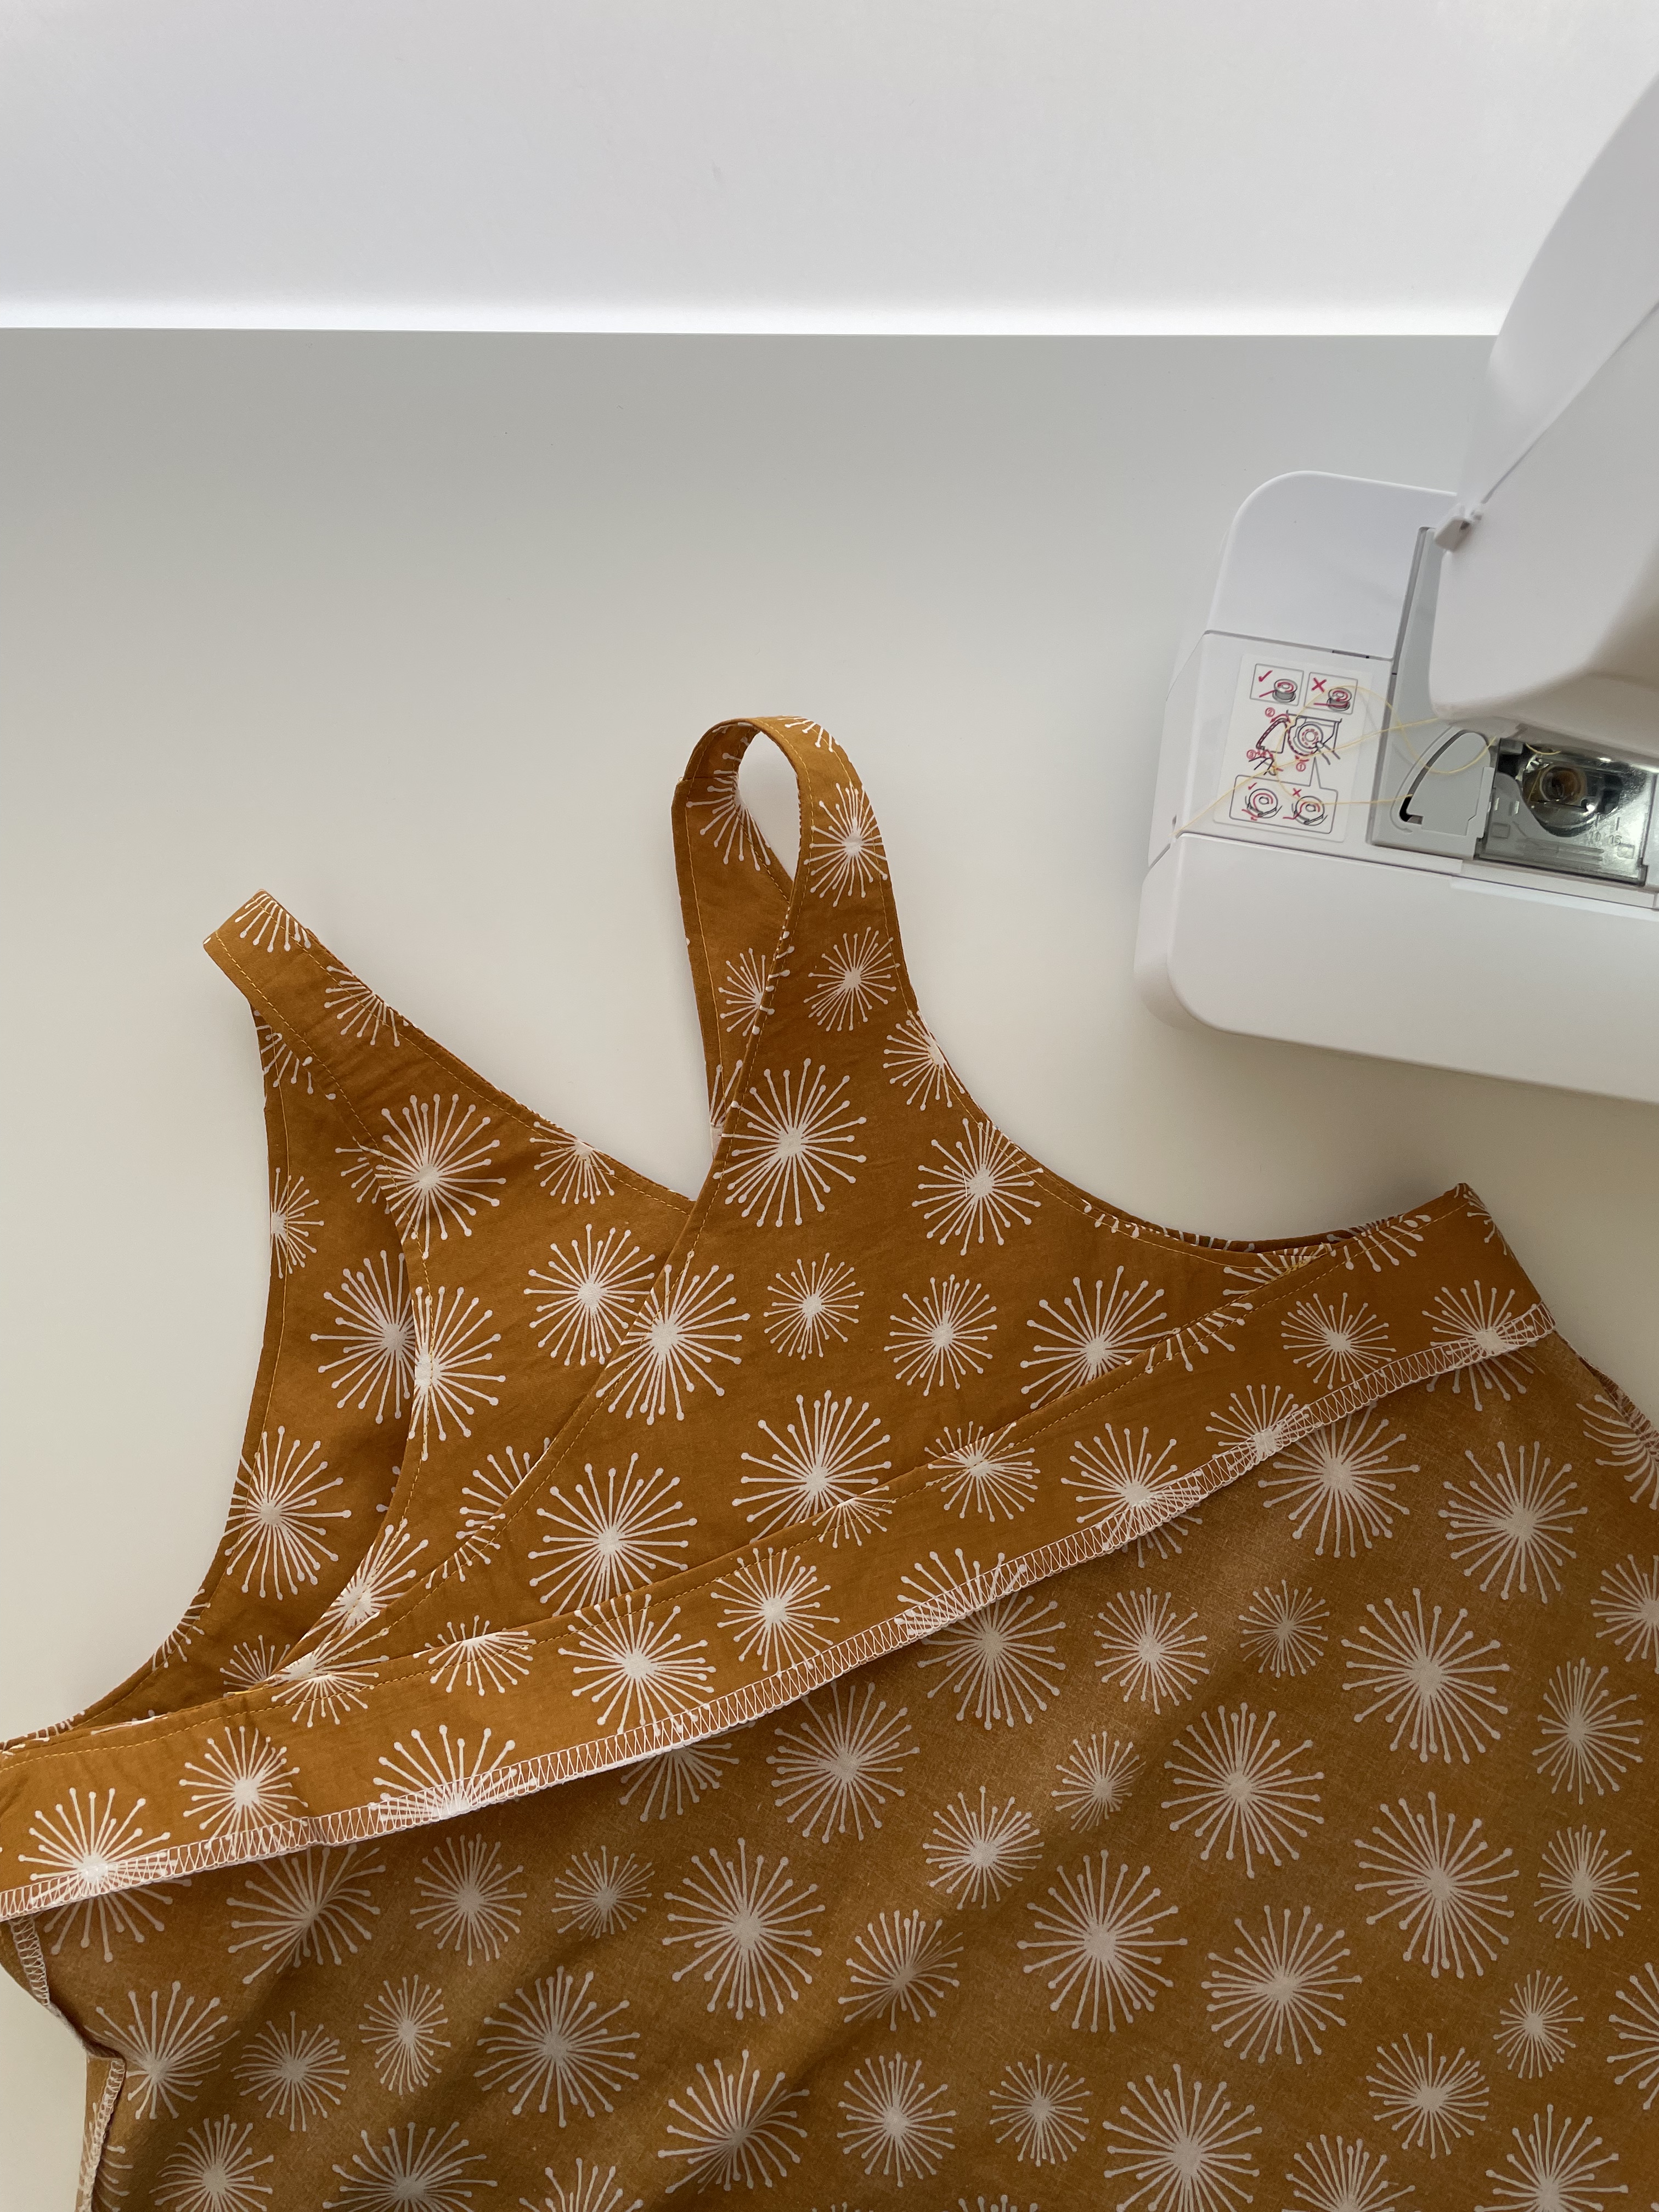
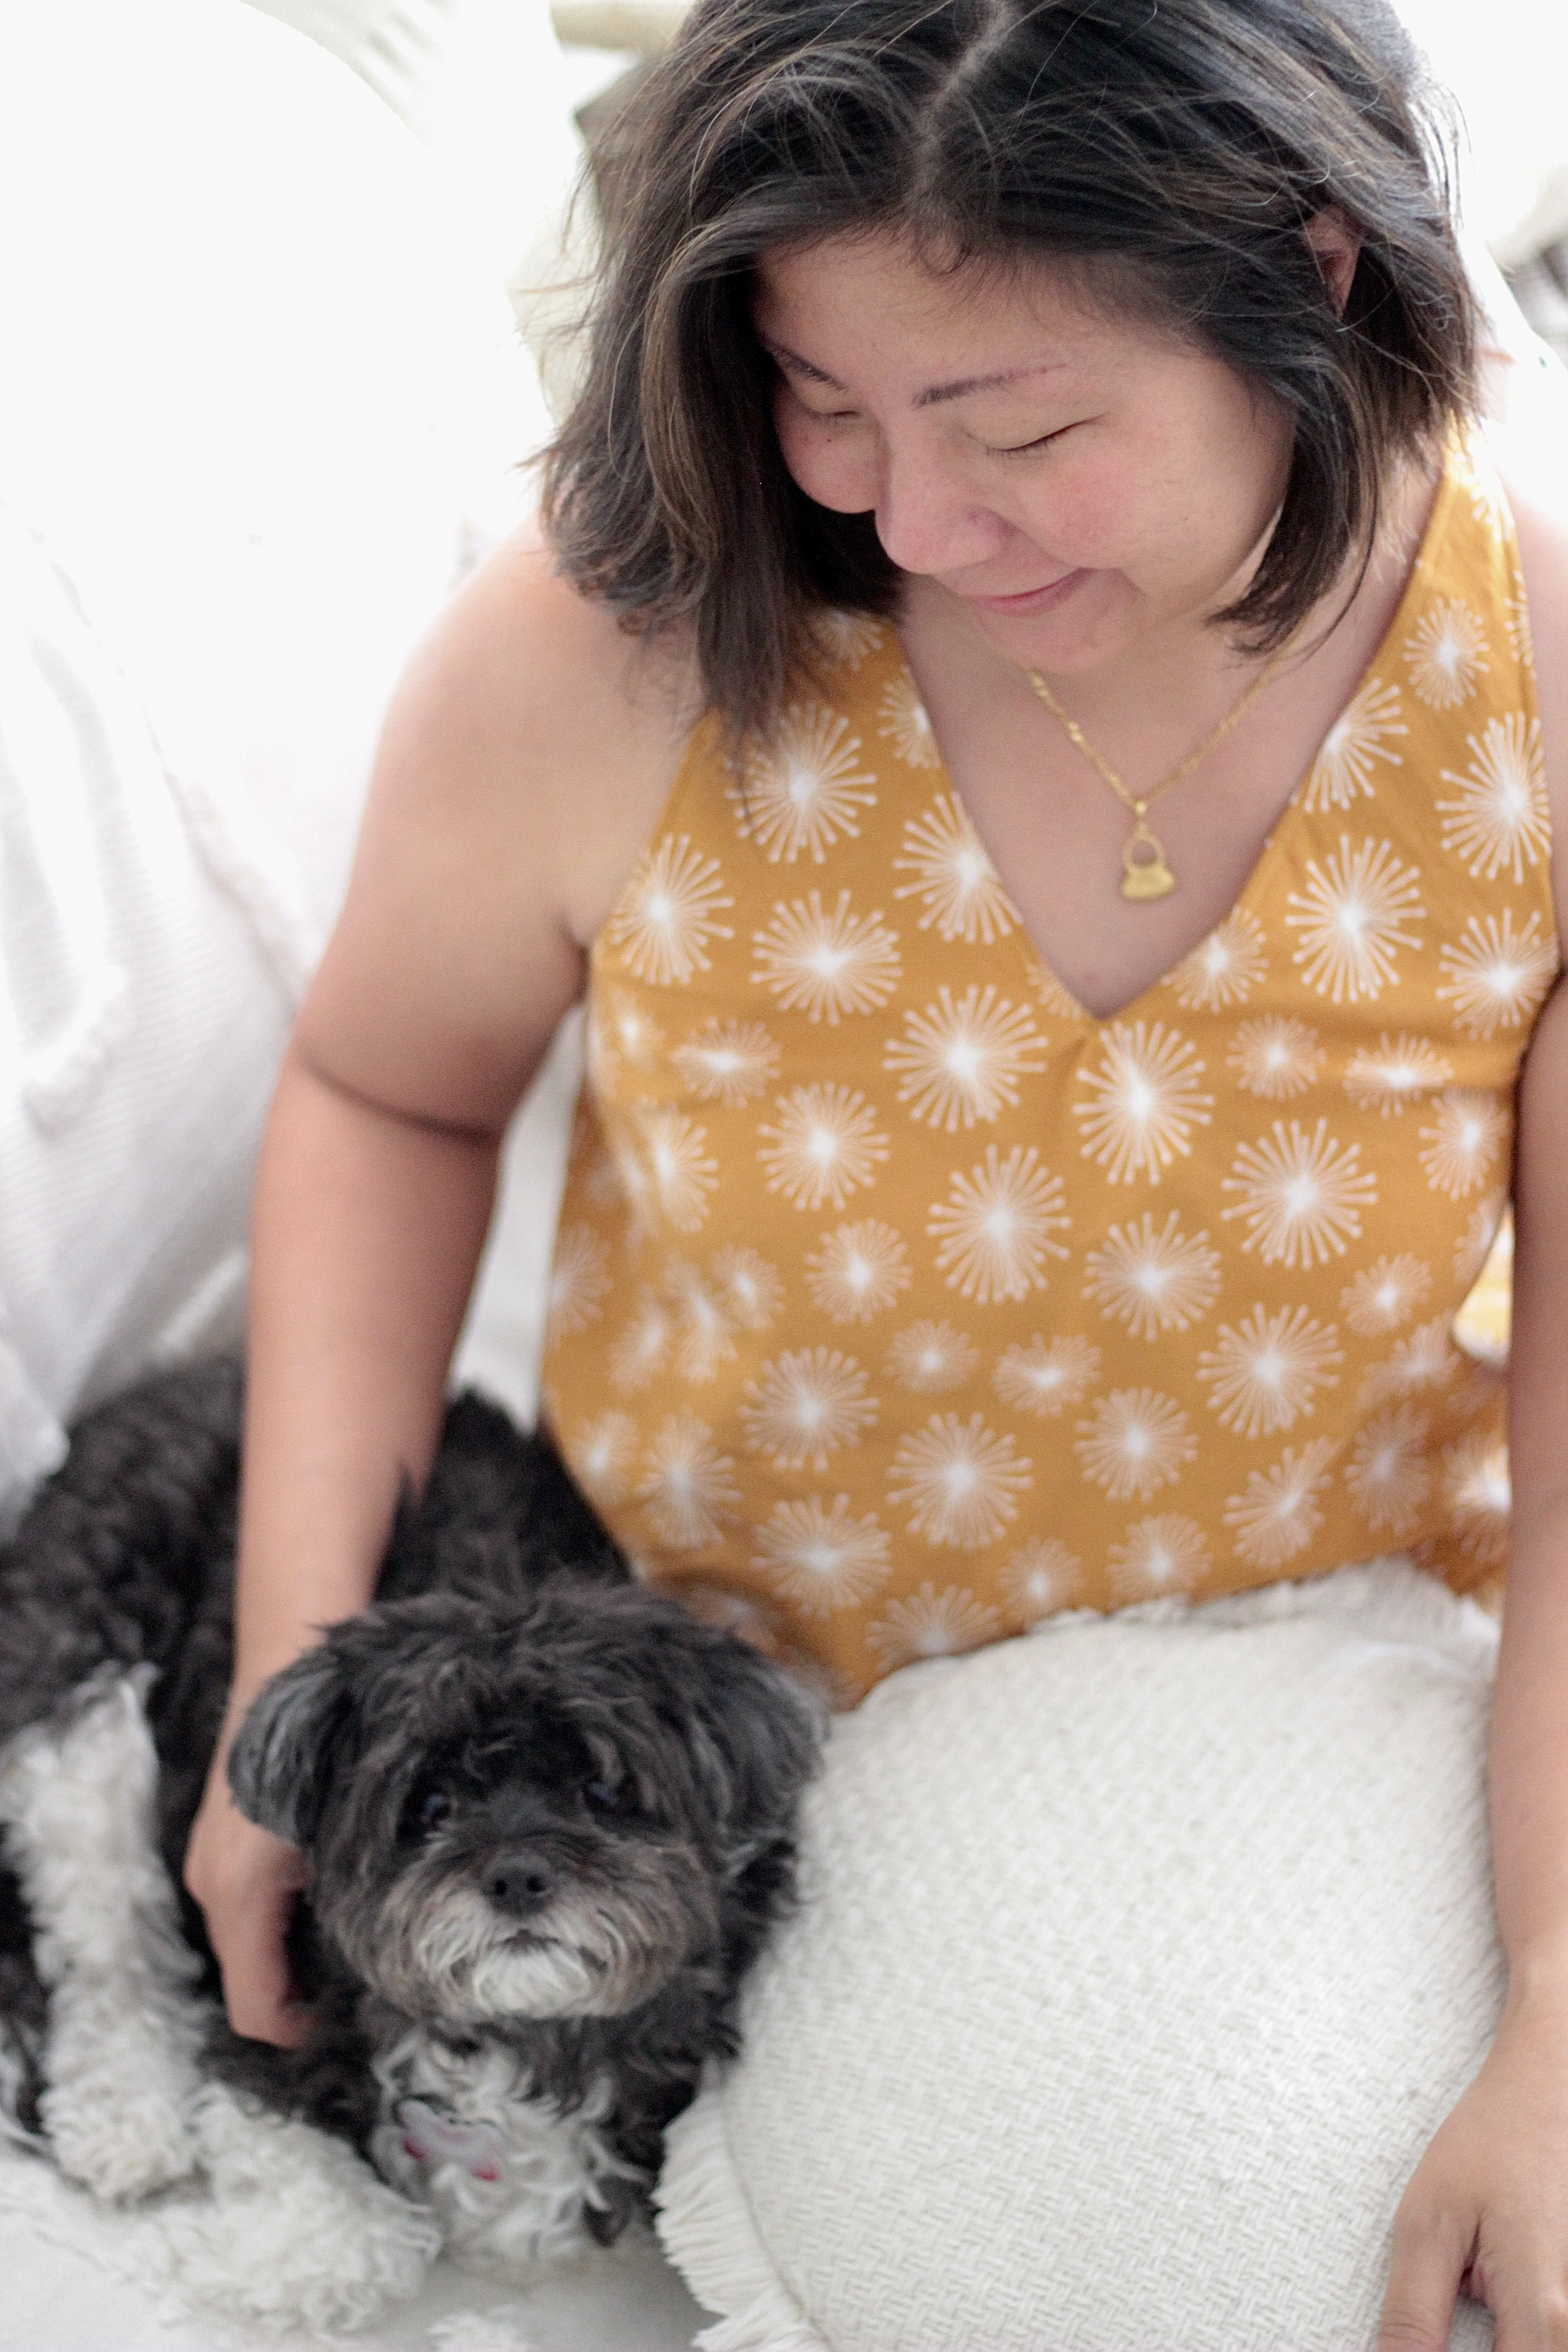
Poppy Blouse is the long anticipated new release from Pattern Scout Studio. It has the most beautiful ruffle collar which is my first. It is in the style of a peasant blouse with raglan sleeves. I was lucky enough to be on the testing team for the Poppy Blouse. This blouse is such a lovely addition to my me-made closet. I do love sewing a dress but for practical reasons, I’ve been looking for more blouse patterns, so I was excited when this opportunity came along.

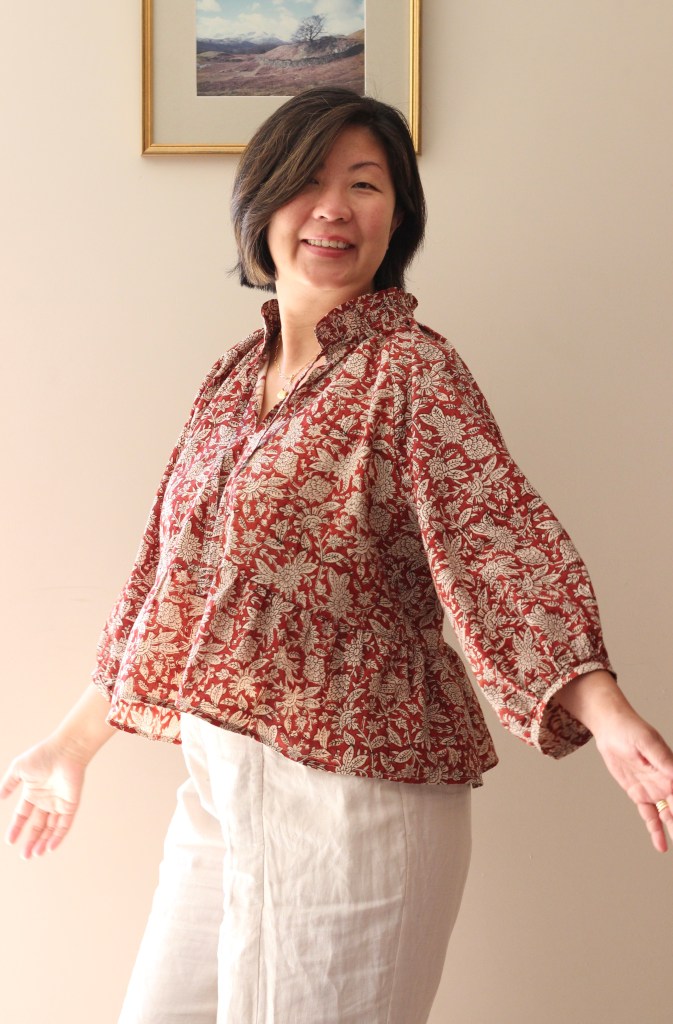
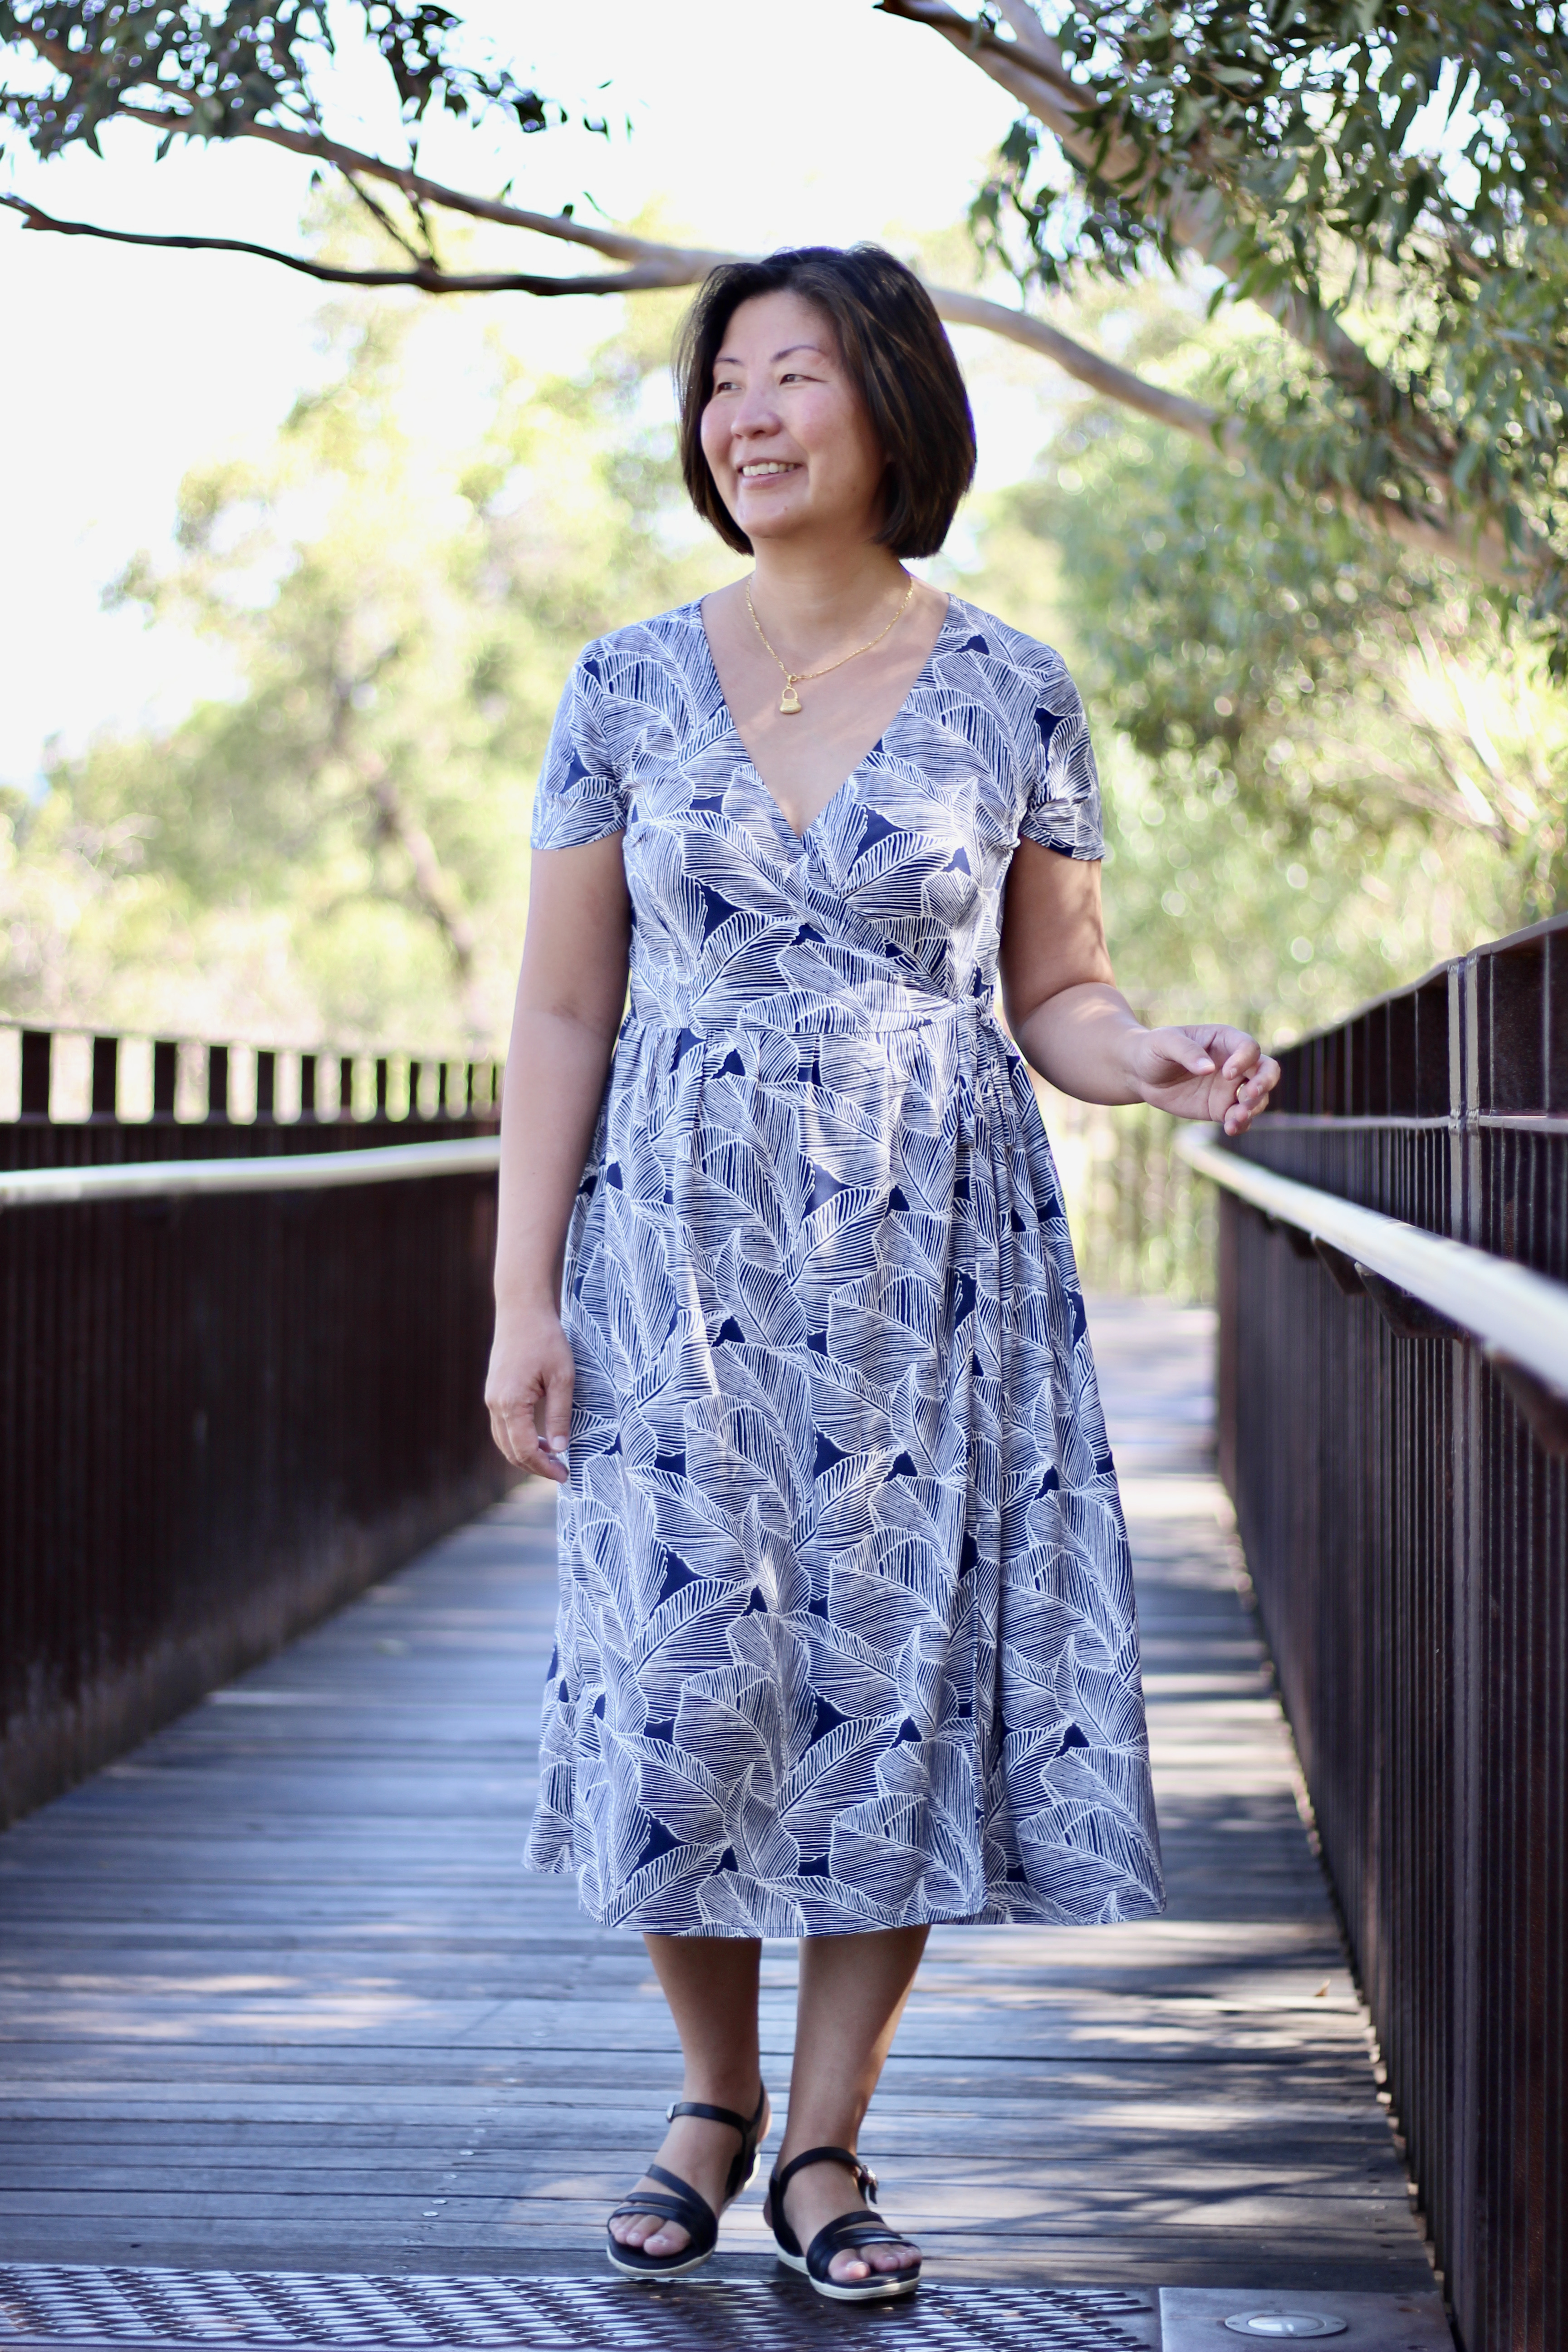
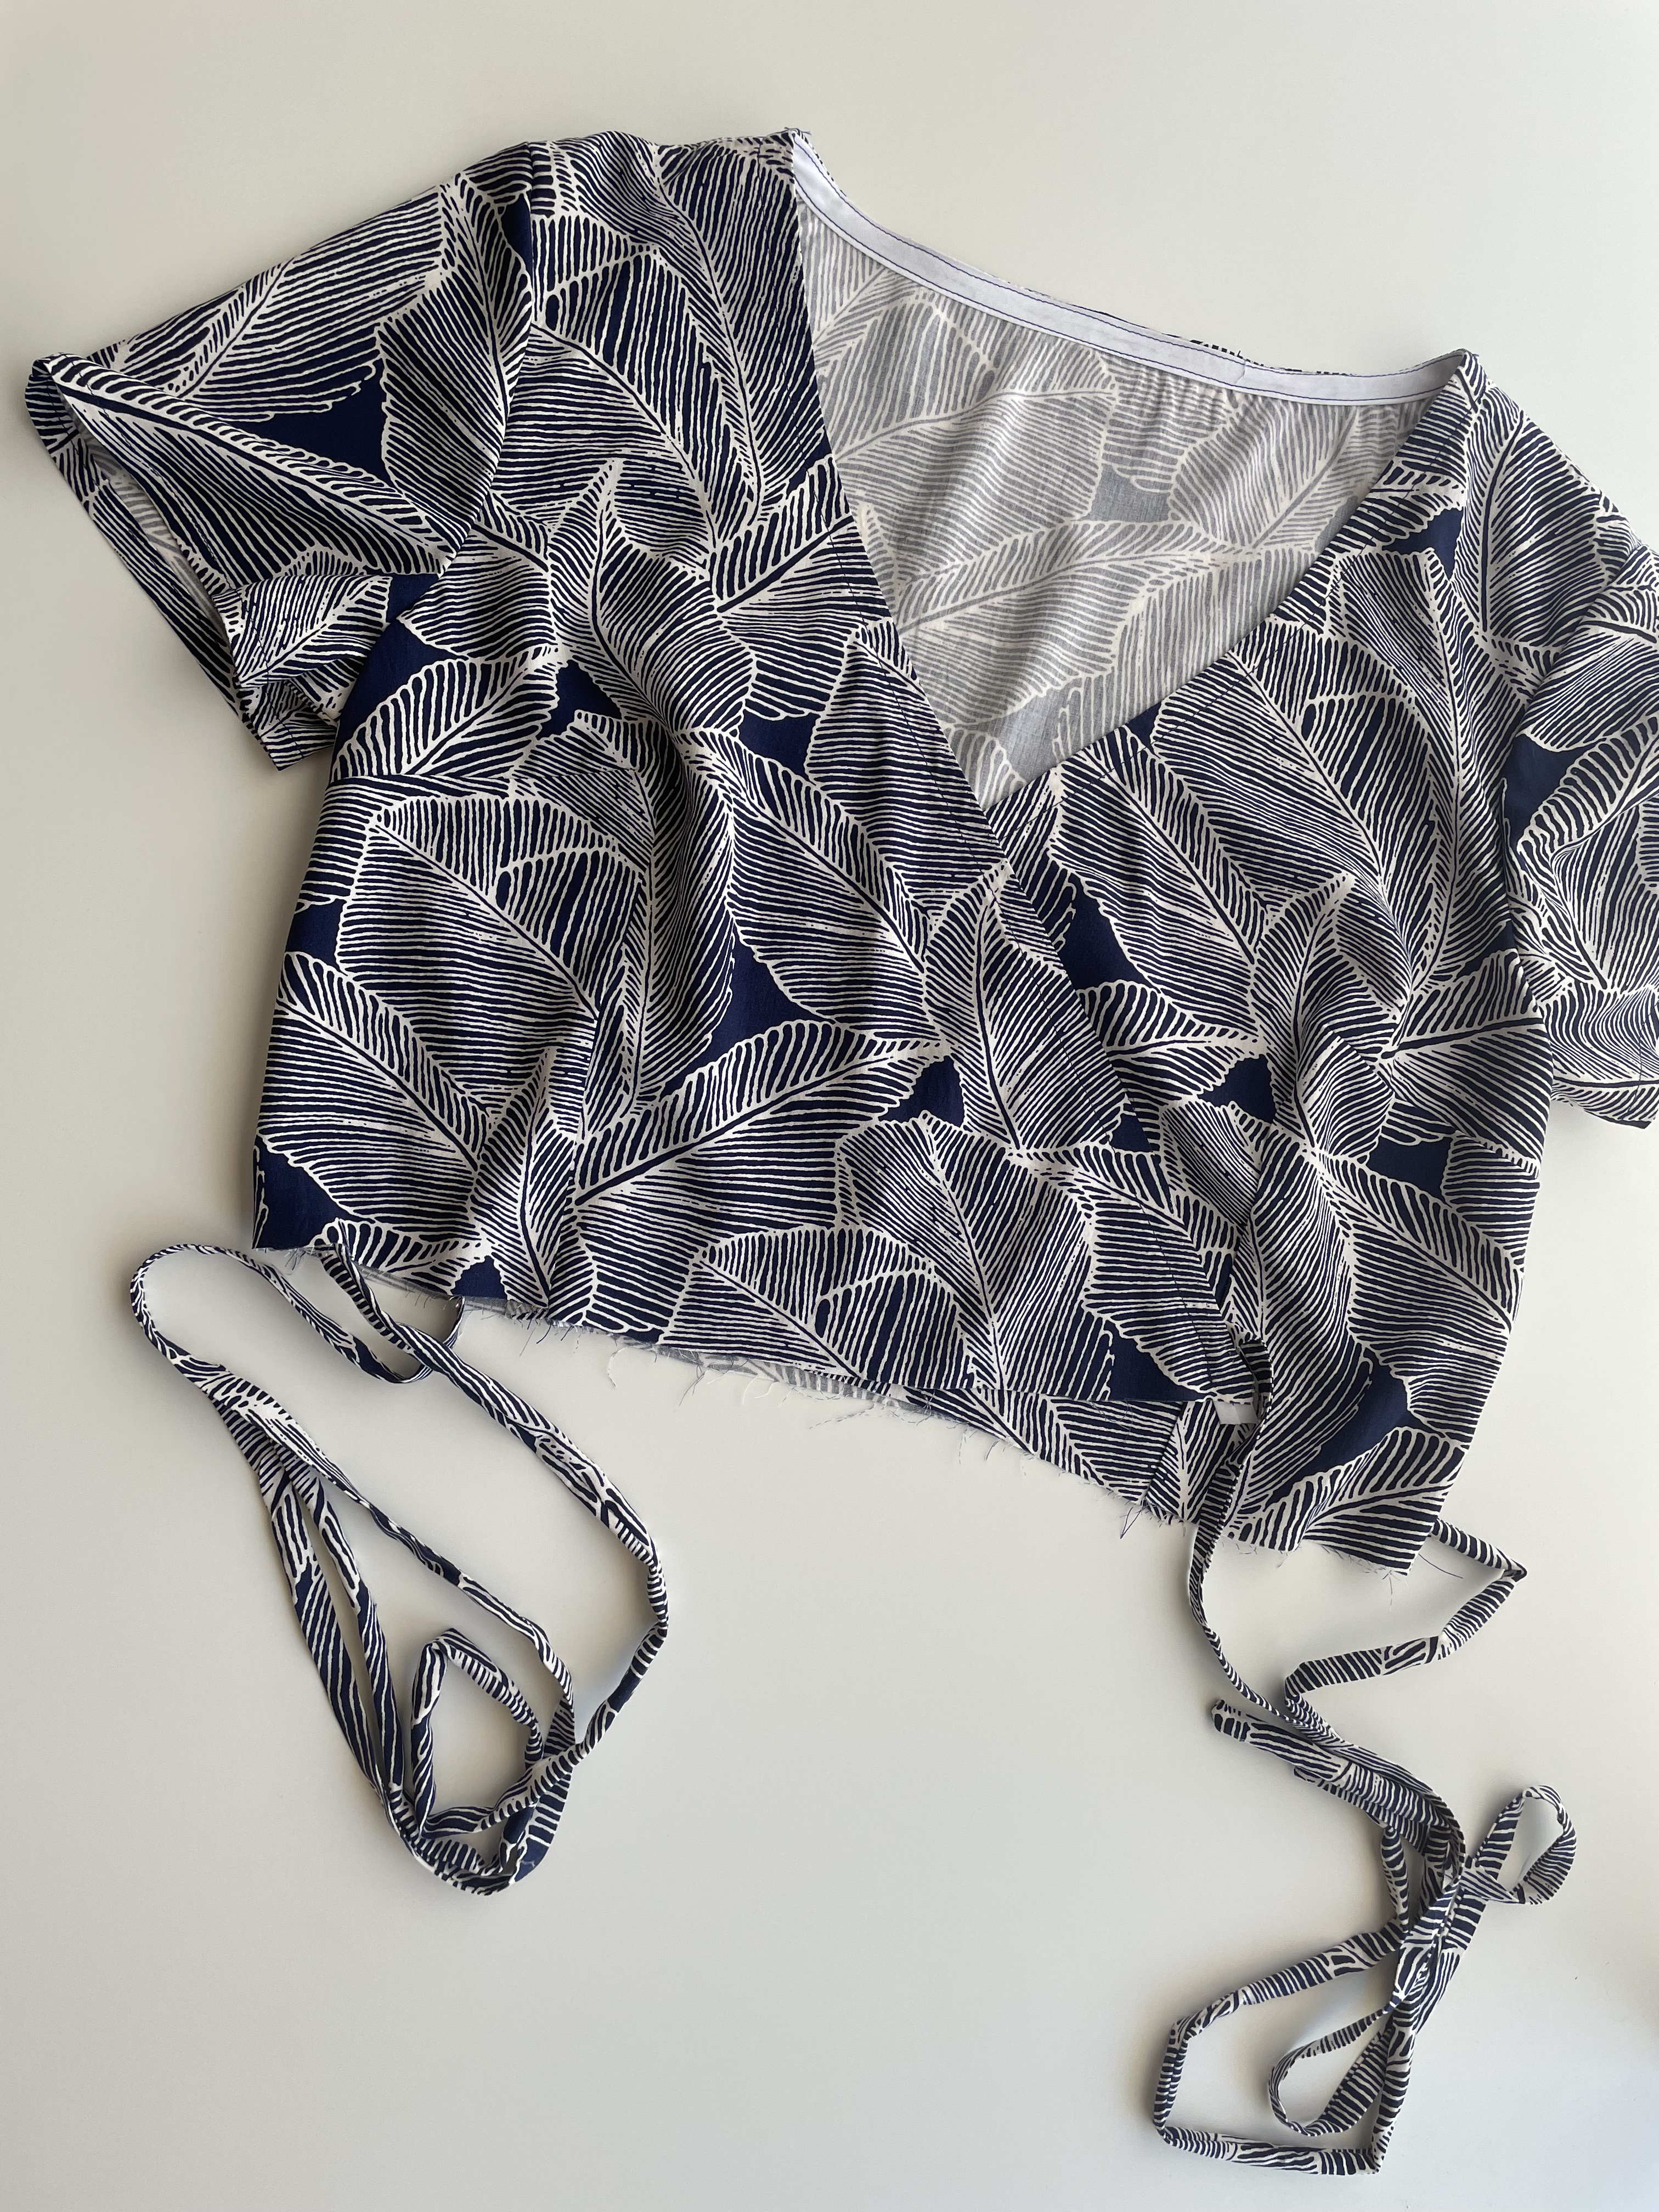
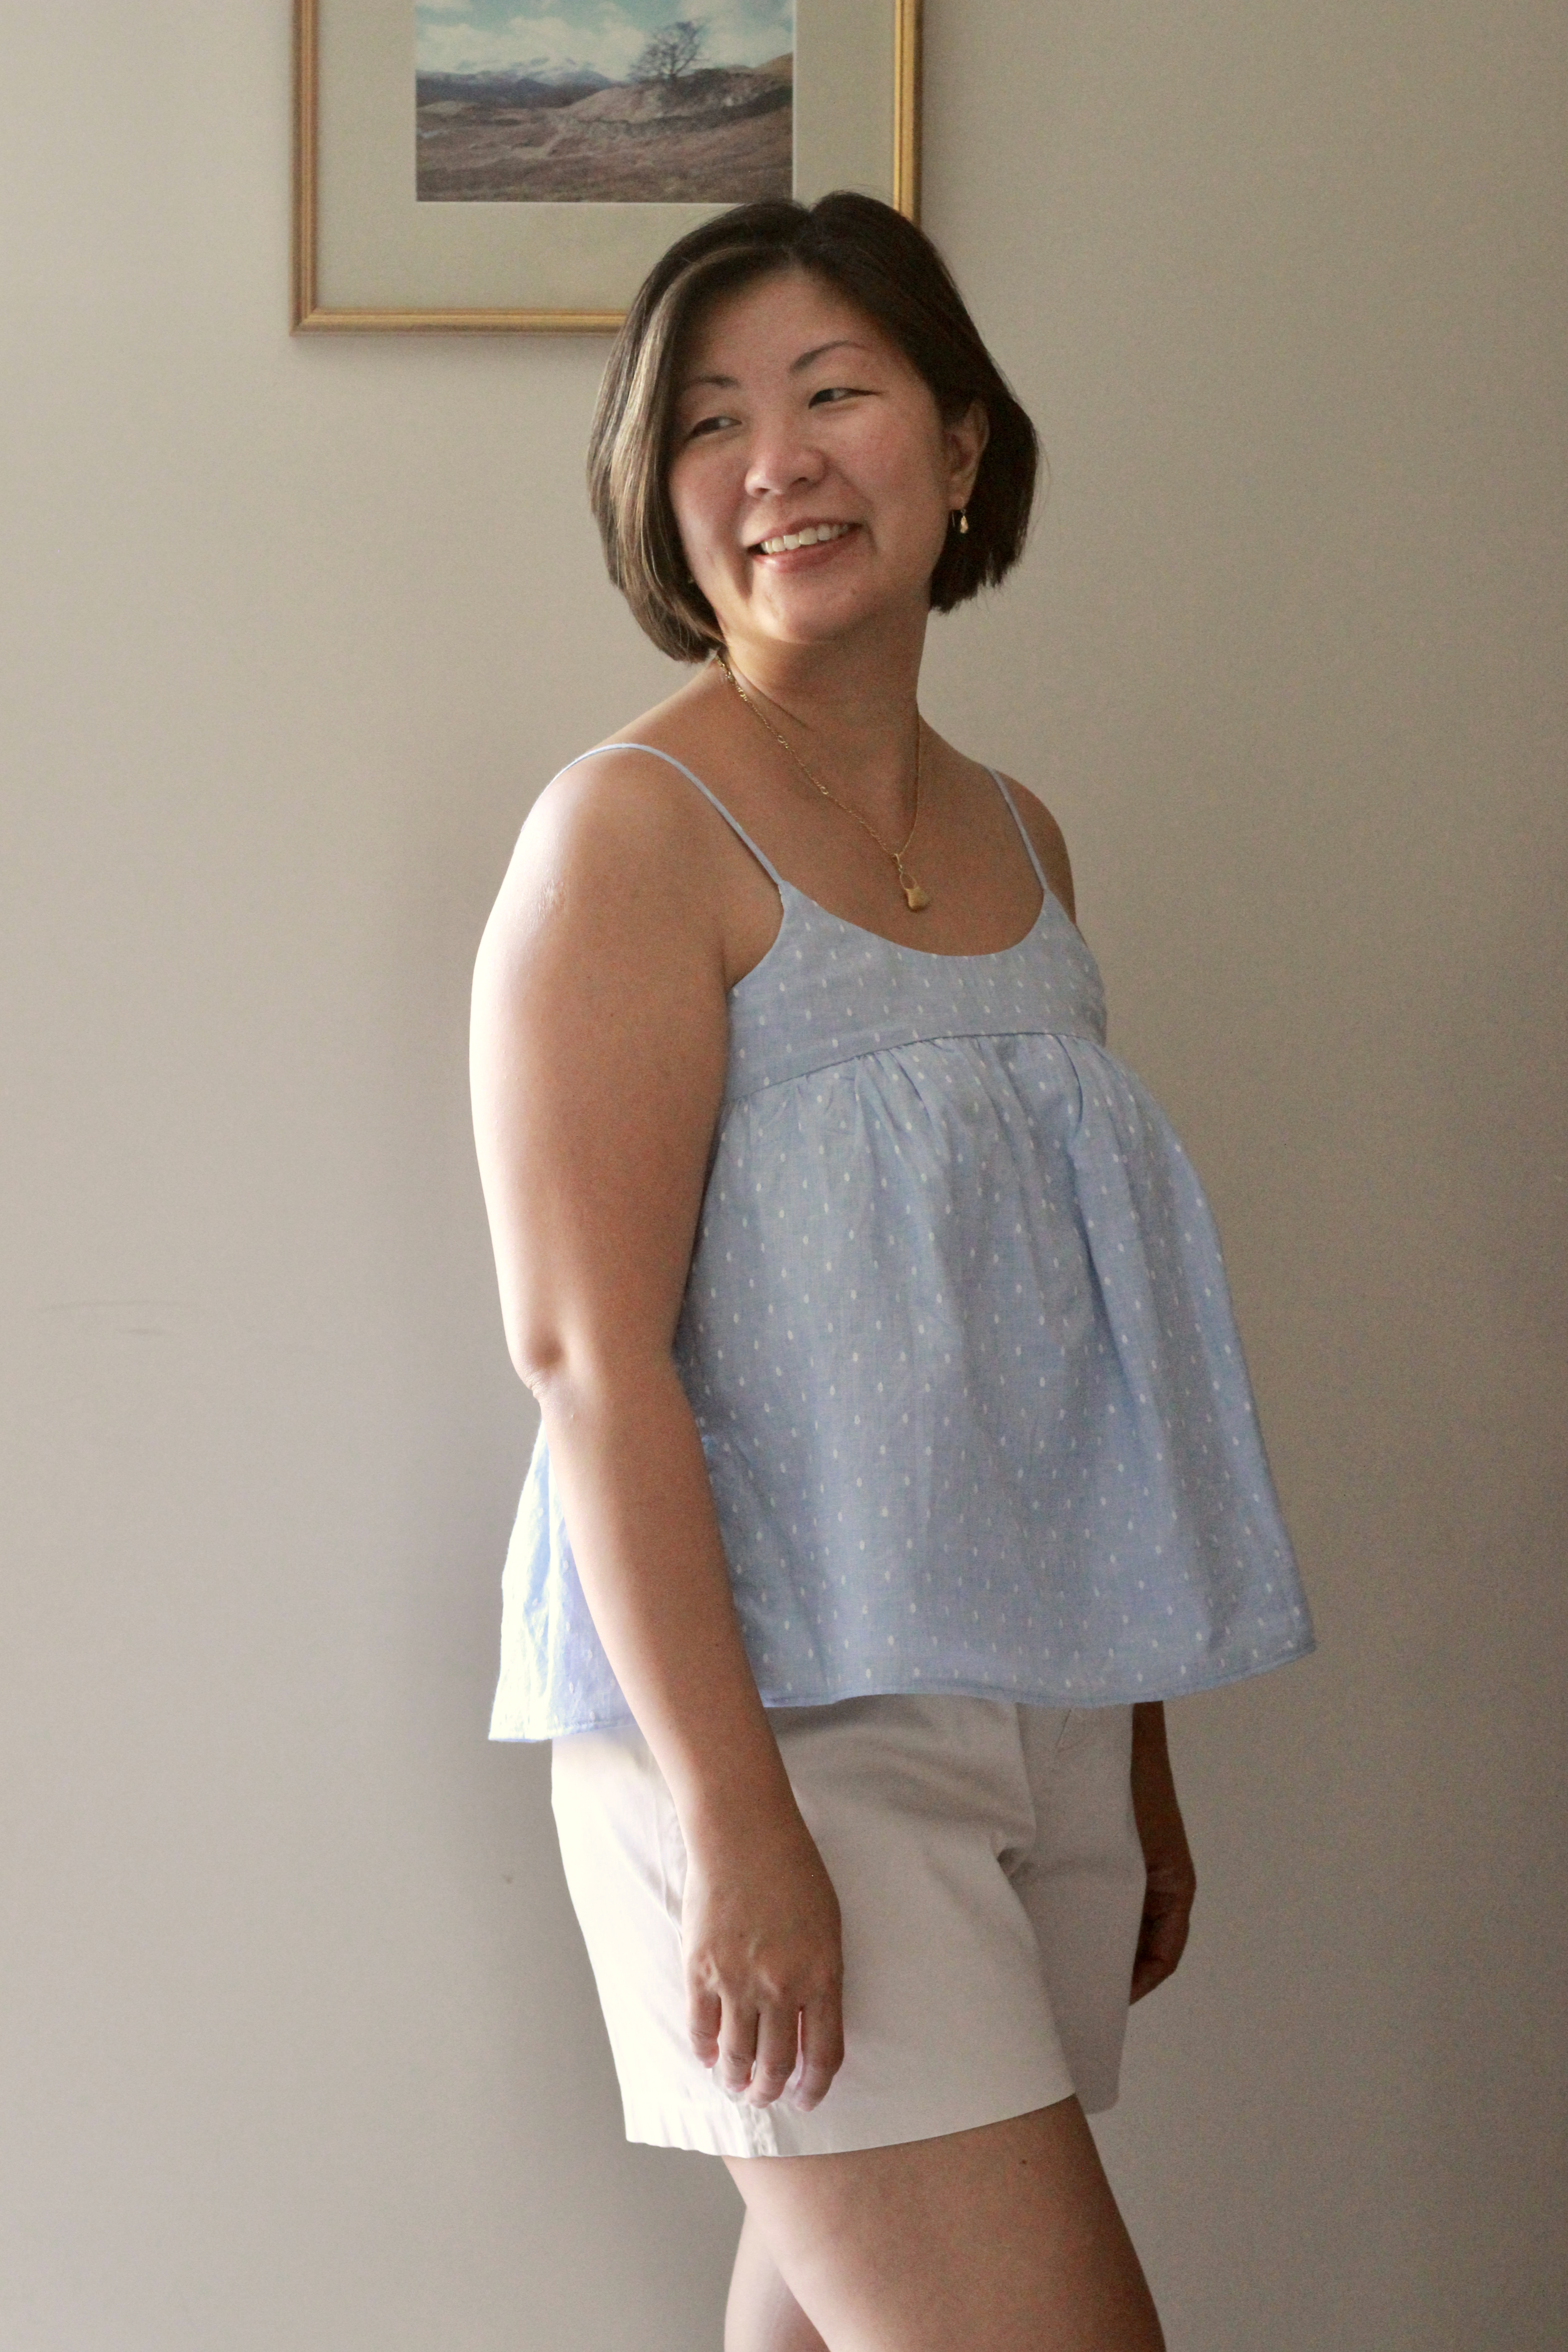
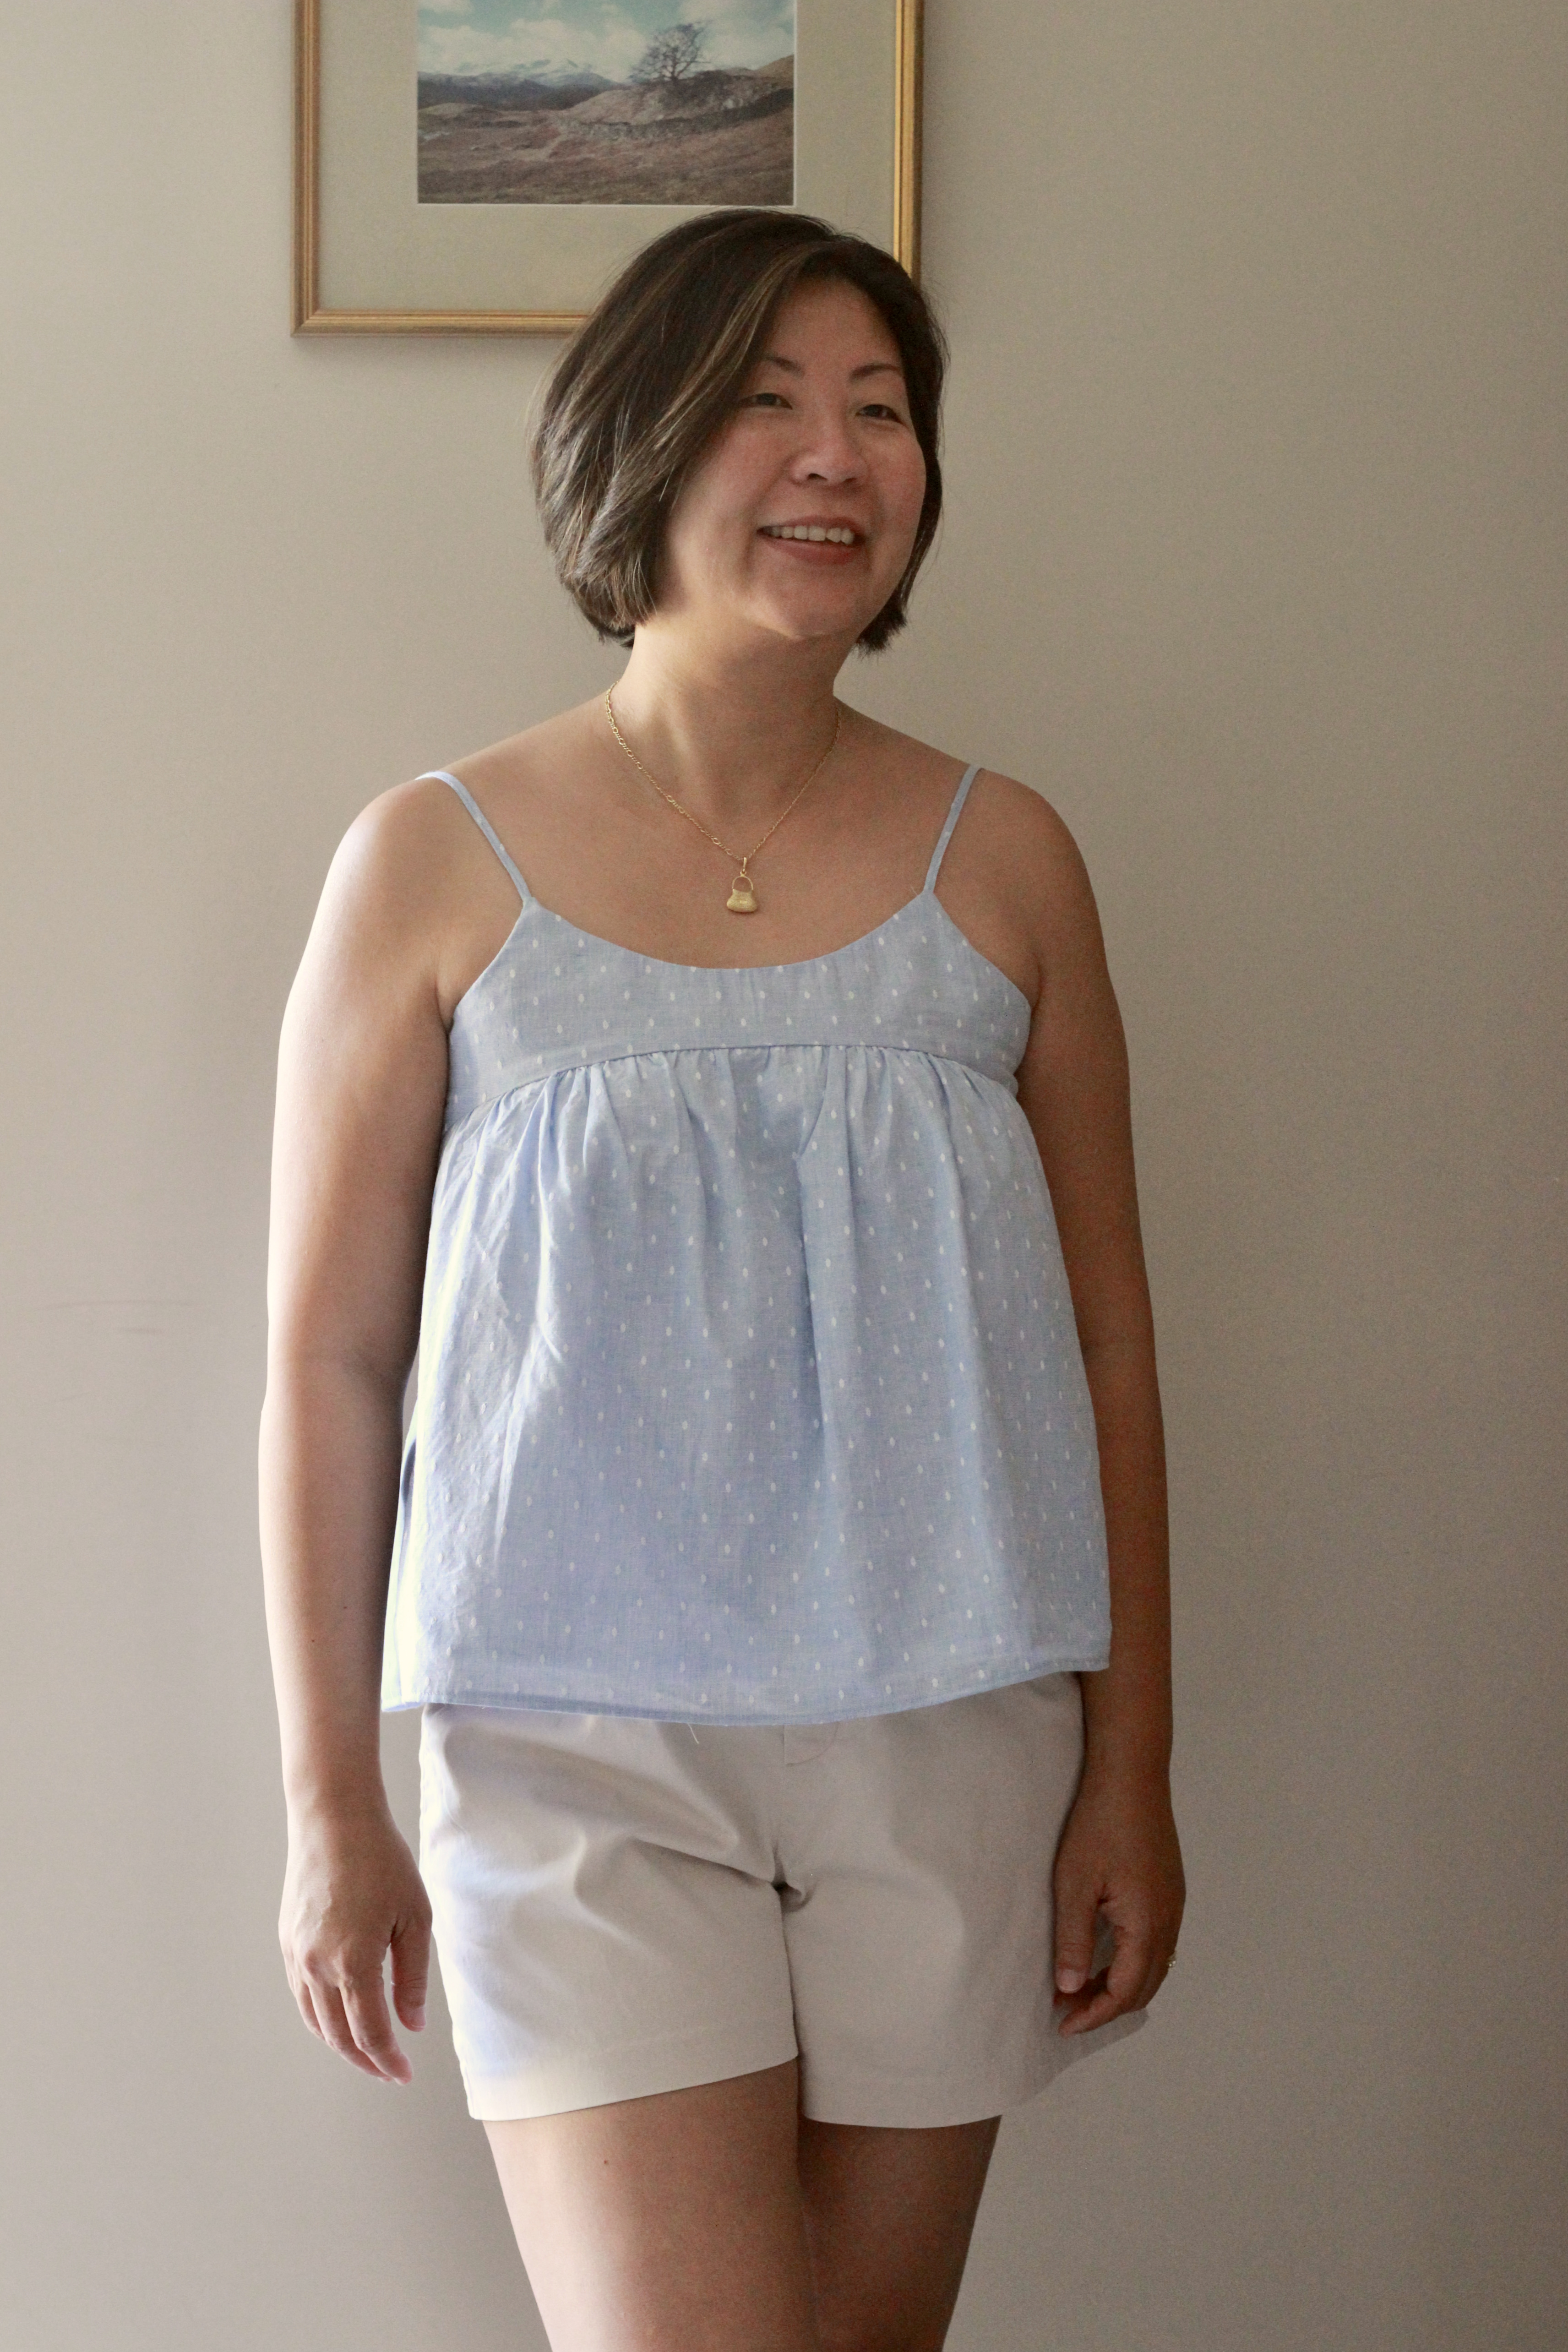
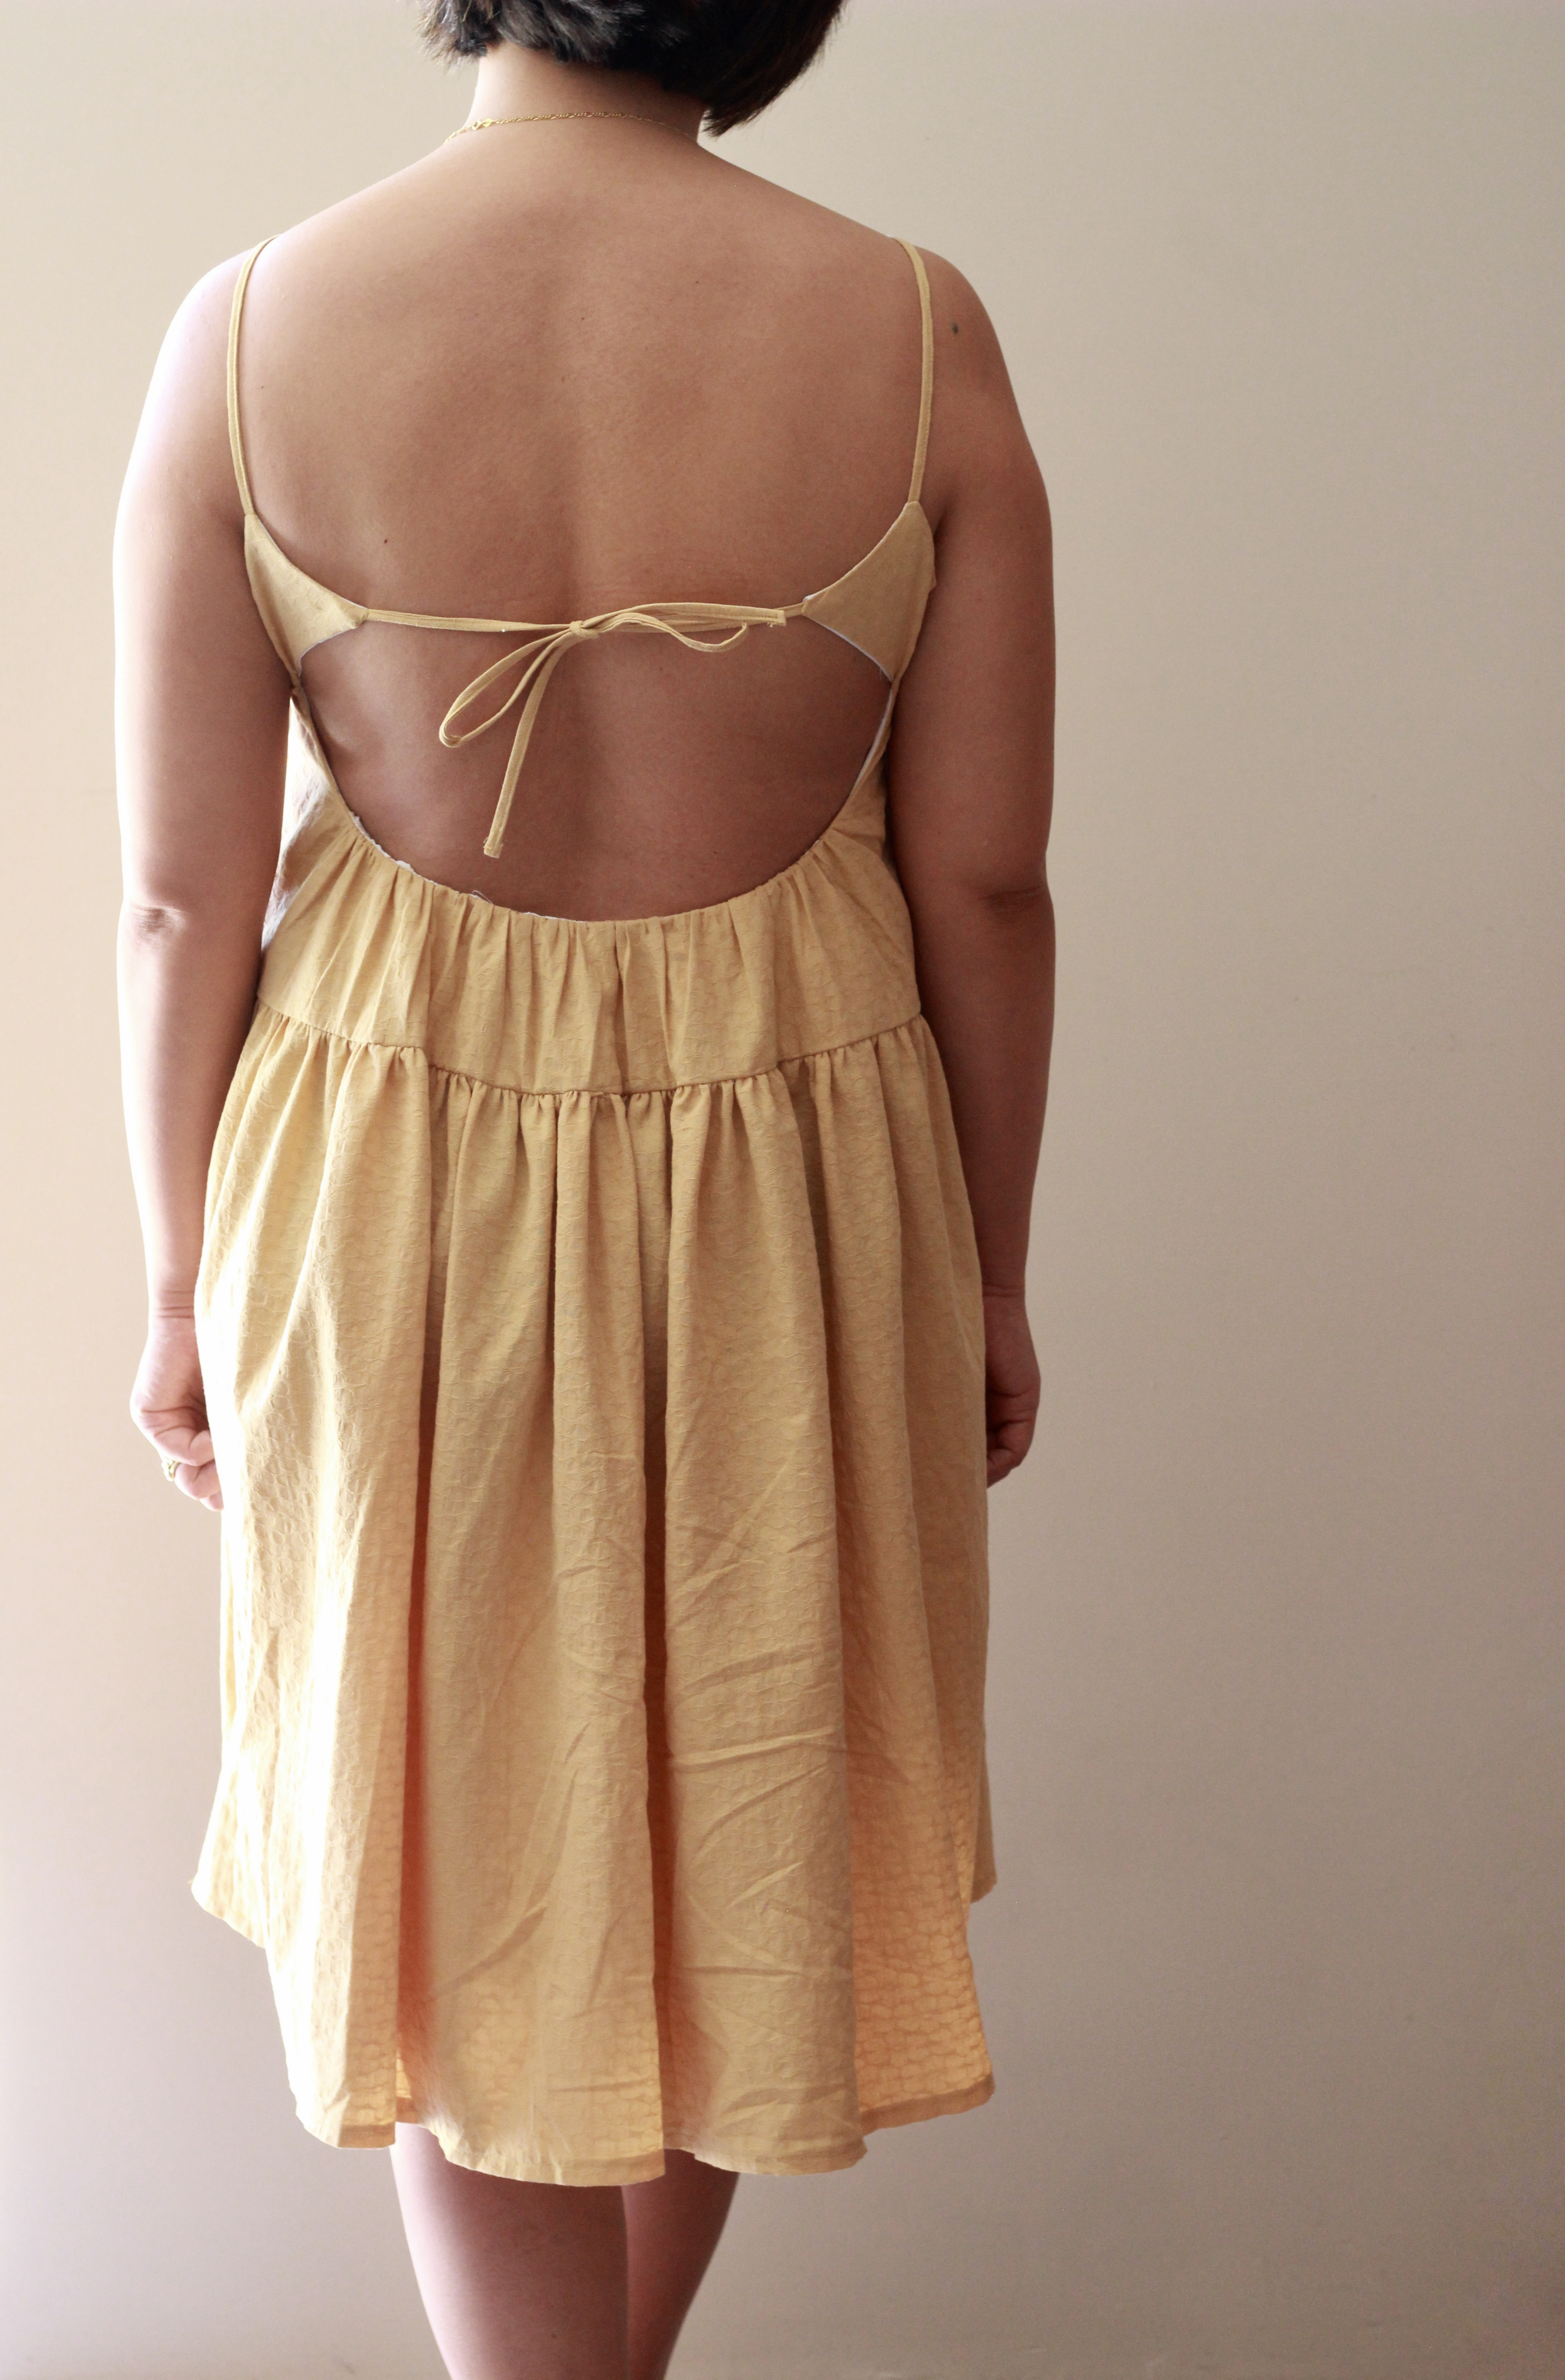
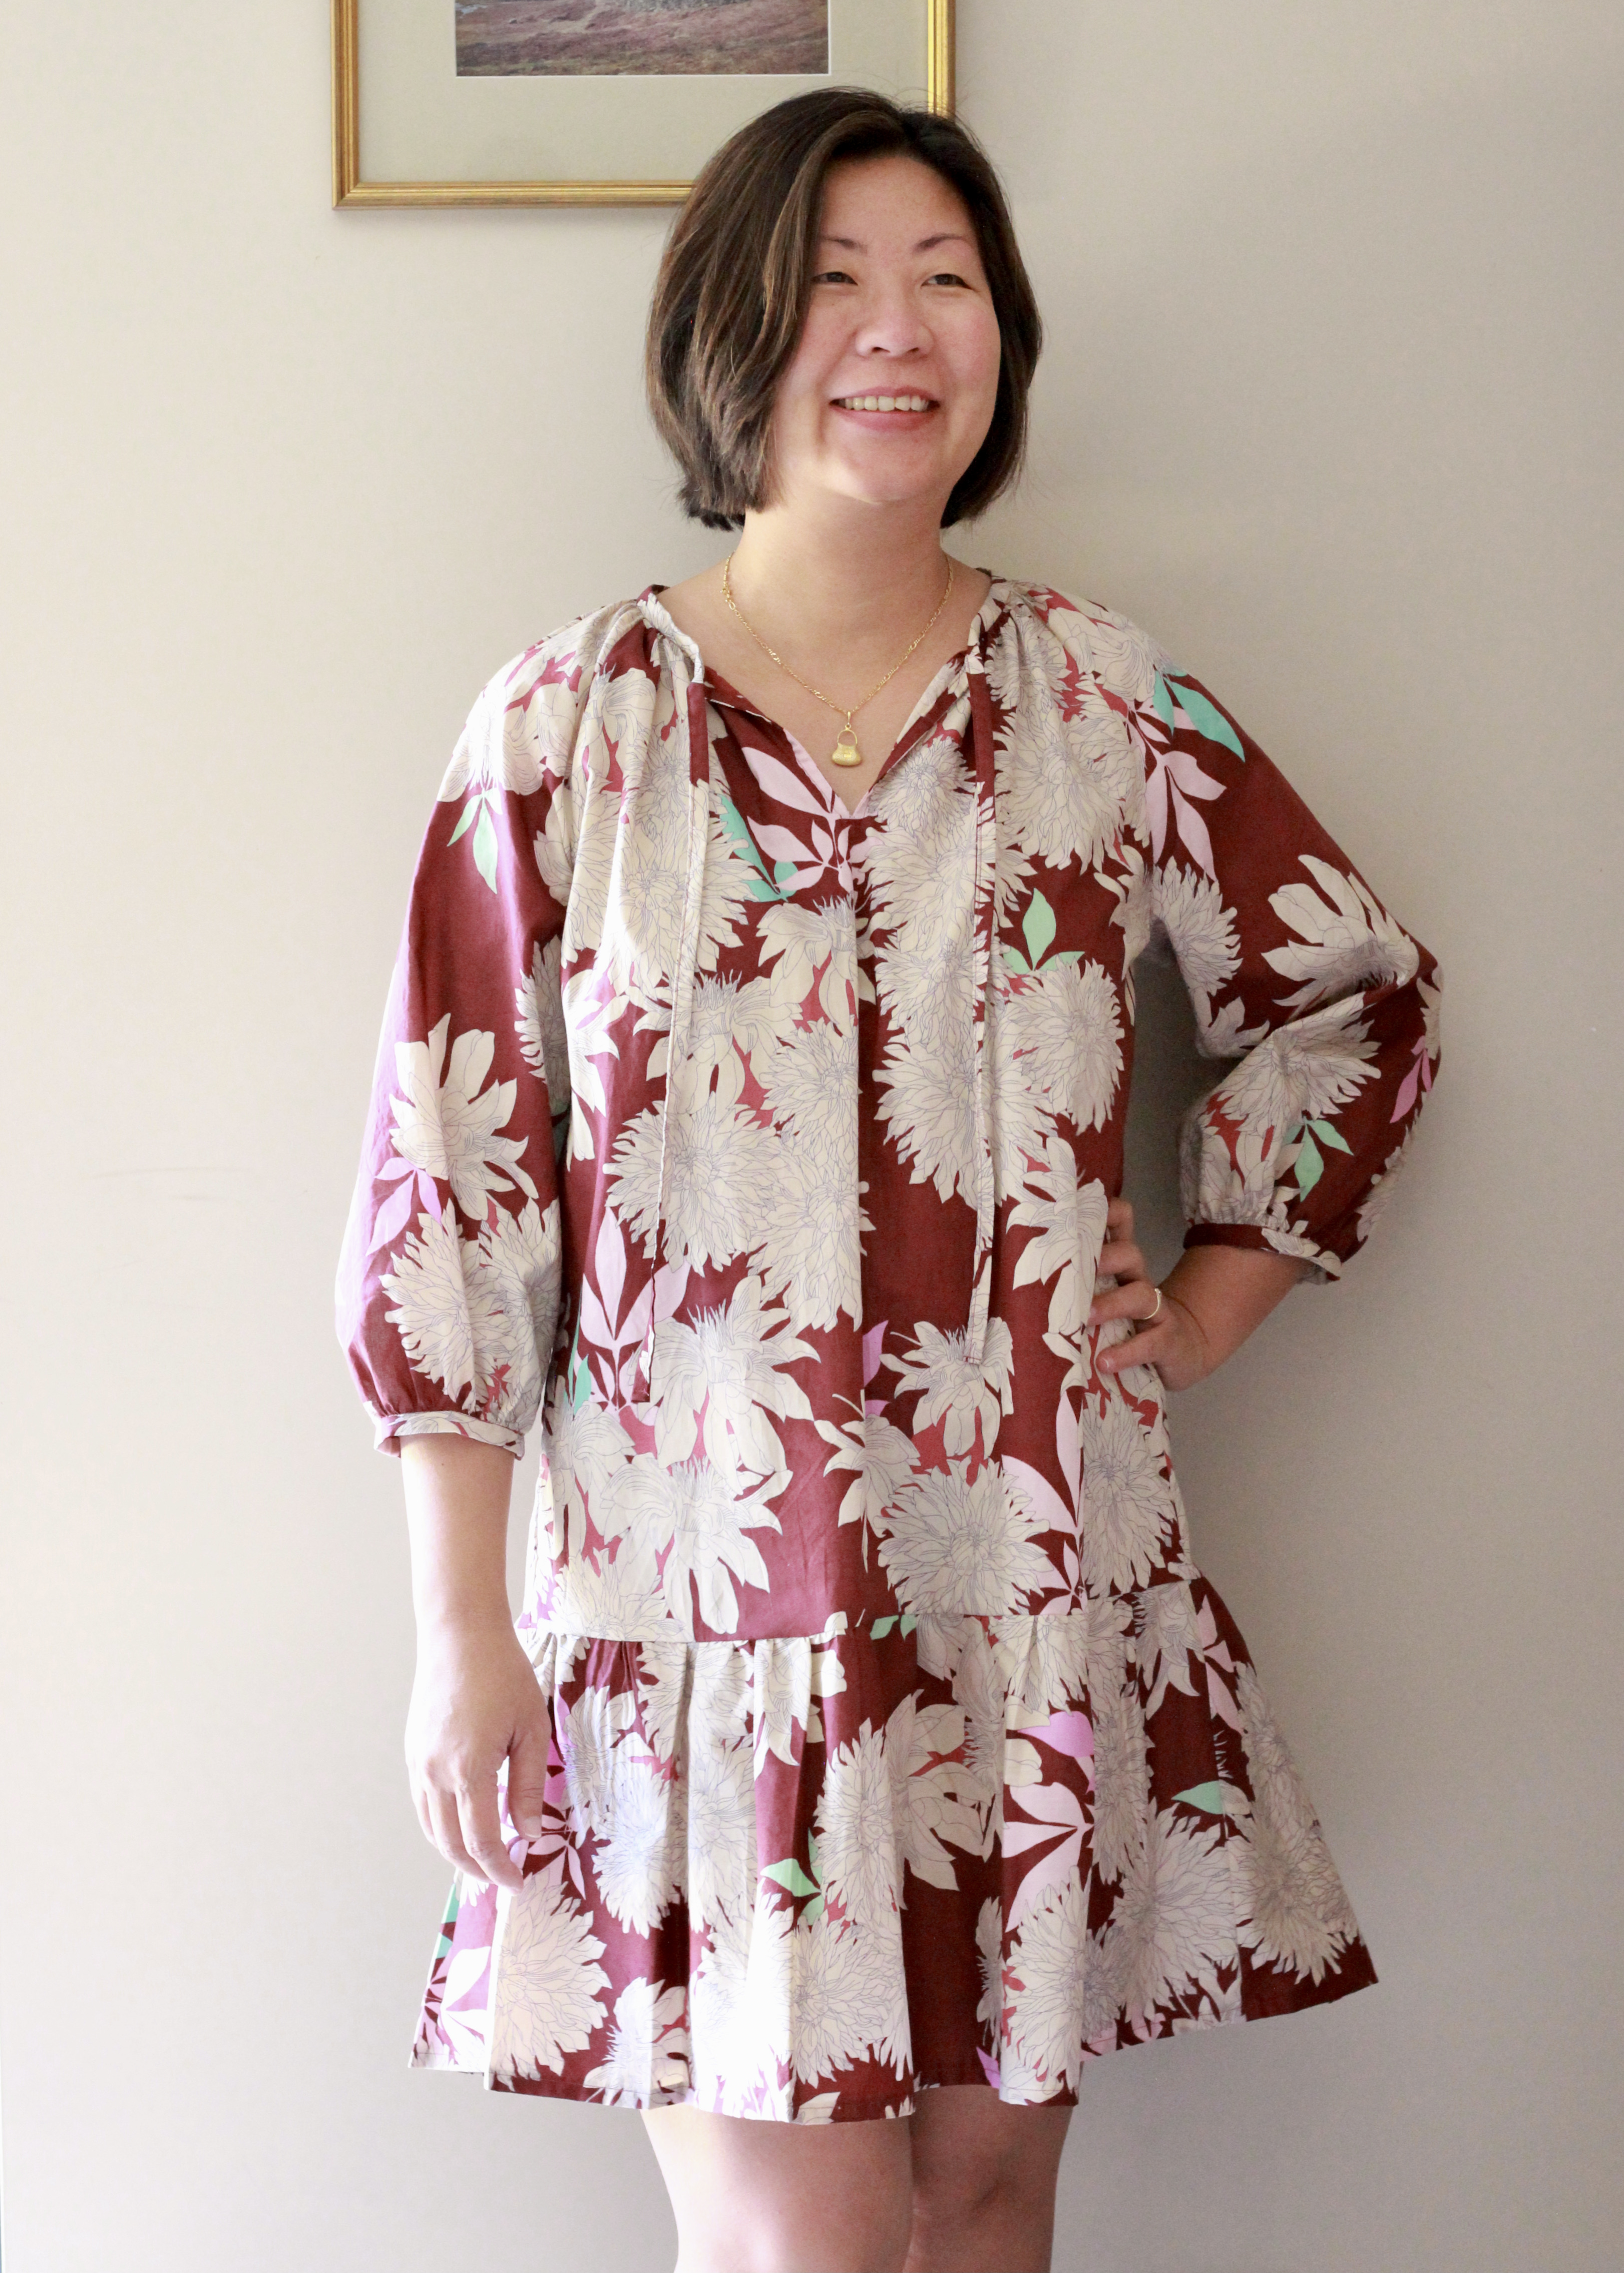
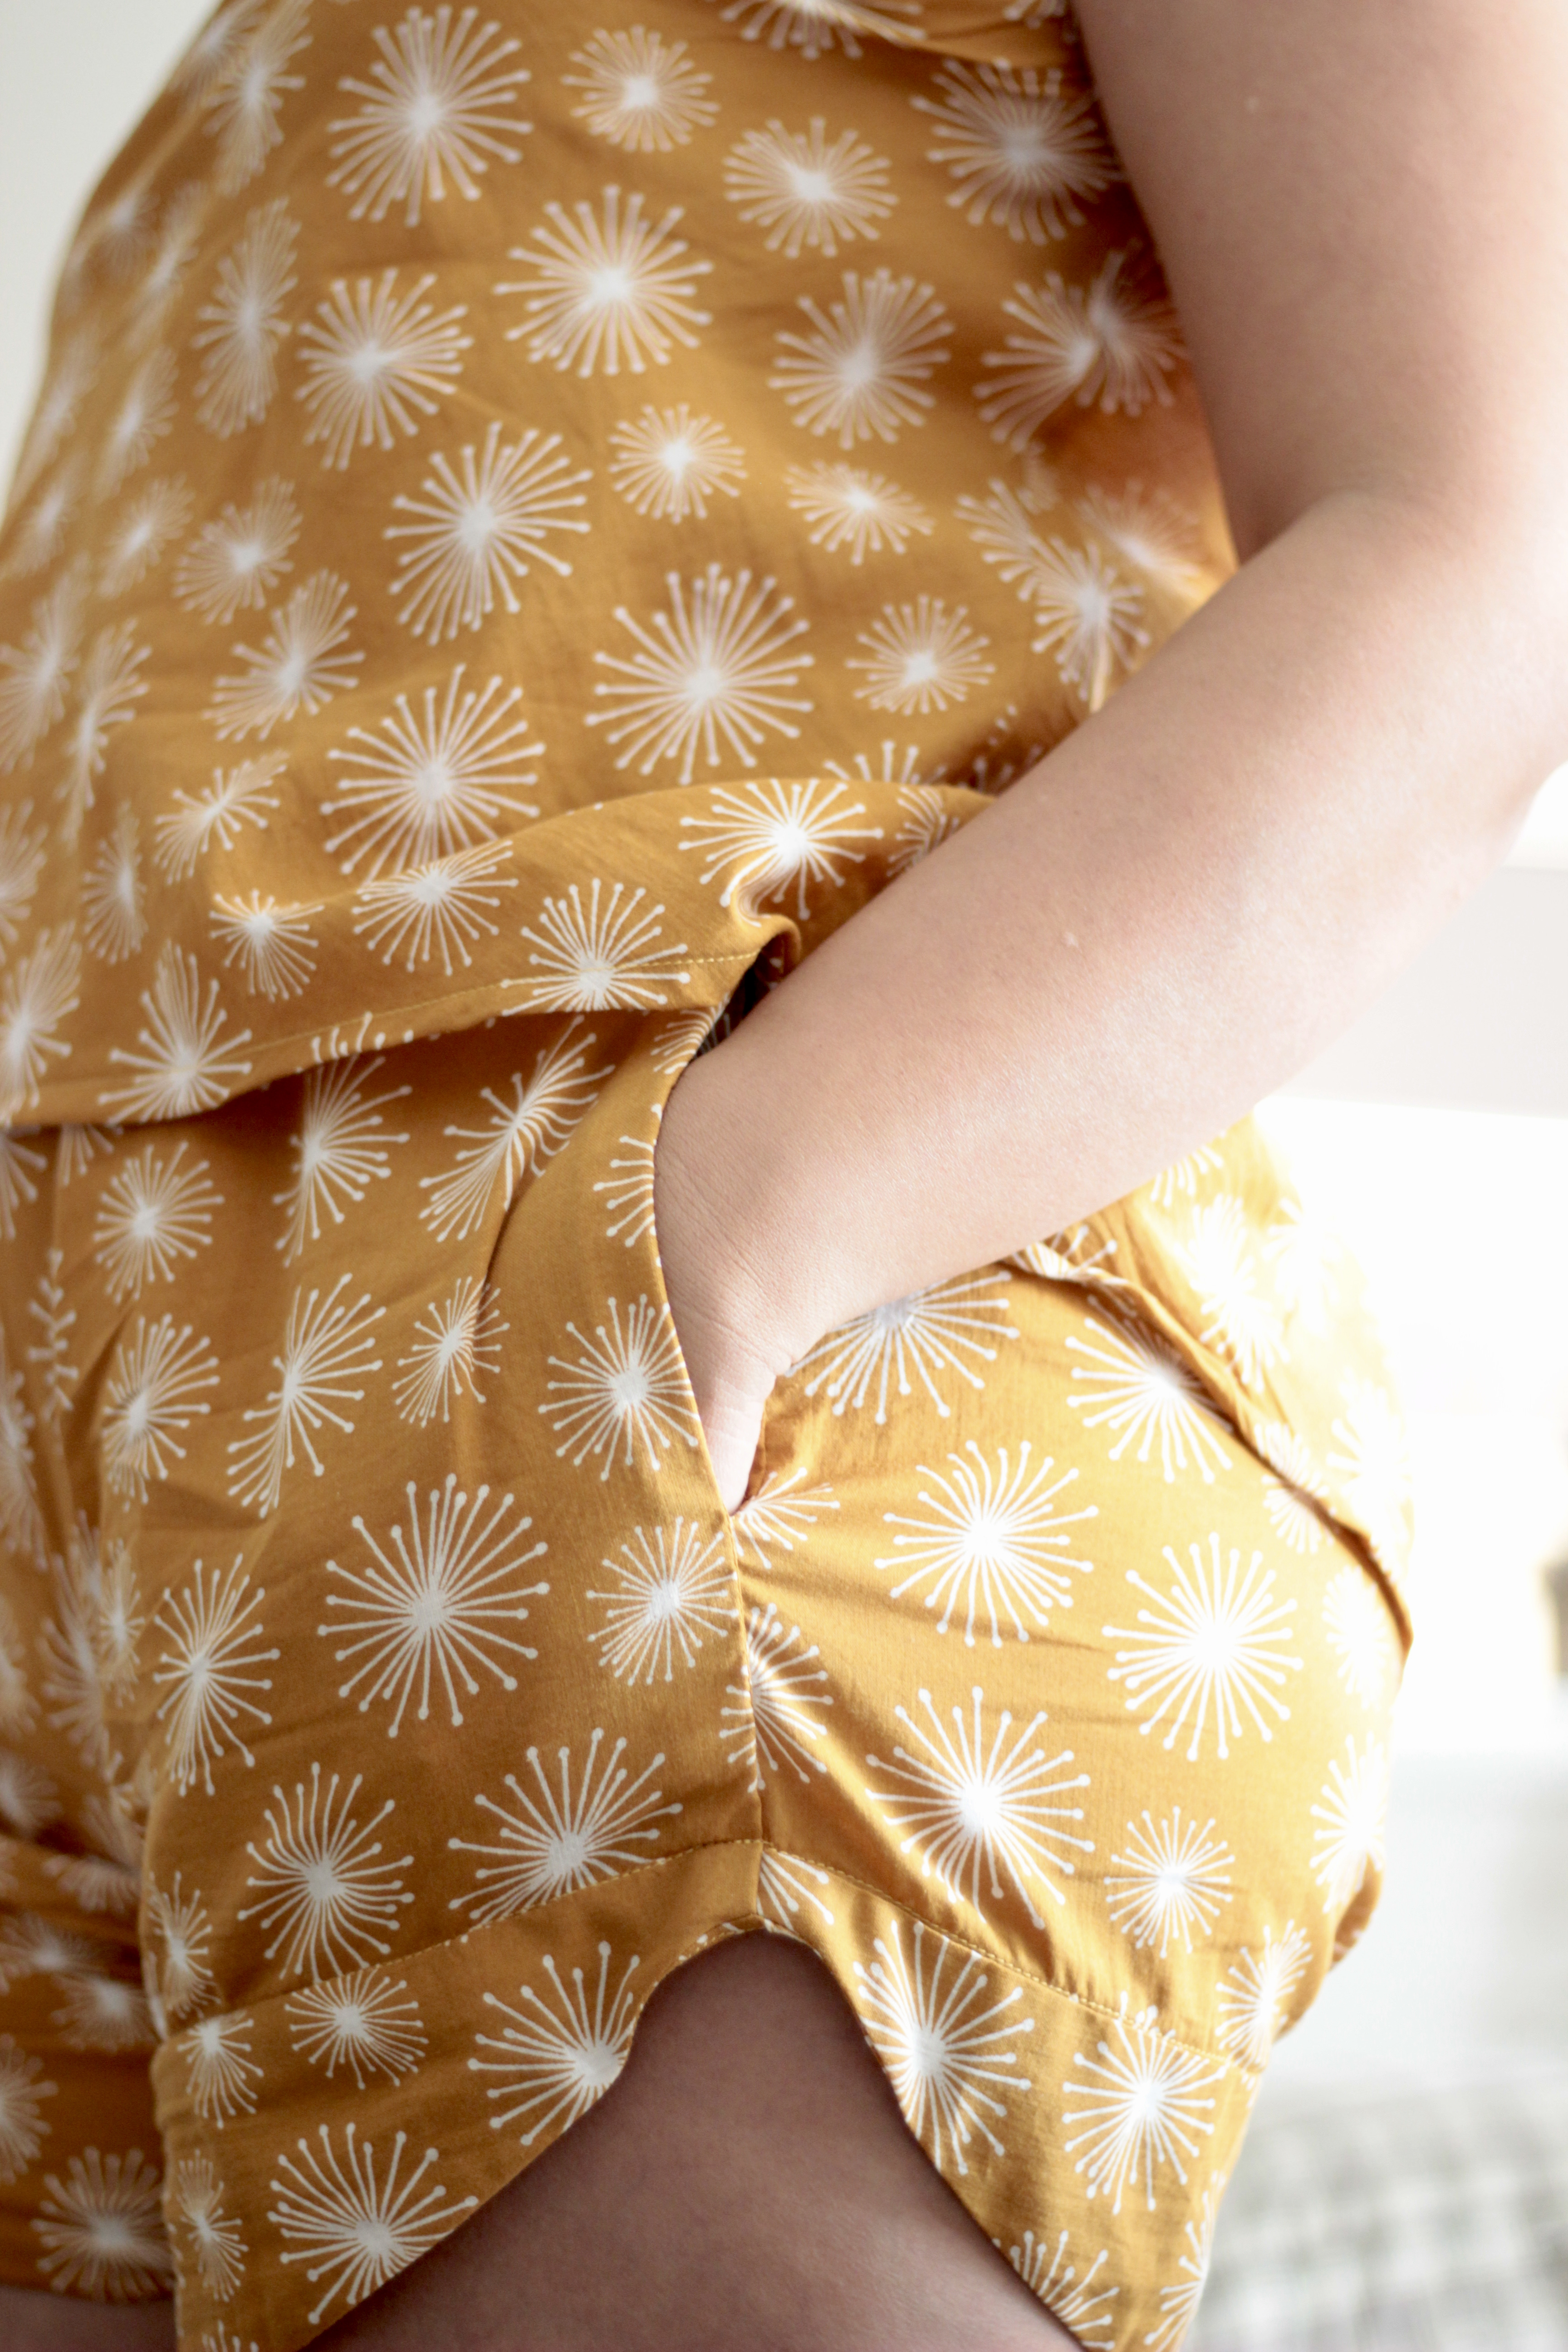
There are two versions on offer with the pattern. Featured above is Version A which has a ruffle hem. It’s a pretty feature and I find the peplum to be a very flattering feature which draws the silhouette in at the waistline and elongates the legs. I also went on to make a silky version B so the pattern is already proving to be a tried and true pattern! I really love both versions.

My measurements currently are 37.5-inch bust, 34-inch waist and 40-inch hips. My measurements were a surprise when I remeasured myself for the test, but it does remind you in the pattern to always remeasure before starting the sew to avoid disappointment. It’s lucky that there is so much ease in the pattern which is more forgiving when fitting the pattern. Grading is not required, and it’s actually not recommended for this pattern. The sizing is very inclusive, it goes from size 0 to 30 and Pattern Scout Studio is great at offering cup sizes with her patterns.

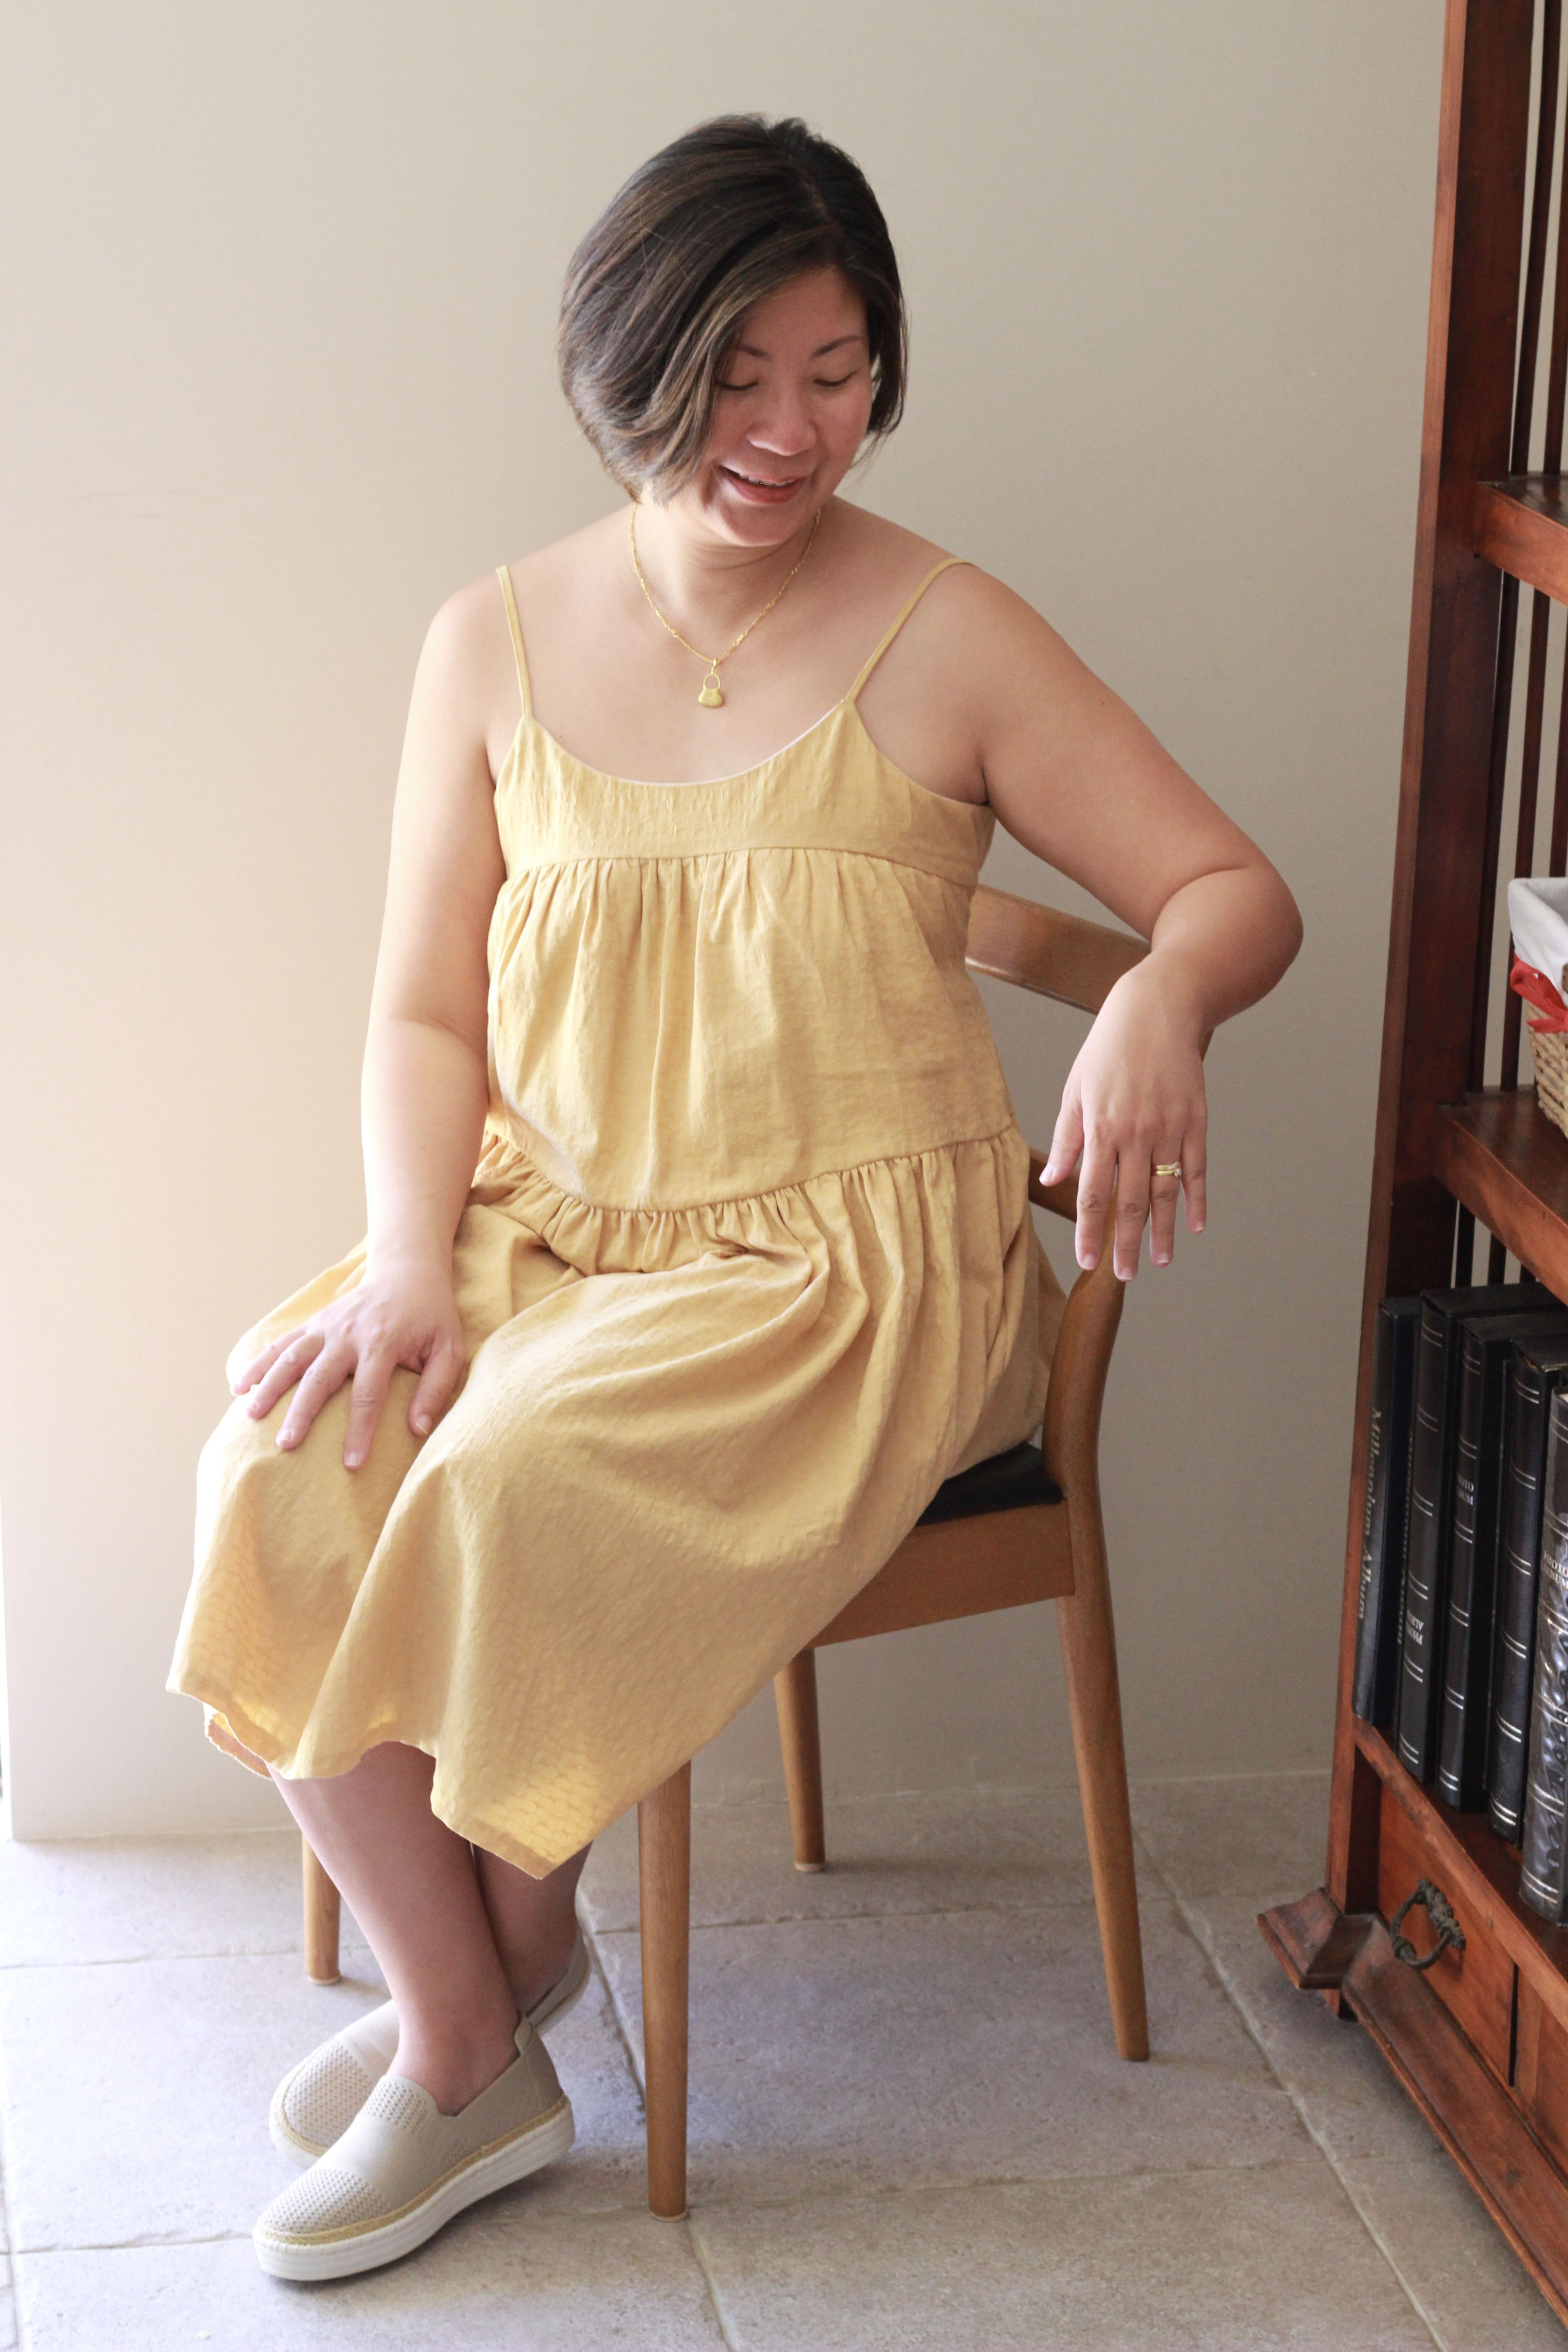
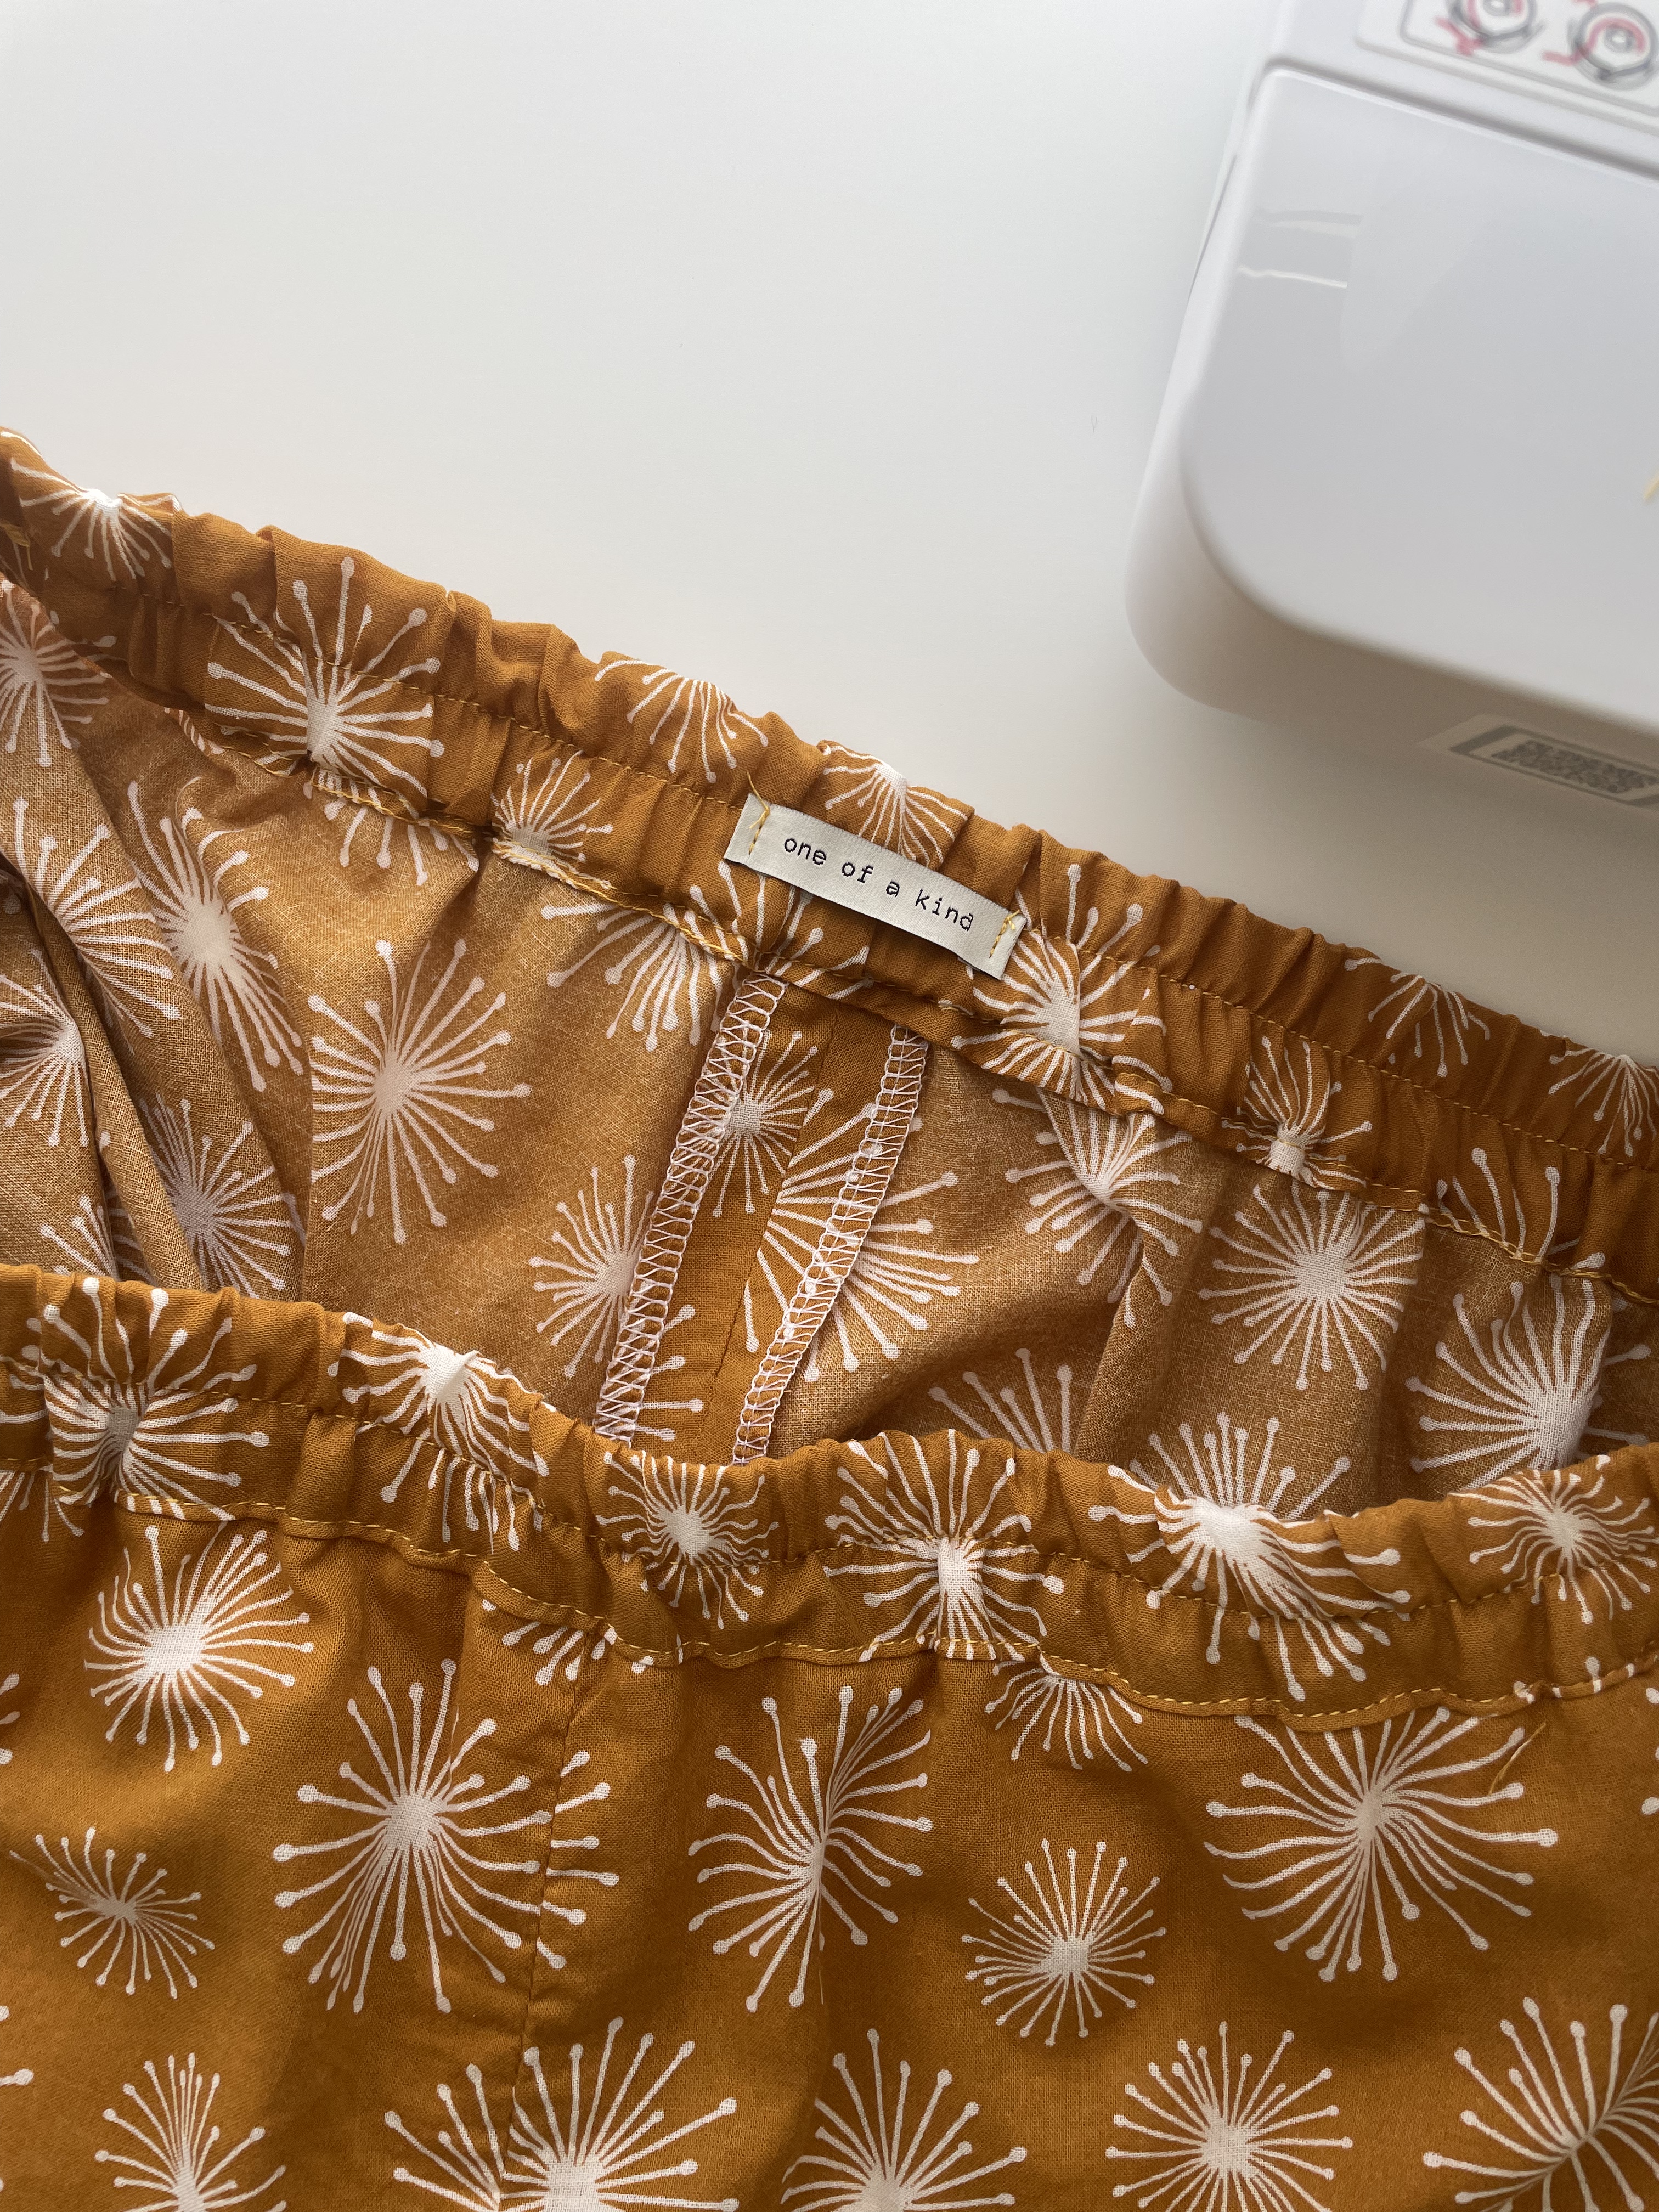
The next consideration was the fabric. There were some beautiful samples which were shared with the testers. The pattern suits a drapey fabric like chiffon, georgette, crepe the chine but for Version A, I had a thin, lightweight vegetable-dyed cotton that I knew would suit the pattern. It does create a fuller shape, but I love the feel of cotton in summer, and I stress that it is a very lightweight cotton.

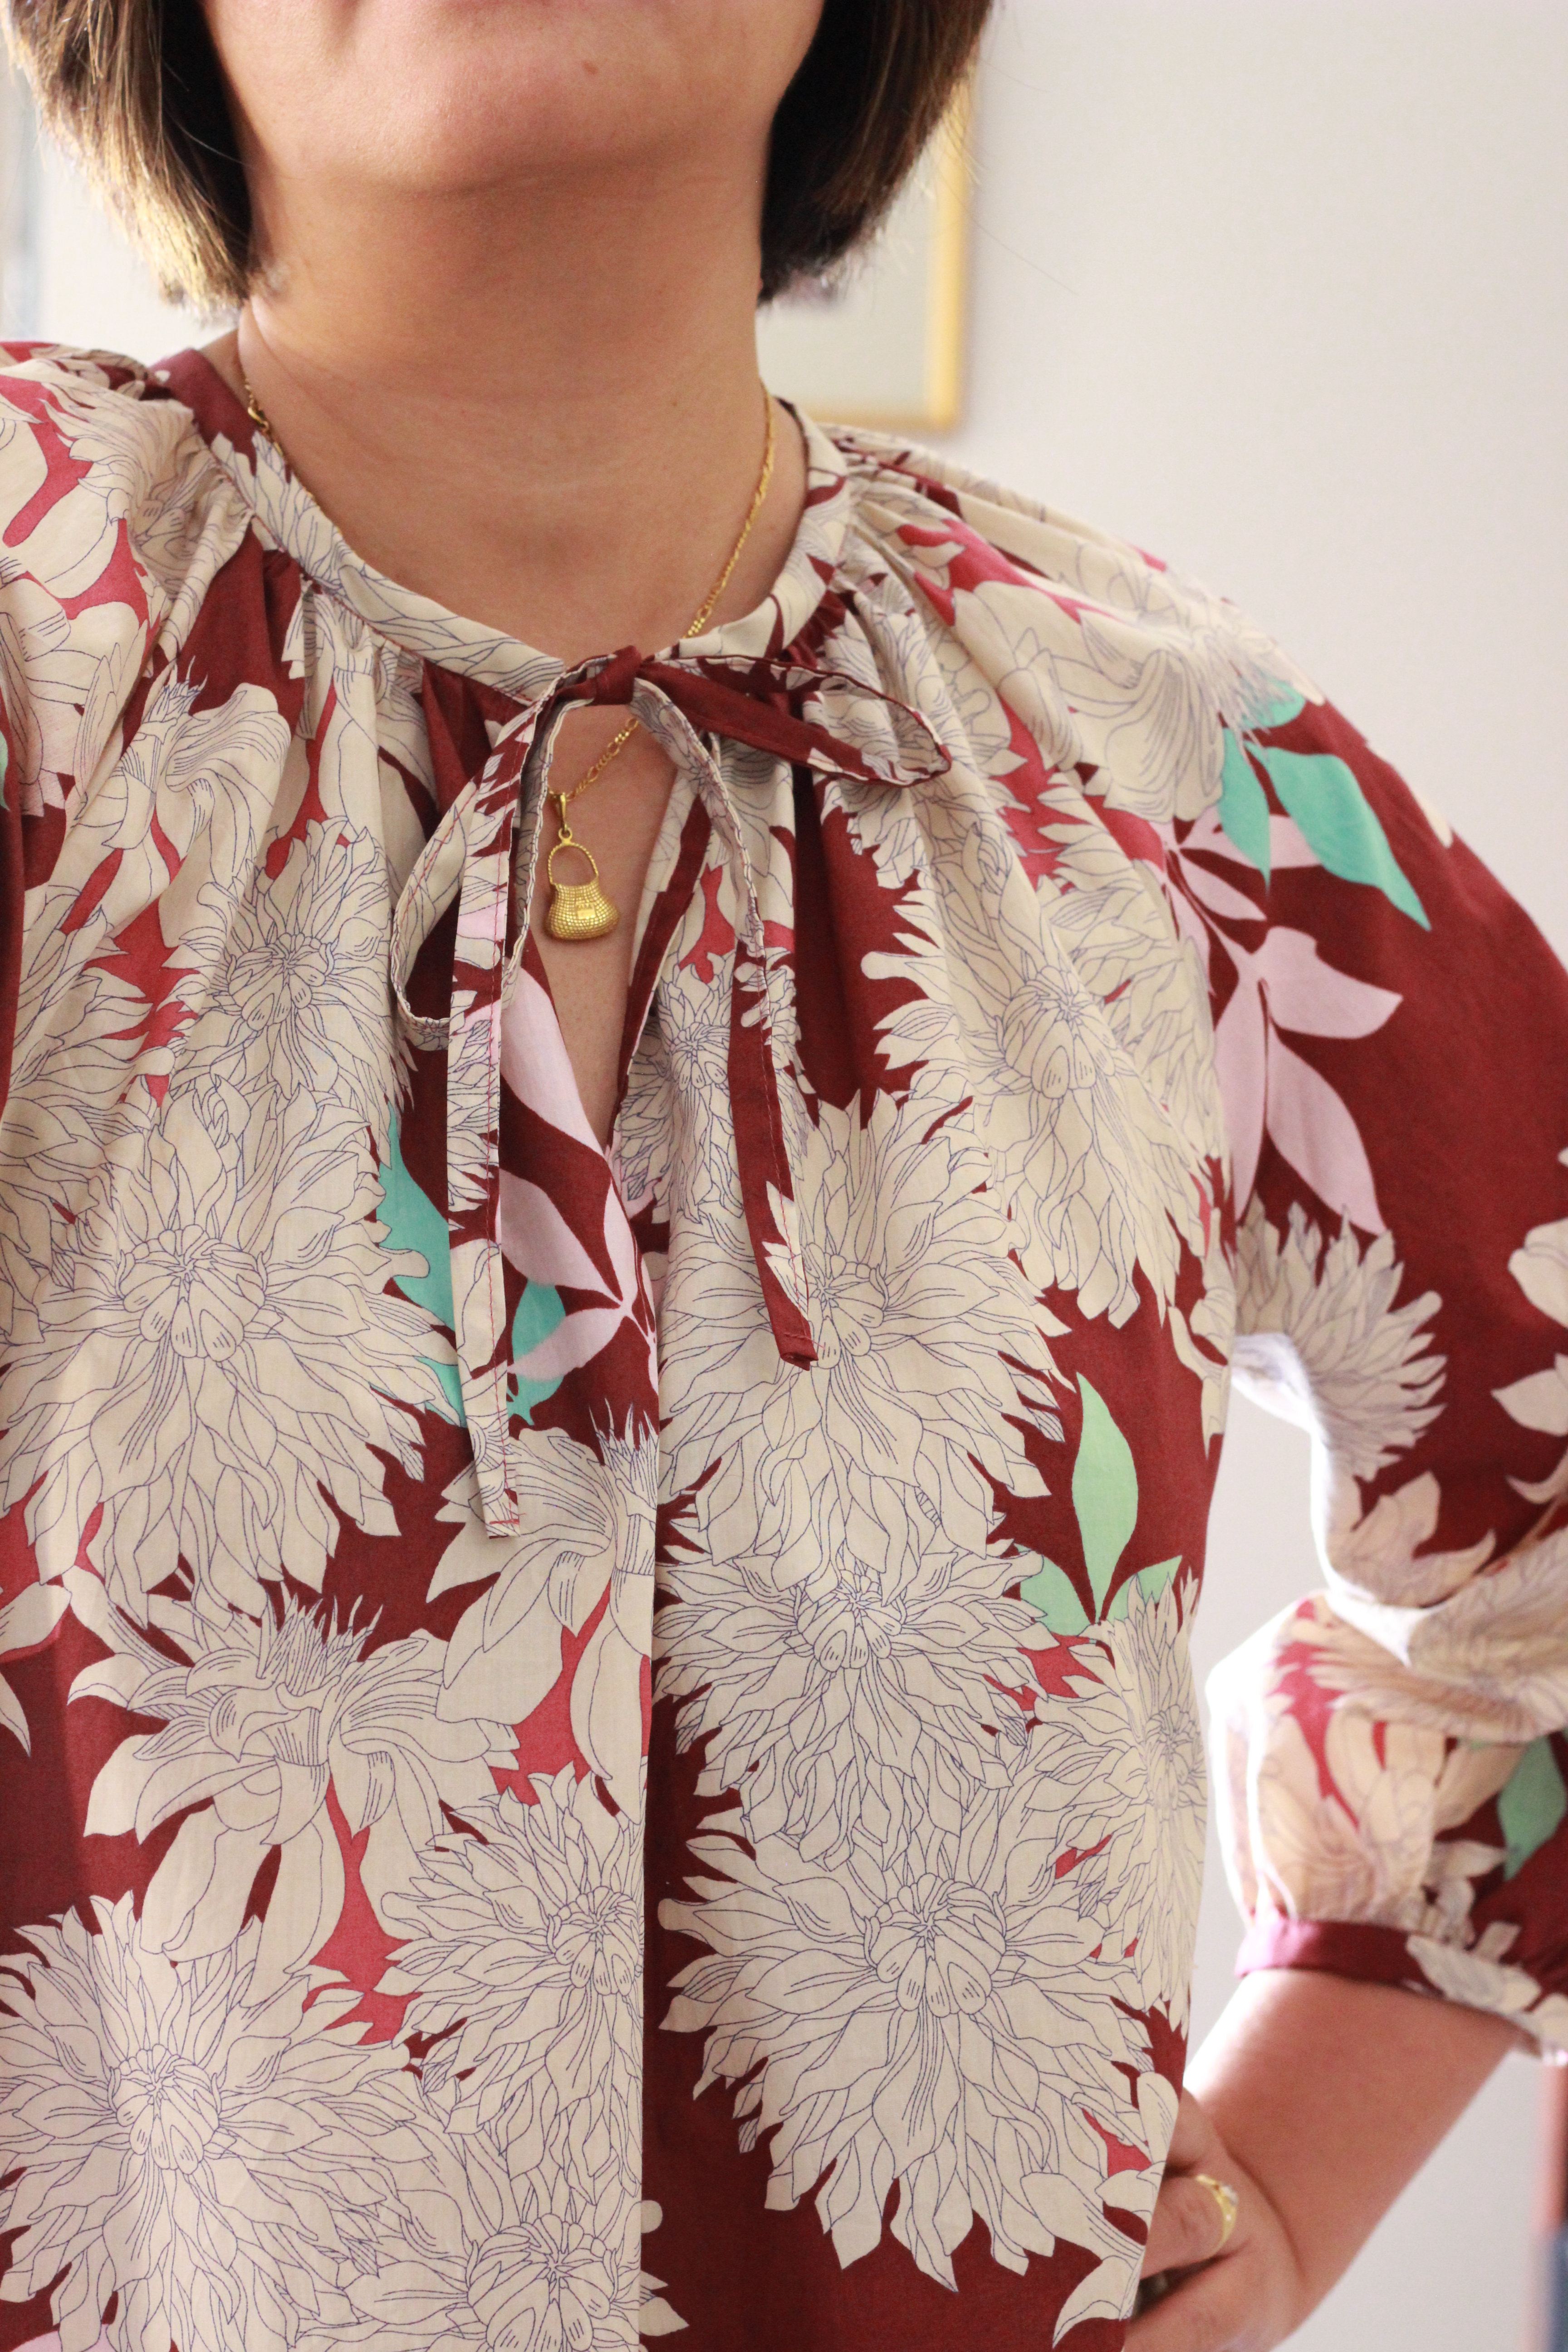
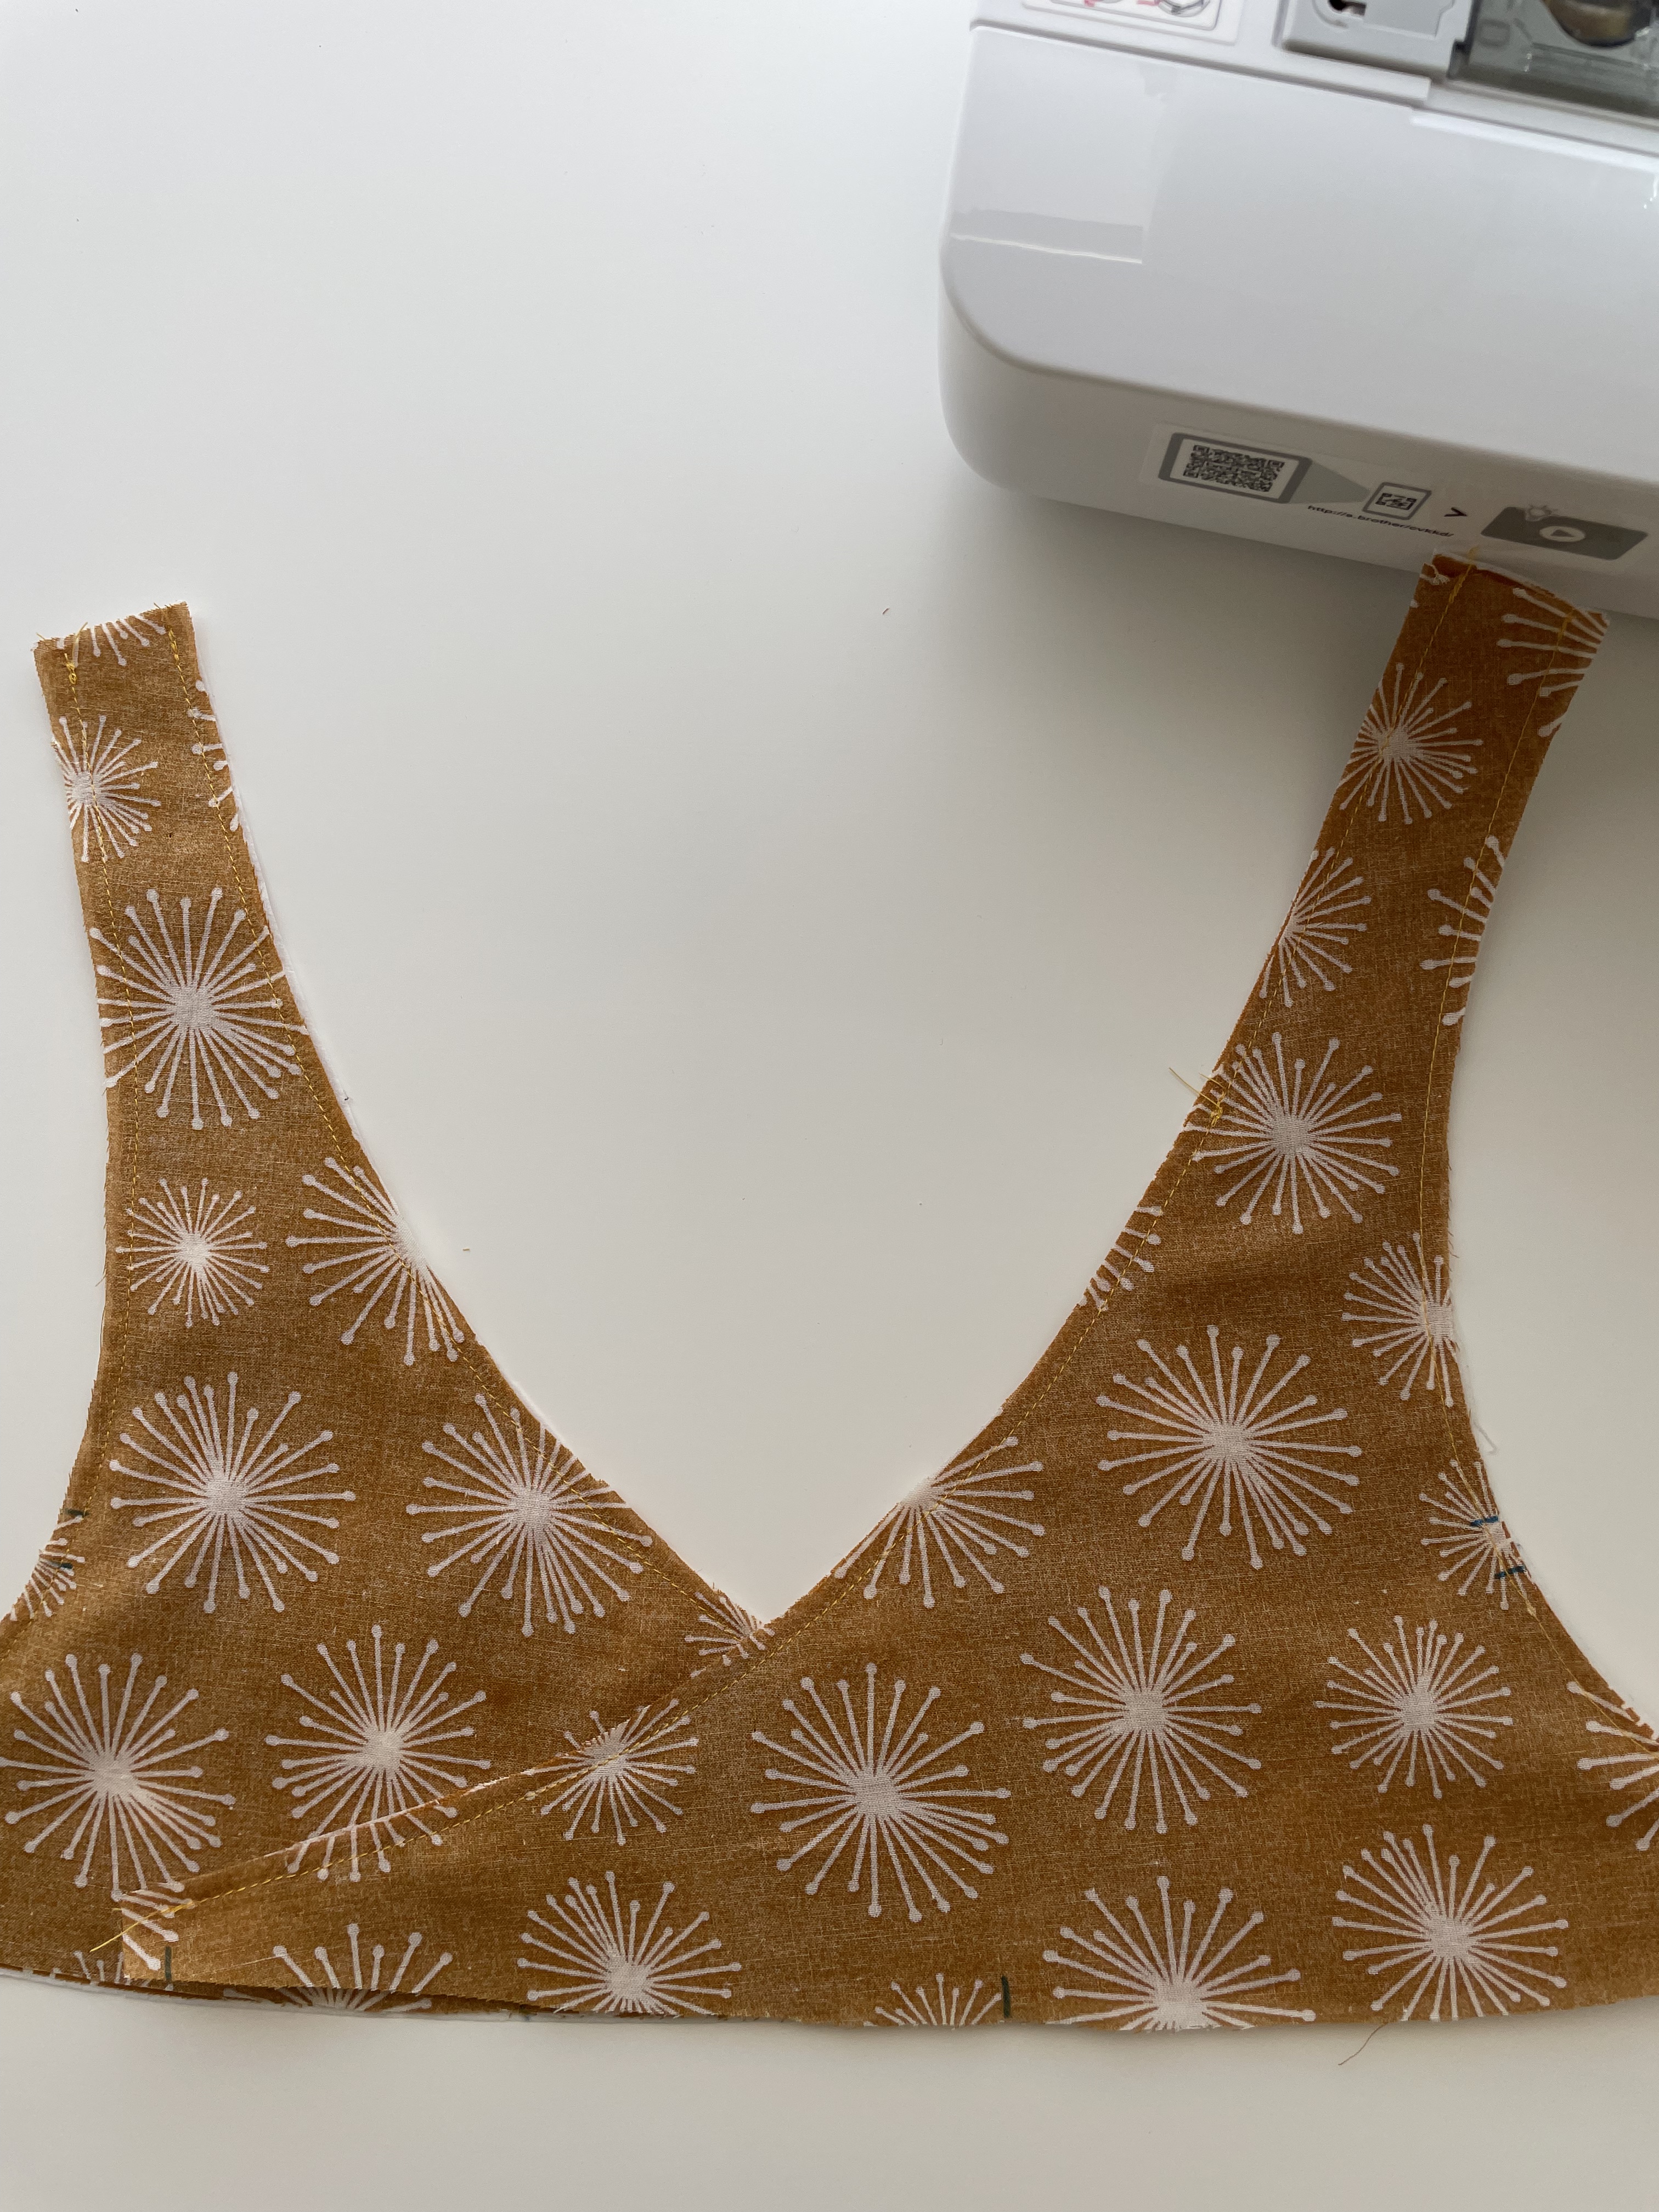
Personally, the collar construction was the most satisfying task. I loved bringing it together and it’s a very pretty feature of the blouse. I like it both tied up or left open. It’s very flattering on the neckline. 

Pattern Scout Studio always include great instructions with their patterns. It’s sewn in a logical sequence and has the right amount of detail to help someone who is at the start of their sewing journey. I always highly recommend and have sewn their patterns many times over myself. I’m so happy to be able to have been part of the testing team again!

Thanks for reading and happy sewing!

X Em

Marlo Sweater

My daughter and I fell in love with the Marlo Sweater by True Bias at first sight. I always find it amusing that to my daughter’s generation, the 90s are regarded as “retro” which of course it is now but the 90s are still so fresh in my mind and the years of my youth! This pattern paired with the argyle patterned fabric that I found conjures images of the outfits that Cher Horowitz wears in the movie, “Clueless”. I love the bond that my daughter and I have formed over sewing. My daughter’s textile course in her final years of school was the catalyst to my sewing obsession. 

So, back to the Marlo Sweater, I decided to make the cropped version. My daughter was happy with a very oversized sweater, so I made it to my sizing which was the size 8.  My closet is often raided by her so it’s understood between us that my sweater will eventually be worn by her. Hence, why she is modelling it as well.

The instructions for construction were very comprehensive and easy to follow. I’ve sewn True Bias a few times now and the patterns are always well thought out and logical. Everything went smoothly. I started by pattern matching the argyle pattern of the fabric. To match the fabric, I had to cut the pattern piece individually instead of two paired pieces. 

The next step was to cut the ribbing. The width that the black ribbing came in did not allow me to cut the bottom ribbing piece in one length. Instead, I cut one length for the back then two equal pieces for the front. These three pieces were sewn together before attaching to the body of the sweater.

My second-hand overlocker has been the best bargain buy of my sewing journey. It’s been such a worthy investment. It allows me to sew directly onto knit fabric without having to zig-zag sew on a sewing machine. This makes it so fast to put together a knitted outfit.

My real challenge (and the one that stalled this project) was the installation of buttonholes. There is a piece of interfacing that is already attached to the inner side of the front ribbing however, when I attempted to sew a buttonhole on a tester piece, the ribbing kept getting caught in the teeth of the machine. This meant that the fabric could not move forward. It was a test to my patience as well as my sewing skills.

After a couple of days of frustration, it occurred to me that the brain bank on Instagram could help me, and they did come to the rescue! The consensus was to line the back and if needed, the front of the ribbing with tear away interfacing or freezer paper. I promptly tested it and it does work well. However, after consulting my daughter, she said she preferred it without the buttons so after all that, I have left the buttons off.

I’ll definitely be making Version B which is the longer cardigan with patch pockets. My preference will be to put buttons on that!

Thanks for reading and happy sewing!

X Em

The Jarrah Sweater Again

I can’t believe how many times I’ve sewn the Jarrah Sweater from Megan Nielsen Patterns. I first came across this in 2020 when I wanted to try out my new (second-hand) overlocker and I found this. It’s a great beginner pattern especially with my limited experience with knit fabrics and overlocking. The first time I made the pattern, I used a Jacquard Knit Fabric. It was a quick sew and it’s a nice thick sweater, great for really cold days and quite oversized so it slips easily over t-shirts.

Last year, I made another version, but I experimented with a drapier, lighter weight jersey fabric and added a thicker ribbed waistband and a brushed cotton knit version. Both were worn on repeat, but I really loved the lighter weight sweater. It was easy to throw on as a top. Perth is quite Mediterranean in climate which means our winters are cold in the night and mornings but can get quite sunny and warmer in the daytime. It’s great to have a top that is versatile enough to cope.

So, since I got so much wear out of my lovely magpie jarrah sweater, I decided to make another one from this beautiful Vanessa Holliday designed jersey fabric from Spotlight Stores. I was thrilled to also find this thin pink ribbing to match. I really love how soft and luxurious the fabric feels.

View A was used to make my top and this time, I did not widen the waistband. In fact, I didn’t make any alterations. I made the size 12 which was comfortable for my frame of 37-inch bust and 33-inch waist. There have been recommendations to size down if you’re unsure of the fit, but I personally love an oversized sweater. There’s been a real appreciation for loungewear since the pandemic. I think it comes from appreciating home and the comforts it provides us. We now love the time spent together, no longer needing to seek excitement and entertainment at every turn. Time together is enough.

Sewing a pattern multiple times also allows me to reflect on technique and helps my progress in sewing. Sewing isn’t just a hobby about making the same thing over and over. There’s a skill set that must be practised and different techniques to master. I was reminded of this when attaching my collar! In my first attempt, I had not used the marking from the pattern (I was winging it!) and as I was attaching the collar, I could see that I had not stretched the ribbing enough at the beginning and was going to end up with some puckering from over stretching the second half, so I stopped and I unpicked all the overlocked stitching. Yes! It is possible but not something one wishes to do too often.

The better way to attach the collar is to mark the centre front, centre back, right shoulder and left shoulder in quarters once you have the short ends joined. It will then be easy to match this to the body of the garment. Also, I find it better to have my ribbing under the jersey fabric to make sure that I only stretch the ribbing and not the jersey fabric. 

Now that I’ve had my “warm-up” knitted fabric sewing, I’m keen to tackle a few patterns that have been on the back burner. I’ve been meaning to sew up the Pattern Scout Cozi Jacket and True Bias Marlo Sweater. Just need to track down the right fabric!

Thanks for reading and happy sewing!

X Em

Hannah Dress

Wrap dresses are the hardest working items in my closet. They’re great for a smart casual outfit or a night out to dinner. Wrap dresses are also a bit more flexible in the fit. I find the Hannah Dress from By Hand London is so flattering on any figure. It was a dream to sew this beautiful pattern.

I chose to sew the Size 10/14 for my measurements of 37-inch bust, 33-inch waist and 38-inch hips. As mentioned, the sizing in a wrap dress is great because there’s some flexibility with the ties. I was very happy with the sizing.

If you’re like me, you’re probably wondering if there was any gaping of the neckline. This is a common problem with some wrap tops or dresses but I’m happy to report that there hasn’t been any gaping. I think this is because the neckline of the bodice is finished with bias binding which places tension along the biased edge of the neckline therefore holding the edge neatly. I’m fascinated by the engineering that goes into a making a garment!

The other feature which makes the bodice fit so well is the “rouleaus”. Expanding my vocabulary! Googled it and it means a coil of ribbon, knitted wool or other material. I’ll just call them ties. So, the ties are not threaded through the dress. Instead, there is a pair of internal ties and a pair of external ties. It’s such a neat way of fastening without the need for a hole to pass the tie through.

There are three options of sleeves with this dress. The first is a simple short sleeve which is what I chose to make this time. The second is a tulip sleeve and the third is a bishop sleeve. I usually must make a full biceps adjustment, but I found these sleeves fitted well without adjustments.

The final step of construction was to attach a gathered skirt. This is my favourite feature of the dress. It’s nice to have the volume of the skirt as it accentuates the waist and creates a lovely hourglass silhouette. 

The instructions are overall very beginner friendly. The only instructions that could have been a bit clearer was attaching the bias tape to the neckline. When I tried to use the link given for the tutorial, it kept coming up with the error message. I also tried on the By Hand London website and this was also not working. If you get stuck at this step, I found googling, “Attaching double fold bias tape” to be a handy search phrase. I’ll aim to document this when I remake this pattern.

This dress has already had a few outings and will be worn on repeat! I’ve really enjoyed making the Hannah Dress and now want to make all the versions of this beautiful dress.

Thanks for reading and happy sewing!

x Em

Holmen Top & Dress

When I looked up “Holmen”, images of a water-bound neighbourhood in Copenhagen popped up. The Holmen Top and Dress is a new release pattern from The Uncut Project. Anna and Isabel are the super talented duo behind this pattern company. They are from Copenhagen and their patterns reflect a cool Scandinavian vibe. 

I feel so lucky to be included in the testing team for the Holmen Top and Dress. The top and dress were made to have a good degree of movement and it can be worn for casual outings or out for a night. It transitions so well from day to night. Definitely a good one to pack for future holidays!

Being a self-taught sew-ist, I was mindful of my limitations, but this pattern is made for an advanced beginner which I felt, was an accurate designation. The bodice of the Holmen Top and Dress are made in a yoke style. It has a fitted yoke which a gathered tier is attached. The first tier for the dress is shorter and then fitted to another full gathered skirt tier. My favourite feature is the back of the Holmen Top and Dress. There is a low scoop which skims the curve of the spine, and the back panel is attached by a thin set of ties.

My test was for Size L. I felt the sizing was quite accurate. I did have to check with them for the back of the dress as this is such an original design. My measurements are 37-inch Bust, 33-inch Waist and 38 -inch Hips. So, my measurements fall between Size L and Size XL. I went with the Size L because the finished garment measurements were quite generous, and the fitting of the bust area was adjustable due to the straps. 

Unique Back Details

The process of testing is always interesting. I started by sewing a toile for the Holmen Top using some scraps of fabric from leftover projects and this allowed me to adjust shoulder strap length. It also allowed me time to follow the construction process and make notes where I felt instructions needed clarification. There really wasn’t any, only one small detail about which notch to sew to in the back tier, but all the instructions were clear, easy to follow and followed a logical sequence.

Once the toile was completed, I went ahead and sewed the Holmen Top. It’s a very satisfying sew. I used a thin blue cotton and lined it with white muslin. It was a challenge sewing the thin straps with my lightweight cotton as it kept shredding when I tried to turn the straps the right way around. In the end I used my own method to achieve the look. I love the look of the thin straps and I think it’s worth the effort. There is a lot of gathering especially around the curve of the back and it was a bit hard doing that amount of gathering but it was better the second time around when I sewed the Holmen Dress. Practise makes progress!

For the dress, I found a beautiful honey hued yellow textured cotton. Still lightweight but not as sheer as my blue top. I also lined the dress but only halfway with the white muslin. It’s a bit more economical doing your lining this way. I’m in love with the silhouette of the dress. It seems reminiscent of the nineteen twenties. 

Doing this pattern test has been enjoyable especially with Anna and Isabel, from The Uncut Project. It’s also so fulfilling at the creative level. It really makes me want to do more in the future. I always hesitate to apply when I see the call for testers but I’m so glad that I was offered to join the testing team otherwise I might have not been confident enough to join in!

Thanks for reading and happy sewing!

X Em

Celestia Dress

The Celestia Dress is a new release from Papercut Patterns, and I think it’s appropriately named! It’s heavenly to wear in this scorching summer heat. The Celestia Dress has a three-tier skirt which fans out from the under bust of the bodice. A bit of a twist from an empire cut dress. There are two options with a square neckline option and a bandeau style bodice which is adjustable with drawstrings. I was immediately drawn to the interesting bandeau style bodice with drawstrings. I’m documenting here my process (and mistakes made) of the bodice.

Initially this was going to be sewn as a top so that I could toile the Celestia for some incoming fabric.

However, I just couldn’t resist making the whole dress after finishing the top half. I was using some leftover linen and lyocell blend from another project. It’s in this beautiful red brick colour.

So, we start the sew by making these drawstrings. This was a great eye-opening process as I didn’t have to struggle with any loop turners or safety pins. It’s all done with cord. It’s then a simple process of attaching the drawstrings to the bodice which is wedged between the shell and a facing. 

Attached drawstrings to bodice

Papercut Patterns always have beautifully detailed instructions which is how a novice like me can sew from a wonderful pattern like this. However, I made a small mistake in Step 9 where we’re making the slit opening for the drawstring. We’re told to only snip the outer layer but unfortunately, I enthusiastically snipped through both layers. But fear not, I repaired this with some fusing. It has worked well, and disaster was averted. Phew! 

As I said, it was just me reading too fast and skimming rather than stopping to check each detail before doing. I have found that as my experience grows with sewing, I sometimes skim instructions and sew in a way that is familiar to me. However, I’m trying not to assume that the technique I’m using is the right way. I’ve found that different designers can have a different technique which is more effective or look better, so I always want to try follow instructions exactly as written in case it could further my learning. I’m also grateful for help from other seamstresses who share their knowledge and techniques.

Well, the rest of the sew was thankfully uneventful. To finish the bodice, there is a cord that runs between and then encased. You then pull a little out at each slit making a loop on each side.

You then finish by attaching the skirt to the bodice. I left the pockets out as I don’t always find them useful, and it can be annoying to iron around them. 

I made the size 4 but I think you’ll find the fitting very easy on this. The drawstrings can be adjusted for a broader or narrower back. It’s quite ingenious engineering. There were no modifications made. After many wears, the hemline may have dropped in the back of my dress. I was impatient to finish and wear the dress and so I’ll have to trim and resew the dropped hemline.

This was worn out and about in Fremantle which is a beautifully historic port city in Perth. It’s full of Victorian Era architecture and has a certain vibe. It was the first city we lived in when we arrived in Western Australia and I have fond memories of the buzz on weekends where it felt like the whole of Perth had descended on Fremantle. 

Exploring Fremantle

Thank you for reading and happy sewing!

X Em

Sydni Shirt

A crisp white shirt is such a staple in a wardrobe. It is easily paired with jeans for an elevated casual look or when worn with dress pants is a work ready outfit. It may look like a simple, quick piece to sew but like a dish that’s pared back, details stand out. This shirt took a lot of careful sewing, and it was a lovely slow sew. This is the Sydni Shirt from Sew To Grow

For my measurements of 37-inch bust and 33-inch waist, I sewed the size Medium. It sits above the hips ending just below the natural waistline. There were no modifications but next time I make this pattern, I will have to look at making some adjustments or sew a size up. I sewed this pattern as the shirt dress in a rayon fabric initially. By comparison, when sewn in the stiffer cotton voile, it feels a bit resistant when I cross my arms across my chest and when reaching above my head. My intention was to wear this to work but with this slight tightness, I might not reach for this shirt for work. I forgot that I tend to buy one size up for my work shirts. The fit is fine for normal day to day wear, but my work is very active as I’m in health care.

The construction on the collar is simple and great for someone who may not have sewn collars before. It’s so clever how the bodice piece folds in the front to form the lapel. It also has a softer look which appealed to me. This shirt also comes with pocket options which I’ll want to use next time. It would also be interesting to leave the collar off and have it as a simple blouse. I love it when there are so many options in one pattern. It’s such great value!

As mentioned, I used a cotton voile to make this. It was really a wearable toile as I had only sewn this as a shirt dress. I’d love to use a lightweight linen blend or cotton lawn next time. Overall, this has been a great addition to my me-made wardrobe. 

Thanks for reading and happy sewing!

X Em

Roscoe Dress

It is traditional to wear red to the family reunion dinner when celebrating the Lunar New Year. Red is considered a lucky colour, so I was excited when Maai Design started to stock Storrs London Fabric, and I came across the Hermia design in red. I love the big flowers drawn across a background of red with pops of highlighter blue-green and hot pink leaves. I knew it would match well with a boho inspired style dress which immediately brought to my mind the Roscoe Dress from True Bias. The dress has a gathered neckline with raglan sleeves. It also has a centre slit with neck ties. It’s truly such a pretty design. On the practical side, it’s lovely and cool to wear in summer when matched with the Hermia Storrs London fabric. The superfine 100% Egyptian cotton is billowy, loose, and cool to wear.

I made the size 8 for my measurements of 37-inch bust, 33-inch waist and 38-inch hips. Bohemian dresses are loose and made with freedom of movement in mind. The finished dress for my size was 48 inches around the chest which gives you some idea of the ease in the fit. There are three versions of the pattern, the first is a blouse which I’ll definitely be returning to sew, a tunic or short dress version and a midi version. I chose the short version which still falls just above my knees. I’m 5 foot 7, to give you some idea about the length of the dress.

Construction was very easy which was a relief because I was sewing to a deadline. The date of the Lunar New Year changes each year according to the cycles of the moon. It came around a lot earlier this year. The sewing went well, and it was a relief that it was so beginner friendly. I love to be challenged with my sewing but now was not the time! 

No modifications were needed however, initially I had made the bottom ruffle pieces slightly longer thinking that I wanted to cover my knees. I found myself shortening them to the original length promptly. It was only an inch and a half but it really threw off the balance of the design. It was interesting that such a small detail could detract from the beauty of a design. I guess that’s why they say that, “…the devil is in the details”.

Nothing much more to add except that it felt special to wear a dress that I had made and it was a great hit. I think I mentioned on my Instagram Post that I need to hide this next time my mum comes over or I might be missing a dress. It was lovely and cool to wear and sewing it with such special fabric elevated the dress from casual to special occasion wear.

Thanks for reading and happy sewing!

X Em

Reef Camisole and Shorts

Christmas holidays arrived and here in the Southern Hemisphere, we found ourselves in sweltering summer heat. Needless to say, it was too hot to be at the sewing machine but I managed to sew up the Reef Camisole and Shorts Set from Megan Nielsen Patterns. It was my final sew for the year just in time for my favourite time of the year. I’ve always loved the time after Christmas and the start of the new year where there is a quietness and a temporary lull to give us a bit of respite before the whirring of busy-ness begins again. It was a good time to finish making the Reef Set so I could have my pyjama day.

Motivated to finish by coffee and panettone

As usual, if you’re looking after a comprehensive sew-along, you should look at the Megan Nielsen Blog Site. This was my own sewing process. Before heading into that, I wanted to talk about the fabric that I used. I bought this lovely muslin from Spotlight Stores. It caught my eye because of the beautiful mustard colour and the pattern is reminiscent of a field of dandelions. Muslin is such a thin fabric; it’s often used for children’s clothing or baby wraps and for good reason. It’s soft, made of cotton and is such a breathable light fabric which is why I’ve thought to use it for summer pyjamas. 

I remember when I had just started sewing, I tried to sew with muslin fabric. I ended up cutting it up for cleaning cloths because it did not even survive the first wash! The best way to prepare muslin fabric for sewing is to overlock the raw cut edges before washing on the cool cycle. This preserves the integrity of the muslin fabric which has a loose weave otherwise you would risk your washing machine unravelling some of the thin fabric. After washing, I gave it a light iron and went on the cut out the pattern pieces. Another beginner tip is to check your needle. I made sure I had a 10/70 needle to ensure that I wouldn’t damage the delicate fabric.

Starting with the camisole, which is cut on the bias, watch that you don’t handle the fabric too much and lay it flat as it will stretch if you hang the fabric before sewing. I also made sure to staystitch where needed as this helps to stabilise the fabric. I love the look of bias-cut garments as it drapes beautifully especially with silky materials. 

The crossover back yoke is the distinguishing feature of this camisole. It’s a really satisfying construction. It’s also so comfortable to wear. I’m tempted to sew this camisole as a top if I can find the right fabric like silk. Once the crossover back yoke is completed, it comes together very fast. Topstitching the neckline and armscye was my own addition to help secure this fragile fabric. I tend to wash everything in the machine and have little time for hand washing so this will go a long way of preserving my Reef Set. I also secured the facing by stitching in the ditch at the side seams and stitching down the back panel.

Onto the shorts, I made the View B option which is the mid-rise. The hemline is curved and again an interesting construction with the attachment of facings. It elevates the piece from basic elasticised waisted shorts to luxurious summer pyjamas shorts. It doesn’t stop there; it also has pockets!

A quick note on sizing, I made the size 12 for my measurements of 37-inch bust, 33-inch waist and 38-inch hips. The sizing was a great for the shorts, but I could sew up a size for the camisole top. The camisole has very narrow seams except for the side seams which returns to 5/8 inch. I narrowed the side seam to allow more room in the armscye. It still fits me in the size 12 but there are some horizontal fold lines where the front straps meet the bust line. The other option would be to make a full bust adjustment but I would also like to lengthen the camisole so I feel the best option would be to size up.

Now that the busy Christmas holiday period is over and we have turned over to the New Year, I have a few days of lounging around in my newly minted pyjama set. I’m really enjoying my new book which is the second book by Named Patterns titled, “Building The Pattern”. This is my first sewing book and it’s a gem.

Thank you for reading and wishing everyone a Happy New Year!

X Em