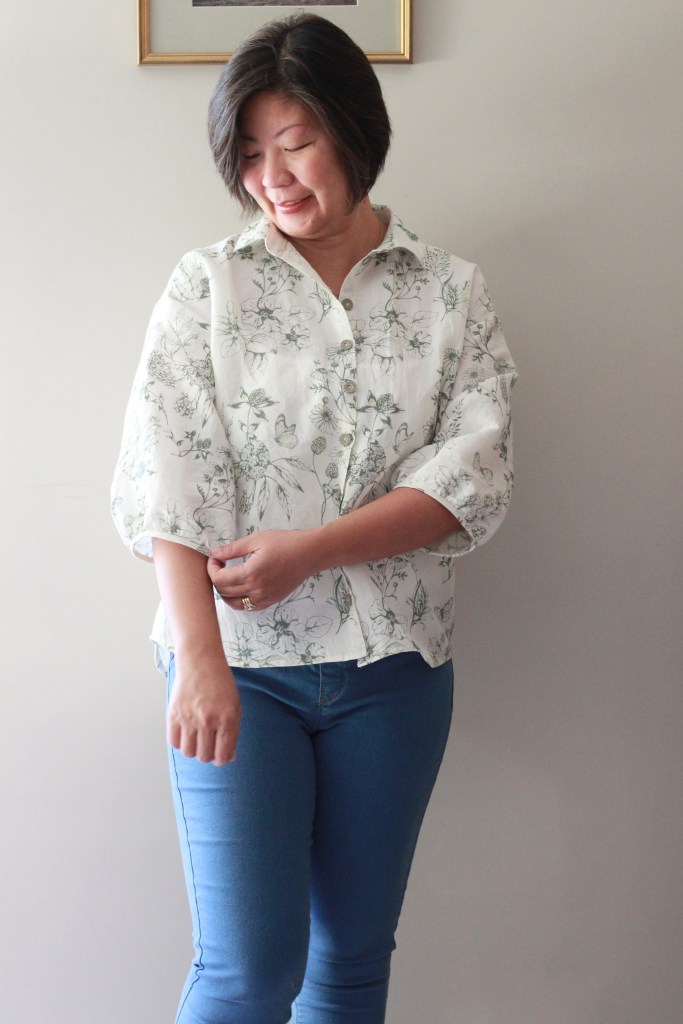
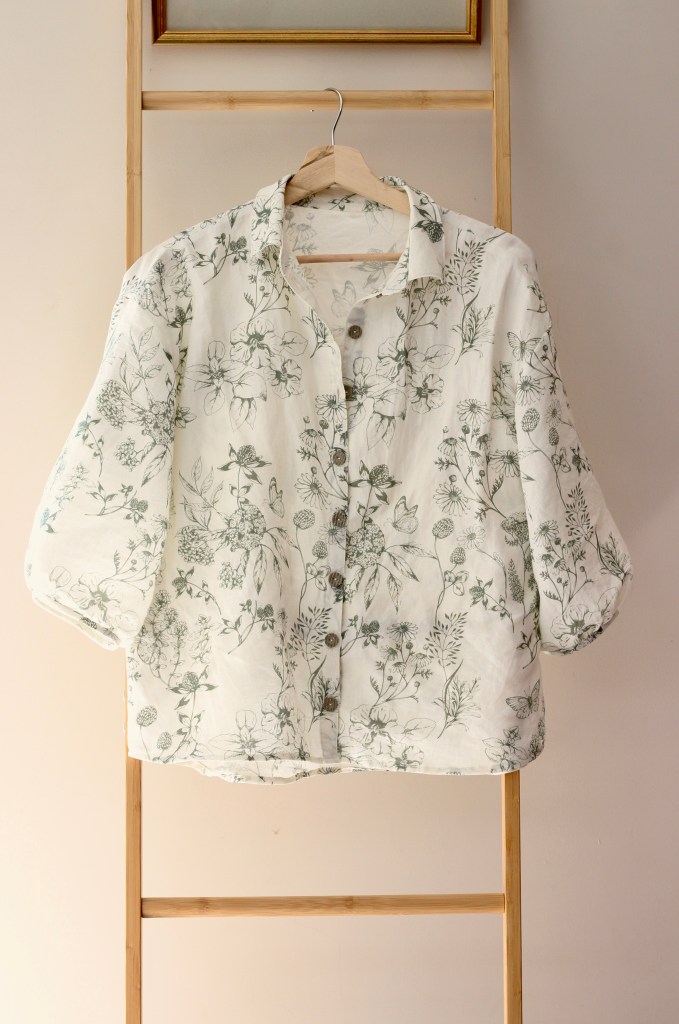
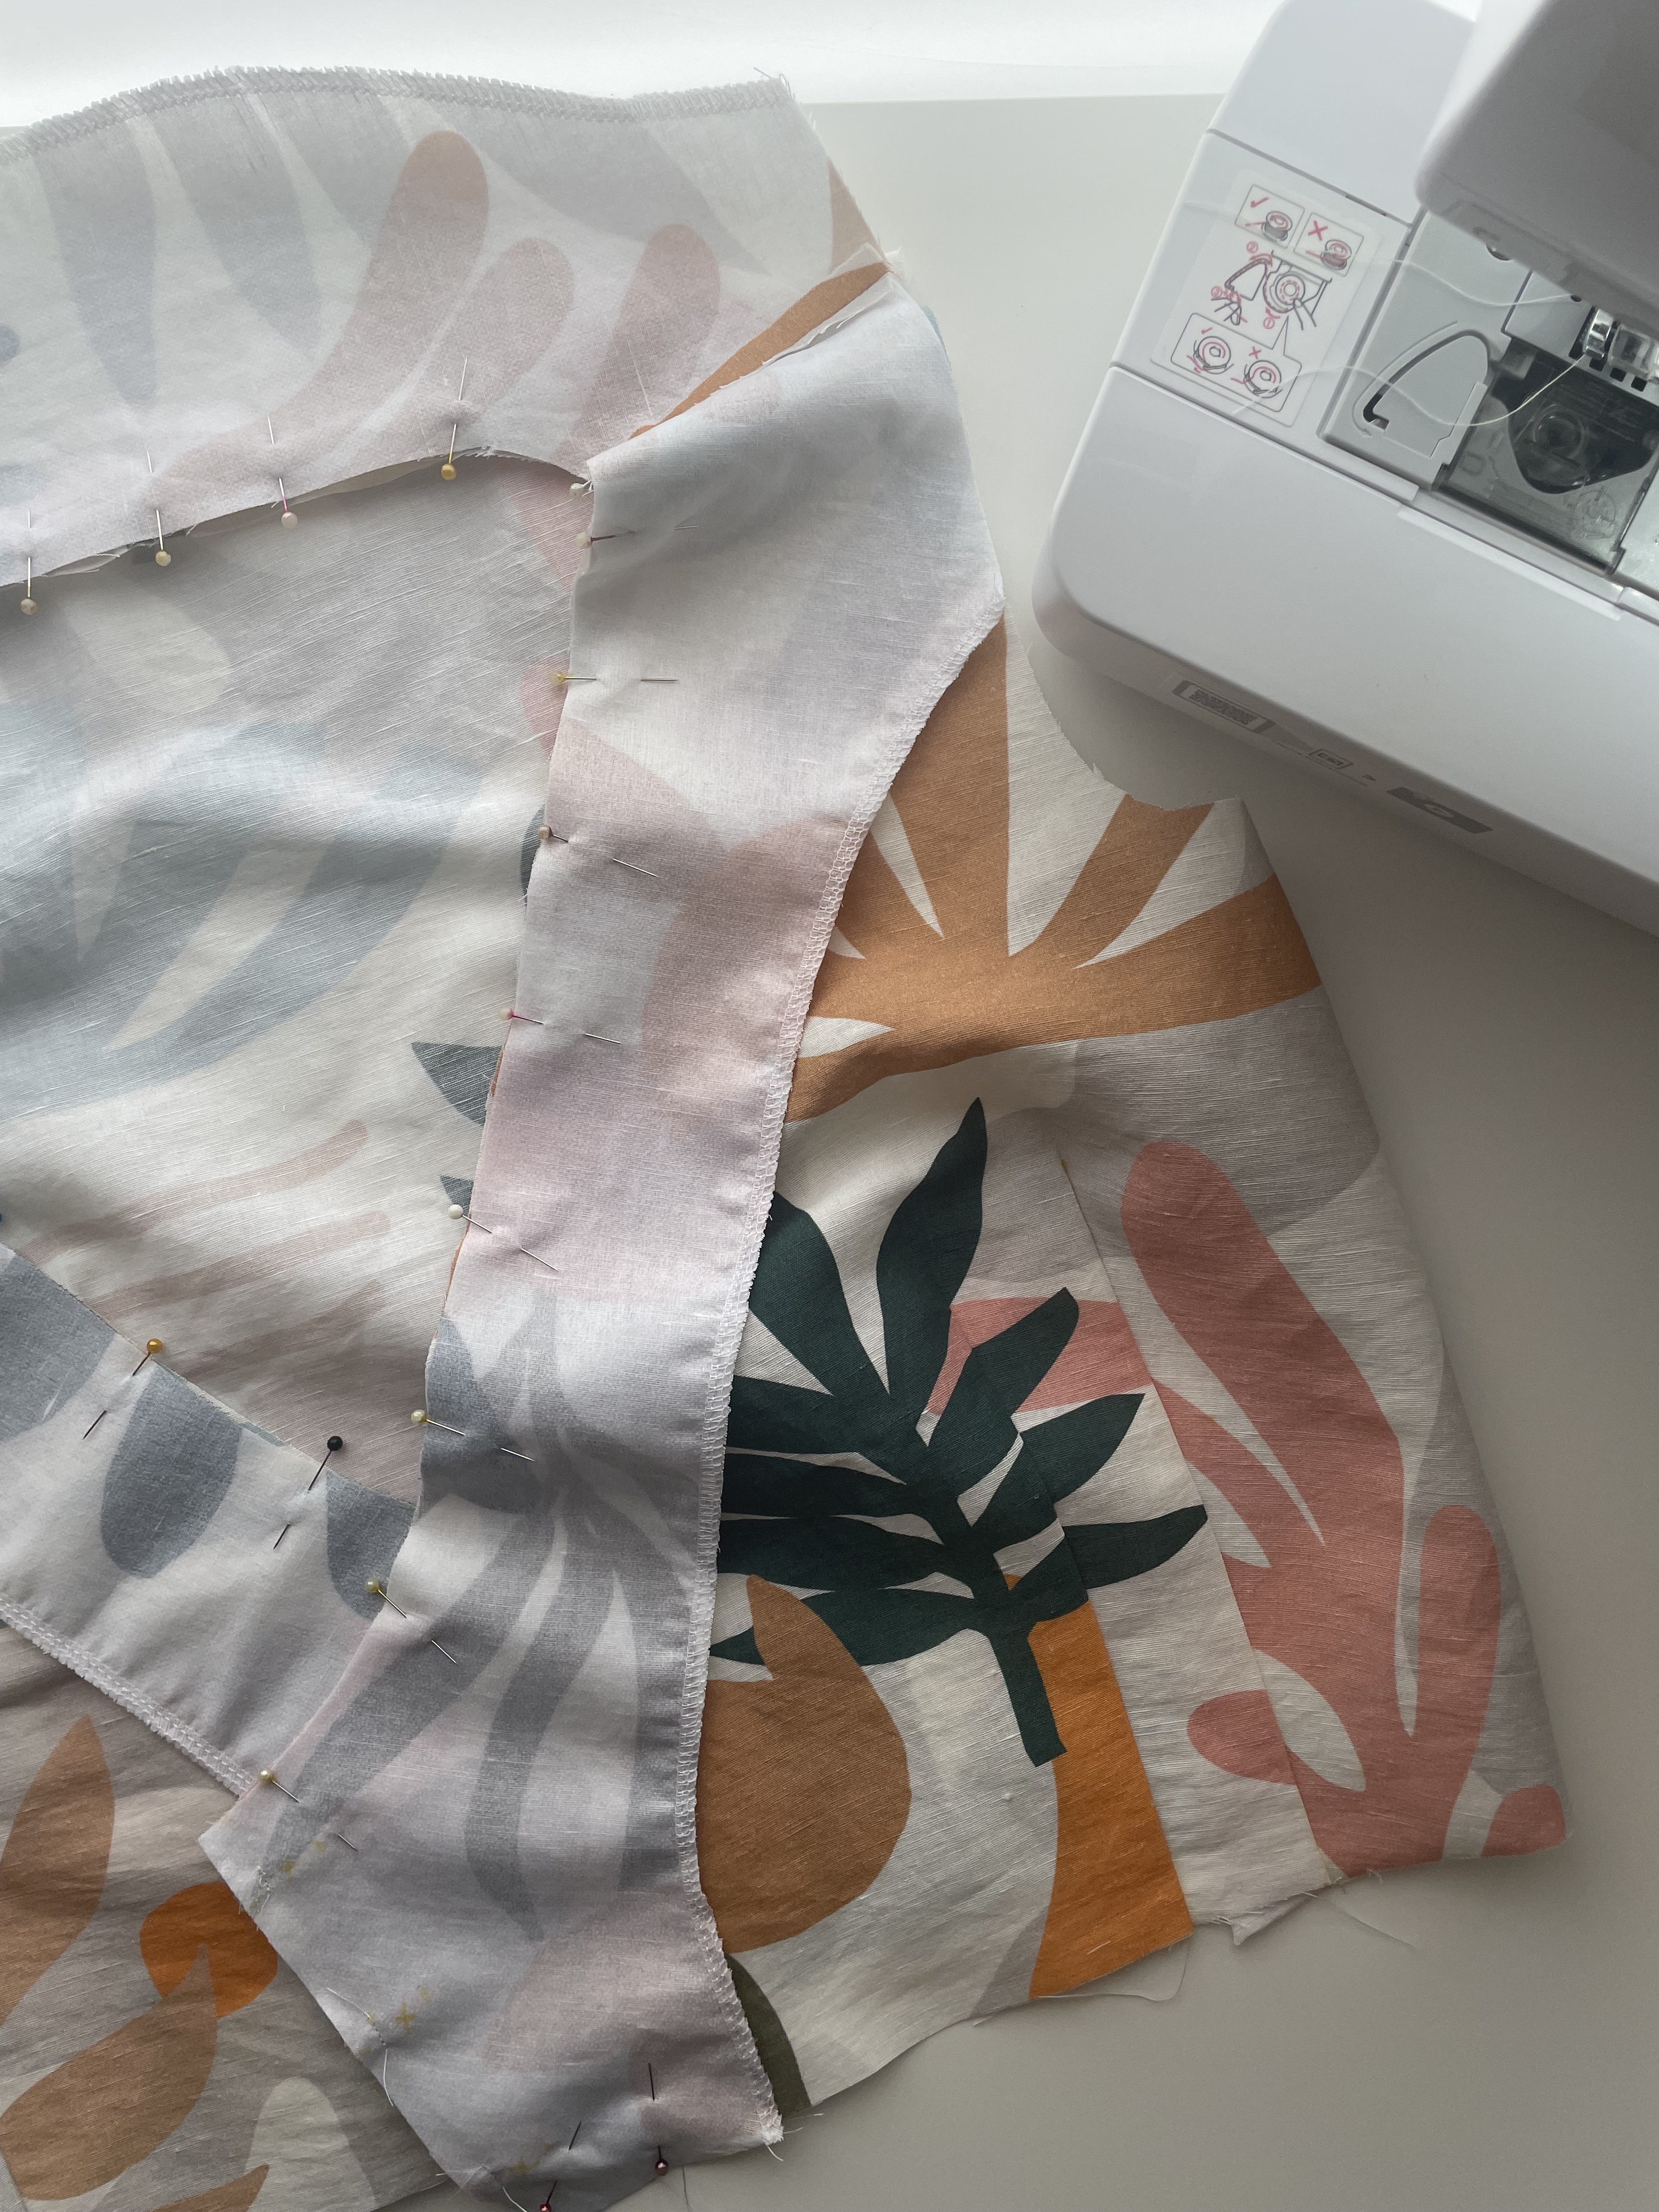
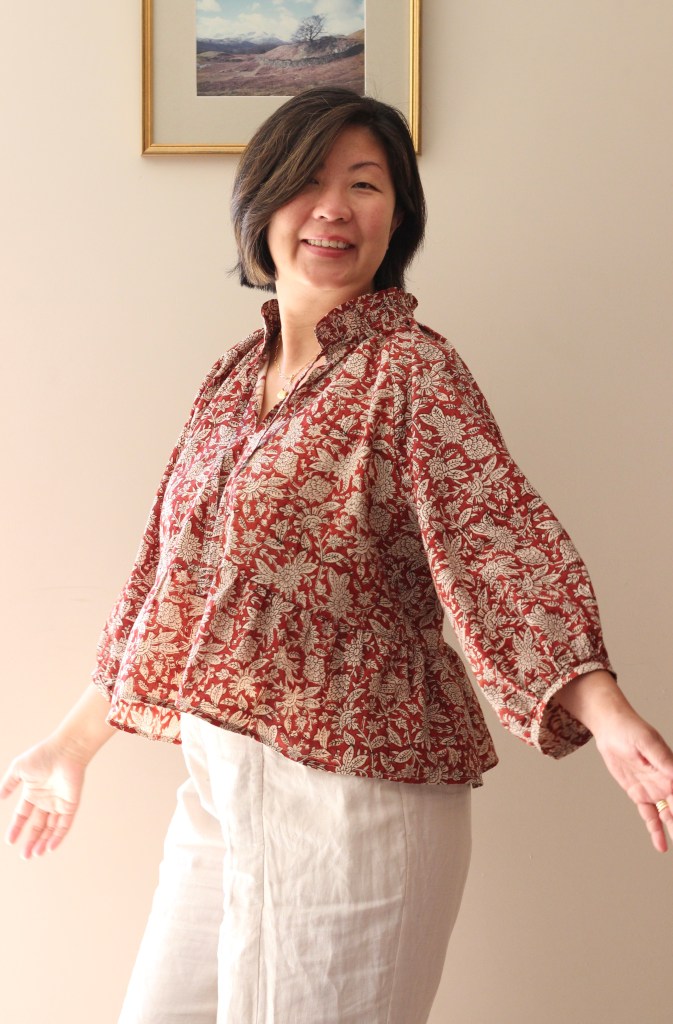
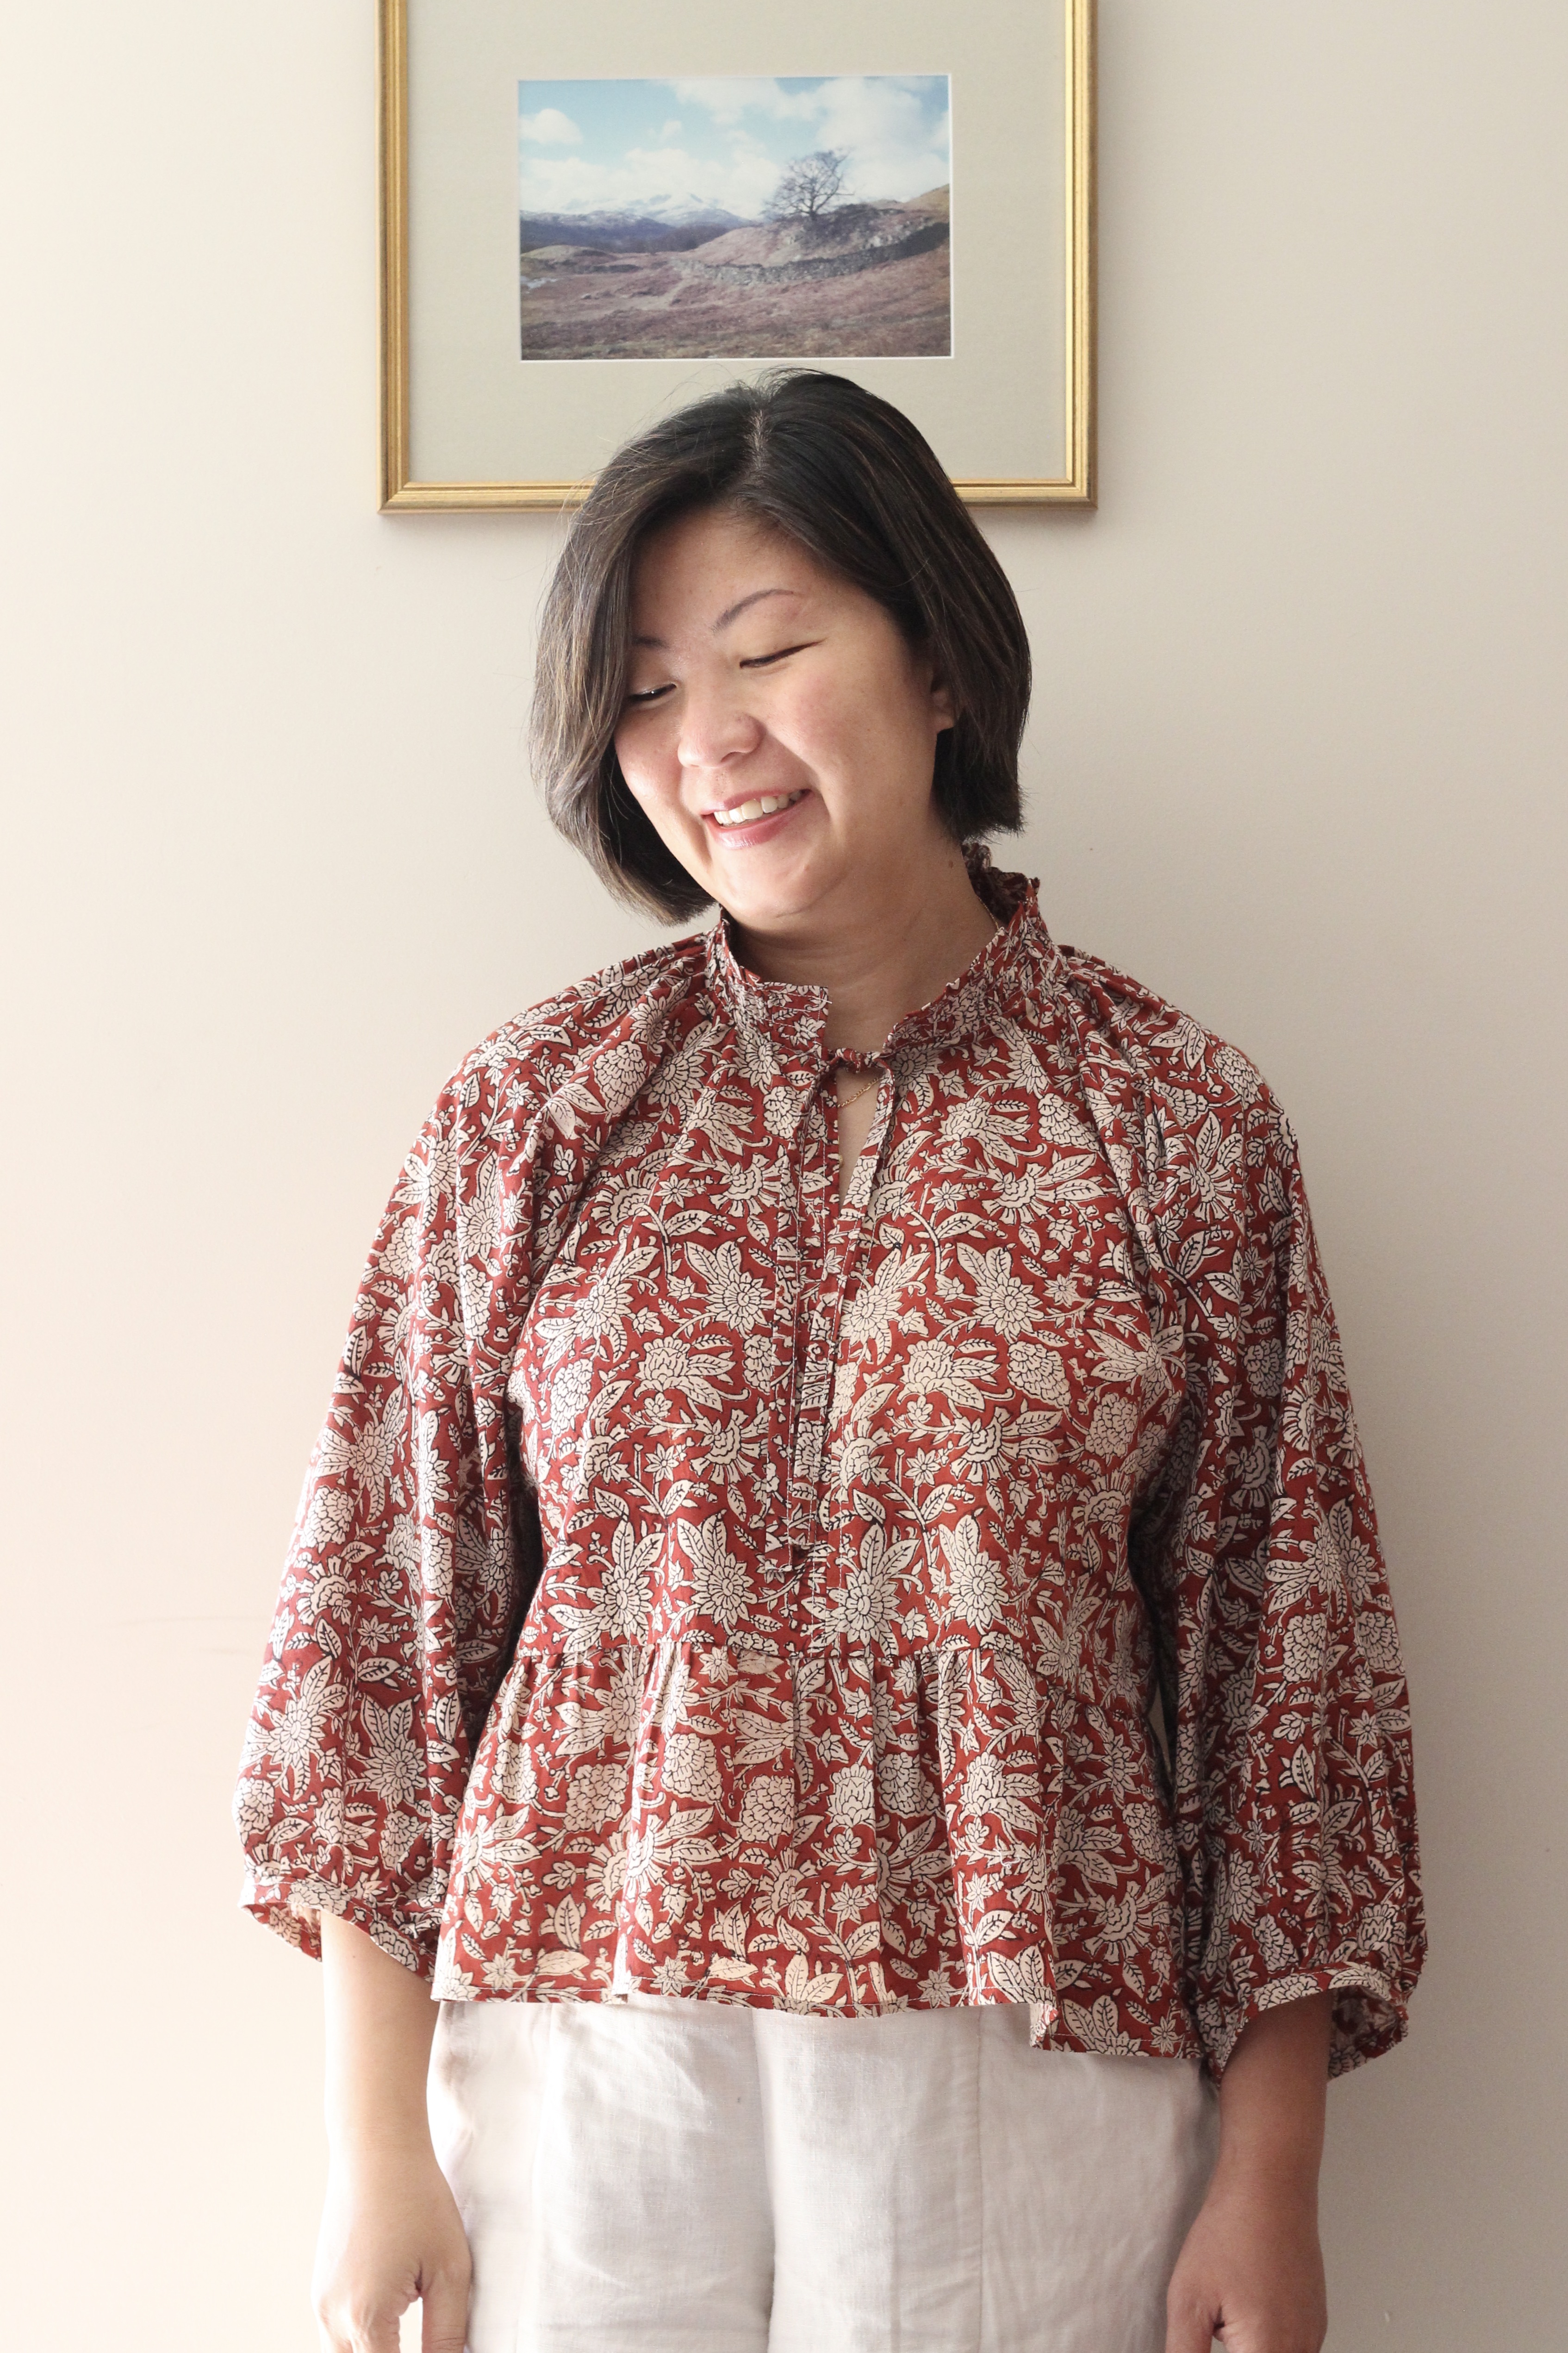
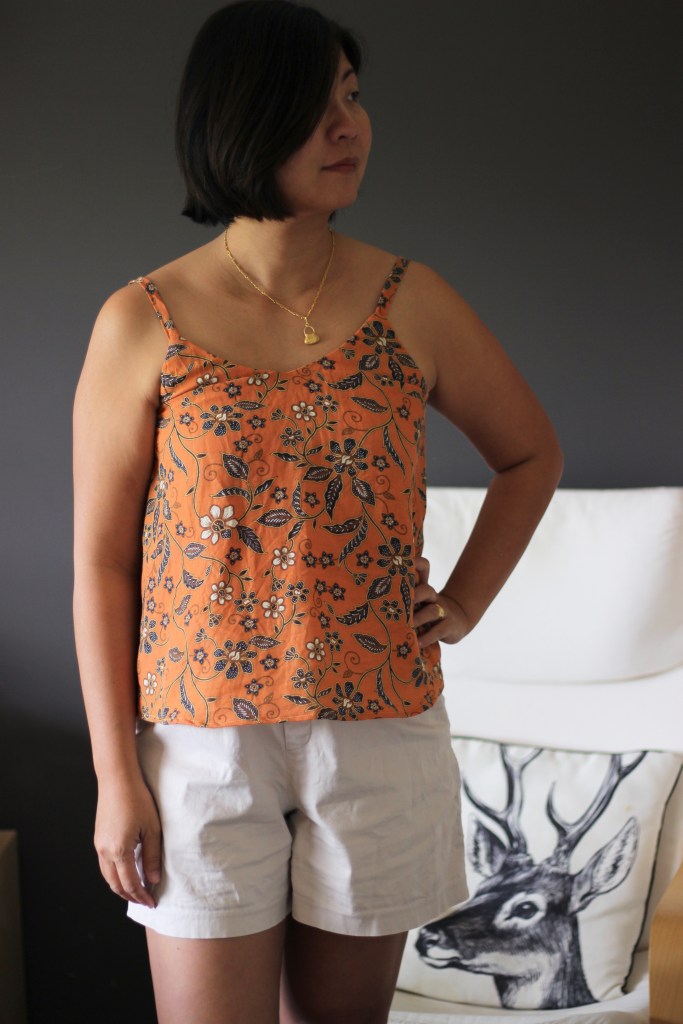
One of my sewing goals this year was to expand my repertoire especially in creating separate pieces. A blouse is such a wardrobe staple, so it was great to find a shirt with some feminine elements. The Alea Shirt has these wonderful full sleeves as an option, and I explored sewing both the three quarter and full long sleeves. This was also the first time I’ve made a stand-up collar. This is a fantastic collaboration between Marsha Style who is one of my favourite pattern designers and the awesomely talented Sewlala.
Linen 3/4 Sleeve Version
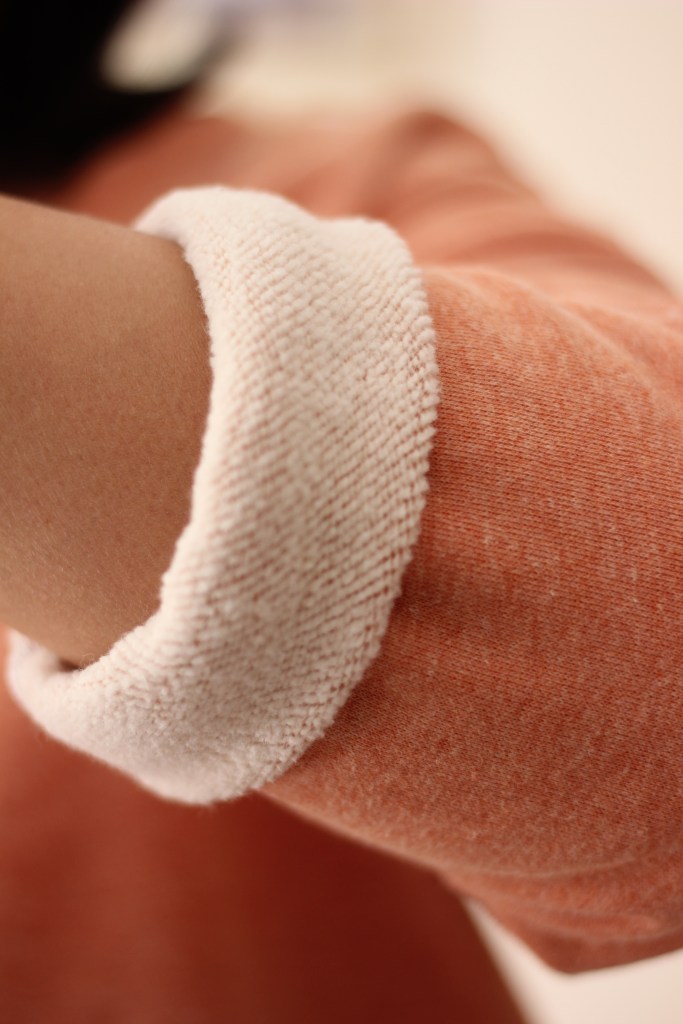
The sizing is spot on. I made the size 8 for my measurement of 37 Bust and 33 Waist. The only small modification I made was for the sleeve when I made the full long sleeve option. I initially finished the sleeve with bias binding but found that it was too loose and hung halfway down my hand. It was an easy fix and instruction are included in the pattern. I just replaced the bias binding with an elasticated sleeve hem. This made full use of the shape and fullness of the sleeve. Some glorious puffiness!
Sleeve with bias binding
The shirt option called for 1.5 meters of fabric. I found that I needed just a little more with the long sleeve version. I had left the pockets off as well which saved some fabric. To be safe, I bought 2 meters for the long-sleeved version. My first blouse was made with linen and my second version was made with a cotton. Both were a great match for the pattern and easy to sew with.
3/4 Sleeve with collar and buttons
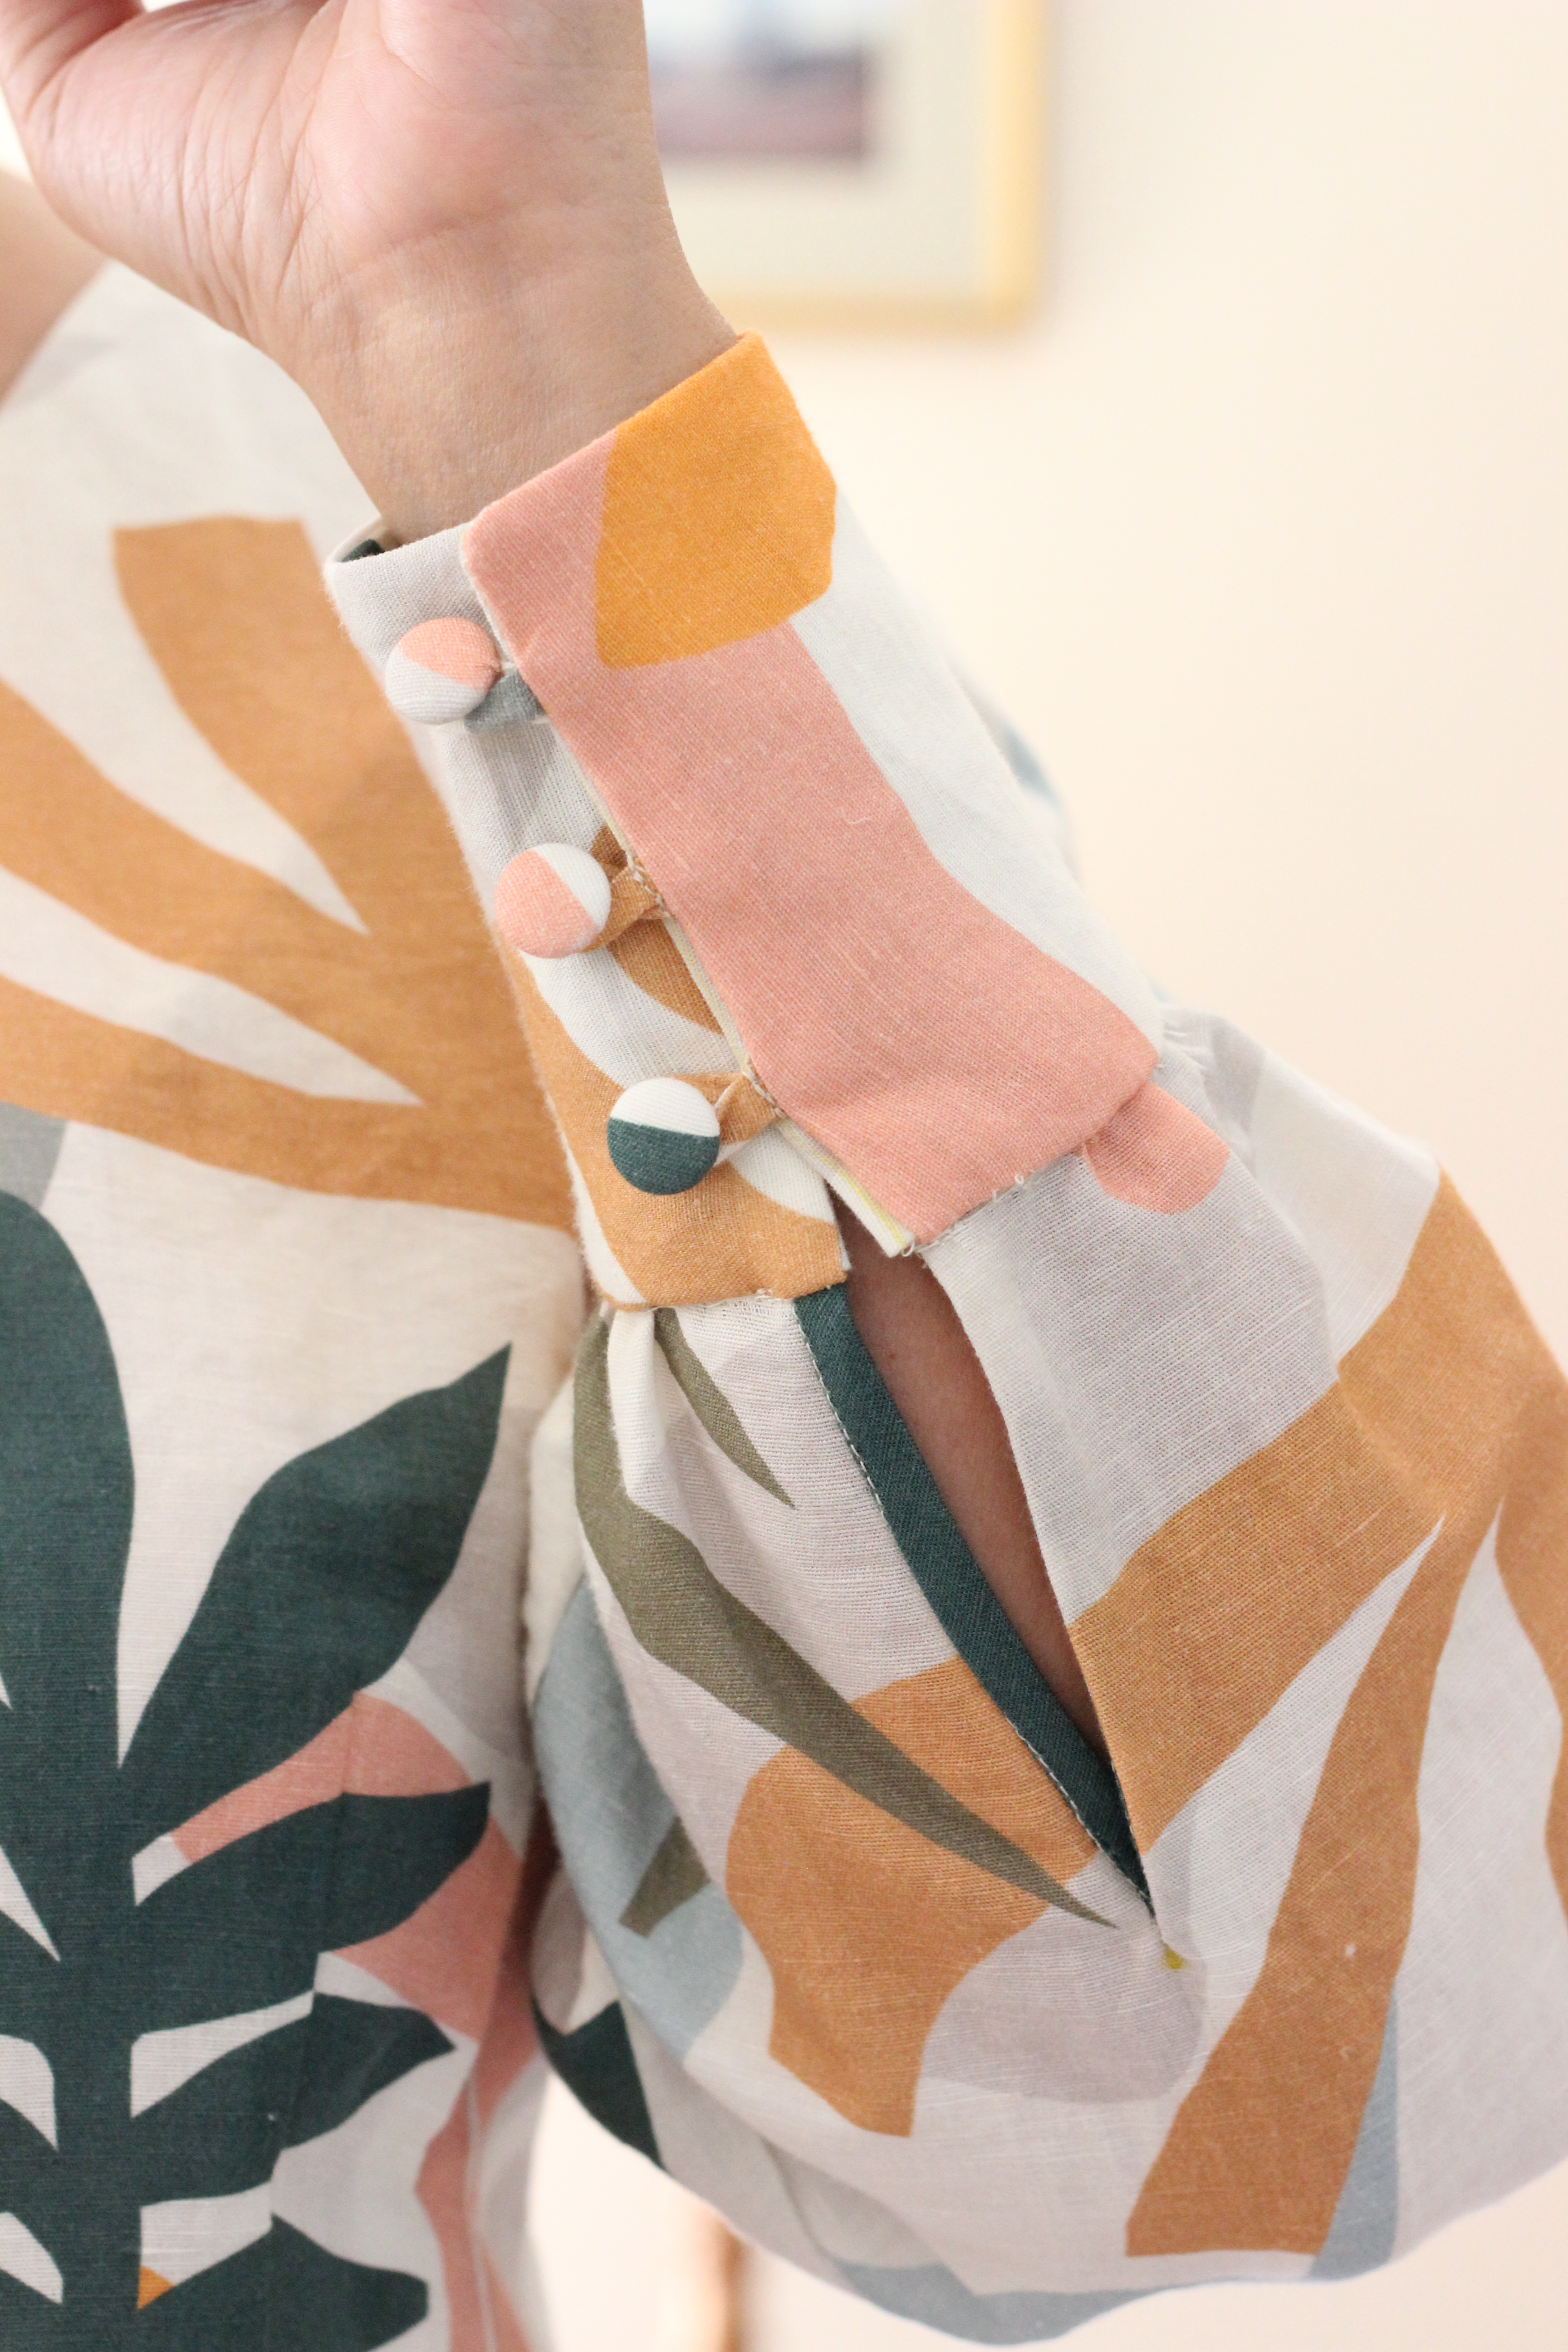
I’m not very experienced with sewing collars or plackets but the instructions made the process so easy! I’ll definitely be referring to this again for the instructions on these. It’s great to have a few ways for constructing the same thing.
Collar Details
Another great learning moment for me on the sew was the attachment of buttons. With the excitement of the finish line in sight, I had sewn the buttons on and then finished the hem. To my disappointment, the two front pieces did not match up when buttoned up. The obvious solution was to resew the hem, right? Well, when I checked the instructions, I saw that my construction was out of order. The instructions recommended hemming first then attaching the buttons. So, the issue was quickly resolved by detaching the buttons and realigning them. Problem solved! A reminder for me to keep checking my steps.
Dealing with uneven hem
I’ll be hoping to tackle the dress version for summer. I’m especially keen to sew Version D.
The Albion Blouse is a collaboration between Vanessa Hansen Studios and Peppermint Magazine. Peppermint Magazine is not only great for their articles but also for their free sewing patterns. I was thrilled to be part of the tester team and so happy to be able to share it. When I started applying to be a tester for patterns, I didn’t realise there could be a gap between sewing and posting. Sometimes there’s no indication of when a pattern will be released which makes it so exciting when you can finally share! I was born in the Chinese year of the dragon and dragons are usually terrible at keeping secrets so I’m patting myself on the back for not letting anything out of the bag so far.
Fitted Wrap Top
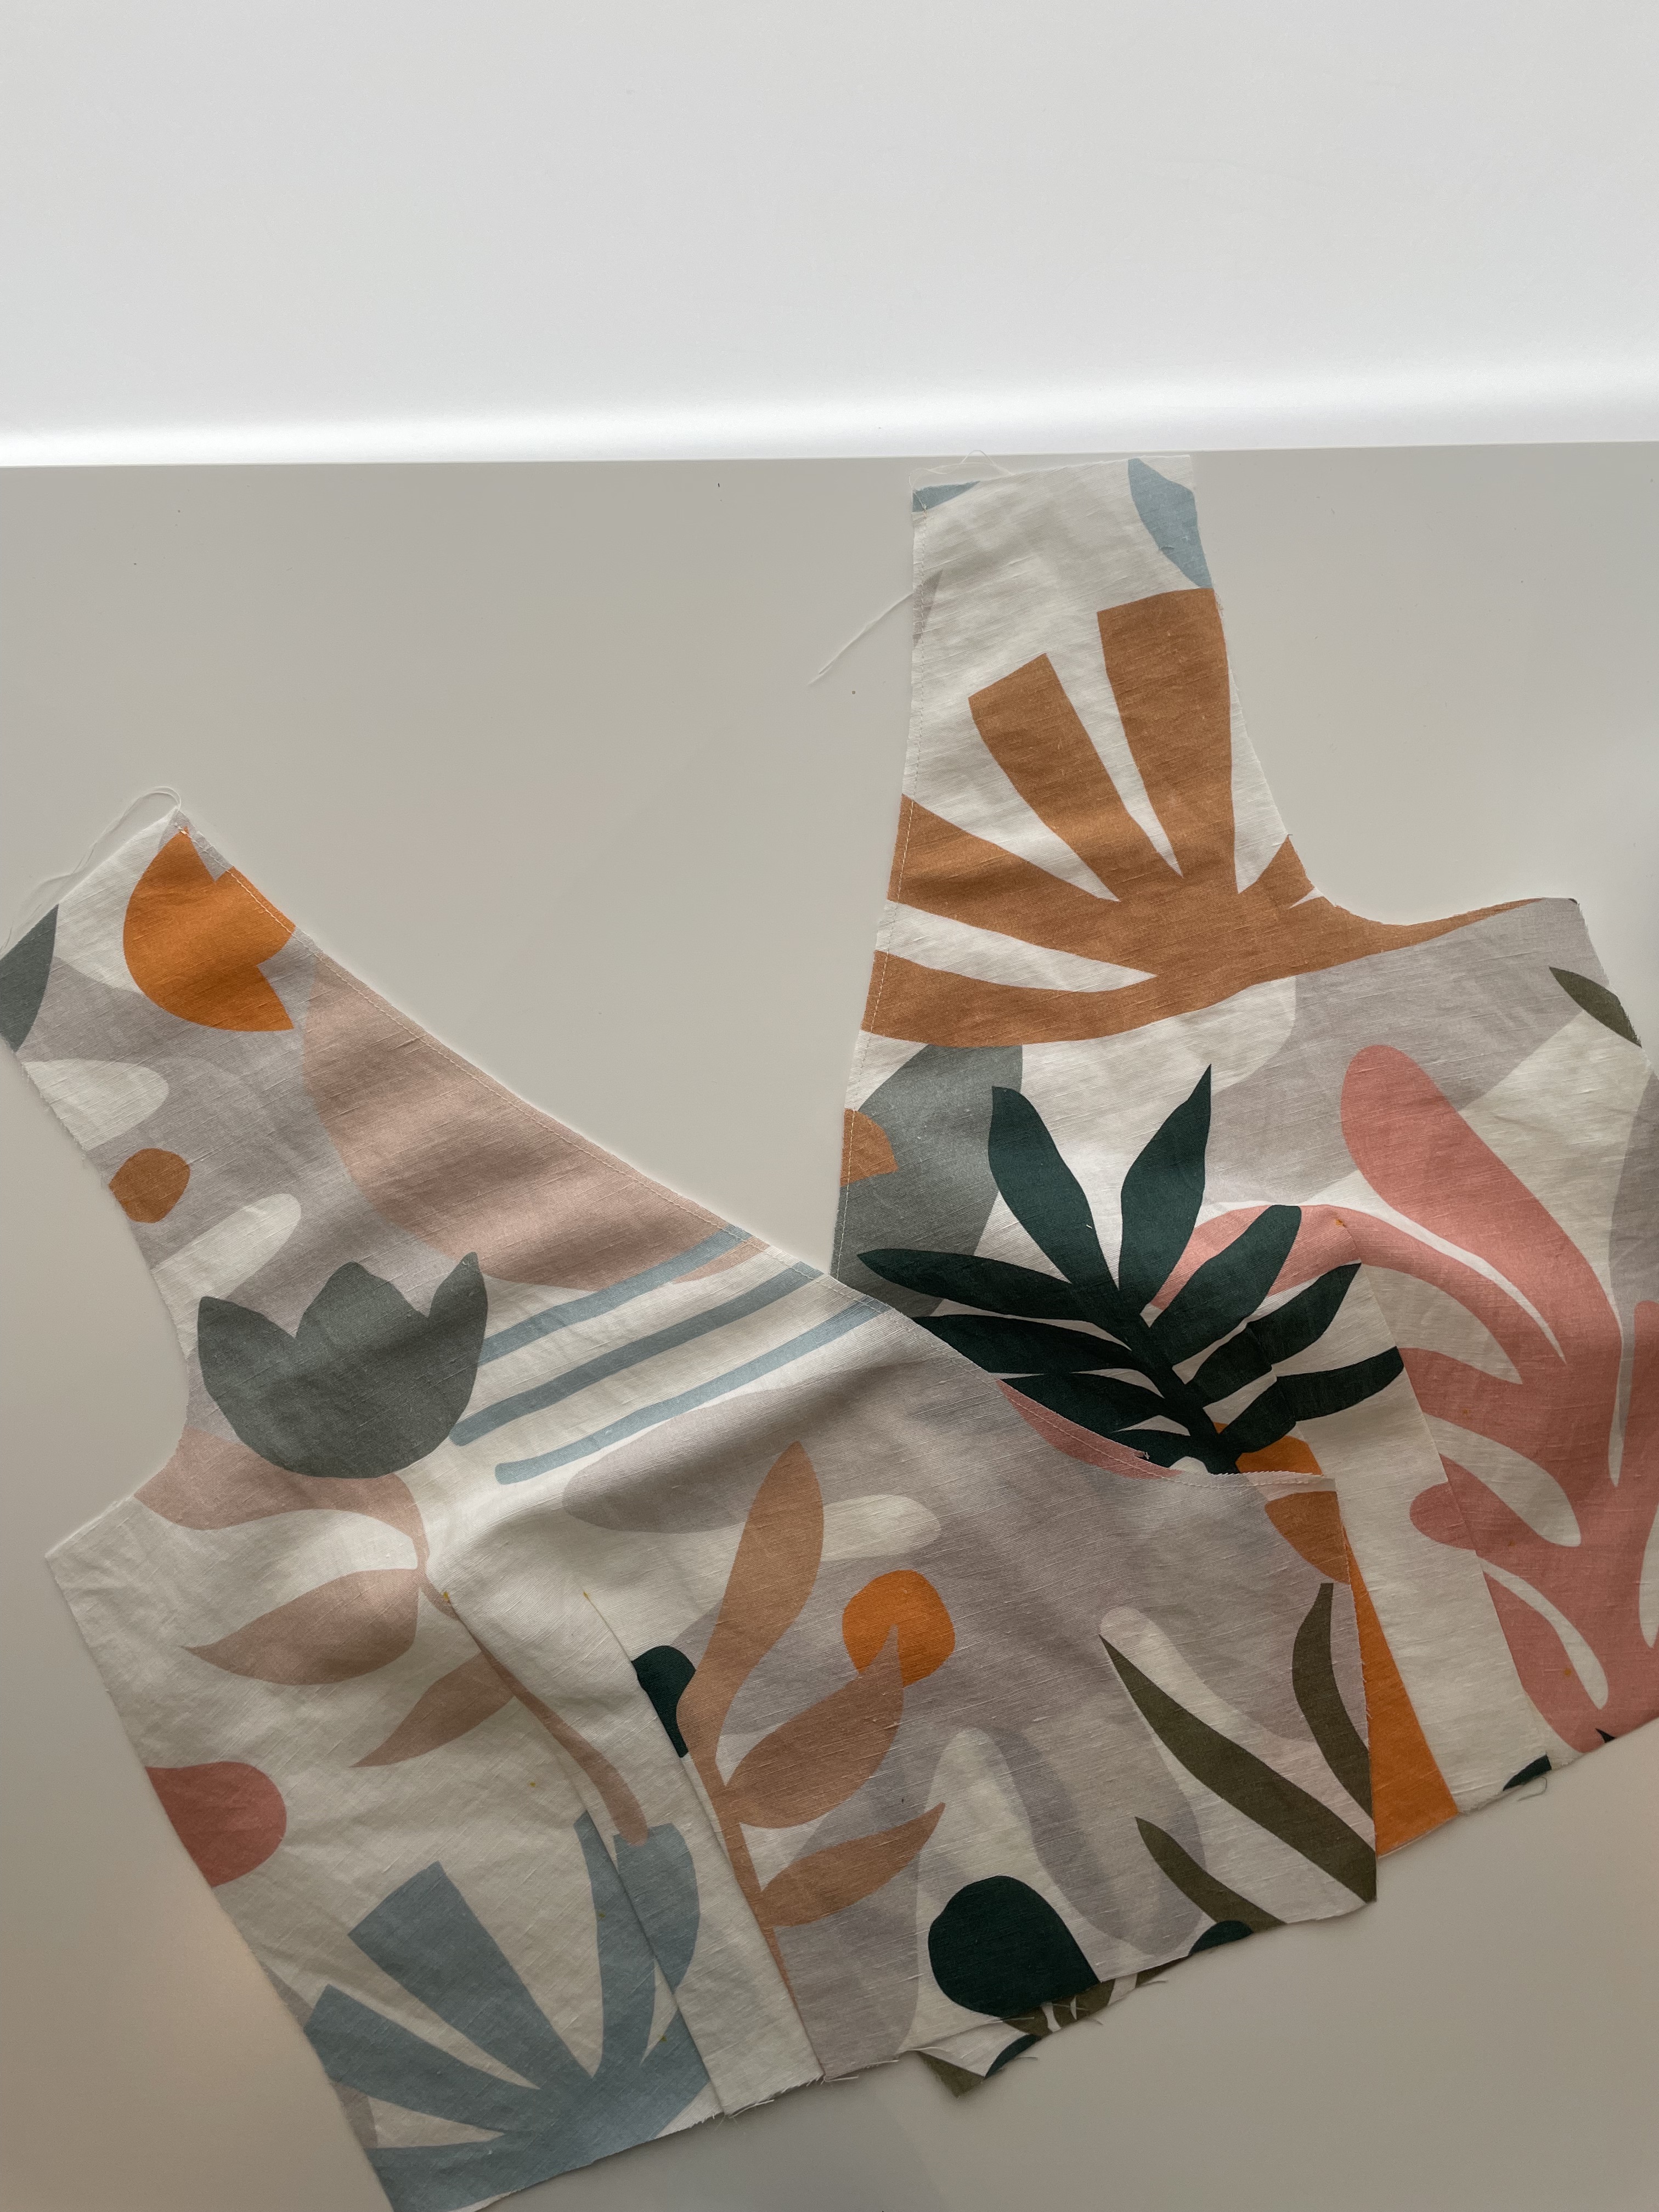
The Albion Blouse is a wrap top which is fastened by buttons and loops. It is quite fitted in the bodice and stops just below the natural waistline. There were a lot of firsts for me in this pattern. I’ve never had to make loops for fastening and it was also my first time making my own buttons. I consider my skill level sitting more towards the advanced beginner so I was happy to be able to complete this pattern which is made for intermediate sewers.
My favourite feature! My own buttons.
The size for the Albion Blouse runs between A to P and has cup sizes. I graded between size F and G as my full bust sat in the F range and my waist was in the G. I love the system on sizing and how Vanessa includes detailed fitting notes in her patterns. The wrap top allows for some flexibility too which helped me as I’m still learning in this area.
Work in progress
There are two versions to make in this pattern and my first make was a wearable toile of the short sleeve blouse. My final version was of the long sleeves with cuff which also fastens with buttons and loops.
This blouse has such classic vintage features, so I chose a beautiful lightweight linen with a modern print to juxtapose this. I always reach for a linen if I can because it’s a natural fibre and great in hot weather and cooler weather too.
Close up of the Albion Blouse
The Albion Blouse is such a generous offering from Vanessa Hansen Studios. Thank you to both Peppermint Magazine and Vanessa for making this pattern free for all of us.
Poppy Blouse is the long anticipated new release from Pattern Scout Studio. It has the most beautiful ruffle collar which is my first. It is in the style of a peasant blouse with raglan sleeves. I was lucky enough to be on the testing team for the Poppy Blouse. This blouse is such a lovely addition to my me-made closet. I do love sewing a dress but for practical reasons, I’ve been looking for more blouse patterns, so I was excited when this opportunity came along.
There are two versions on offer with the pattern. Featured above is Version A which has a ruffle hem. It’s a pretty feature and I find the peplum to be a very flattering feature which draws the silhouette in at the waistline and elongates the legs. I also went on to make a silky version B so the pattern is already proving to be a tried and true pattern! I really love both versions.
My measurements currently are 37.5-inch bust, 34-inch waist and 40-inch hips. My measurements were a surprise when I remeasured myself for the test, but it does remind you in the pattern to always remeasure before starting the sew to avoid disappointment. It’s lucky that there is so much ease in the pattern which is more forgiving when fitting the pattern. Grading is not required, and it’s actually not recommended for this pattern. The sizing is very inclusive, it goes from size 0 to 30 and Pattern Scout Studio is great at offering cup sizes with her patterns.
The next consideration was the fabric. There were some beautiful samples which were shared with the testers. The pattern suits a drapey fabric like chiffon, georgette, crepe the chine but for Version A, I had a thin, lightweight vegetable-dyed cotton that I knew would suit the pattern. It does create a fuller shape, but I love the feel of cotton in summer, and I stress that it is a very lightweight cotton.
Personally, the collar construction was the most satisfying task. I loved bringing it together and it’s a very pretty feature of the blouse. I like it both tied up or left open. It’s very flattering on the neckline.
Pattern Scout Studio always include great instructions with their patterns. It’s sewn in a logical sequence and has the right amount of detail to help someone who is at the start of their sewing journey. I always highly recommend and have sewn their patterns many times over myself. I’m so happy to be able to have been part of the testing team again!
I can’t believe how many times I’ve sewn the Jarrah Sweater from Megan Nielsen Patterns. I first came across this in 2020 when I wanted to try out my new (second-hand) overlocker and I found this. It’s a great beginner pattern especially with my limited experience with knit fabrics and overlocking. The first time I made the pattern, I used a Jacquard Knit Fabric. It was a quick sew and it’s a nice thick sweater, great for really cold days and quite oversized so it slips easily over t-shirts.
Last year, I made another version, but I experimented with a drapier, lighter weight jersey fabric and added a thicker ribbed waistband and a brushed cotton knit version. Both were worn on repeat, but I really loved the lighter weight sweater. It was easy to throw on as a top. Perth is quite Mediterranean in climate which means our winters are cold in the night and mornings but can get quite sunny and warmer in the daytime. It’s great to have a top that is versatile enough to cope.
Jarrah Sweaters from last year
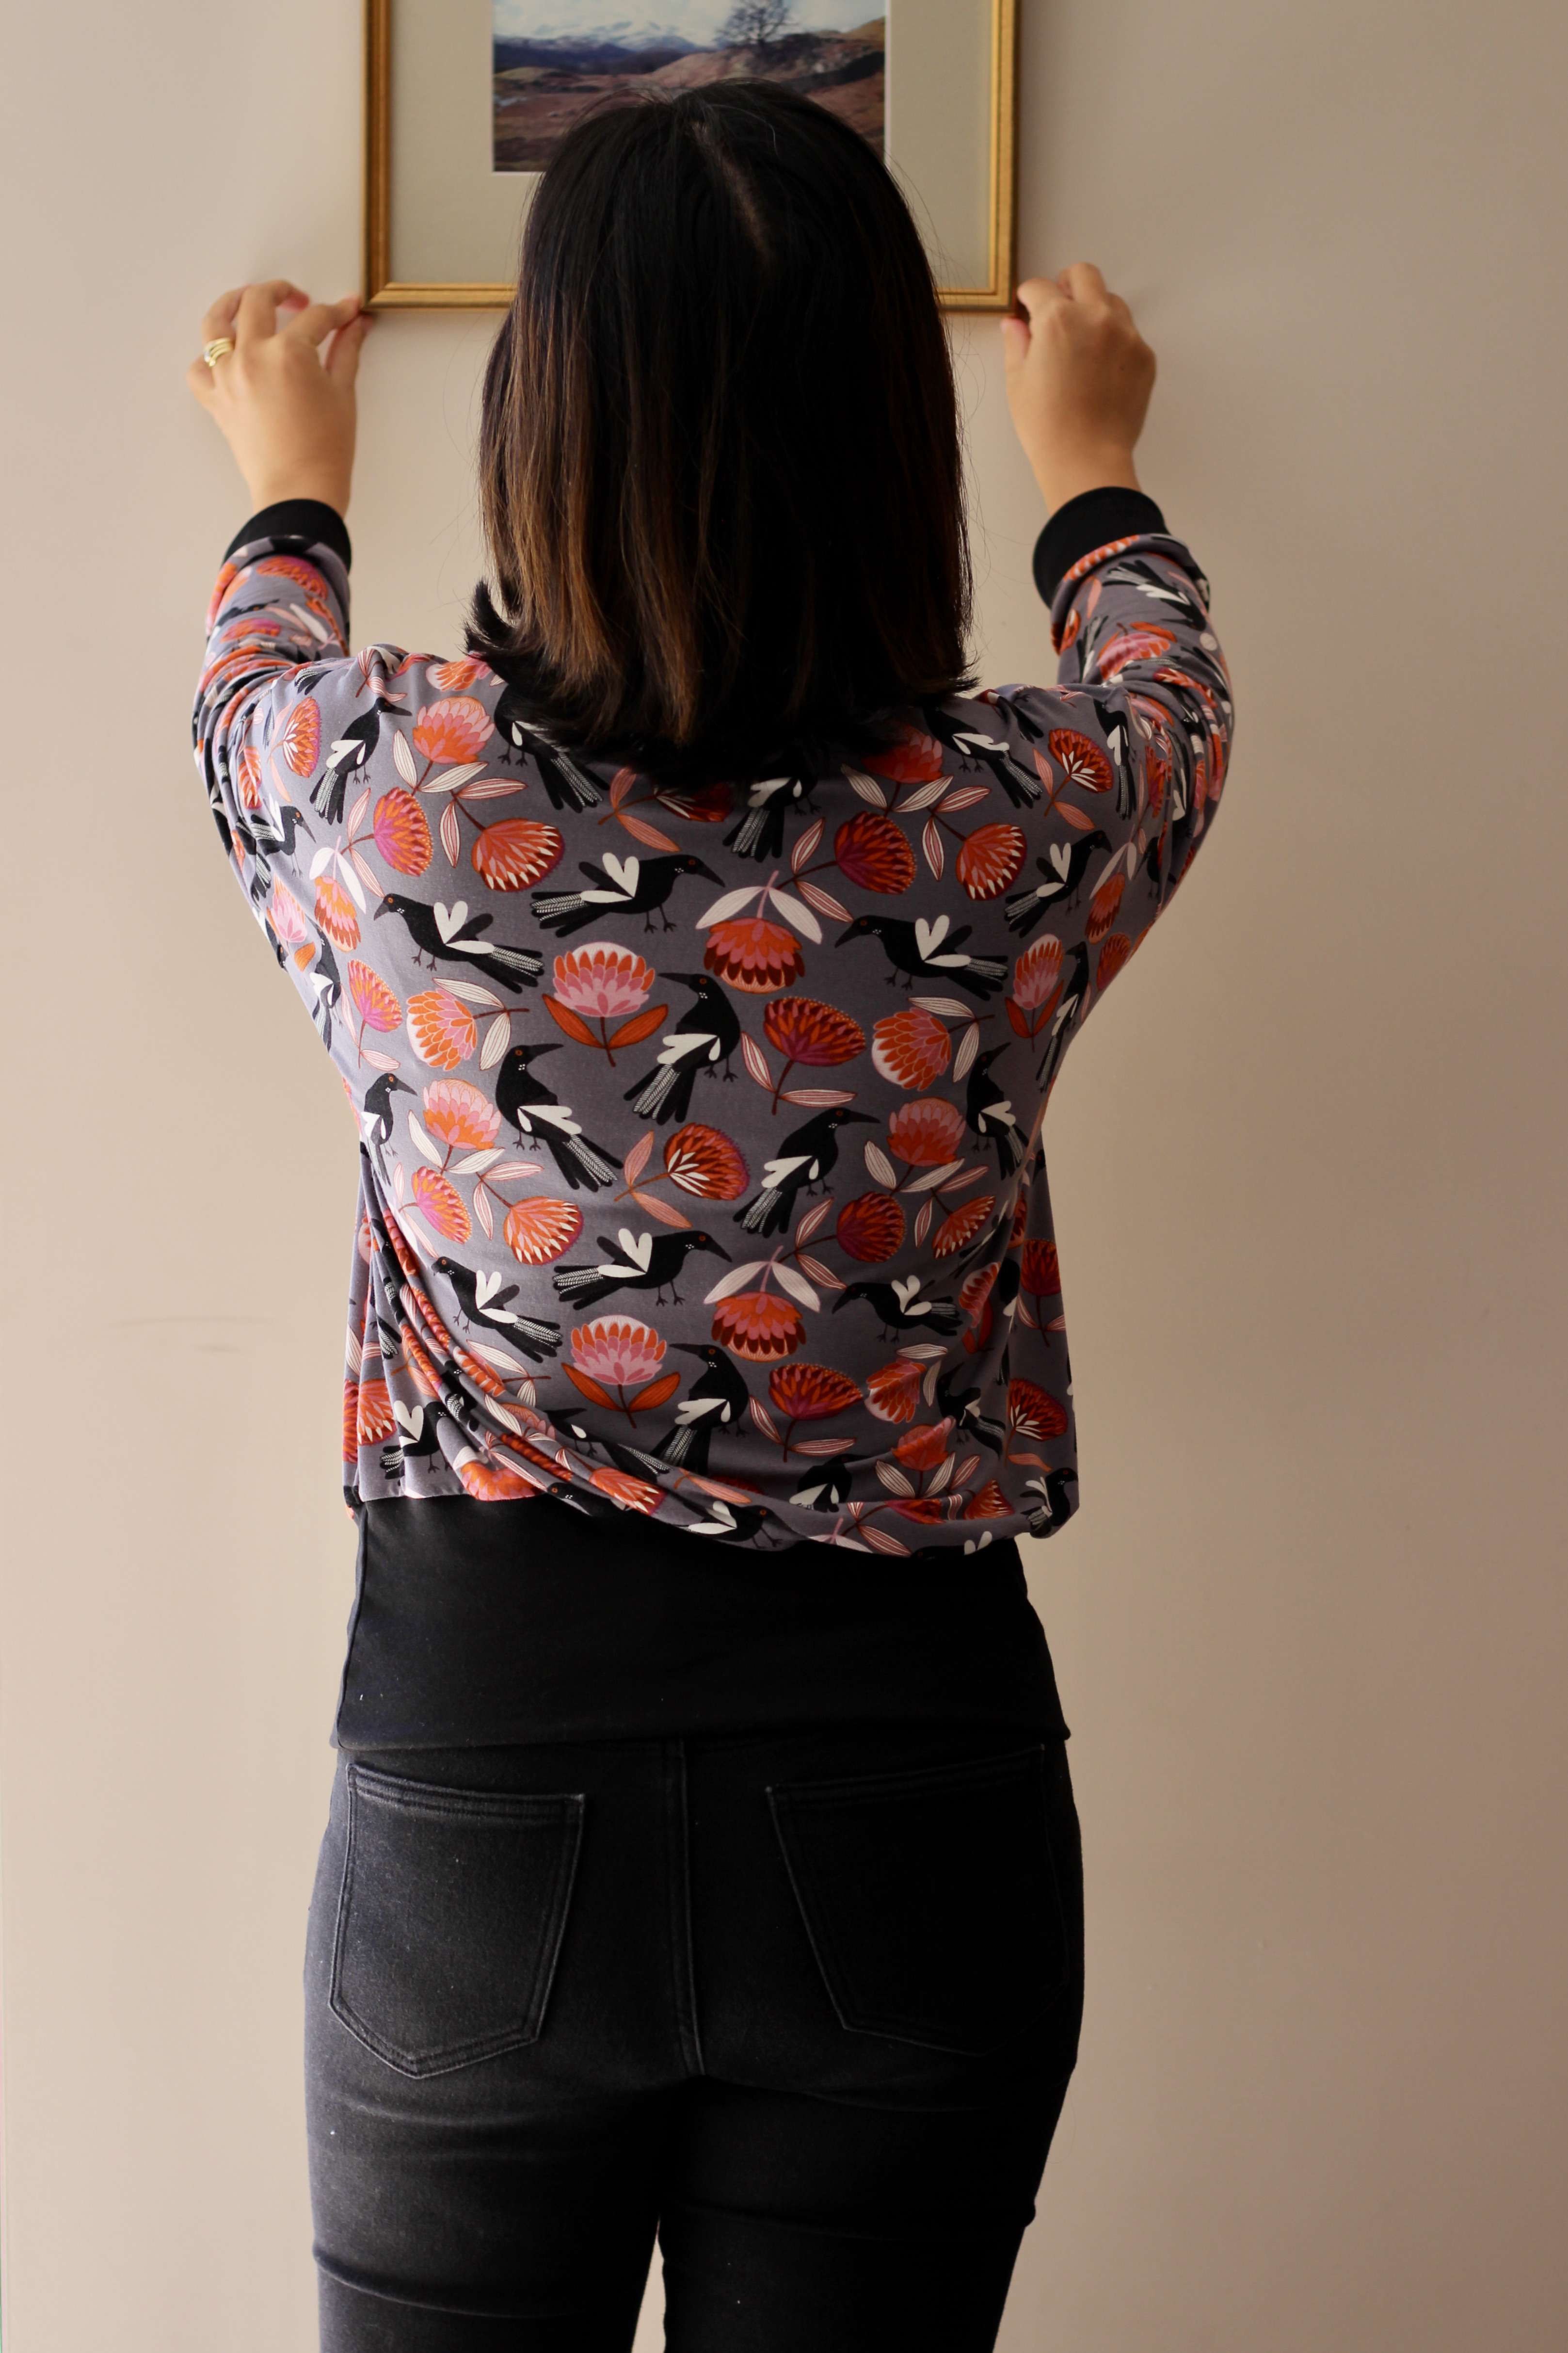
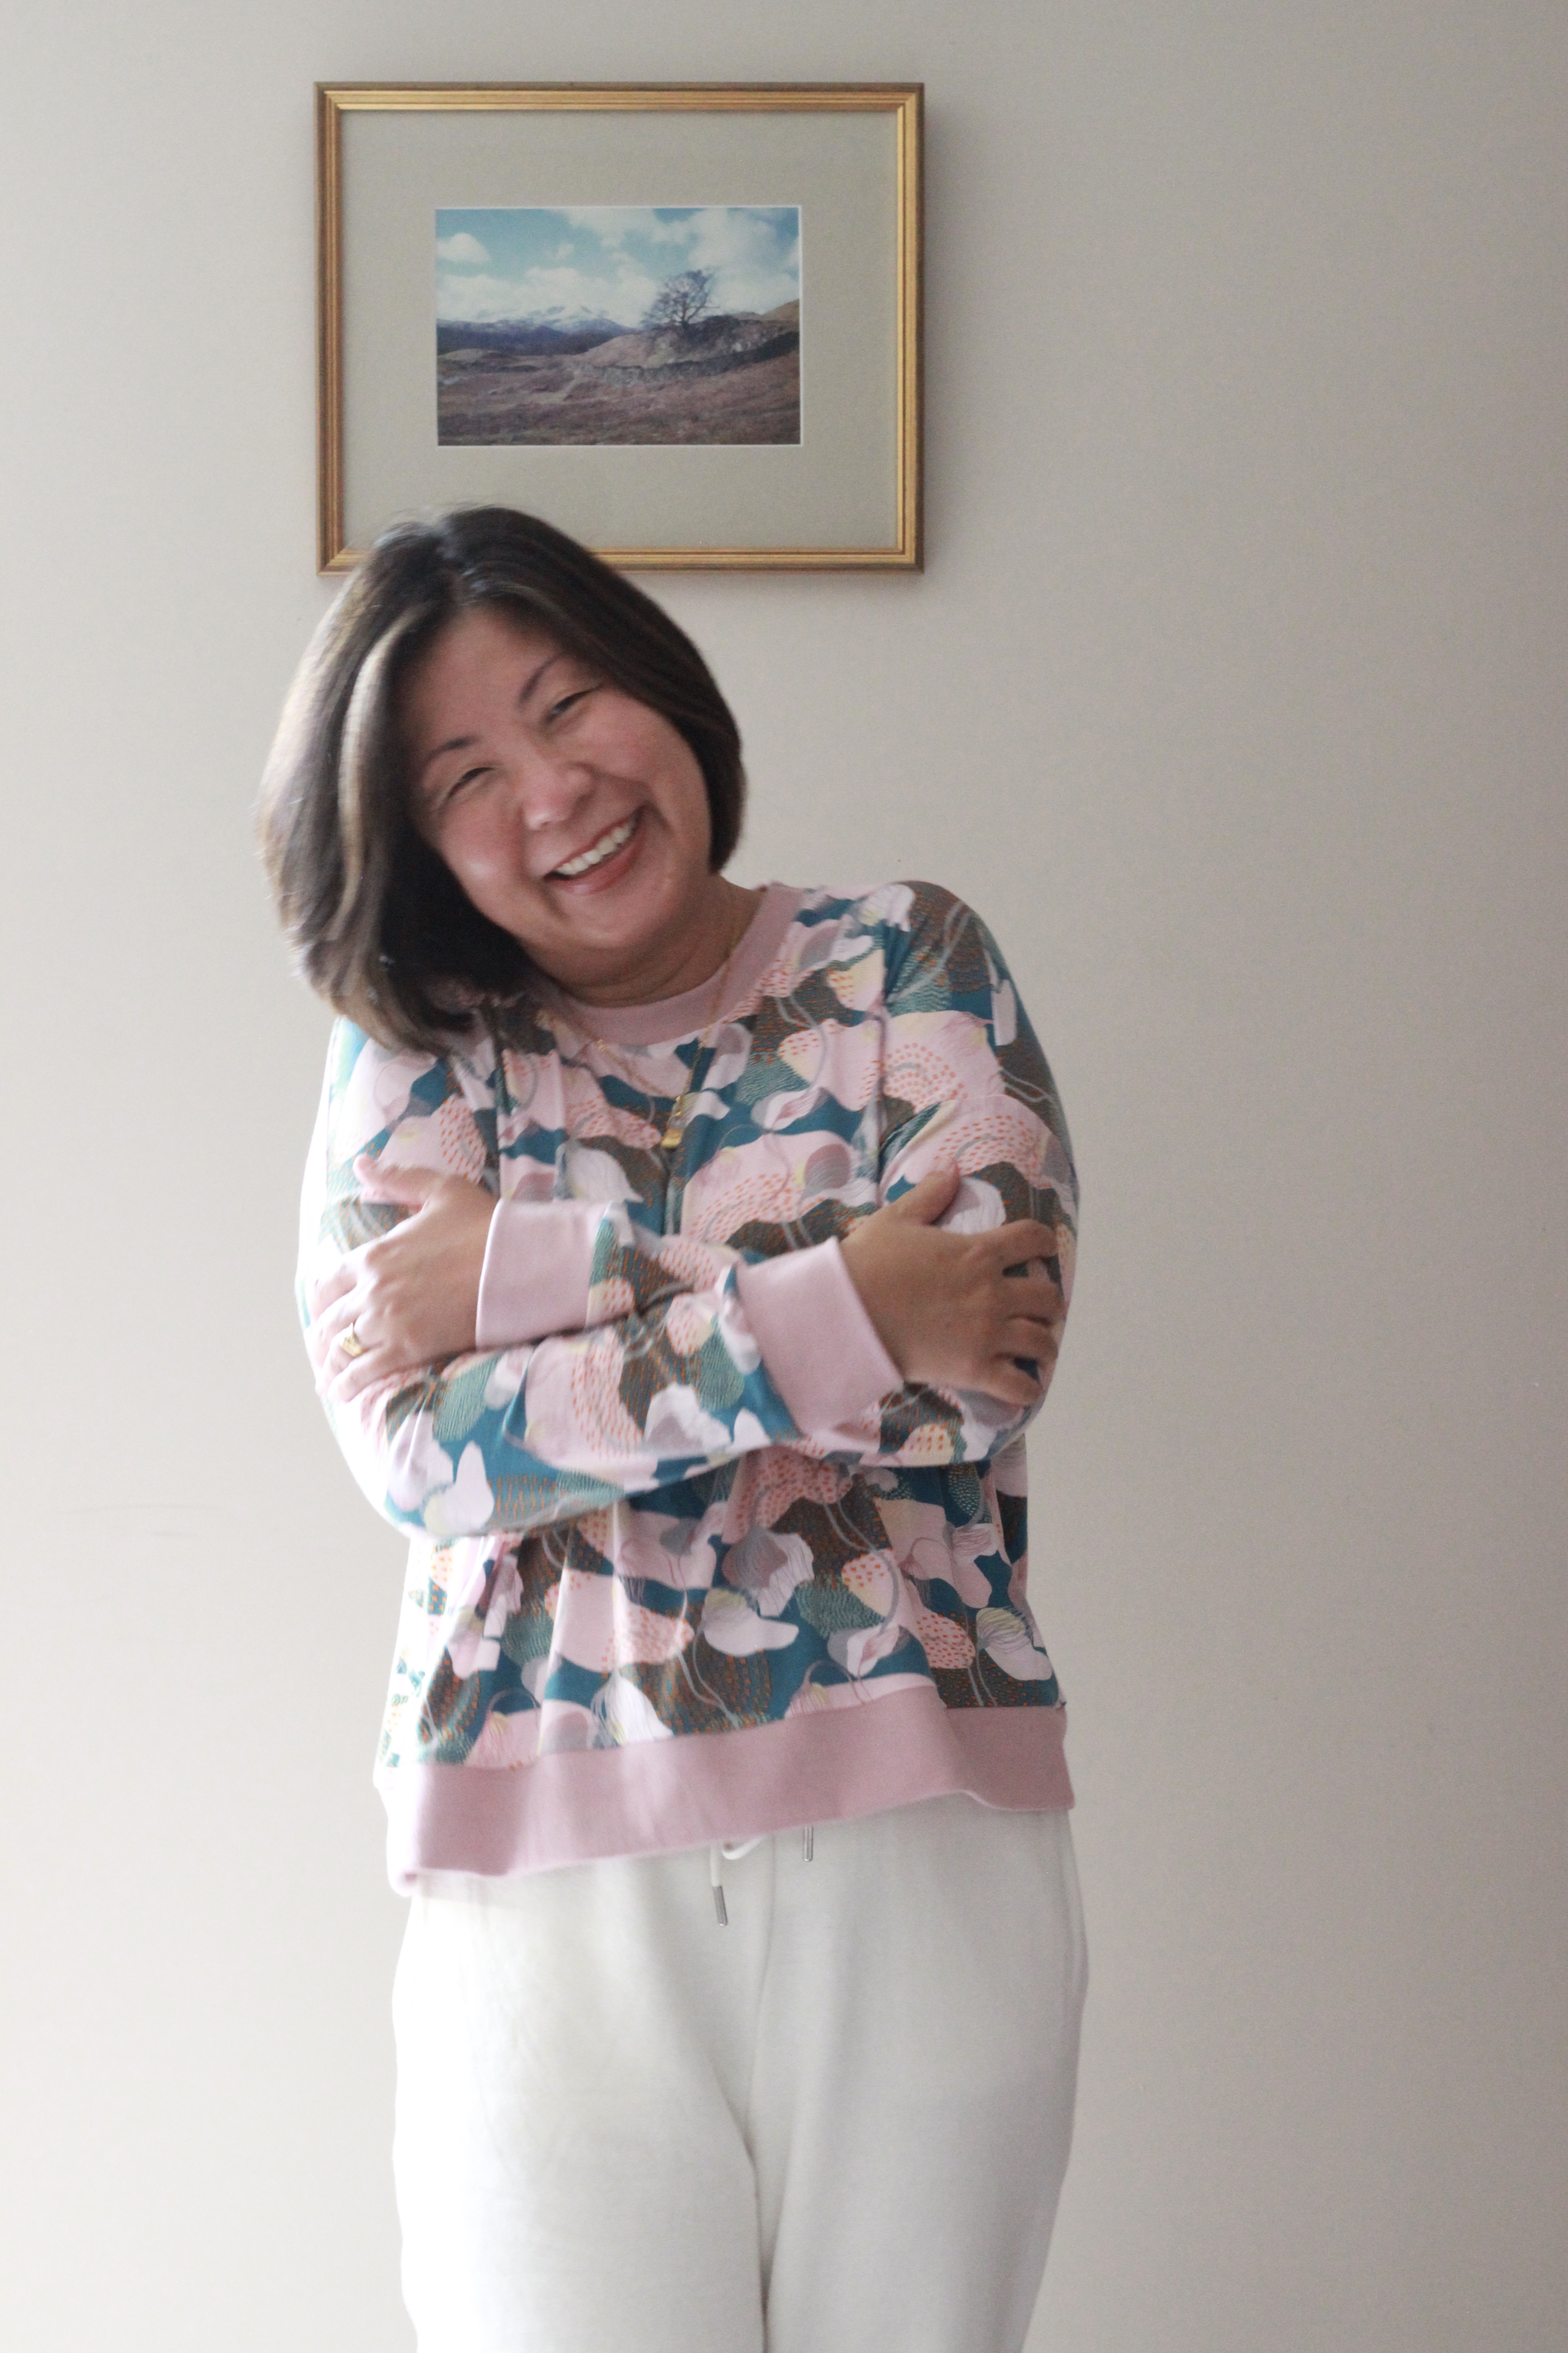
So, since I got so much wear out of my lovely magpie jarrah sweater, I decided to make another one from this beautiful Vanessa Holliday designed jersey fabric from Spotlight Stores. I was thrilled to also find this thin pink ribbing to match. I really love how soft and luxurious the fabric feels.
View A was used to make my top and this time, I did not widen the waistband. In fact, I didn’t make any alterations. I made the size 12 which was comfortable for my frame of 37-inch bust and 33-inch waist. There have been recommendations to size down if you’re unsure of the fit, but I personally love an oversized sweater. There’s been a real appreciation for loungewear since the pandemic. I think it comes from appreciating home and the comforts it provides us. We now love the time spent together, no longer needing to seek excitement and entertainment at every turn. Time together is enough.
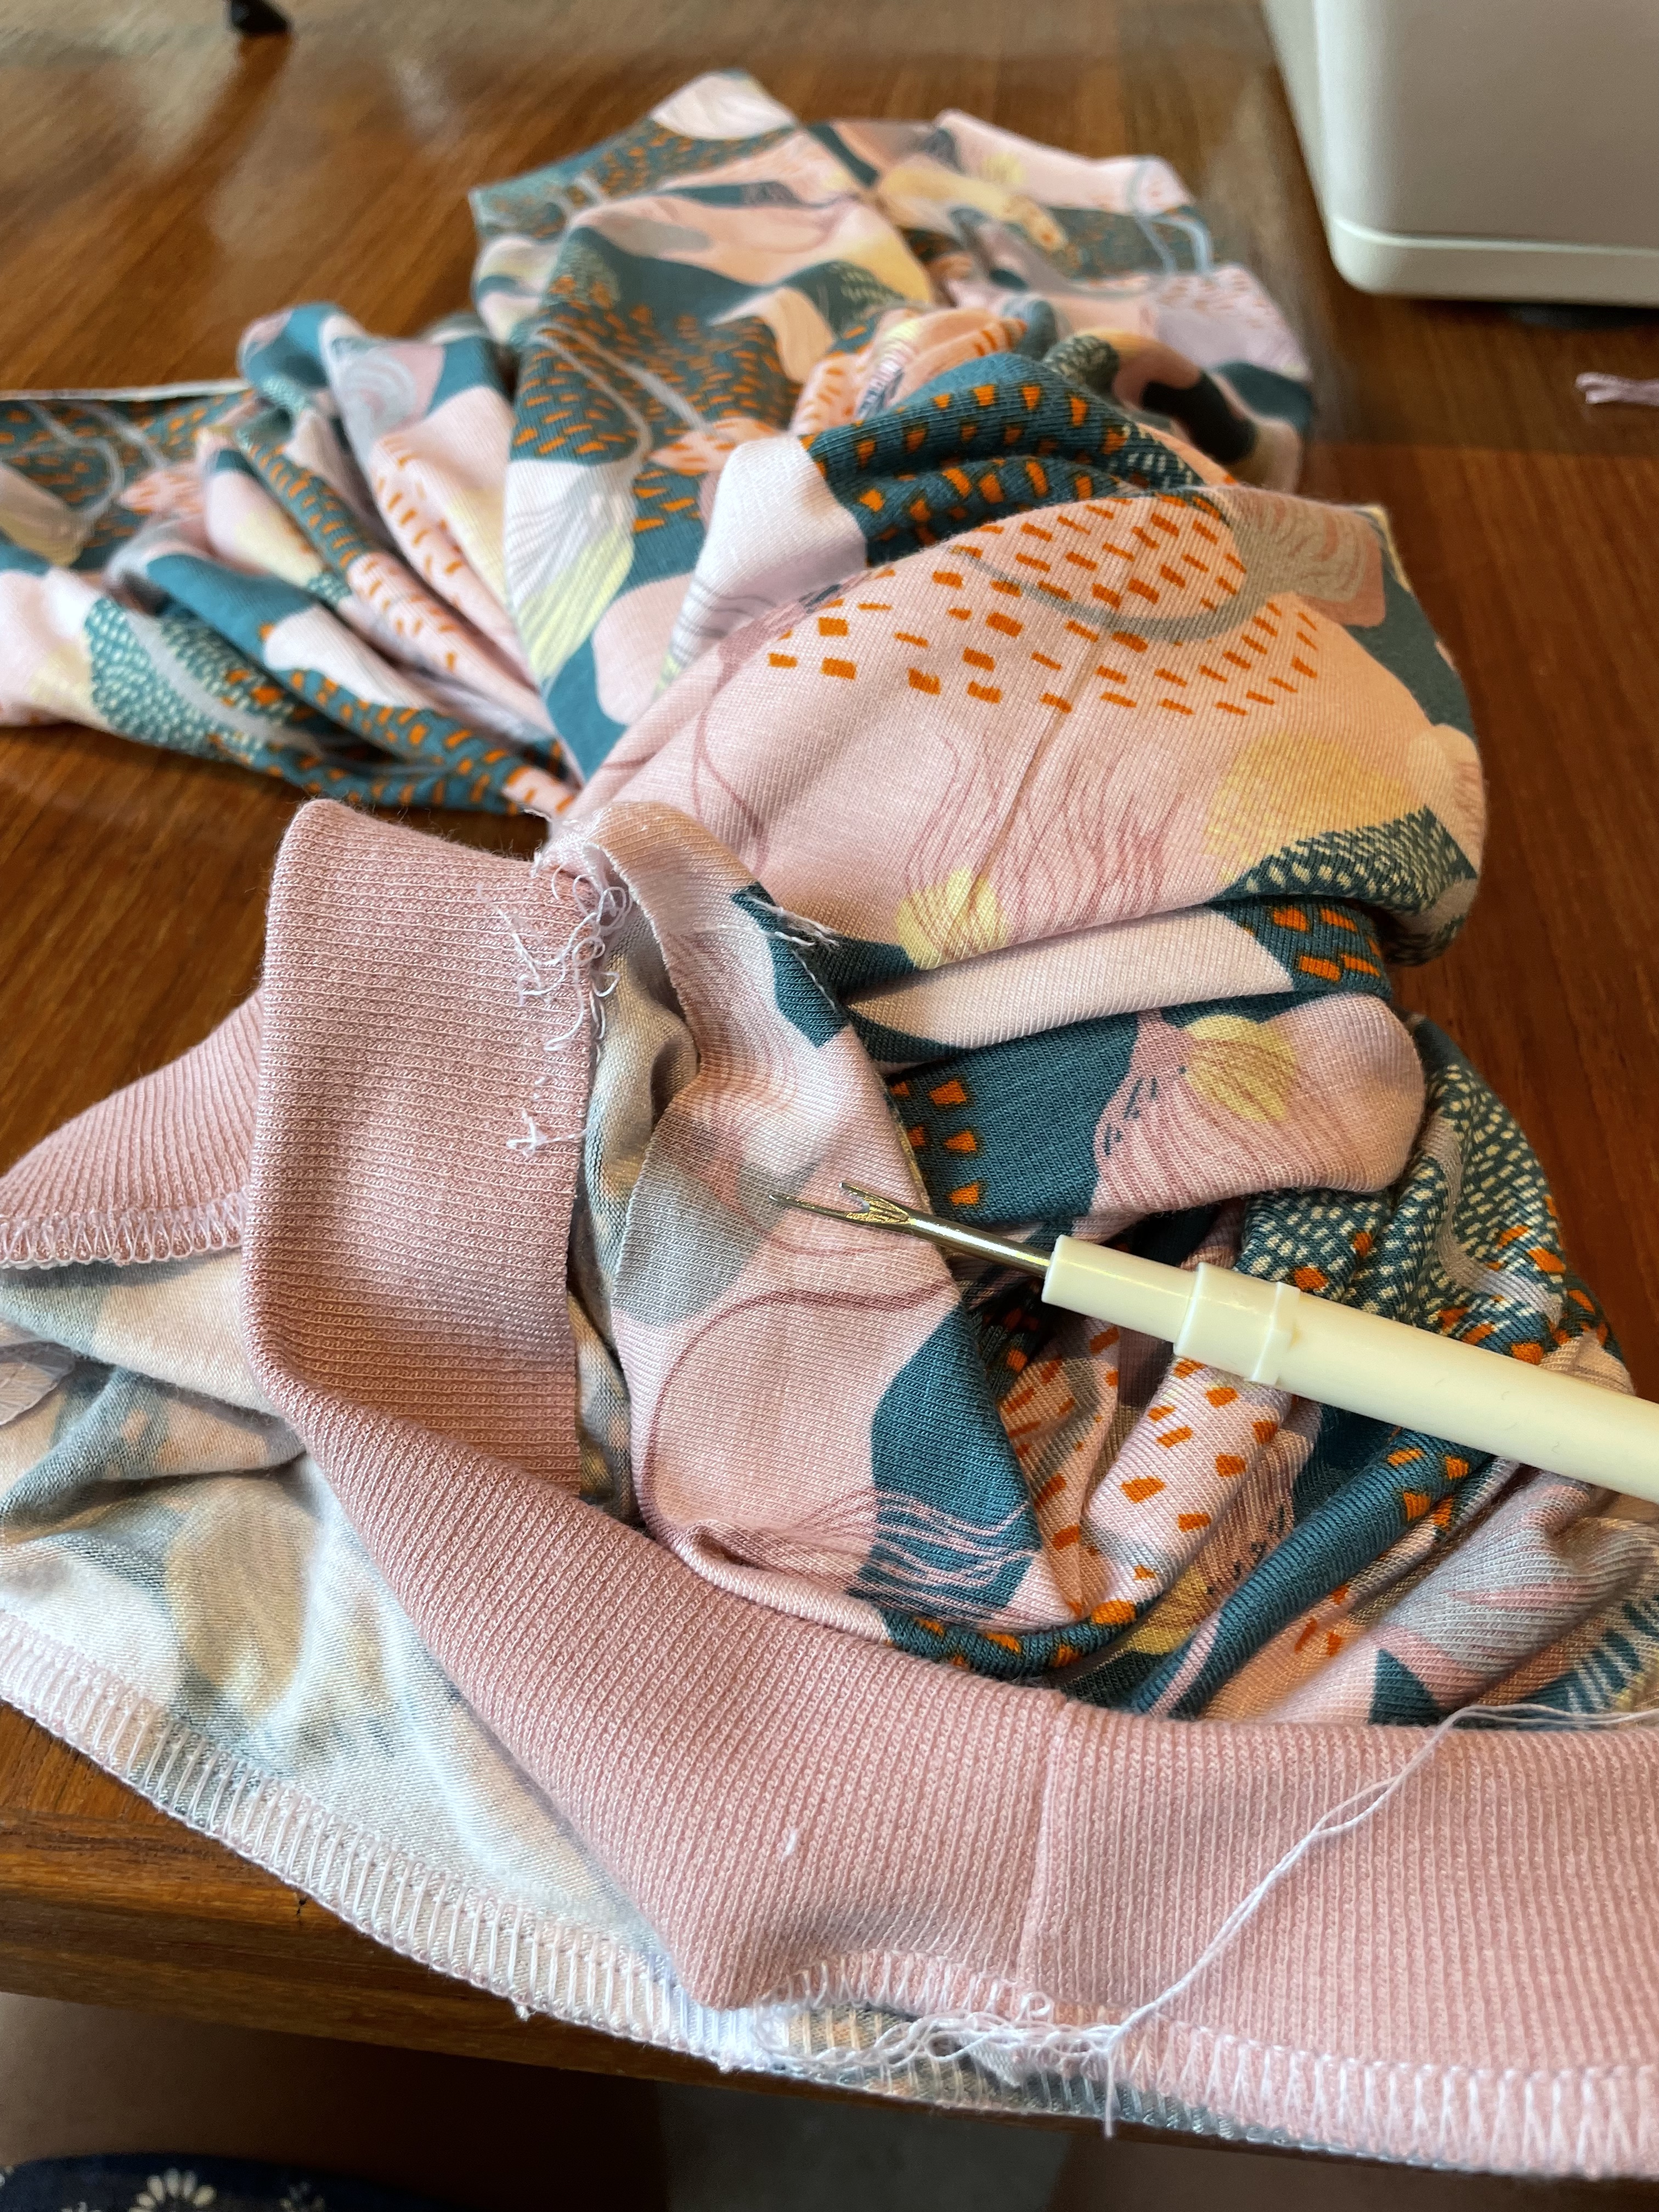
Sewing a pattern multiple times also allows me to reflect on technique and helps my progress in sewing. Sewing isn’t just a hobby about making the same thing over and over. There’s a skill set that must be practised and different techniques to master. I was reminded of this when attaching my collar! In my first attempt, I had not used the marking from the pattern (I was winging it!) and as I was attaching the collar, I could see that I had not stretched the ribbing enough at the beginning and was going to end up with some puckering from over stretching the second half, so I stopped and I unpicked all the overlocked stitching. Yes! It is possible but not something one wishes to do too often.
Oh dear! Start again.
The better way to attach the collar is to mark the centre front, centre back, right shoulder and left shoulder in quarters once you have the short ends joined. It will then be easy to match this to the body of the garment. Also, I find it better to have my ribbing under the jersey fabric to make sure that I only stretch the ribbing and not the jersey fabric.
Ready for some lounging weather! My 2022 Jarrah Sweater
Now that I’ve had my “warm-up” knitted fabric sewing, I’m keen to tackle a few patterns that have been on the back burner. I’ve been meaning to sew up the Pattern Scout Cozi Jacket and True Bias Marlo Sweater. Just need to track down the right fabric!
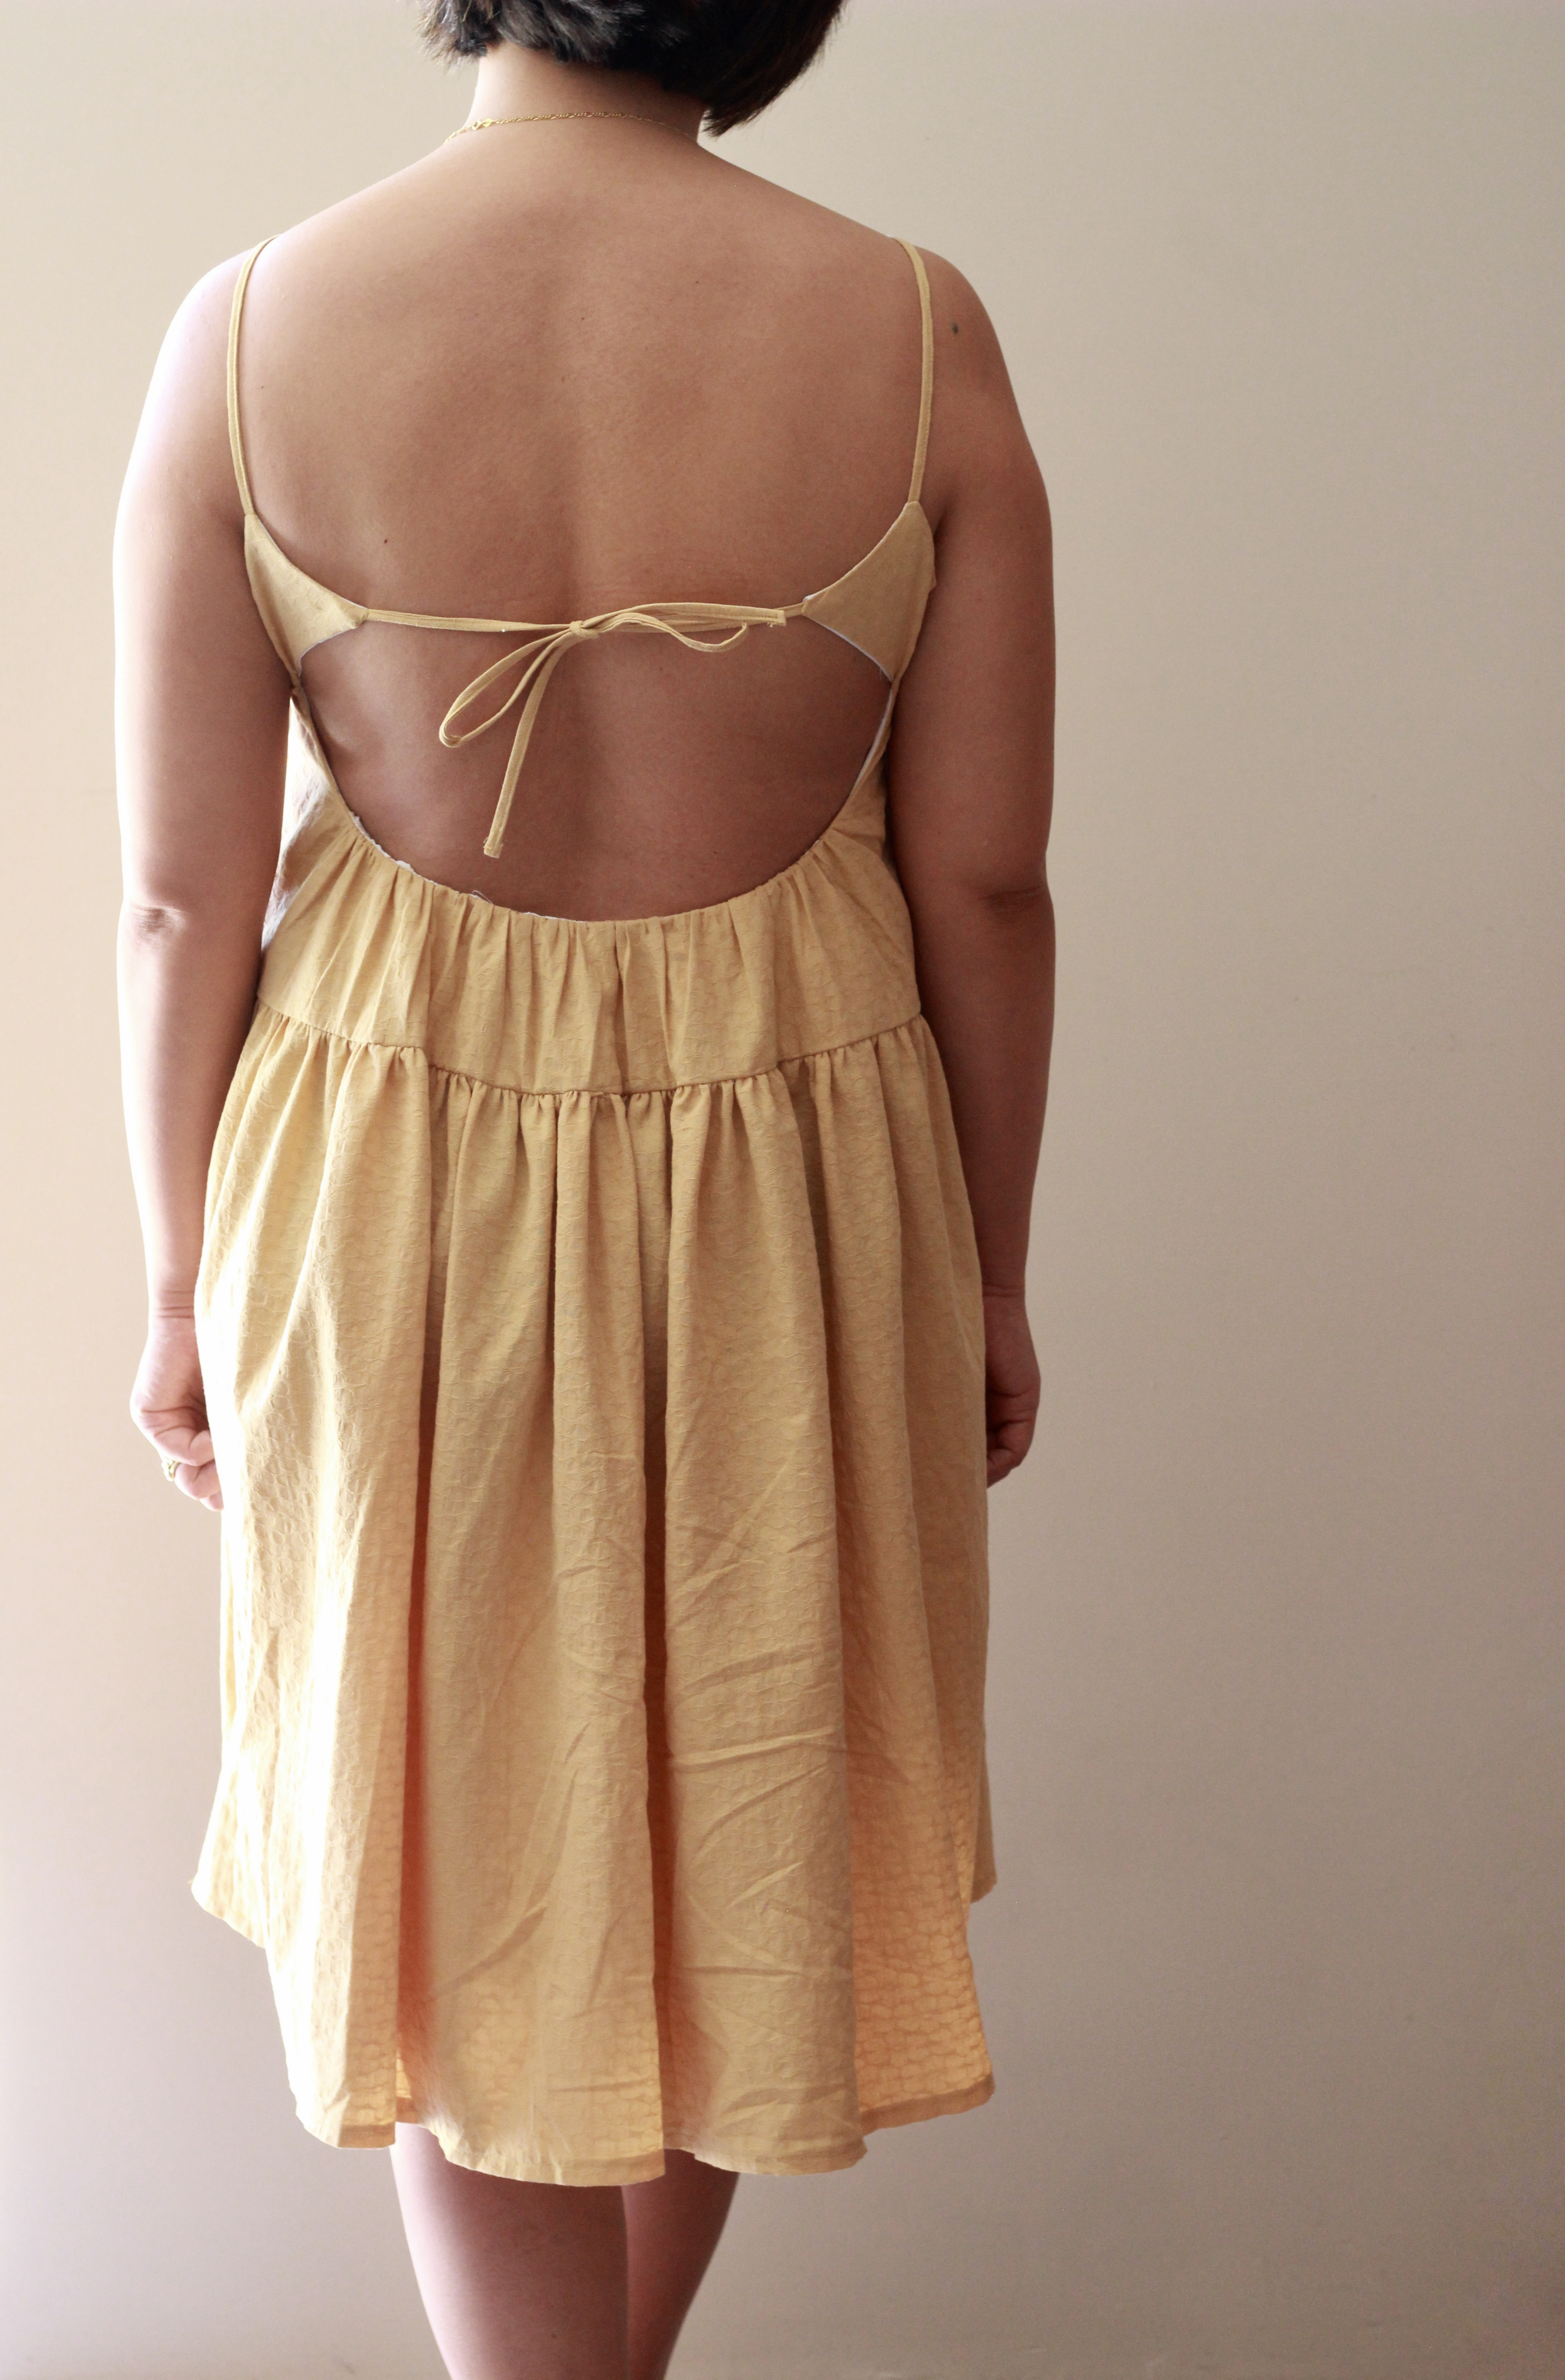
When I looked up “Holmen”, images of a water-bound neighbourhood in Copenhagen popped up. The Holmen Top and Dress is a new release pattern from The Uncut Project. Anna and Isabel are the super talented duo behind this pattern company. They are from Copenhagen and their patterns reflect a cool Scandinavian vibe.
I feel so lucky to be included in the testing team for the Holmen Top and Dress. The top and dress were made to have a good degree of movement and it can be worn for casual outings or out for a night. It transitions so well from day to night. Definitely a good one to pack for future holidays!
Being a self-taught sew-ist, I was mindful of my limitations, but this pattern is made for an advanced beginner which I felt, was an accurate designation. The bodice of the Holmen Top and Dress are made in a yoke style. It has a fitted yoke which a gathered tier is attached. The first tier for the dress is shorter and then fitted to another full gathered skirt tier. My favourite feature is the back of the Holmen Top and Dress. There is a low scoop which skims the curve of the spine, and the back panel is attached by a thin set of ties.
My test was for Size L. I felt the sizing was quite accurate. I did have to check with them for the back of the dress as this is such an original design. My measurements are 37-inch Bust, 33-inch Waist and 38 -inch Hips. So, my measurements fall between Size L and Size XL. I went with the Size L because the finished garment measurements were quite generous, and the fitting of the bust area was adjustable due to the straps.
Unique Back Details
The process of testing is always interesting. I started by sewing a toile for the Holmen Top using some scraps of fabric from leftover projects and this allowed me to adjust shoulder strap length. It also allowed me time to follow the construction process and make notes where I felt instructions needed clarification. There really wasn’t any, only one small detail about which notch to sew to in the back tier, but all the instructions were clear, easy to follow and followed a logical sequence.
Once the toile was completed, I went ahead and sewed the Holmen Top. It’s a very satisfying sew. I used a thin blue cotton and lined it with white muslin. It was a challenge sewing the thin straps with my lightweight cotton as it kept shredding when I tried to turn the straps the right way around. In the end I used my own method to achieve the look. I love the look of the thin straps and I think it’s worth the effort. There is a lot of gathering especially around the curve of the back and it was a bit hard doing that amount of gathering but it was better the second time around when I sewed the Holmen Dress. Practise makes progress!
Close Up of the Holmen Top
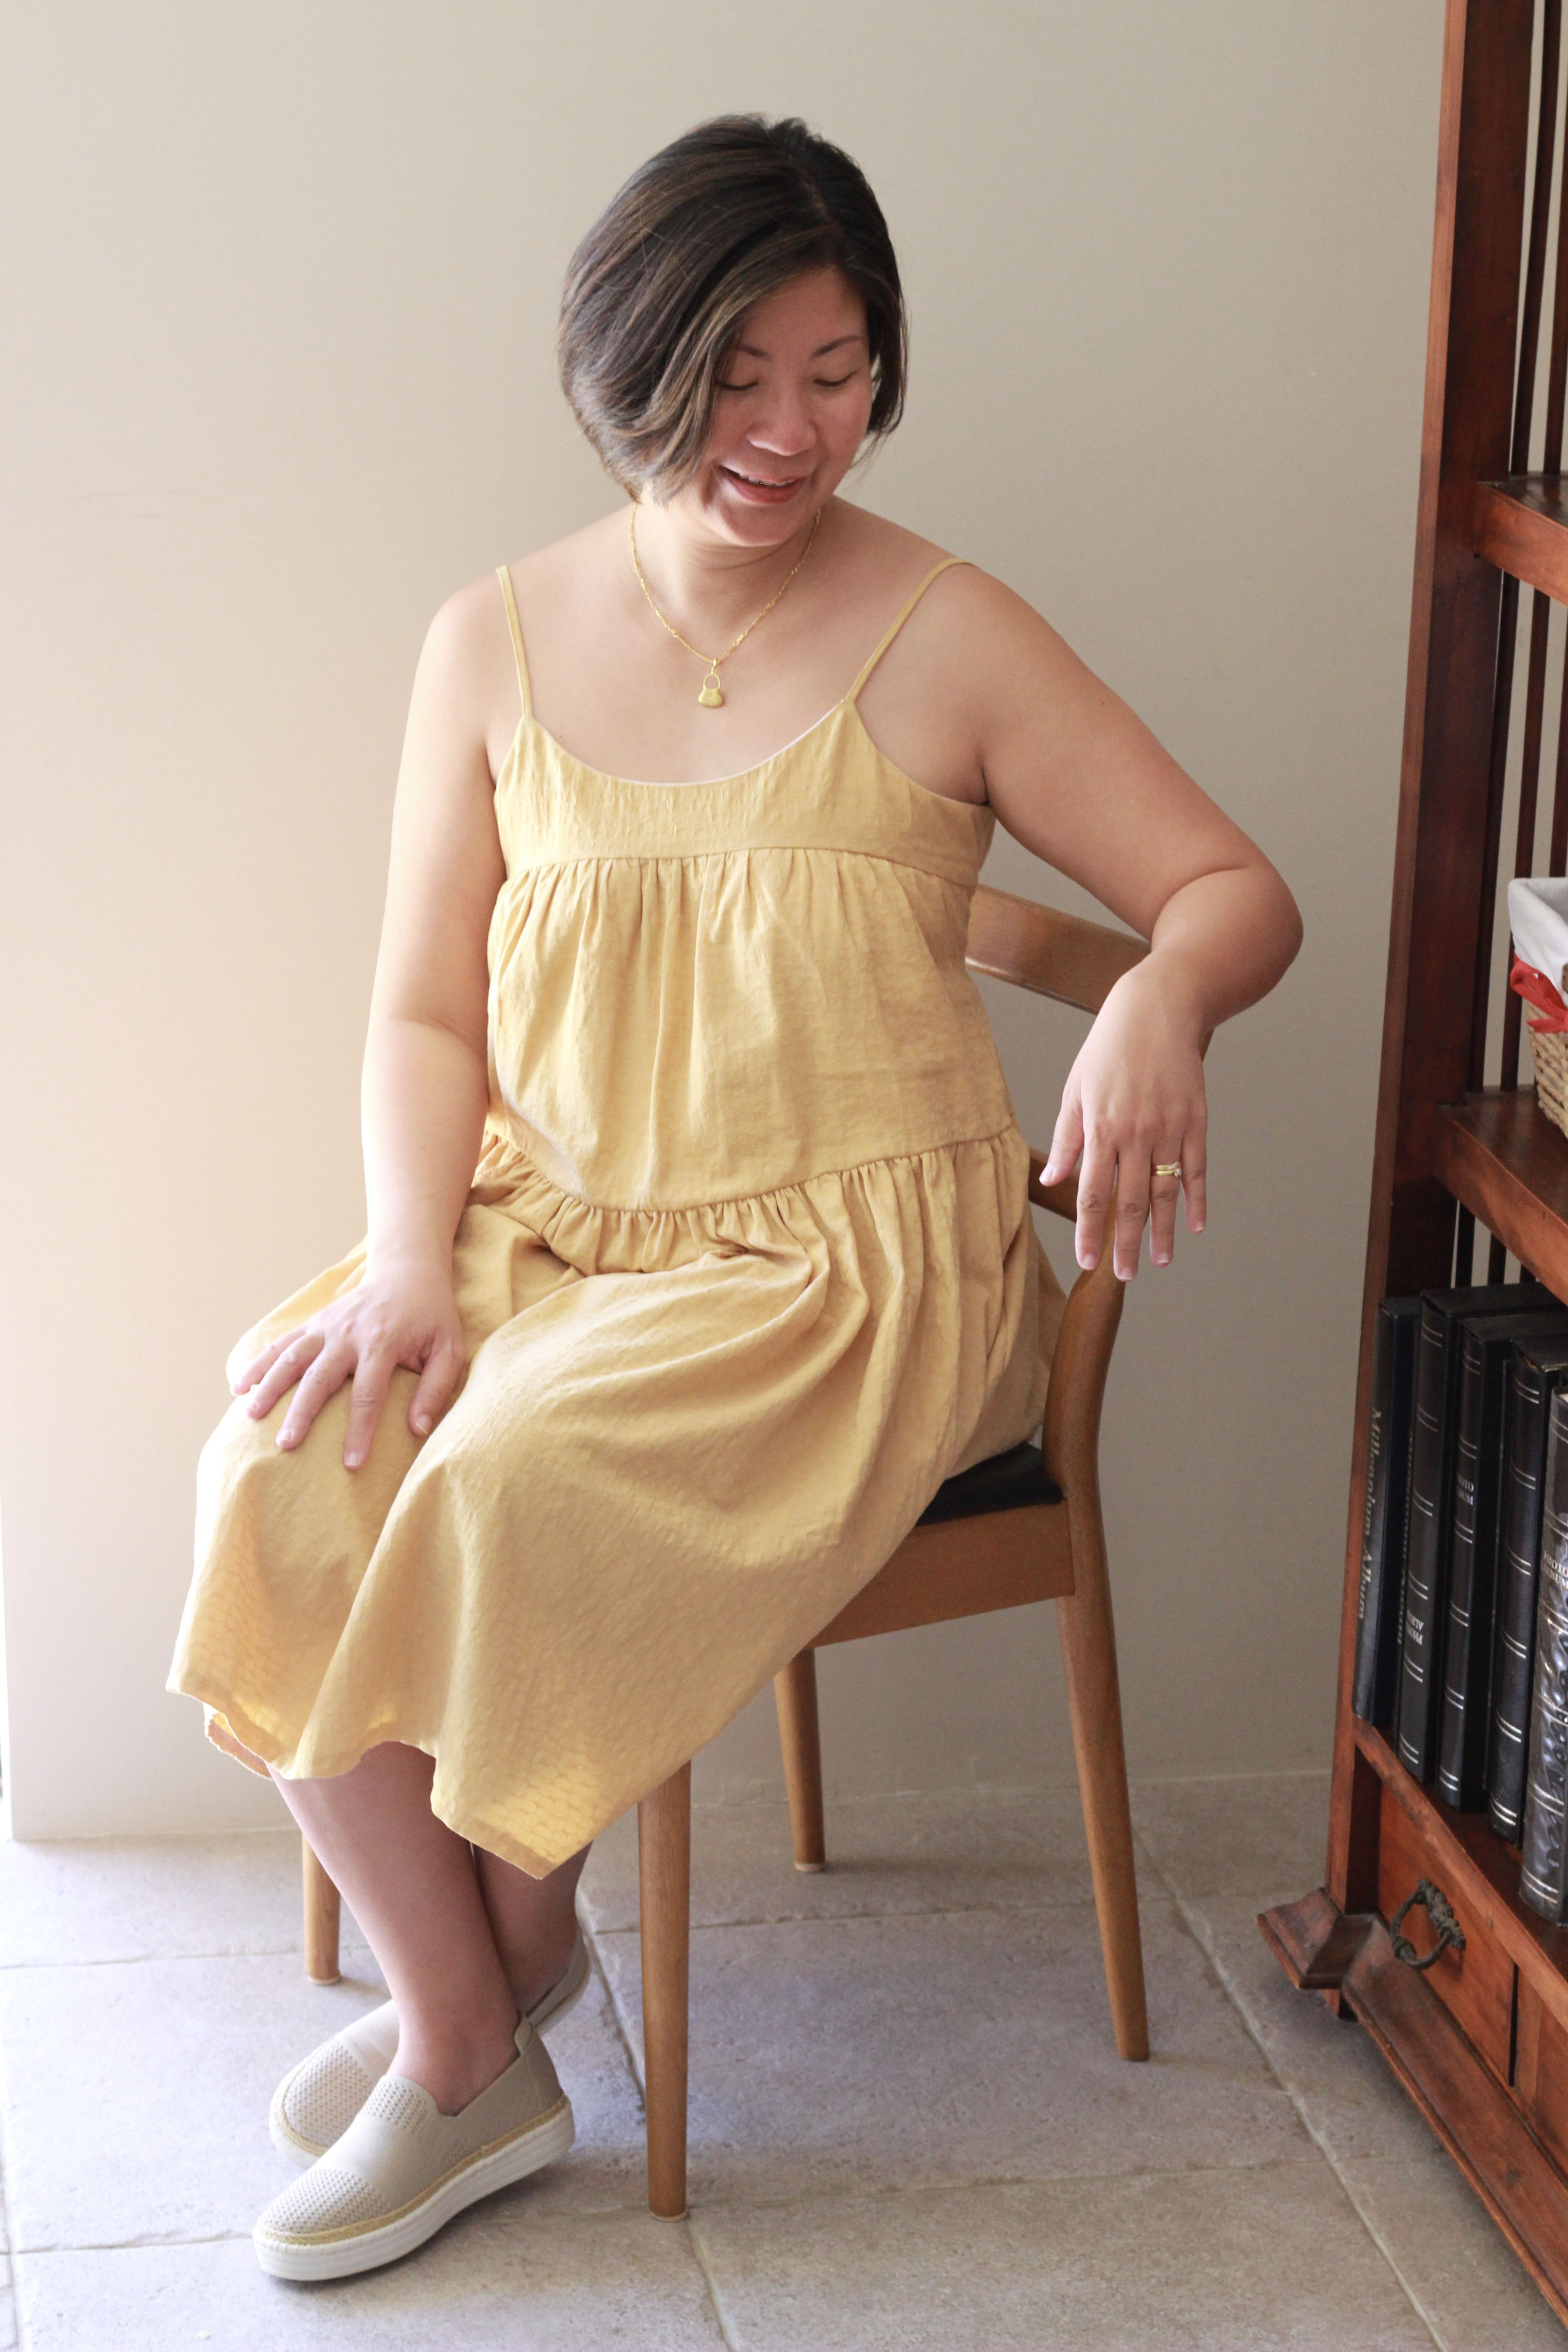
For the dress, I found a beautiful honey hued yellow textured cotton. Still lightweight but not as sheer as my blue top. I also lined the dress but only halfway with the white muslin. It’s a bit more economical doing your lining this way. I’m in love with the silhouette of the dress. It seems reminiscent of the nineteen twenties.
Close Up of the Holmen Dress
Doing this pattern test has been enjoyable especially with Anna and Isabel, from The Uncut Project. It’s also so fulfilling at the creative level. It really makes me want to do more in the future. I always hesitate to apply when I see the call for testers but I’m so glad that I was offered to join the testing team otherwise I might have not been confident enough to join in!
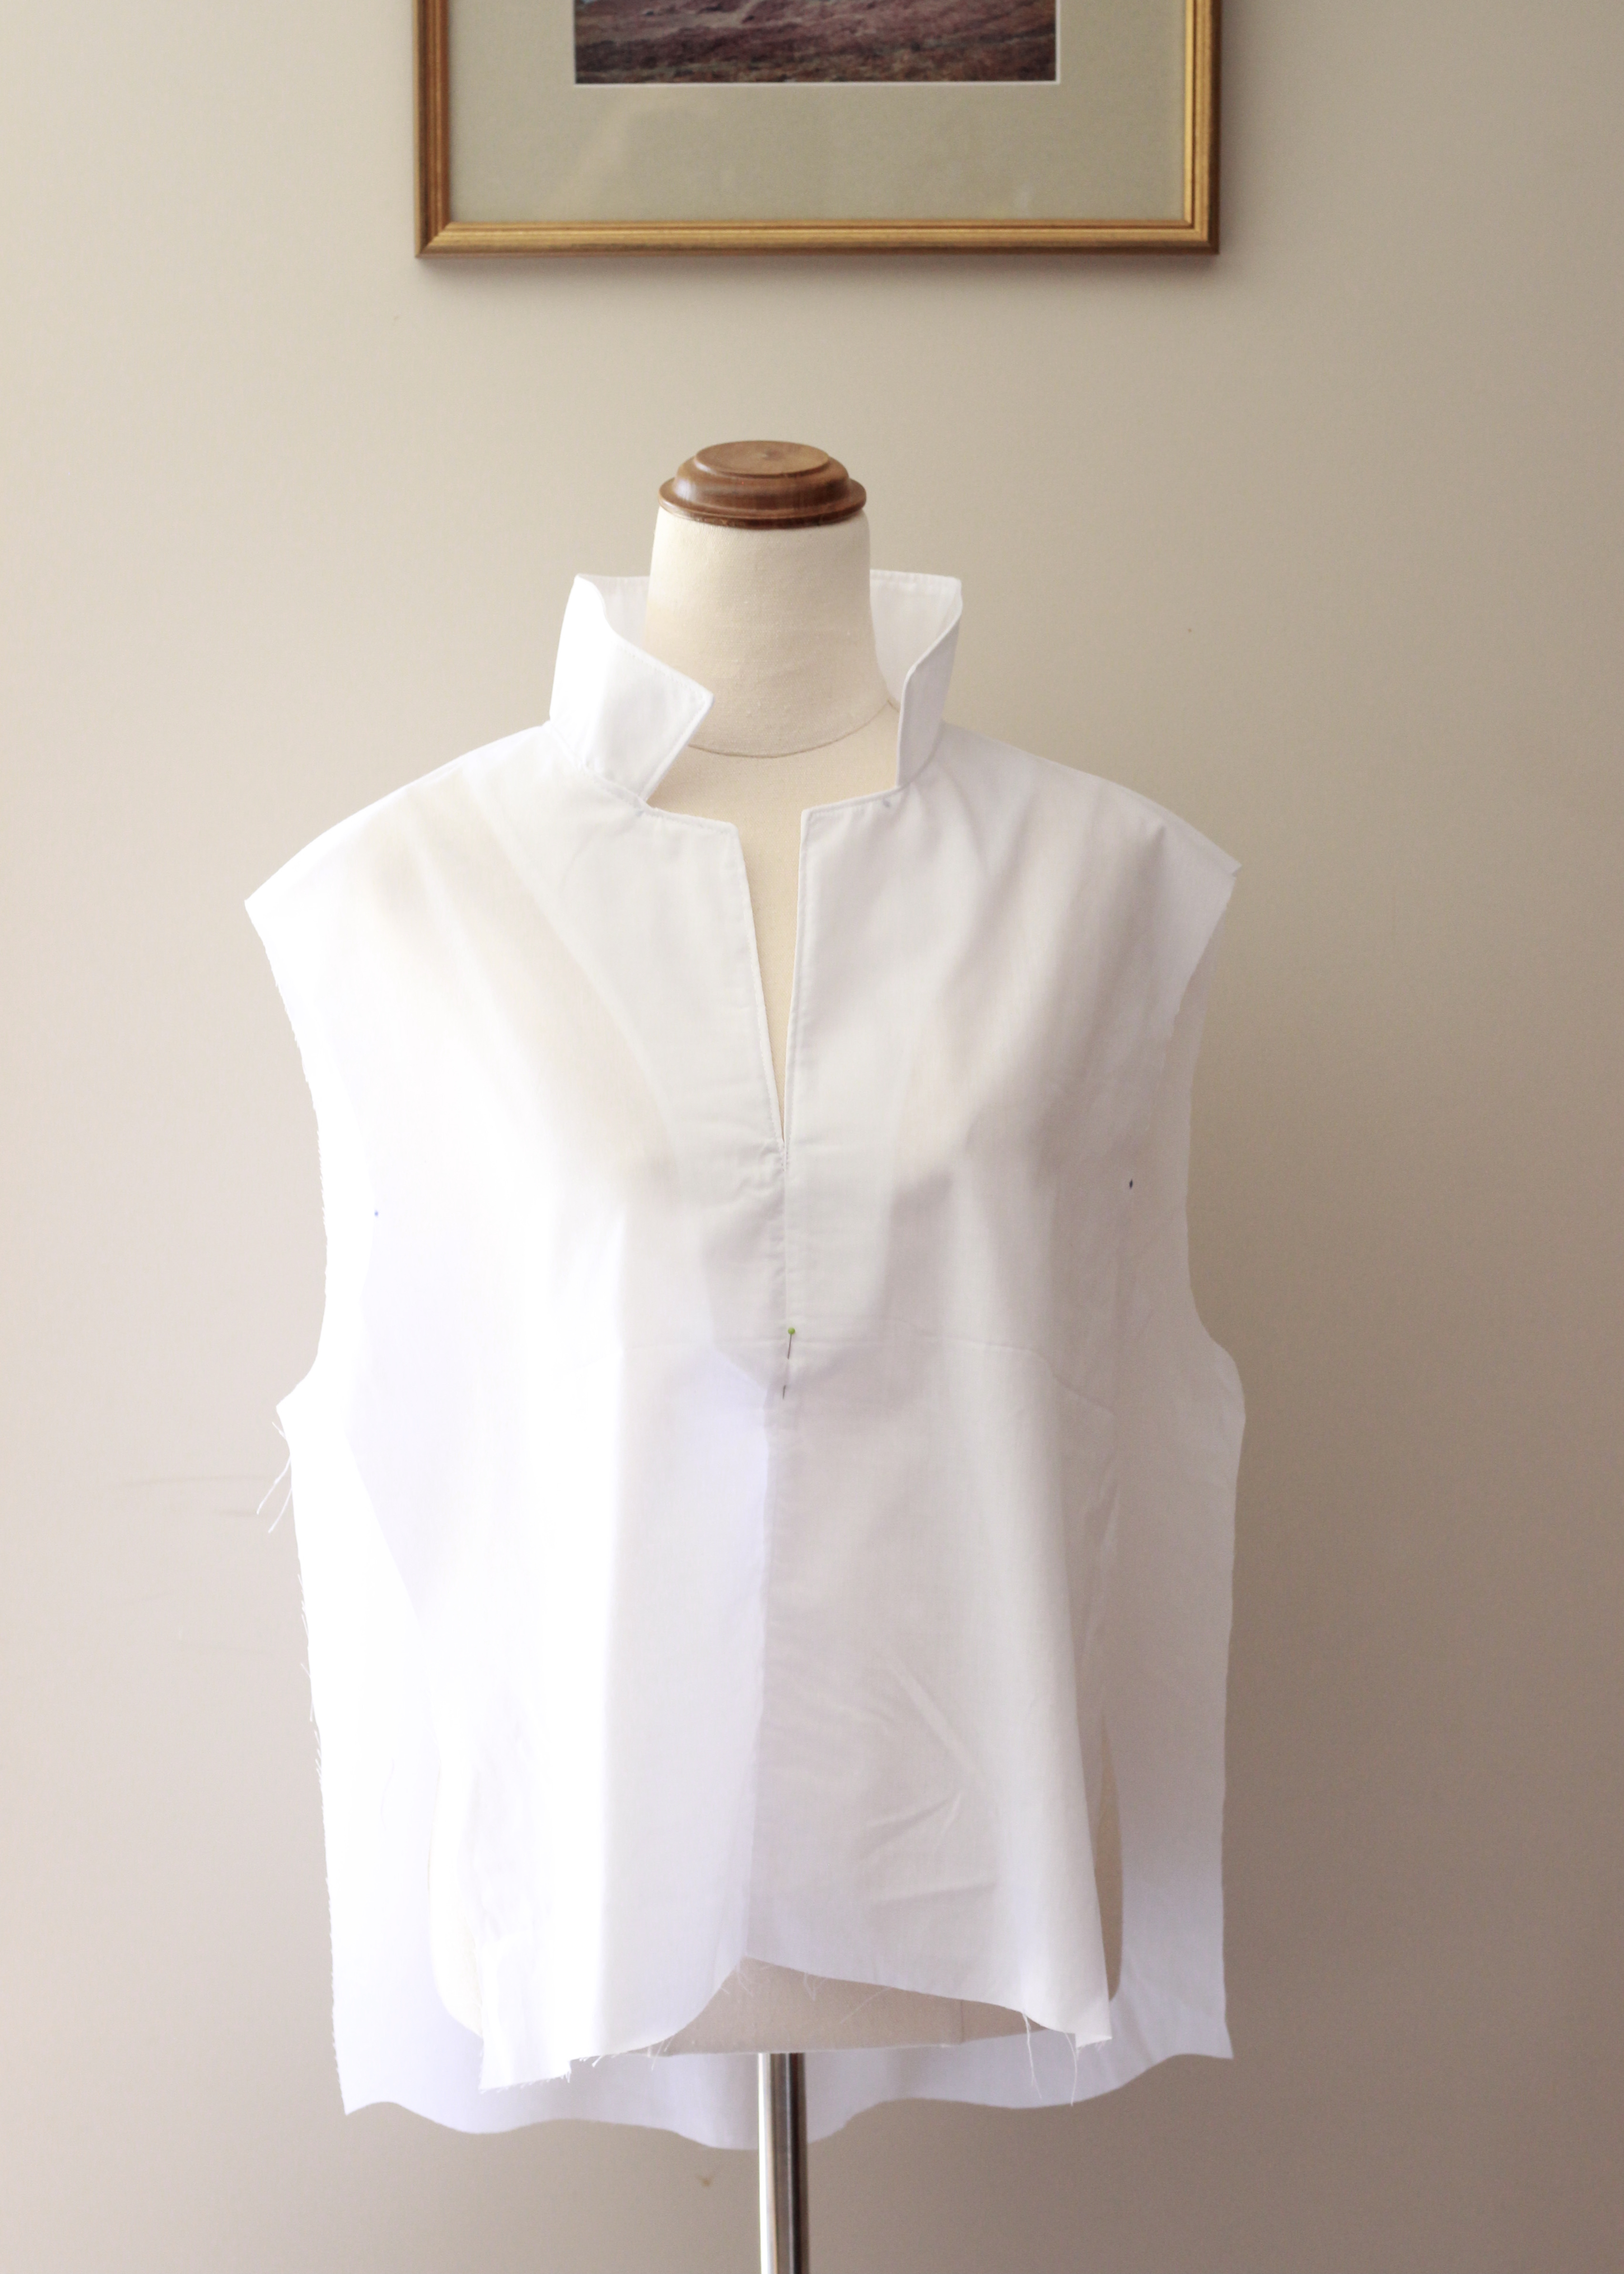
A crisp white shirt is such a staple in a wardrobe. It is easily paired with jeans for an elevated casual look or when worn with dress pants is a work ready outfit. It may look like a simple, quick piece to sew but like a dish that’s pared back, details stand out. This shirt took a lot of careful sewing, and it was a lovely slow sew. This is the Sydni Shirt from Sew To Grow.
Under Construction
For my measurements of 37-inch bust and 33-inch waist, I sewed the size Medium. It sits above the hips ending just below the natural waistline. There were no modifications but next time I make this pattern, I will have to look at making some adjustments or sew a size up. I sewed this pattern as the shirt dress in a rayon fabric initially. By comparison, when sewn in the stiffer cotton voile, it feels a bit resistant when I cross my arms across my chest and when reaching above my head. My intention was to wear this to work but with this slight tightness, I might not reach for this shirt for work. I forgot that I tend to buy one size up for my work shirts. The fit is fine for normal day to day wear, but my work is very active as I’m in health care.
The construction on the collar is simple and great for someone who may not have sewn collars before. It’s so clever how the bodice piece folds in the front to form the lapel. It also has a softer look which appealed to me. This shirt also comes with pocket options which I’ll want to use next time. It would also be interesting to leave the collar off and have it as a simple blouse. I love it when there are so many options in one pattern. It’s such great value!
As mentioned, I used a cotton voile to make this. It was really a wearable toile as I had only sewn this as a shirt dress. I’d love to use a lightweight linen blend or cotton lawn next time. Overall, this has been a great addition to my me-made wardrobe.
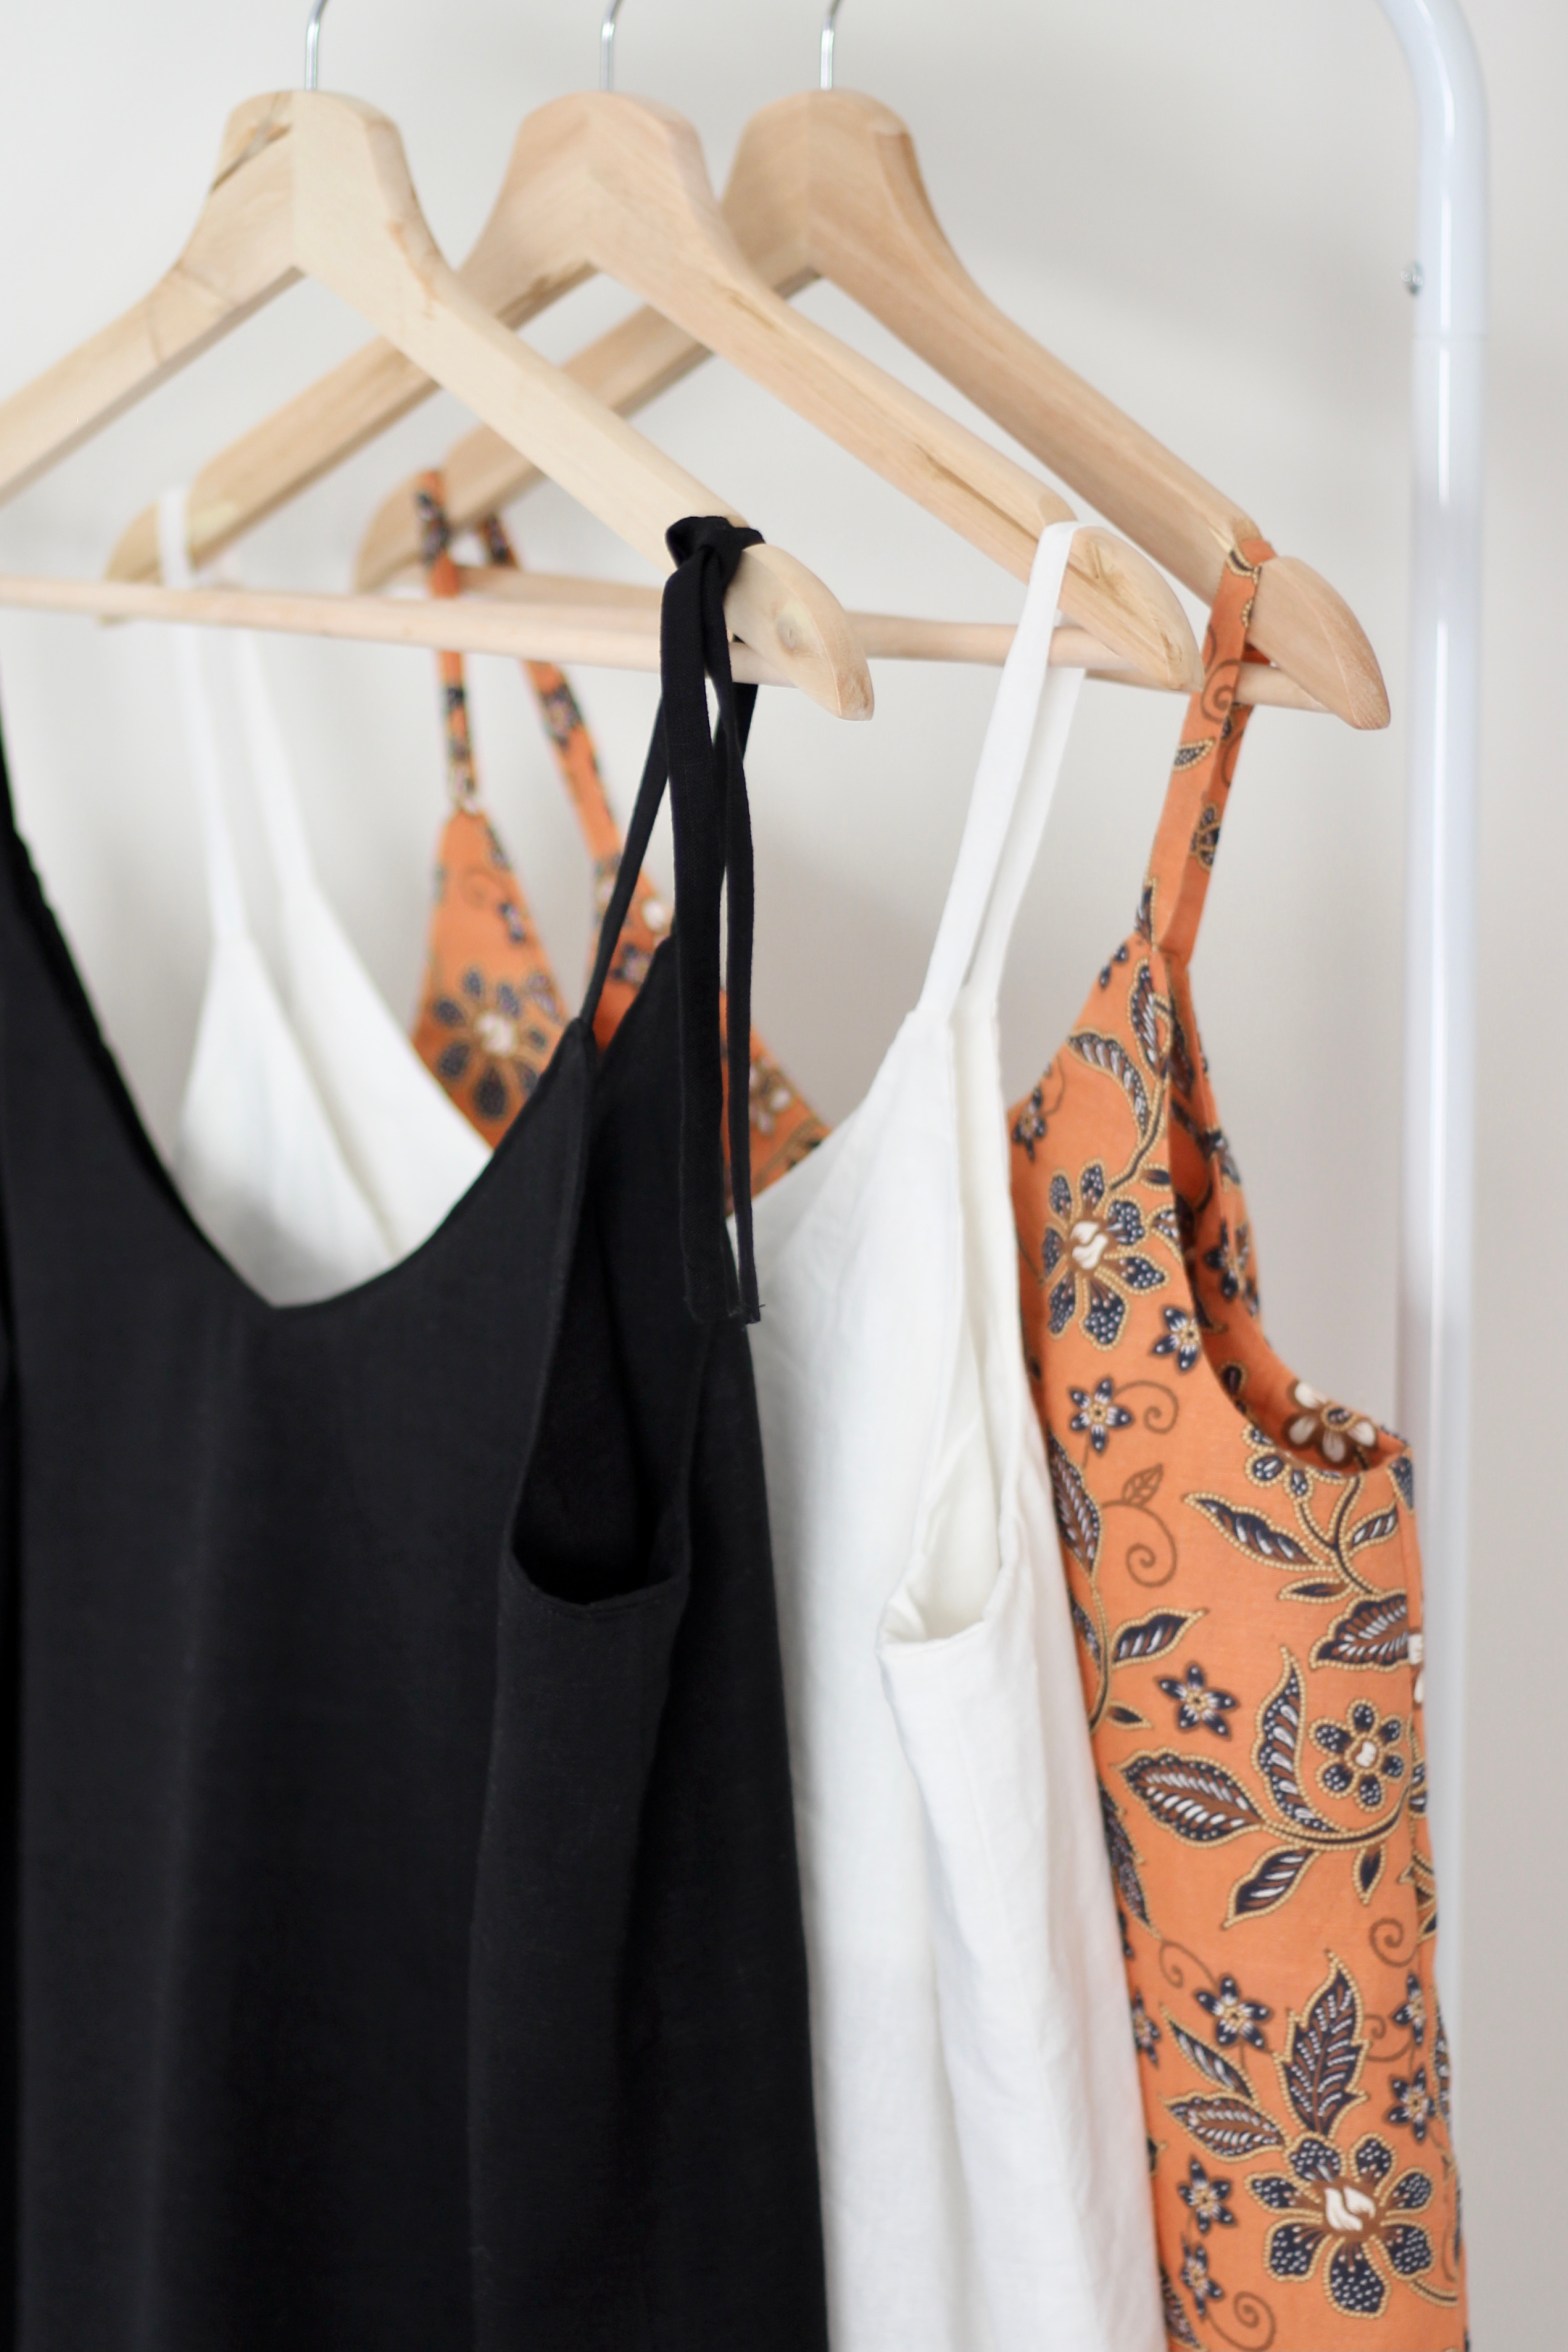
We’ve just seen a close to the end of Ogden Cami Month. It’s been so inspiring to follow along the True Bias blog. This is such a well-loved pattern in the sewing community. There is a plethora of clever hacks for this pattern. From the True Bias website, the Ogden Cami is described as, “The Ogden Cami is a simple blouse that can either be worn on its own or as a layering piece under blazers and cardigans. It has a soft V neck at both center front and center back necklines, and delicate spaghetti straps. The neckline and armholes are finished with a partial lining for a beautiful, high end finish.”
Batik Cotton Linen Version
I’ve loved wearing the cami as a layering piece, but I’ve also loved it as a stand-alone piece on those really hot, sticky humid days. I’ve made three of the Ogden Camis with linen which is so breathable and such a great fabric for those days. I’ve also hacked the Ogden into a summer dress using very lightweight rayon for both.
Dress Hack Ogdens
The sizing was spot on for me. There were no adjustments needed which was great! I sewed up the Size 8 and my measurements are B37:W33:H38. When deciding on sizing, I usually look at the sizing chart and in addition to that, the finished garment sizing. It’s also handy to consider the fabric you’re sewing with. I could have possibly sewn up a size if I had chosen a very stable fabric but I found that linen “grows” so you can end up with a slight increase in the “give” of the fabric. On the finished garment chart, the sizing range is from bust size 33 inch to 59.5 inch but be aware the sizing is divided to two ranges.
It’s definitely great core item for your closet and it’s a pattern that keeps on giving! After this Ogden Month, I’m even more inspired for a few more creative hacks for next year.
The Jarrah is a pattern by a beloved local Perth Designer Megan Nielsen and comes with so many options due to the fact that it’s a modular pattern. This allows you to mix and match the different bodice options with different neck band and sleeve options. This is such a feature with Megan Nielsen’s patterns as she offers many variations making her patterns such good value. I’ve now sewn the Jarrah pattern a few times producing a different look each time. The Jarrah is such a comfortable loose-fitting sweater. I also love how the look of the Jarrah changes depending on the fabric choice so I decided to explore this by making two versions. In the first version, using a fleece lined knit and a rayon spandex with the second.
Both were sewn up in the Size 12 without any adjustments as these were the closest to my measurements. There is a lot of ease in the pattern so you could look at the finished measurements and size down for a narrower fit but I personally liked the generous give in the fit as it feels so comfortable and great for lounging in. For both versions, I had 1.5 meters of fabric which turned out very well. I did try to see if I could use less but had to take into account the direction of the stretch in the first version and the pattern placement in the second version. With the second version, I also needed some black ribbing. You don’t need much, about half a meter should be plenty.
The choice of the fleece lined knit was just right for a sweatshirt style sweater. The fleece I chose is smooth on the outer side and has a loose nap on the underside which is just so soft and plush. It will be so warm and soft to wear against the skin. The peach is a delicious pop of colour that I just couldn’t resist! Testing the stretch of the fleece, it has a tight stretch one way and is quite a stable knit. I made View B with the high-low hemline. It has an interesting curve along the hemline and is the longest option so very good to style with jeans or even activewear.
Fleece fabric for sweatshirt style Jarrah
The peach is a beautiful colour but it was difficult to find any ribbing to go with the colour so I had to make my own neckband. I did this by cutting a longer than needed strip of the same fabric along the stretch of the fabric. You could also cut along the bias to make it stretchier, however, I felt that it had enough stretch without doing that. I then measured the band against the neckline and subtracted about 20% in the neckband so it could give some tension to the neckline and sit flush when worn.
To finish the cuffs and hem, I used a twin needle. The cuffs were easy to sew up but it was a bit trickier with the curved hemline. I found it hard to pin the thick fabric especially going around curves so I used some quilter’s tape. Also, a word of warning when you first start sewing with twin needles, go slowly! I was chugging along full speed and didn’t notice the thread getting tangled and broke the needle. Luckily the sharp part was still attached to the thread. It really made me consider getting some safety goggles for my sewing.
View B with high low hem. Using twin needle for finishing.
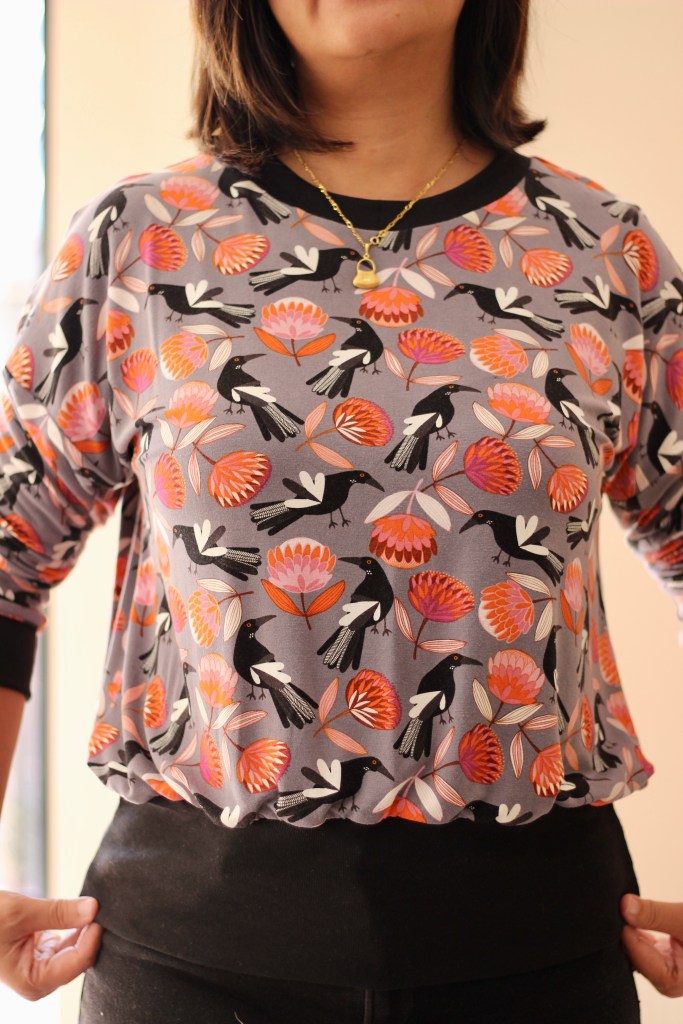
The second sweater I made was with the Jocelyn Proust Magpie Printed Rayon Spandex Fabric. This is currently exclusive to Spotlight Stores. Jocelyn Proust designs are so recognizable for the Australiana flora and fauna featured in her designs. I love the unique call of the Magpie bird so I fell in love with this design straight away.
The rayon spandex knit is a very soft drapey fabric and has amazing stretch recovery. It has quite a luxurious feel and although I’m making it for my winter wardrobe, I think this fabric is also quite good for summer. The look I wanted was a long-sleeved cropped blouse sweater so I used View A. Cropped sweaters were all the rage in the 80s so I thought it would be fun to recreate that look. I used black ribbing for the neckline and cuffs and to recreate the cropped look without exposing my belly button. I doubled the height of the hem cuff and shortened the width so it would cinch in the fabric at the waist.
Jocelyn Proust Design Rayon Spandex
This time, everything was sewn up using only the overlocker. It was incredibly fast doing it this way. I worried about the strength of the seams but after testing a bit of off-cut fabric I felt that the stitches held very well. However, I’m very inexperienced with knit fabric so please don’t take my word for it. Personally, I felt that for the speed and convenience, I was happy to take the risk of sewing up with the overlocker.
The Jarrah is such a versatile pattern and it was fun playing around with all the options. I made my first Jarrah a year ago and I know it will be one of my “tried and true” patterns. It has also been an interesting exercise coming back to a pattern that I made at the start of my sewing journey. I feel that I’ve made huge progress and the finishes, although not perfect, are getting so much better.